Logic Tutorial: Producing Music To Picture Part Five – Action Scoring With Drums
Cinematic percussion often forms the driving force to the music that supports an action scene. Mark Cousins creates an epic drum score… Having explored the mechanics of writing music to picture, we thought it was about time we explored the process from a more creative standpoint. In this workshop we’re going to take a look […]
Cinematic percussion often forms the driving force to the music that supports an action scene. Mark Cousins creates an epic drum score…

Having explored the mechanics of writing music to picture, we thought it was about time we explored the process from a more creative standpoint. In this workshop we’re going to take a look at scoring an action sequence, with particular reference to use of drums and percussion.
Broadly speaking, the sound that we’re exploring is termed as ‘cinematic percussion’ – built from a battery of percussion sources: like Taikos, Concert Toms and Orchestral Bass Drums. This powerful cinematic percussion sound tends to dominate trailer soundtracks and the work of modern composers such as Hans Zimmer.
Layer Cake
One of the key characteristics of cinematic percussion is the blend of three instrument layers, each forming a distinct part of the frequency spectrum. The first layer is that of high-end percussion – like shakers, bamboo sticks, hi-hats and so-called ‘ticki’ sounds – that really help define the movement of the cue. Even if the cue becomes particularly stripped-down, it’s often the high-end percussion that carries through the duration of the track. Equally, it might be that the cue starts in a subtle way, initially just working with the high-end percussion, with the more powerful layers added as the action picks up.
Moving up through the frequency spectrum we hit the mid-range percussion. As a rule, the mid-range percussion isn’t quite as frenetic as the high-end percussion, although there’s still a distinct sense of movement, but with less need to fill every 16th division. Traditionally speaking, the principle sound choice here is Concert Toms, but there’s also plenty to explore using a variety of ethnic drums (ideally without too much low-end), snare drums and mid-sized Taikos or Daikos. Ultimately, the aim of the mid range is provide power and drive to the pattern, often entering as the action steps up a gear.
Going Deep
The final part of the spectrum covers the low-end, using deeper Taikos, Orchestral Bass Drums and so on. Given the depth of the sound, it’s important the pattern isn’t too frenetic, otherwise the bottom-end of the mix will just become cluttered.
Having created movement with the high-end, alongside power and energy with the mid-range, the low-end is all about creating an epic ‘scale’ to the result, arguably forming the final, crucial piece of the cinematic sound. The deeper Taiko, the grander its scale, and the more cinematic your cue becomes!
To unite the three different bands of percussion, we’ll find a consistent accent pattern across each instrument group. This clear use of accenting helps define the feel, contrasting between a sequence that places the accents distinctly ‘on the beat’, against an alternative pattern
that makes a distinctive use of syncopation using off-beat accents. Varying the accents throughout the cue can also be good way to develop your music, maybe moving from a simple on-the-beat feel to a more syncopated alternative to reflect a change in the picture.
Production Tricks
The use of a variety of different production effects can help define the three percussion bands. With the use of stereo, for example, imagine your mix fanning out – staying centre-focused in the low-end, widening in the mid-range, and then using the extremes of left and right as you move up to the high-end percussion. Instrument doubling (using two types of shaker, for example, or a combination of Djembes and Toms) can help define this. If you decide to double instruments, consider small amounts of randomisation or delay offsets in your MIDI data so that it sounds like multiple players rather than a duplicate MIDI part.
The use of reverb and compression can also help define the various layers of percussion. Directing more compression towards the mid-range elements can real help drive the cue forward, whereas a light-handed approached on the high-end preserves important transient details. With reverb, use shorter settings for the faster moving elements, while the slower moving low-end can really benefit from a ‘back of the hall’ reverb setting to add a real sense of scale.
Coming Soon
Following on from this exploration of cinematic percussion, we’ll taker a look at how synths can integrate with this sound palette, adding further interest and energy into the mix. In many ways, it’s this dynamic combination of epic percussion, synth sounds and a splash of orchestra that defines modern cinema, and it’s a combination that we’ll be exploring in much more detail over the coming months.
Focus On Power Percussion
Over-compressing your percussion tracks can have a negative effect on their transient energy, which is important in respect to how the drums cut through the mix. As an alternative, consider the use of parallel compression, which can add body and energy to your percussion track without sacrificing the transients. Use an aux send to route a proportion of your chosen sound/s through to a compressor instantiated across a
bus.
Set up the compressor to apply compression in a heavy-handed way (fast attack, medium release, 6:1 ratio), which you can bleed back into the mix to create the desired amount of body.
Action Scoring With Drums
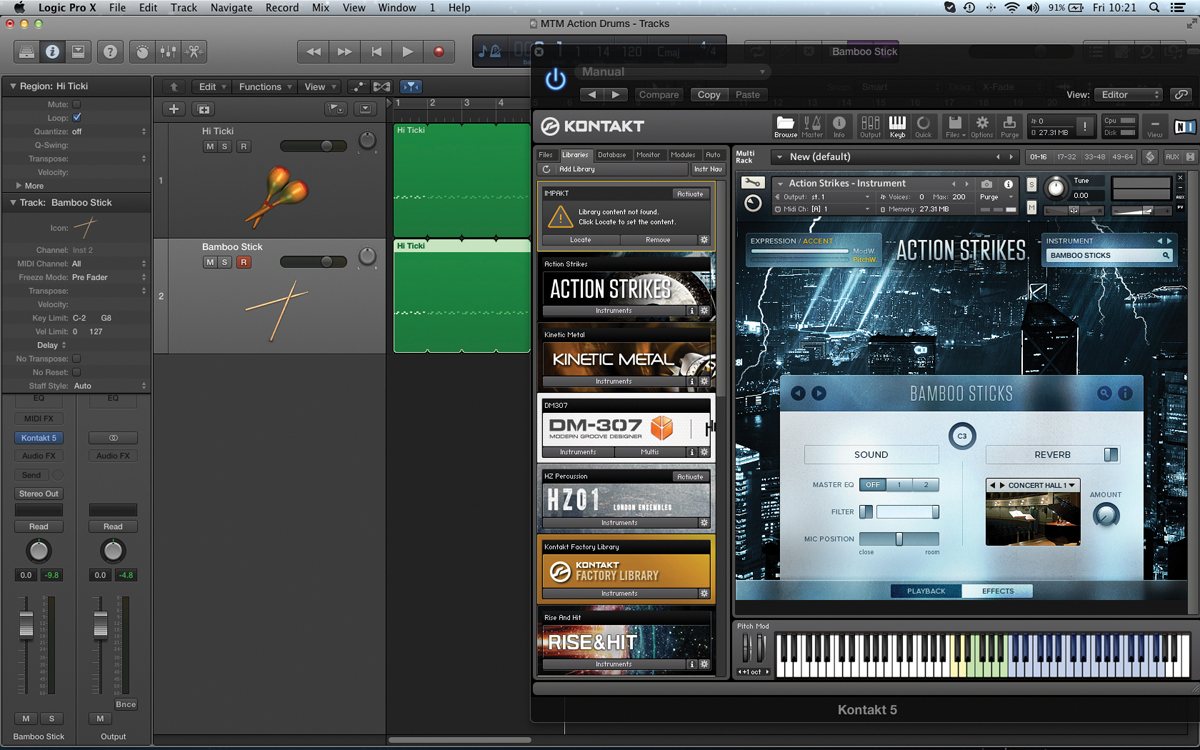
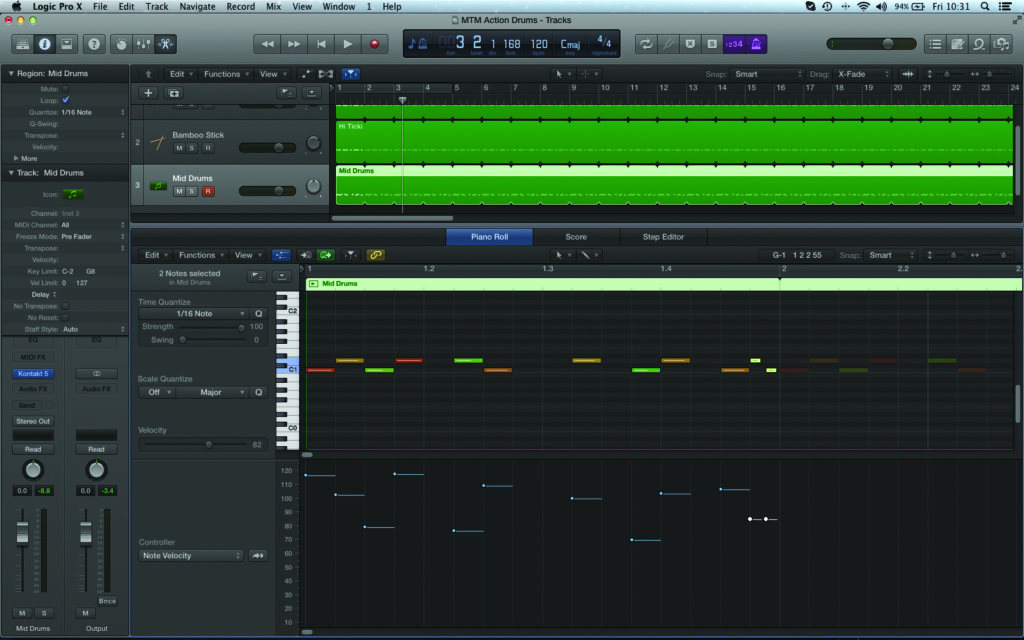
1: Working on the principle of a three-part instrument grouping – low, mid and high – we’re going to start with the fast-moving high-end percussion. For the sound source, we’re using one of the Tikitaka Hybrid sounds from Native Instruments’ Action Strikes.

2: The high-end percussion should form the fastest movement – in this case, creating a 16th movement. You need to define where the accents fall so that the pattern has a rhythmic shape. In this case, we’ve accented groups of three, and then the last two quavers.

3: To give the sequence more interest, we’ve created a second duplicate track, assigned to a different high-end percussion source. You can keep the pattern largely the same, or alter it slightly, although you still want to preserve the 16th movement.
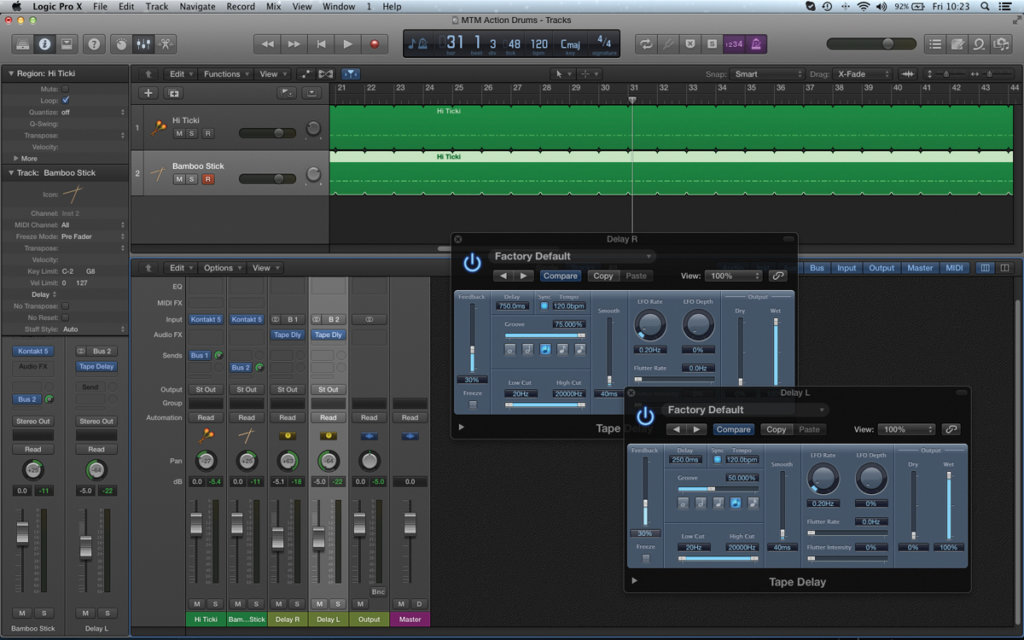
4: It’s well worth creating some stereo dimensionality to the high-end percussion. Start by panning both parts off-centre to create some width. We’ve also added a stereo delay effect using two mono delays, set to different timings and panned hard left and right.
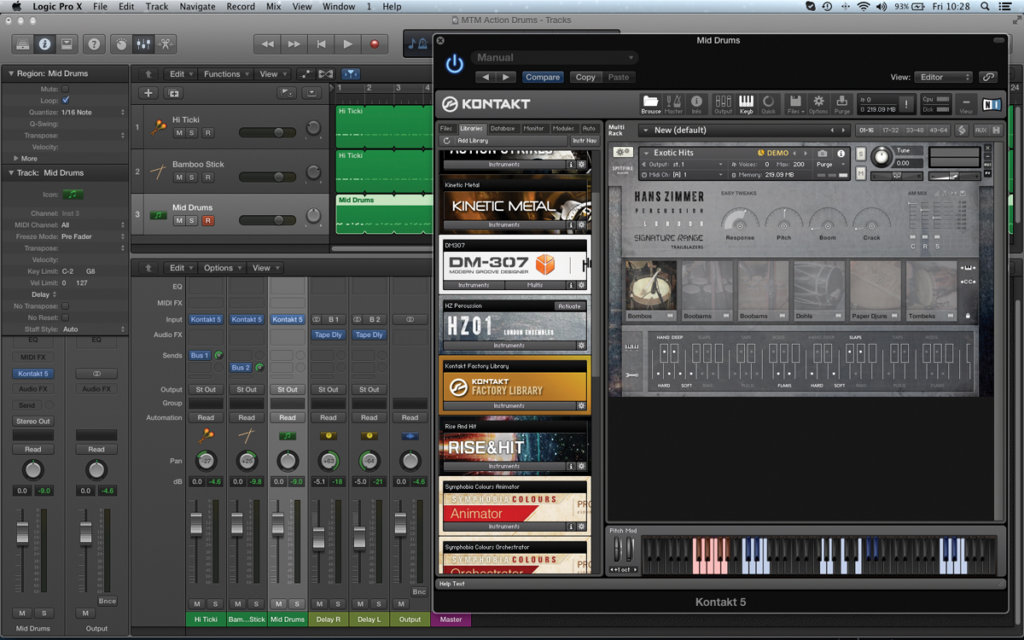
5: Let’s move up the frequency spectrum and take a look at the mid-range percussion. The sound source here is Bombos, from Spitfire Audio’s Hans Zimmer Percussion. Balance the different mic sets (C, R and S) to create a sound with plenty of ambience.
6: For the musical sequence you should create a pattern with slightly less movement than the high-end percussion part, carrying through the same accent pattern. We’ve also added some interest at the end with a short flam into the next bar.
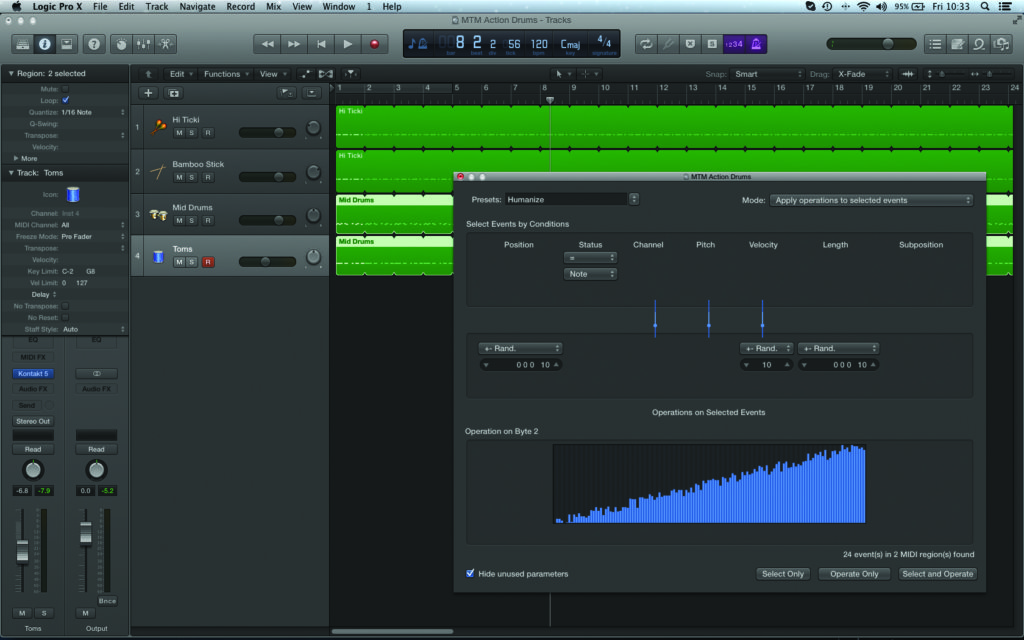
7: Doubling the part up on Toms helps add scale to the sequence. However, to get the feel of a ‘drum ensemble’ we’ve applied some soft humanisation – randomising note position, velocity and length to create subtle variation between the parts.
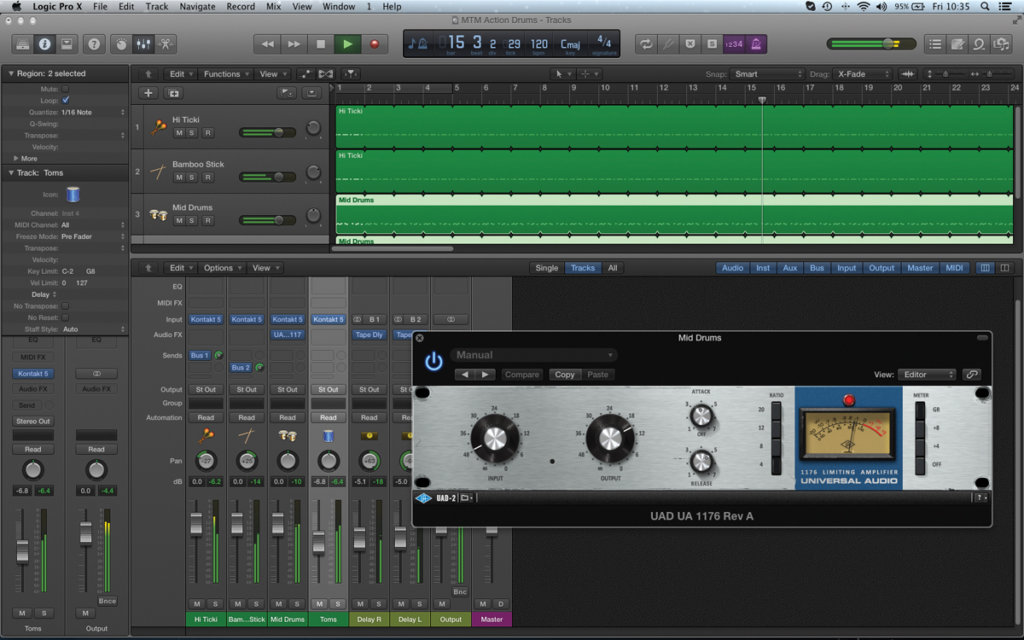
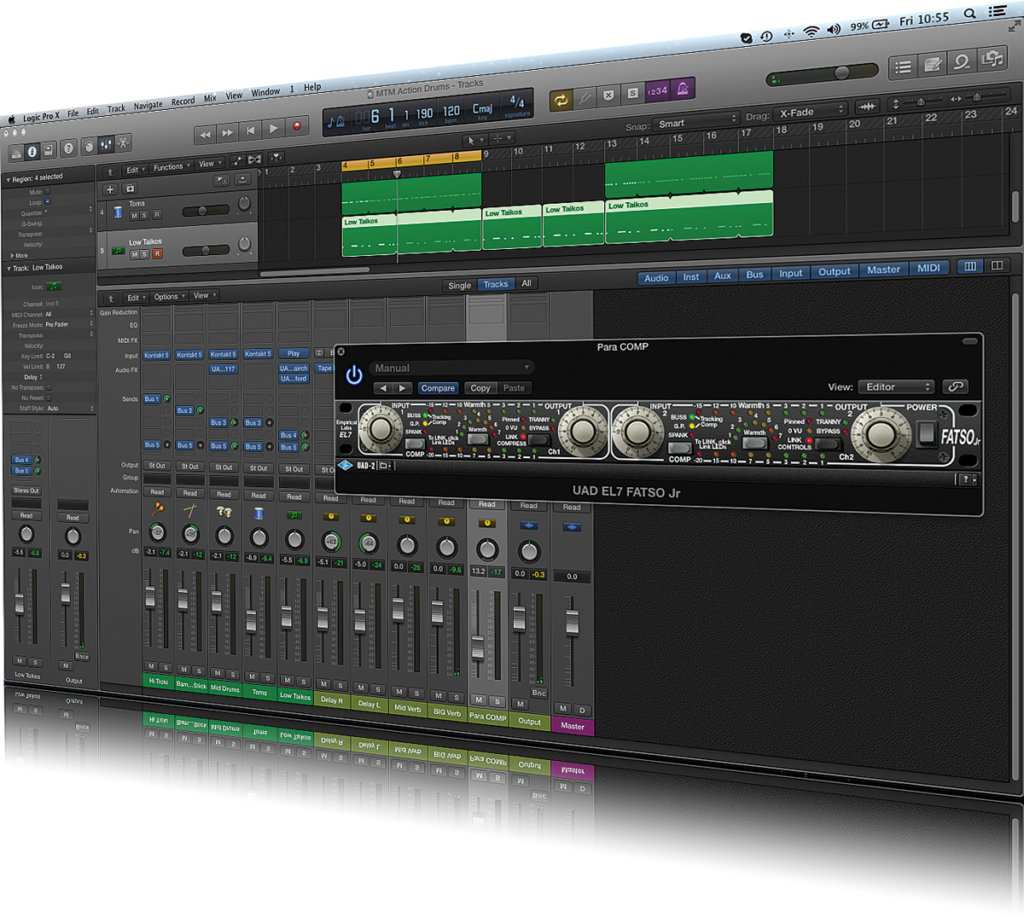
8: The mid-range percussion carries of lot of the power and energy in the sequence, so it’s worth enhancing this with the application of compression. We’ve used a compressor with plenty of character and grit, working on a 4:1 ratio.
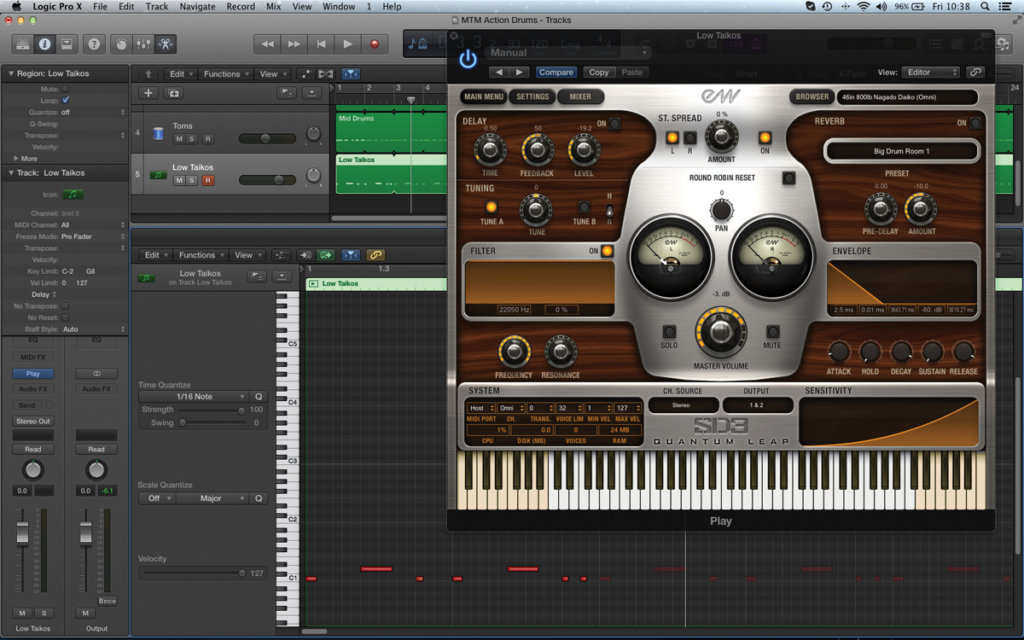
9: The bottom-end of your drum track should be pinned-down with instruments like Taikos (like this example from SD3), or big orchestral bass drums. Keep the pattern simple, though, only playing on or around the accents you defined with the high-end percussion.
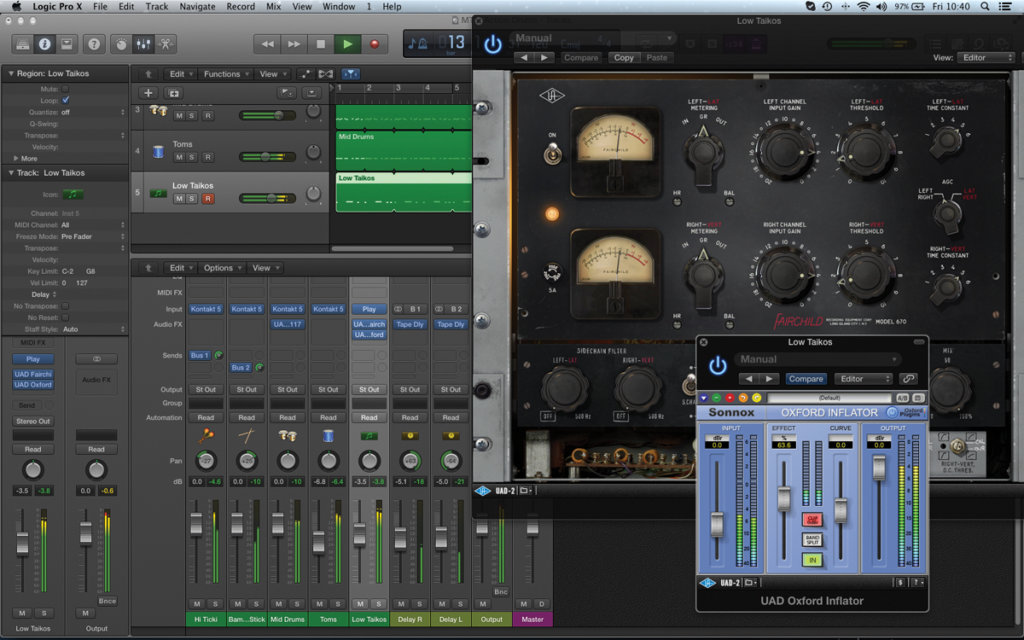
10: Doubling the low-end percussion can get messy, but you might want to experiment with compression (in this case, Fairchild compression) as well as scale-enhancing effects such as Sonnox’s Oxford Inflator. Try to preserve transient detail, but enhance the power.
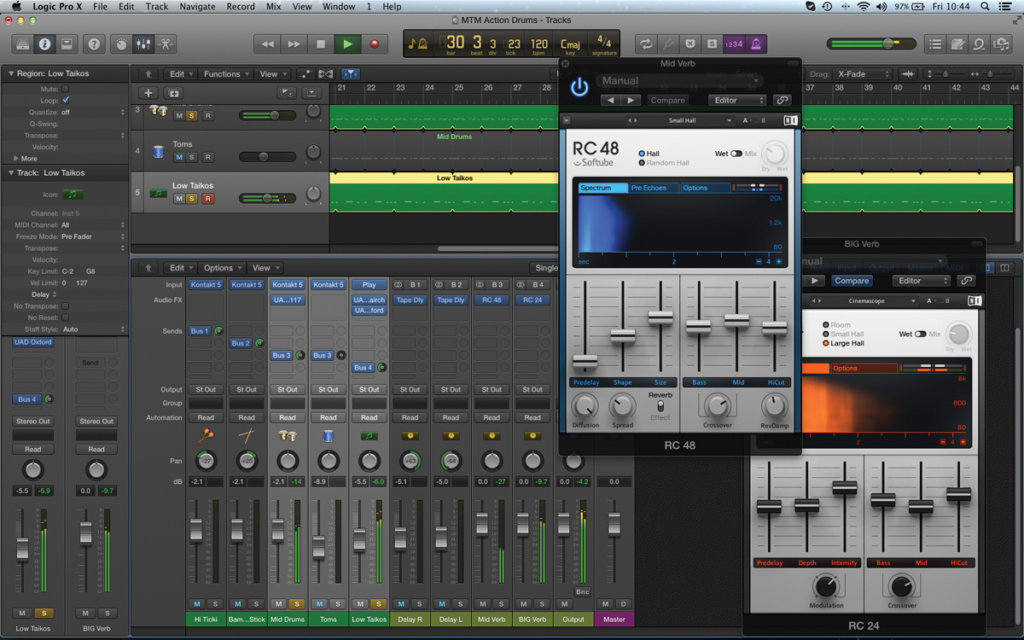
11: Differentiate the use of reverb between the different layers. The low-end percussion really benefits from a big, spacious reverb setting. As you move up to the mids, though, use a shorter setting so that the reverb doesn’t interfere with the power of the pattern.

12: Having created the basic pattern, the next step is to contour it throughout the duration of the cue, matching the action on screen. Bring the layers in and out accordingly, add dynamic stops and also consider moving between a 4/4 and 12/8 pulse.

