Logic Tutorial: Step Sequencing Using Logic’s ES2 – Part 2
Mark Cousins continues his look at using Logic’s ES2 for step sequencing in this Logic Tutorial Voltage Control Having finished our sequence for now, the real fun happens when we start applying the various control-voltage movements to parameters within the ES2. Of course, the only limit here is your imagination, but let’s take a […]
Mark Cousins continues his look at using Logic’s ES2 for step sequencing in this Logic Tutorial
Voltage Control
Having finished our sequence for now, the real fun happens when we start applying the various control-voltage movements to parameters within the ES2. Of course, the only limit here is your imagination, but let’s take a look at a couple of common techniques.
The obvious starting point here is to map the velocity movements to the filter cutoff. The key section of the ES2 in all of these examples is the modulation matrix, found in the centre of the interface, where a number of modulation sources are mapped through to target parameters within the ES2. In this case, we need to establish a new modulation routing, picking Cutoff 2 as the Target and Velocity as the Source. The finesse is in the fine-tuning – setting the amount of modulation not only from the velocity but Env 2 as well, which is also modulating the filter. Use a small amount of envelope modulation to add shape to the note, while the velocity amount establishes the degree of movement you want to create.

Given the different durations, there’s also a lot of scope in adapting the current Envelope 1 and Envelope 2 settings, which are currently mapped through to Filter and Amplifier respectively. With both envelopes, the Decay and Release settings are key points to explore, with Decay establishing the body of the note and Release setting the movement after the note. Try widening Env 1 to add more sustain to the overall effect (even between the notes) or shorten the Decay and Release to create a more percussive overall effect.

Modular Heaven
Adding further modulation makes the effect even more dynamic, simulating the complex routing that might occur within a modular synthesizer. As two examples, therefore, try using RndNO1 as the source mapped through the Detune, as well as ModWhl through to LPF FM. In the case of the Detune routing, the RndNO1 option produces a random control voltage for each note of the sequence, which creates an analogue-like pitch drift across the duration of the sequence. The other routing is small amounts of FM modulation to the filter, creating a distortion-like effect, with its relative strength based on the level of the modulation wheel.

If you really want to add interest, though, consider creating duplicate instances of the ES2 that can be used to generate further layers with an increasingly leftfield bias. To start with, therefore, create a duplicate track via the local menu option Track>New with Duplicate Setting. This will create a new track with a copy of the ES2 setting, which can be triggered using a copy or alias of the original MIDI region. A simple but effective option, as used on the classic I Feel Love step sequence, is the use of a noise oscillator. Noise can be found on the third oscillator, but you’ll need to ensure there’s a degree of resonance to help give some ‘pitch’ to the sound.

Some of the most unusual layers come from the application of features such as FM (found in oscillator 1) and the Sync and Ring Modulation options found in oscillator 2. All of these options create unusual and occasionally dissonant harmonic material based on the relative tuning differences between the oscillators. In the Oscillator Sync example, set oscillator 2 to its Sync waveform (using a duplicate of the original ES2 patch and its associated region), with only oscillator 2 present in the output. Now modulate the pitch of oscillator 2 using either velocity or the mod wheel – this will distort the waveshape rather than the pitch. To hear the effect properly you might want to open up the filter depending on how much filtering you previously applied.

Given that both of these additional layers reside on individual instruments you can adjust the relative level of each ES2 instance to best suit the effect. In most cases, these layers should make only a marginal contribution, so you’ll probably want to keep the faders low. Also remember that you can copy the sequence over, transposing each region so that it matches the chord sequence of your track. This is a key part of the step sequence effect, with the bass line shifting up and down with the harmonic progression of the track.

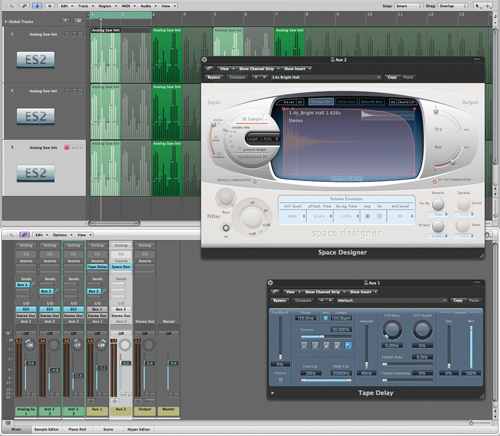
Delayed Reaction
Something that many of the classic 70s step sequencer lines already mentioned have in common is the application of effects to enhance the existing qualities of the basic sequence, particularly the use of reverb and delay. Try using a simple tempo-sync’ed delay setting, with a minimal amount of feedback and some dynamic pan positions to create interest. The classic I Feel Love bass line, for example, used a 1/8th step sequence coupled with a 1/16th delay, each panned slightly off-centre. For simple delay effects such as this the Tape Delay plug-in is an excellent choice, especially given the added colour it delivers.

Although you’ll want to be careful with the application of reverb to the bass end of your mix, you can still achieve some interesting treatments with a touch of selective processing – perhaps processing just the delay return, for example, or one of the more experimental noise or Osc Sync layers added to our basic sequence.
Step To The Beat
Having detailed some classic step sequencing techniques in this Workshop, the next step (no pun intended) is to conduct your own sonic experiments with analogue-style sequencing. The key concept, of course, is the interaction between the sequence data – with the multiple ‘track lanes’ of control voltages – and the modulation matrix on the ES2. Thinking creatively about how you trigger and modulate different parts of the synthesizer makes for an increasingly engaging sound, especially as you start to layer multiple layers of ES2, with each instance working in a subtly different way.