Logic Tutorial: EXS24 Sample Mapping Step-by-Step
In this step-by-step guide we take a look at using EXS24 in depth… EXS24 In Depth – Step-by-Step 1: Create an empty instance of EXS24 and then press the Edit button in the top right-hand corner to open the EXS24 editor. Resize the editor window and then open the All Files media browser in Logic’s […]
In this step-by-step guide we take a look at using EXS24 in depth…
EXS24 In Depth – Step-by-Step
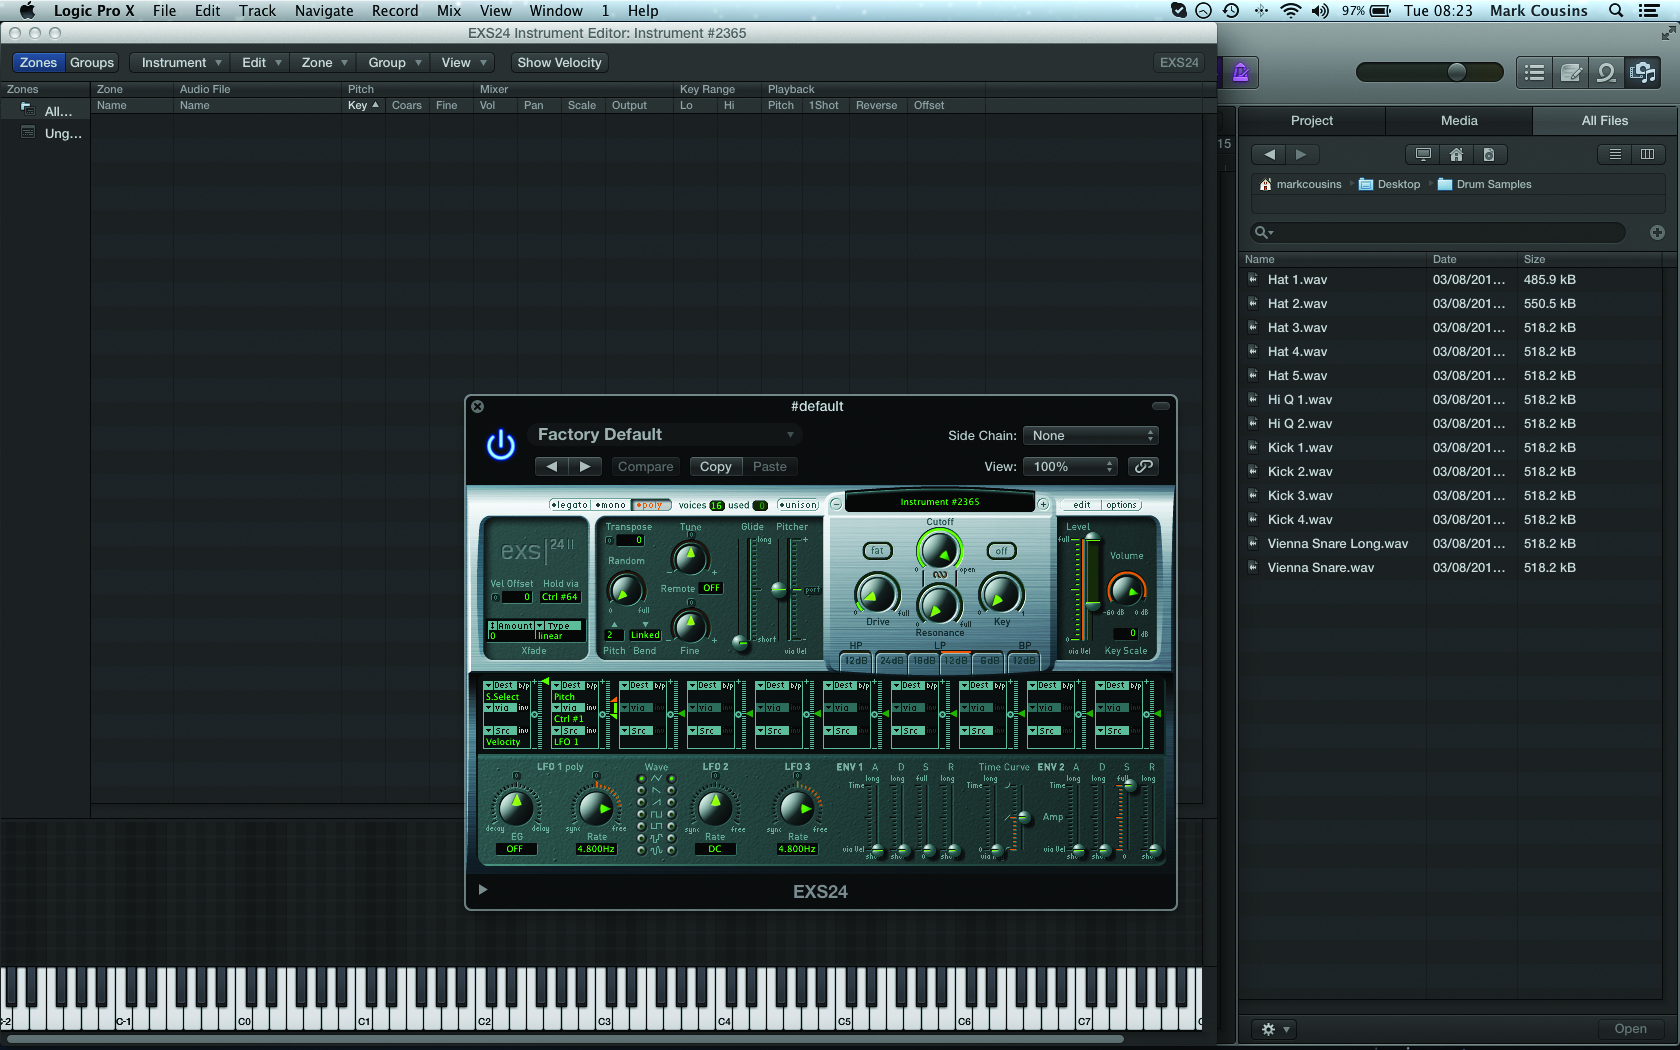
1: Create an empty instance of EXS24 and then press the Edit button in the top right-hand corner to open the EXS24 editor. Resize the editor window and then open the All Files media browser in Logic’s main window. Locate your samples using the browser.
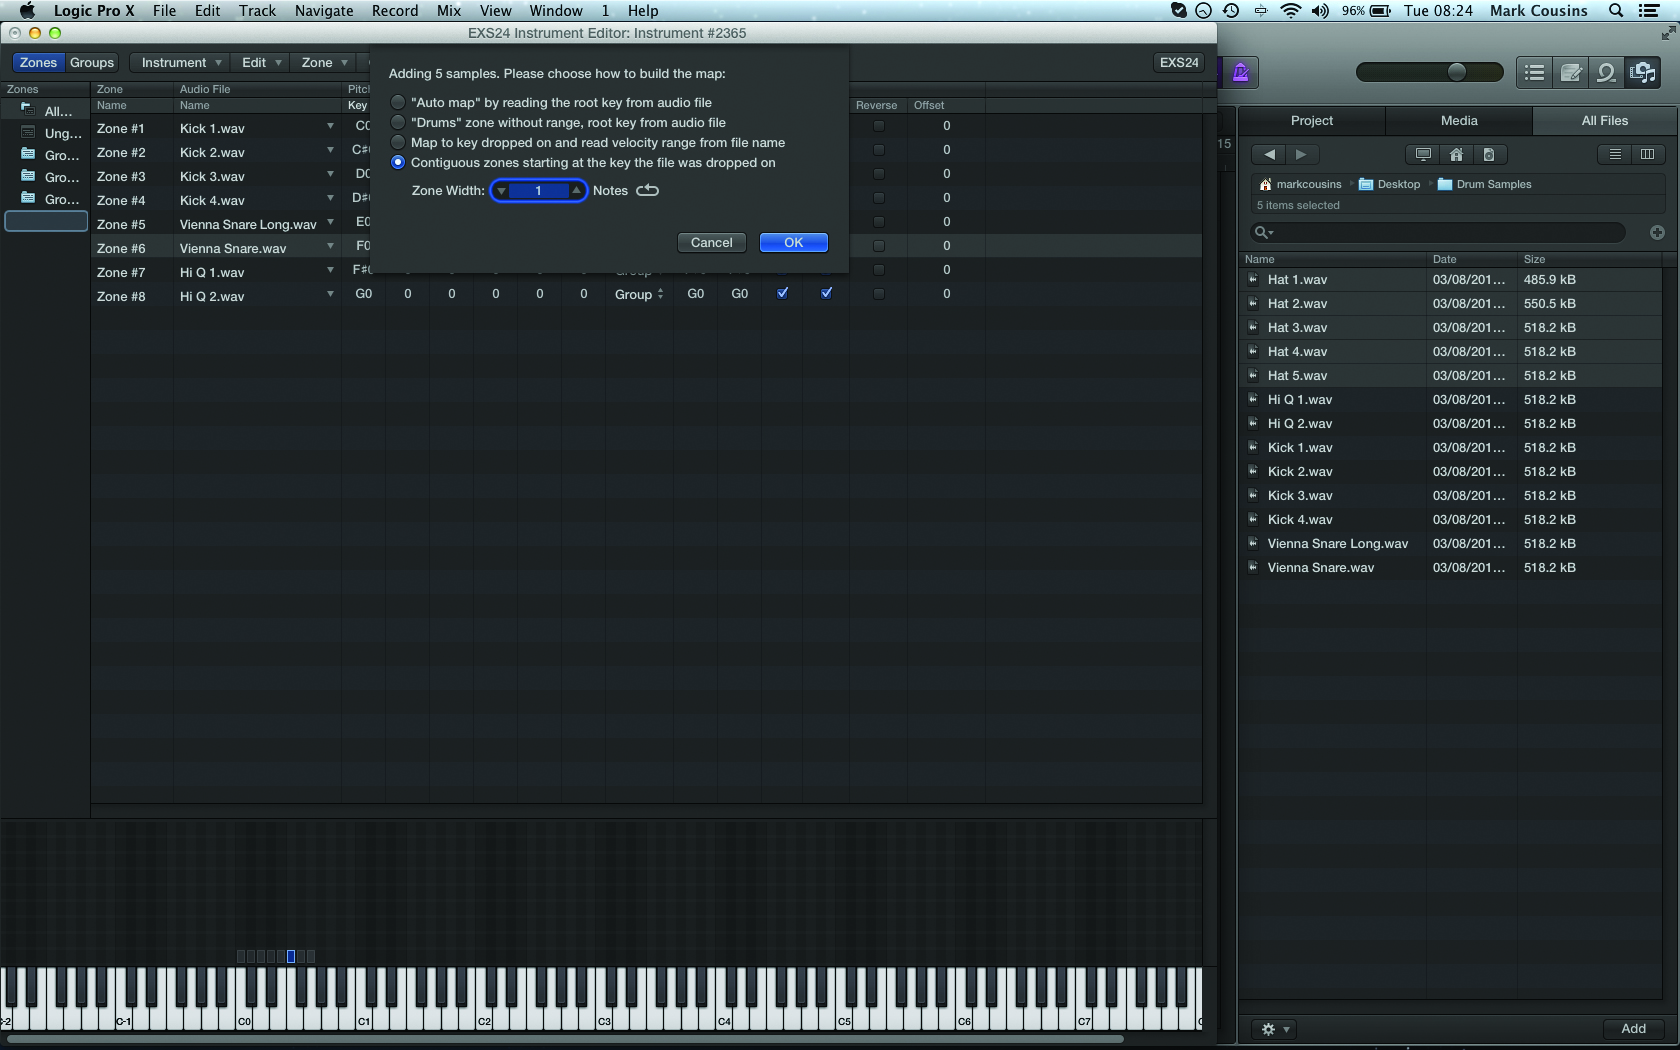
2: Samples in the browser can be dragged-and-dropped into the EXS24 editor. In this case, we’ve dragged each sound group across separately, using the ‘Contiguous zones starting at the key the file was dropped…’ option to auto-map the samples accordingly.
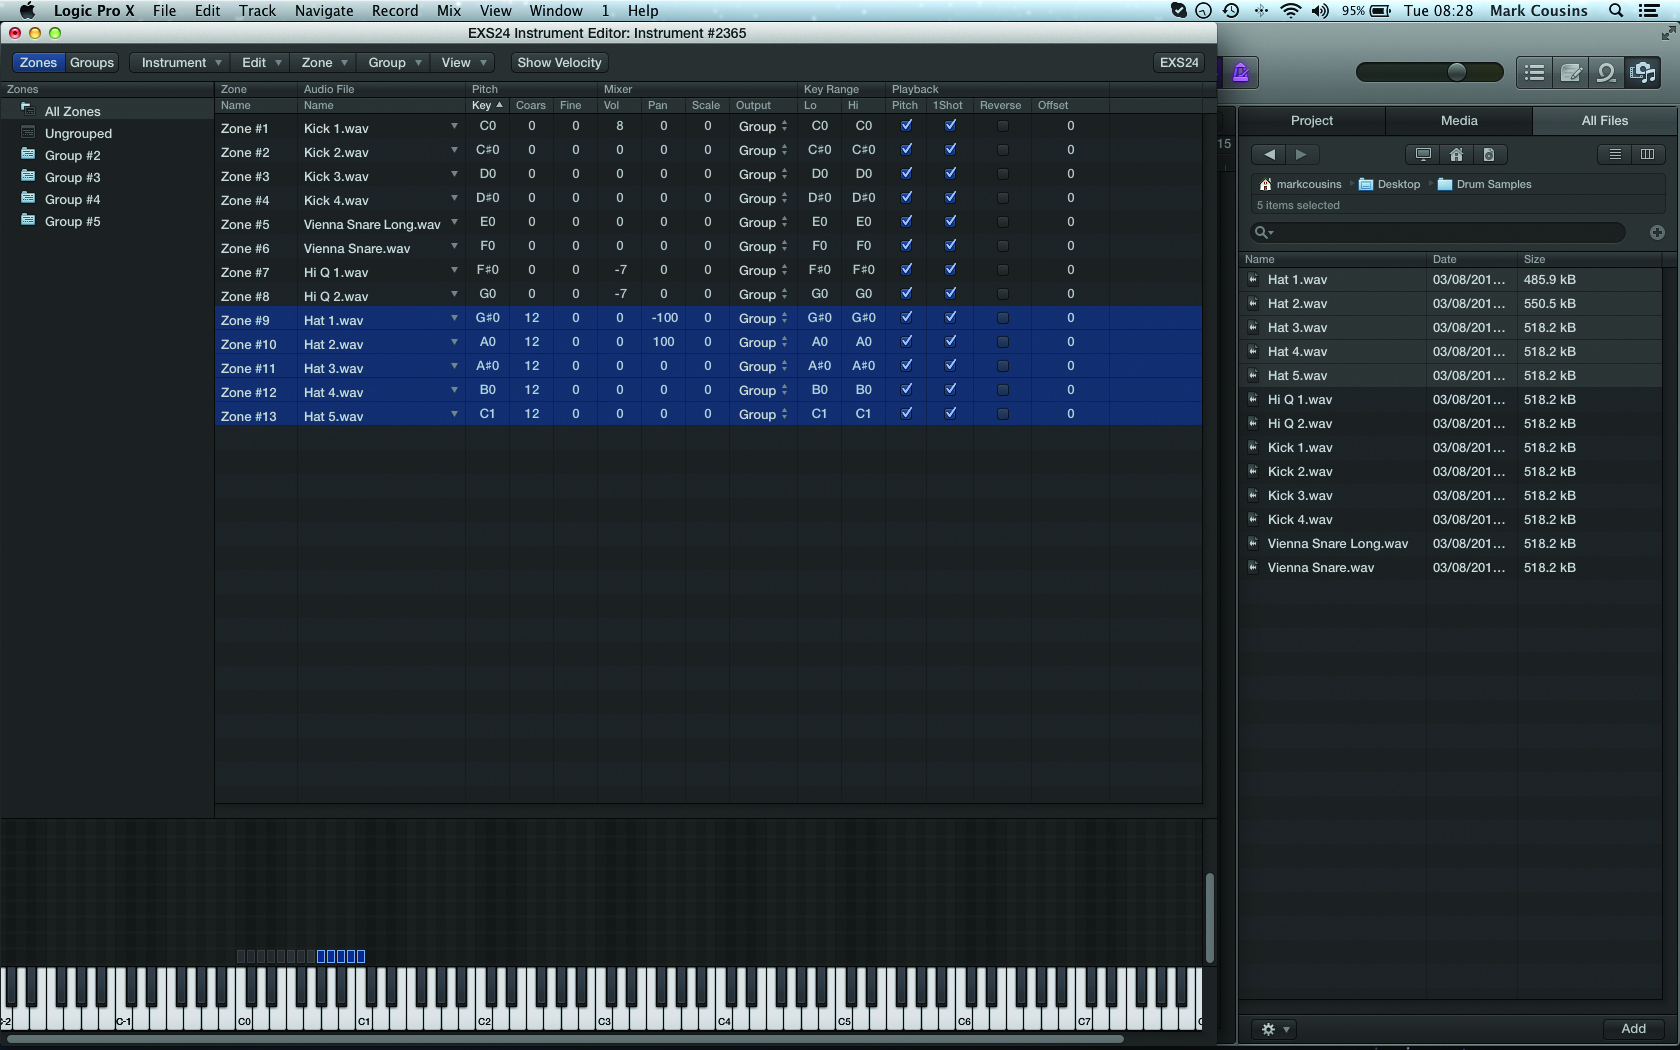
3: Each zone (which contains the sample we’ve imported) has its own tuning, pan and level controls. This is useful with our drum samples, letting us pan the hi-hat samples hard left and right, for example, or attenuate the level of the Hi-Q zones.
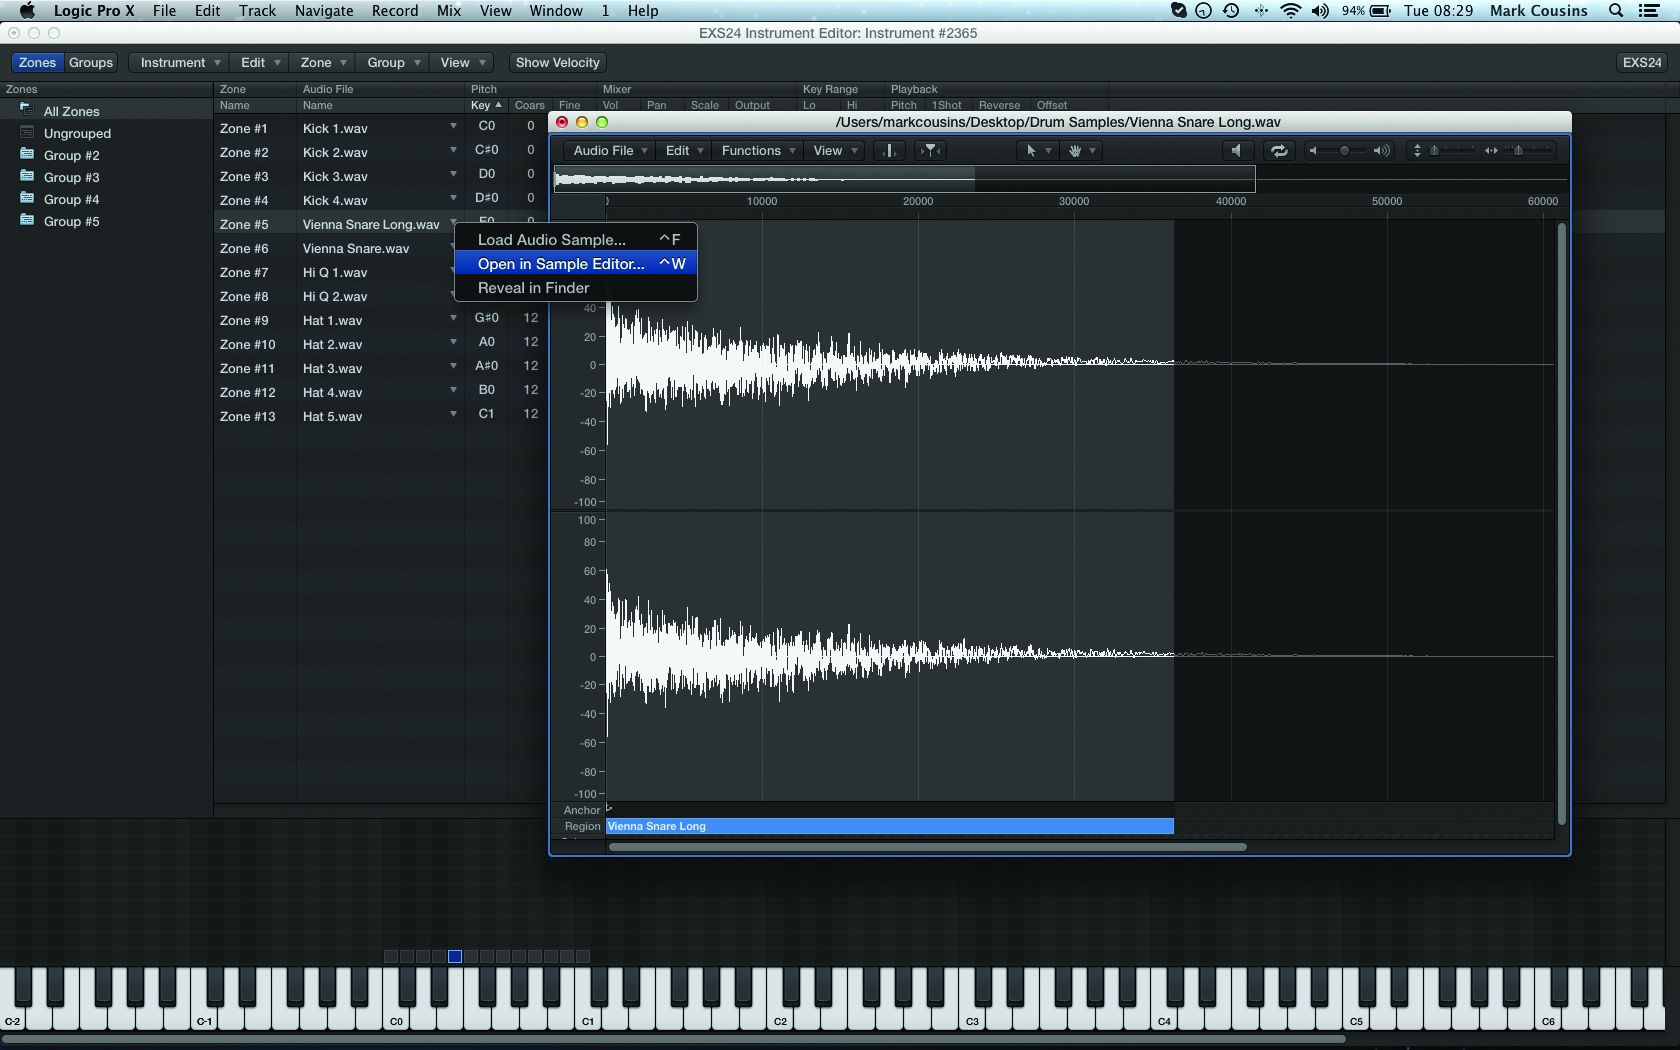
4: One particularly creative option is the ability to reverse a zone. Try this on one of the snares. Open the sample editor (using the drop-down menu in the Audio File column) so that you can change the end marker, which is currently the start point.
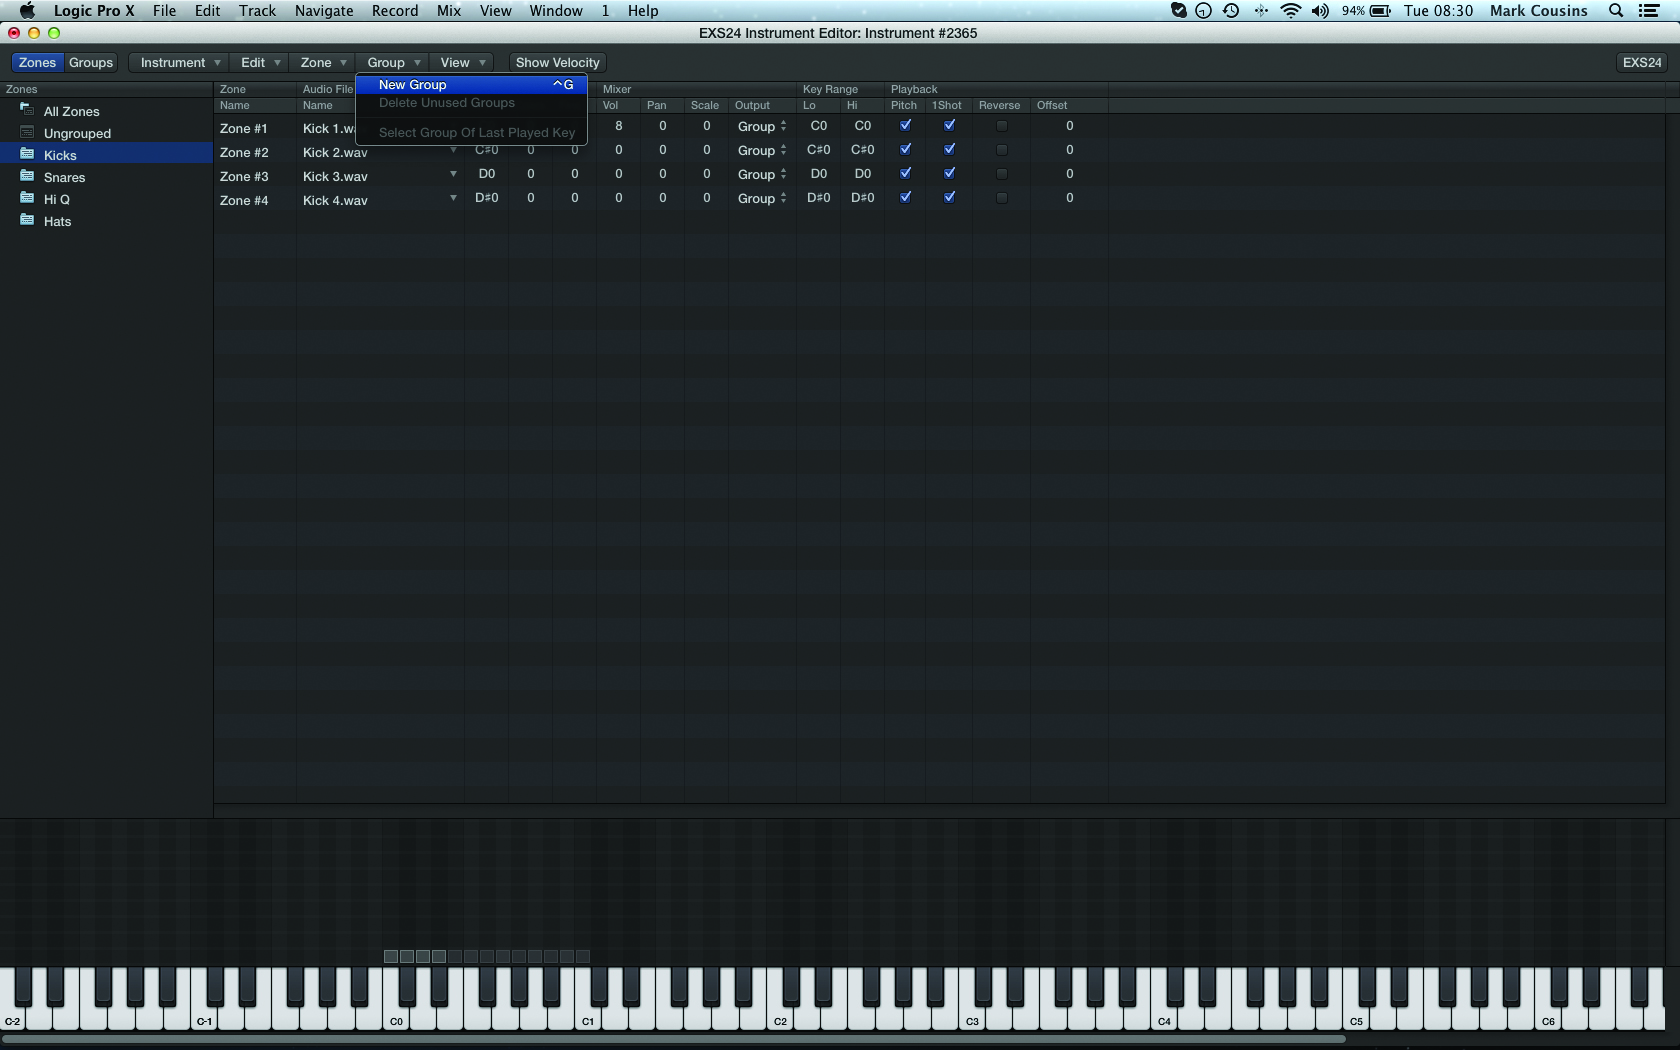
5: For complicated EXS24 instruments, it’s useful to organise zones into groups. As we performed an incremental import, Logic has created an accompanying Group, which we re-name. Alternatively, select the zones and use the local menu option Group > New Group.
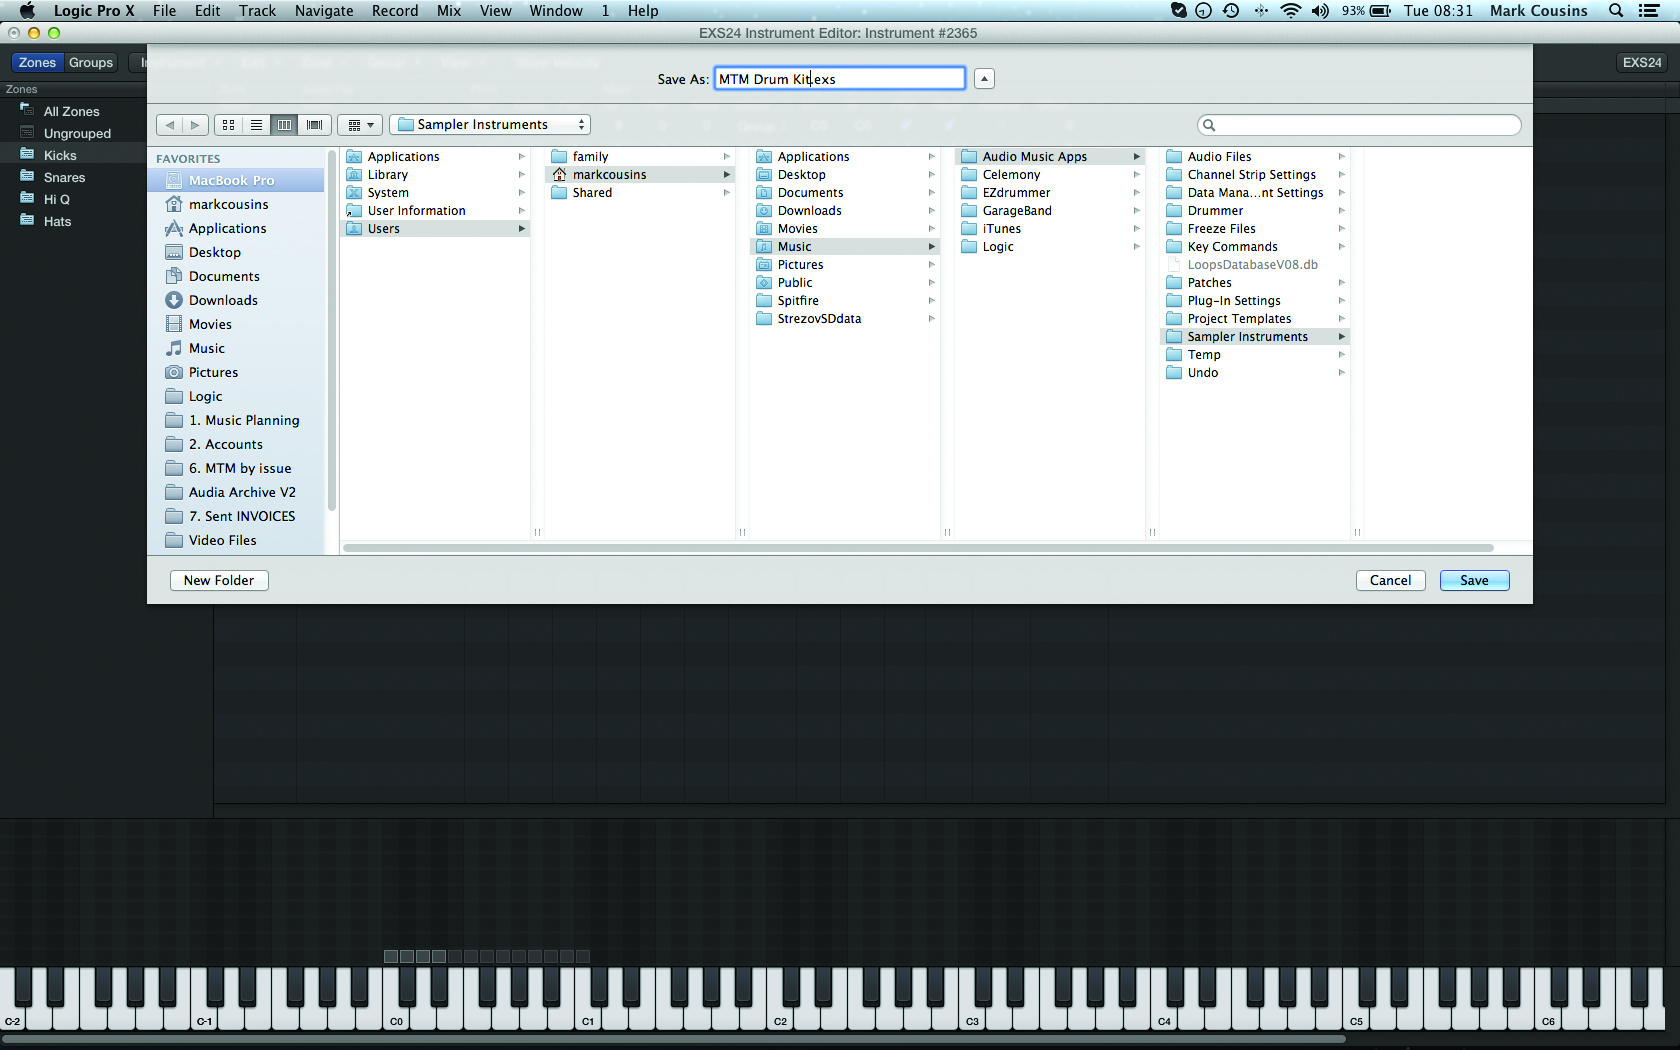
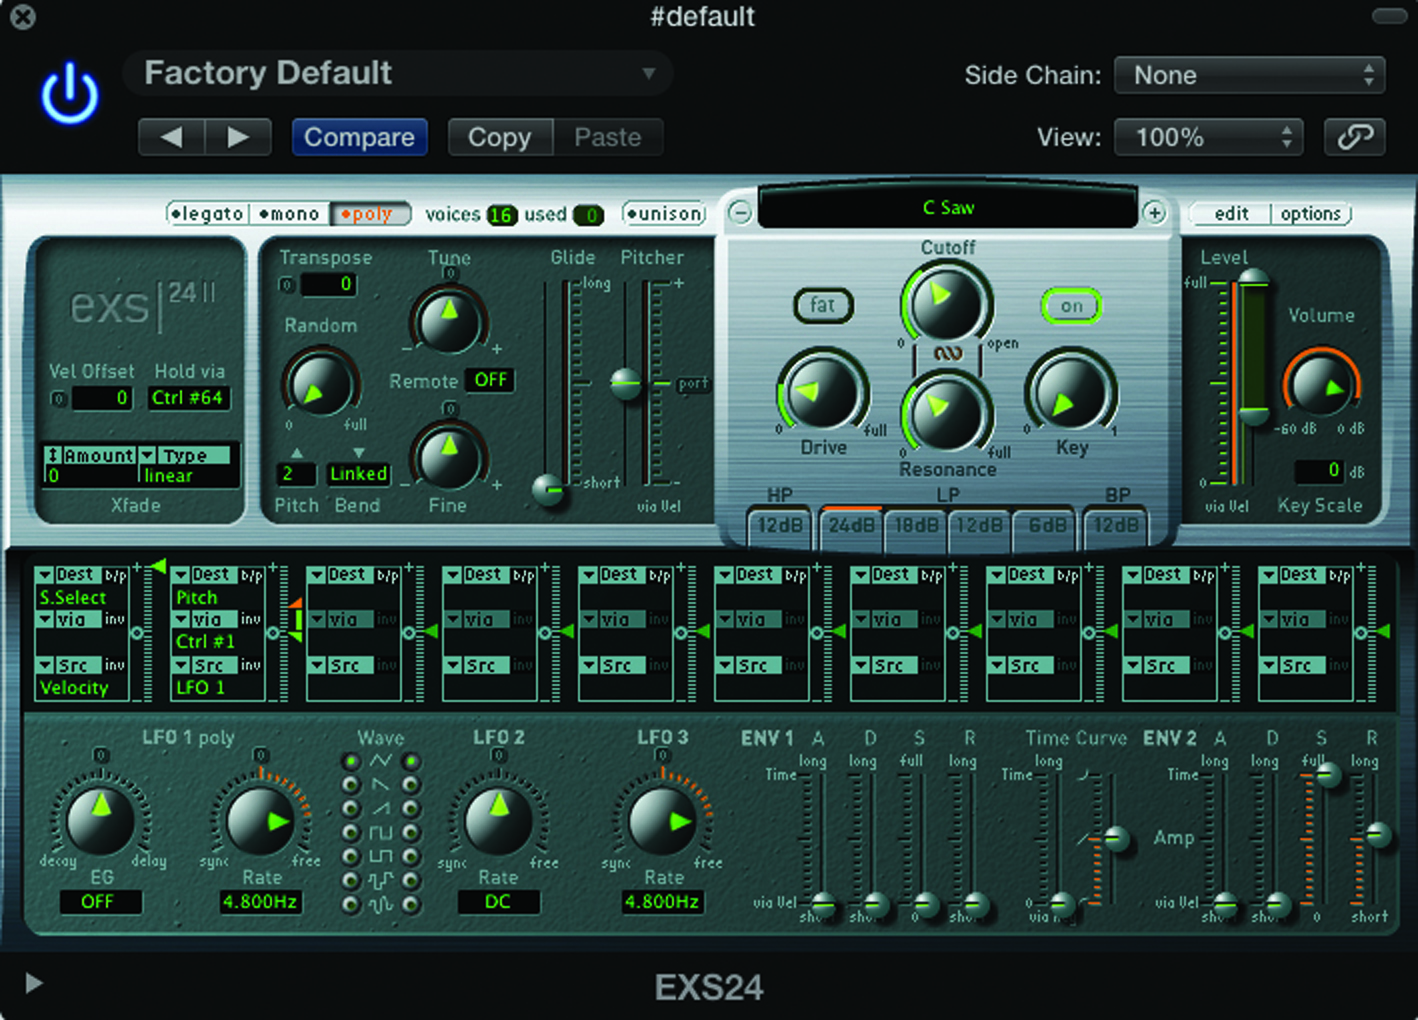
6: Once you’re happy with the instrument, using the local menu Instrument > Save As to permanently store your creation. Logic defaults to the Sampler Instruments folder in your Library, which will mean all songs can access the same instrument

7: While the Instrument Editor deals with mapping the samples, the front panel of the EXS24 handles a number of important parameters. For example, with a drum instrument, we might want to reduce the velocity scaling using the bottom half of the Level slider.

8: Env 2 controls the amplitude envelope of the sample. Try reducing sustain to 0 and then gradually lower the decay, to produce a more clipped envelope. This is also interesting with either a raised or lowered tuning using the Tune control.
9: Move over to the C Saw patch on Instrument 2 to understand the filter. To make the filter active, switch the Off button to On. Adjust the cutoff, resonance and drive to taste, using the tabs to move between high-pass, low-pass and band-pass operation.

10: Now let’s add some filter modulation using LFO 2. All the LFOs have the advantage of being MIDI-syncable, moving the rate control to the left of the zero point on a 1/16 setting. Set the waveshape to the sawtooth option.
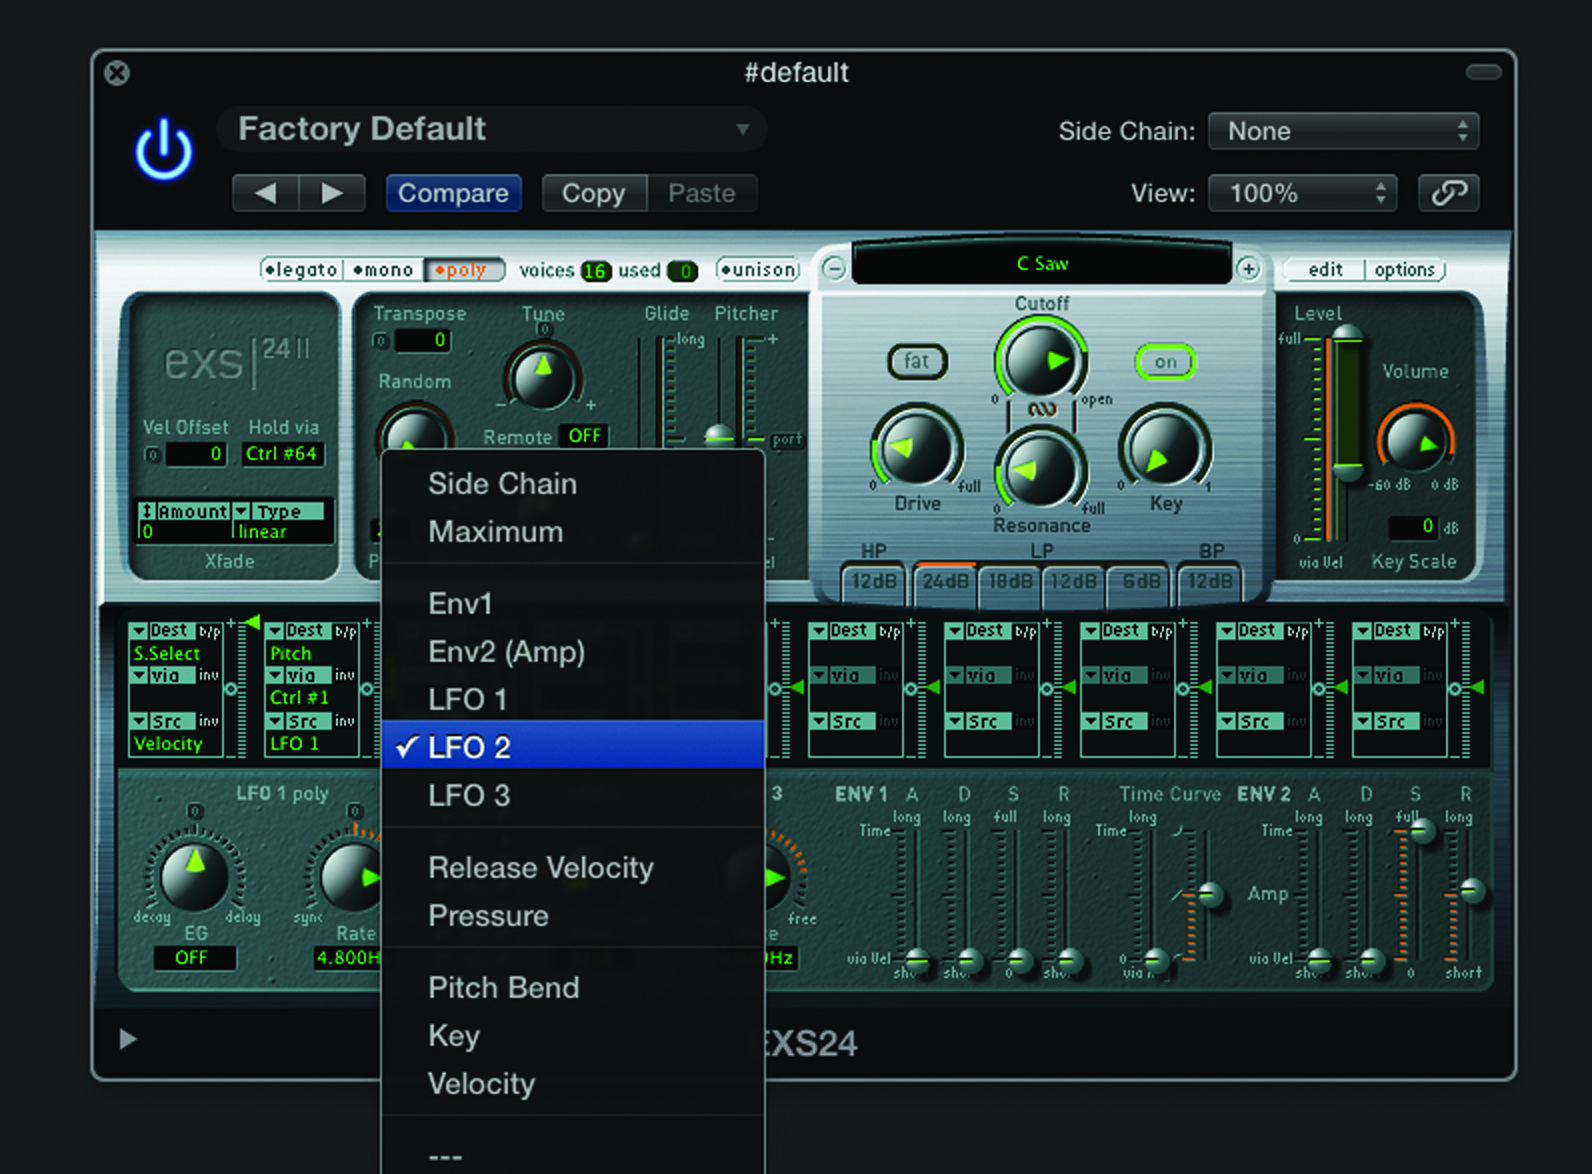
11: The EXS24’s modulation matrix is much the same as that of the ES2. First, select a destination (in this case, filter cutoff) and then pick LFO2 as the source. Set the amount of modulation using the slider on the right-hand side of the routing path.
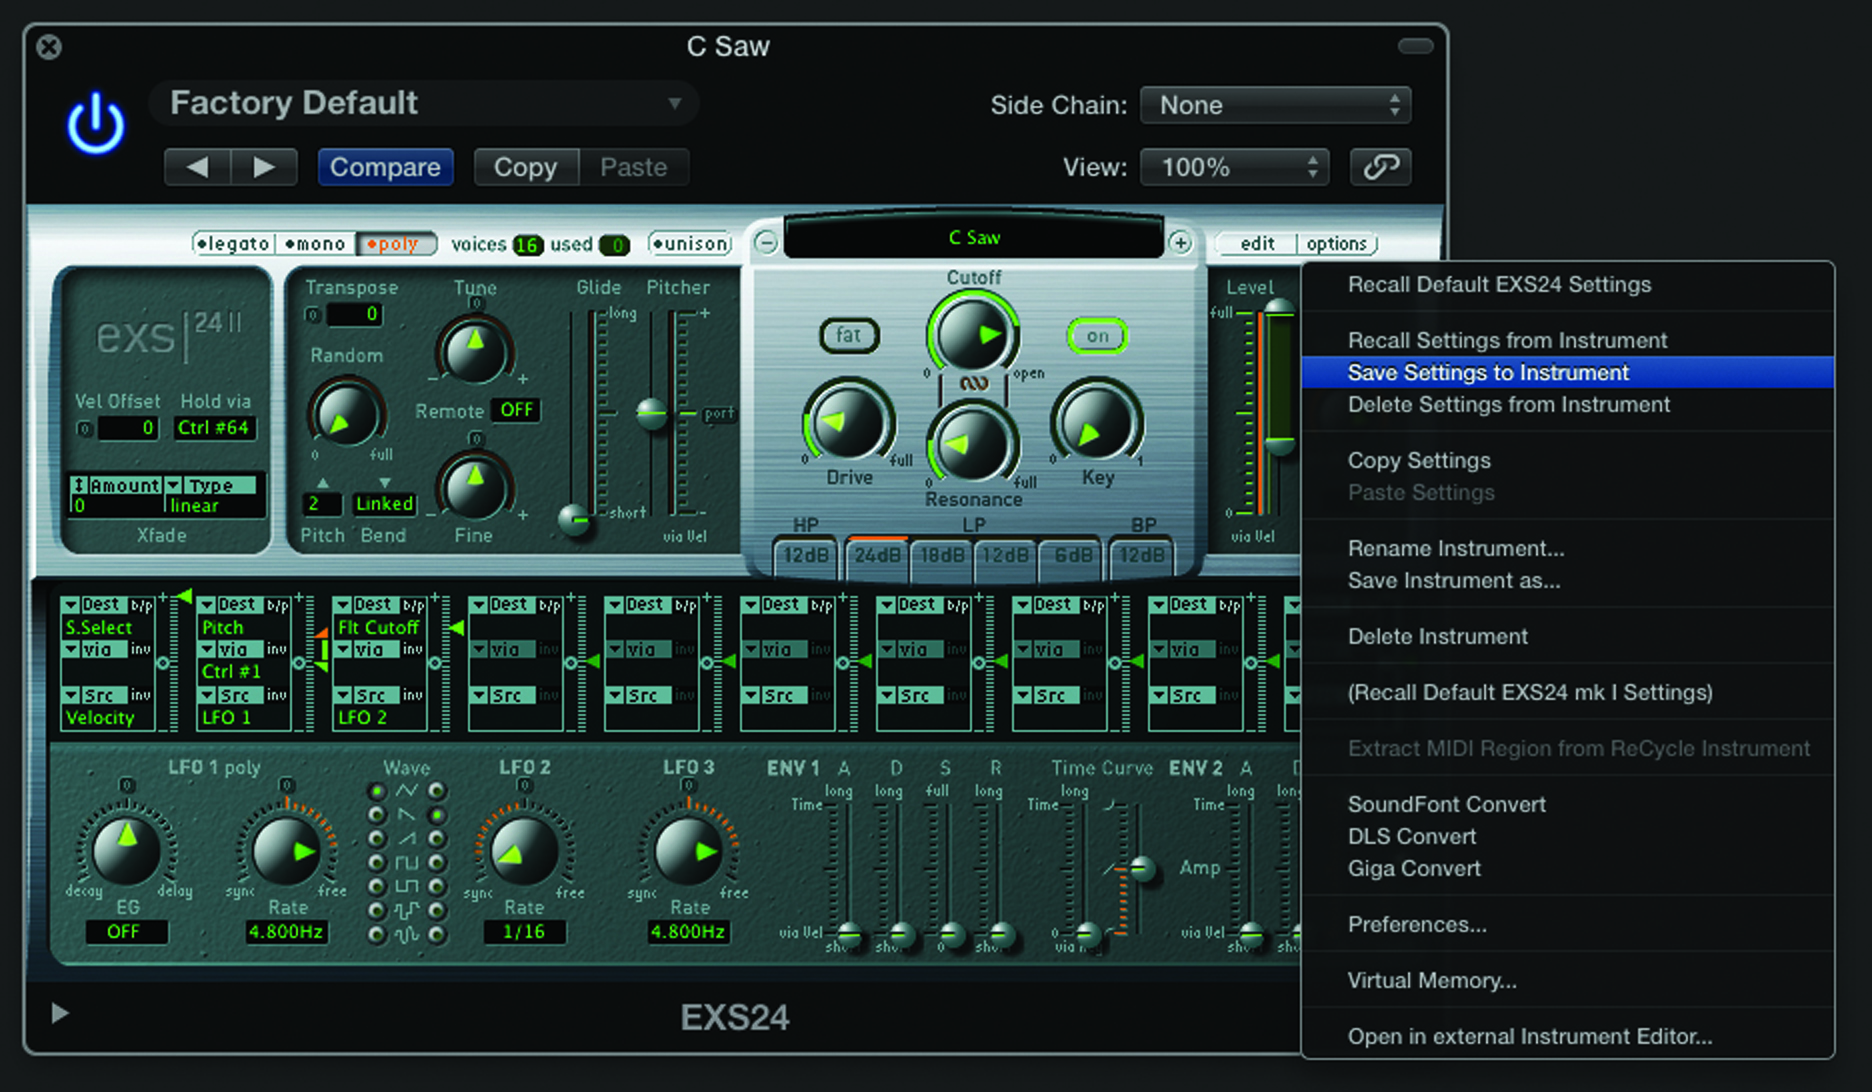
12: Settings on the front panel are temporary unless written to the mapping data created in the EXS24 Editor. To do this, use the EXS24 Option menu and select Save Settings To Instrument, so that your panel settings are stored with the mapping data.
This tutorial is endorsed by Point Blank. With courses in London, online and now in LA, Point Blank is the Global Music School. You can study sound to picture on their Music Production Diploma courses, with pro industry tutors.
