Logic Tutorial: VCA’s, Groups and Aux Channels
Logic’s three-tier solution to channel grouping seems complicated at first. Mark Cousins explains all – and gives you the lowdown on VCAs, Aux channels and Fader Groups One of the most confusing recent introductions to Logic Pro X has been the new VCA faders system. While the concept of VCAs on a console will be […]
Logic’s three-tier solution to channel grouping seems complicated at first. Mark Cousins explains all – and gives you the lowdown on VCAs, Aux channels and Fader Groups

One of the most confusing recent introductions to Logic Pro X has been the new VCA faders system. While the concept of VCAs on a console will be familiar to many working engineers, their exact role and function in Logic Pro X isn’t immediately apparent. The confusion stems from the fact that VCAs are primarily used as a means of grouping related channels, a task seemingly already addressed by Aux channels and Fader Groups. So, what do VCA faders offer that the other two solutions don’t, and how best can you integrate VCA faders into your workflow?
To best understand VCAs, therefore, we’re going to take a look a the three main ways you can group related tracks in your Logic mix: Aux channels, Groups, and VCA faders. As you’ll see, although the three solutions broadly achieve the same outcome, each brings slightly different benefits into the equation. Rather than being an either/or solution, the right combinations of all three solutions are essential to creating a professional mix, especially when you’re dealing with large track counts.
Auxiliary Reserve
Probably the first solution for signal grouping in Logic is its Aux channels system – also known as bussing – or for that matter, the Track Stack feature. In essence, the Aux channels system uses Logic’s internal bussing system as a means of routing the output of one or more faders to the input of another.
You can create an Aux channel either by changing a channel’s routing output assignment, or by creating a summing Track Stack. Once routed in this way, you can then attenuate or lift the amplitude of all signals routed to that Aux channel simply by raising or lowering the fader.
Arguably the best, and most important, reason for using an Aux channel is the ability to insert additional signal processing across its input path – a submix of drums, for example, could have a compressor patched across it, or for that matter, some equalisation.
The catch, however, is if you use send effects (like reverb and delay) sent from the original channels strips. In this configuration, lowering the Aux channel leaves the reverb ‘floating’ in the mix, effectively undoing any carefully set ratios between wet and dry signals.
Group Mentality
The solution to the send effects issue, therefore, is the use of Fader Groups. With Fader Grouping, you effectively lock the relative position of two or more faders together. Once placed in the Fader Group, moving one fader will move all of those in the group at the same time, which in turn, will also adjust the level of signal being sent to reverb and delay in your mix.
Obviously, you miss out on the Aux channel’s insert path, but you do gain a slightly more elegant way of ‘locking together’ the key instrument groups in your mix.
As useful as Fader Groups are, they also have an important caveat: automation. Once you start to write automation into one or more channels in the group, it can prove tricky to then go back and change the relative balance of the ‘macro’ mix elements.
In truth, therefore, it’s best to leave automation moves until the last point of mixing – and at that point, accept that the Fader Group function might ultimately become somewhat redundant (unless, that is, you continue to write and read automation moves as part of the group).
Voltage Controlled
VCA faders, therefore, are another level of channel grouping that address both caveats of the Aux channel and Fader Group system.
Take the example of the reverb levels in the Aux channel solution, where the reverb was present in the mix even if the Aux channel was fully attenuated. With a VCA fader group, the ‘grouped’ level control is post any insert effects, but pre any send effects. Turn down the VCA fader, therefore, and the reverb and delay send will be attenuated accordingly.
Turning now to the use of Fader Groups and the use of automation, we can also see the distinct advantage of VCA faders. Again, the key is where VCA faders control the level of grouped channels – in this case, trimming the levels after the application of automation.
The point at which you apply automation therefore becomes irrelevant, as you can always trim the level at any point in the mix. Indeed, VCAs are even a great solution for a single channel (like a vocal, for example) that has a lot of automation moves, but needs a 1dB global lift in the mix.
One size fits all?
Of course, VCA faders aren’t the universal panacea to all channel-grouping requirements. Like Fader Groups, it’s impossible to apply any form of processing across the accompanying VCA master fader – so there’s no chance of any bus compression, for example.
It’s worth noting that VCA faders are largely the same as the master fader in your Logic Project, which works as a form of VCA fader on the main stereo output from Logic. In effect, VCA faders are nothing more that user-configurable master faders.
Moving back to Fader Groups, the downside would be the relatively hidden nature of the VCA system. With Fader Groups, the relative instrument levels are what you see; but with VCAs not moving the faders, channel-fader positions only become a partial indicator of the final mix levels.
So there’s still a reason to use all three systems we’ve described. We usually start using Fader Groups, both as means of controlling grouped instrument levels, but also for speedier editing across multiple regions. Aux channels come into play as you move on to mixing, especially where signals need a touch of bus compression and equalisation.
Finally, VCAs are real godsend as a mix grows in size and you need a realistic means of controlling grouped levels, especially after automation has been applied.
Group Automation
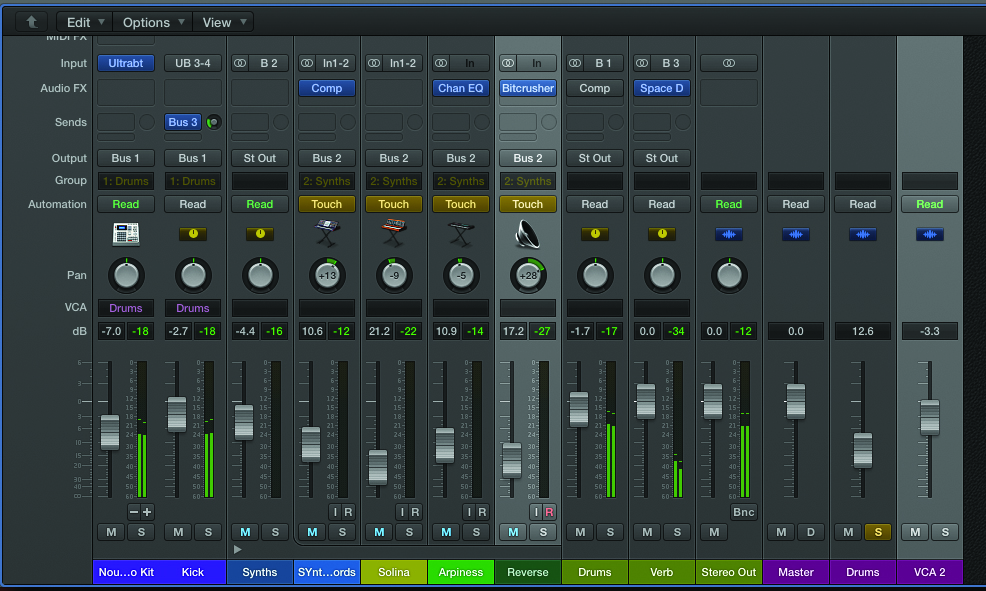
One parameter in the Group settings is the Automation Mode, which governs how Fader Groups work with automation data.
With the Automation Mode setting active, changing the Automation Mode between Read, Touch, Write and Latch on one fader will change the corresponding Automation Modes on all faders. Un- checking Automation Mode is useful where you want to write automation data across the majority of faders in a group, but maybe leave one fader untouched. In this case, change the Automation Mode of the fader you want to leave out of automation (Read is probably the best mode), while leaving the other faders in either Touch, Write or Latch.
Step By Step – Aux Channels
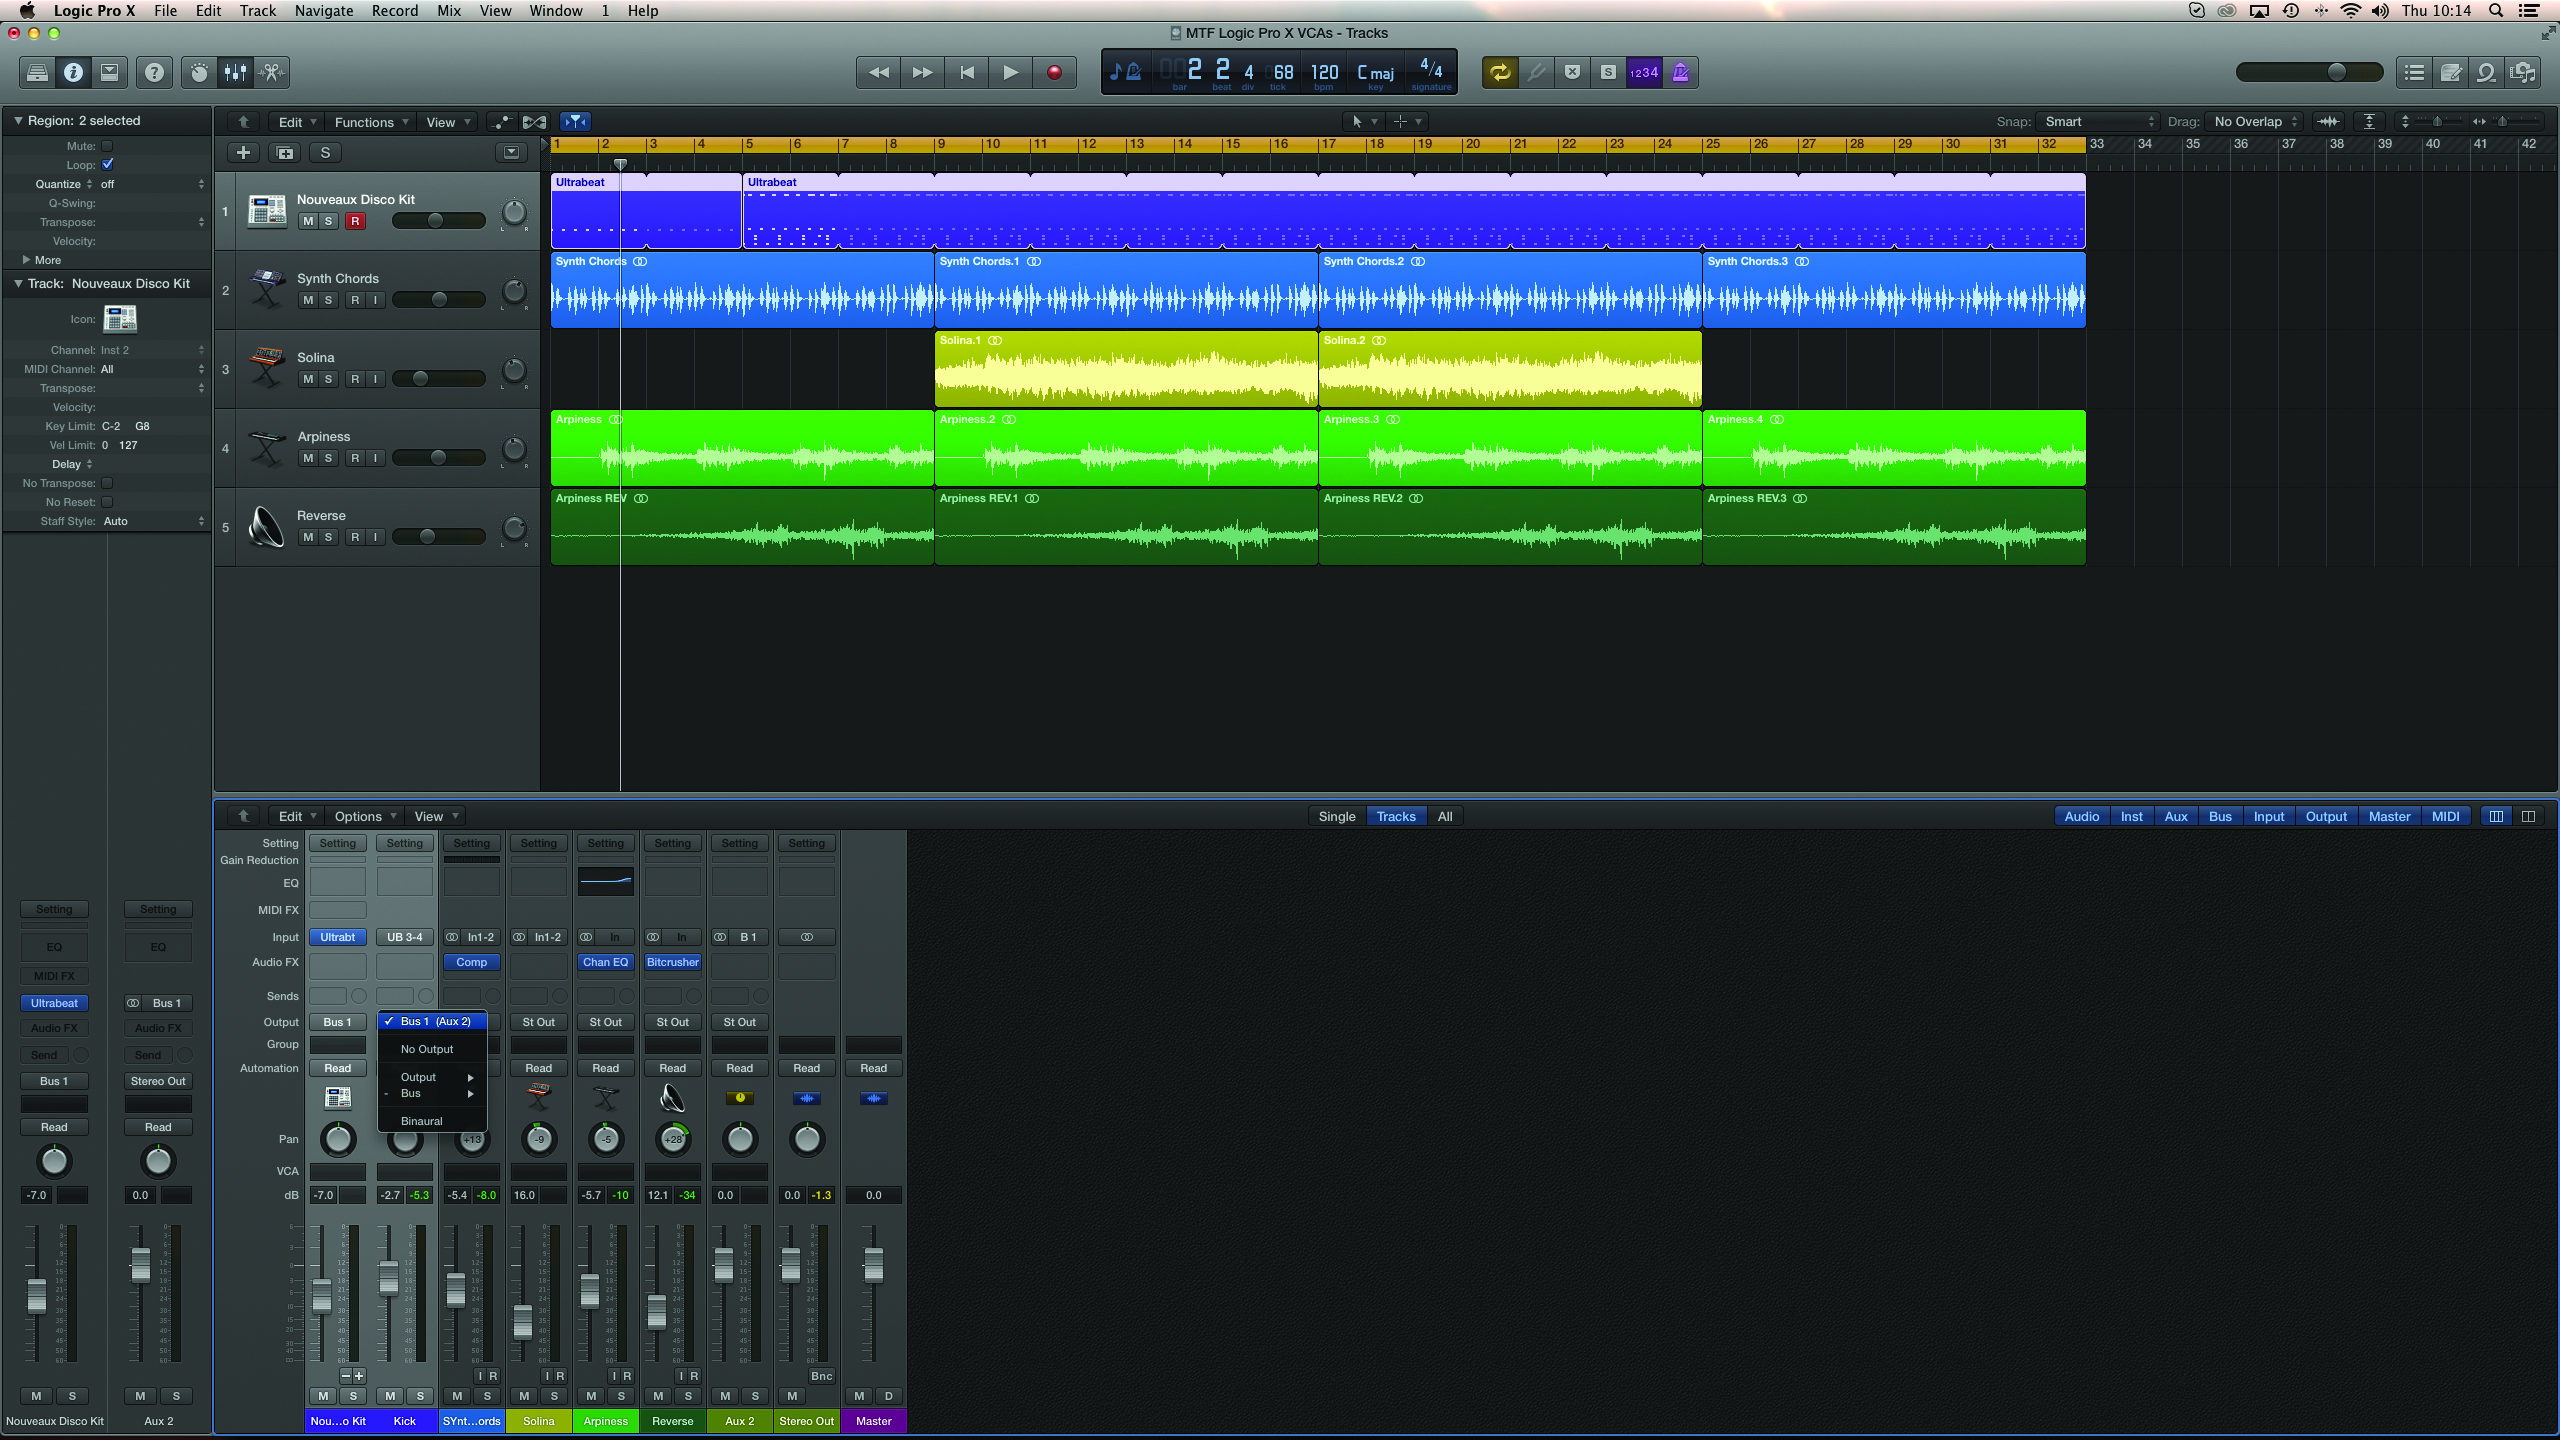
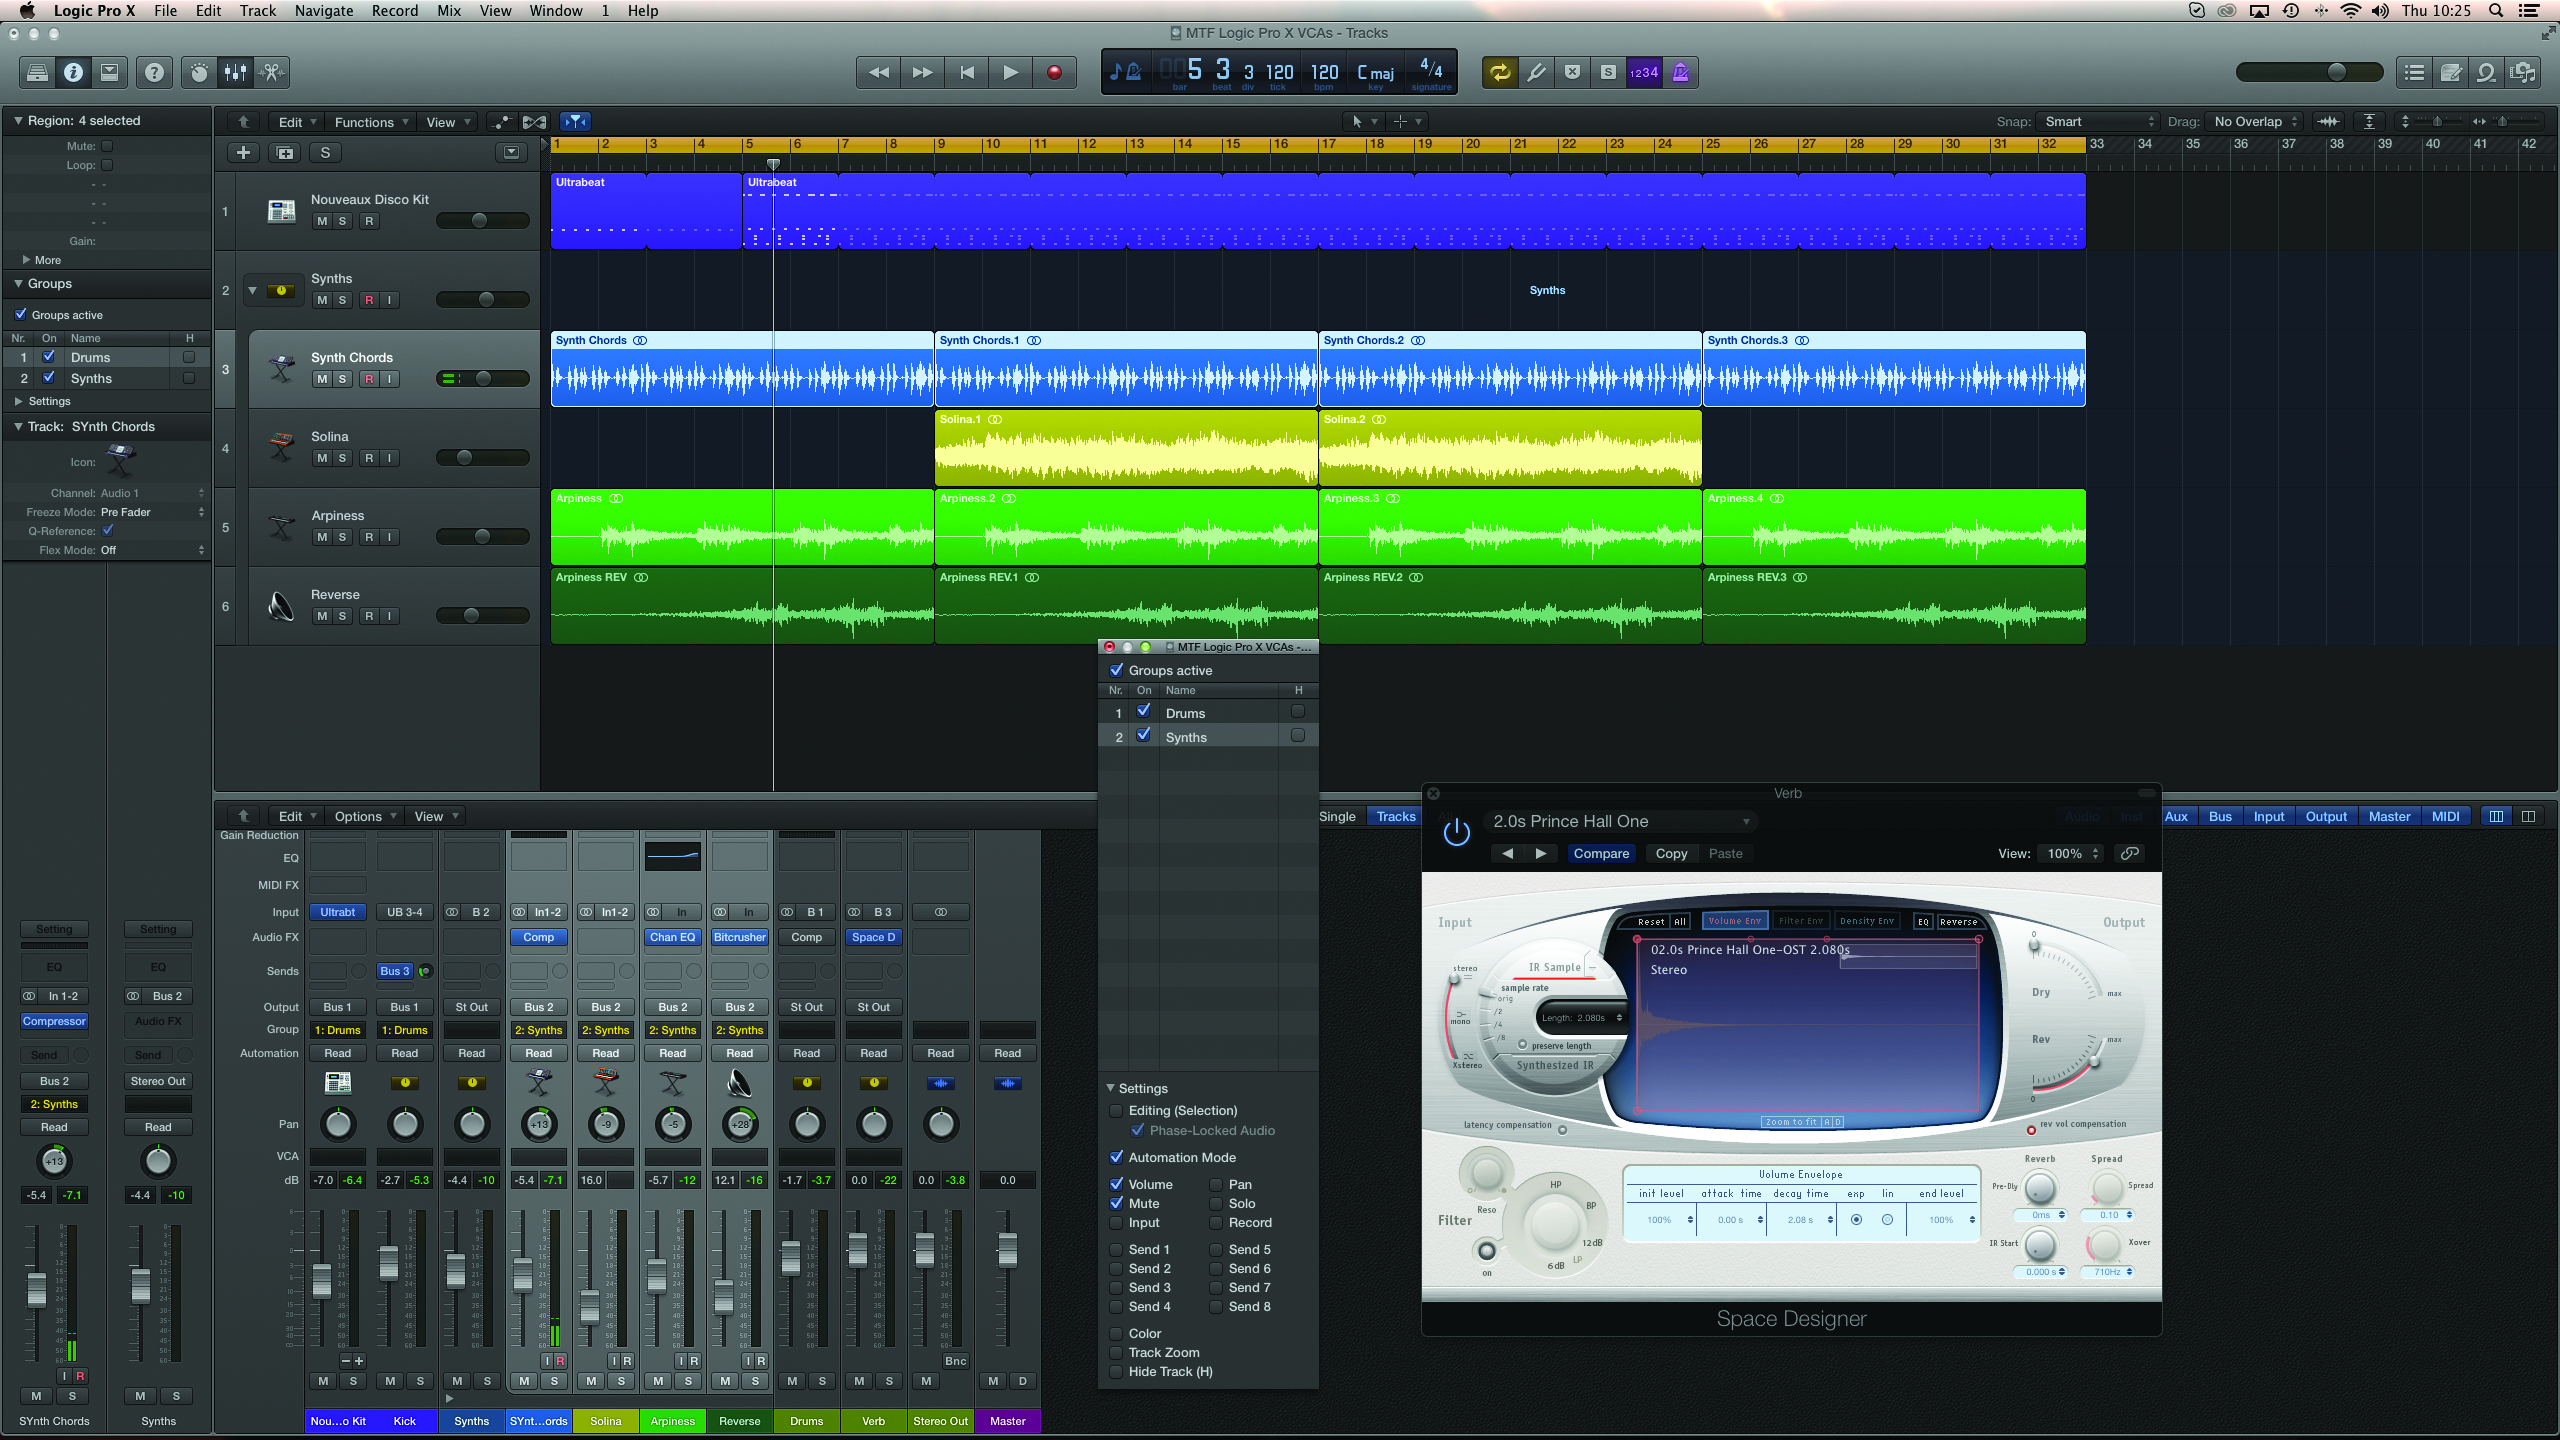
1: There are two ways of creating an Aux channel for a group of faders in your mix. In our example, try selecting the two channel faders for the drums and change their output assignment from Stereo Output to a Bus 1.
2: If the bus is new to the mix, Logic will create a corresponding Aux channel. You can now control the level of the drums from this single point, as well as adding additional processing via the Aux channel’s insert points.
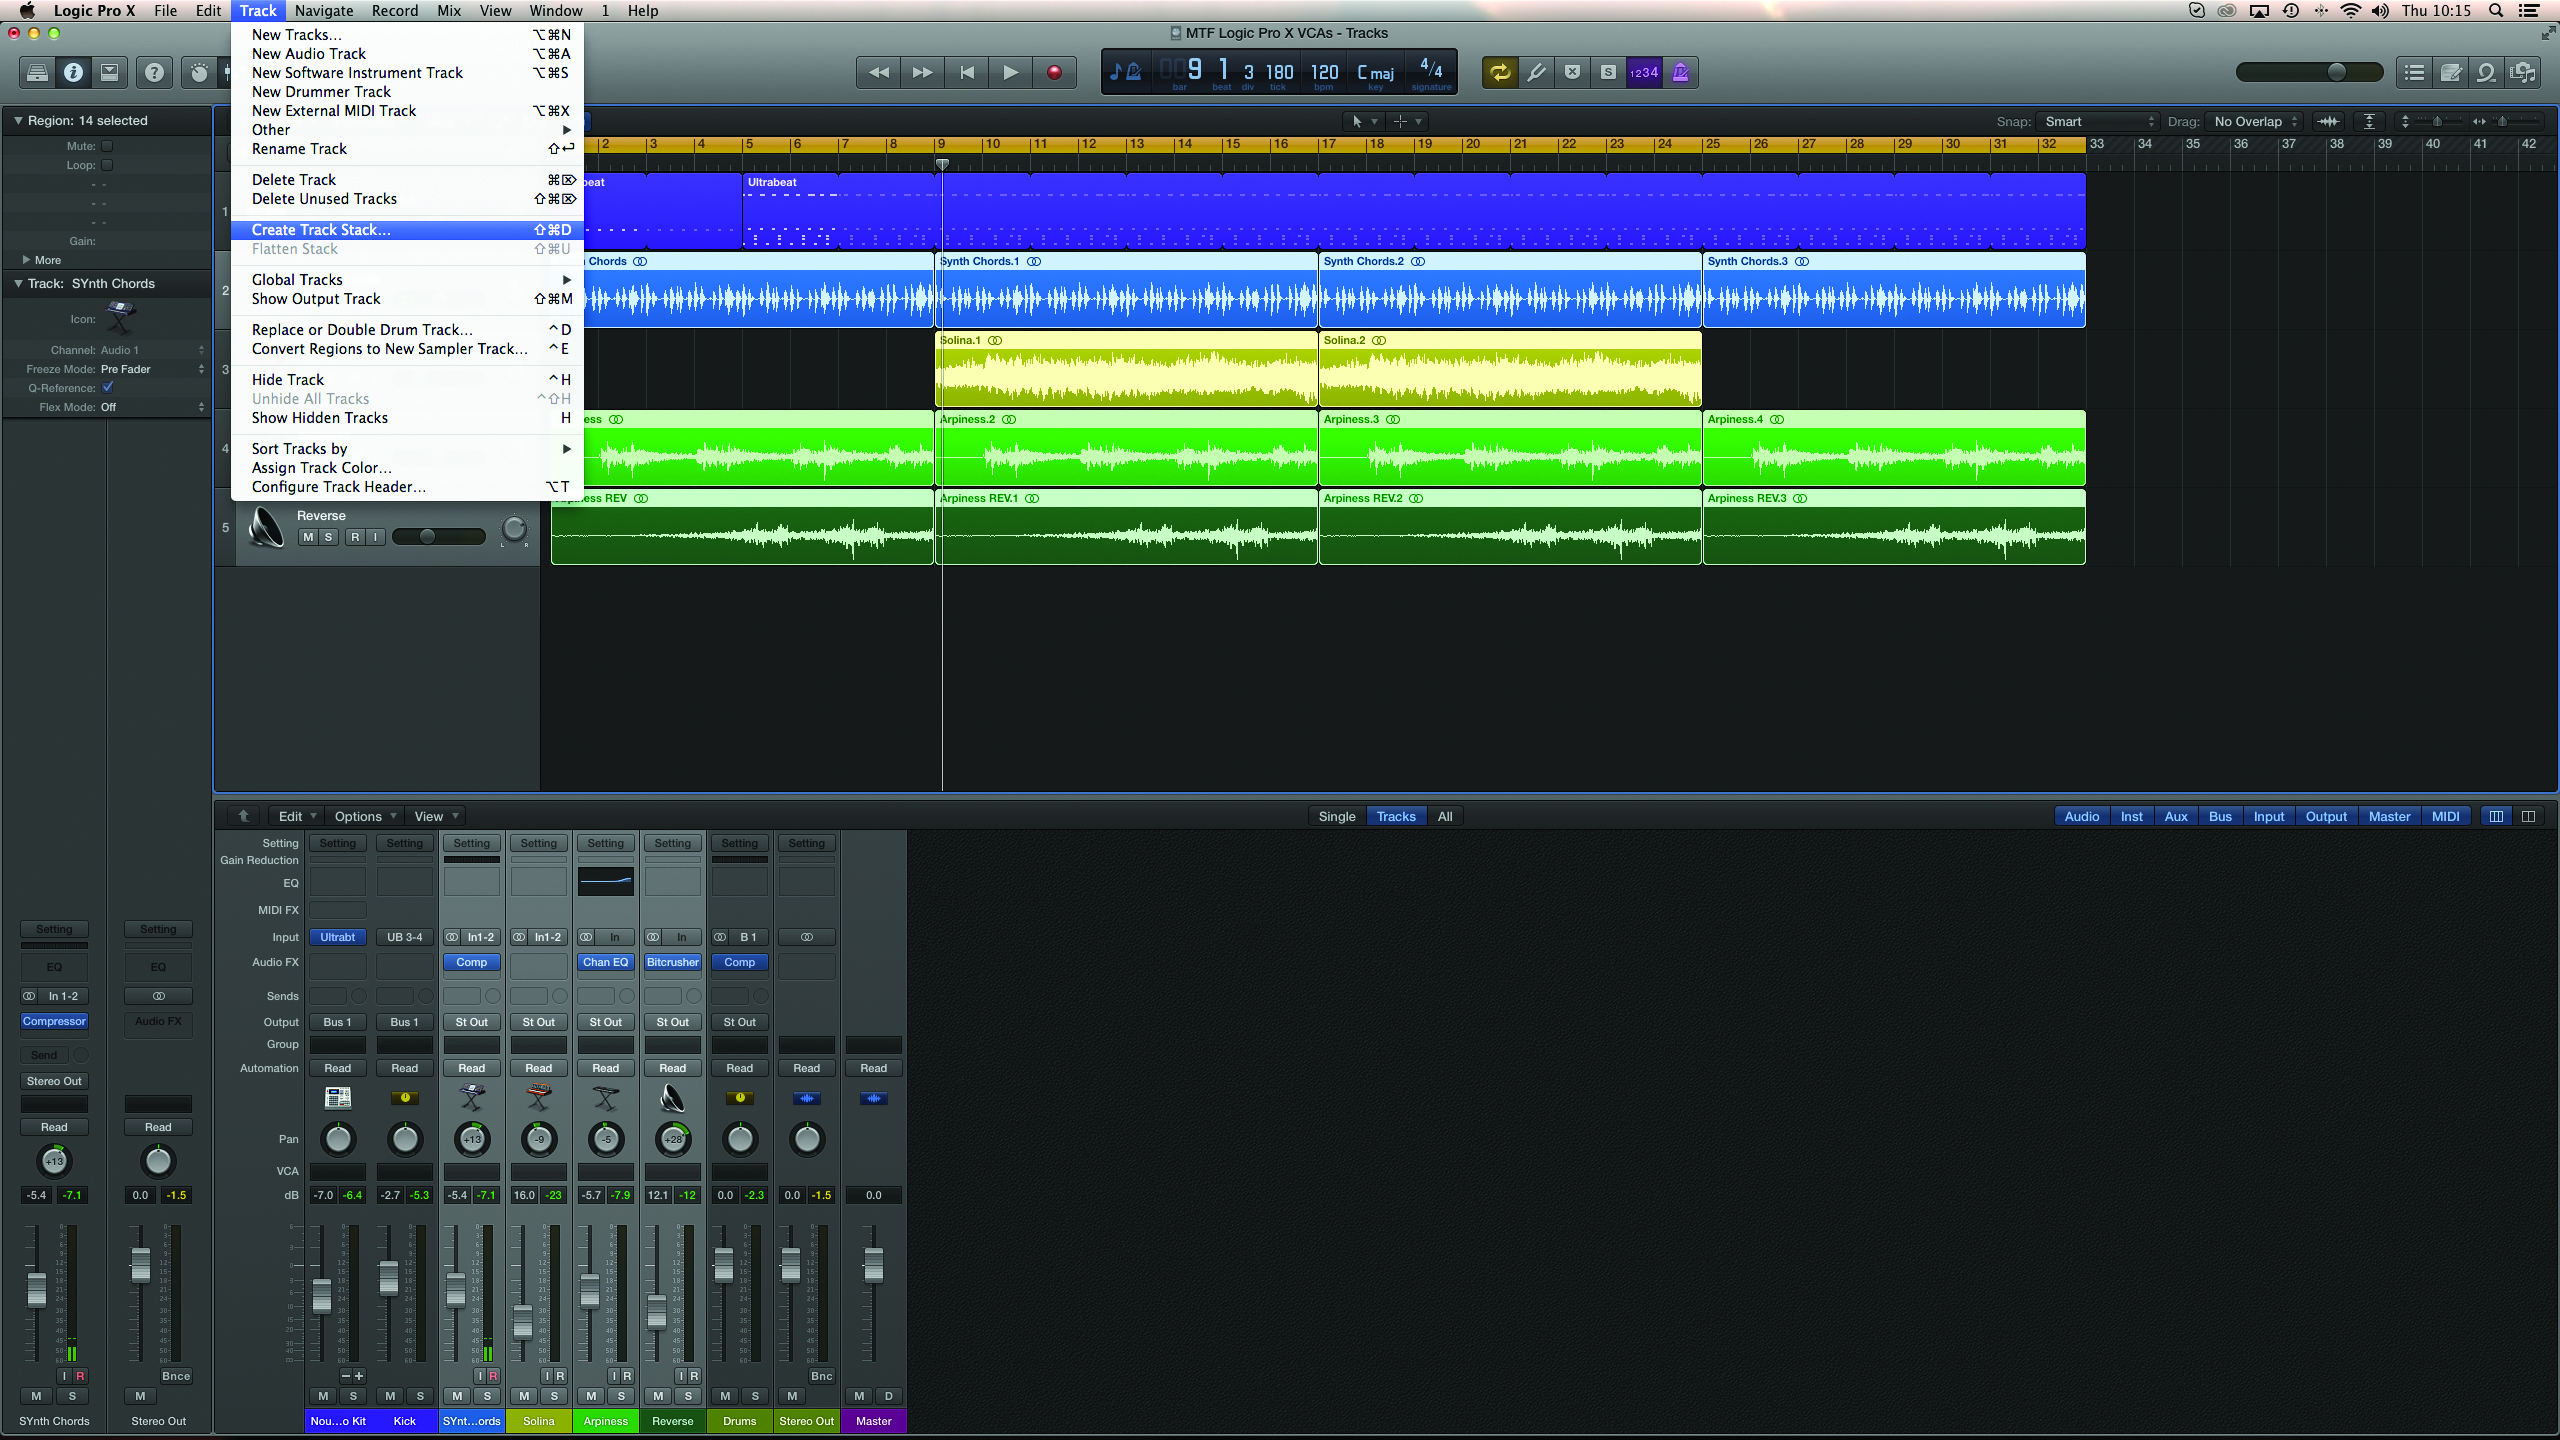
3: An alternative solution is to use the Track Stack feature. In this example, select all the synth parts and pick the menu option Track>Create Track Stack. The end routing is the same, assuming you pick the Summing stack option.
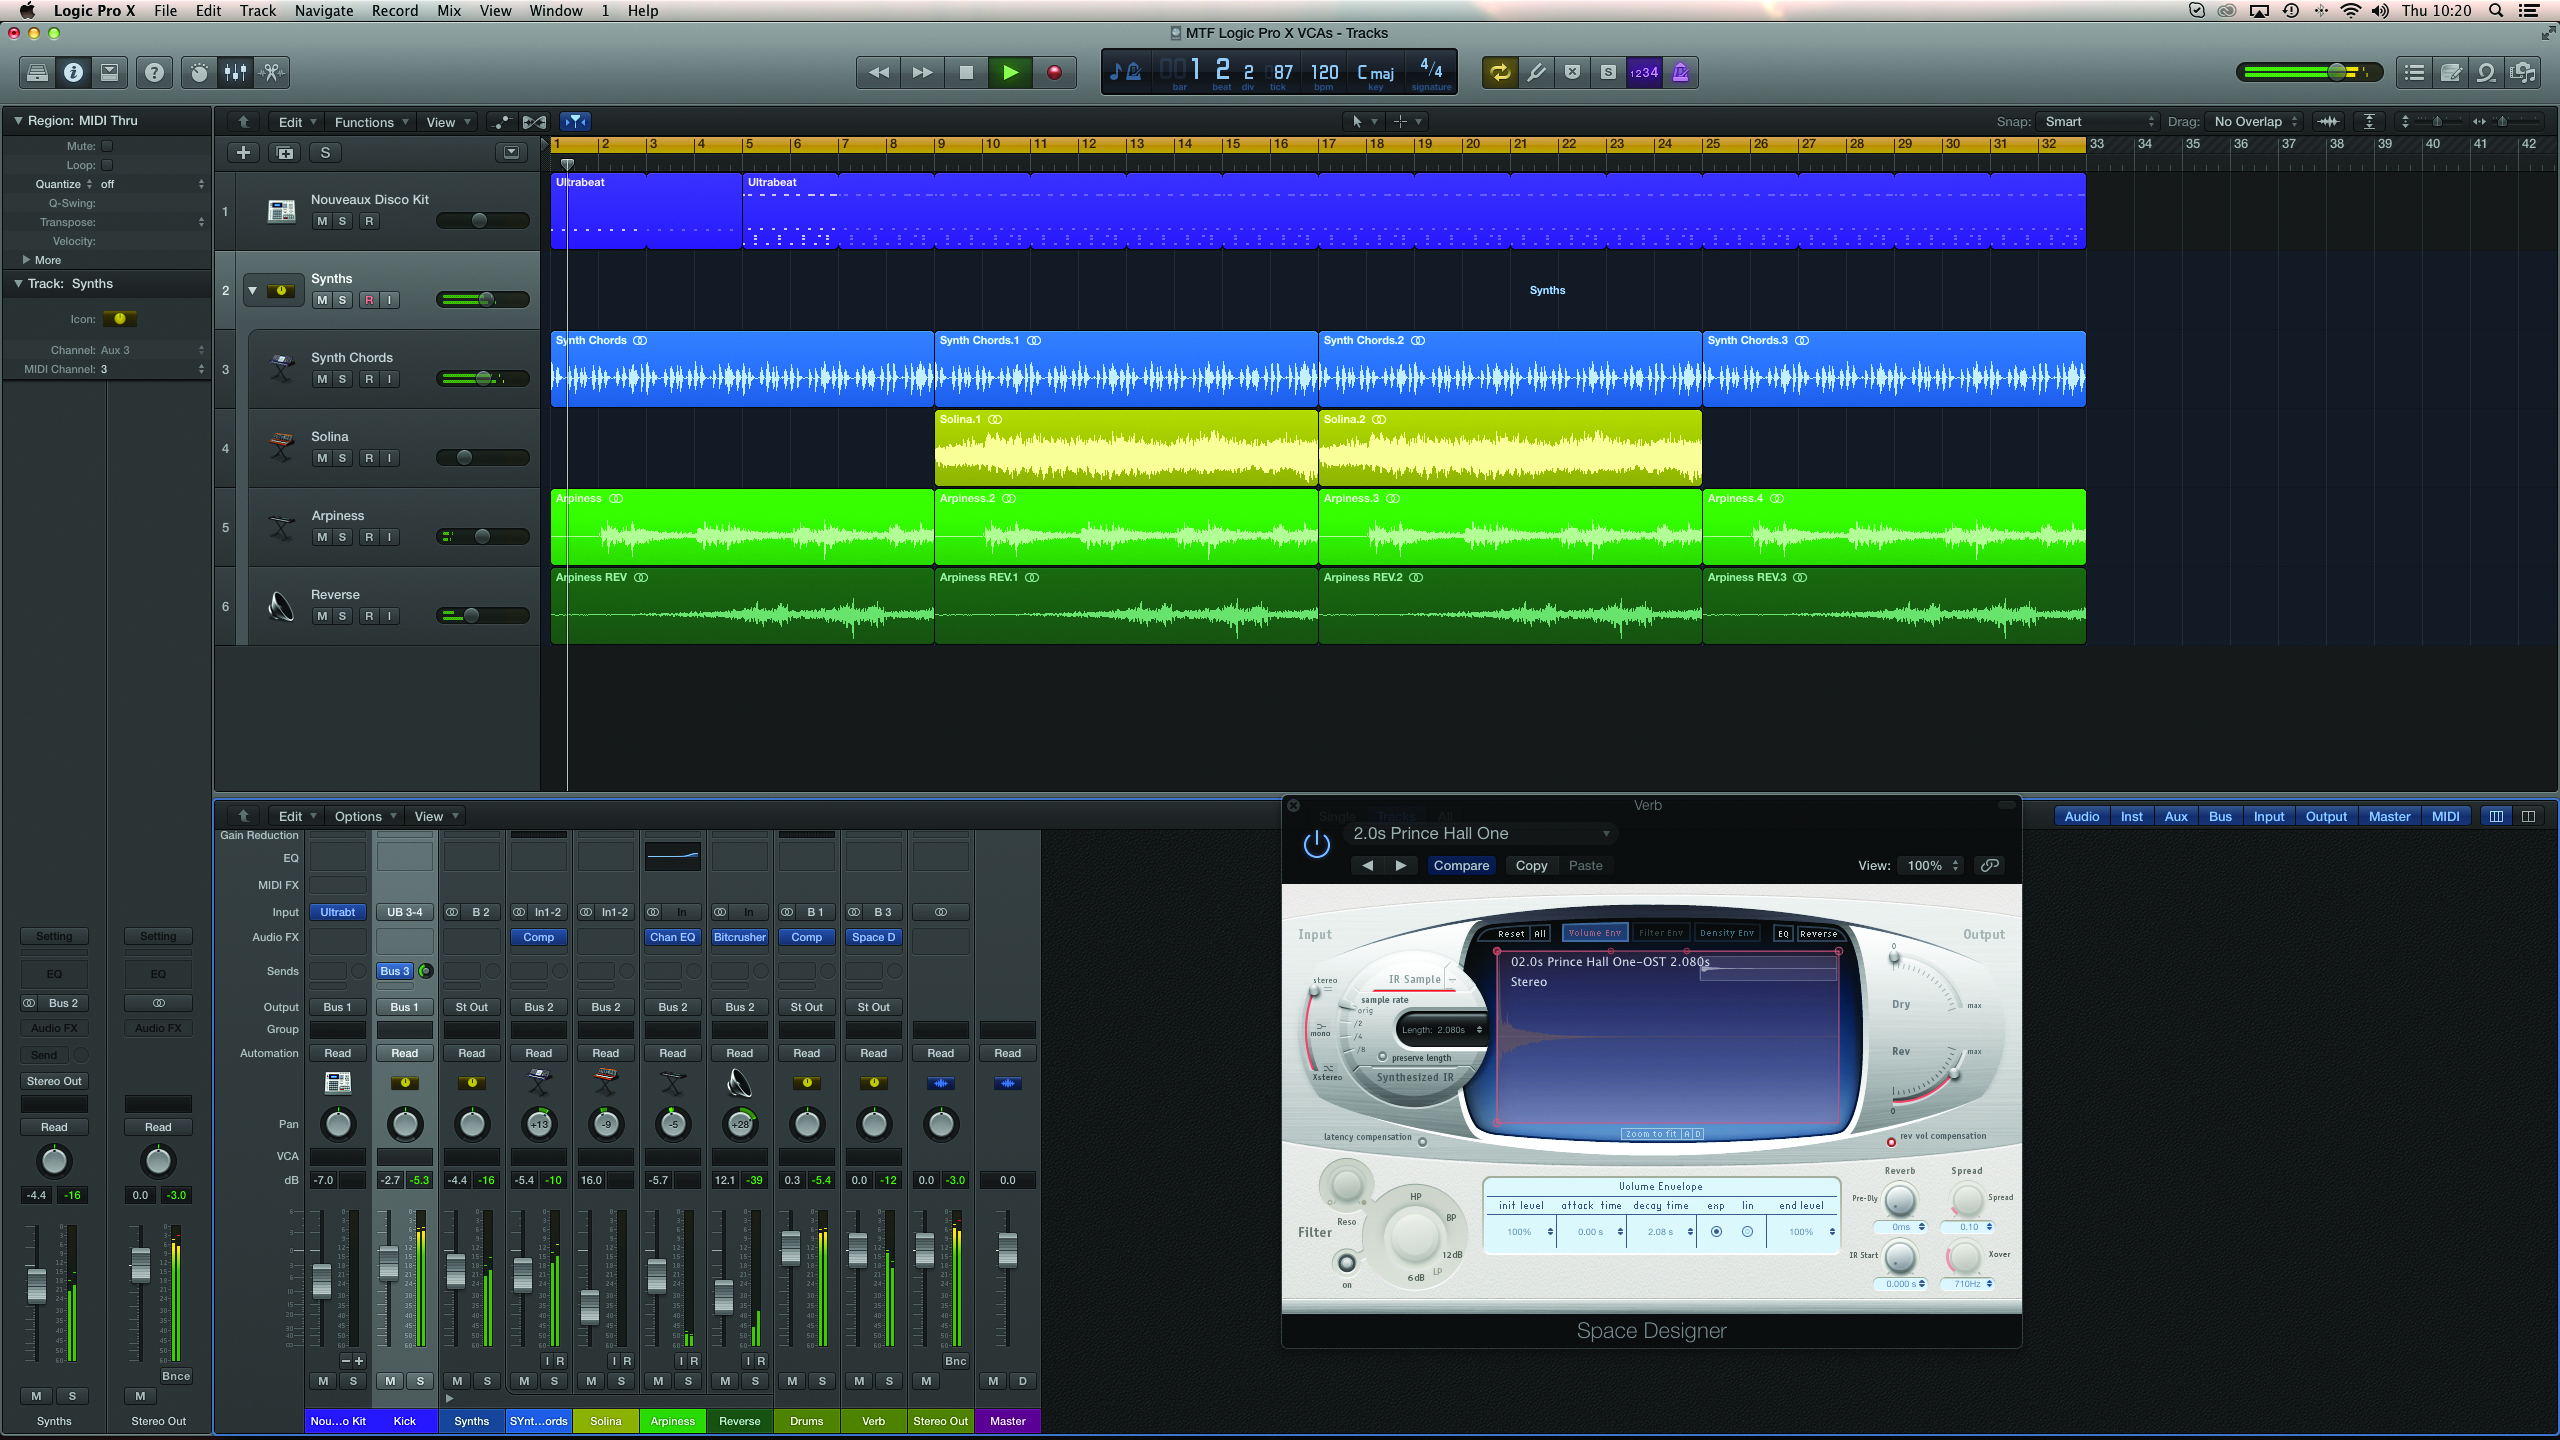
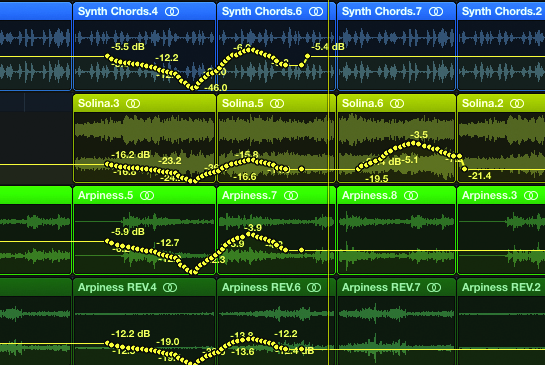
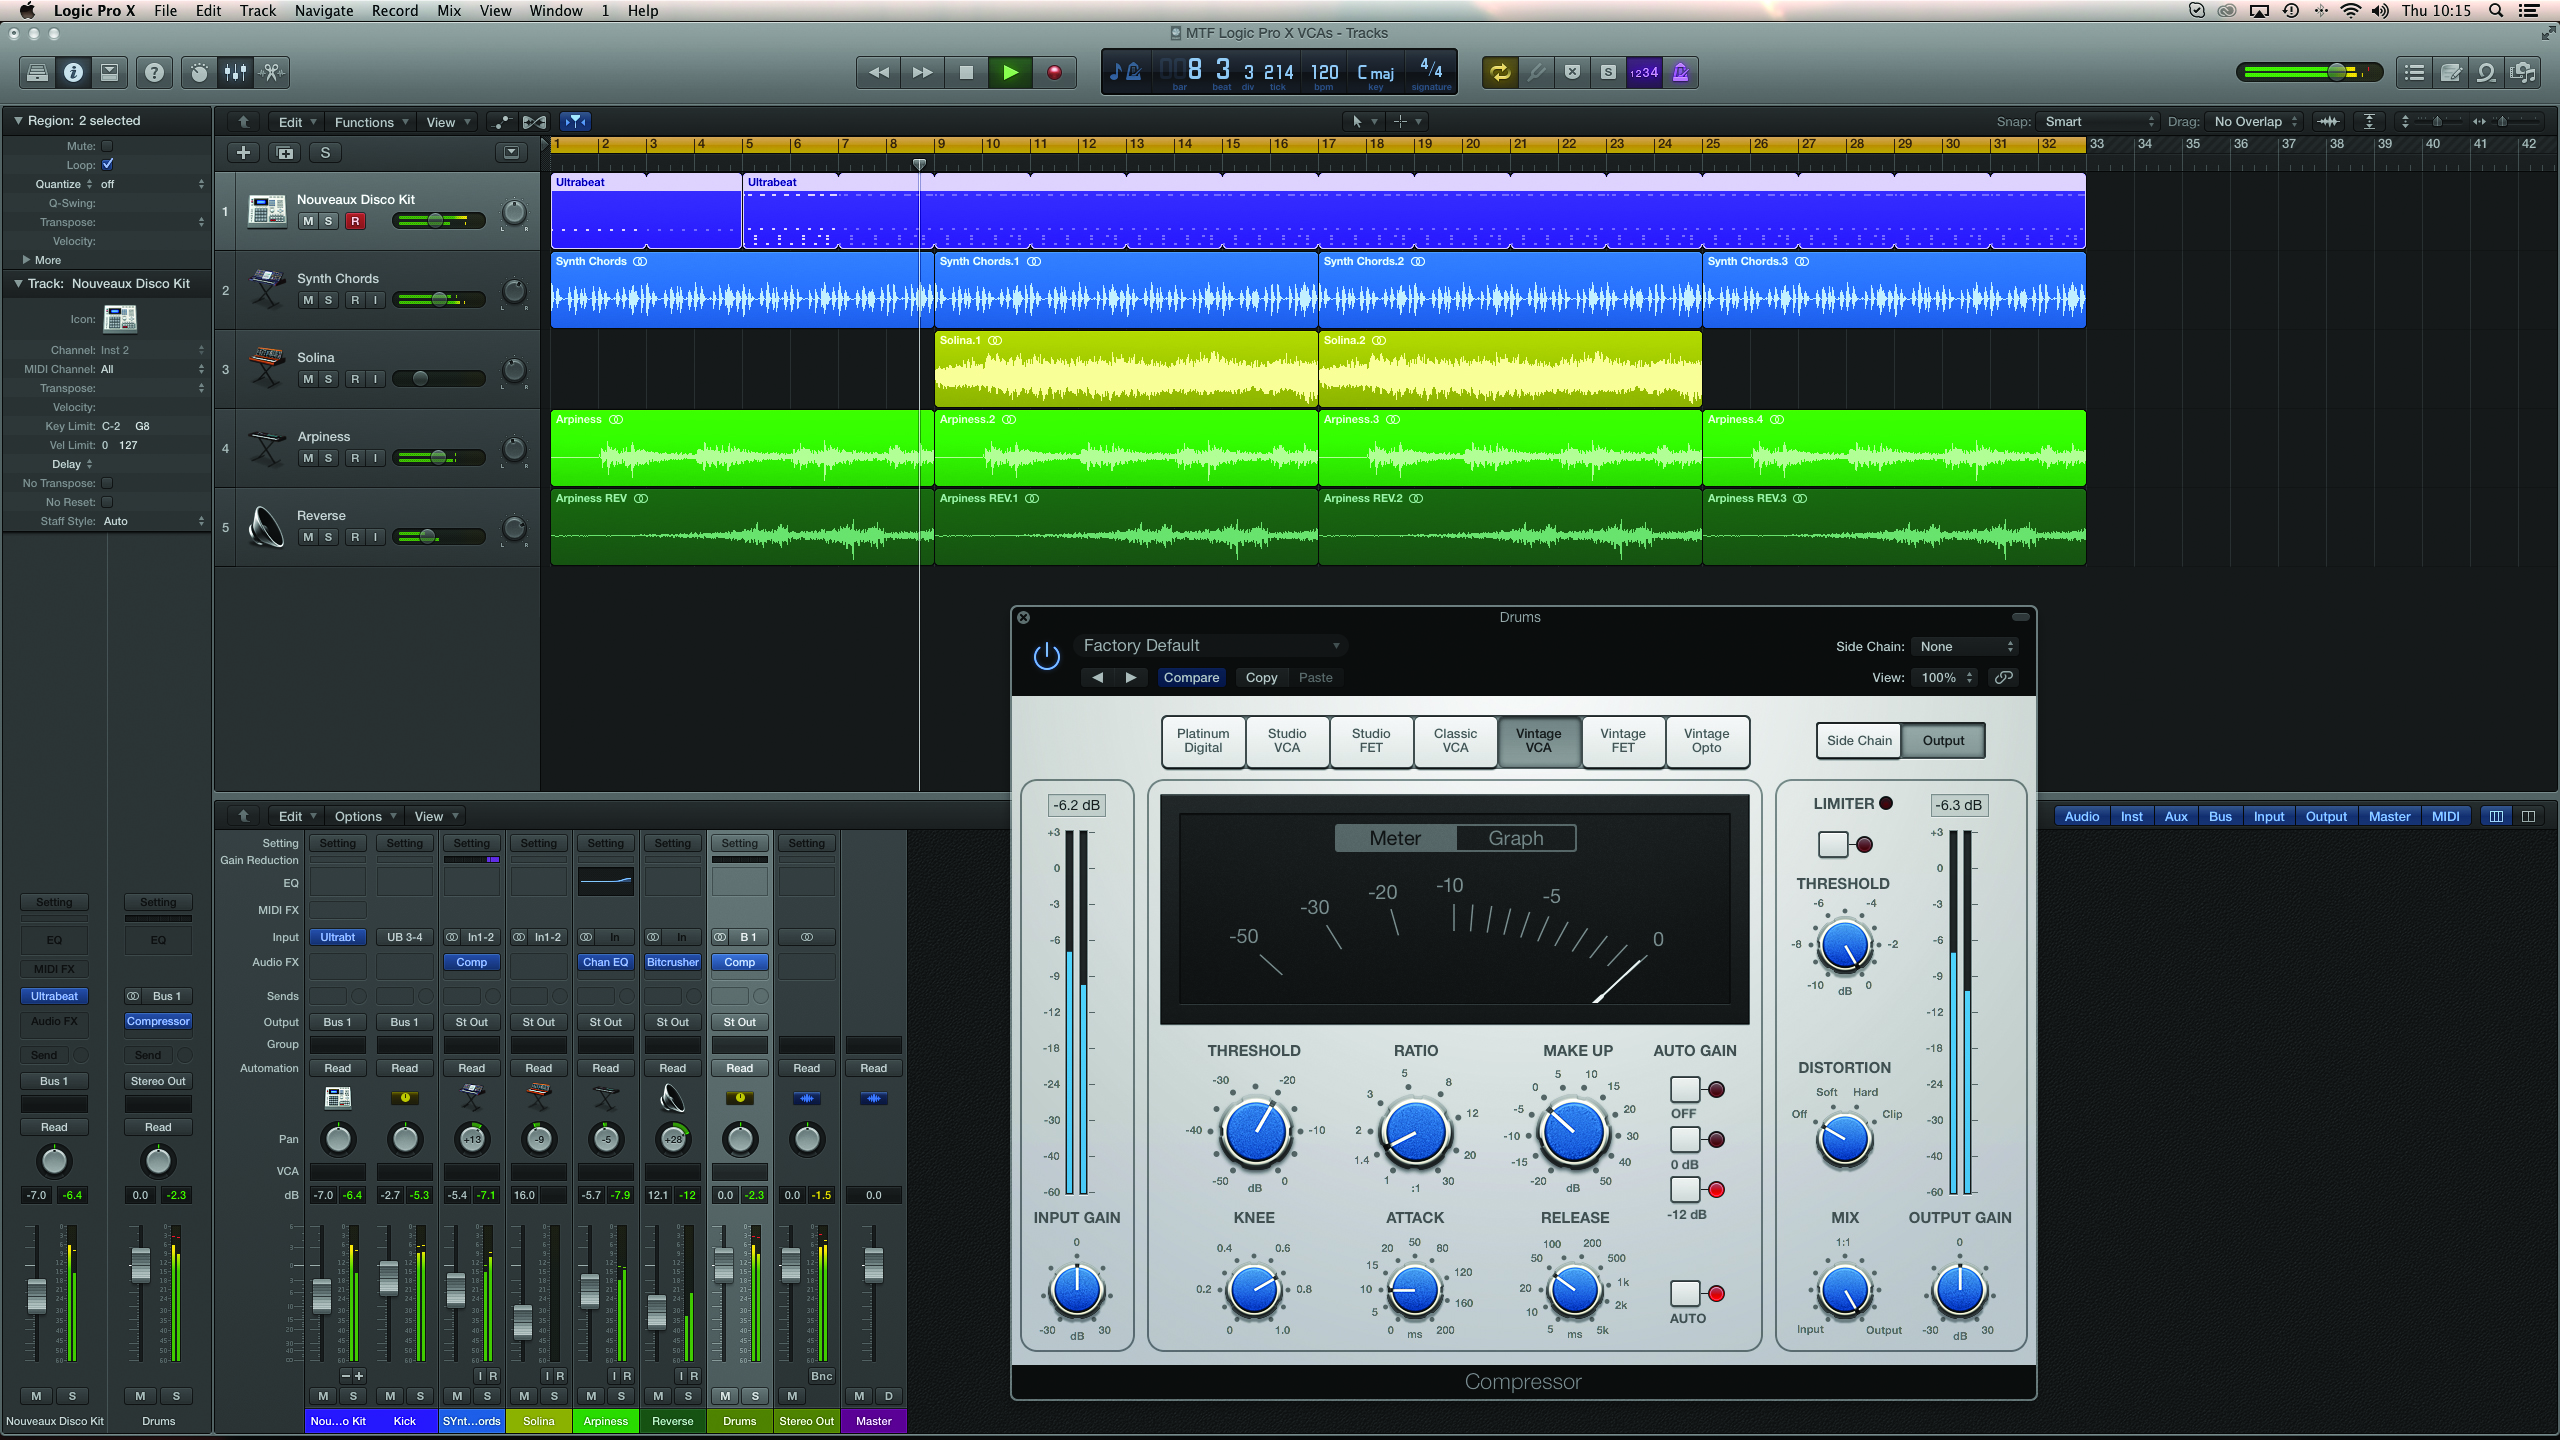
4: To illustrate the problem with Aux channels, try creating a bus send (to Bus 3, which is currently unused) from the kick-drum channel. On the newly created Aux channel, patch an instance of Space Designer, set to a medium-length reverb.
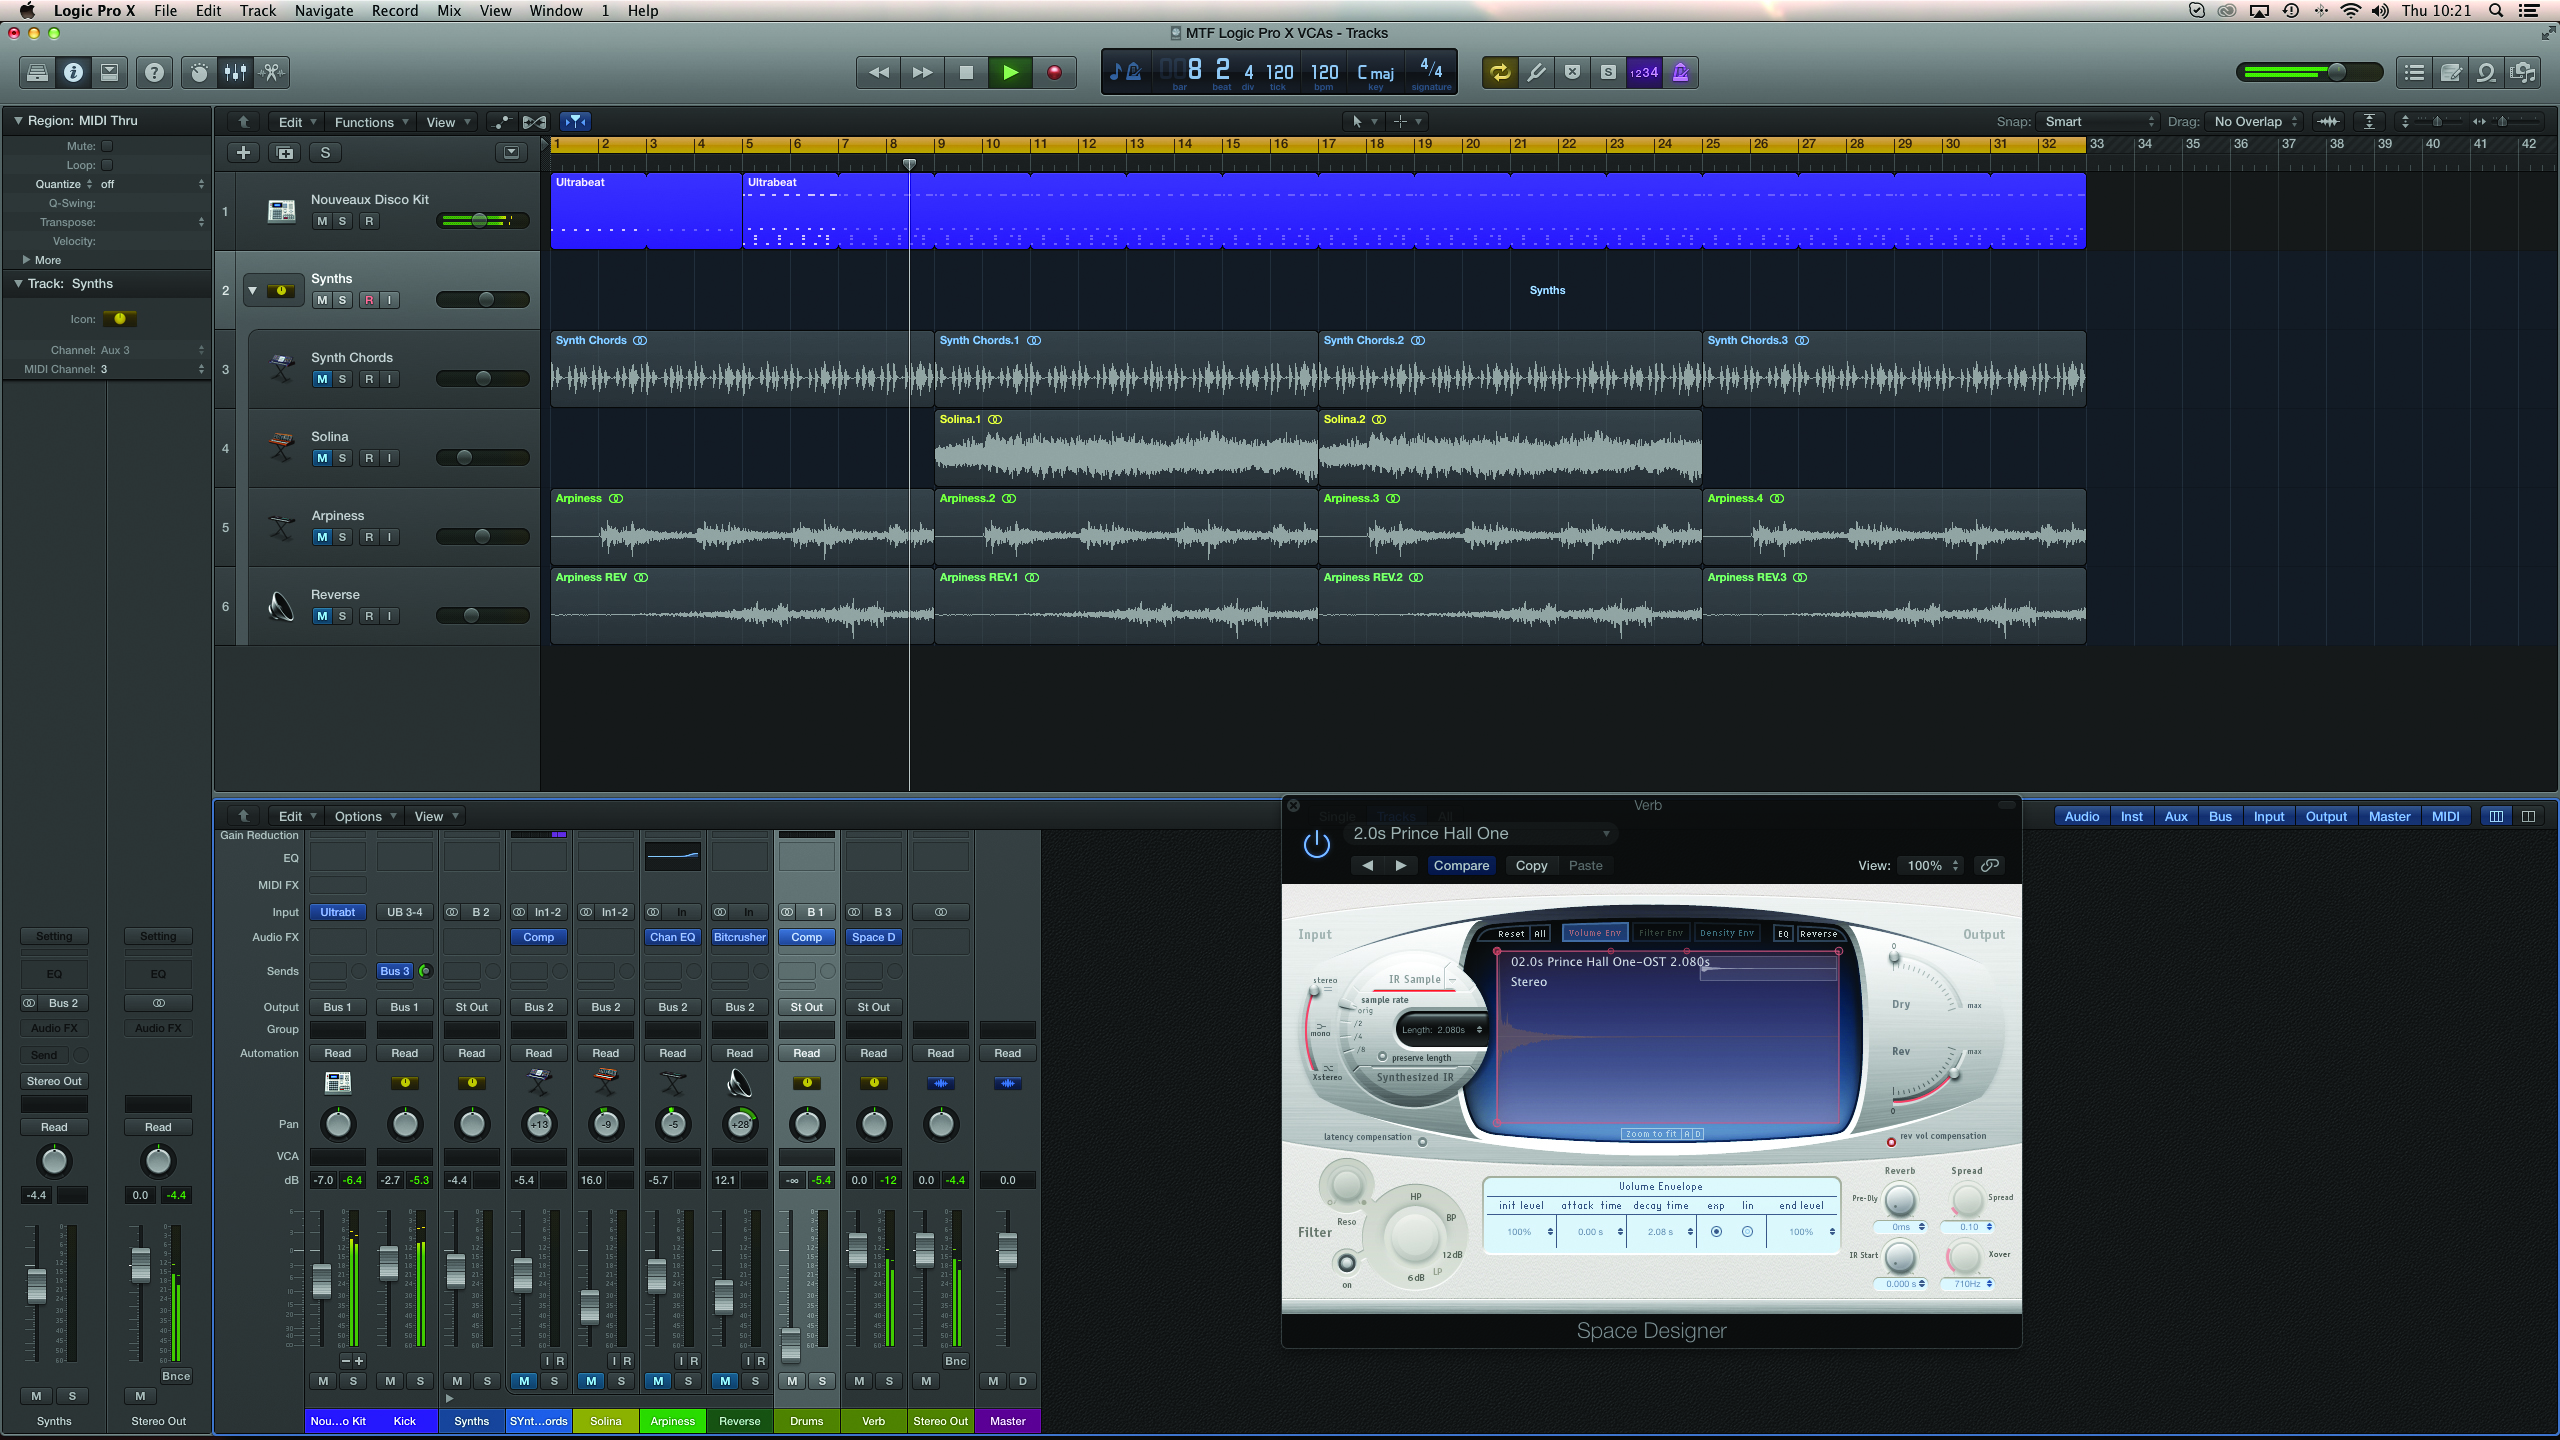
5: With the reverb setup, try reducing the level of the Aux channel being used as the drum submix. Notice that the reverb level stays fixed, irrespective of the Aux channel’s fader position. Therefore, dropping the level makes the sound wetter.
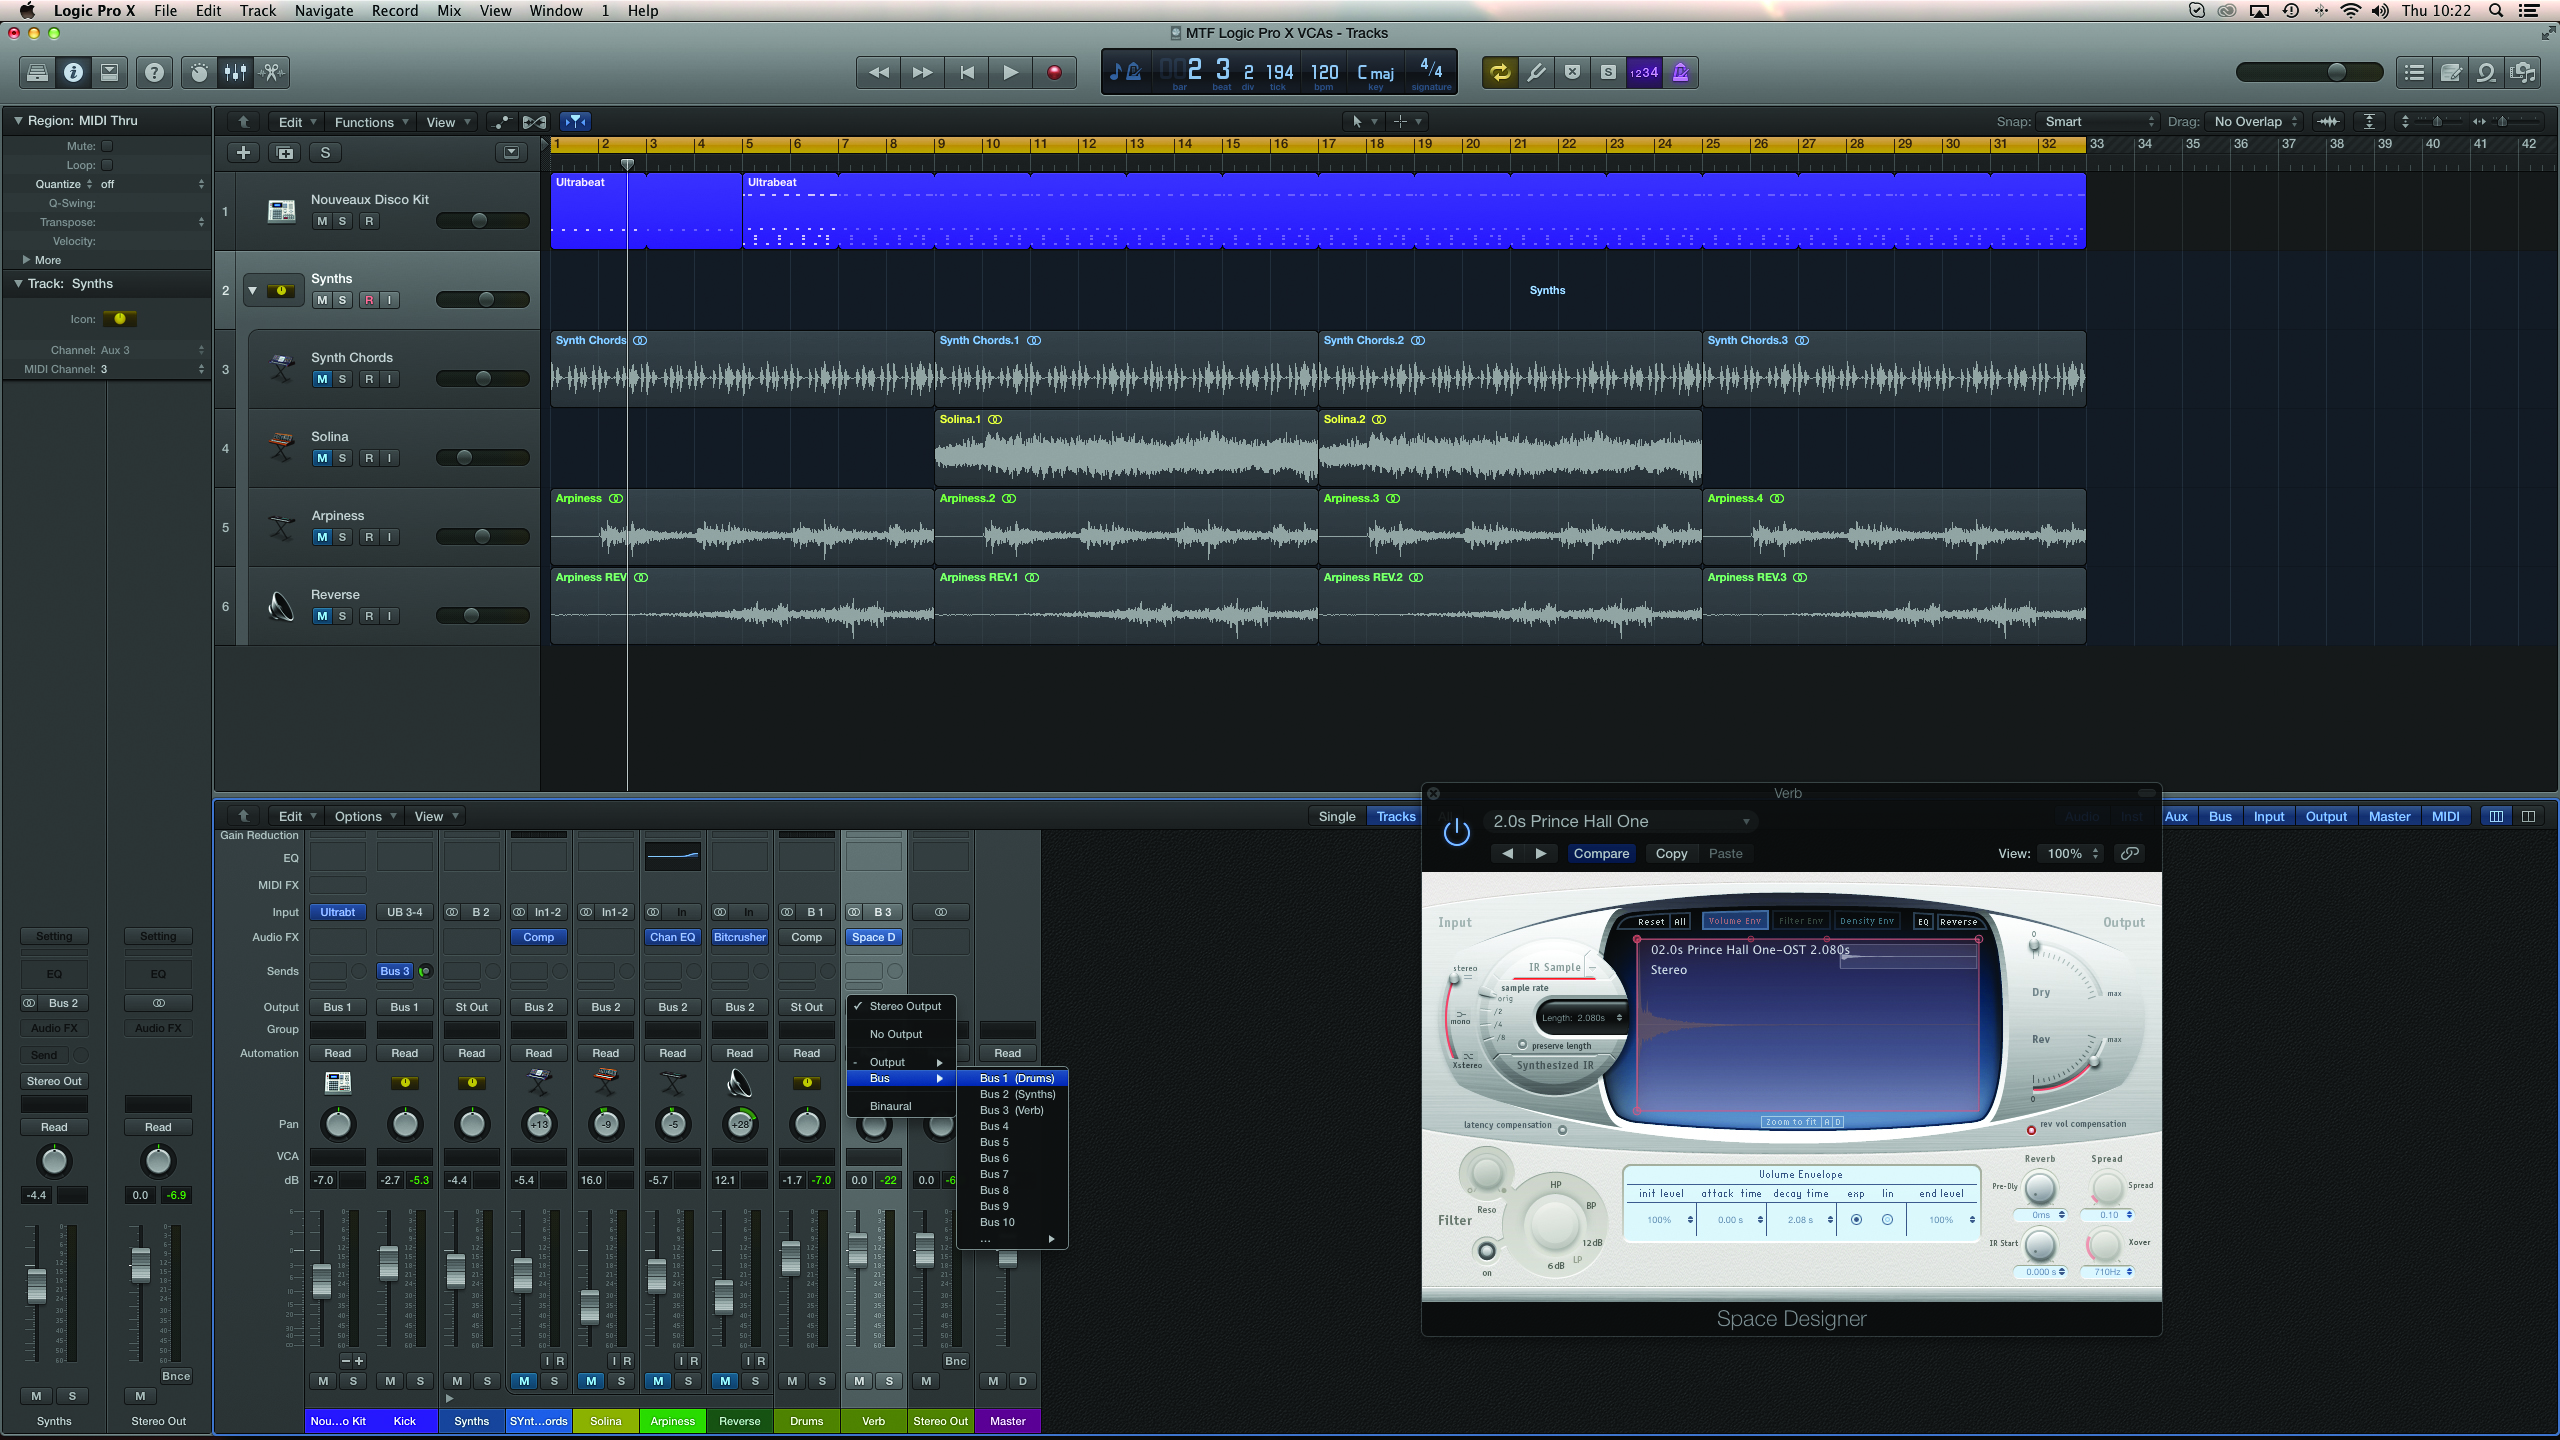
6: To solve the floating reverb problem, you have two choices. One is to route the reverb output to the same summing bus (assuming no other channels outside the Aux channel grouping using the reverb); the other is to use a Fader Group.
Click Here To Continue
This tutorial is endorsed by Point Blank. With courses in London, online and now in LA, Point Blank is the Global Music School. You can study sound to picture on their Music Production Diploma courses, with pro industry tutors.
