Logic Tutorial: VCA’s, Groups and Aux Channels – Step-by-Step
Mark Cousins continues his latest Logic tutorial with a step by step guide to using fader guides and VCA faders… Fader Groups 1: You can place faders into a Fader Group using the Group Assignment slot in the mixer. Done in this way, you can attenuate the channels and have the reverb level reduced at […]
Mark Cousins continues his latest Logic tutorial with a step by step guide to using fader guides and VCA faders…
Fader Groups
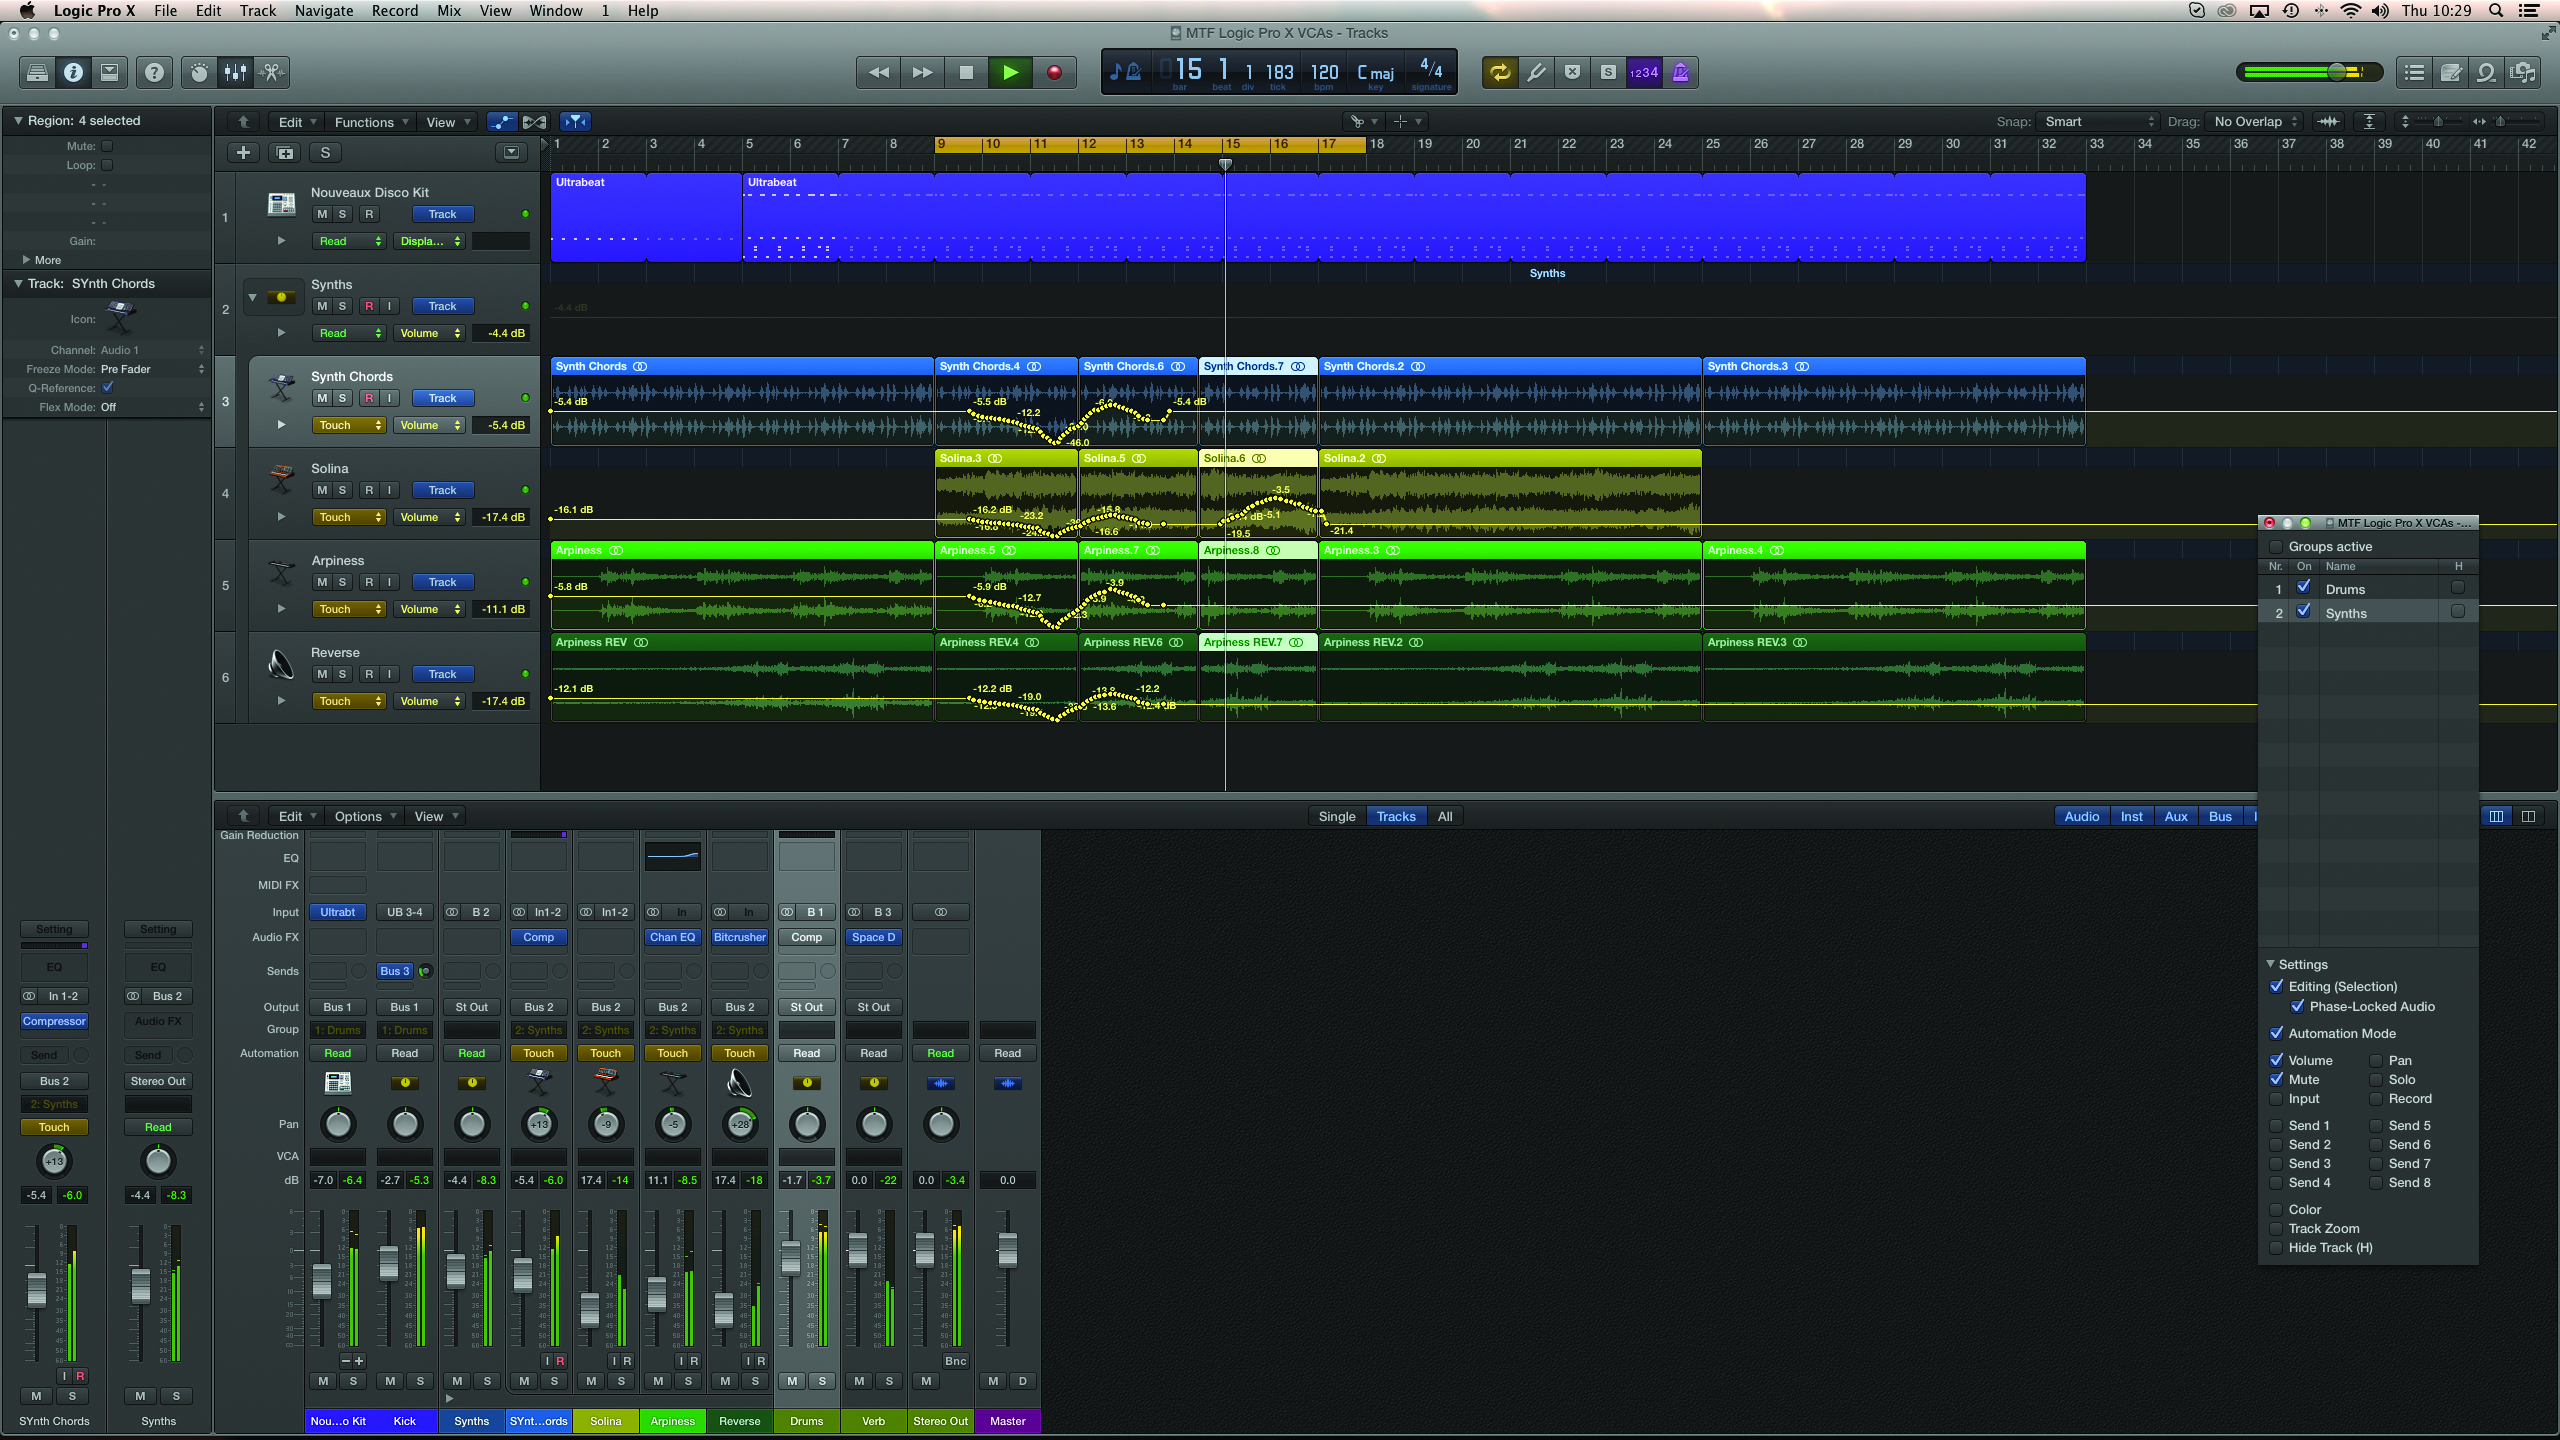
1: You can place faders into a Fader Group using the Group Assignment slot in the mixer. Done in this way, you can attenuate the channels and have the reverb level reduced at the same time – in effect, the faders are locked together.
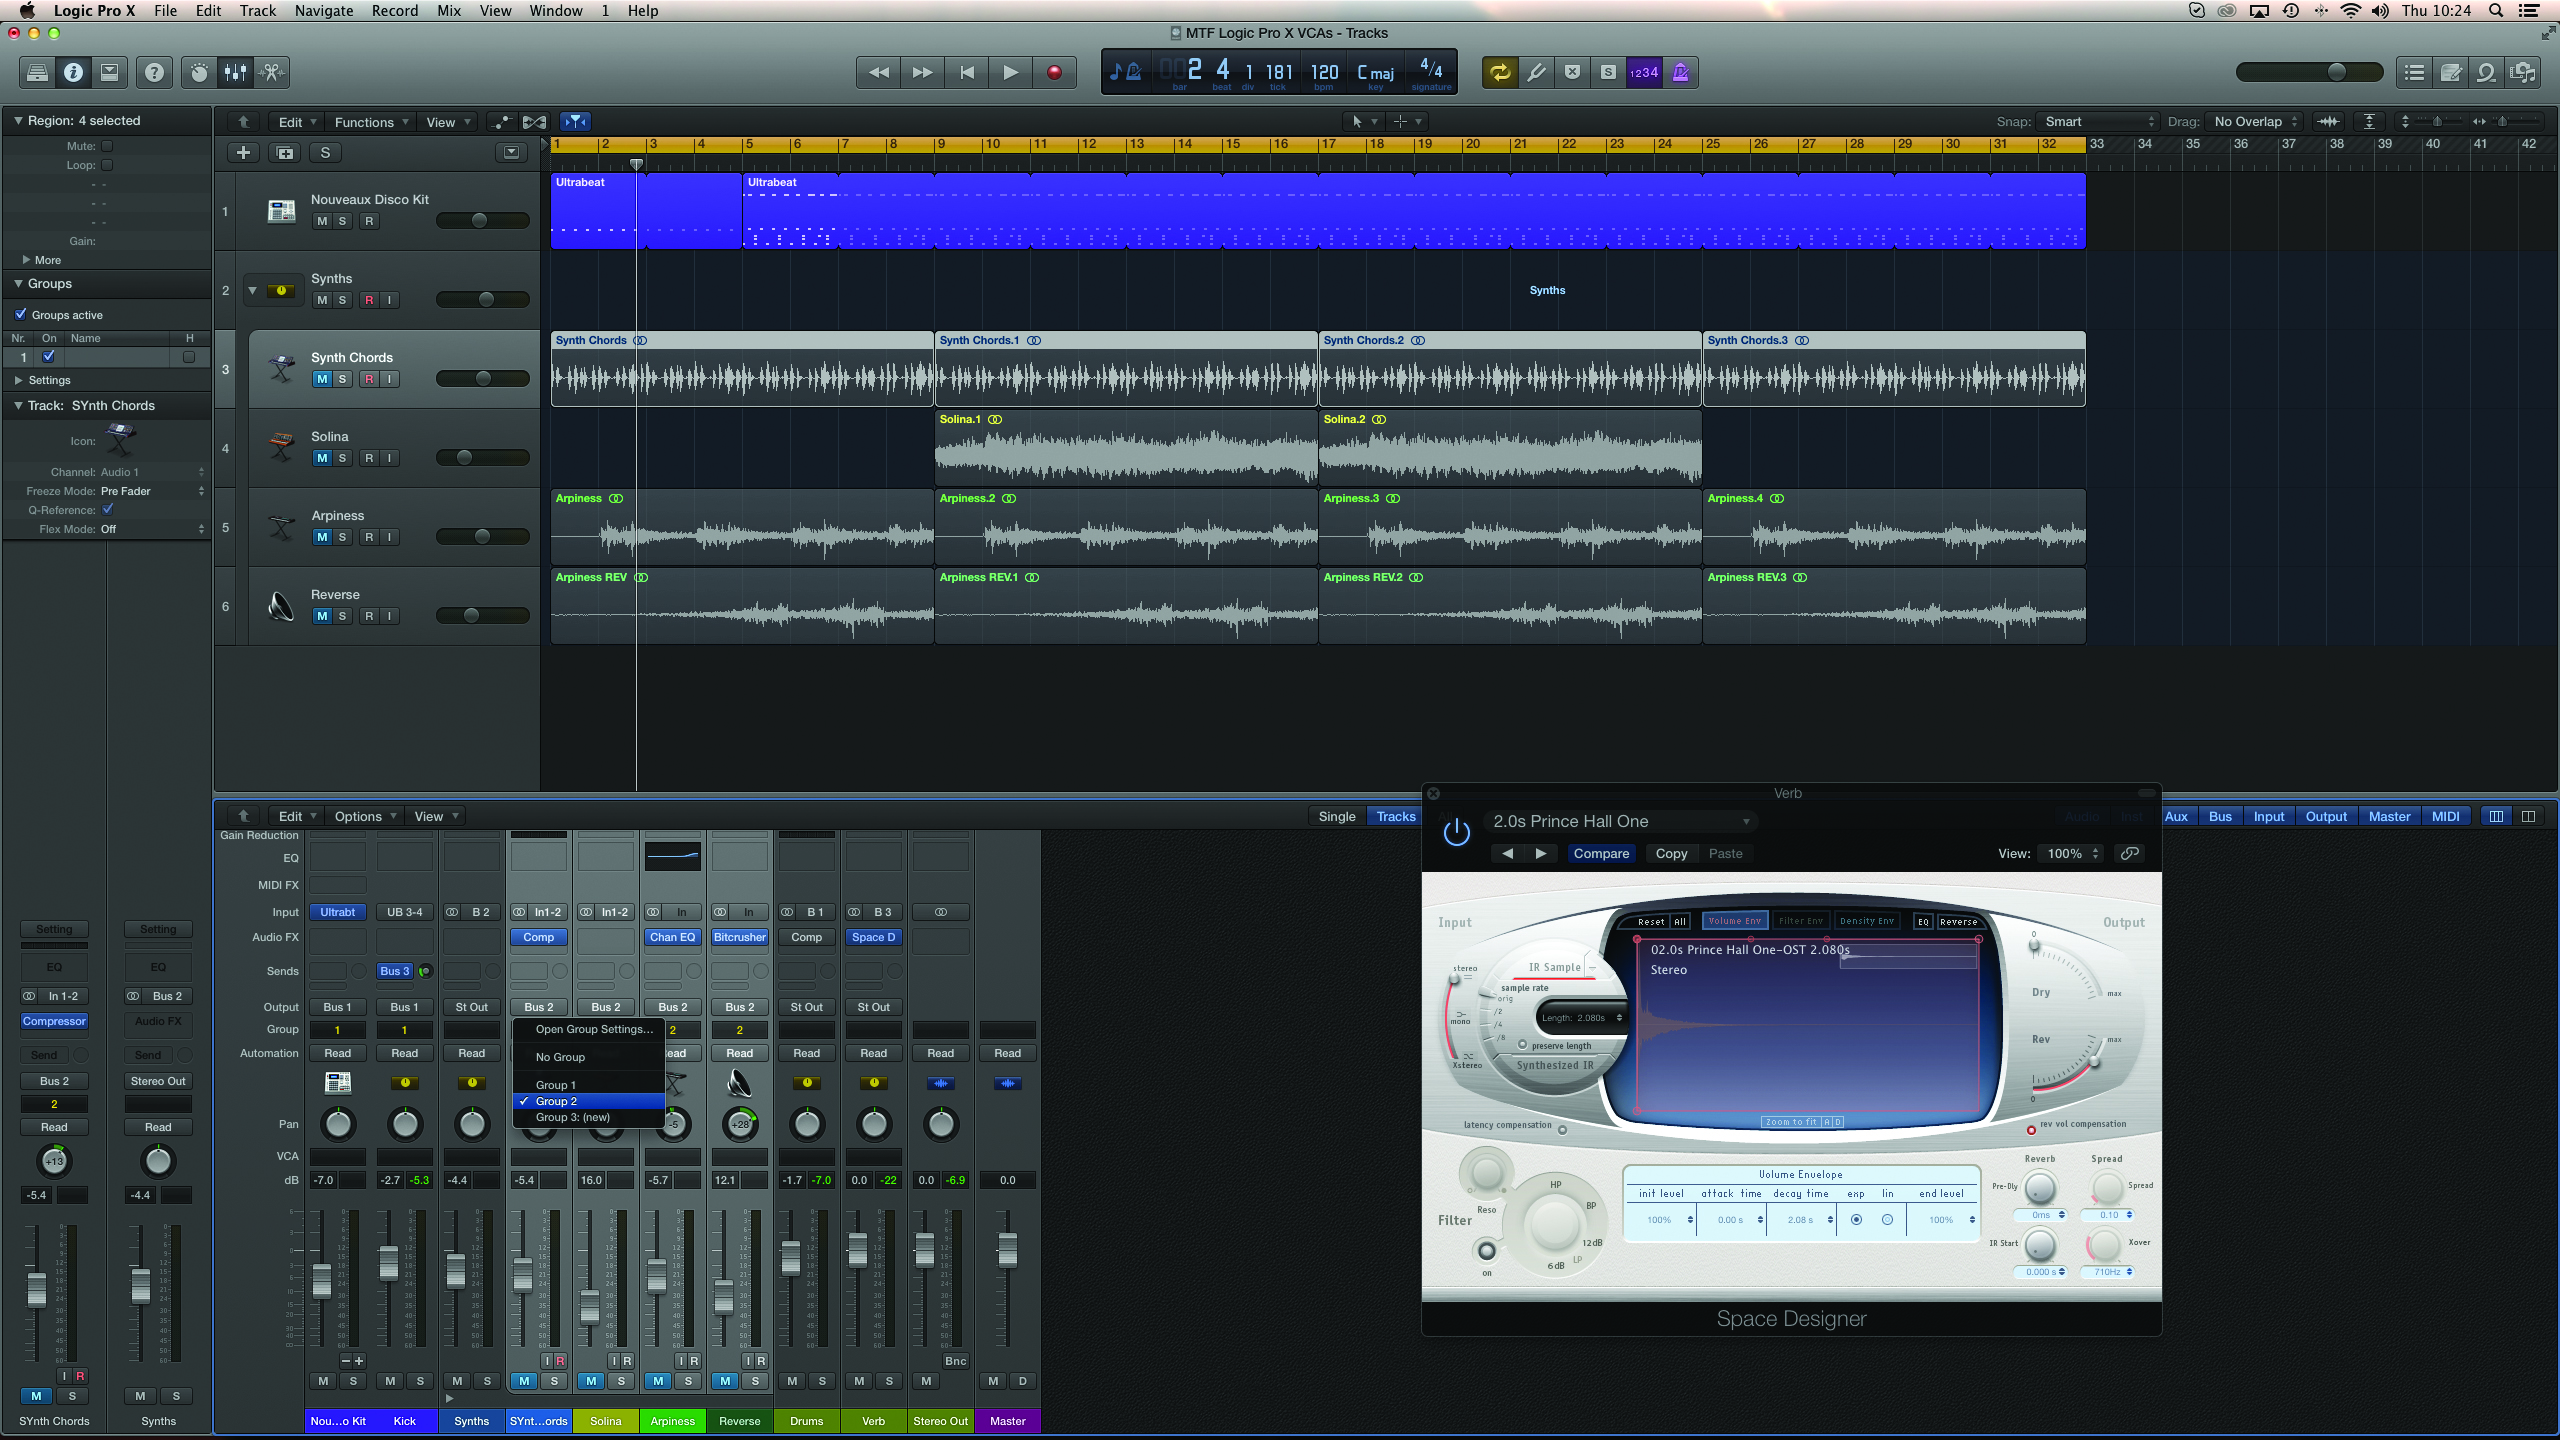
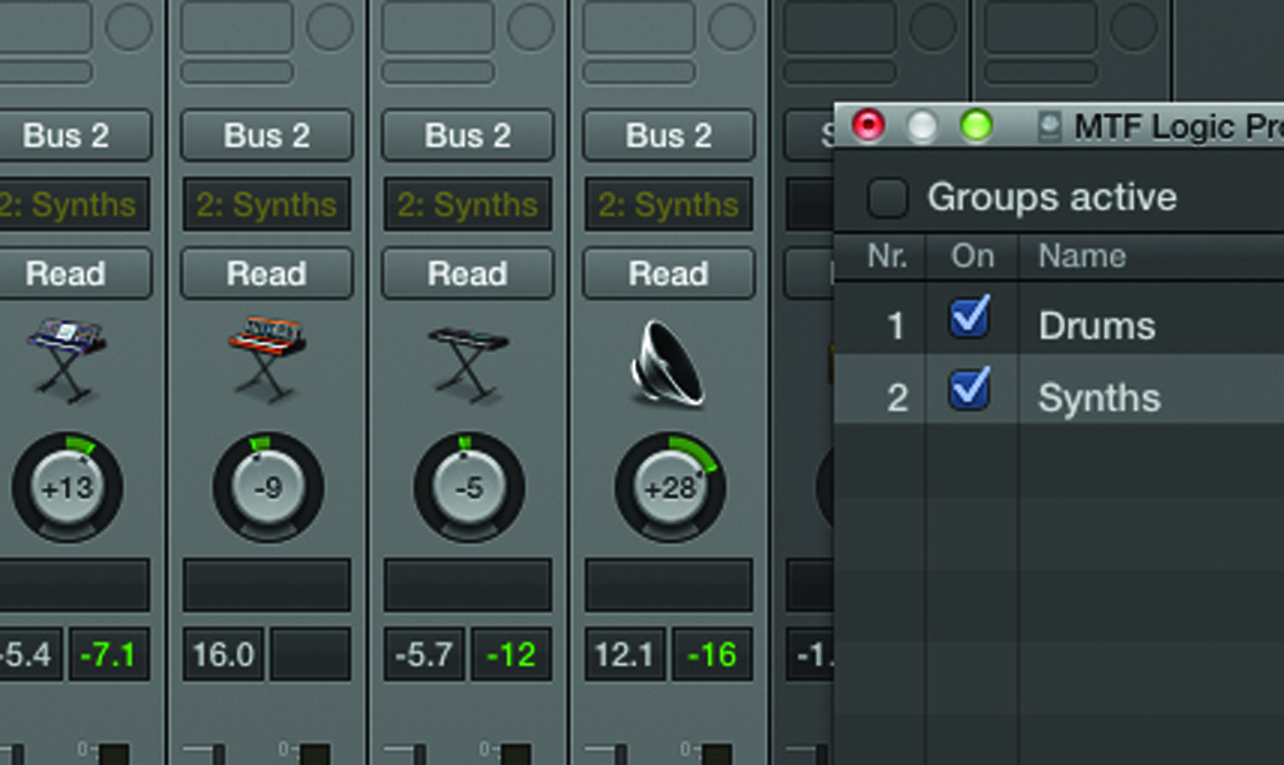
2: Fader Groups have an accompanying dialogue box (select Open Group Settings… from the drop-down assignment menu), which lets you access several additional parts of the Fader Group’s functionality, including the option to name the group.
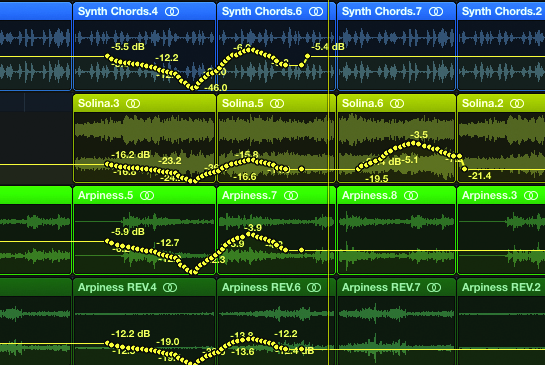
4: Grouping is also handy for editing recordings made with multiple mic channels, like a drum kit, for example. Enable Editing (Selection) in the Group Settings, and any edits made on one region will be transferred to others in the group.
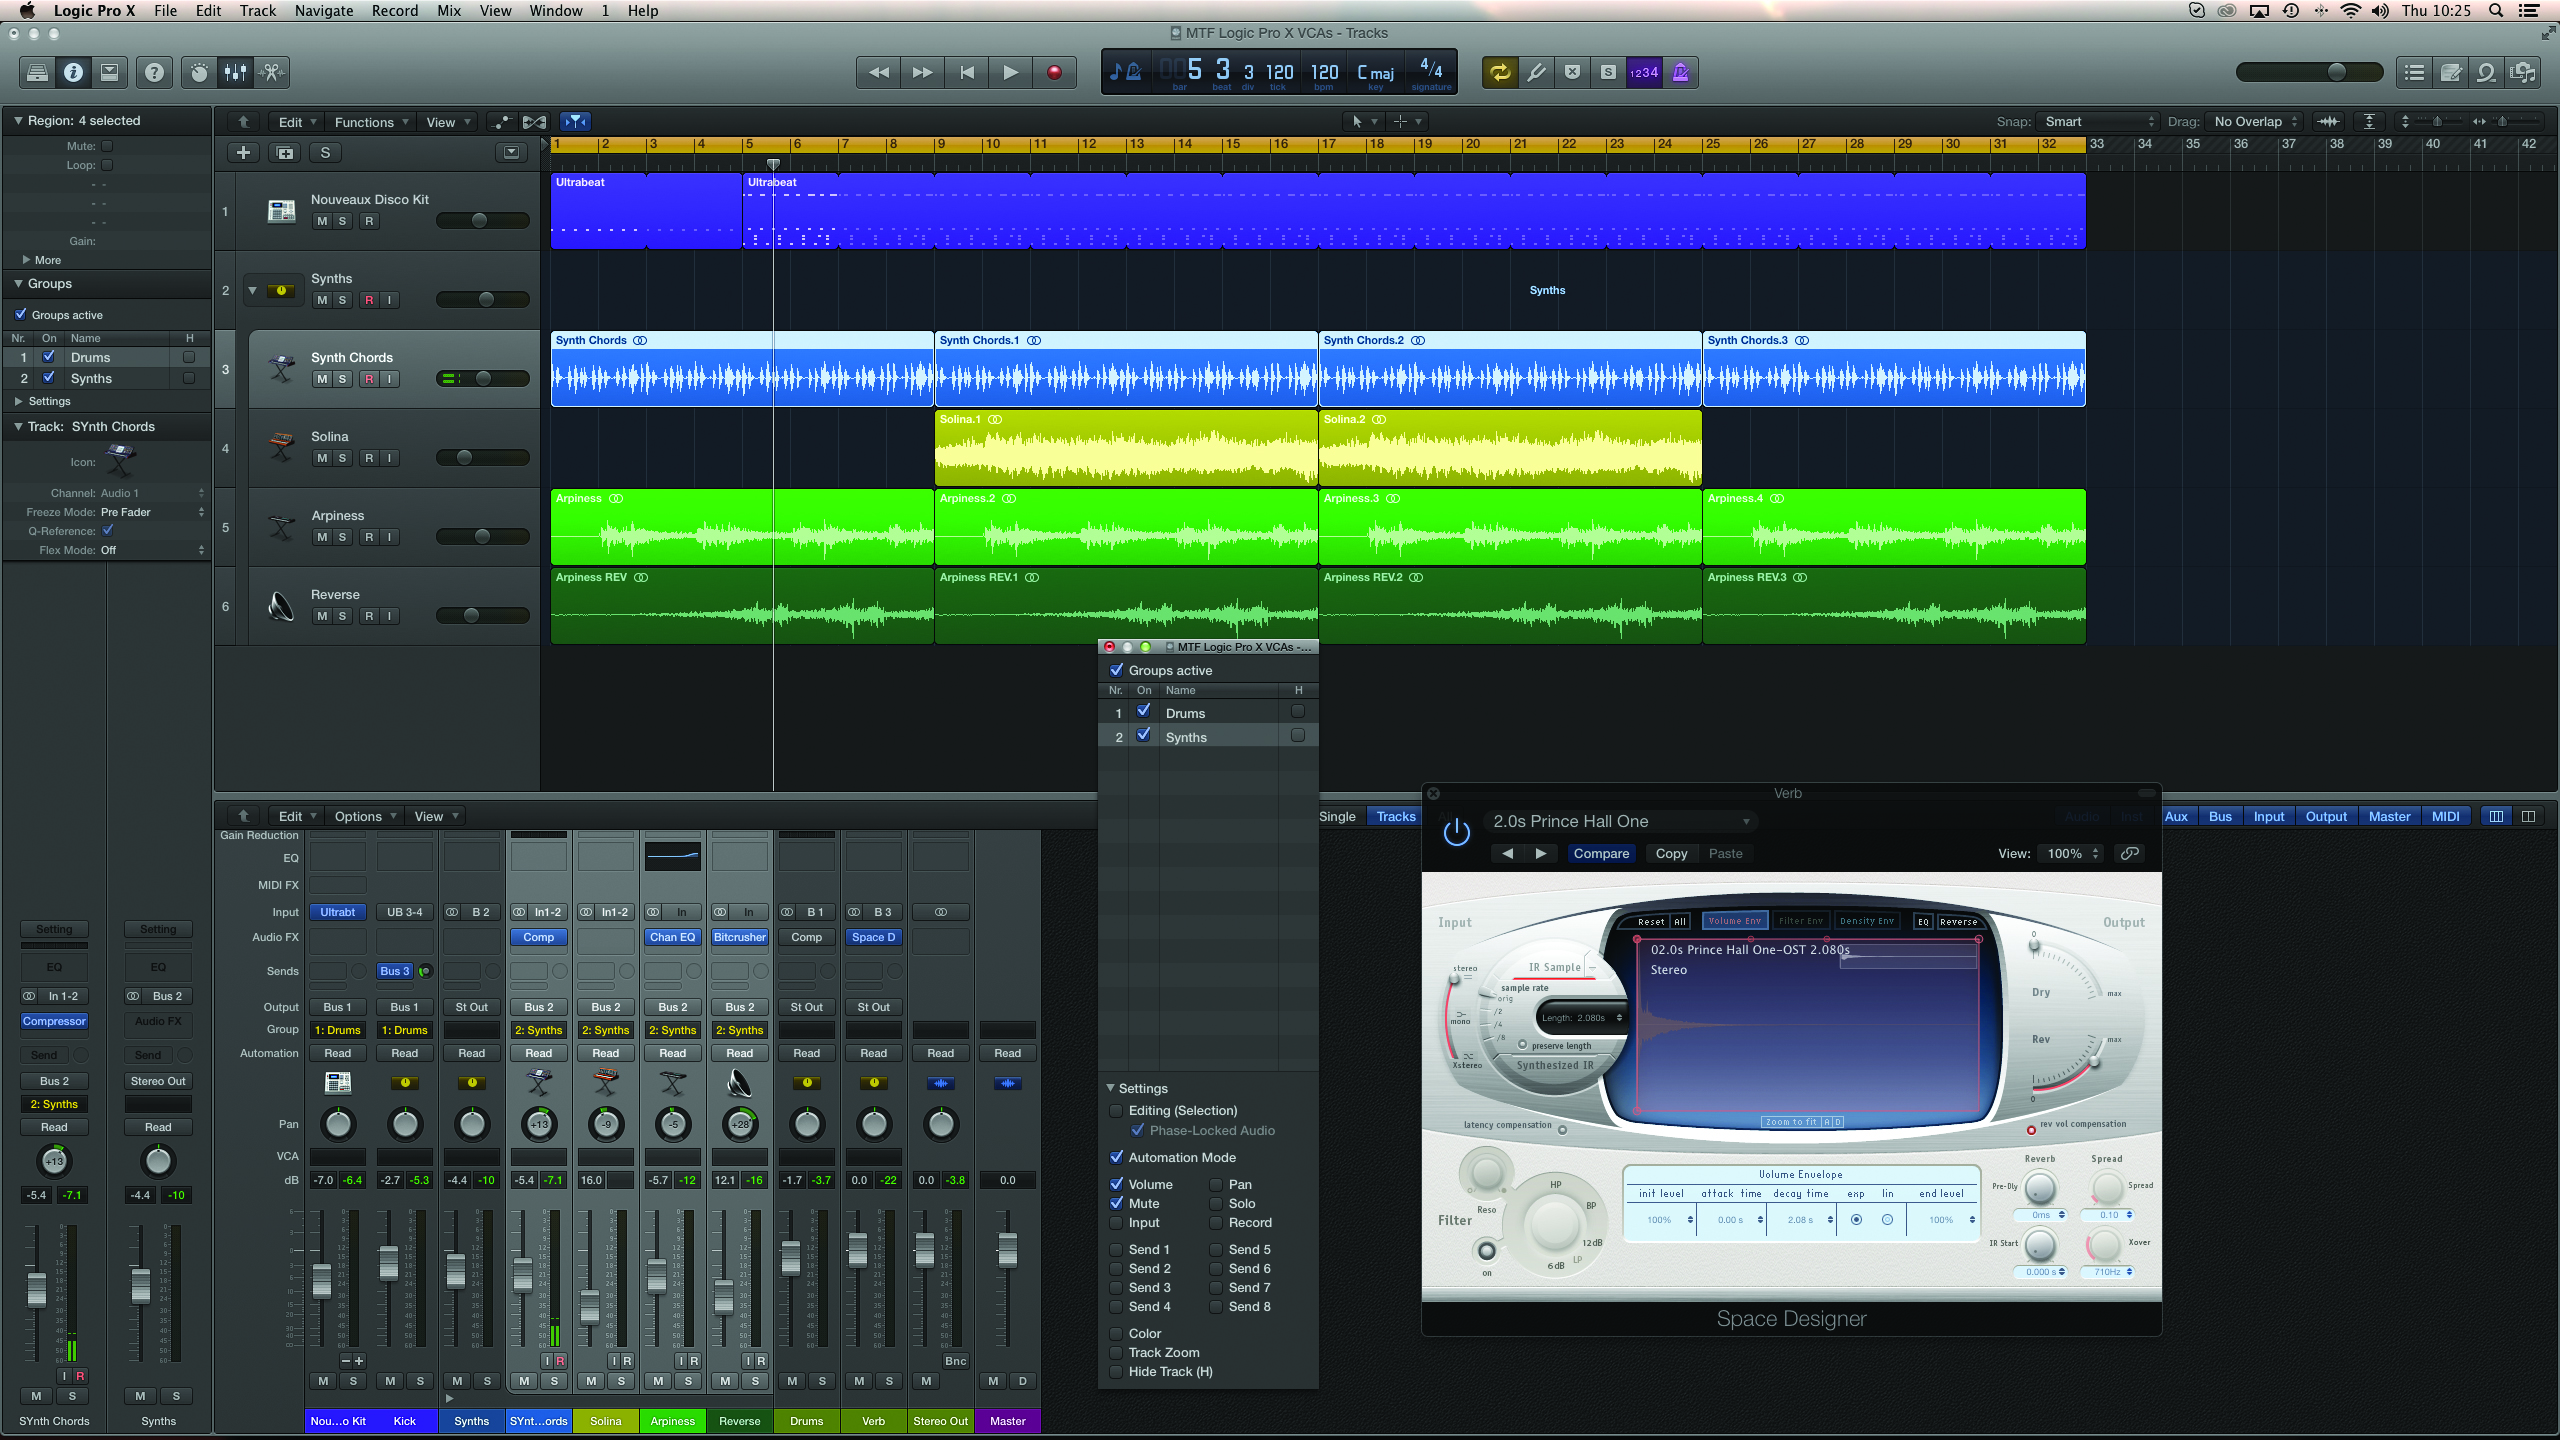
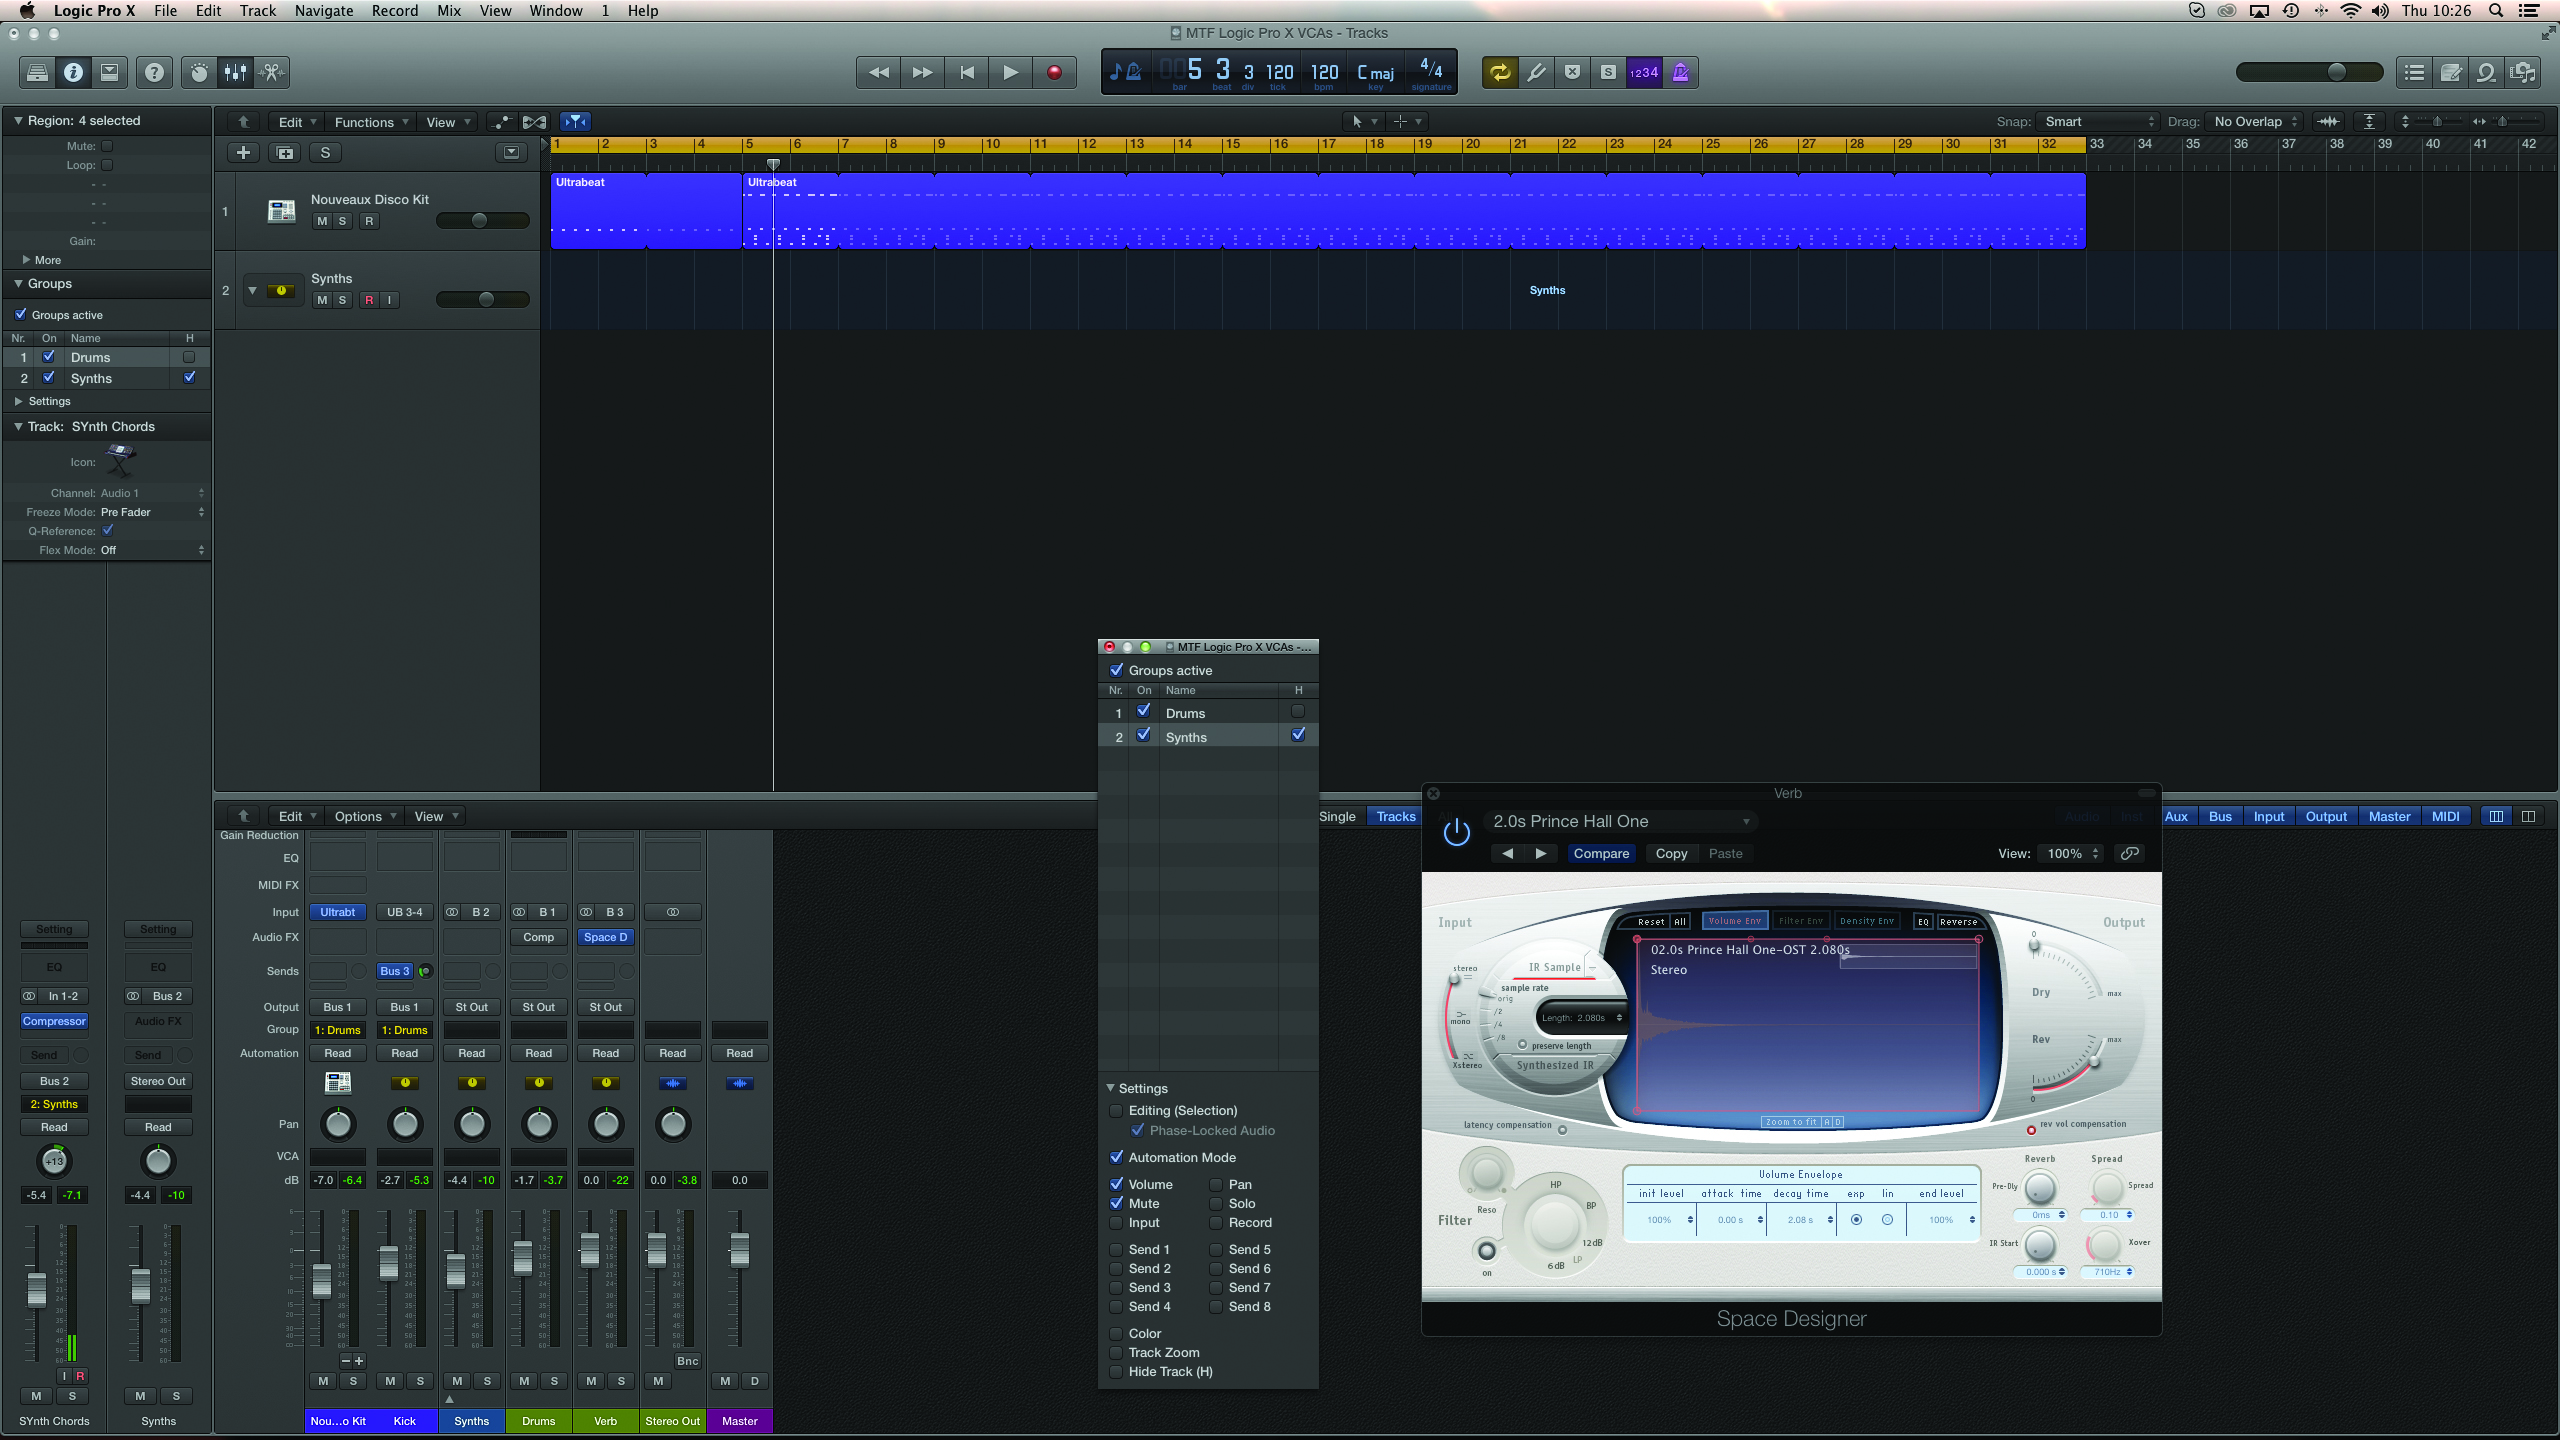
5: If you’re using Fader Groups, remember the keyboard shortcut Shift+G, which works a ‘group clutch’ key turning the grouping functionality on and off as appropriate. You can also find the clutch functionality in the Group Settings window.
6: The clutch functionality is useful when you’re using automation. Toggling the groups lets you move individual channels, or write in automation moves across a whole group of faders. Post automation, though, adjusting the ‘grouped’ levels can be tricky.
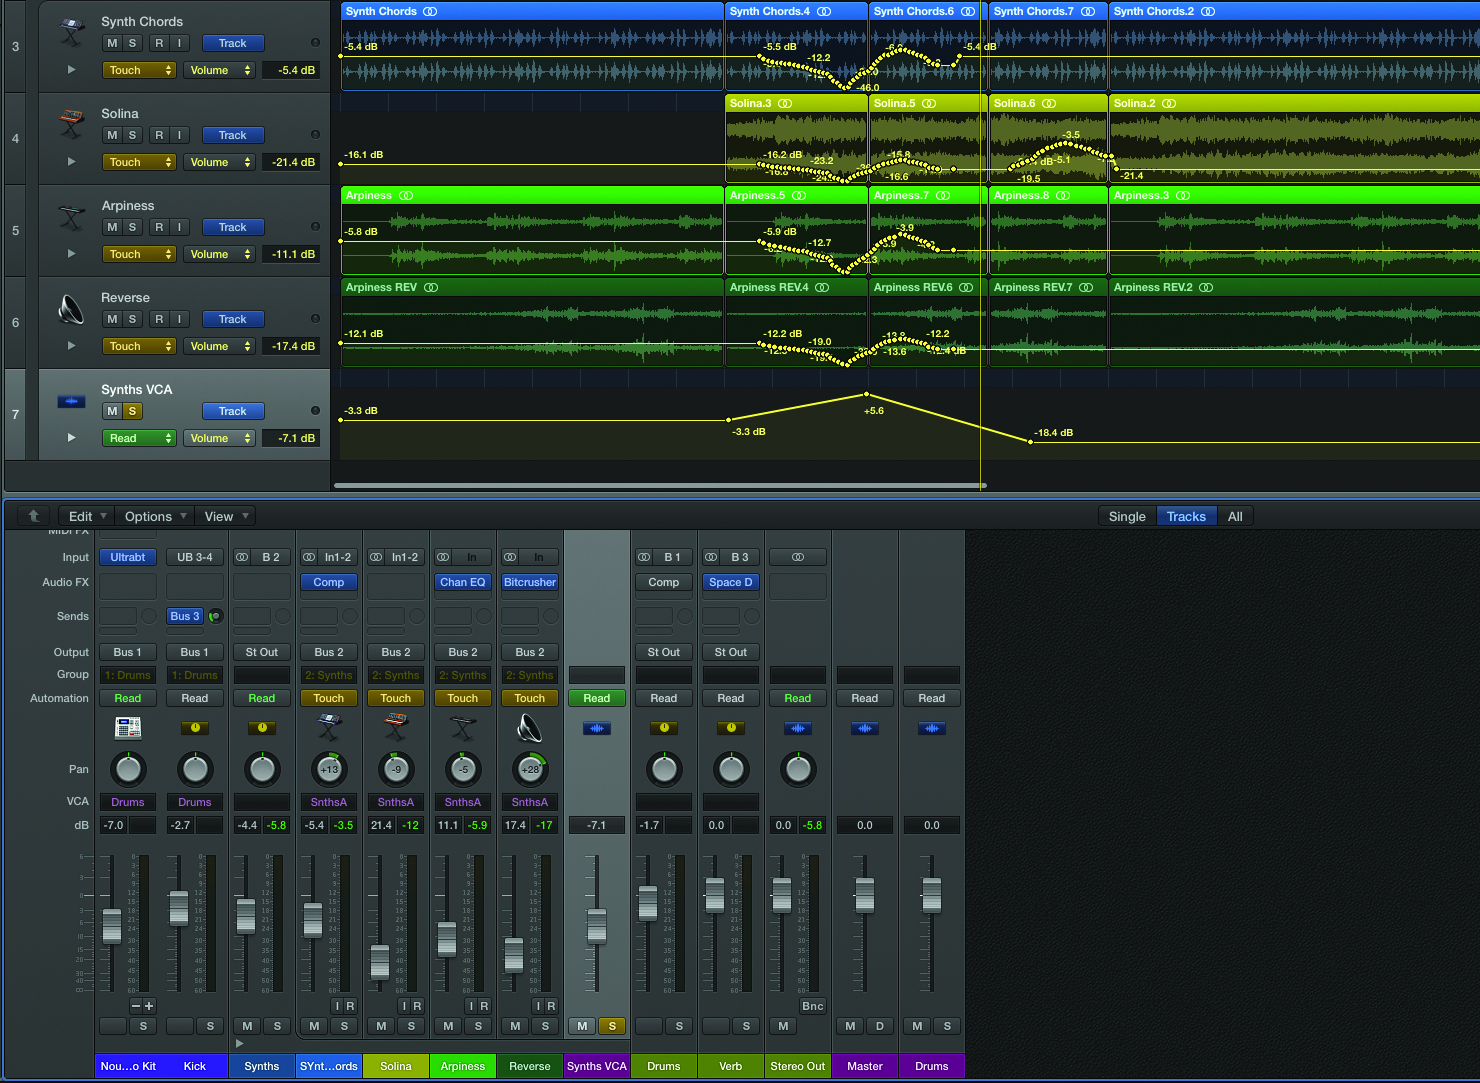
VCA Faders
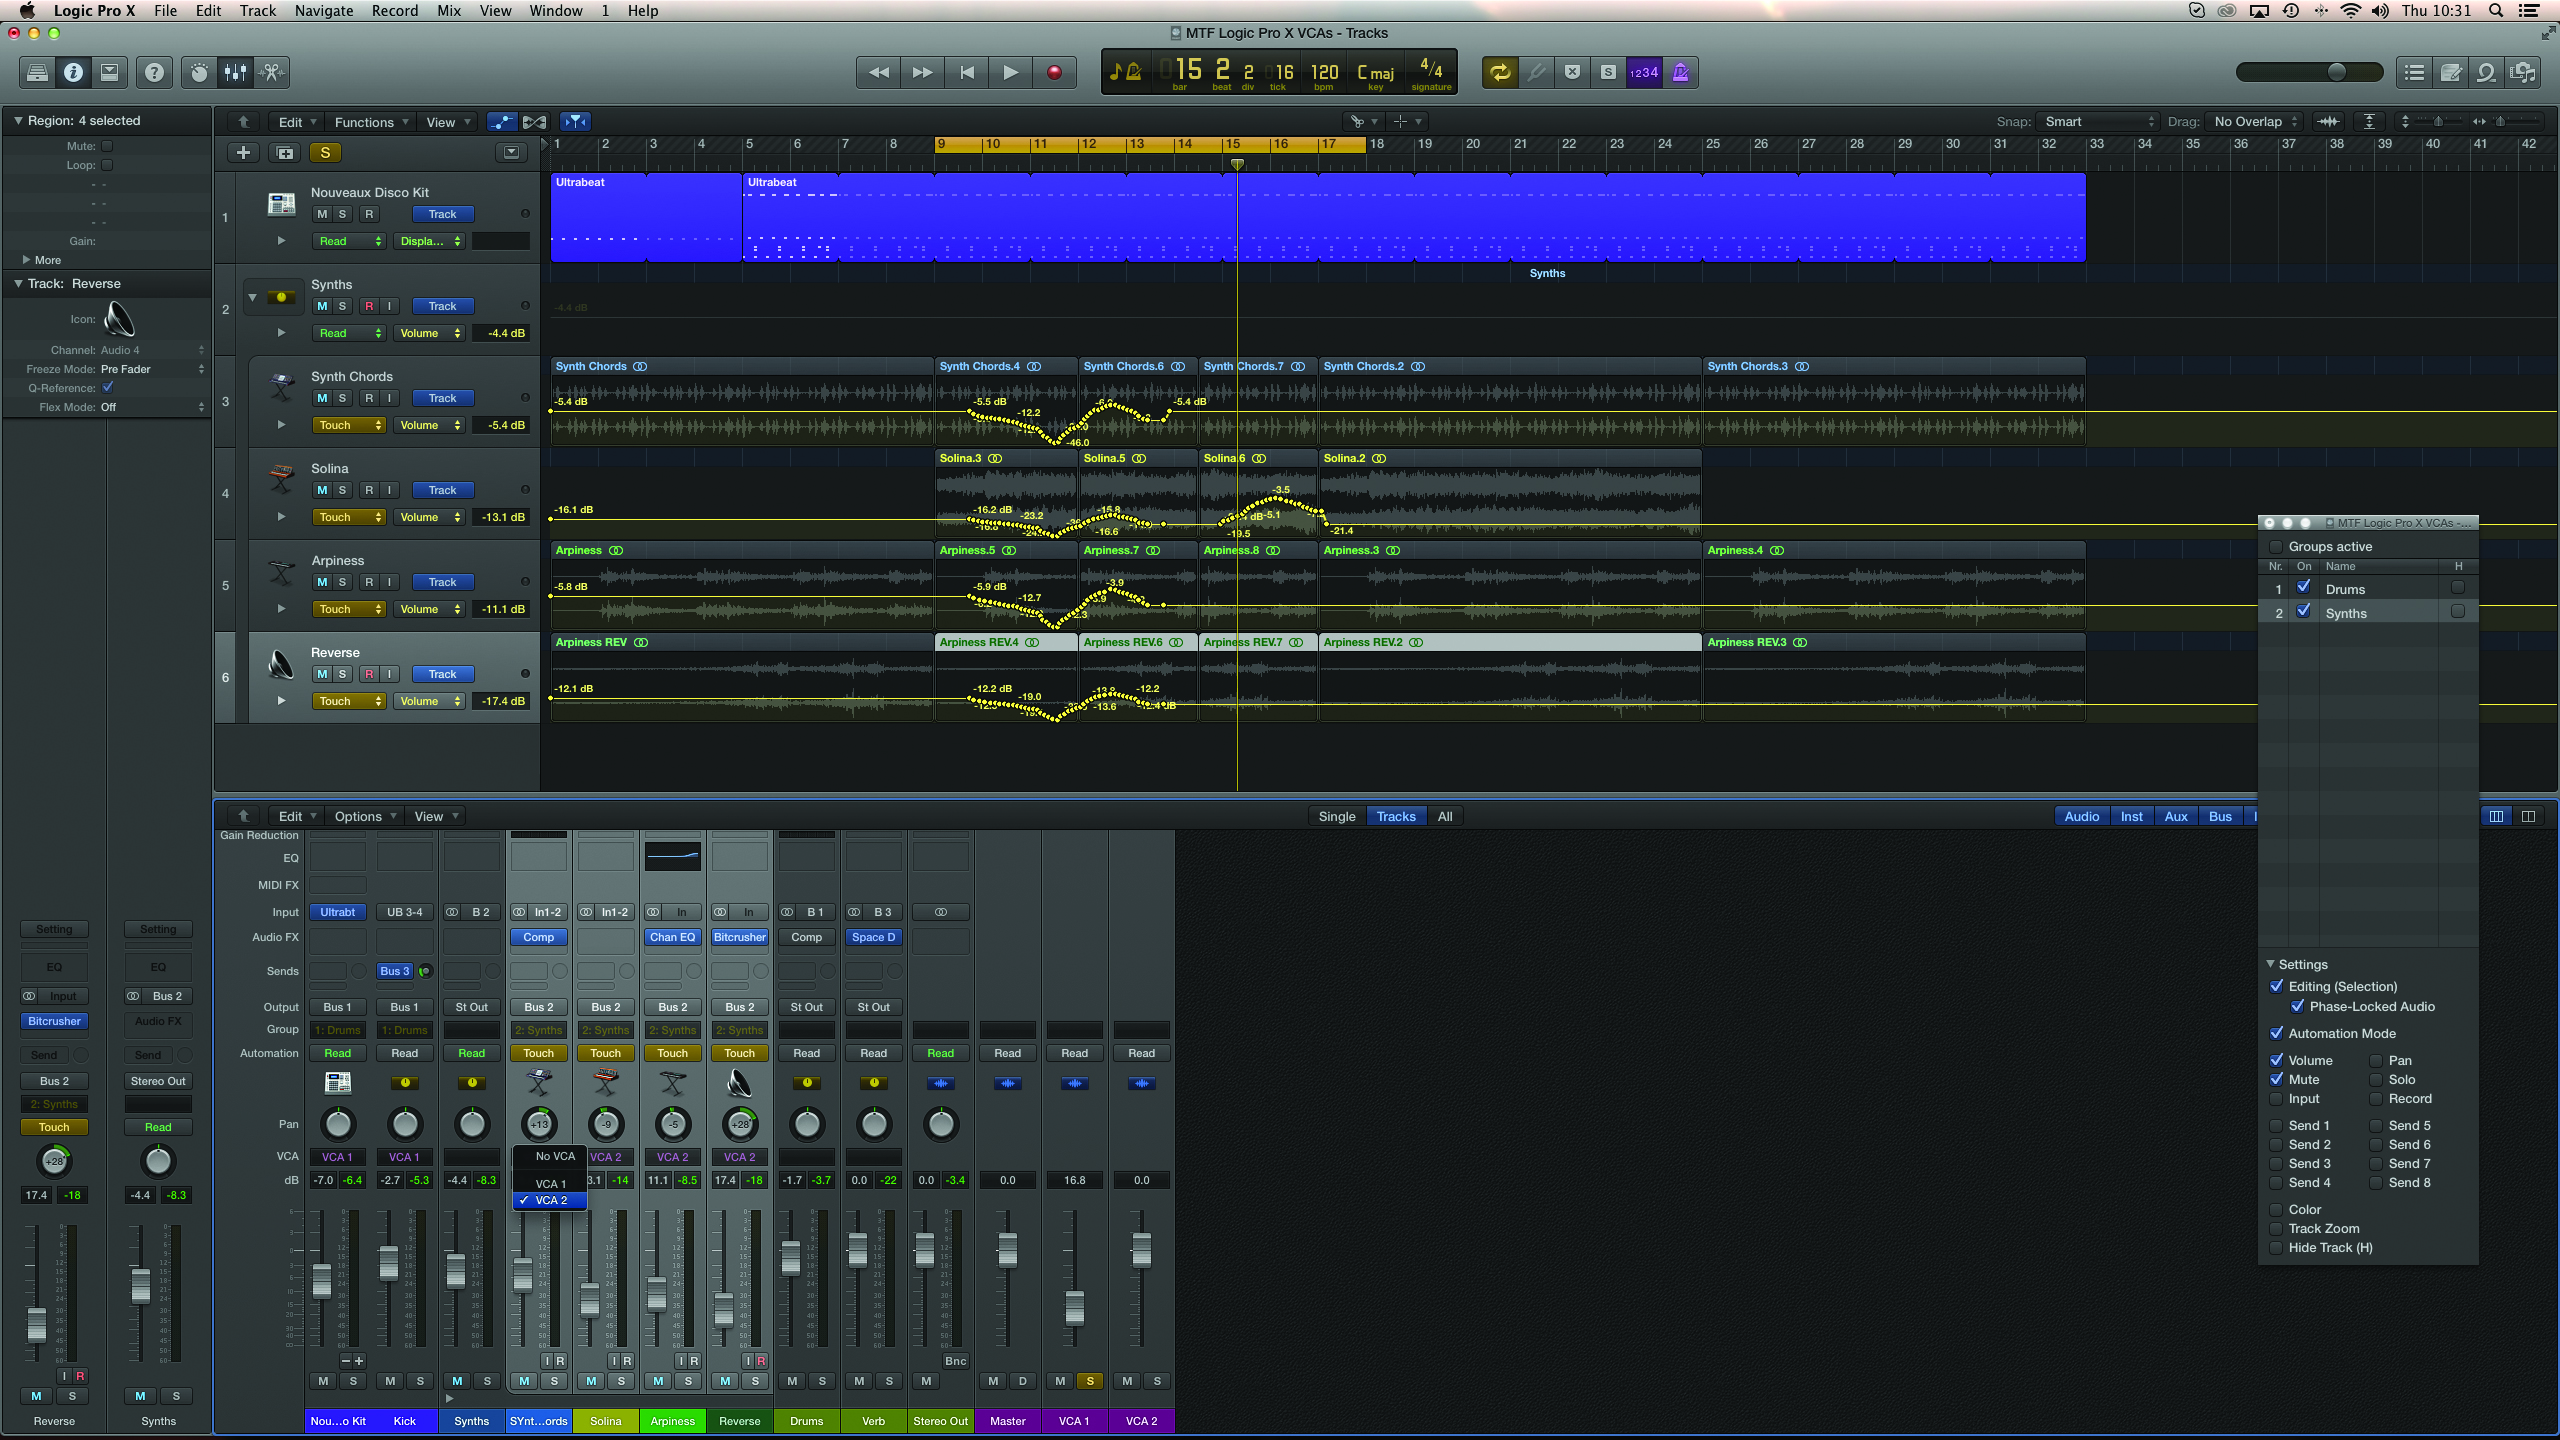
1: The VCA assignment slot is found towards the bottom of a channel fader (check View>Channel Strip Components, if you can’t see it). Simply select the channels and assign them a VCA, just as you would a Fader Group.
2: The VCA masters are found on the right-hand side of the mixer. They work in a similar way to the Master fader – so there are no Insert effects, but you do get a level control, as well as solo and mute.

3: The VCA controls the channel’s signal levels post insert processing (as shown on the individual channel meters), but pre any form of FX/bus sends. This means the relative reverb levels remain intact as you raise or lower the VCA fader.
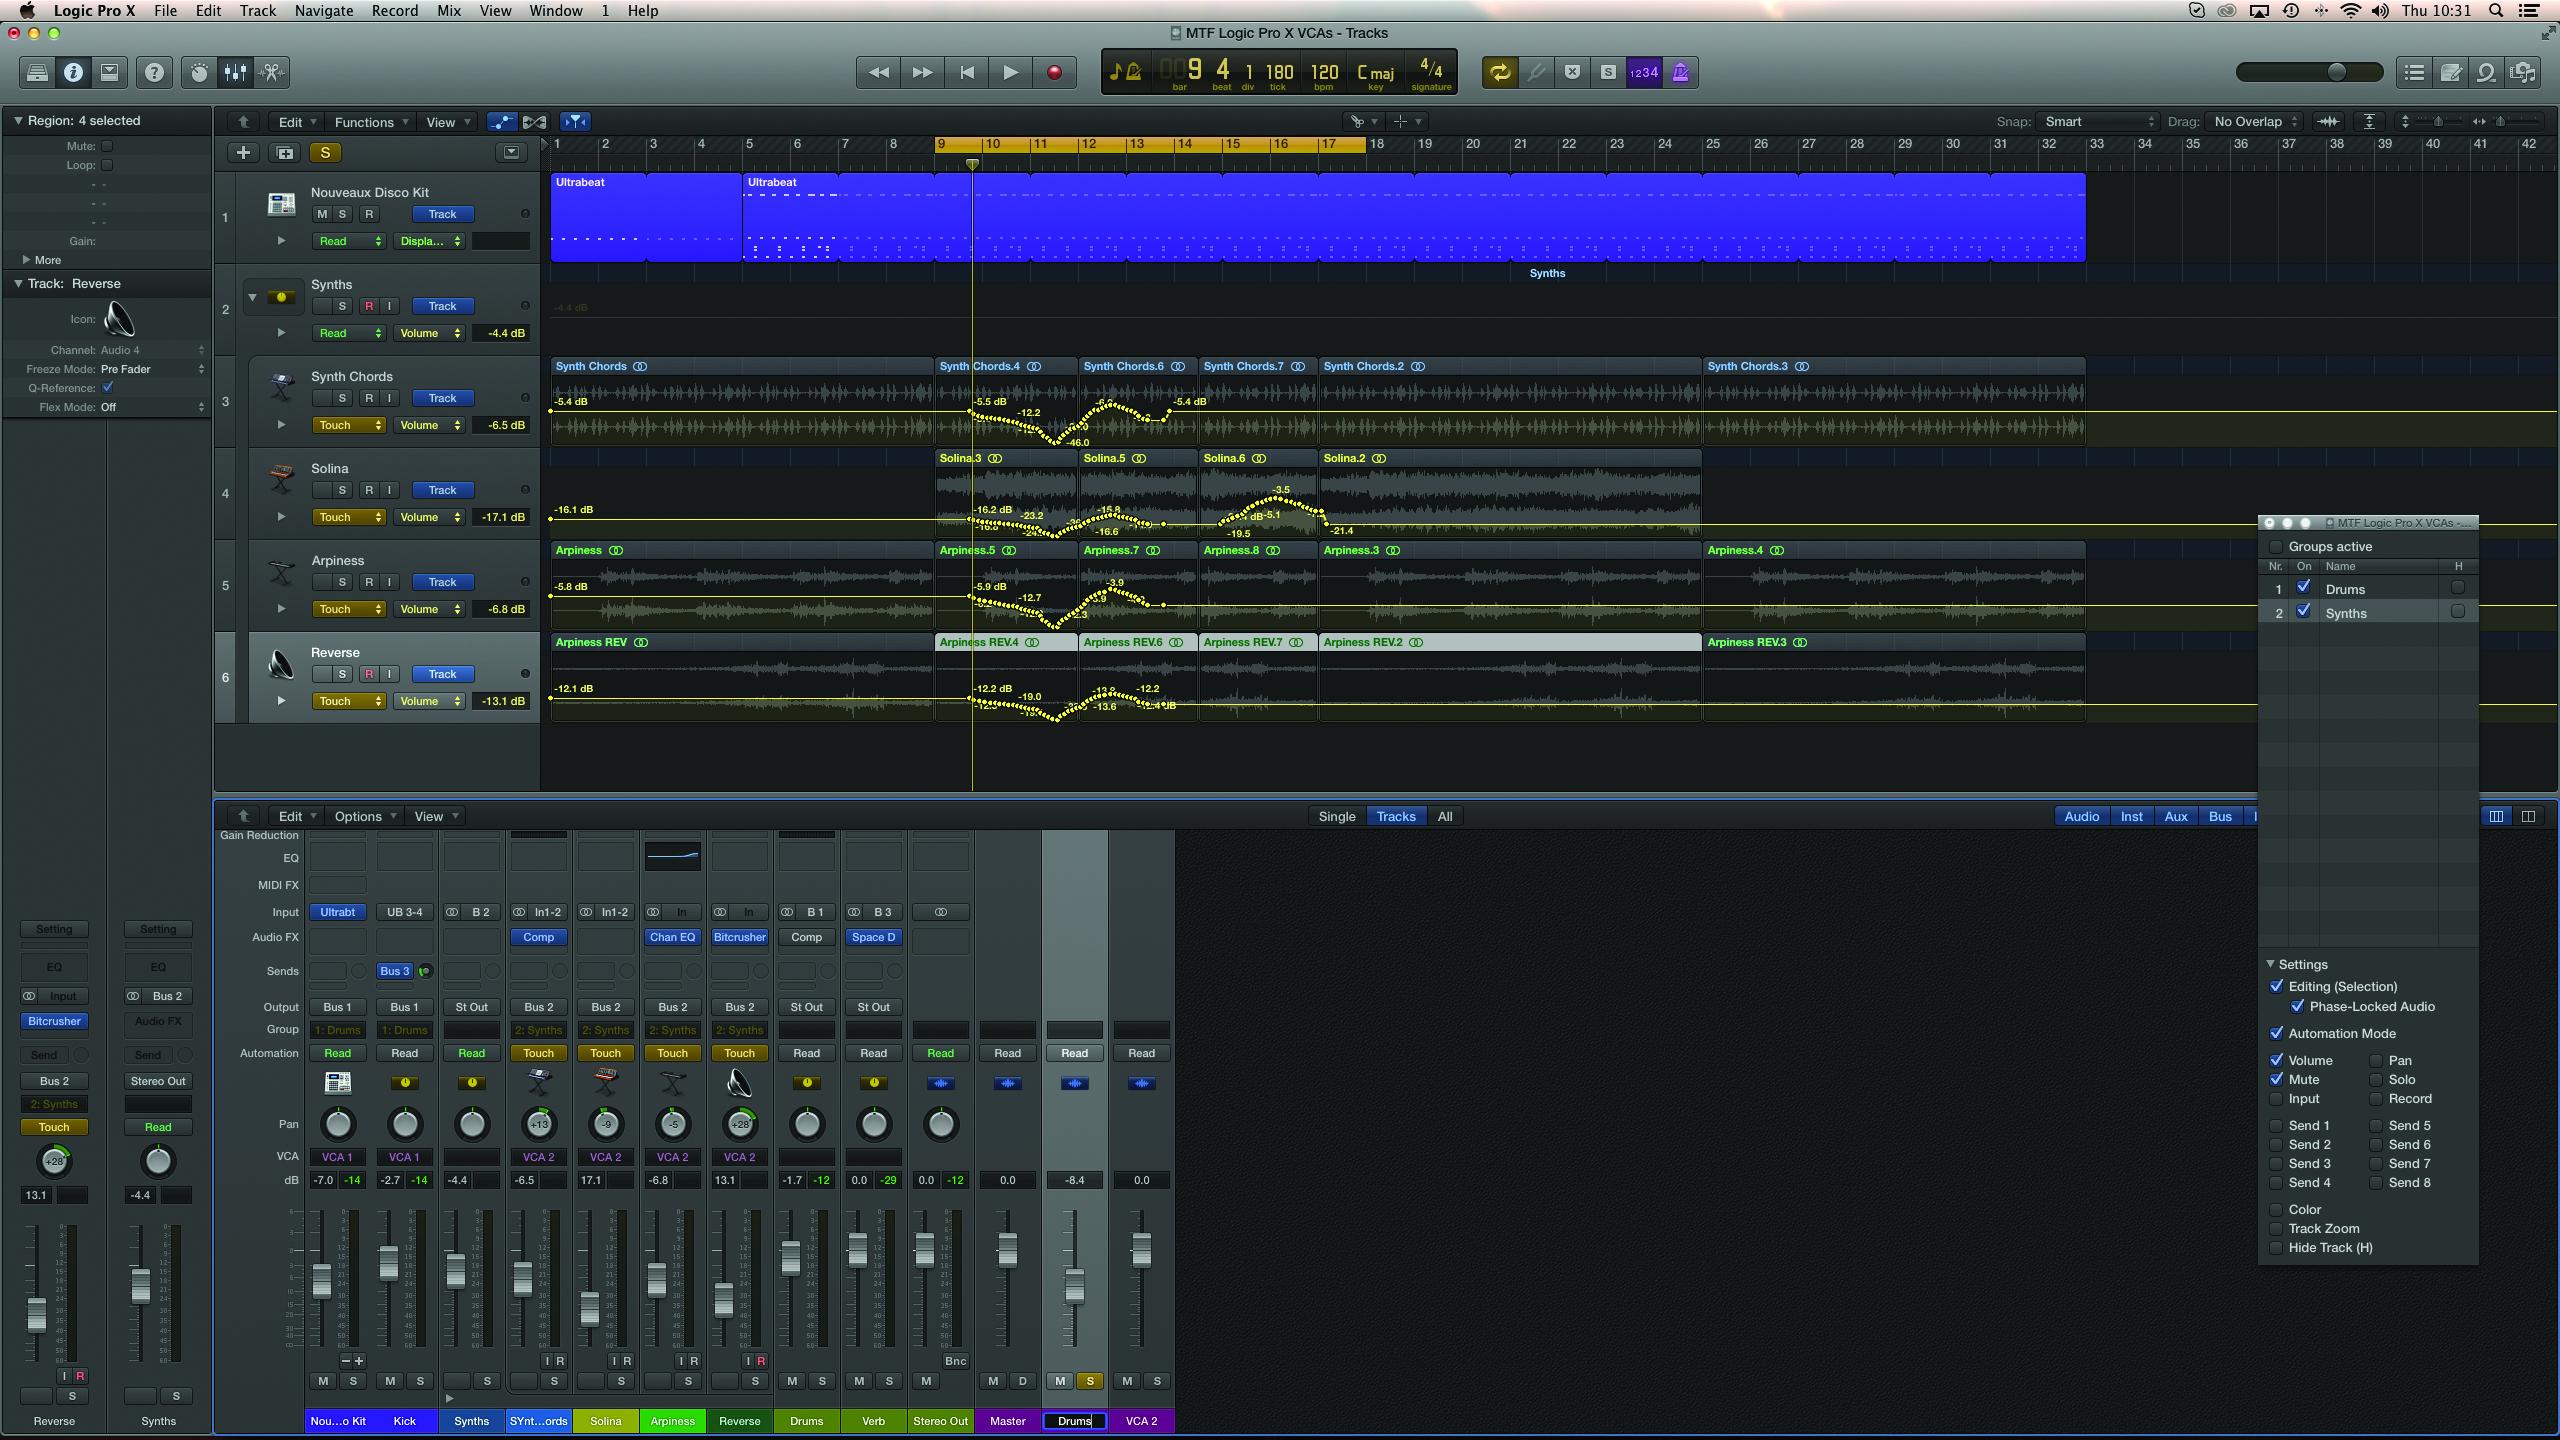
4: Another important note about VCAs is that they adjust signal levels post automation, providing an important means of level adjustment, even if you’ve written in fader moves previously. So you might therefore even use a VCA on a single channel.
5: If you want to dynamically alter VCA balance in the mix, consider the use of automation on the VCA channels. To automate the VCA channel, place it in Touch mode and Logic will create a new accompanying track lane in the arrange area.
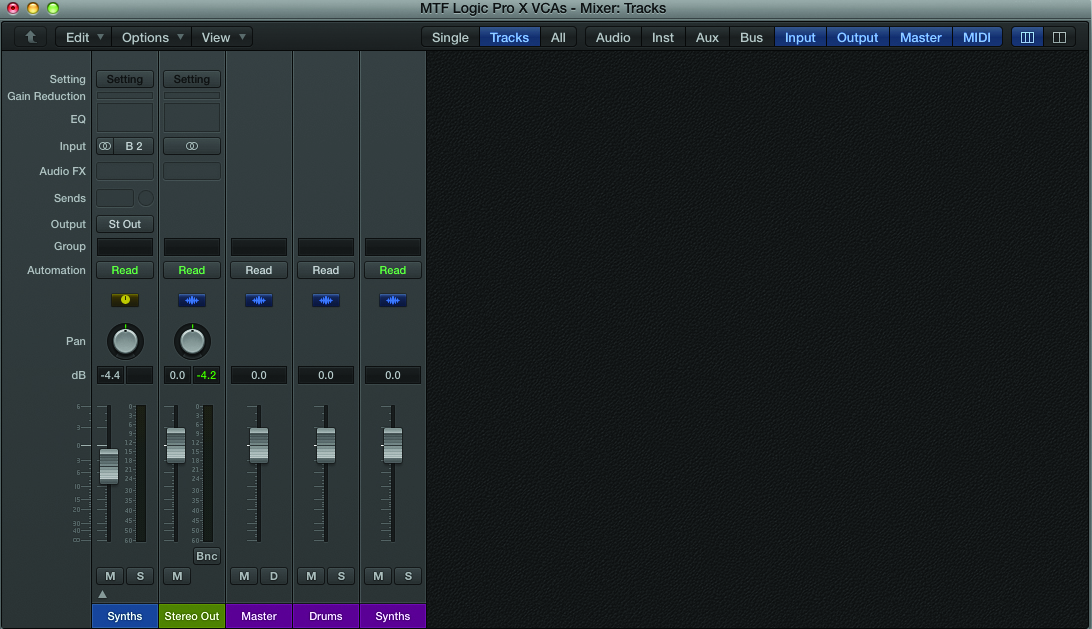
6: For a tidier mix, consider removing some of the Audio and Instr tracks, leaving just the Aux master faders and/or VCA groups. Remove the required element using the boxes in the top right-hand corner of the mixer area.
This tutorial is endorsed by Point Blank. With courses in London, online and now in LA, Point Blank is the Global Music School. You can study sound to picture on their Music Production Diploma courses, with pro industry tutors.
