Using Two Macs with Logic – A Step-by-Step Guide (Continued)
As the step by step guide to using Logic with two Macs continues Mark Cousins continues to outline the technicalities required to get two machines working in tandem… 7: One popular application of the slave computer is to use this solely for video playback. Open the synchronisation settings on the main computer using the menu […]
As the step by step guide to using Logic with two Macs continues Mark Cousins continues to outline the technicalities required to get two machines working in tandem…
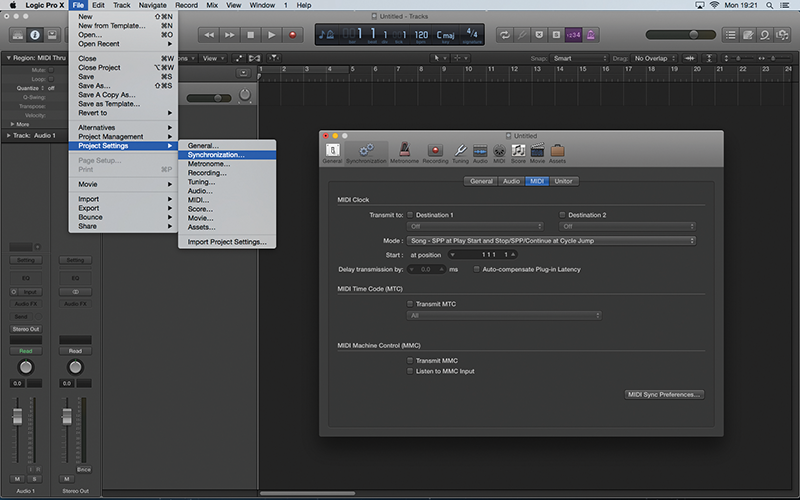
7: One popular application of the slave computer is to use this solely for video playback. Open the synchronisation settings on the main computer using the menu option File > Project Settings > Synchronization. Click on the MIDI tab.
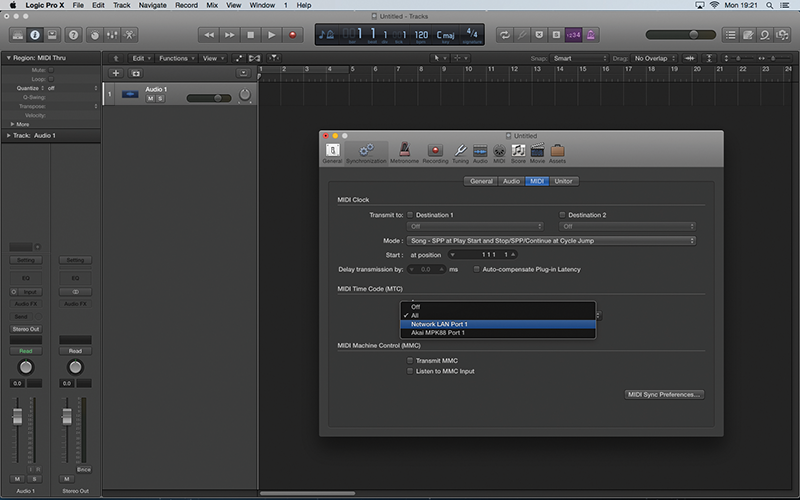
8: Under the MIDI tab, check the box for MIDI Time Code (MTC), and from the drop-down menu select Network LAN Port 1. The computer will now transmit MTC over the Ethernet cable, ready to be received by your slave machine.
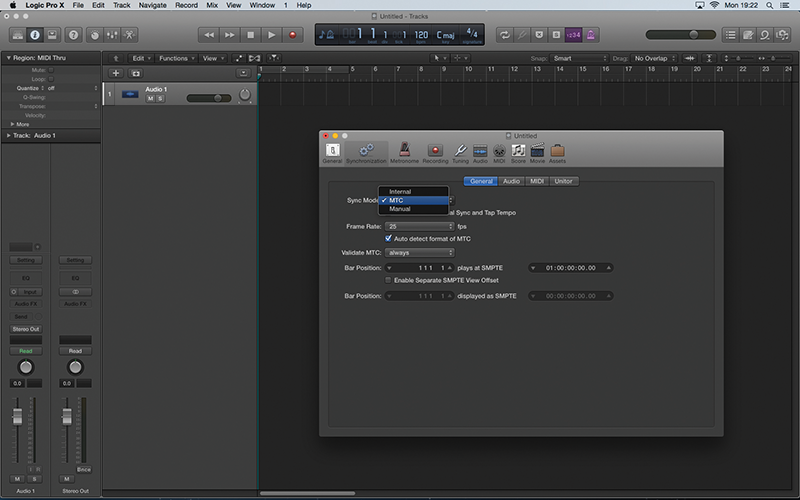
9: On the slave machine, open the same synchronisation settings, but this time, click on the General Tab. Under the Sync Mode, select MTC and click on the checkbox for Auto-enable External Sync and Tap Tempo. Note how the Song Position Pointer turns blue.
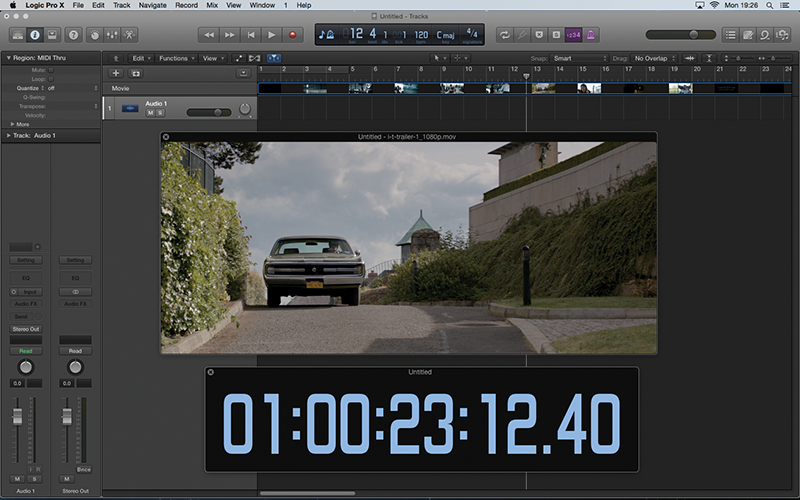
10: You can now import a movie file into the slave machine’s Logic project via the menu option File > Movie > Open Movie. Pressing play on the main machine will now run the slave machine, with the movie playing back in perfect sync.
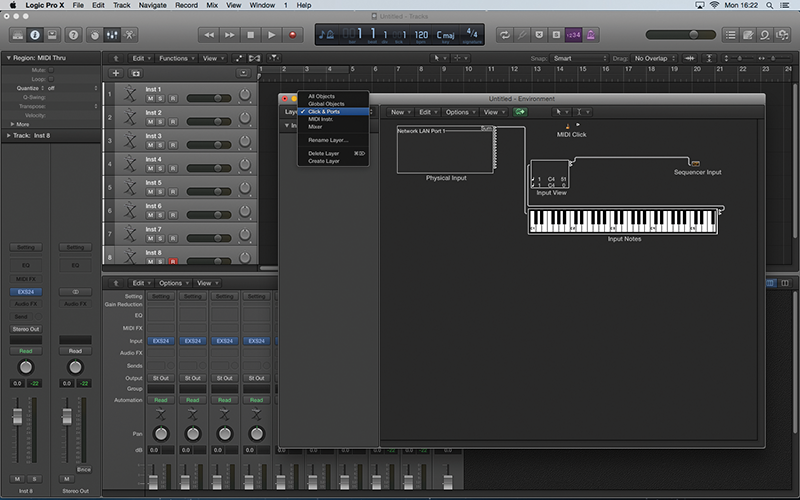
11: Now we’re going to re-route the Network MIDI on the host computer so that it can address individual virtual instruments. Open the slave’s Environment (Window > Open MIDI Environment) and select the Click & Ports layer from the drop-down menu.
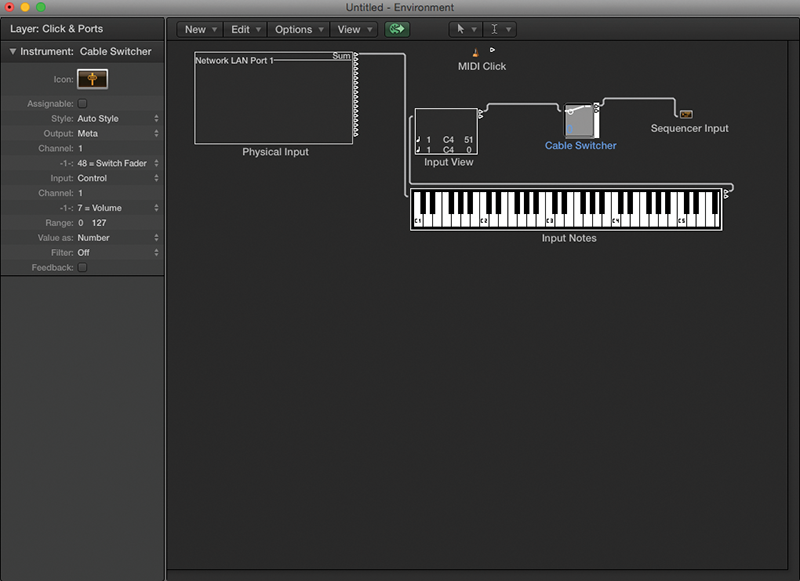
12: Add a Cable Switcher (New > Fader > Specials > Cable Switcher) from the local menu. Take the routing cable out of Sequencer Input and patch it to the input of Cable Switcher, then create a new patch from Cable Switcher to the Sequencer Input.
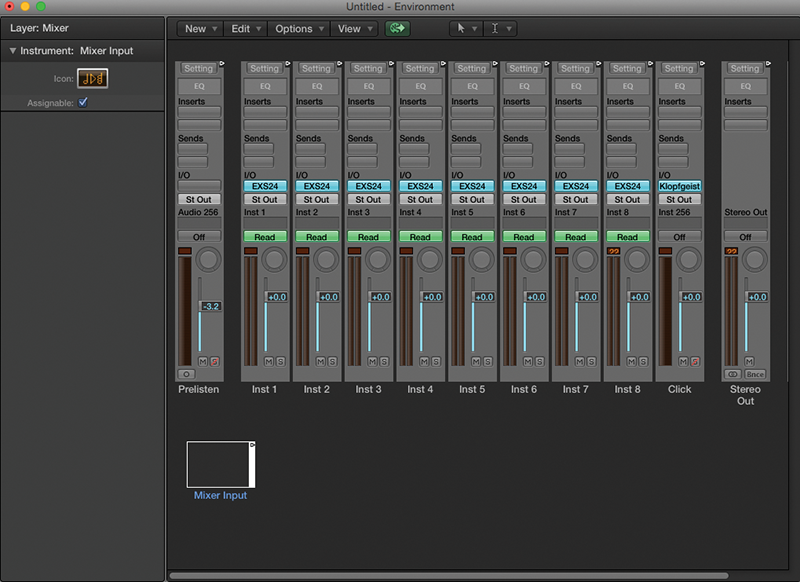
13: The Cable Switcher will act as a flip switch for our new routing. Move over to the Mixer layer and create a new Monitor object, changing its name to Mixer Input and ensuring the Assignable checkbox is ticked.
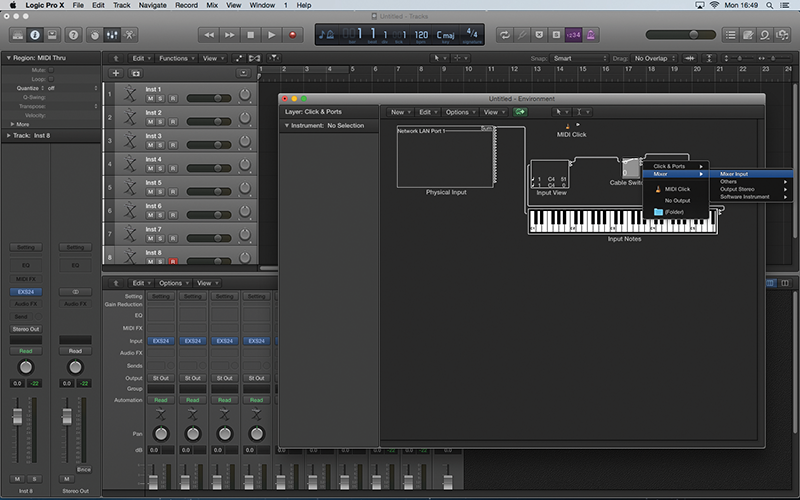
14: Now return to the Click & Ports layers and Alt-click on the second node on the Cable Switcher. Select Mixer > Mixer Input from the drop-down menu. Flick the Cable Switcher to 1, so that the MIDI is routed to the Mixer layer.
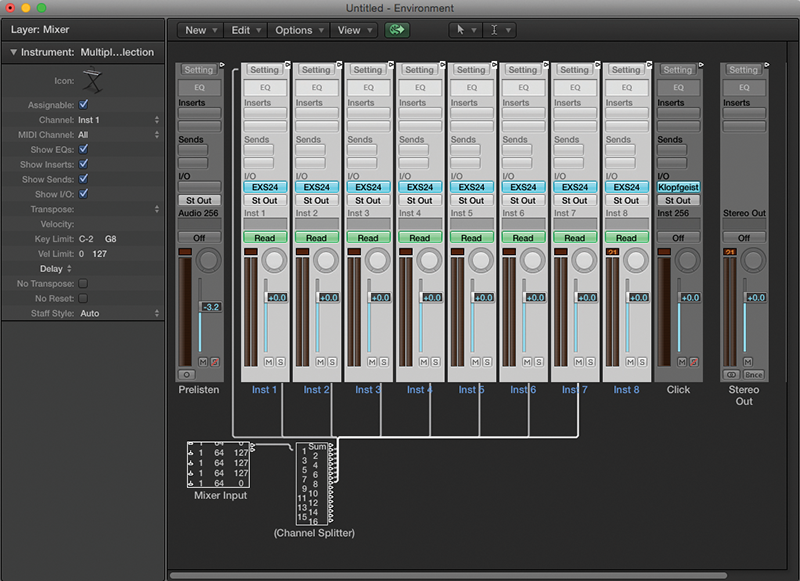
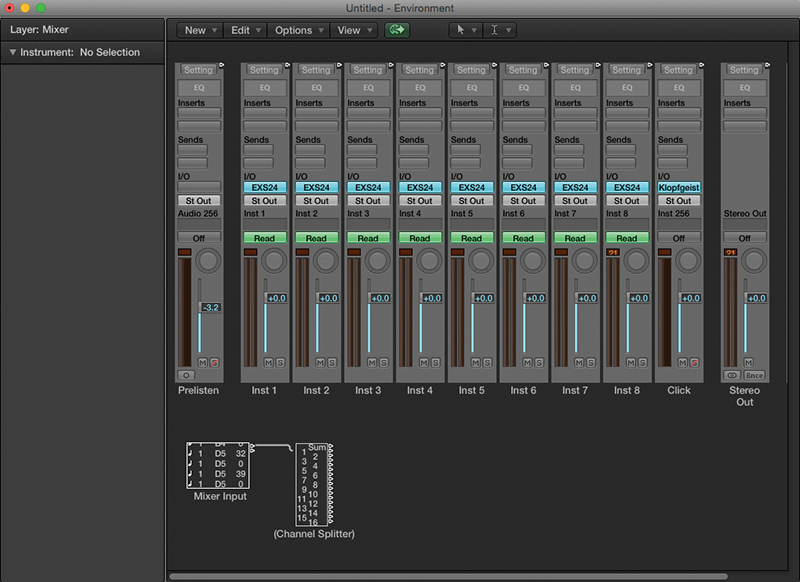
15: Pressing a key on the keyboard should now display MIDI data in the Mixer layer’s Monitor object. Route this to a new Channel Splitter object (New > Channel Splitter). This object will split the MIDI stream based on the MIDI channel assignment.
16: Now route each of the Channel Splitter’s Nodes through the consecutive instruments (you’ll need to have created the instrument before they appear in the Mixer layer). Ensure you only patch the numbered nodes, ignoring the Sum output.
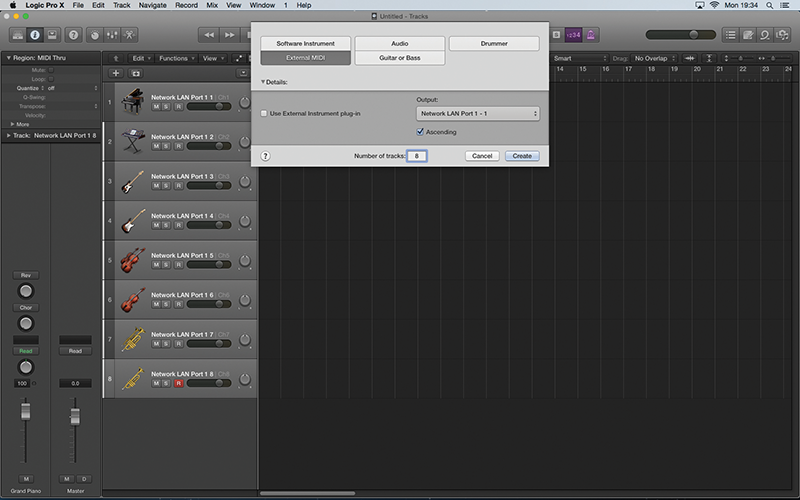
17: On your main computer, create a new External MIDI track. The LAN Port 1 should appear as an output destination. Select the Ascending option and specify the number of tracks to match the number of instruments on your slave computer.
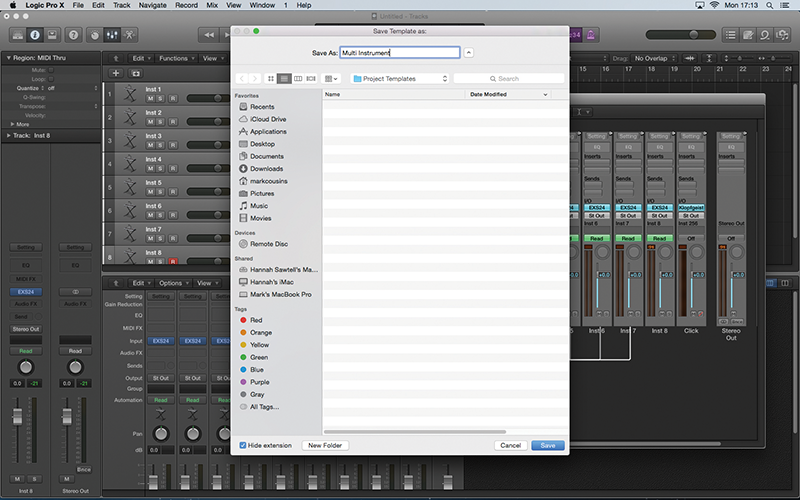
18: To save time in the next project, consider saving the resultant project as a Template (File > Save as Template). This will mean the environment in setup by default, with you simply needing to swap out the instruments as you see fit.
This tutorial is endorsed by Point Blank. With courses in London, online and now in LA, Point Blank is the Global Music School. You can study sound to picture on their Music Production Diploma courses, with pro industry tutors.
