Making the Most of Mastering: A Step-by-step Guide
As with so many things in life, the best way to master mastering is through practice. The more you do it, the easier it gets to know what processing – if any at all – is needed in any given circumstance. When it comes to mastering, never be afraid to try things out. There are […]
As with so many things in life, the best way to master mastering is through practice. The more you do it, the easier it gets to know what processing – if any at all – is needed in any given circumstance.
When it comes to mastering, never be afraid to try things out. There are no rules here other than to listen critically to what you’re doing and only apply processing that makes things sound better. I’ve gathered a few pre-master mixes for you to practise with, courtesy of MT’s sister publication, The Guitar Magazine. You can download them here. Now, let’s grab one of those and do some mastering…
Music examples © Chris Vinnicombe & Martin Holmes The Guitar Magazine www.youtube.com/theguitarmagazine
Making the Most of Mastering: step-by-step
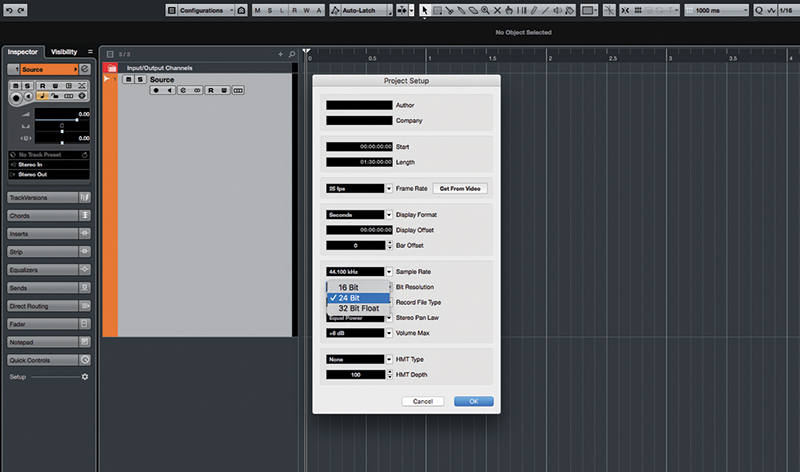
1. Launch your DAW and create a new project / session. Set the project’s sample rate and bit depth to match the audio you’ll be working on (the supplied examples are all at 44.1kHz / 24-bit). Set the timeline to show minutes-and-seconds. Create a stereo track and name it ‘Source’.
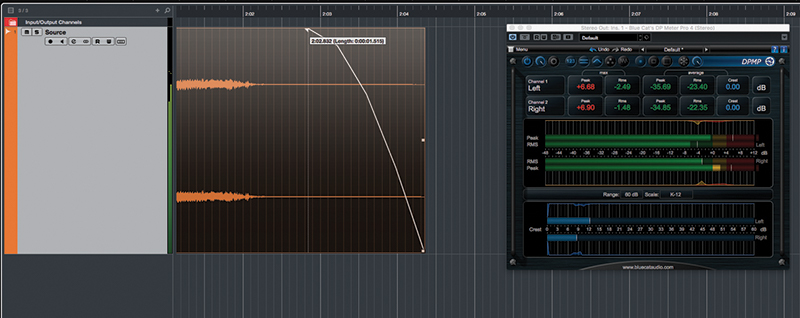
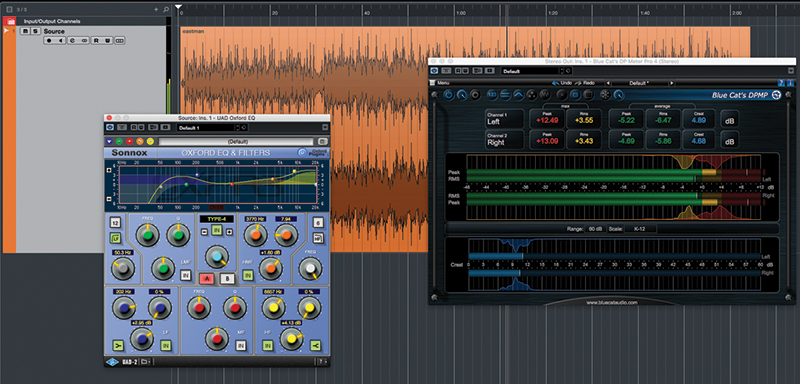
2. Import the ‘Eastman_Premaster.aif’ example audio to the Source track. Top-and-tail the audio (see this ‘Topping and Tailing’ section). Add a metering plugin across your main master output buss, and set it to show a ‘K-12’ scale. Play the track, paying close attention to the tonal balance.
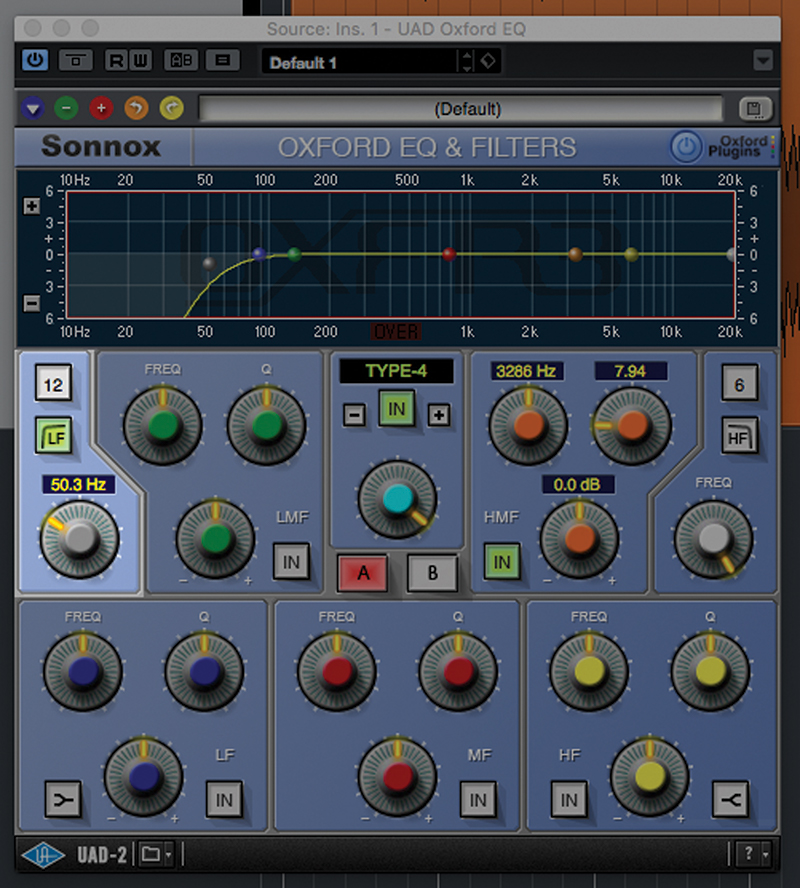
3. On the Source track, insert an EQ that has a wide, gentle characteristic. If your EQ doesn’t have high- and low-pass filters, add a suitable filter plug-in before the EQ. Apply a 12dB/oct high-pass filter at around 50Hz to restrict the very low-end frequencies.
4. Make adjustments to the EQ to get a tonal balance you like. I’m adding a gentle shelving below 200Hz to thicken the bottom end, and above 8.5kHz to brighten the top. I’ve also added a touch of presence around 3.7kHz using a parametric band with a fairly wide EQ.
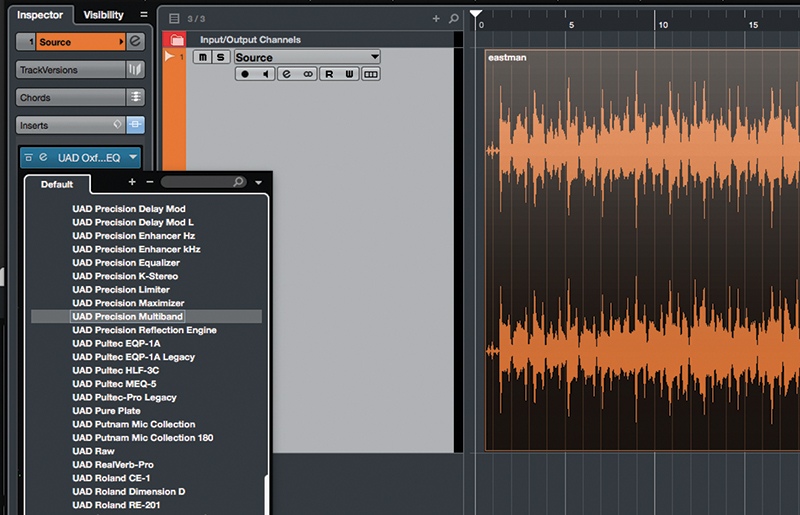
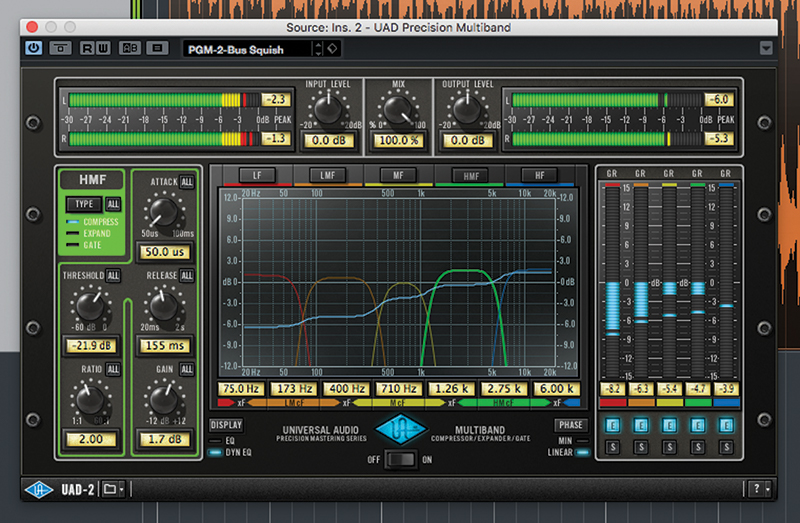
5. Insert a multiband compressor after the EQ. Typically, the higher the band the less gain reduction you should aim for. Set ratios of between 3.5:1 and 3:1 for the low band(s), 2.5:1 for the mid, and between 2:1 and 1.5:1 in the upper band(s).
6. Adjust each band’s threshold so that the lowest band is getting around -6dB of reduction, through to around -3dB of reduction at the highest band. Once happy, adjust the make-up gain of each band, aiming for the same tonal balance as when the compressor is bypassed.
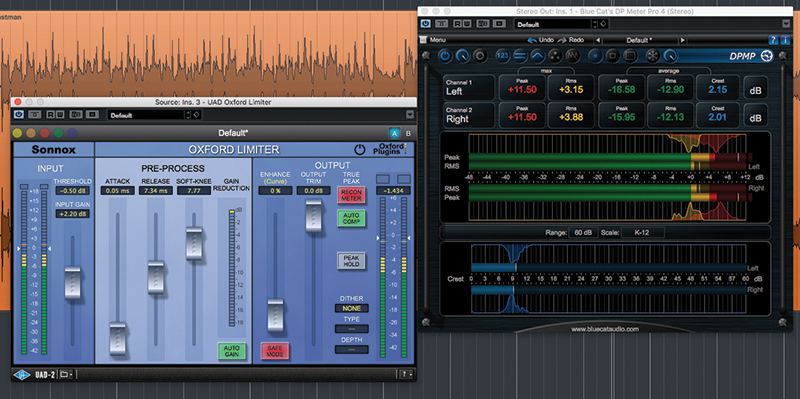
7. Insert a limiter after the compressor. Set the limiter’s threshold to -0.5dB, set a fast attack and release, and a hard ‘knee’ characteristic. Use the limiter’s input gain control to adjust the level so that the RMS level lands around 0dB and the peaks don’t clip.
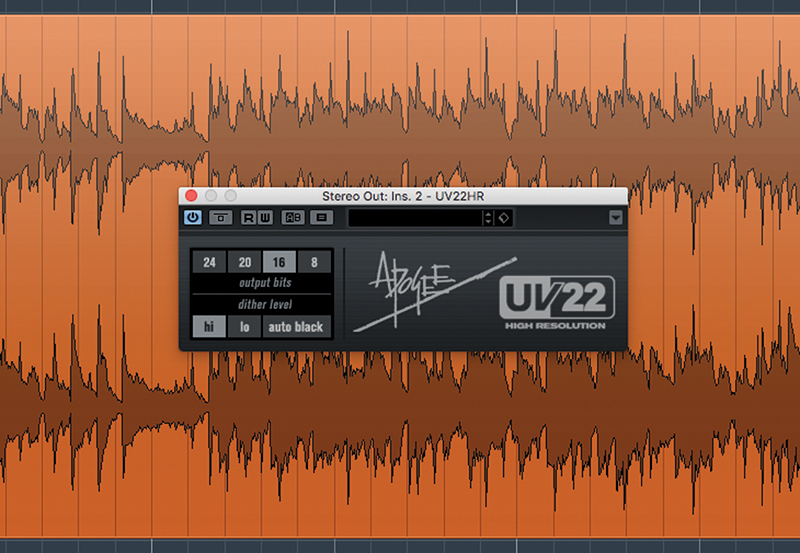
8. We’ll assume we’re mastering for CD, so add a dither plugin at the end of the processor chain. Set it to output 16 bits. A/B test against the unprocessed signal, making adjustments as needed. Once happy, export the processed audio to a new, mastered 44.1kHz / 16-bit audio file.