Mastering Tutorial: Part Three – Mid-Side Processing Step-by-Step
Mike Hillier continues his mastering tutorial looking at mid-side processing with a step by step guiding through using it on a track… 1:The Great Divide hinges on a fingerpicked acoustic guitar and a soft vocal, and also features drums, bass, piano, electric guitar and pedal steel. The mix has a strong central focus on the […]
Mike Hillier continues his mastering tutorial looking at mid-side processing with a step by step guiding through using it on a track…
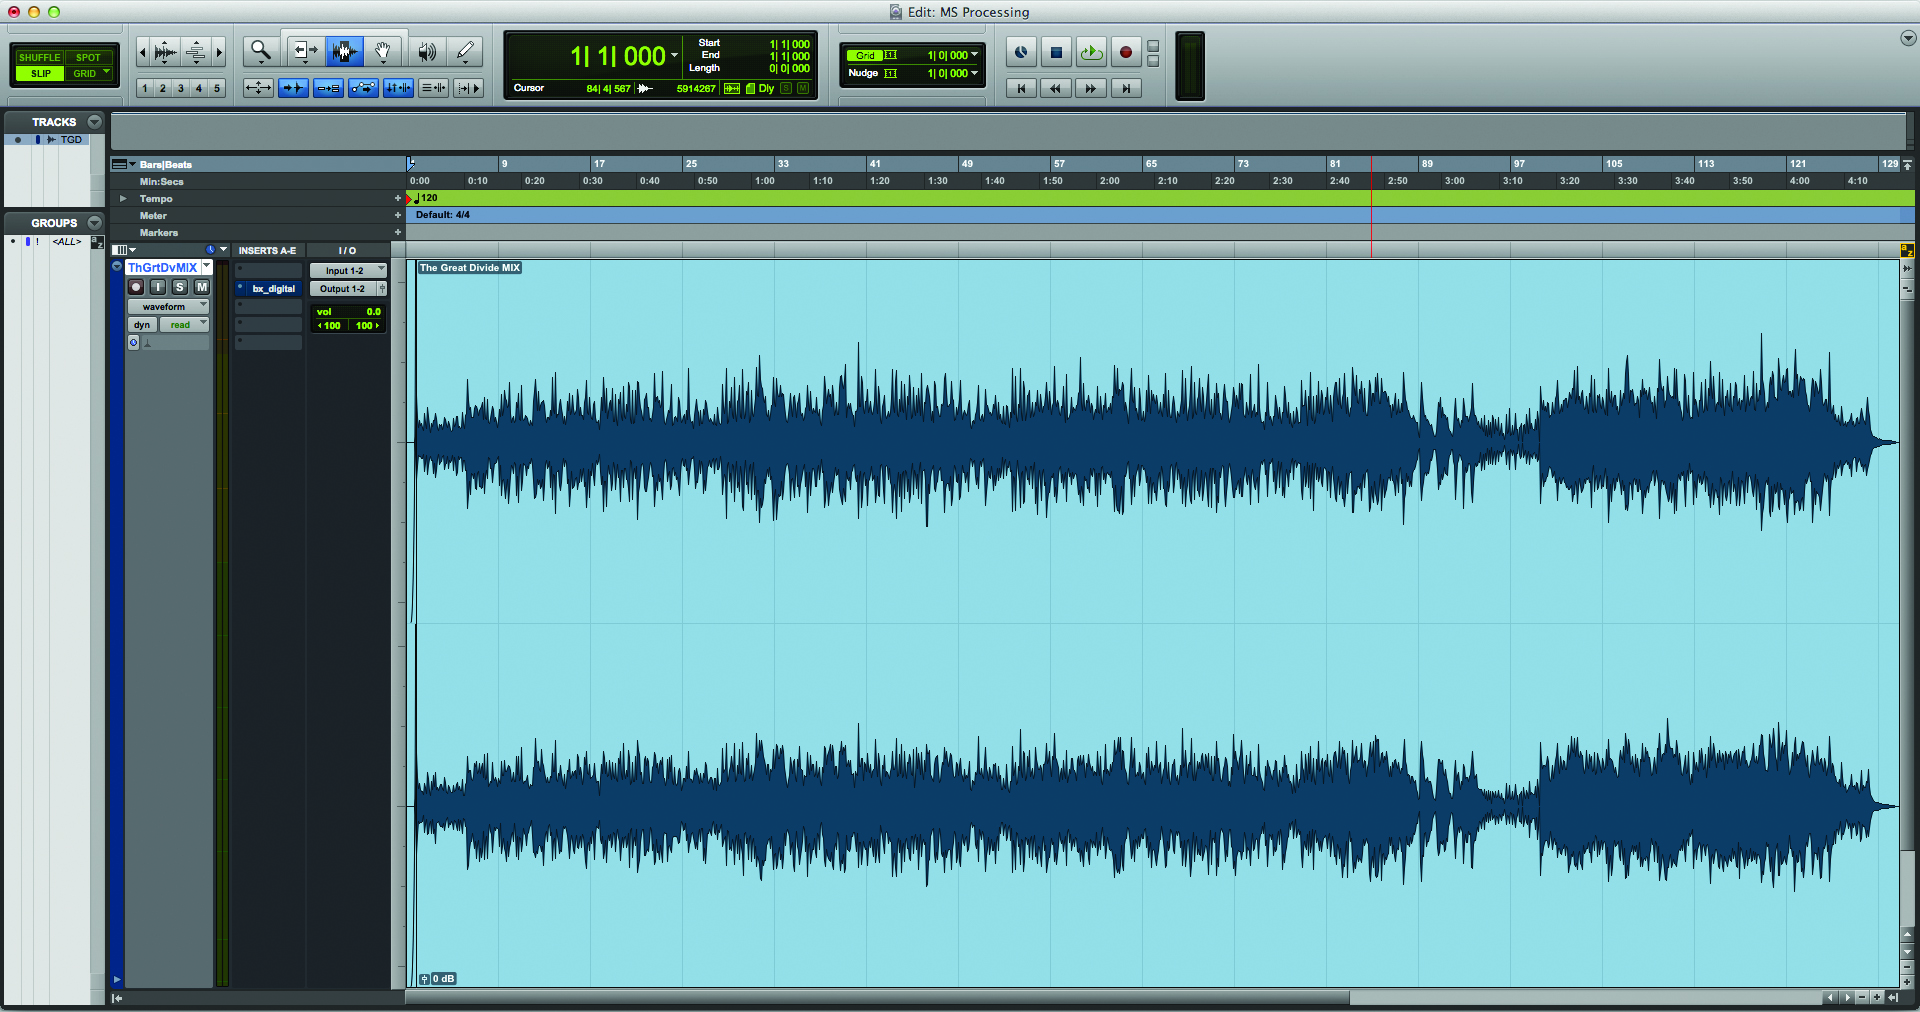
1:The Great Divide hinges on a fingerpicked acoustic guitar and a soft vocal, and also features drums, bass, piano, electric guitar and pedal steel. The mix has a strong central focus on the drums, bass and vocals, and the other instruments surround them without heavy panning.
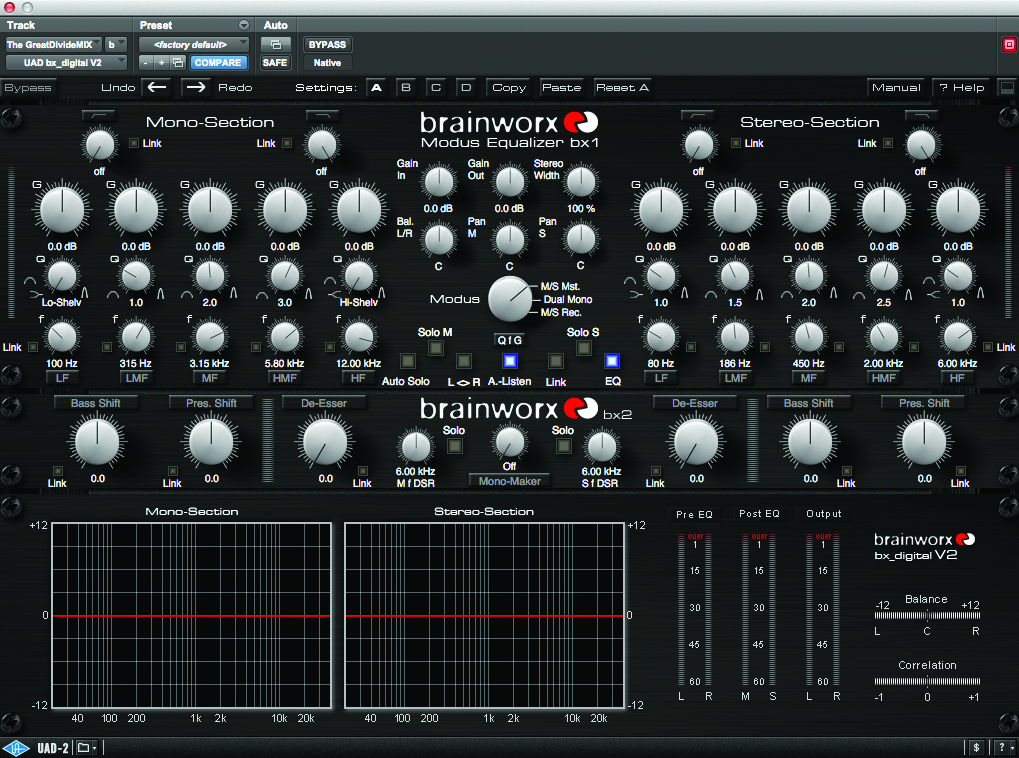
2: We’re going to use the Brainworx bx_digital V2 as our M/S EQ. This EQ does all the M/S matrix work for you and has five parametric EQ bands and high- and low-pass filters per channel, alongside bass- and presence-shift options, de-essers and a mono-maker function.

3: The mono-maker applies a filter to the side-channel which shifts all the energy below a certain frequency to the mid-channel. This was especially useful when mastering for vinyl but can still be handy for dealing with wide synth bass in some mixes.
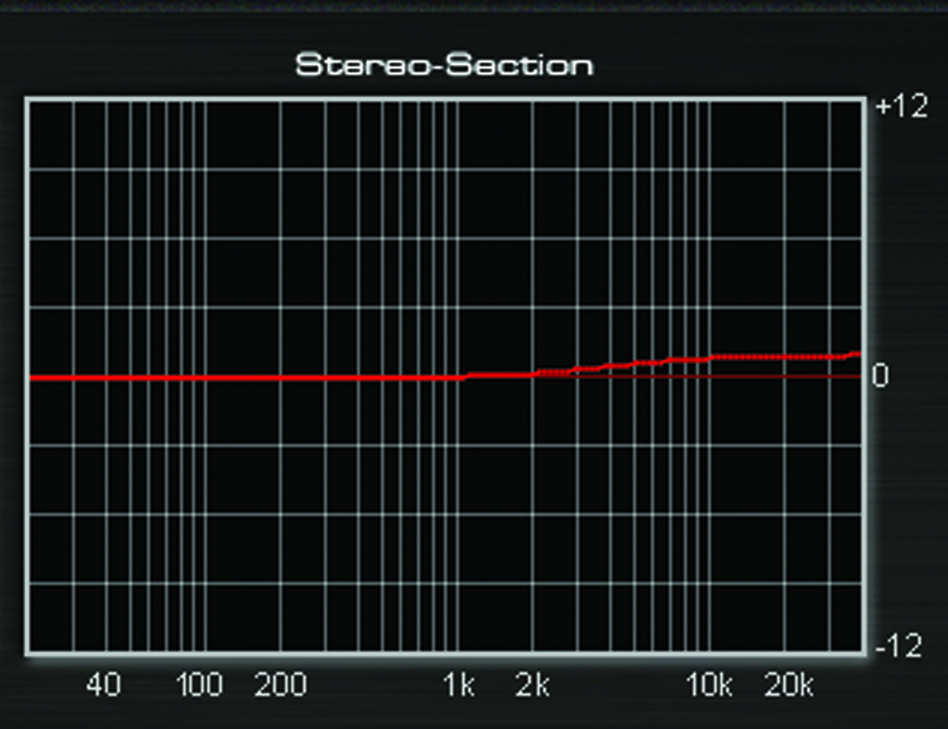
4: Although this mix doesn’t need the low-end sent to the mids at all, some additional width in the top-end might help to give space to the vocal in the centre. We’re going to dial in a high-end shelf on the side channel and boost by 1dB, but starting at a fairly low frequency.
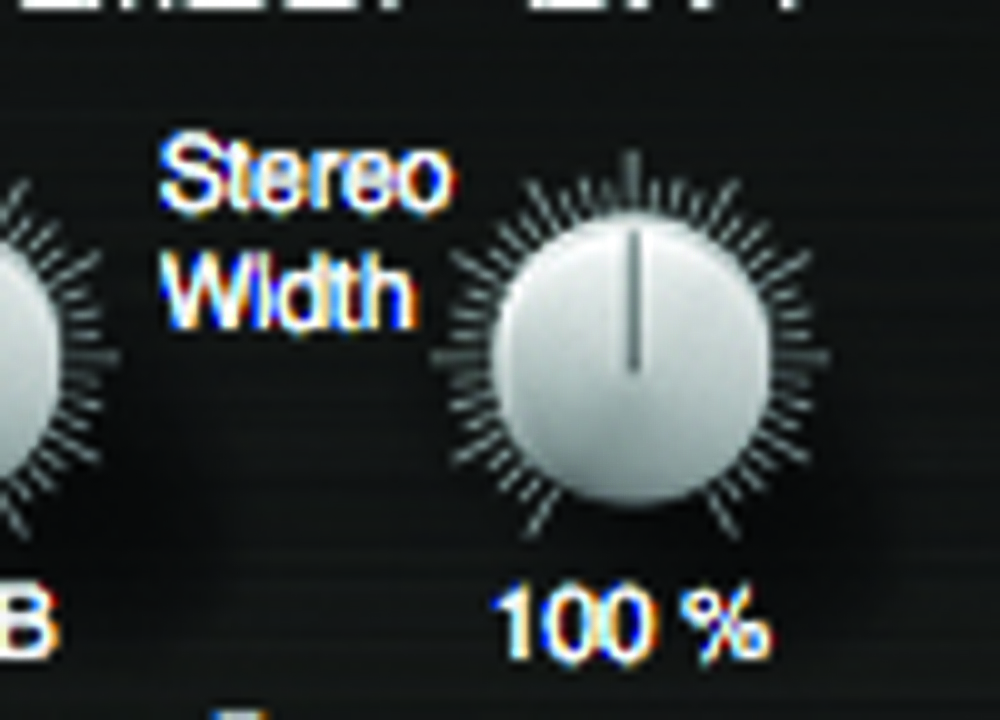
5: The Stereo width knob works as a balance between the mid-and the side-channels, and needs to be balanced against any EQ changes you make. We often find that dialling it down slightly, while boosting the high-frequencies in the side-channel, can give focus to a mix. However, in this mix we’re going to dial it up slightly,in order to add more separation to the stereo field.

6: Boosting the very low-end – perhaps the fundamental of the kick in the mid-channel – can bring weight to a mix without lifting the noise floor of the side-channels. In this screen shot, the fundamental is just below 50Hz.
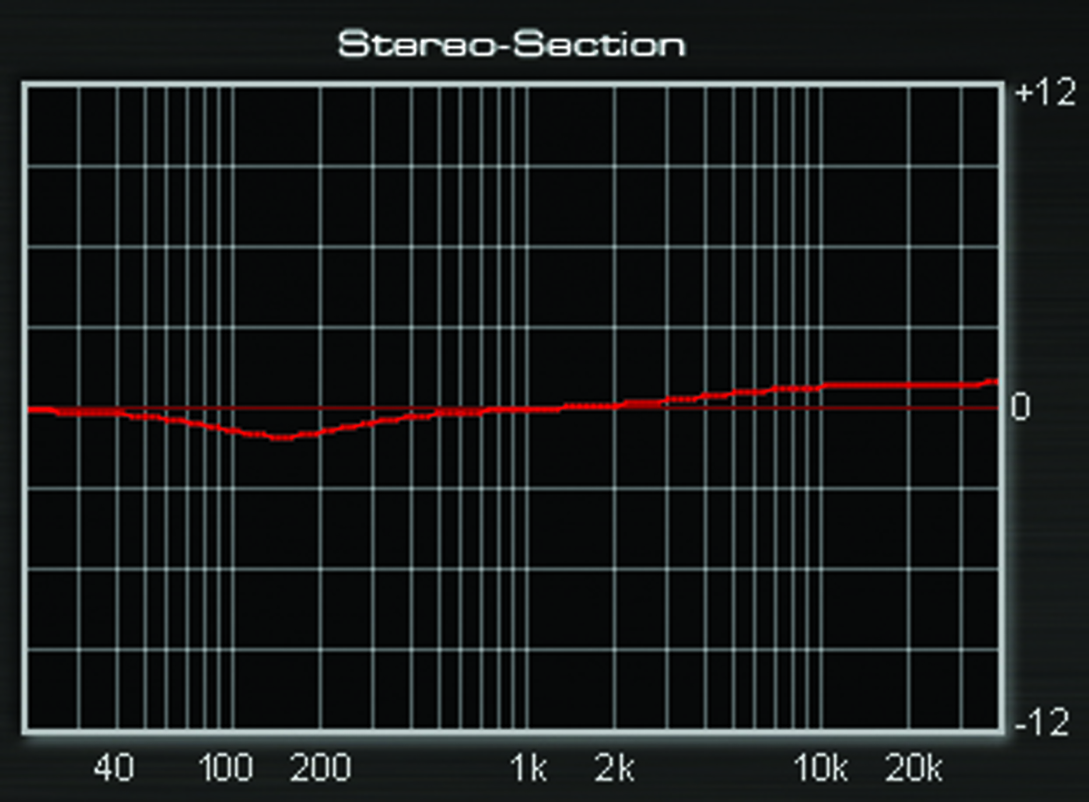
7: A parametric cut in the side-channel will push those frequencies to the middle of the mix. This can be especially useful for focusing centrally placed instruments in the stereo image, especially if they have a wide reverb attached to them.
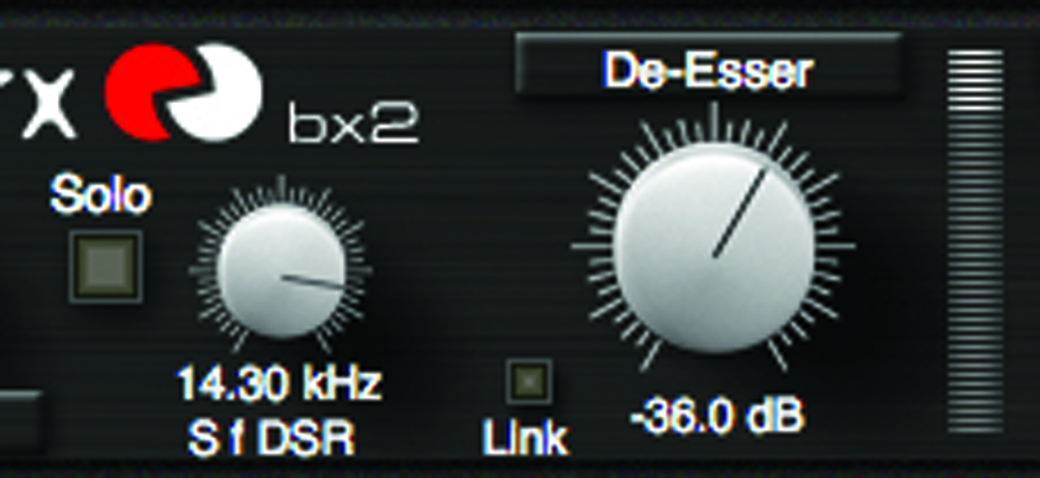
8: A de-esser can be used for more than removing sibilance. De-essing the side-channel can help to tame bright cymbals, or if used alongside a boost in the top-end, to add ‘air’ around a mix without too much additional energy, as the ‘air’ is compressed by the de-esser.
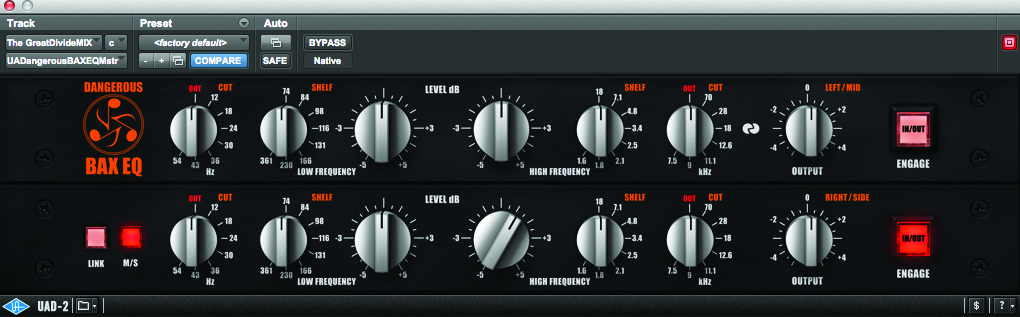
9: As we’re already using the high-frequency shelf in bx_digital we’ll get the second shelf higher up from the Dangerous BAX EQ for the ‘air’ band.

10: Mid-side EQ is only one of the tools that are available for you to use. Compression can also be utilised in M/S processing. Here we’re going to use the UAD Fairchild 670 emulation, which has a native M/S mode that it calls Lat/Vert.

11: Before compressing the signal, the Fairchild has to be put into Lat/Vert mode, and then the sidechain and controls need to be unlinked, otherwise both mid and sides will be compressed similarly, and there will be no real difference between this and Left/Right.

12: As you bring the threshold up on the mid-channel (Lat), you should notice the image start to get a little wider. Therefore, logically, as you bring up the threshold on the side-channel (Vert), the image will begin to shrink.
