Reason Tutorial: Become a Power User Part 10 – Mixing in Reason
Reason’s mixer is friendly yet powerful enough to help you take your mixes to the next level, as Hollin Jones explains… When Reason first debuted, its mixer was a breath of fresh air in the DAW world. Simpler and more approachable than other DAWs’ mixers at the time, it used the same real world analogy […]
Reason’s mixer is friendly yet powerful enough to help you take your mixes to the next level, as Hollin Jones explains…
When Reason first debuted, its mixer was a breath of fresh air in the DAW world. Simpler and more approachable than other DAWs’ mixers at the time, it used the same real world analogy as many of the other modules and was really easy to get to grips with. Since then much has changed, not least the incorporation of full audio tracking, and the mixer has had a complete overhaul to match. The similarity to a real mixing console is still evident, only now it’s a much bigger and more capable desk that you’re working with.
The Props have been careful to keep things useable even when adding loads of new functionality. The mixer uses a scrolling system to navigate its many sections and you can split the mixer window off to a second screen if you have one, or expand it to full screen to maximise the space on offer. As well as pro-level components like dynamics, EQ and insert sections with preset facilities you also get eight FX send and return slots, a master insert effect facility with presets and a master buss compressor that can be used to add some gentle but important glue to the overall mix.
Mixing is of course an art as much as a science and every project you work on will have different requirements. In truth you should probably have a good working mix going as you put a track together, since you will be listening to it repeatedly and probably making small changes as you go. When it comes to the actual mixdown process however, it makes sense to really spend some time getting it right. Start with the bass and drums, soloing them up and checking their compression levels. Reintroduce other elements to the track gradually, making sure they sit in the mix correctly. Remember that a sound doesn’t have to be amazing in isolation, what matters is how it fits with the other elements of the production. Use the channel strips to EQ and add just the right amount of compression and other effects, and automate faders and panners if necessary to add interest.
Setting up a mix in Reason
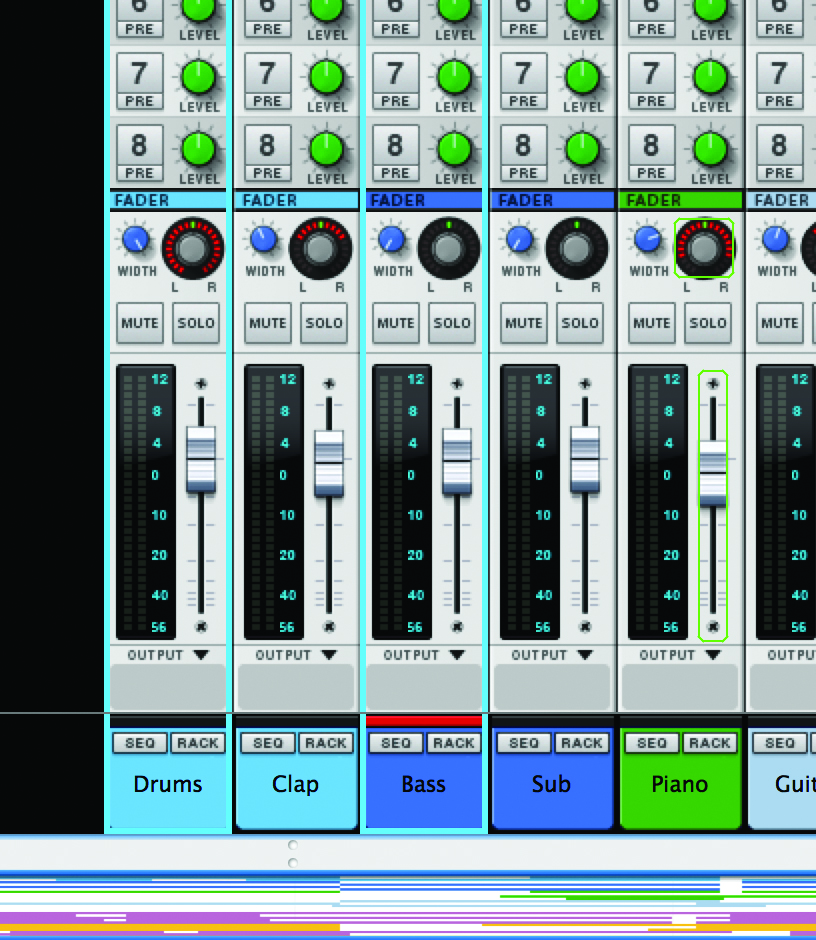
1: Channels in Reason’s mixer can actually be rearranged by picking them up from the base and dragging them. This doesn’t affect the routing at all, but it can make mixing easier by allowing you to place similar channels together. Linking isn’t possible yet and nor is changing channels’ visibility but you can at least place similar groups of sounds next to each other.
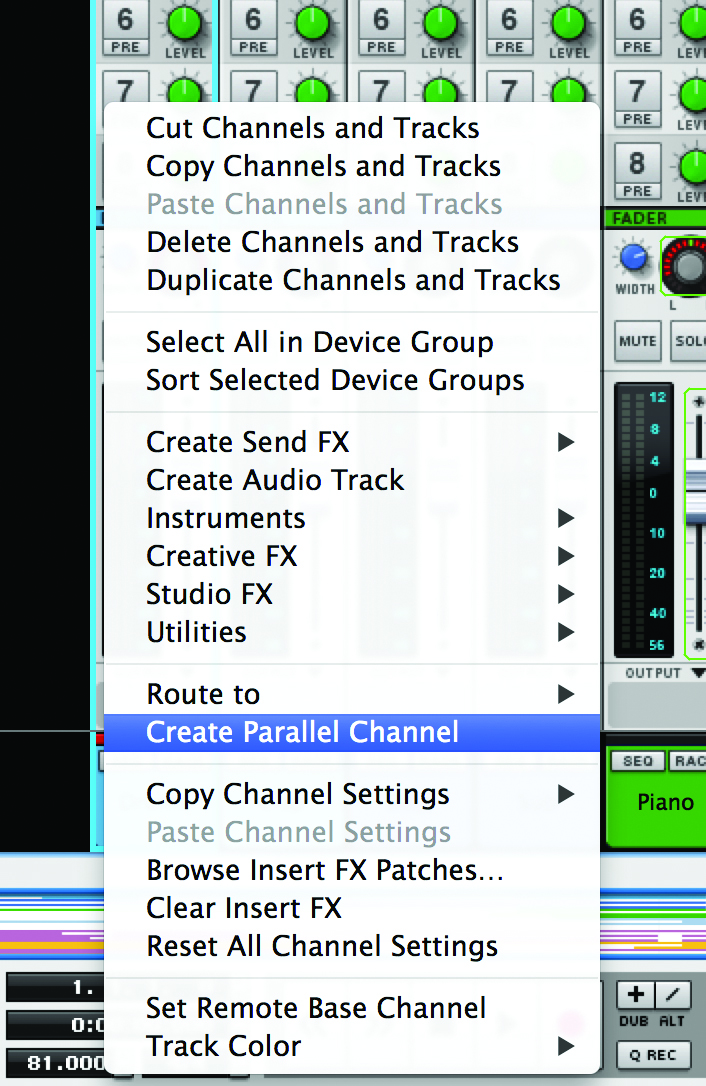
2: You can rename channels of course, by double clicking on their name fields and entering something new, to make mixing easier to keep track of if you have large projects. Another mixing trick in Reason is creating parallel channels, which can be used to feed in alternatively-processed versions of the same track without having to duplicate anything in the sequencer.
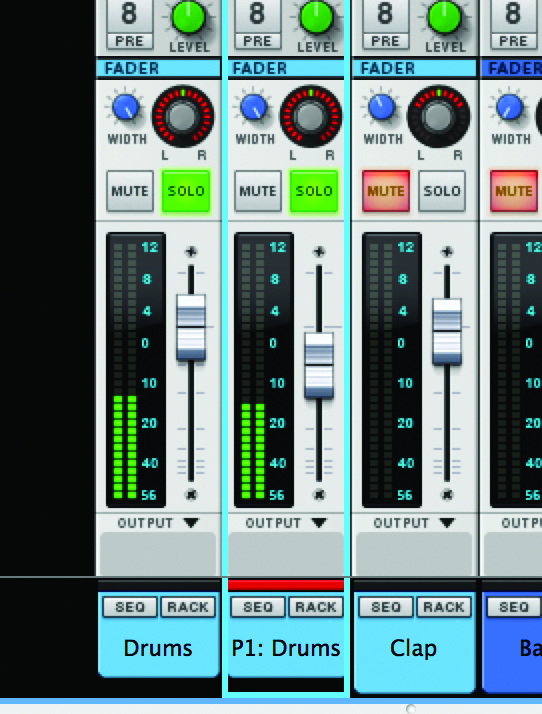
3: Here for example we have created a parallel channel based on the drum channel. Initially, it will simply duplicate the sound of the drums. But by using some alternative EQ and processing like adding heavy compression, then balancing the fader accordingly, you can blend some of the processed with the original drums to create a more interesting sound.
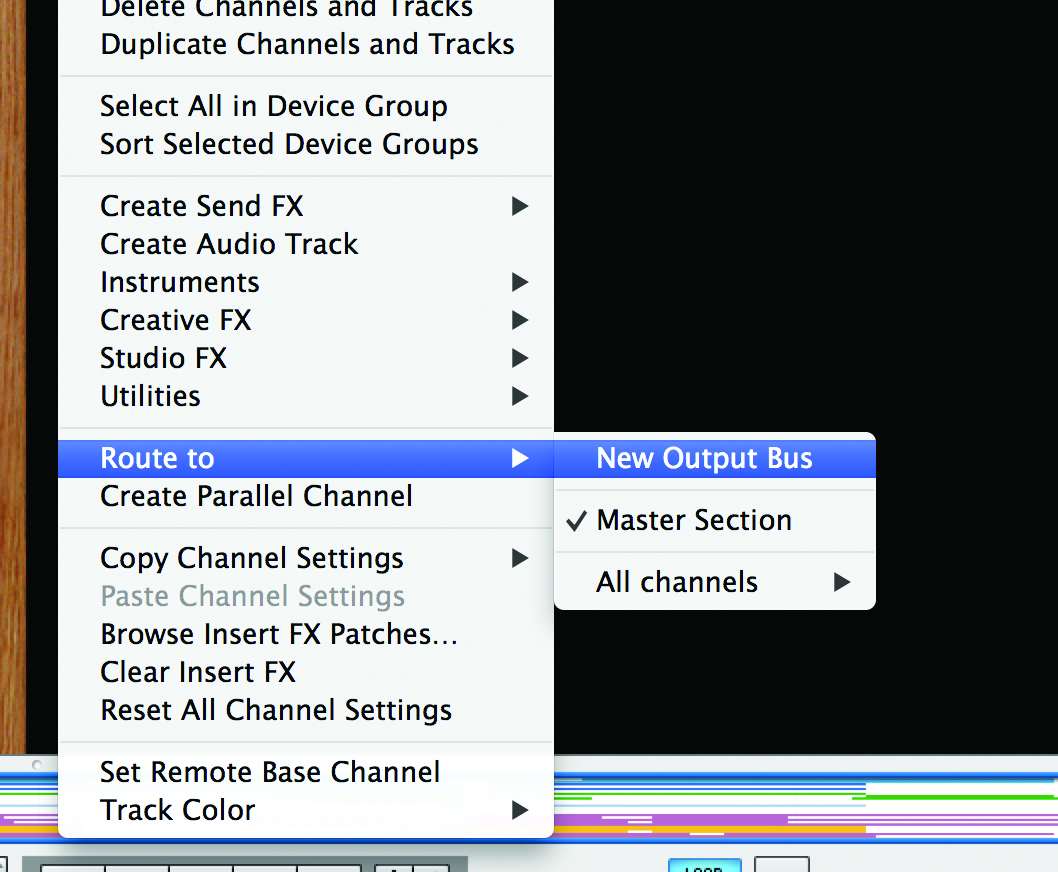
4: You can also create multiple output busses in Reason in order to get better control of a mix. Right click on a channel and choose Route To > New Output Bus. This creates a new bus which you should probably name so you know what it is. The output tab at the base of the channel you just assigned should update to reflect the new routing.
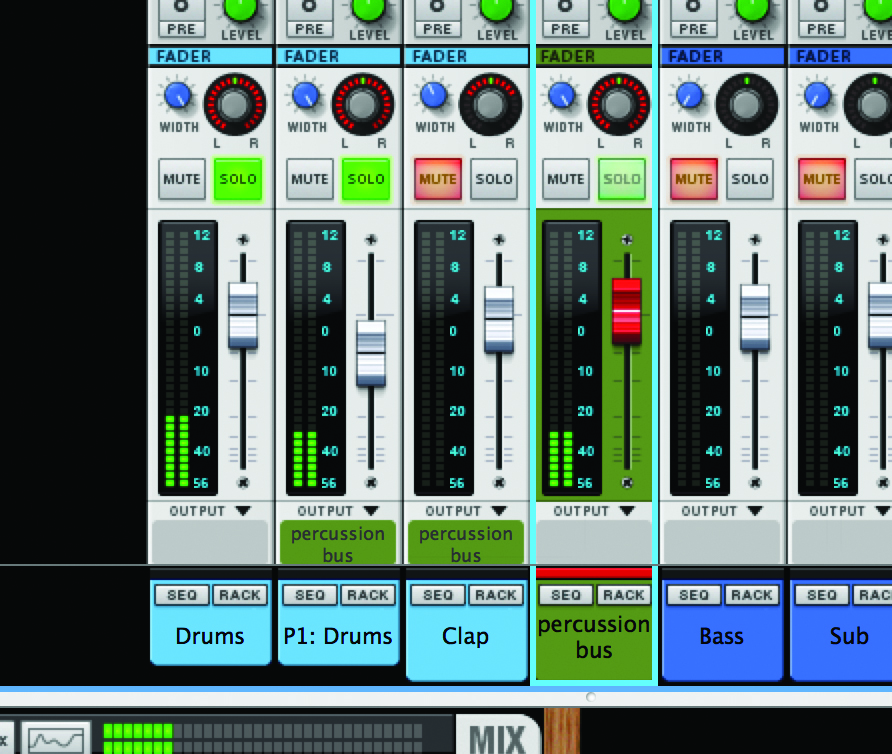
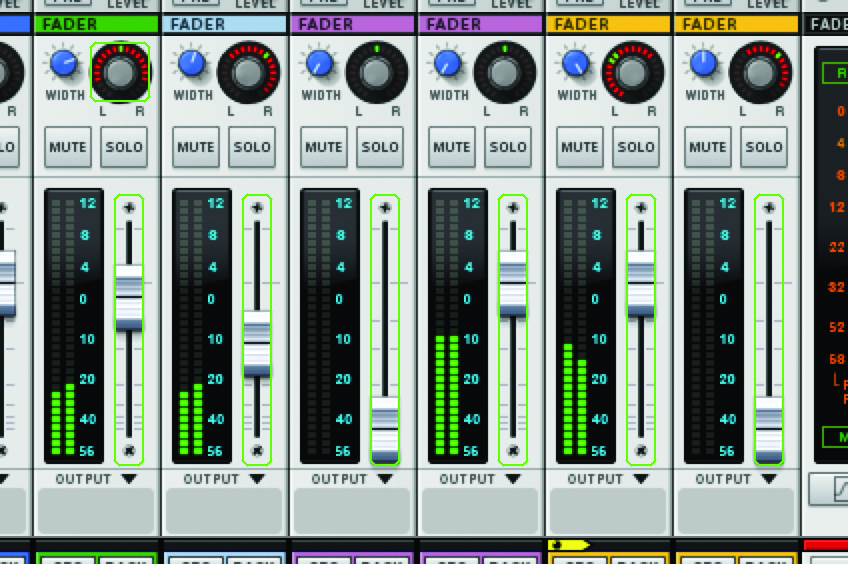
5: You can route other channels from the mixer to this bus channel in order to effectively group them together. By submixing, say, a bunch of percussion or backing vocal tracks together and then routing them to their own bus, you can control them all from a single fader. So by using fader automation you could for example raise or lower the level of lots of sources at once using this trick.
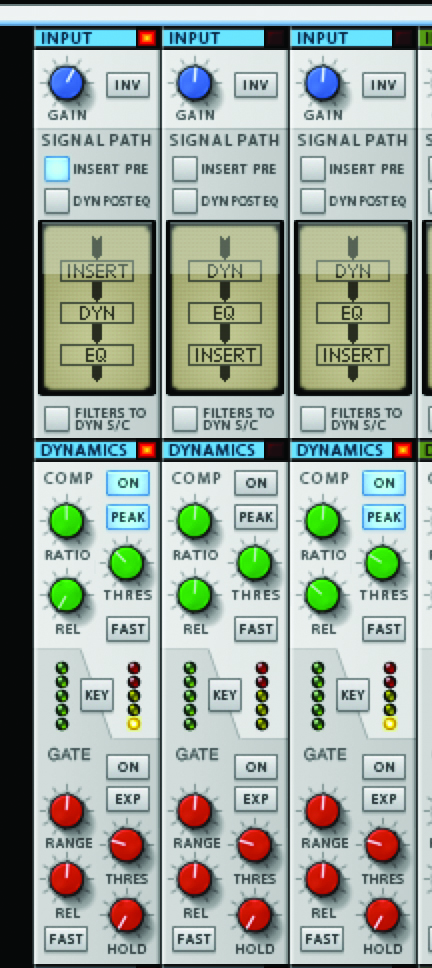
6: The channel strip is a great place to start dealing with the mix. Go to the top of a strip and you will see a dynamics section where you can add compression and gating for each channel as well as switching whether the dynamics section works pre or post-EQ, which can alter its effect.

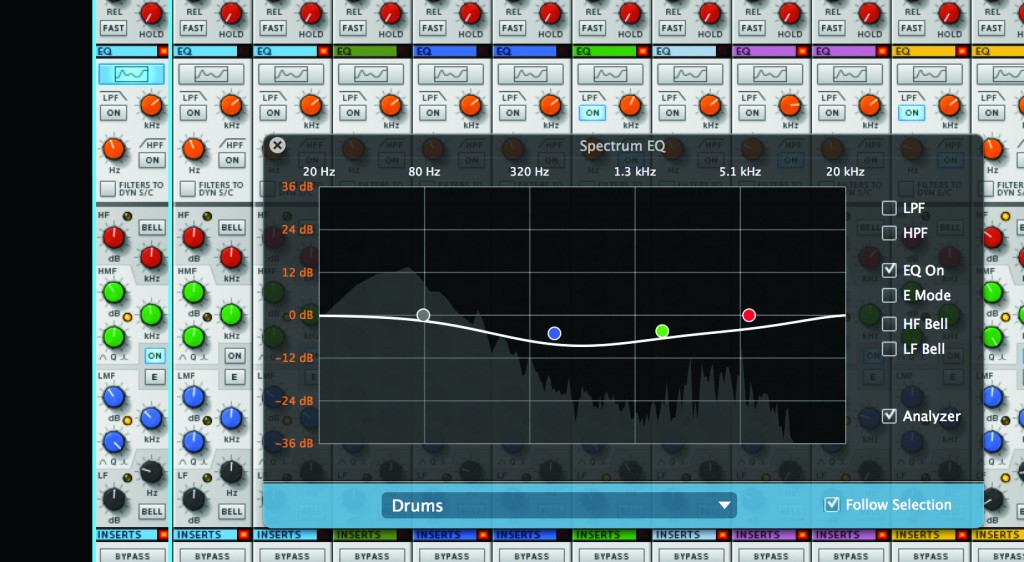
7: Moving down you will find the EQ section. Click on the waveform window and you will get a much larger EQ window where you can manually set and adjust EQ points, a much more precise approach than using the tiny onscreen dials. If you use the track name dropdown menu here you can even flip between channel EQs without leaving this window.
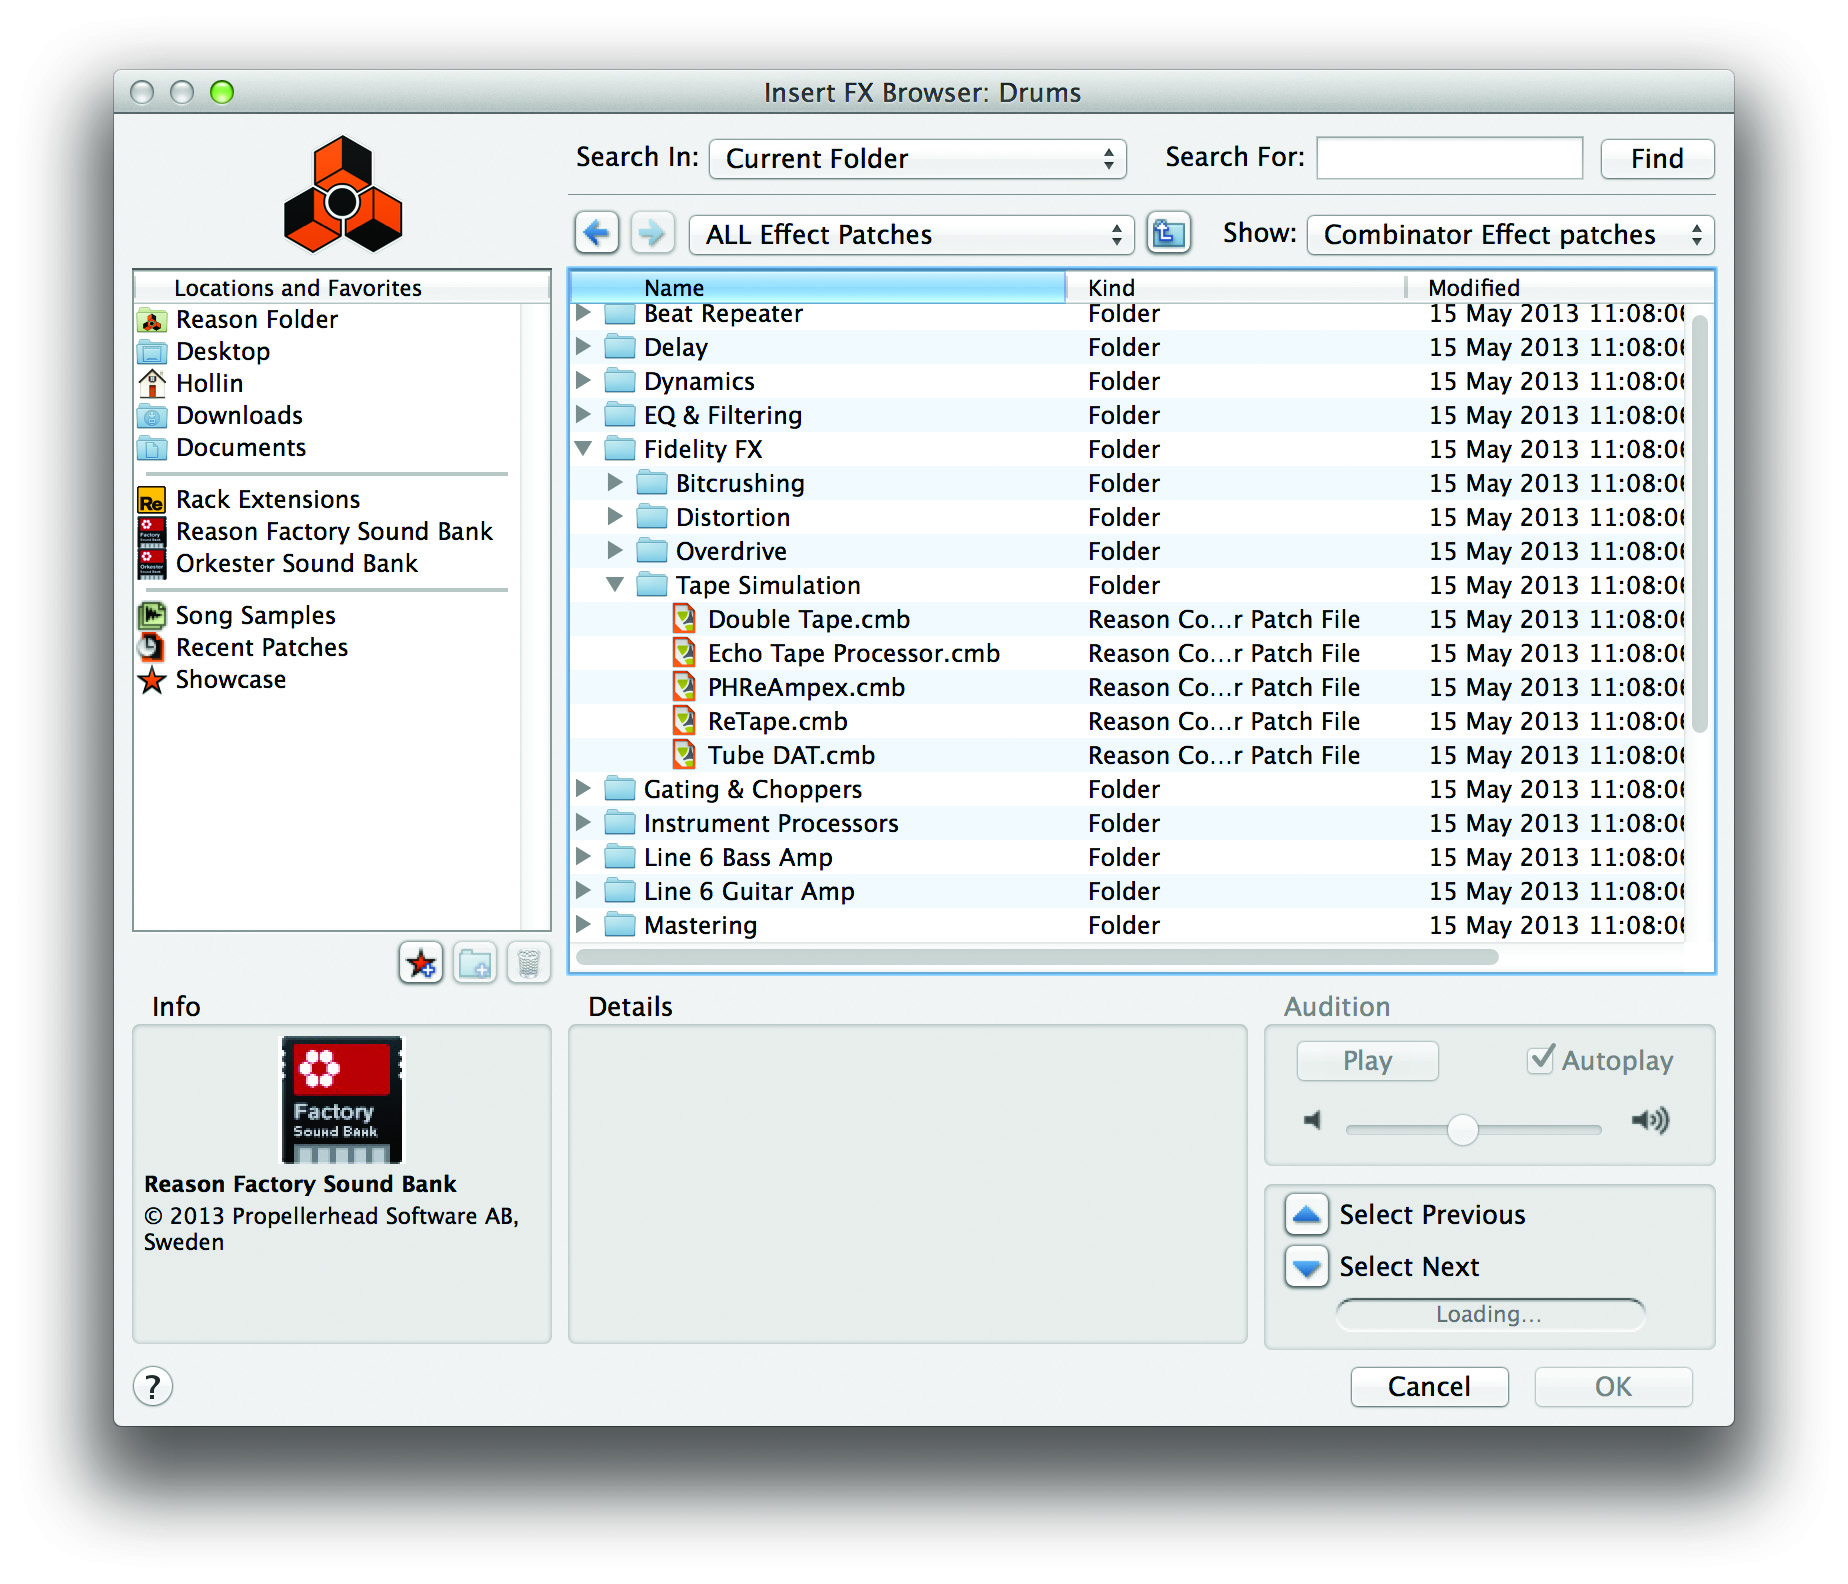
8: A little lower down you will find the insert section where you can assign shortcuts or load and save presets. The Factory Sound Bank contains some instrument-specific effect combi patches and many others that you can add to a channel to get the sound you want. Alternatively, manually add effect modules to a channel in the Rack.
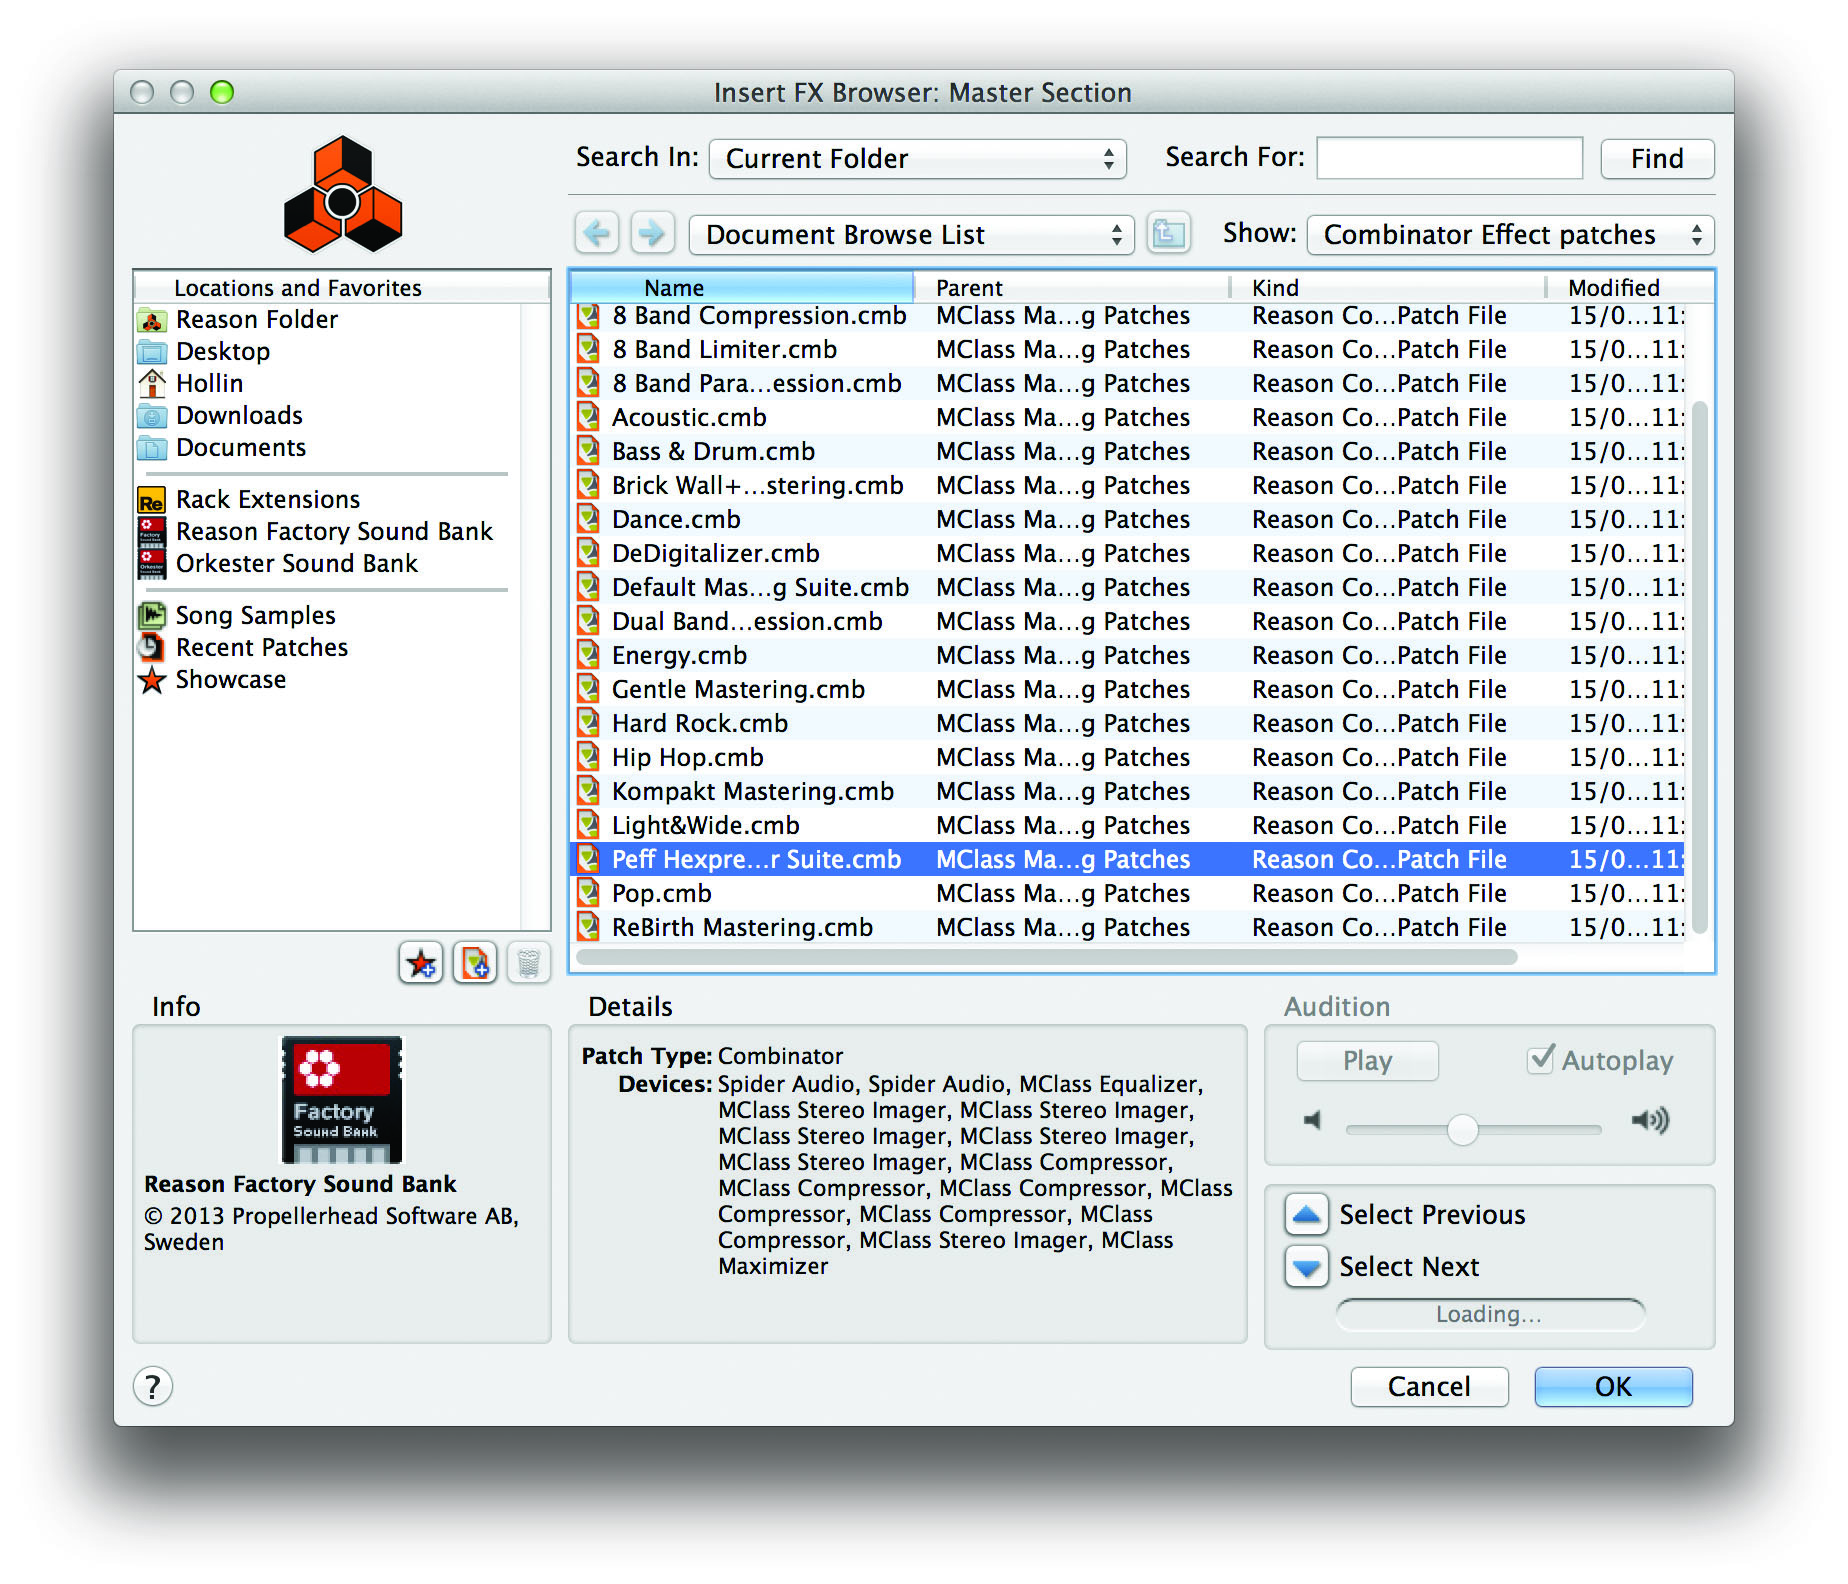
9: In the Master Inserts section on the right you are also able to access effect presets, though the factory ones tend towards mastering processing rather than mixdown processing. If you are comfortable combining the two you can do this, though it’s usually better to separate the two. You can of course build your own tailored mixdown master processing chain.
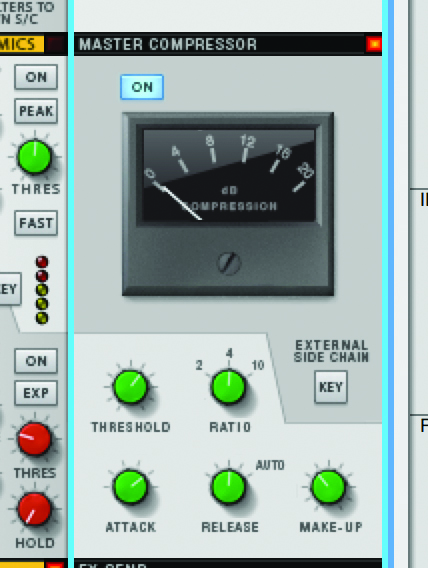
10: The master buss compressor is actually really useful for adding a sort of audio ‘glue’ to your track. You should do the majority of the tweaking before activating it, then when you think you have a good sound, add a little master compression and go back and fine tune the balance of the different channels to account for any changes it has introduced.
![]()
11: If the mixer is a bit overbearing and you find you’re not using certain sections, you can use the buttons at the right hand corner of the mixer to show or hide various things. You might for example want to hide the input and FX Send sections, as these are probably used less during mixing than the other sections. You can always unhide them at any time.
12: Remember that many mixer channel parameters can be automated just like the modules in the rack, and this is a good way to add interest and dynamism to your tracks. Simply move controls with record enabled and you can edit the automation data using automation subtracks in the sequencer just like you would for any instrument or effects.
