Get Perfect Beats: Part 2 – Recording Acoustic Drums
Last time we looked at getting perfect electronic beats together. Now it’s time to get out-of-the-box and record and mix acoustic drums. Huw Price has the mics… For the longest time, all drums were acoustic – because that was the only option. Then drums became electronic – because that was the fashion. Eventually, samplers came […]
Last time we looked at getting perfect electronic beats together. Now it’s time to get out-of-the-box and record and mix acoustic drums. Huw Price has the mics…
For the longest time, all drums were acoustic – because that was the only option. Then drums became electronic – because that was the fashion. Eventually, samplers came along and enthusiastic programmers began grabbing acoustic drum sounds from other recordings and chopping-up and looping ‘real’ drum parts.
The distinction between acoustic and electronic drums has been thoroughly mashed-up ever since and that derisory term ‘real drums’, so beloved of musical Luddites, has almost fallen out of use.
For a while, musicians and programmers were content to spend countless hours trawling through the most obscure funk, reggae and soul records in shabby second-hand stores. The object was to find groove-tastic beats that were unrecognisable to all but the very few.
Then, during the mid-1990s, something interesting happened: some big-name jungle and D&B producers who were very switched on to classic drum sounds decided it was preferable to commission their own drum recordings rather than live off scraps from old records and deal with the legalities of sample-clearance. Many tracks from that era feature world-famous drummers who had been engaged to jam along to click tracks.
For funk and soul keep the room as dry as possible
Although drum sample CDs covering every musical genre are now readily available, many of us still enjoy making our own samples and loops. You can work with pre-mixed drum tracks or start with multitrack drum recordings and mix your own. In this feature, we’ll be examining some of the tricks and techniques that can be used to record and mix drums for customised beats and signature sounds.
On the Record
If we want to create our own loops and beats, the first thing we have to do is record the drums. Budding sound engineers are often told that recording drums is hard, but this isn’t necessarily true. Although you can take a complex approach to drum recording, there are also very simple methods that can produce fantastic results. The way you choose to do it will depend on the type of sound you are chasing and the gear at your disposal. But before we get into recording techniques and microphone placement, let’s take a look at other factors that can influence the sound.

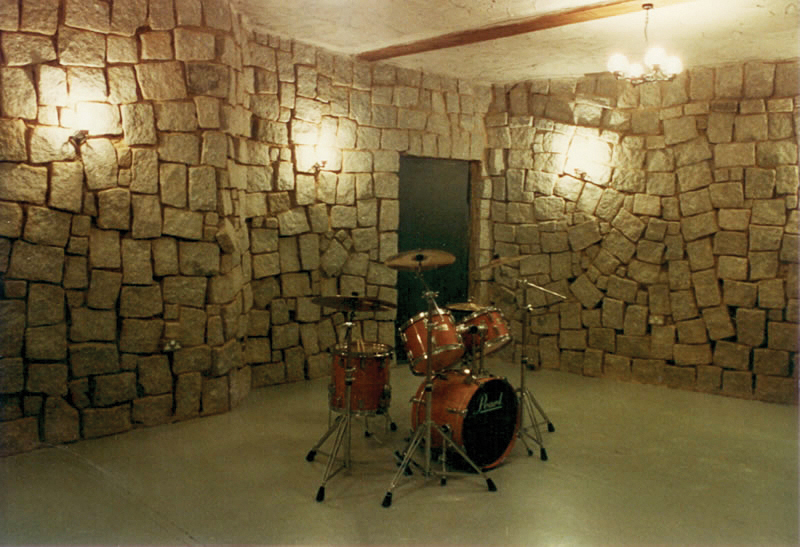
Changing Rooms
Using microphones means that in addition to the sound of the drums, you will be recording the sound of the room. To an extent, this is unavoidable.
For funk and soul sounds you may want to keep the drums as dry and free from ambience as possible. Many of the original recordings were made in specially constructed drum booths that were designed to minimise early reflections. Close-mic’ing was also the method of choice. Then again, plenty of classic break beats sound roomy.
Click Here to Read Our Top Microphone Suggestions
The opposite end of the sonic spectrum would be the ‘big’ drum sounds beloved of 1980s stadium rock bands. Many productions combined close drum mics with heavily compressed room mics in studios with massive live rooms. Setups tended to be complex and time-consuming.
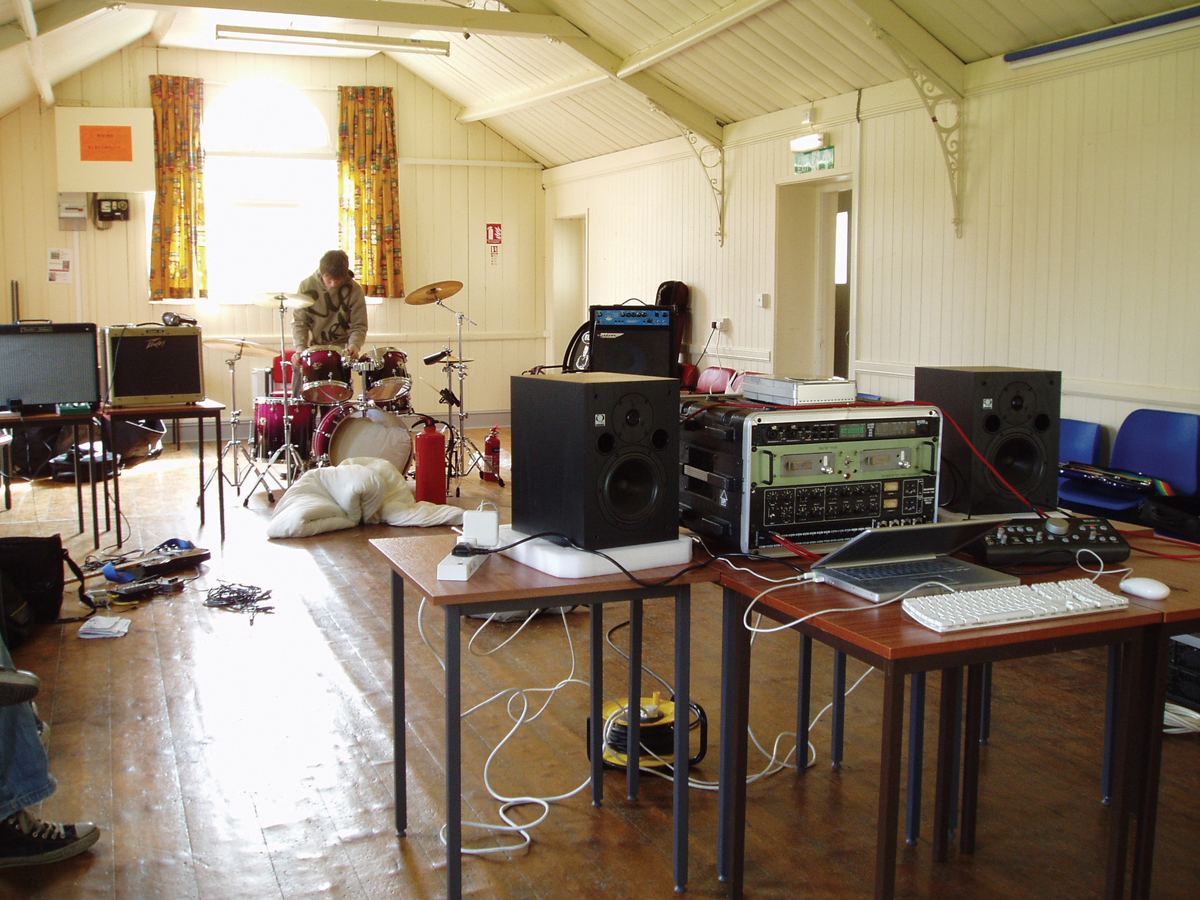
Unless you live in a mansion, it’s easier and more practical to get dry and intimate drum sounds when recording at home than big, ambient drums. If you want the latter and you can’t afford a studio with a large live room, consider recording on location in a village hall or somewhere similar.
Recording in a living room with a carpeted floor will result in a drier sound. To minimise ambience further, draw curtains or close blinds to prevent sound from bouncing off windows. You might also drag in some mattresses to soak up high frequencies. You can lean them against the walls around the drum kit to stop hats and cymbals bouncing around. If you have any spare mic stands, try placing them a few feet apart and drape blankets or duvets over the top as makeshift gobos.

Tuning Basics
Well-tuned drums sound bright and clear, but when they are carelessly tuned they can sound dull and lifeless. You may also get strong harmonic overtones that dominate the sound. Unfortunately, drummers can’t always be relied upon to tune their kits properly, and close microphones tend to expose sonic issues that may go unnoticed with ambient microphones. The only way to take control is to learn the rudiments of tuning yourself. Fortunately, drum keys are cheap and online video tutorials are easy to find.
Set-up is key, whichever method you go for…
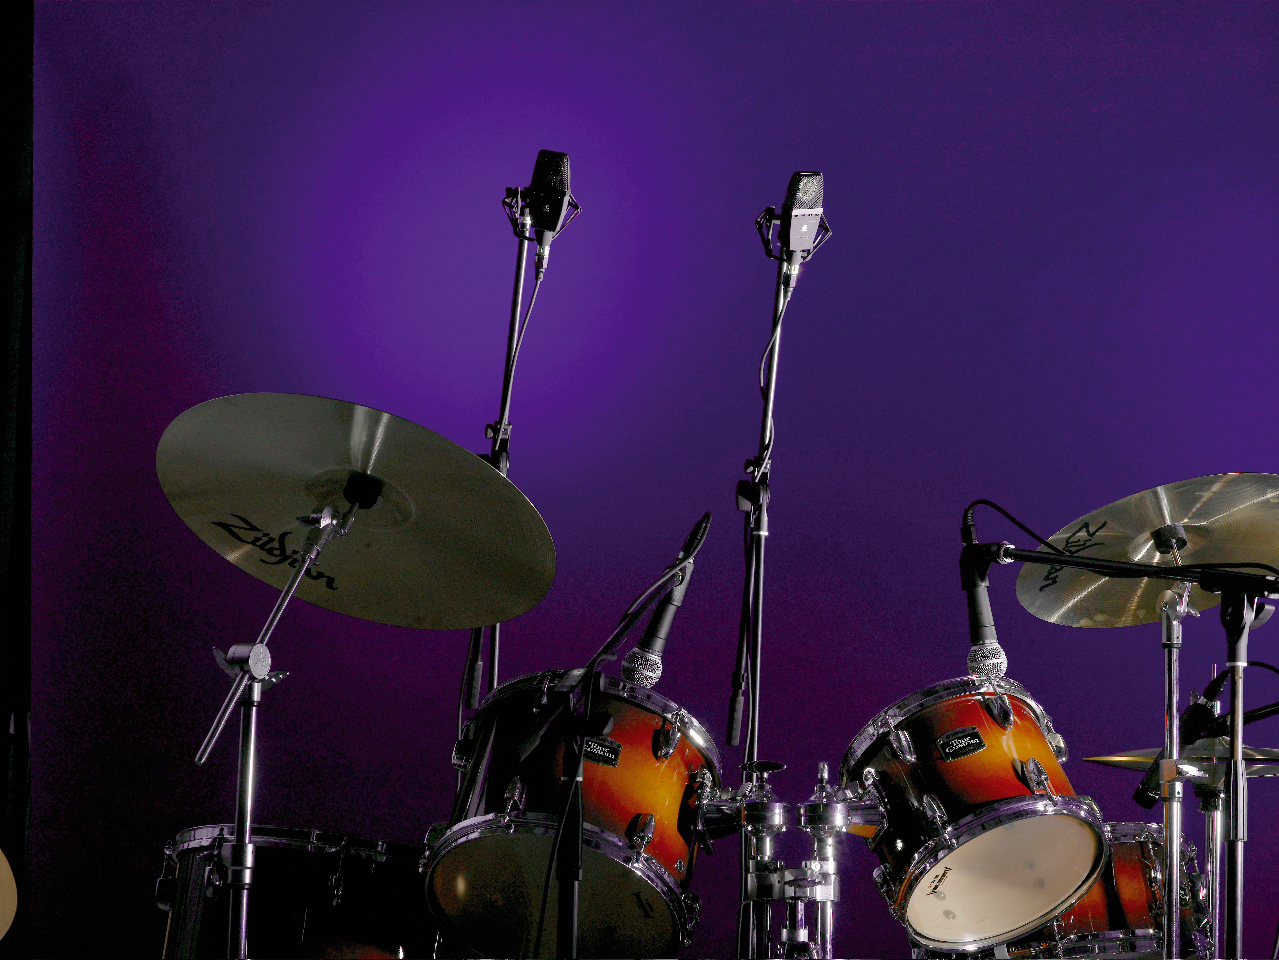
Assuming you’ve created a suitable recording space and have an appropriate, well-tuned drum kit, it’s finally time to mic it up. Let’s examine the various ways to do this, starting with a simple mono setup.
Mono Tones
If you want your drum track to sound like a kit being played in a room, then there’s not much point in sticking a microphone on each individual component, stripping everything back and trying to piece it all back together again. You wouldn’t mic-up individual strings on an acoustic guitar or a grand piano, so there’s no overriding necessity to take that approach with drum kits.
Walk around the drum kit as it’s being played and try to identify the areas where the sound is clear, powerful and well balanced. When you have identified a ‘sweet spot’, place a microphone right there and take a listen. You may get good results with the mic a few feet above the drummer’s head, or even set back behind the drummer. However, for a mono sound, most engineers place the microphone out in front of the drums, a few feet above the top of the kick drum.
Simple Stereo
Like mono recording, the easiest stereo techniques stem from conceptualising the kit as a whole rather than a collection of individual parts. However, you do need to think outside-the-box regarding mic placement if you are to capture a balance that corresponds to the actual sound of the kit.
Unfortunately, two microphones in conventional ‘overhead’ configurations – like spaced and coincident pairs – are unlikely to produce the desired results because the cymbals will dominate the toms and the kick drum. Whether you’re a novice recordist, a pro engineer who has become sick of putting up loads of drum mics that never make it to the final mix or you have only two microphones to play with, the Glyn Johns approach is the ideal solution.
Glyn Johns stumbled across his trademark technique while recording John Bonham for Led Zeppelin’s first album. A condenser or ribbon mic is placed between the drummer’s shoulder and the ride cymbal and aimed across the drum kit towards the snare. A second (preferably matching) microphone is placed directly above the snare drum.
You should use a cable to check that the distance from the centre of the snare drum to the capsule/ribbon is identical for both mics. One variation is to place the second mic in front of the kit, aimed towards the snare in the gap between the hi-hat and the first rack tom.
Pan your overhead mics left and right until the snare just begins to lose focus, then toe the pan pots back in very slightly (they usually end up around 10 and 2 o’clock). Blend in a kick drum, mic panned dead-centre, and the result should be a sound that accurately represents the drummer’s natural balance.
Click Here to Read our Guide to Drum Skins
Multiple Mics
Most engineers will close-mic drums, even if they are uncertain whether or not the close mics will be used in the final drum mix. After all, there’s no reason why close-mic’ed drums can’t be combined with a mono mic or ‘Glyn Johns’ pair to add punch or enhance definition.
Before we look at mic’ing individual drums, it’s worth being aware of some of the technical and practical issues. We suggest deciding on your kit mics/overheads configuration before placing any close microphones. The kit/overhead mics can then be moved around freely and left in the optimum position while the close microphones are set up.
When using multiple microphones on a drum kit, it’s vital to ensure that all the signals are in-phase – or at least as close as they can be. Switch your desk or monitor controller to mono or simply pan everything dead-centre. Push up the two kit/overhead mics and flip the polarity of one channel using the phase button on your mixing desk or preamp. If the sound gets thinner, flip it back. But if it gets fatter, leave it flipped.
For a more natural sound consider placing the overheads in front of or behind the drum kit, using a more conventional stereo microphone array such as spaced omnis or a near coincident pair.
Starting with the kick, add just enough to the overheads so that the kick track is at about the same volume as the kick in the overheads. Flip the phase of the kick track and check out which setting sounds best. It’s sometimes hard to be entirely sure, but the process becomes quicker with practice. Mute the kick track and repeat this process, one at a time, with every other microphone.
You will often find that the snare sounds fatter in combination with the overheads when the top snare mic’s polarity is flipped. If that’s the case, mute the overheads and check that the underside snare mic is still in-phase with the top mic. This is important to know because you might dive into compression and EQ to fatten up a snare sound when all that’s really wrong is a phase correction.
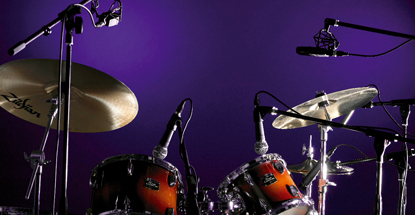
Drum Overheads
Unless a lo-fi sound is required, dynamic microphones are seldom used. Condensers are the usual choice and ribbon microphones are becoming more popular. Small-capsule condensers provide fast transient response with plenty of detail, crisp stereo imaging and extended high-frequency content.

Placing the overheads close to the cymbals will give better separation, but this may be at the expense of a recording that captures the sound of the kit as a whole
Large-capsule condensers image less crisply, but they may sound smoother and more full-bodied. Ribbon mics sound fattest and smoothest of all. The majority will attenuate high frequencies, which is ideal if you’re recording trashy-sounding cymbals in a bright room. Fortunately, ribbons also respond well to equalisation when they need brightening up.
Typically, a pair of microphones (matched if possible) is used in a stereo configuration. Spaced stereo is common, but make sure you measure the distance from the centre of the snare drum to each mic. They should both be at an identical distance from the snare if you want to minimise phase-shift.
Coincident stereo techniques produce crisper and more sharply focused images than washy spaced pairs, but if the centre focus of the two mics is directed straight down, the snare drum will appear off-centre in the stereo image. The solution is to turn the microphone, or stereo pair, to centralise the snare drum. If you don’t, the stereo imaging will be vague and smeared when you add the close-mic’ed snare to the mix.
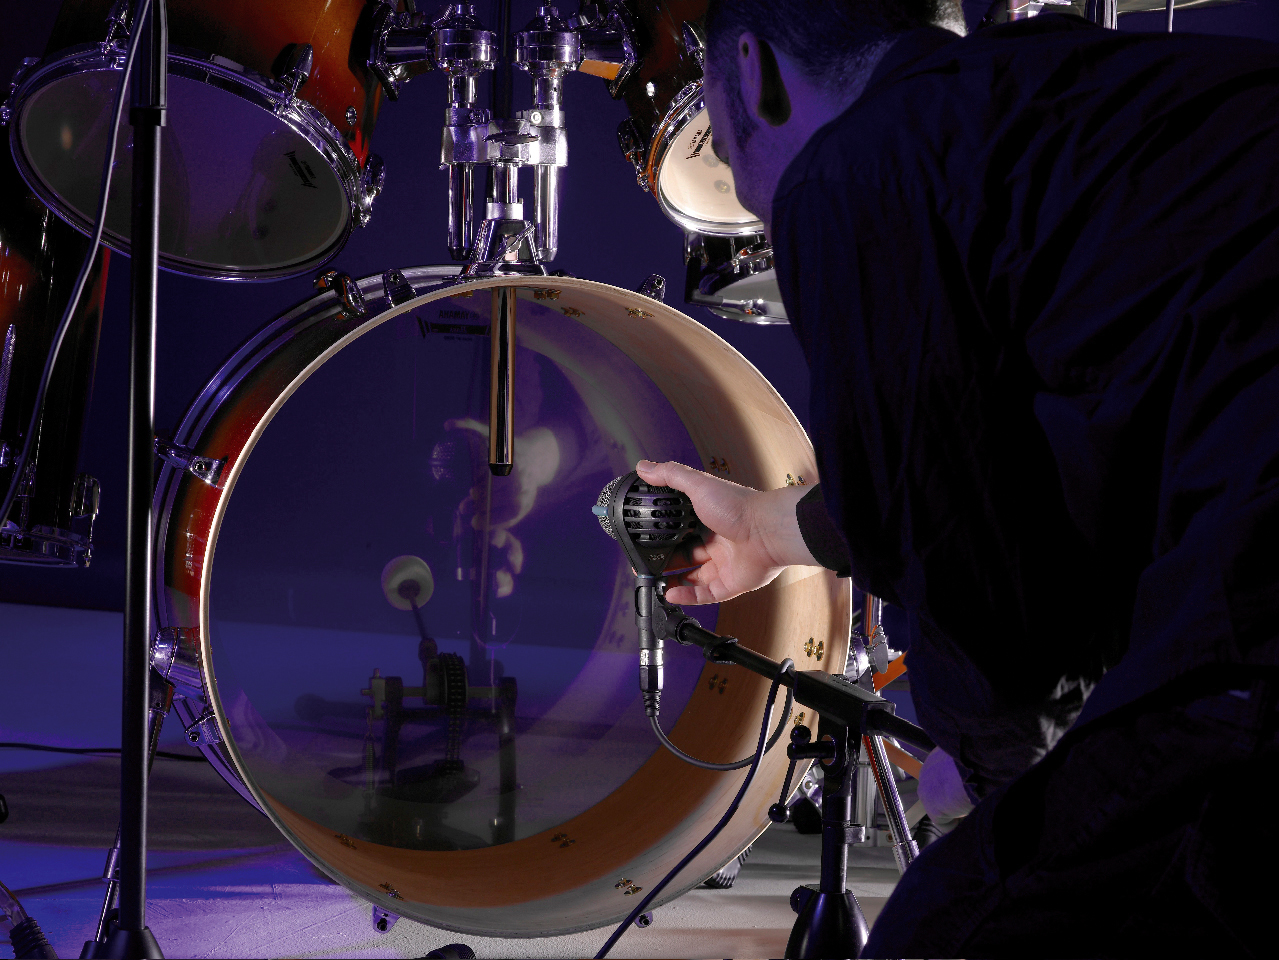
Bass Drum
Hand-held dynamic microphones designed for vocalists tend to have bass roll-off. This is done to overcome handling noise and proximity effect and, as such, they are unsuitable for recording bass drums. In fact, achieving an extended low-frequency response presents a challenge for any moving-coil microphone manufacturer and moving-coil mics for kick drum and bass are specialised items.
These days, most are voiced for instant results in a rock sort of way – ie, lots of treble and bass with pre-scooped mids. Predictably enough, older designs are more likely to get you old-school kick sounds, but beware of vintage AKG D12s, D20s and so forth because AKG no longer supplies spare parts.
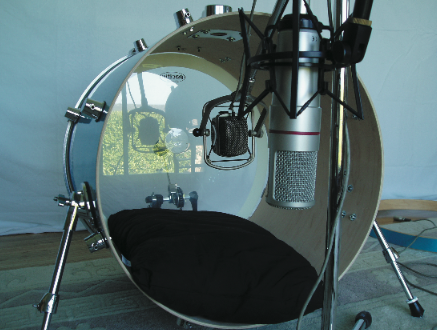
Here an AKG D20 is placed inside the kick drum shell with a Red 5 RV15 tube mic out front.
Some modern ribbon microphones, like Royers, are able to handle the high sound pressure levels (SPL) inside a bass drum, but you should check with the manufacturer before risking a ribbon mic. Most condenser microphones are capable of capturing very low bass frequencies, but not all can handle high SPLs. Attenuation pads sometimes help, but they won’t prevent capsule distortion.

Although small-capsule condensers are rarely selected for bass and kick duties, many are ideally suited due to low proximity effect and very even low-frequency response. Switching to omni might extend a condenser mic’s low-frequency response, but spillage may become an issue.
Engineers sometimes build ‘drum tunnels’ using packing blankets, duvets and whatever else might be available. Wrap them around the outside of the drum shell and use a stool or chair to extend the tunnel while sealing the edges with gaffer tape. This can dramatically reduce spillage, and the second microphone can be placed further away from the drum for deeper tone.
If the front skin of a kick drum is left on, in the jazz style, it produces a boomy, more rounded sound with a discernible note.
Some recordists favour placing one microphone actually inside the drum – moving it closer to the beater for a more attacking sound or further away or to the side for more tone and low end. You can also use two microphones in combination – maybe a moving-coil up-close for attack and a condenser set back to capture a little more natural tone.
Try using a second bass drum with the front skin left on as a resonant drum. Place your close mic inside kick No1 and the second drum directly in front of the first with microphone No2 inside it. With two drums, the tunnel will be easier to construct and the blast from the first kick will set the second drum skin in motion. You can get your punch from drum No1 and your low end and tone from drum No2.
The woofer from an old set of monitors (like an NS10) can be set up in a clamp next to the kick and used as a second dynamic mic. It will capture some serious lows, but since it’s not full-range, you’ll notice less phase-shift when you combine it with the close microphone. A PZM/boundary mic placed inside the drum is a funky, decent-sounding alternative.
Snare Drums
Nobody in their right mind would place their ear right next to a snare drum. The sound we associate with snare drums comes from listening, at a distance, to a combination of the top skin and the resonance of the metal wires beneath. However, to minimise spillage we are obliged to use close-mics, so to capture the full snare sound it’s common practice to use two mics placed top and bottom.
All things being equal, the two signals will be out-of-phase. Check that the top mic is in-phase with the overheads then balance the volume of the top and bottom snare mics and reverse the phase of the bottom mic. They’re in-phase when tone is fattest. You may choose to record the top and bottom snare mics to separate channels to give yourself maximum scope for tone-shaping later. Other interesting techniques include placing a lavalier mic through the vent hole or on the side of the snare shell.
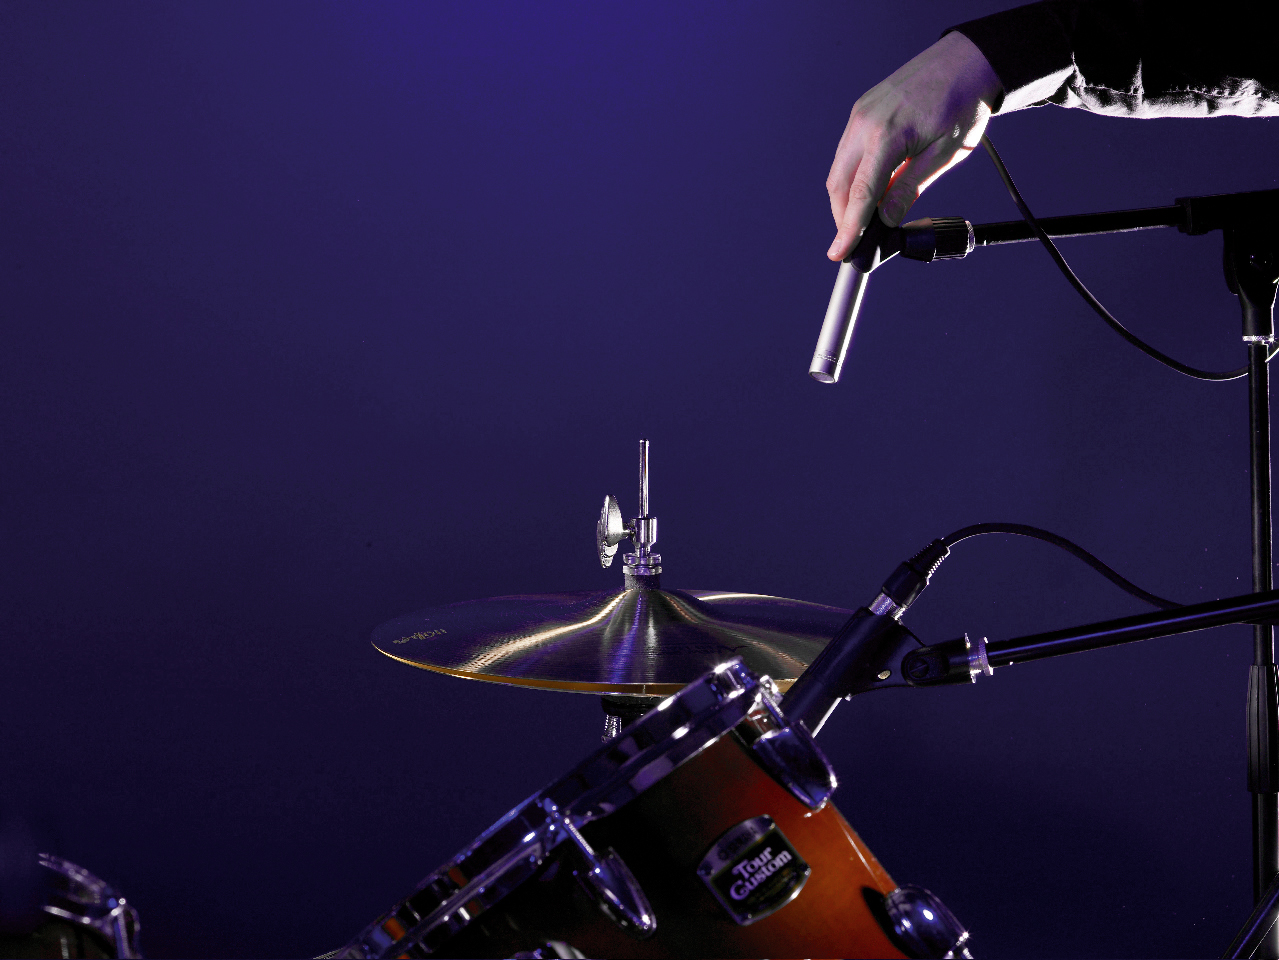
Placing a condenser mic a few inches away from where the stick hits the hi-hat provides the most natural sound. If your mic supports it, try using some bass roll-off as well.
Condenser microphones often have a fast and realistic transient response. While this means they’re technically good, spiky kick and snare transients aren’t necessarily desirable and they will require limiting somewhere in the production process. Many engineers are happy to use moving-coil mics, but small-capsule condensers provide extra fidelity. You could also try aligning the capsules of moving-coils with a condenser and taping the microphones’ bodies together to capture more of the snare’s natural tone. This works particularly well for drummers with a lighter touch, or those who use hot rods and brushes.
Snare drums are naturally ringy. Sometimes a snare with a distinct tone works well, but a drier thud may be preferred. Drummers often use gel and dampening rings on the top skin, but you may achieve the required degree of deadening by sticking rolled-up kitchen paper to the skin with thin strips of gaffer tape. Other old-school techniques include draping a tea towel over the snare or the disco wallet trick. It may seem implausible, but placing a wallet on top of the snare drum can be a shortcut to authentic 70s snare sounds.
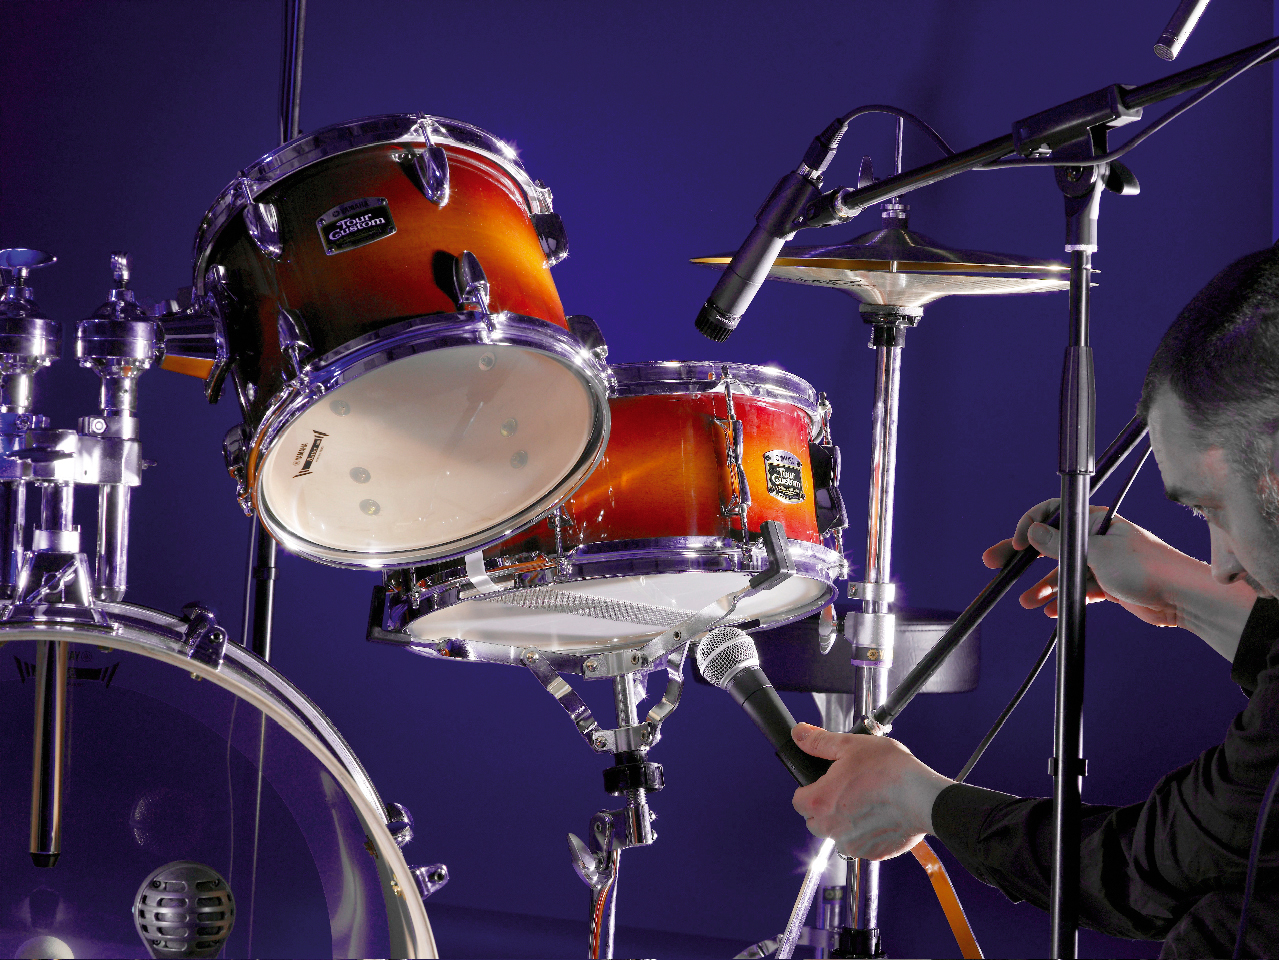
An additional phase-inversed bottom dynamic mic can be used to pick up the ‘crack’ of the snare wires
In the next part we’ll be looking at the mixing and mastering processes when it comes to producing acoustic drums in the final part of the series.