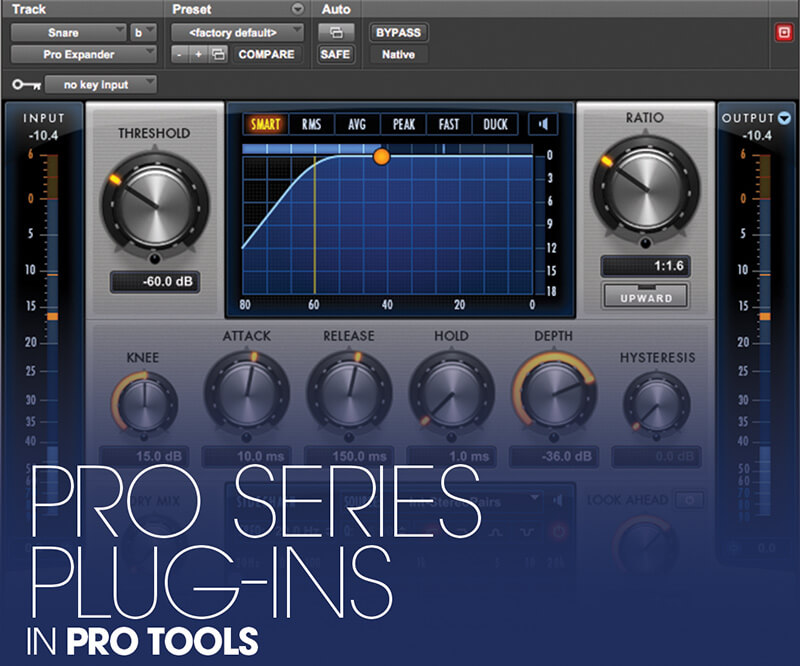
Mixing Drums using the Pro Series Plug-ins in Pro Tools
The Pro Series plug-ins are now available as subscription extras for Pro Tools. Mike Hillier demonstrates how to use them to mix drums… When it comes to dynamics, Pro Tools users are now spoilt for choice. The old Dyn III-era plug-ins look dated, but are still surprisingly versatile tools, and they are still in daily […]
The Pro Series plug-ins are now available as subscription extras for Pro Tools. Mike Hillier demonstrates how to use them to mix drums…
When it comes to dynamics, Pro Tools users are now spoilt for choice. The old Dyn III-era plug-ins look dated, but are still surprisingly versatile tools, and they are still in daily use in studios around the world – as is the Bomb Factory BF76 1176 emulation, while the Channel Strip plug-in takes the dynamics section from the Euphonix consoles.
All of these are included in Pro Tools and Pro Tools Ultimate as standard, but if this isn’t enough, Avid also has the Pro Series, which can be purchased separately, or added to your subscription bundle as an optional extra as part of the Complete Plug-in Bundle. The Complete Plug-in bundle costs £4.80 a month, or £46.80 a year (inc. VAT).
The Pro Series is made up of four dynamics processors: the Pro Compressor, Pro Expander, Pro Multiband Dynamics and Pro Limiter, and one left-field inclusion, the Pro Subharmonics low-end synthesiser. In this workshop we’re going to concentrate on the first three of these dynamics processors and the Pro Subharmonics.
Hear the drummer (get wicked)
When mixing drums we like to start simple, bringing up a quick balance of all the channels and deciding from there what needs to be fixed first of all, before moving on to any creative experiments. Listening to the overheads first, and bringing the other elements in around this to build up the bigger picture.
Our initial feeling was that the overheads were a little boxy, so we applied a little corrective EQ to de-emphasise the low mid-range and hype the upper mids. With this done we added the kick and snare direct mics. Bringing in the kick mic adds more attack, but it also brings a little muddiness back and doesn’t have quite the weight we would want.
Before EQing we tried switching the polarity of the kick, which helps a little, but we still felt it needed some EQ. We opted to take some low-mids out of the kick and added a little weight in at 40Hz. We also notched out what we felt was a problem frequency at 130Hz.
The snare direct mic is much closer to what we were wanting to get from the snare direct mic, but still had a few problem resonances that we notched out. Finally we brought the Room mics in filtering out much of the low-end in the room, and taming the highs a little too.
The drum kit was starting to sound more like a kit, but we still wanted to gate the kick and snare direct mics to try and clean up the sound around these, particularly the hats, which can sound a little boxy and phasey when the overheads are blended with the direct mics.
In the workshop we show how to add the Pro Expander to the snare drum channel, but we also ended up adding it to the kick drum, to control bleed from the snare, but also to shape the kick tail, tightening up the sound considerably.
To bring each of the elements under greater control we’ve added an instance of Pro Compressor to the Snare, Overheads and Room. And we explain in detail how we got the Overheads to sound right in the step-by-step section of the workshop. But we’ve used a similar technique to shape the snare with the Pro Compressor, and a more judicious use of compression on the room to bring up the room response.
With this all done, the channels will need a little re-balancing, as some channels may have become louder or quieter depending on the specific settings used. We opted to pull the Room down a little, now we’ve applied quite so much squash to it.
Shaping the tone
The kick drum still sounds a little weak, and while we could add some depth with EQ, compression, parallel compression, even distortion. We’ve opted in this instance to use the Pro Subharmonic to dial in just a little extra synthesised low-end.
Finally we added the Pro Multiband Dynamics to the whole of the drum group. This ties all of the sounds together, and also gives us another opportunity to shape the tone of the drums submix. This is one of the most powerful tools on display here.
The Multiband can completely alter the sonic characteristics of the mix, so we’re using it very subtly. If our mix had been that far off, we would have mixed it differently in the first place! This is just a starting point with these tools, showcasing the quality and the versatility of the Pro Series plug-ins. Be sure to experiment on your own projects, combining these plug-ins with your own mix techniques to get the results you want for your mixes.
Pro Series Plug-ins in Pro Tools: step-by-step
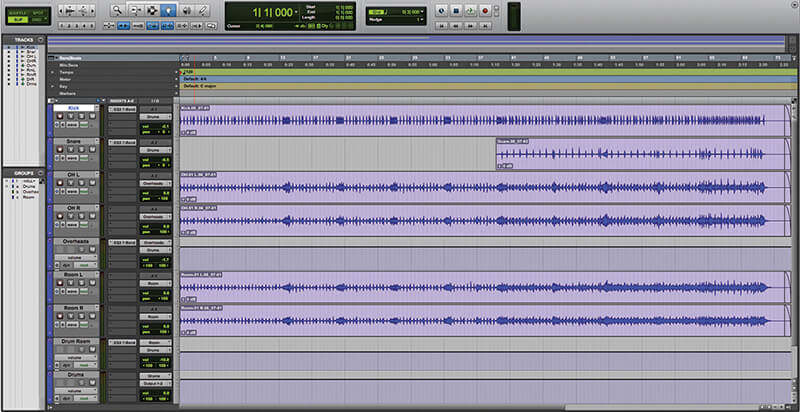
1. The Workshop session file opens up with a multi-tracked drum recording from last year’s Recording a Band feature with Reptile.
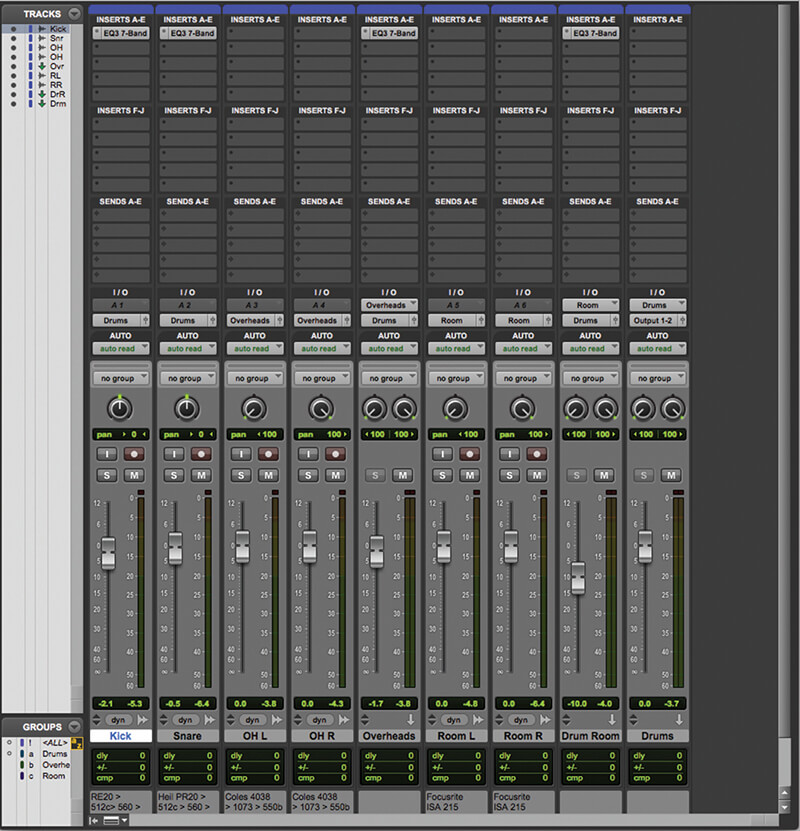
2. We’ve routed the overheads and room channels to stereo busses, and then created a stereo drums buss. We’ve also applied a little EQ to the Kick and Snare channels and the Overheads and Rooms busses before starting.
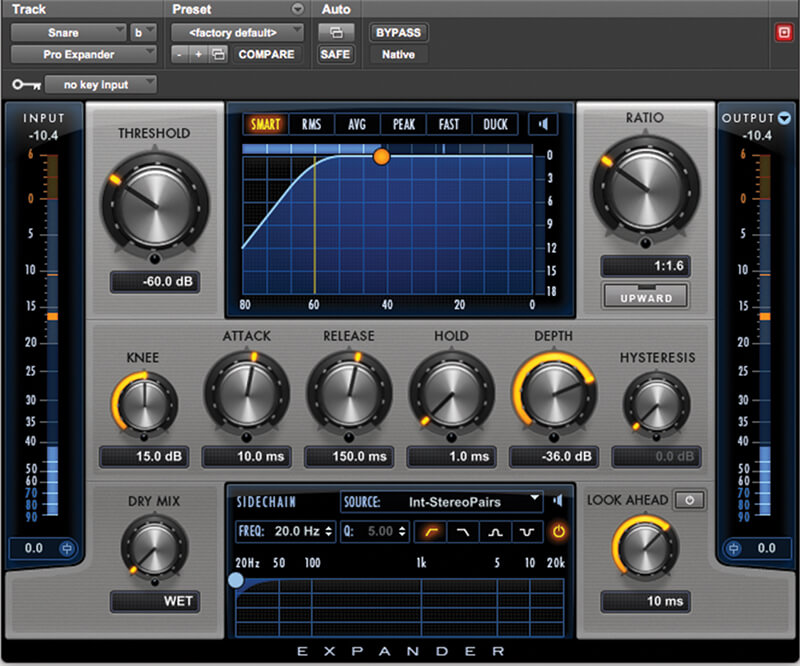
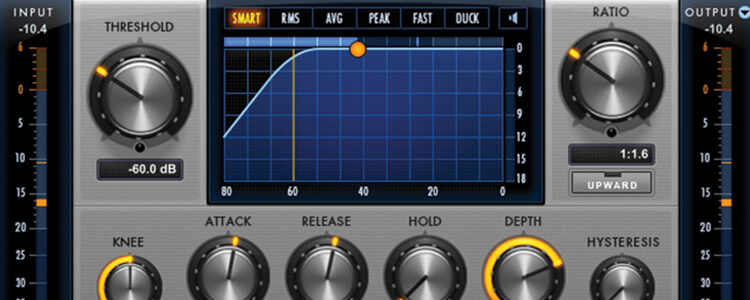
3. There’s a lot of bleed on the snare, add an instance of Pro Expander to the Snare channel. We can use this to gate the bleed, passing only the snare hits through.
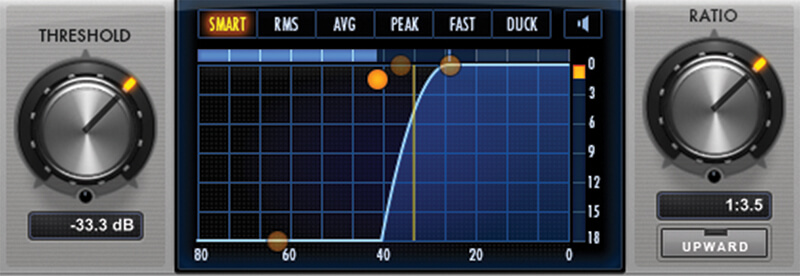
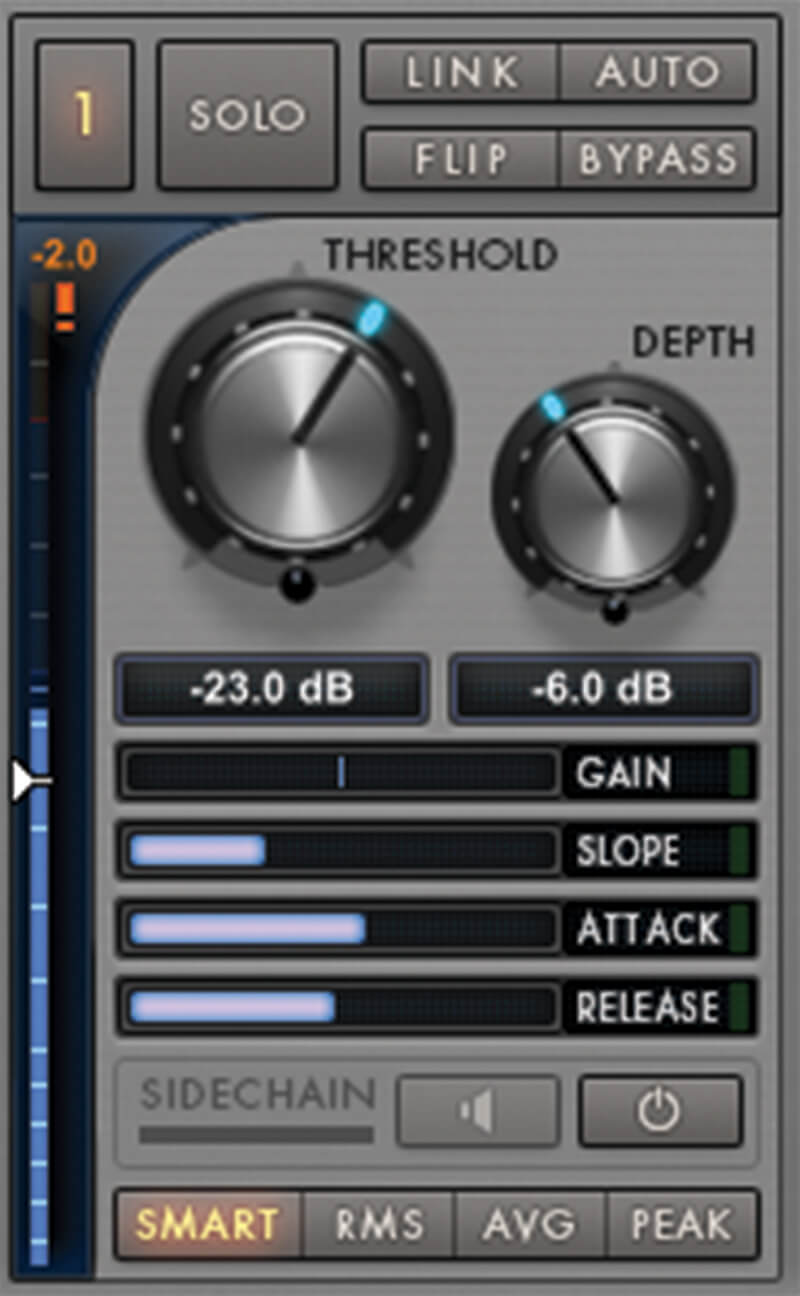
4. The most important parameters on any dynamics processor are the threshold and ratio. We’ve tried to set the threshold so that with a fast attack and release we can only hear the short attack of the snare.
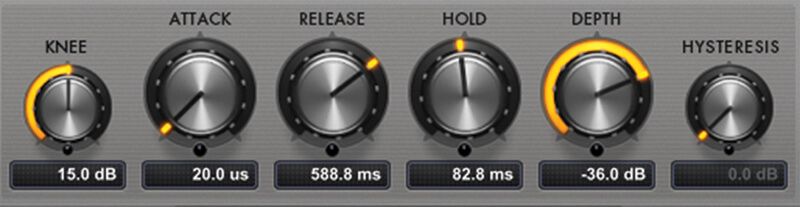
5. We can dial up the Hold parameter until all of the body of the snare is being let through. Finally, dial up the Release to set the fade. As you dial up the Release you can pull the Hold back a little too.

6. One cool trick is to use the side-chain of the Pro Expander to dial in a frequency range with only snare. Here we’re using a tight band-pass filter around 490Hz, which sounds awful solo’d, but has no kick and no hats.

The Pro Limiter is aimed more at mastering applications than mixing, and has some fantastic tools for reading loudness, making it really simple to adjust loudness to reach certain targets – for example Spotify loudness levels, or R.128 for broadcast.
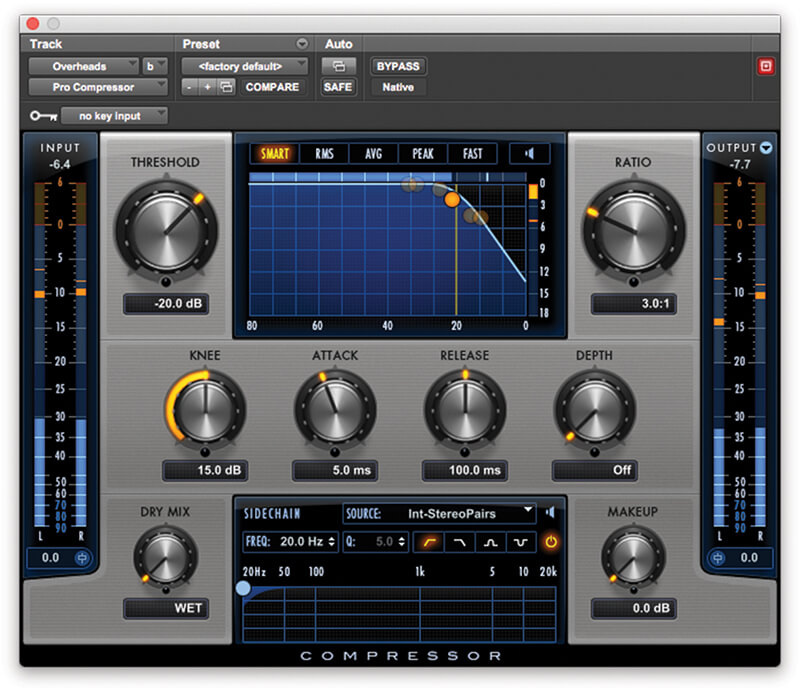
7. Add an instance of Pro Compressor to the Overheads channel. This is the primary focus of our drum sound, and we can use a compressor to bring it under control, adding glue, depth, consistency and tightening up the tone.
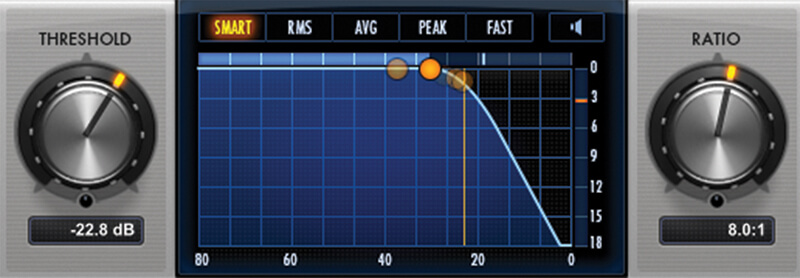
8. Again, the most important parameters are the threshold and ratio. We’re going to use a fairly high ratio of 8:1. Triggering around 3dB of gain reduction of the loudest hits.
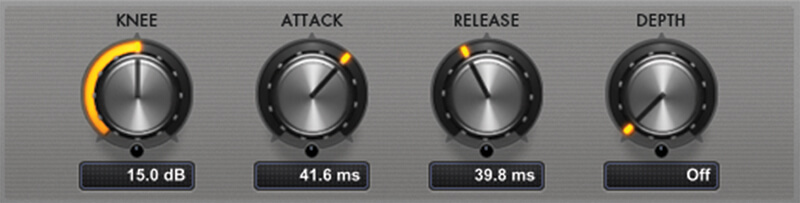
9. By using a slow attack we allow the transients at the front of the hits to pass through mostly unchanged, but bringing consistency to the body of the hits. A fairly fast release ensures the compression is out before the next hit.
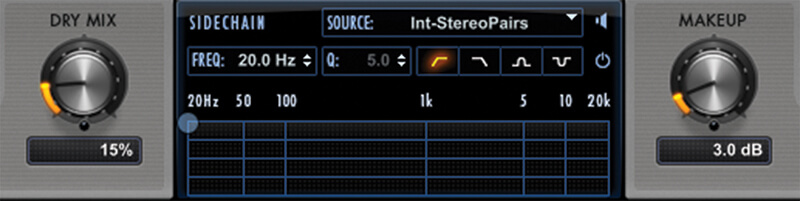
10. Here, we’re using the Dry Mix control to emulate a parallel, New York-style compression, blending the compressed signal with the raw unprocessed signal, bringing a little more dynamic back into the tone.
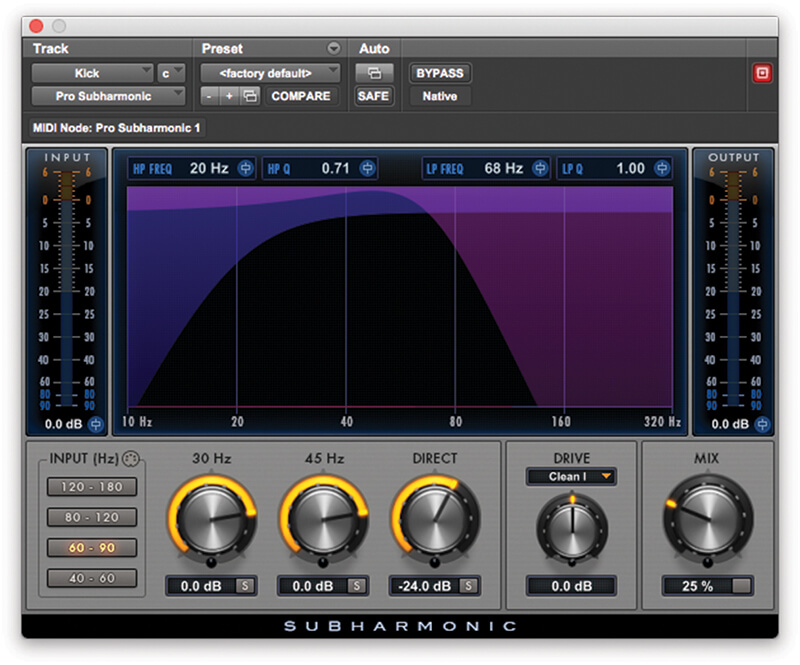
11. The kick drum is a little lightweight. We can add extra heft to it with the Pro Subharmonic plug-in. This plug-in synthesises subharmonic content in response to the incoming signal.
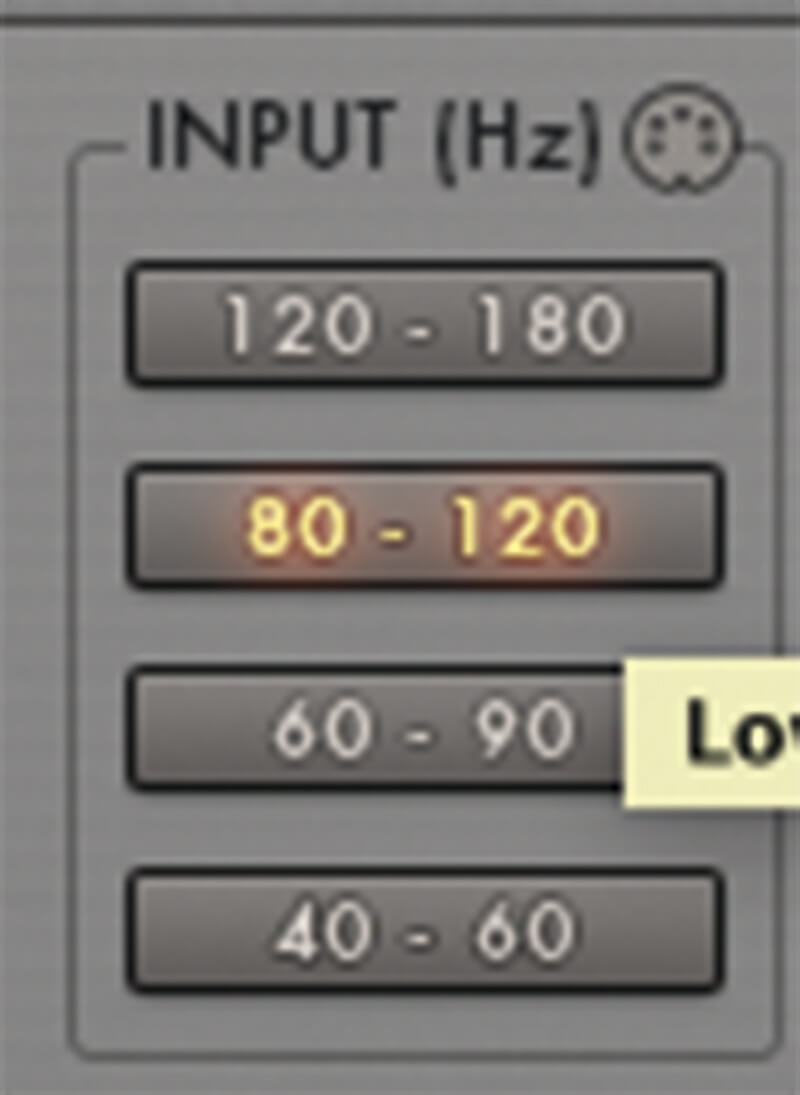
12. Most of the energy in our kick drum is quite high, around 90Hz. So we’ve set the Input to listen in the 80-120Hz region.
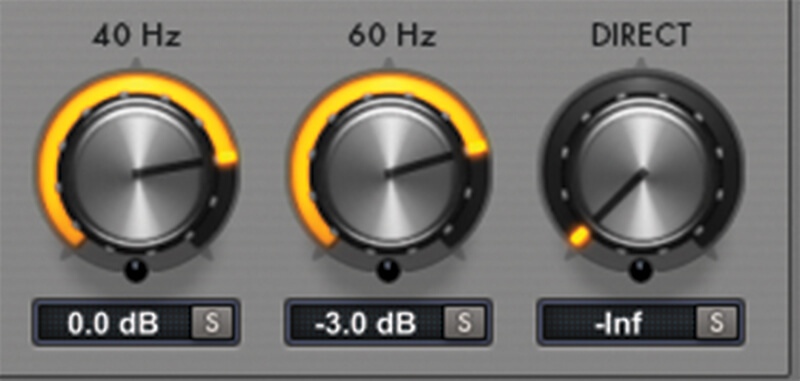
13. With the input set at 80-120Hz, the plug-in will synthesise weight at 40Hz and 60Hz. Dial both of these up and solo each one to listen to the effect it has on the overall tone of the kick. Dial back until you have a tone you want.
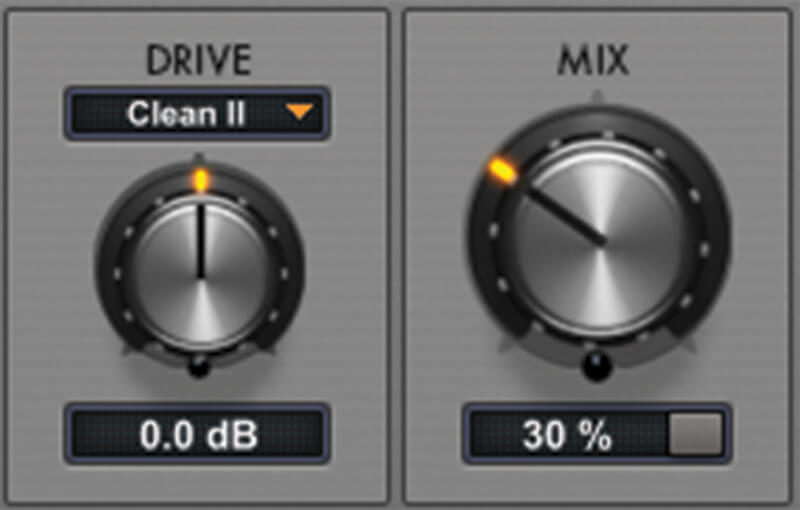
14. We dialled the direct tone out completely, and instead we’re using the Mix knob to dial the direct tone back in. But you could set this to 100%, and then use the three gain knobs to shape the tone.
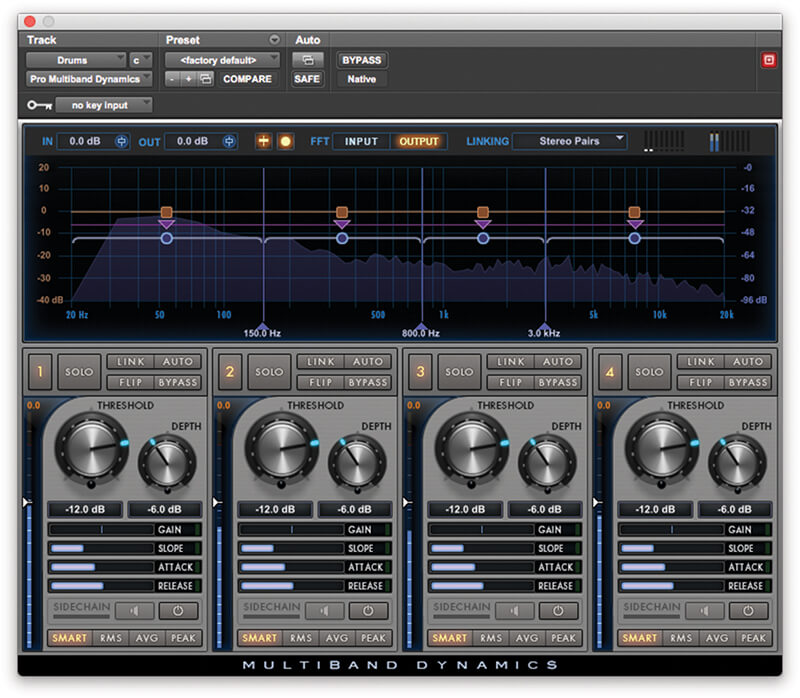
15. Finally, we’re going to add the Pro Multiband Dynamics plug-in across our drums buss. This is a very powerful tool that can be used to shape the overall drum sound.
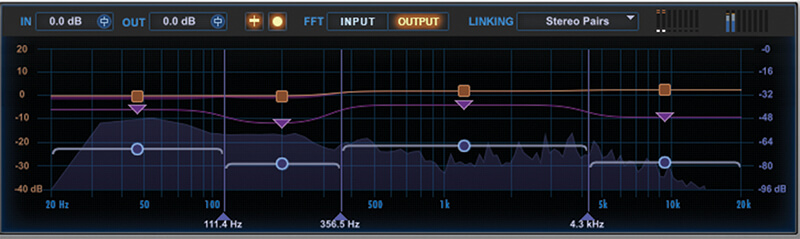
16. With multiband processors the most important task is to tune each of the bands. You want each band to be focussing on a different section of the signal. Here we’ve dialled the first band across the kick and snare fundamentals.
17. Once you’ve configured the bands, using the multiband is much like using any other compressor, with ratio and threshold being the most important controls, and attack and release providing the tone shaping.
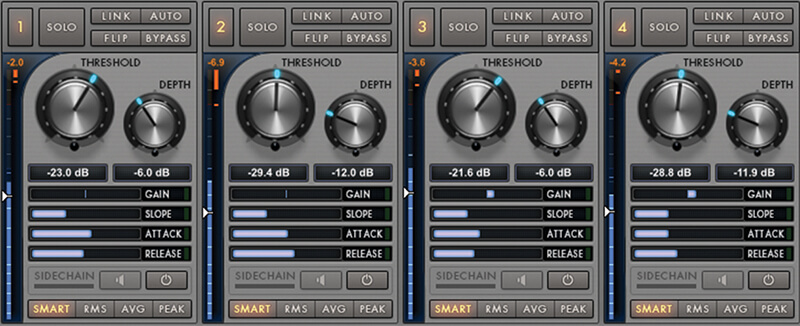
18. Remember, a little goes a long way with multiband compression, and you don’t have to use every band. You can also use the gain parameter as a basic EQ, boosting or cutting each band appropriately.