Pro Tools Tutorial: Cutting Edge Production Techniques – Custom Channel Strips
Mastering your EQ is essential in removing unwanted frequencies from your mix. Mike Hillier figures out which to choose, and when to use them… High-end analogue channel strips, including those found on many large-format consoles, will usually come with a switch enabling you to position the EQ before or after the compressor. Each position has […]
Mastering your EQ is essential in removing unwanted frequencies from your mix. Mike Hillier figures out which to choose, and when to use them…

High-end analogue channel strips, including those found on many large-format consoles, will usually come with a switch enabling you to position the EQ before or after the compressor. Each position has its own advantages. Changes made to the EQ before the compressor will affect how the compressor responds, but because of the compression small EQ changes will be less noticeable. While EQ placed after the compressor is more obvious and has no effect on the compression response.
But why restrict yourself to only one of these options? Mastering engineers often use a combination of different EQs placed before and after the compression stage. And while it would be expensive to start placing EQs before and after compression in analogue, in the digital world it’s simply a case of utilising another plug-in.
As a rule of thumb, use subtractive EQ before the compressor and additive EQ after the compressor.

Pulling unwanted frequencies out of the signal before it hits the compressor means the compressor will only be responding to frequencies that you want in the signal and not to those you don’t.
A high-pass filter will remove any sub-harmonics and rumble that may have been captured in the signal, but tight notches are great for removing resonant frequencies, especially in acoustic bass instruments and drums, which could easily trigger a compressor. Boosting before the compressor will cause the compressor to respond more to the boosted frequency range than it did before, in turn bringing the signal down more in response to you trying to lift it up.
There may be times when you might want the compressor to react more to certain frequencies, such as forcing a bass into pumping, but it’s rare. An exception to this is the top-end ‘air’ frequencies. Boosting the ‘air’ frequencies is very unlikely to result in harder compression, because the top-end has much less energy than the bass frequencies. So boosting at the top before compression isn’t as problematic.
In fact, as many compressors will introduce a little bit of noise – which is most obvious in the top-end – boosting the top before you compress will help to keep your signal-to-noise ratio as low as possible. This is because by boosting before the compressor you’re boosting only the signal, and not the noise added by the compressor.
Sorting out Subtraction
In general we like to use our favourite feature-packed digital EQs for the subtractive part of the process, before the compressor. The built-in EQ III in Pro Tools is a surprisingly good choice, as are those in other DAWs, and third-party options such as FabFilter Pro-Q2, Sonnox EQ or Waves H-EQ. These EQs provide far more flexibility when it comes to carving out specific problem frequencies than an analogue, or analogue-modelled EQ.
After the compressor we usually opt for something with a little more colour, so we’ll try a few EQs to see which works best on the signal we’re working on, and within the mix as a whole. Drums, for example, can benefit from a little extra punch, with something like the Waves API 550 EQ, or the UAD Neve 1073, while vocals might benefit from an EQ with a very smooth upper-mid-range and plenty of air, such as the Maag EQ4. There are plenty of options.
Focus On User Defaults
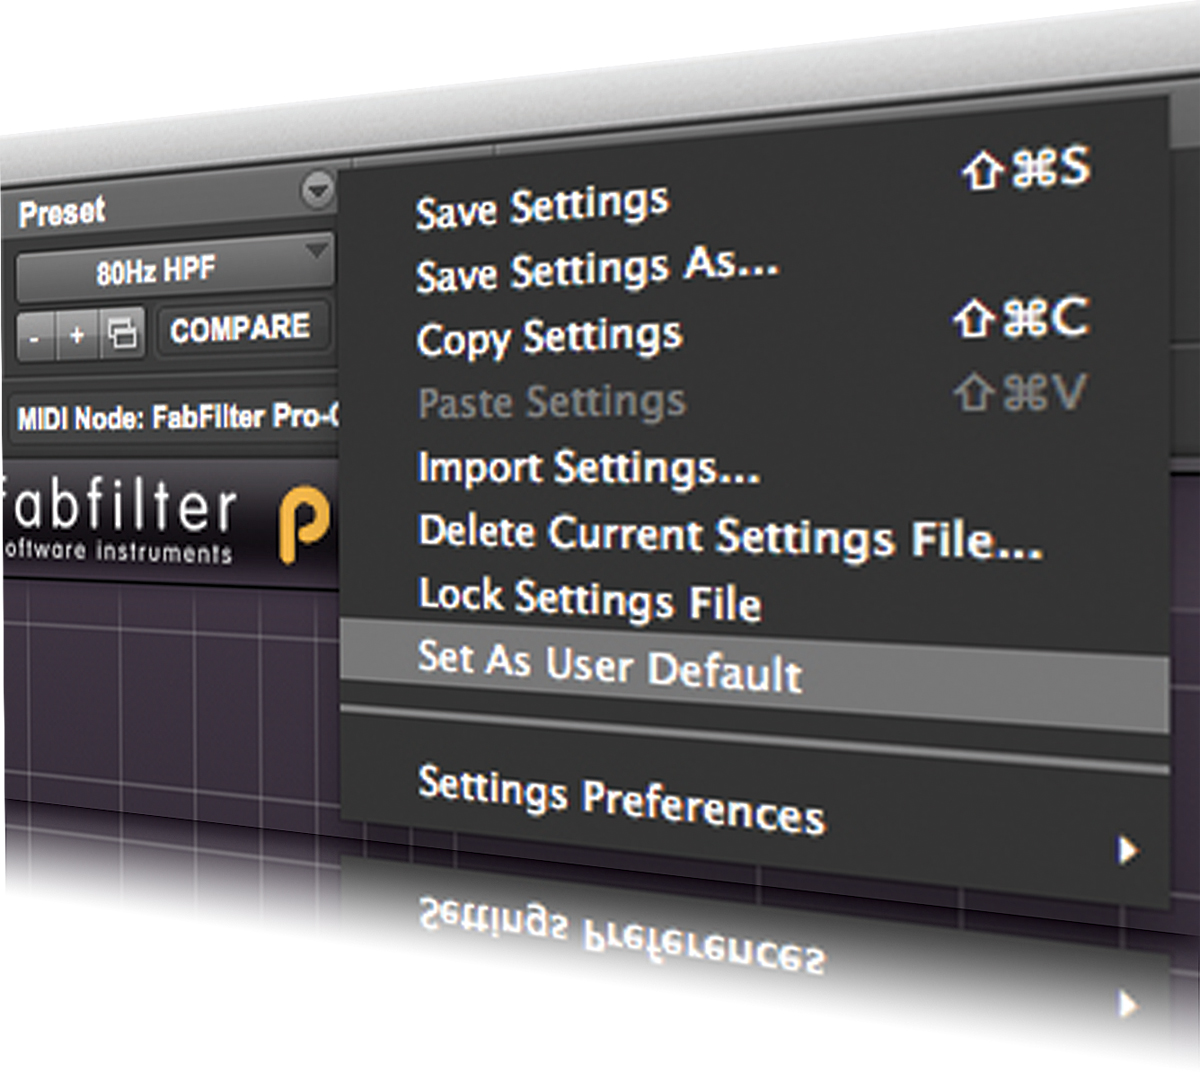
More often than not when adding an instance of an EQ plug-in such as Pro-Q2 we engage a high-pass filter around 80Hz. We may move it, but this is a good place to start. To save us time, we’ve made this the factory default, so whenever we add an instance of the plug-in it has this preset ready for use.
To do this, simply Save your preset and then from the drop-down Preset menu select ‘Set as User default’.
Step By Step – Custom Channel Strips
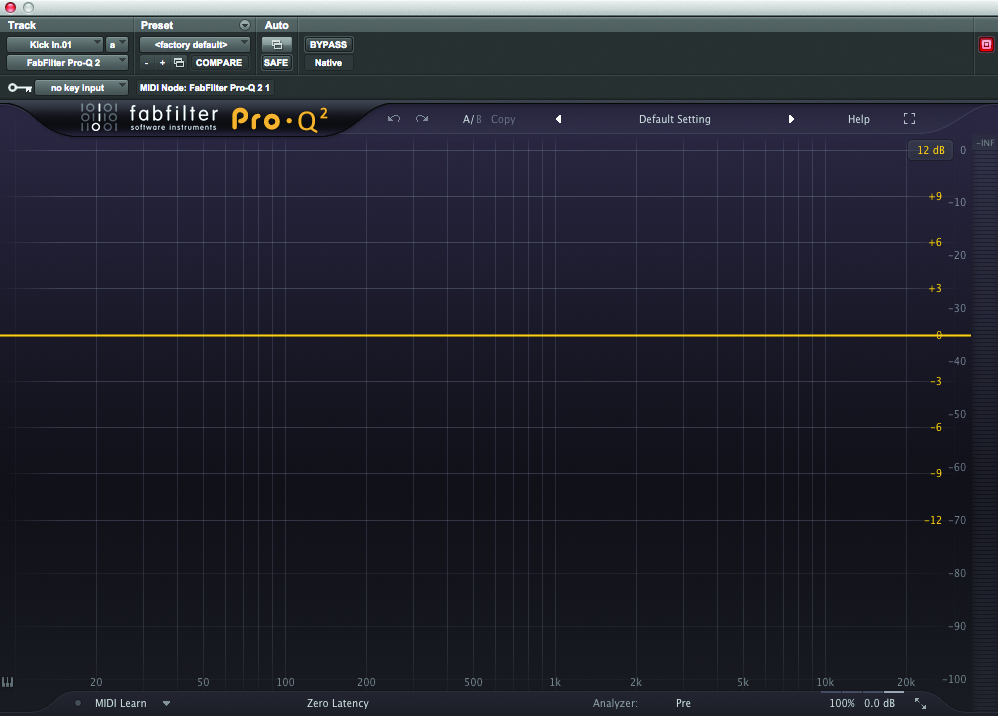
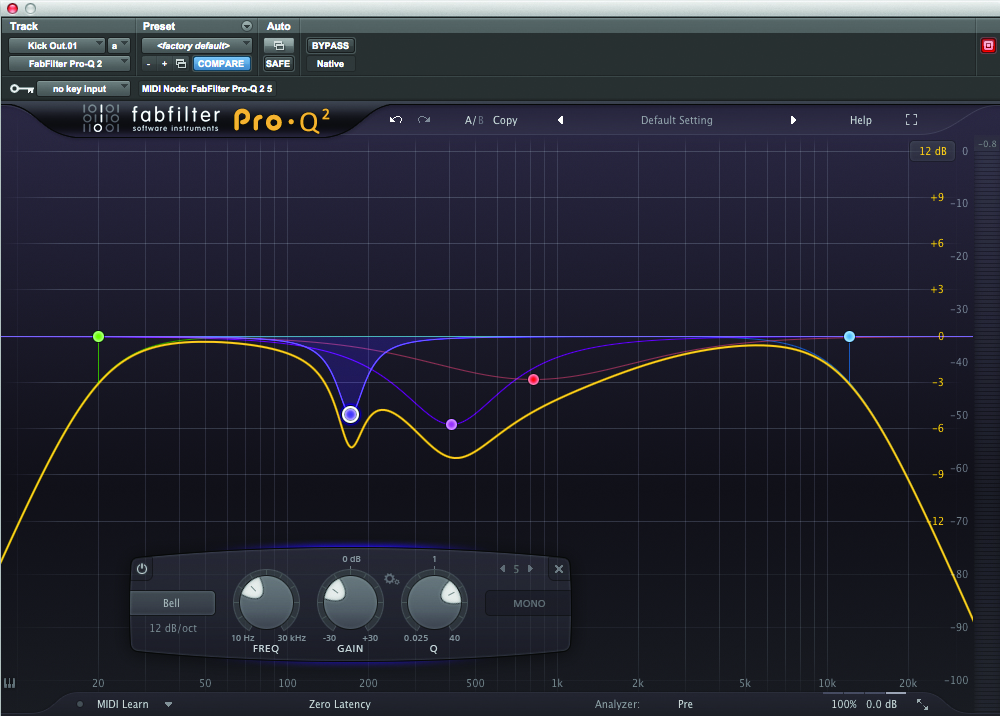
1: The first plug-in we’re going to add is a versatile digital EQ. We’ve opted for FabFilter’s excellent Pro-Q 2, which has some great filters and very sharp notch settings. But there are plenty of good alternatives if you fancy something else.
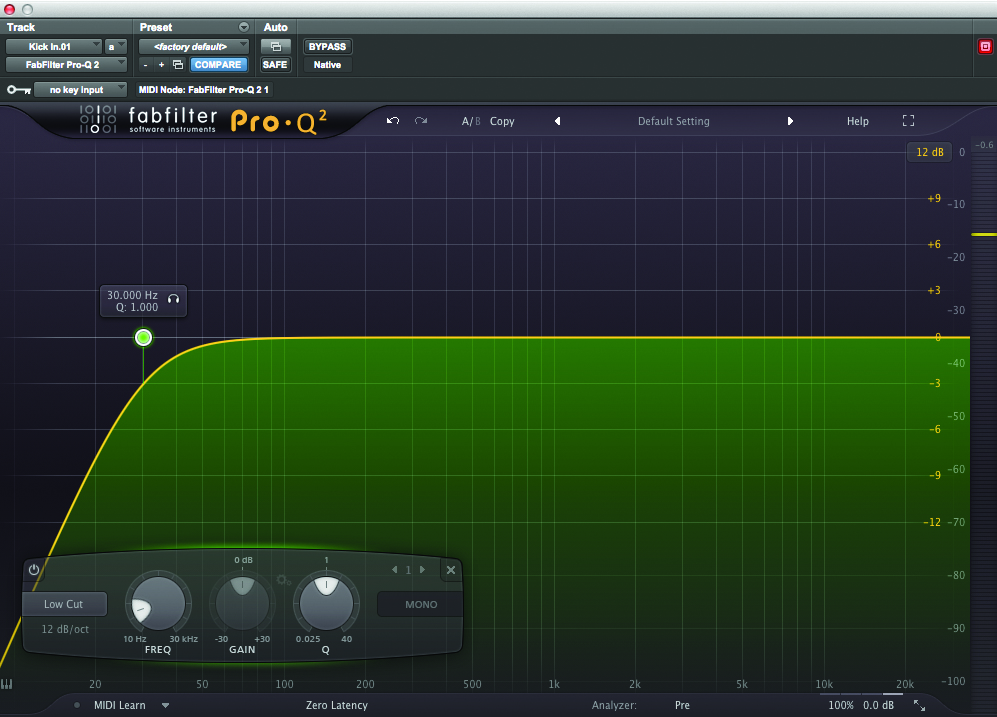
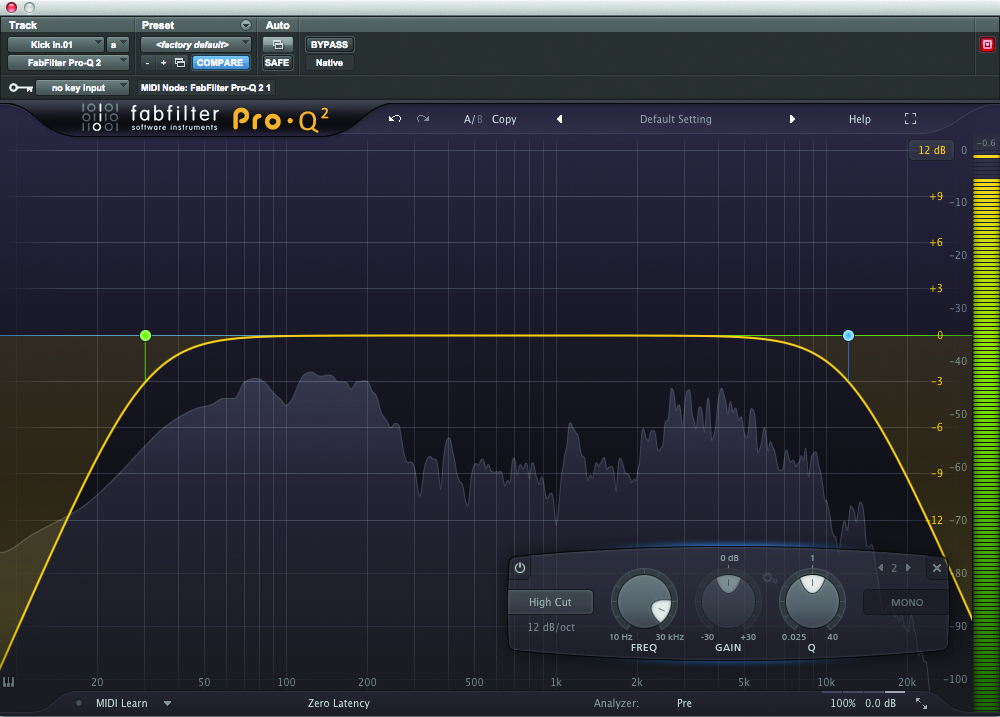
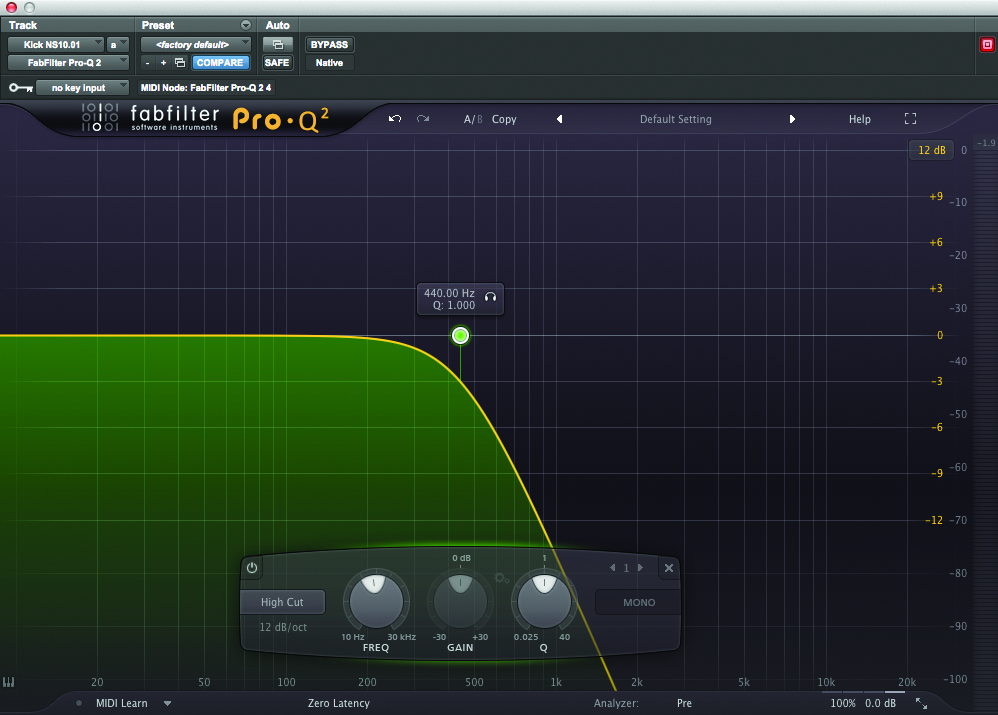
2: We always start with the high-pass filter. This is often the first thing we do to all the channels in our mix. We’re mostly looking to remove sub-sonic rumble, but you might also choose to roll off some of the lows from drum overheads, hats and even guitars.
3: While not as common as the high-pass filter, the low-pass can be just as useful for helping you place instruments within a specific frequency range. The top-end of overdriven guitars for instance can just be hiss, which will eat into the air around the vocal.
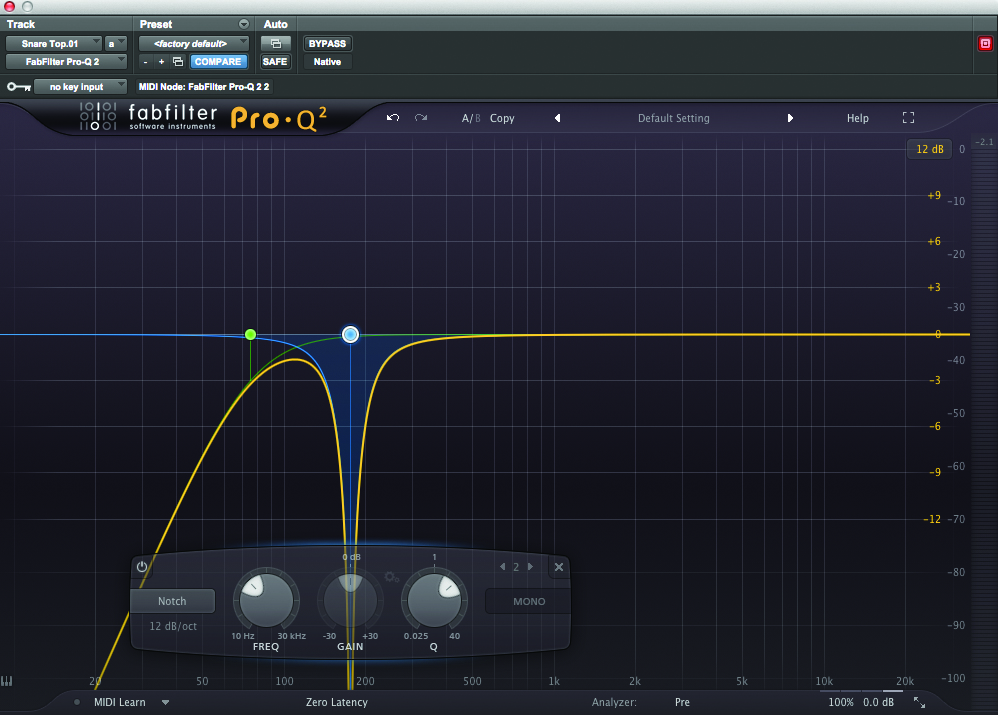
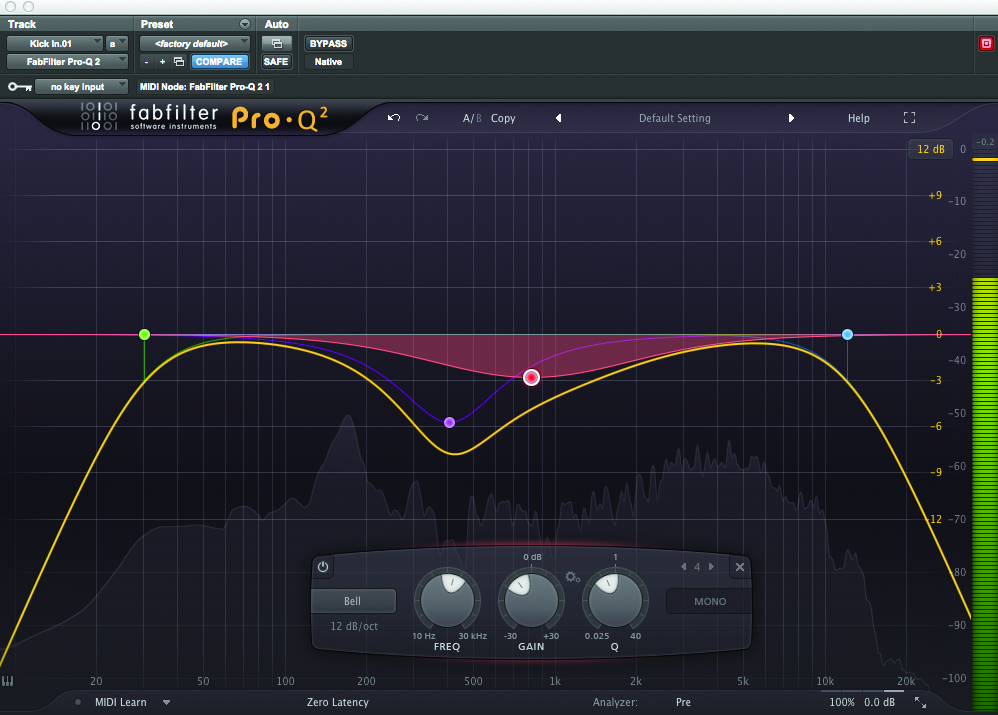
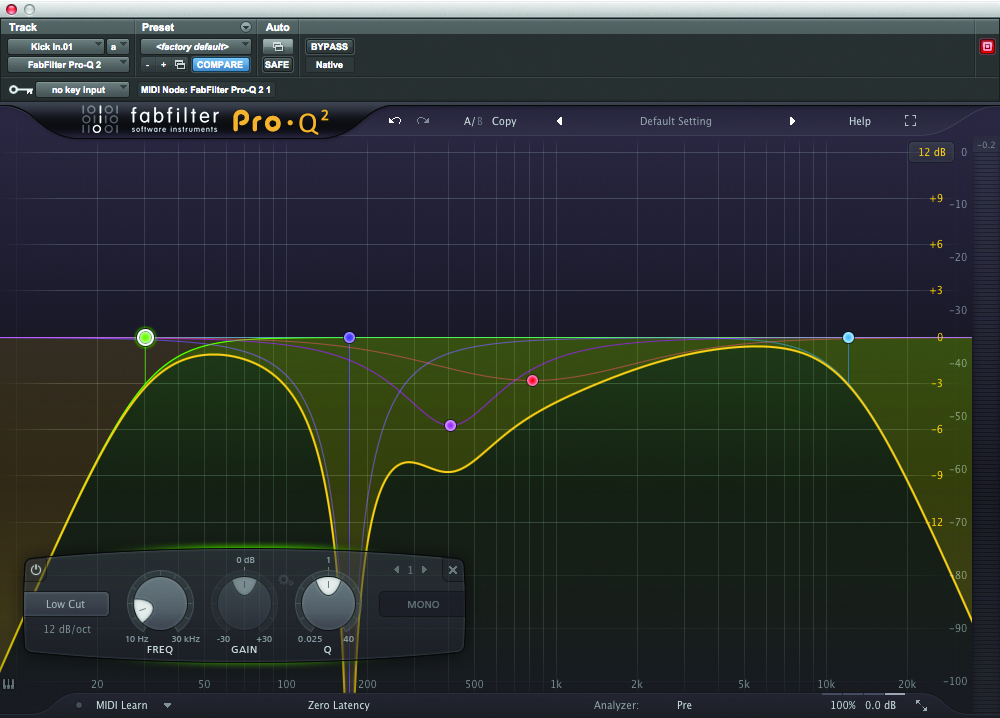
4: Notch filters are useful for removing specific resonant frequencies, but dialling them in takes a little work. Thankfully, many EQs including the FabFilter Pro-Q 2, have a spectrum analyser built-in which lets us quickly see where any resonant peaks may be.
5: We may also want to subtly shape the tone with one or two wider cuts. On this kick drum we’re carving out plenty of the boxy frequencies around 400Hz, and adding a wide smile curve through the whole of the mid frequencies.
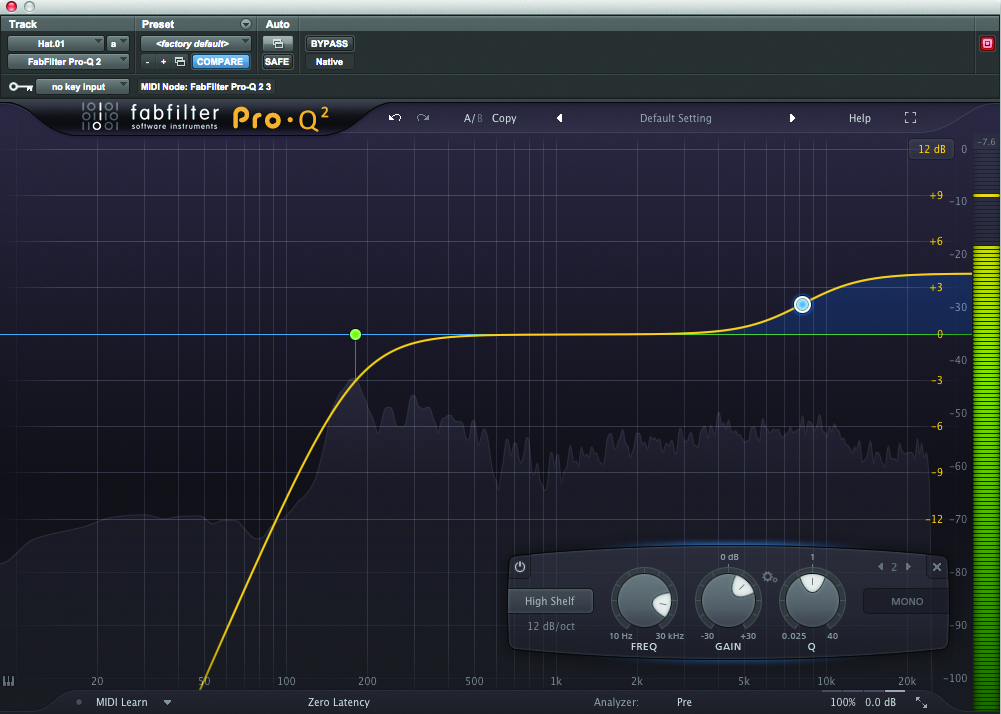
6: Finally, think about boosting the top-end before it hits the compressor, unless of course you’ve already filtered it out with a low-pass filter.
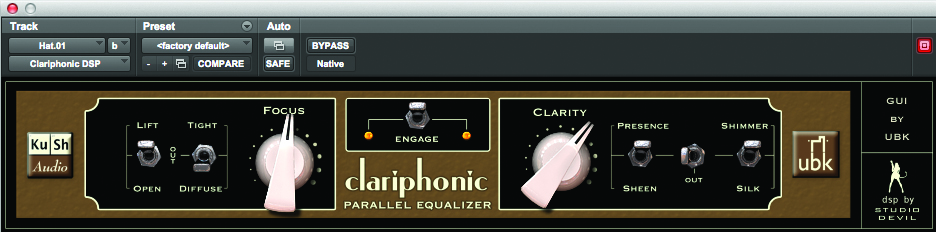
7: Instead of boosting with our versatile digital EQ, we sometimes add an additional high-frequency specialist EQ here for this job, such as the Kush Audio Clariphonic.

8: Once you’ve pulled out all the frequencies you don’t want you can add your compressor. Because we’ve already pulled out the unwanted frequencies we won’t need to rely on the side-chain filters to prevent the compressor from triggering, and can focus purely on getting the compression threshold, ratio, attack and release to sit.
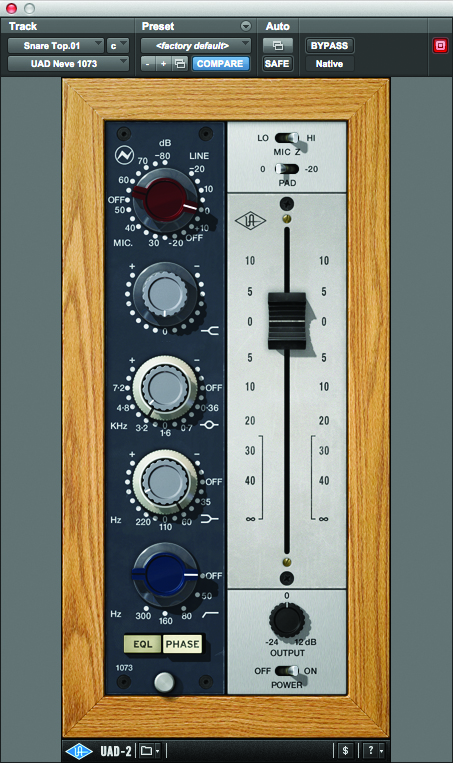
9: After the compressor we add another EQ. Here we’re using the UAD Neve 1073 to give the instrument a sense of weight in the bottom end, and boosting a little more around the 3.2kHz region for presence.
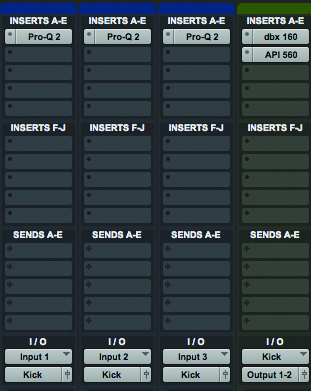
10: When using this technique with instruments that have been mic’ed with multiple mics the technique can be expanded across multiple channels, including the buss. These three kick mics, for example, are all routed to a single mono aux. ‘Kick’ channel.
11: We’ve added the first subtractive EQ plug-in directly to each of the three mic channels. Removing all the frequencies from each that we don’t want in the final ‘Kick’ channel. See the three stages above
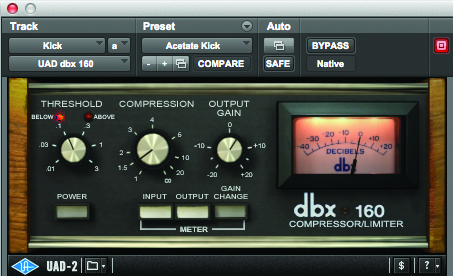
12: We then add the UAD dbx 160 compressor directly to the aux. ‘Kick’ channel, followed by an instance of the UAD API 560b EQ to shape the overall Kick drum sound.

