Pro Tools Tutorial: Understand EQ – Step-by-Step
Mike Hillier brings the EQ into play in this step-by-step For this tutorial you’ll need the project file – download here 1: This month we’ve used a variation on last month’s project, with a single drums stem and parallel chain, acoustic guitar, bass and organ. We’ve added Avid Dyn3 compressors for compatibility, but feel free […]
Mike Hillier brings the EQ into play in this step-by-step
For this tutorial you’ll need the project file – download here
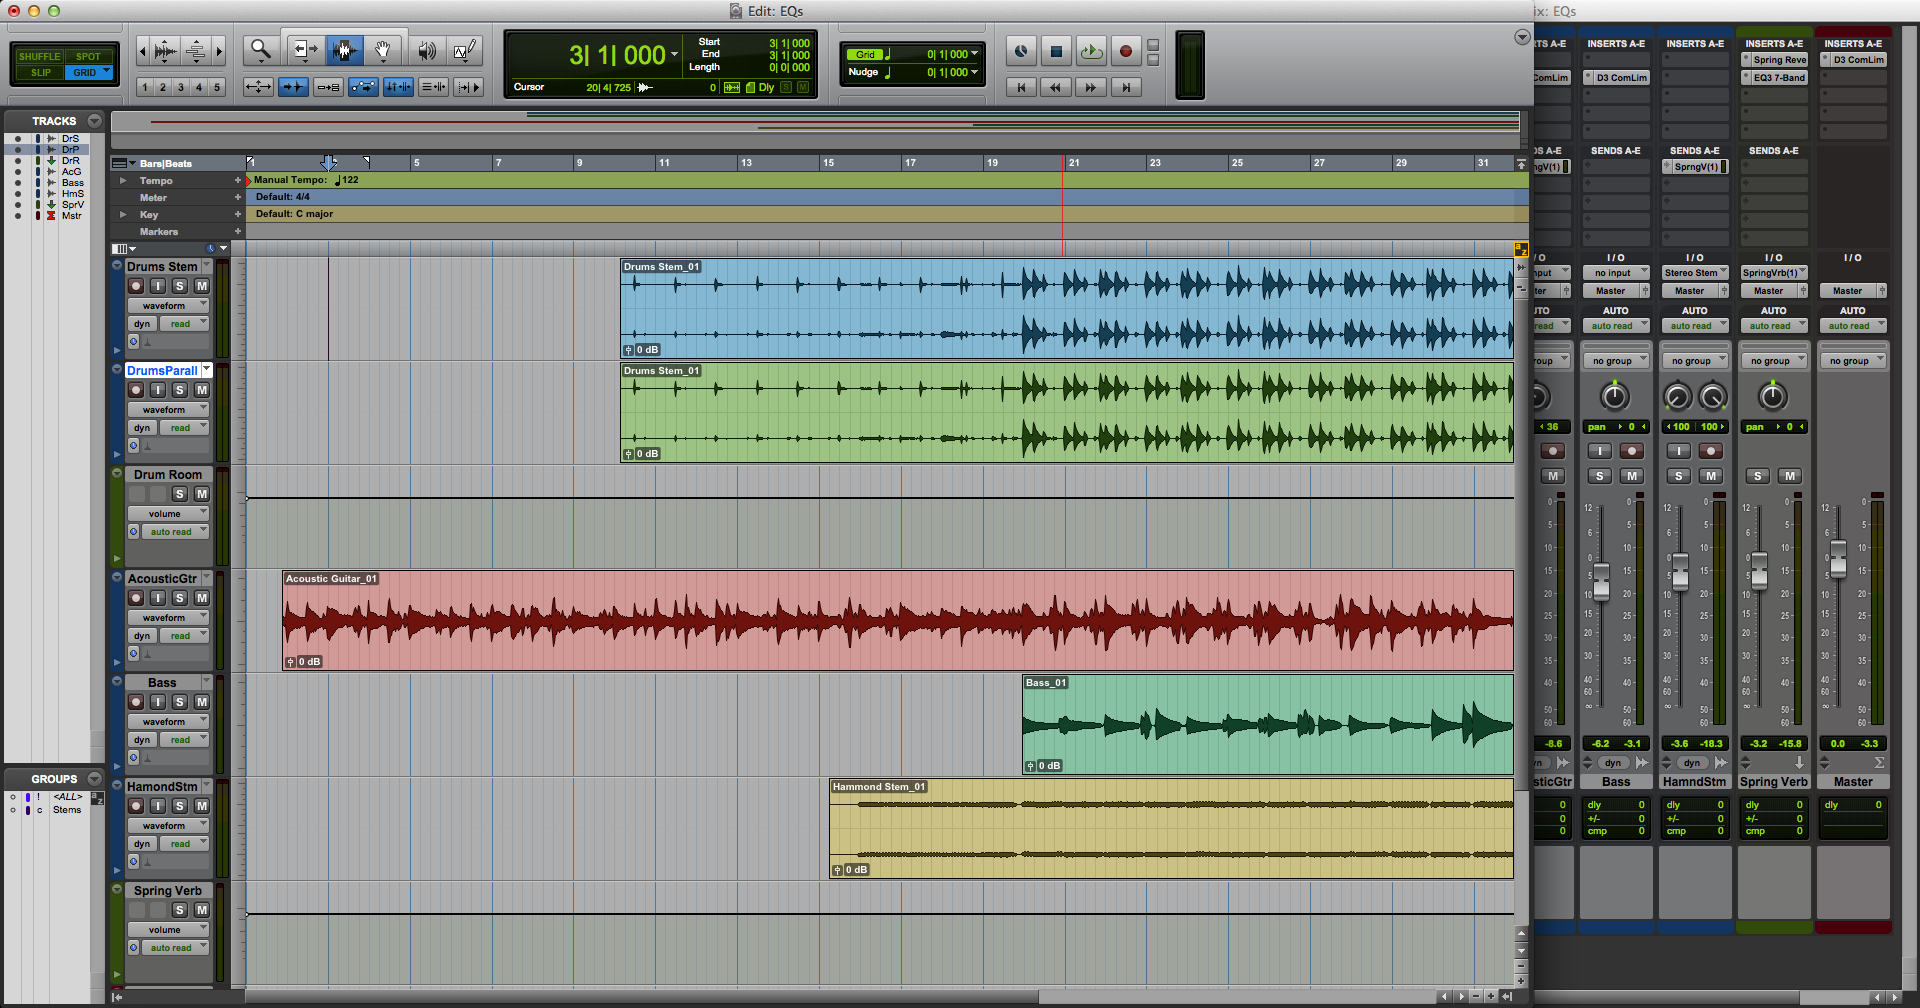
1: This month we’ve used a variation on last month’s project, with a single drums stem and parallel chain, acoustic guitar, bass and organ. We’ve added Avid Dyn3 compressors for compatibility, but feel free to swap these out with some of your favourites.
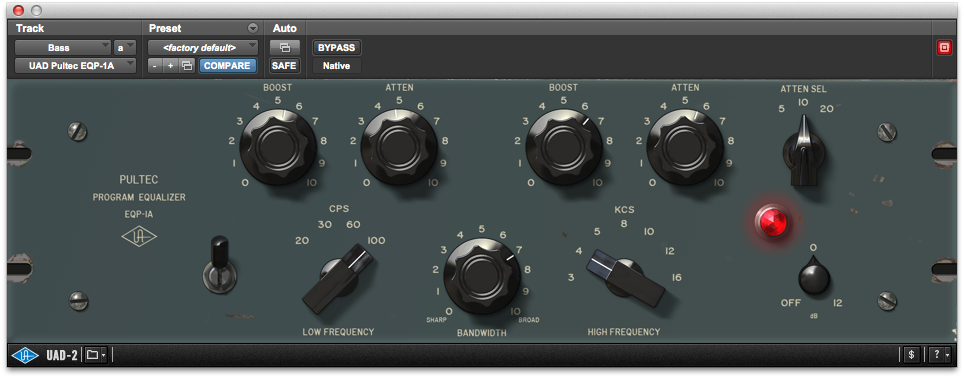
2:The bass is sounding quite lifeless, so let’s start by adding a Pultec-style EQ after the compressor, both to give some life to the top-end, and to try the big bottom trick. We’ve boosted heavily around 4kHz, cutting around 10kHz at the top, while we’ve used the big bottom trick around 60Hz to add some weight.
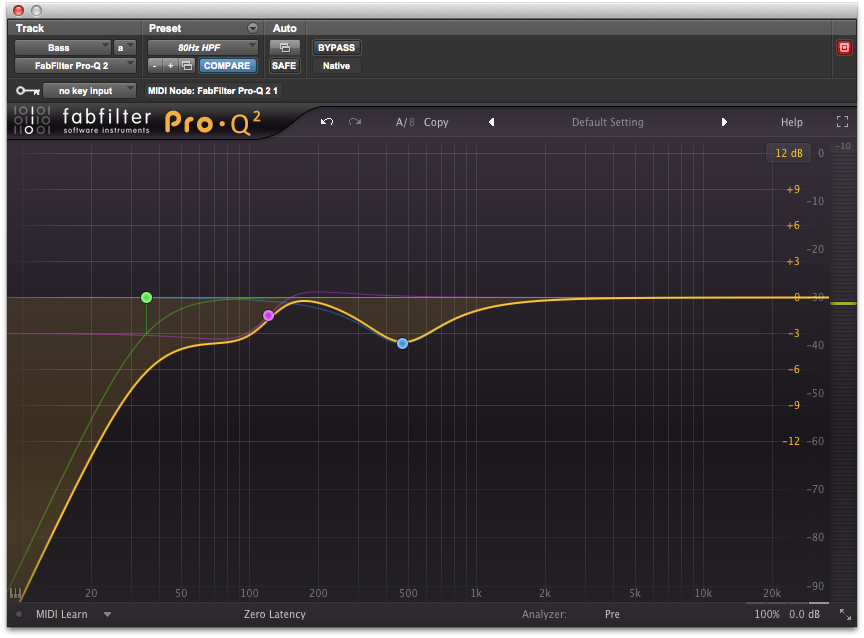
3: The bass is starting to sound a little better, but the mid-range is still quite muddy, so we’ve added a digital EQ to clean it up. Here we’ve used FabFilter Pro-Q2 in the first Insert slot to pull out frequencies we don’t like before the signal hits the compressor.
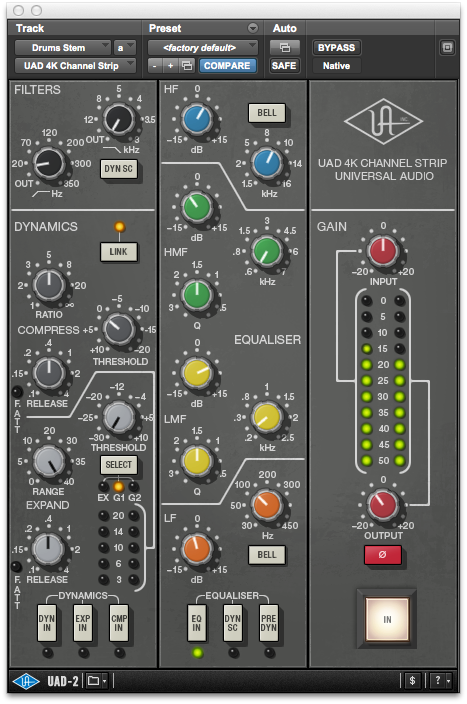
4: For the clean drums channel we’ve added an SSL style channel strip EQ using the high-pass filter to scoop out the very, very low-end – even on the drums – and then shaping the bottom end with the low- and two mid-bands, adding in just a little top with the high-shelf.
5: As you EQ, be sure to re-adjust the levels, pulling the signal down a bit if you’ve boosted too much, to ensure you don’t simply raise everything up in the mix.
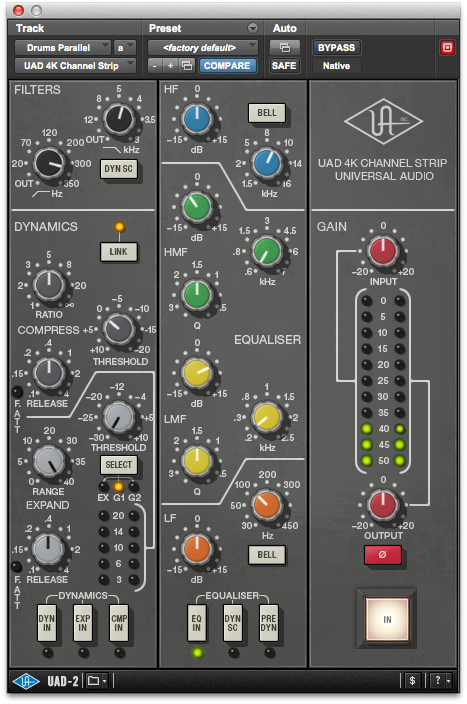
6: On the parallel drums track, we want to remove all but the mid-band before it hits the compressor, so we’ve added another console EQ and used the high- and low-pass filters to create a band-pass filter around the mids.
7: Using the same console EQ on a number of different sources can have a gluing effect on the mix, as each will add similar harmonic distortions. Add another console EQ to the acoustic guitar track for this purpose.

8: The acoustic guitar has a rhythmic as well as a melodic part to play in this mix. However, it’s masking the bass guitar a little, so we need to try and find room for these two to come through the mix together.
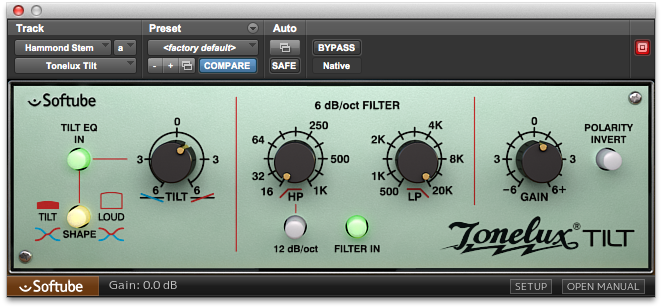
9: The Tonelux Tilt acts similarly to a high- and low-shelf, raising one while lowering the other. It can be a great way of quickly finding a place for a sound in your mix, and we’ve used one on the Hammond Organ to lift the top-end a little.
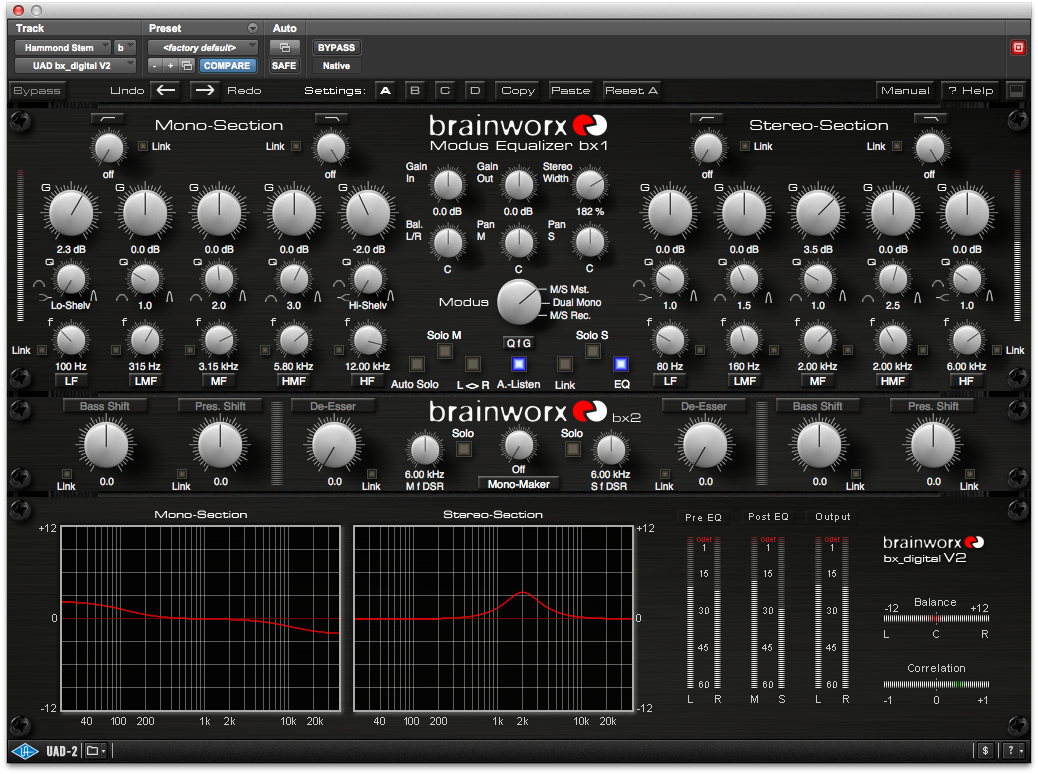
10: We’ve also added a mid-side EQ to add some width to the mid-range of the organ. This will help to push it out of the way of the bass guitar part in the mix, while keeping the overall tonality of the instrument.
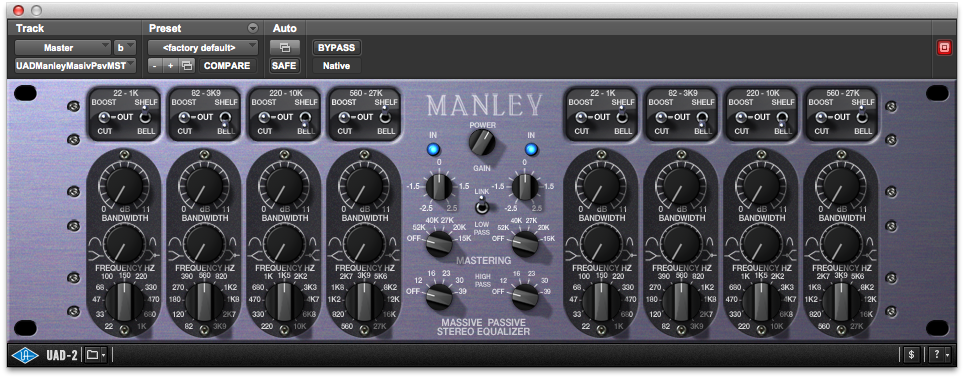
11: One of our favourite EQs for the master buss is the Manley Massive Passive, as it can work wonders through the mid-range, has a great tonality of its own, and can really lift the top-end if needed.
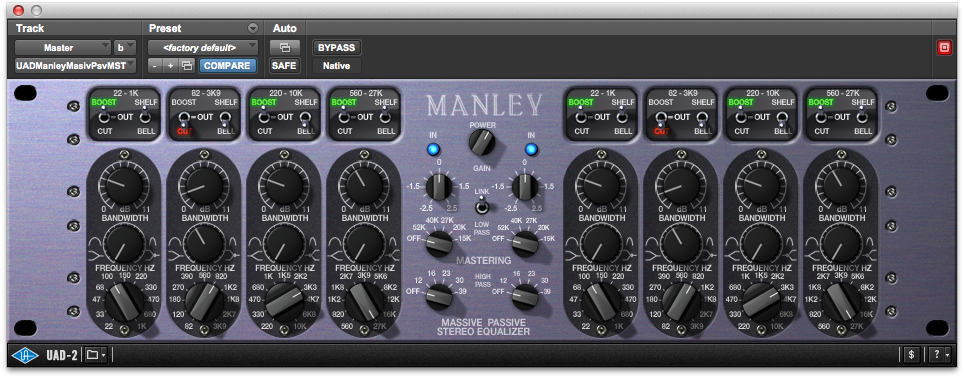
12: Even a subtle use of the Massive Passive can transform a mix. Here we’re adding a little top-end in with a high-shelf set to 27kHz, boosting the bottom end with a lift around 100Hz, and tightening up the mids with a cut around 800Hz.
