Pro Tools Tutorial: Become a Power User Part 2 – Organising Your Session
Following rules and regulations might seem counterproductive to creativity, but you’ll sure appreciate it when it comes to the mix. Mike Hillier puts everything in its place. For this tutorial you’ll need to Download the Project files Pro Tools can be a confusing place in which to work, especially if that work involves big sessions […]
Following rules and regulations might seem counterproductive to creativity, but you’ll sure appreciate it when it comes to the mix. Mike Hillier puts everything in its place.
For this tutorial you’ll need to Download the Project files
Pro Tools can be a confusing place in which to work, especially if that work involves big sessions with huge track counts and various different musical sections. Finding your way around these sessions can be a nightmare, but Pro Tools has a variety of tools for aiding navigation around a mix.
In this tutorial we look at how best to set up your Pro Tools rig for a recording session, focusing on the I/O setup window, routing, preparing a click track and the various record modes available to you.
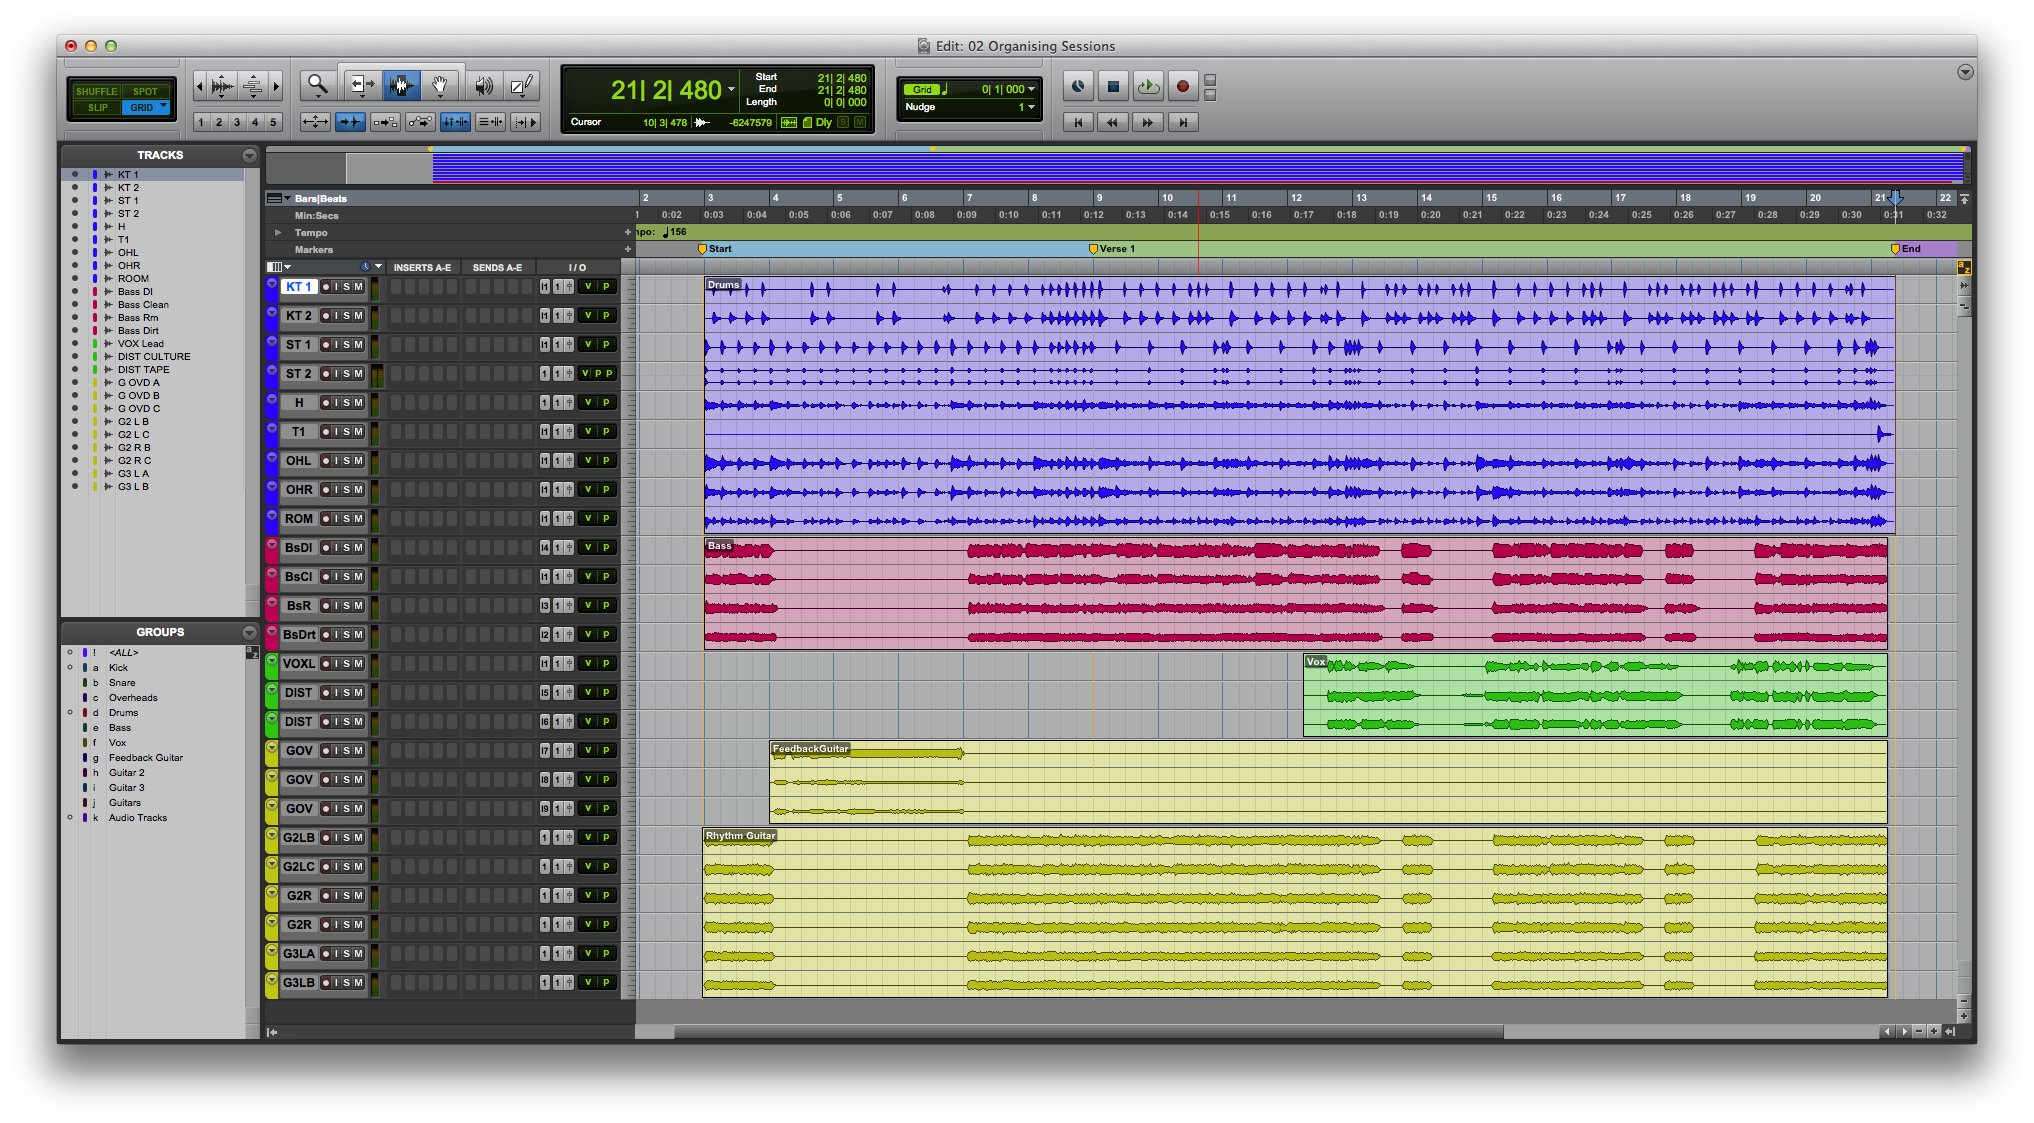
The first thing we do when we start a new session is to go through and make sure that everything is named appropriately – ‘Audio_01_bip’ provides no useful information as to what is on the channel, and while a good recording engineer will have ensured all their files were appropriately named before the mix, we still encounter this problem frequently. Going through and listening to each channel can be time-consuming, especially if there’s an unexpected instrument change on a single channel, but it can still save a lot of time later in the mix.
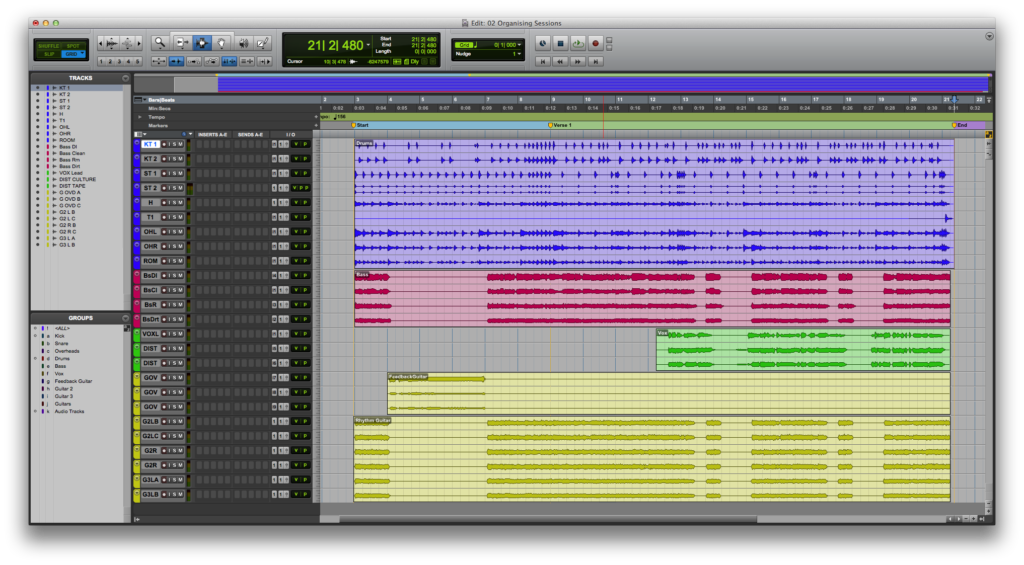
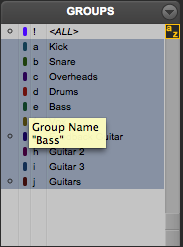
With everything named correctly, we then like to sort all the instruments into groups – usually the drums and percussion first followed by bass instruments, midrange rhythm and pad-type instruments (guitars, synth pads, strings, brass, piano and so on), lead instruments and, finally, vocals. We then colour channels to provide visual identification at-a-glance. The exact order can change from track to track, but it’s useful to stick to the same colour scheme.
Grouping clips can be useful from both a visual perspective as well as for when you’re editing. More useful, however, are Mix/Edit groups, which can be activated whenever necessary to perform grouped fader moves, grouped edits, and to show/hide whole channels quickly. Showing only the section you are working on at any one time can be very useful for navigating larger Pro Tools sessions. In addition to Mix/Edit Groups for each instrument group, we like to create groups of all the audio channels, so we can quickly show only audio channels in the Edit window and hide aux busses. Furthermore, if you are using sub-groups it can be useful to create a Mix Group of all the sub-groups, enabling you to quickly work on these channels to get your mix working at a more macro scale.
Memory Locations and Window Configurations can be incredibly useful for speeding up your workflow once the mix gets under way, making it easy to quickly skip to the start of any verse and loop sections without taking your fingers off the keyboard. Indeed, a good Pro Tools operator will make very little use of the mouse.
Preparation and Navigation
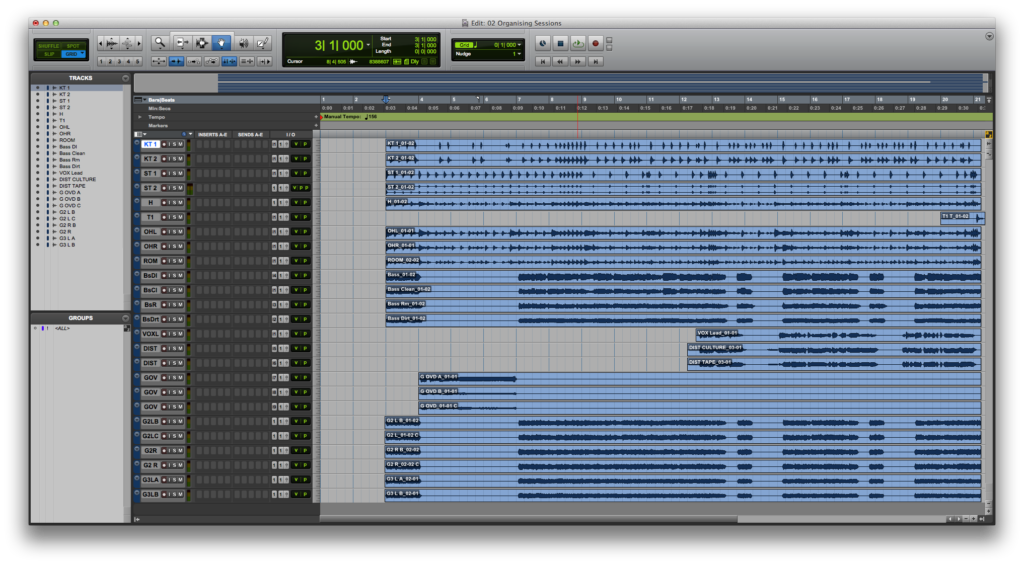
1: Open the 02 Organising Sessions session file from the DVD. The session has part of a mix newly imported into it ready to begin. All of the tracks and clips are named, some even have notes. Quite often you will get mixes that simply come with clips named ‘Audio 01’ or similar; if this happens, you will have to solo each one and name them before you even get started

2: We’re going to start by creating Clip Groups in the Edit window. Highlight all of the nine drum clips by [Shift]-clicking on each clip and then group them by pressing [Ctrl]+[Alt]+[G]/[Cmd]+[Alt]+[G] (PC/Mac) to group them as a single Clip Group. Repeat this to group the bass, vocals and guitars. Clip Groups are useful for any clips that you want to edit together.
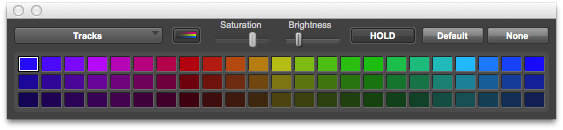
3: Open the Color Palette by clicking on the blue bar to the left of each channel in the Edit window (or at the bottom of each channel in the Mix window). Alternatively, if you have the Track Color hidden, you can open the Color Palette from the Window menu.
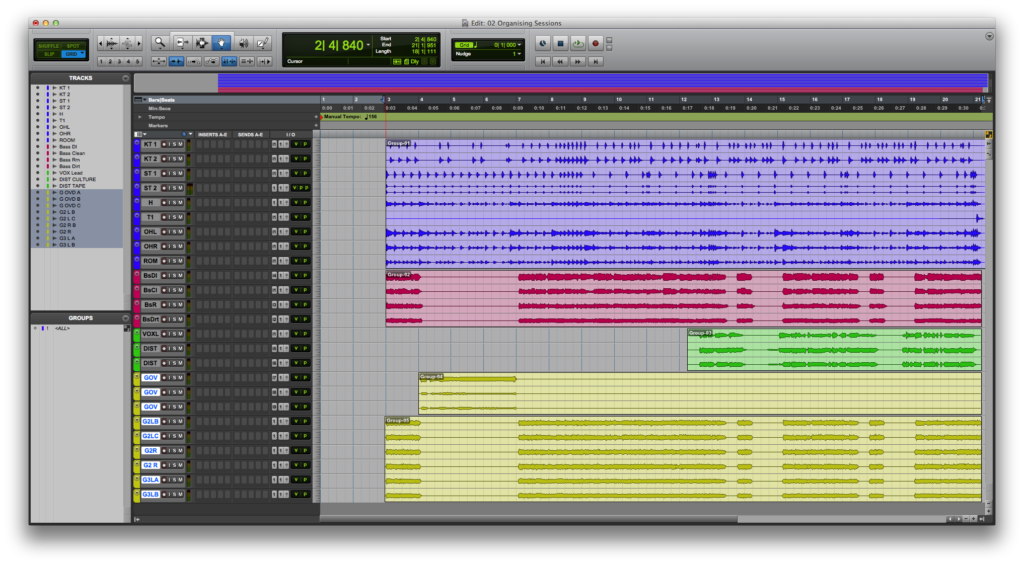
4: Select all the drum channels (not the clips) and select a colour for drums. It helps to remain consistent from one song to another with your choice of colour, and keep similar tracks in similar colours – you might choose dark-blue for drums and light-blue for percussion and so on. Repeat this process for the other instrument groups.
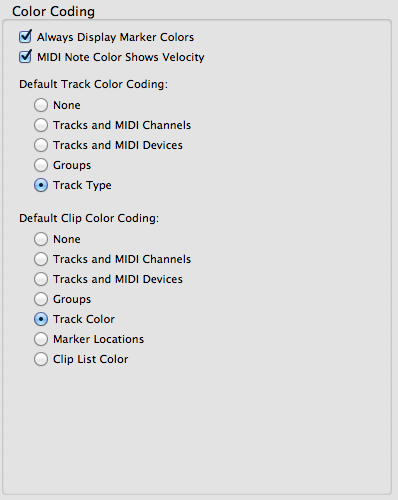
5: If your tracks are now coloured but your clips remain the same, go to Preferences>Display and, in the Color Coding section on the right, change the Default Clip Color Coding to match Track Color. This will change the colour of all your clips to match the Track Color choice. You can, of course, choose to colour clips individually if you prefer.
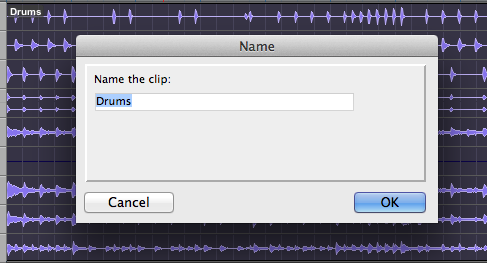
6: When we created the Clip Groups, Pro Tools simply names them Group_##; by double-clicking on the Clip Group we can give each one a more descriptive name. This is especially helpful if you’re collaborating on a session, as your collaborator may not follow your particular colour scheme.
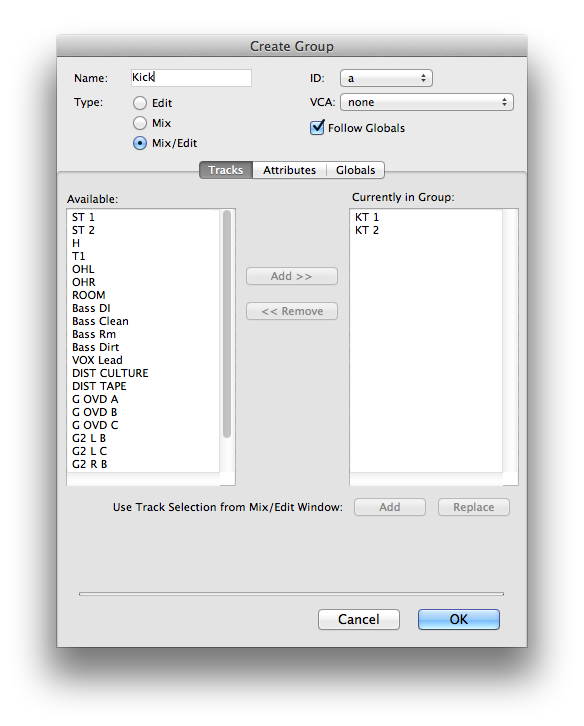
7: Clip Groups are useful, but Pro Tools has another, more powerful grouping tool: Mix/Edit Groups. Highlight the two kick channels in either the Edit or Mix window and press [Ctrl]+[G]/[Cmd]+[G] to group them. With a Mix Group active any fader-moves, solos or mutes will effect all grouped channels equally, while an edit will effect clips in all grouped channels equally.
8: We like to create as many Mix/Edit Groups as we think we’re going to need early on, creating one for every kit piece in the drum kit and another for the kit as a whole, plus additional groups for every instrument that has been tracked on multiple channels. This can come in very useful for gain-staging later on in the mix. Groups can be turned off individually from the menu
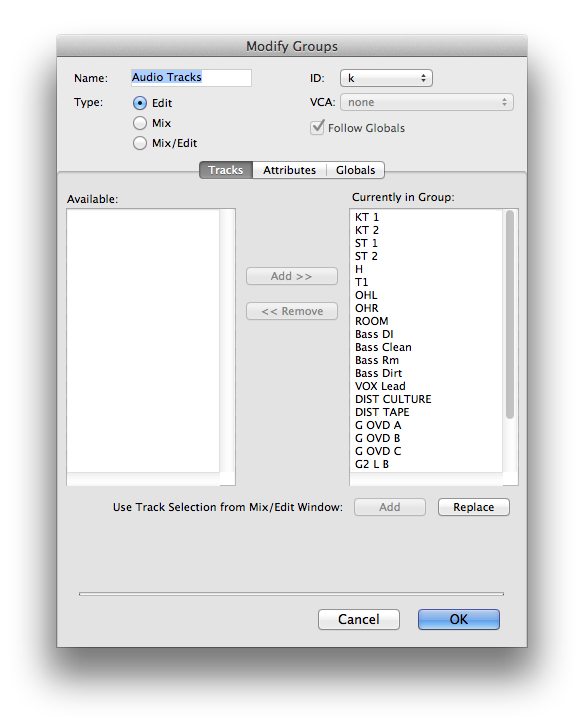
9: Not all of our groups need to effect both the Edit and Mix windows. We like to create a group for all audio tracks that effects only the Edit window, and many of our instrument-specific groups may need to effect only the Mix window, especially groups of aux channels.

10: Once we’ve grouped our tracks we like to place markers on the timeline to make it easy to see where on a track we’re working, and to provide a means to skip to different sections easily. The obvious choices are to place markers at the start of each different song section, marking Start, Verse 1, Chorus, Verse 2, Bridge and so on. To add a Memory Location at the timeline simply press [Enter].

11: With markers in place you can jump to any Memory Location by pressing [.] then the number of the Memory Location followed by [.]. You can also highlight a region from the current position to a Memory Location marker by holding down [Shift] while pressing [.] then the number then [.].
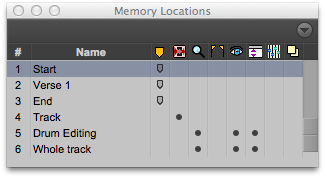
12: Once you’ve placed quite a few markers it can be difficult to remember which number each one is. To bring up a list of Memory Locations press [Ctrl]+[5]/[Cmd]+[5]. This list shows the number of each Memory Location in the left-most column, with the other columns showing what makes up that Memory Location.
