Pro Tools Tutorial: Cutting Edge Production Techniques: Know Your Reverbs
Reverbs come in all manner of shapes and sizes, and picking the right one is crucial. Mike Hillier reflects on what makes the perfect space… Reverbs are back in fashion, and in a big way. After what seems like decades of dry, reverb-less recordings, artists are now embracing it. Reverb comes in a variety of […]
Reverbs come in all manner of shapes and sizes, and picking the right one is crucial. Mike Hillier reflects on what makes the perfect space…
Reverbs are back in fashion, and in a big way. After what seems like decades of dry, reverb-less recordings, artists are now embracing it. Reverb comes in a variety of flavours, and understanding the different types is key to using it effectively in your mixes.
Once you’ve decided on which type of reverb you want to use, then you can go deeper into the effect and alter the specific characteristics to fit it to your track.
Changing Rooms
The oldest types of reverb were large chambers with speakers and microphones set up, so that you could run a signal out into the chamber and record it back through the mics. You can use any space for this, but large, diffuse rooms work best, and trying the same thing in a project studio doesn’t often produce good results.
Artificial reverb began with plates and springs. Plates produce a dense reverb that can sound incredible on vocals or drums, adding body to the signal without seeming to place it considerably further away in the stereo image.
Springs are commonly found on guitar amps, and along with the amp saturation produce a decidedly lo-fi tone, which is perfect for vintage guitar tones and electric pianos. These springs are usually quite small, between 6in and a foot, but larger spring units, such as the AKG BX20 were always popular in studios. While not as commonly used on more natural-sounding instruments, springs can produce some great effects in the right mix – even on vocals.

The first digital reverbs enabled modelling of rooms, halls, springs and plates using multiple delay lines to emulate the reflections. This method enables you to quickly dial in the size and shape of the room, as well as the exact decay time, and even to modulate parameters such as the room’s size in real time, producing very musical results.
Halls tend to build in density, and can muddy dense mixes even at short settings, but are ideal in slower, more spacious mixes, while rooms tend to decay faster and can be used to add realism and depth to close mic’d instruments. As well as modulating parameters that would not be modulated in a natural environment, algorithmic reverbs can be used to produce some very unusual sounds, such as gated reverbs or unusually shaped blooms.
The Modern Age
A more recent type of digital reverb is the convolution reverb, which imparts the sonic characteristics of one waveform onto another. If the waveform used is a reverb impulse response then the convolution will produce a reverb that sounds as if it was captured in the same space as the impulse response. This is extremely useful as it can be utilised to capture some very unusual spaces, and even other hardware. However, the impulse is fixed, so you can’t capture modulation or dynamic responses.
Convolution is incredibly powerful, and as well as being used to capture the sounds of various speaker cabinets it can also capture existing rooms. Plug-ins such as the UAD Ocean Way Studio use convolution to let you place your dry recordings in Ocean Way’s stunning studio environments.
As well as incredibly natural sounding reverbs, convolution can also create some very unusual tones by using sounds that weren’t meant to be used as impulse responses. For example, try using a synth to create an impulse response. These are often of fantastic sound design value, but aren’t all that useful as simple reverbs!
Pro Tip
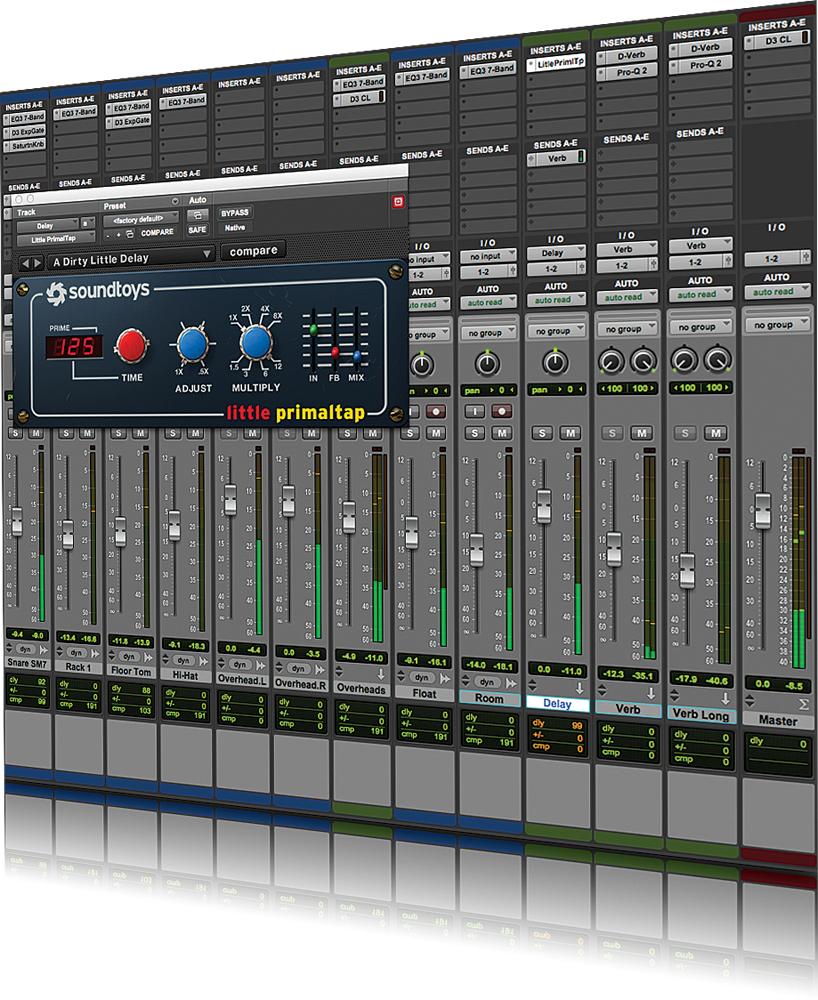
Combining reverbs with delays, either one after the other on a buss or feeding each other from multiple busses, can be an exciting way to create some interesting spaces. Beware of creating any feedback loops, however, as it can be very easy to do and will quickly create some very unpleasant sounds in the studio.
Using Reverb In A Mix

1: Usually when working with reverbs we add the effect to a separate buss. As well as being able to send multiple channels to this buss simultaneously it also enables us to EQ, compress and distort the reverb signal separately from the dry signal.
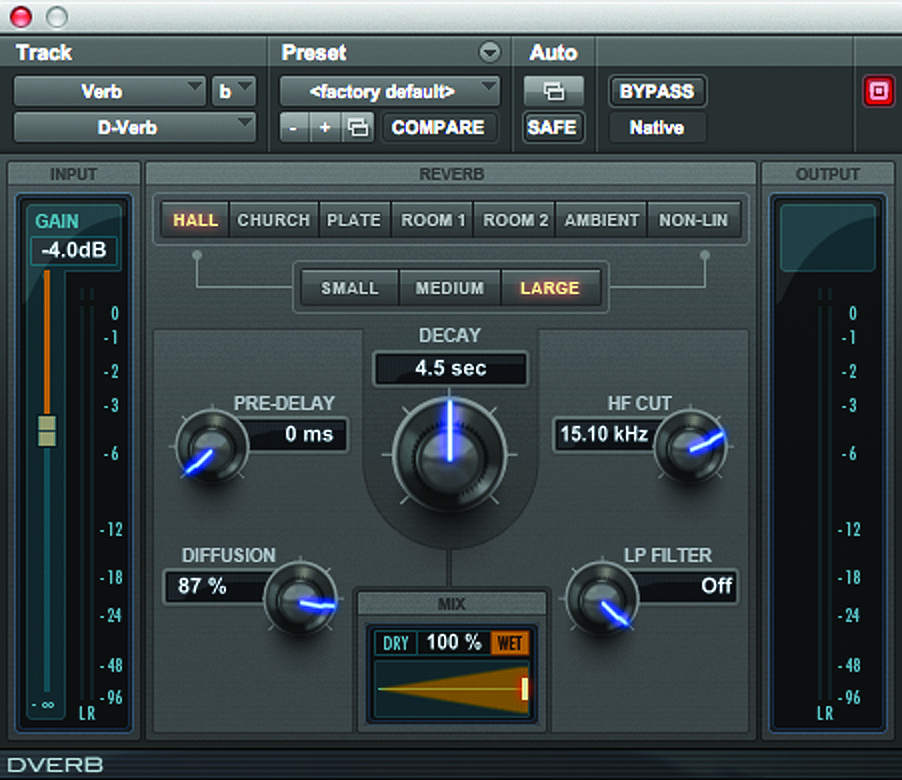
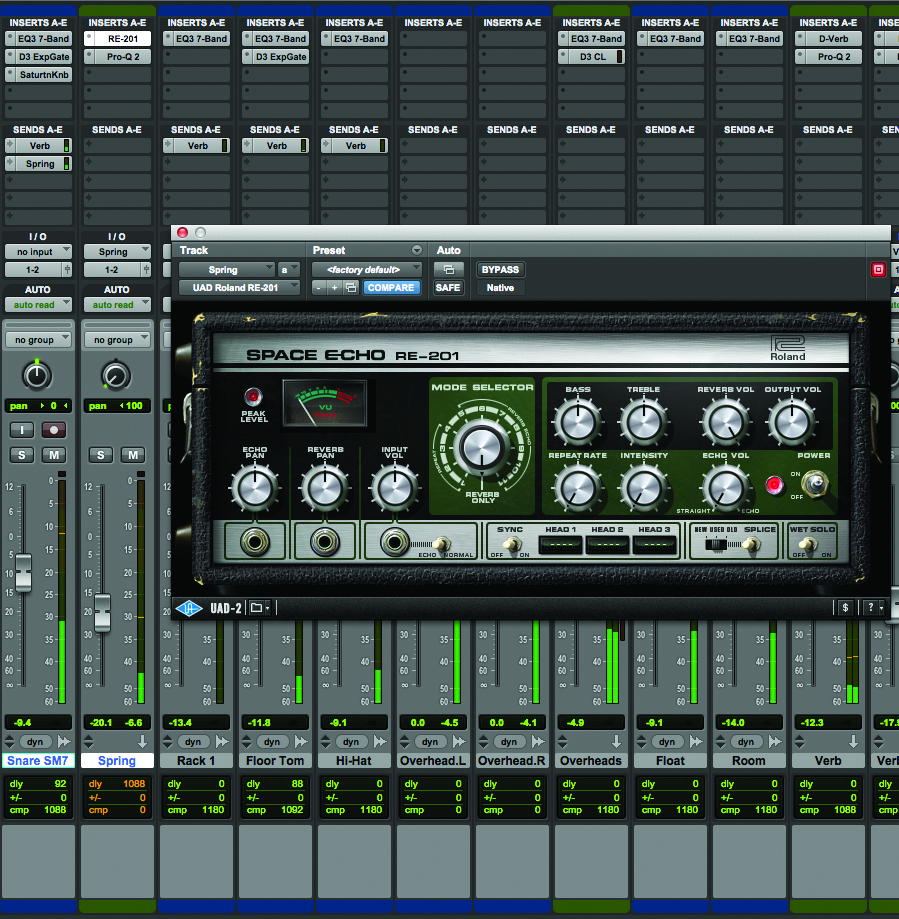
2: At its most basic, reverb is a series of very short delays meant to emulate an acoustic environment such as a room or hall. Algorithmic reverbs, such as D-Verb, have a selection of different acoustic spaces that they emulate ranging from rooms, large halls and cathedrals to springs and plates and even unusual non-linear or gated reverbs.
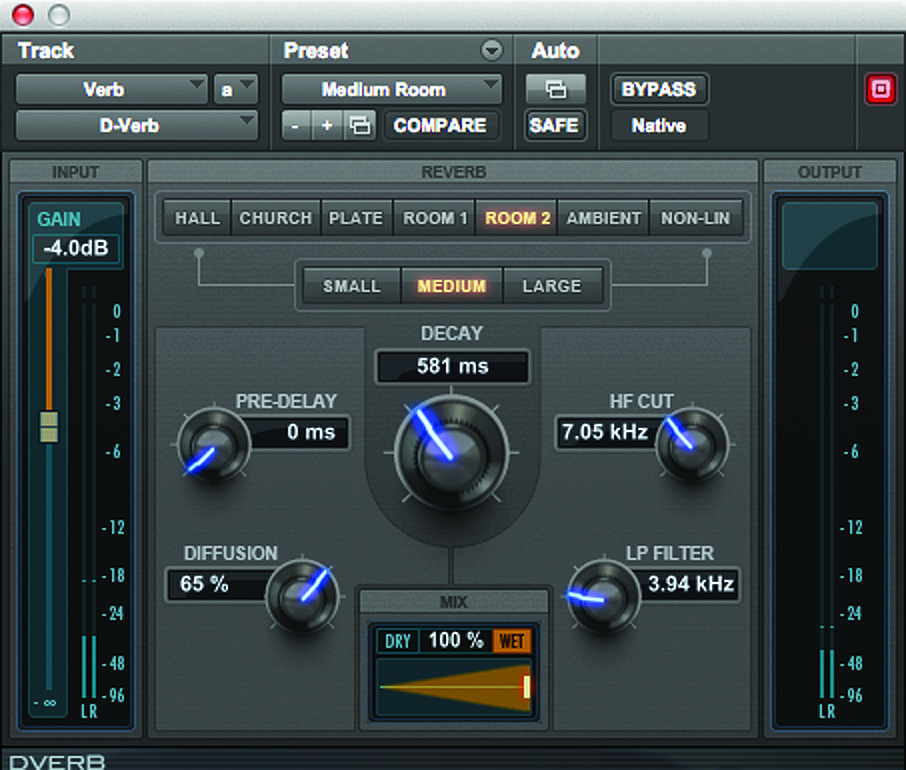
3: For drums we usually like to set up a small room sound, which we then send all the close mic’d signals to for a little extra depth and space in the mix. Keep the pre-delay at zero and use any EQ in the reverb to shape the frequency response to a more mid-present sound. Dial the delay time down to keep the room sounding small.
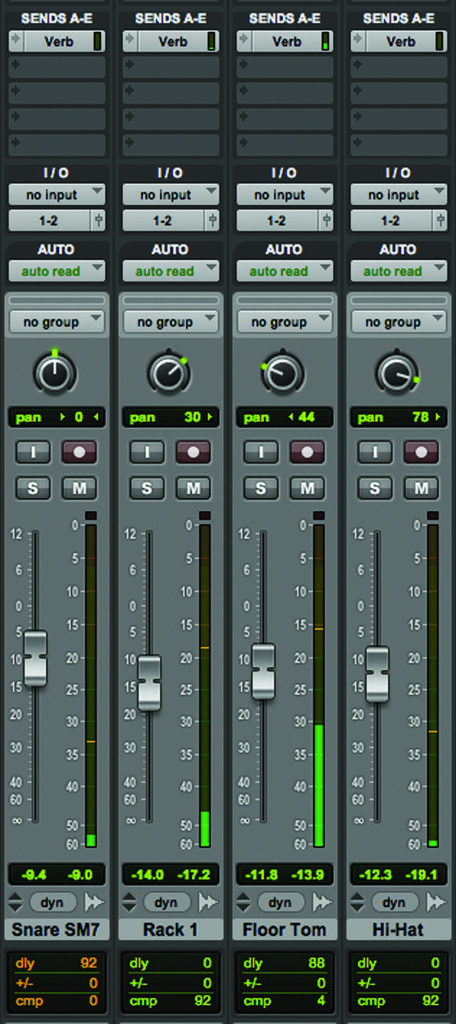
4: We’ve copied the reverb send onto all the close mics in the kit, altering the relative send levels of each to create just the balance we’re after. The snare and toms usually need the most, while the kick, ride and hats often need little-to-no reverb added to them.
![]()
5: When sending multiple signals to the same reverb it can be advantageous to pan the reverb sends so that the picture arriving at the reverb follows the picture of the kit itself. In Pro Tools this can be achieved quickly by engaging the FMP (Follow Main Pan) button on the Send.
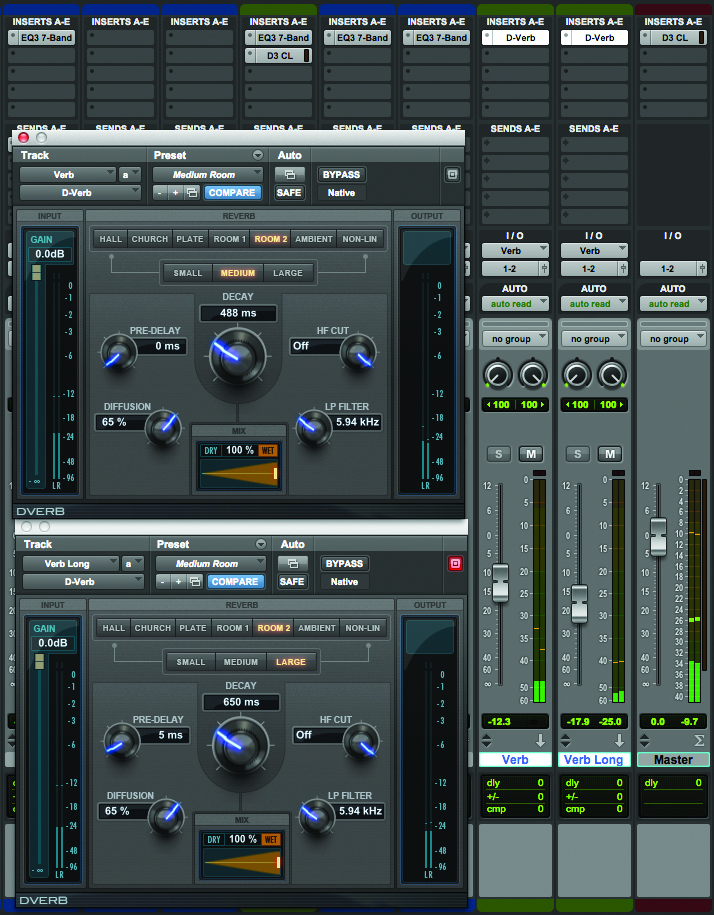
6: For a more realistic reverb sound, and in sparser mixes, we often layer multiple reverbs from the same send buss, creating the illusion of the same instrument mic’d at a variety of distances. This can be done using a similar algorithm, but with a longer reverb time and maybe a little pre-delay brought in
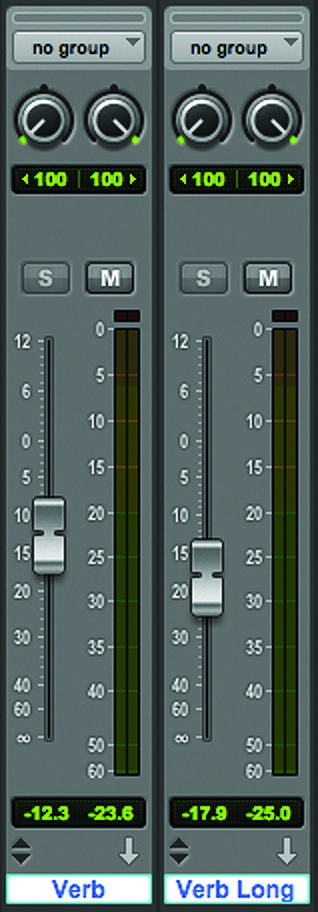
7: To layer the two reverbs, we usually balance the closest one first, with the more distant reverbs muted. We then bring up the more distant ones until they’re just adding that little bit more ambience without masking the closer of the reverb tails.

8: Using ideas from the tutorial: Processing the Returns, let’s bring some colour to these reverbs by adding some additional EQ, compression and saturation. The approach here is to treat the reverb returns just as you would an additional room mic.
9: Special effect reverbs can be useful. Here we’ve added a spring reverb to the snare mic, which can be blended in at specific places in the track to add an extra colour whenever it is needed.

10: Another useful effect, especially in the run-up to a chorus or in break-downs, is reverse reverb. To do this, first reverse the part you want to add the reverb to. We’ve chopped out one snare hit at the start of the pattern and reversed it on a new track.
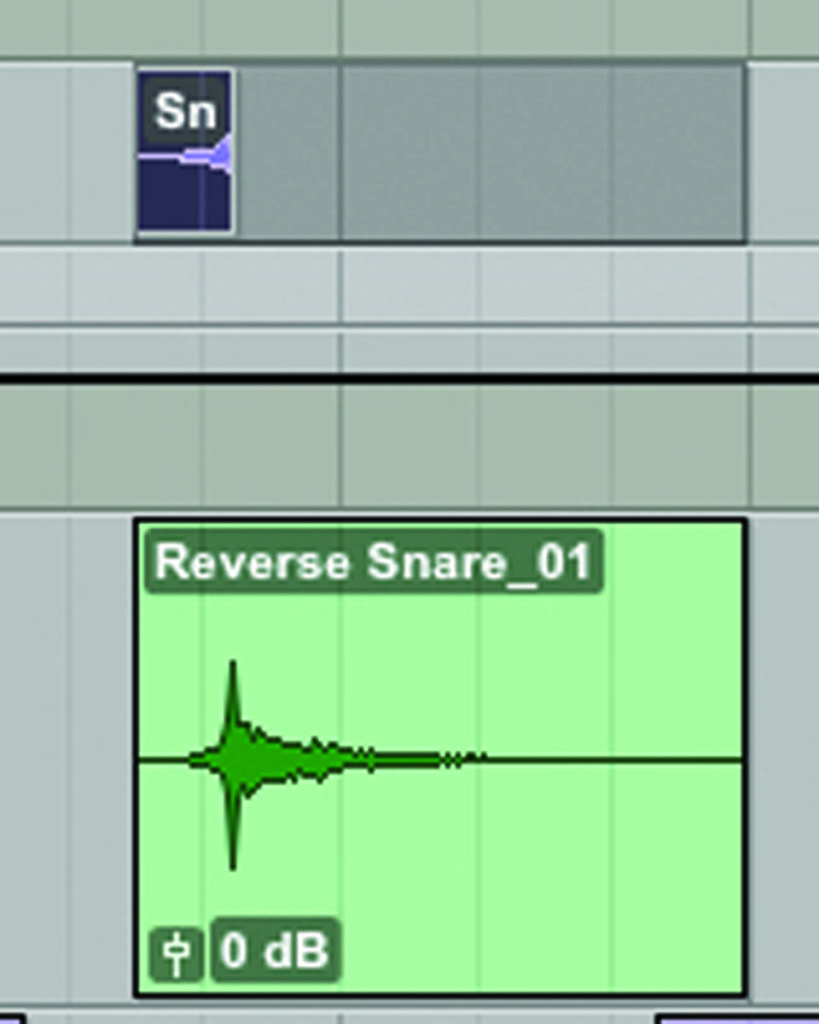
11: Now add plenty of big reverb to that new track and bounce the file back onto the track with the reverb printed. This should give you a reverse snare hit followed by plenty of reverb.
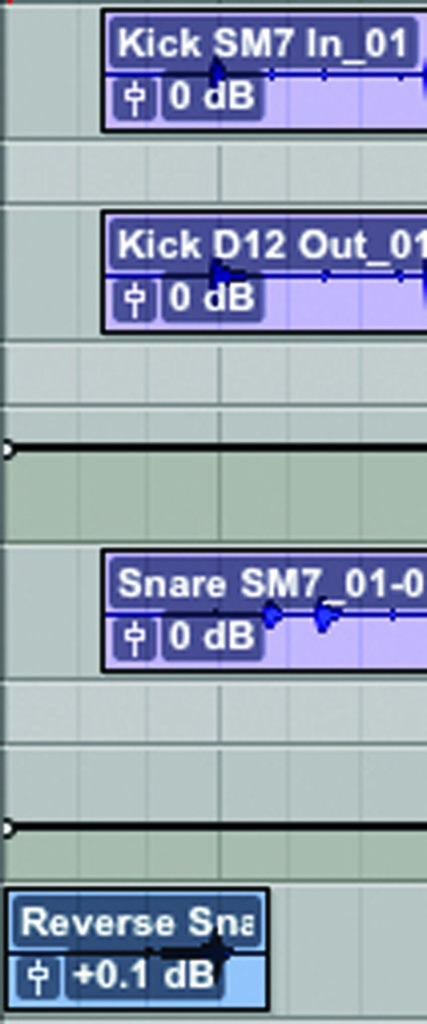
12: Finally reverse the new file and remove any duplicate tracks that you created on the way, leaving only the original tracks and the new reversed snare reverb. We’ve then moved this snare hit to the very start of the pattern to act as an intro.

