Pro Tools Tutorial: Advanced Mid-Side Recording and Processing
For this tutorial you will need the DVD project files – if you don’t have the disc you can download them from here If your experience of stereo recording goes only as far as coincident pairs, it’s time to extend your repertoire. Mike Hillier explains why. Mid-side (M/S) is a popular recording technique in which […]
For this tutorial you will need the DVD project files – if you don’t have the disc you can download them from here
If your experience of stereo recording goes only as far as coincident pairs, it’s time to extend your repertoire. Mike Hillier explains why.
Mid-side (M/S) is a popular recording technique in which a figure-8 mic is placed at 90-degrees to a cardioid mic. The two mics are then processed such that the signal from the figure-8 microphone is doubled, with the polarity of the doubled signal being reversed. These two signals are then sent one to the left channel and the other to the right channel to create the ‘sides’, while the signal from the cardioid microphone is kept mono as the ‘mid’ channel.
Mid-side recording enables the engineer to blend the mid and sides to fine-tune the stereo width as desired. However, it isn’t just of use as a recording technique: it can also be employed as a processing technique on stereo recordings. It is commonly used by mastering engineers, enabling them to process the mid – where the kick, bass, snare and vocals typically reside – separately from the sides, which often house the guitars, reverbs and delays. Mastering engineers can also use M/S processing to judiciously add width to a stereo mix, and it can also be a great technique to use when working with samples. Stereo drum loops, for instance, are likely to have most of the kick and snare in the centre, while any hi-hats and cymbals will be panned to the sides.
Code breaking
Open the M/S Pro Tools session file from the DVD/Download. This session contains an M/S acoustic guitar recording tracked onto two mono channels.
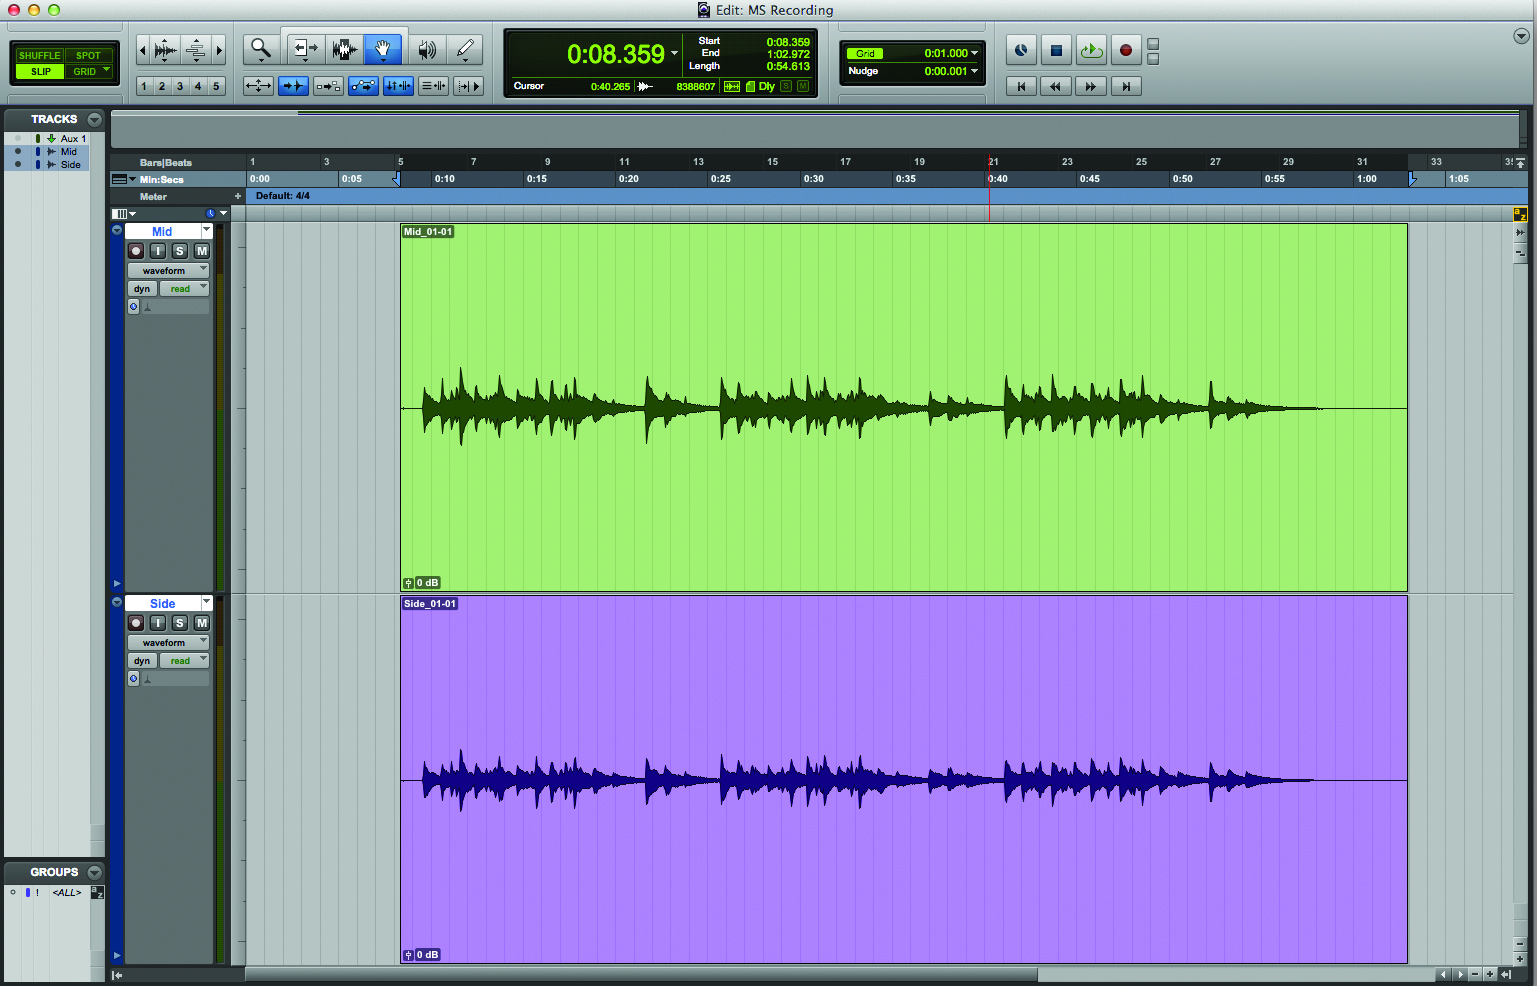
The Mid channel was recorded using a Sontronics STC-1 with a cardioid capsule pointing at the 12th fret of the guitar from about 30cm away. The side channel was captured using an sE RNR1 ribbon mic placed just underneath the STC-1 so that the RNR1 transducer was as close to the STC-1 capsule as possible to keep any phase cancellation to a minimum. Furthermore, the figure-8 response of the ribbon was turned 90-degrees to the guitar, as we described above. If you want more detail on M/S mic’ing techniques you’ll find plenty of articles on MusicTech.net. For this part of the Workshop we’re going to focus on how to process the signal after it has been captured.
If you listen to each of the two channels in solo you’ll hear that the mid channel has a solid, clean guitar sound, while the side channel has a more roomy, distant sound. While it is possible to blend these two signals in mono to get a balance, we can use M/S processing techniques to create a stereo image.
Start by duplicating the side channel so we have two identical channels – we’ve chosen to name the first ‘Side+’ and the duplicate ‘Side-’.
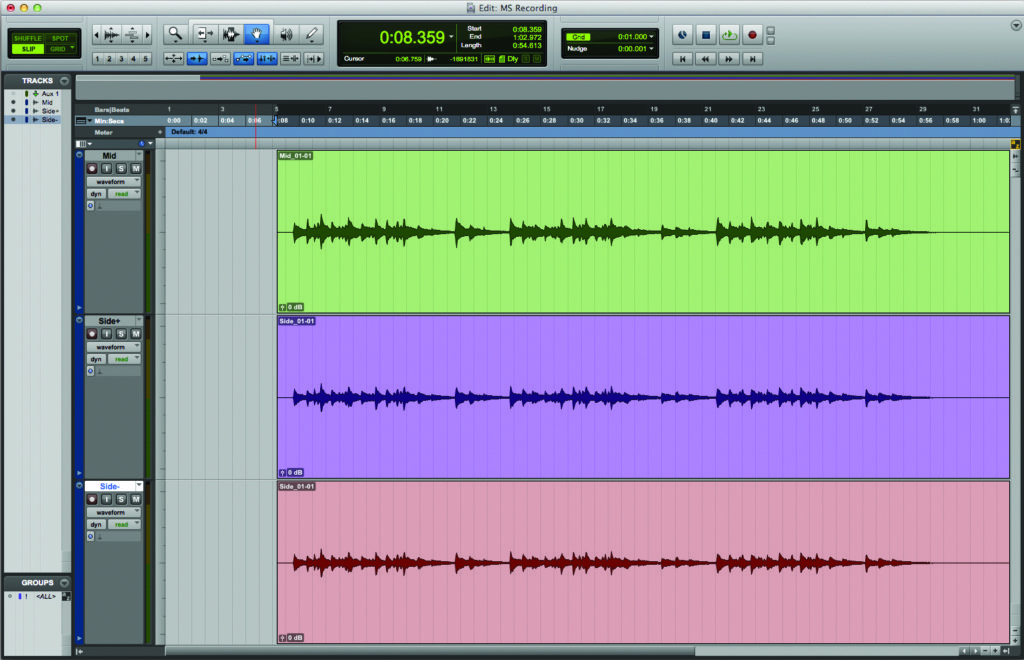
Pan one far left and the other far right in the mix.
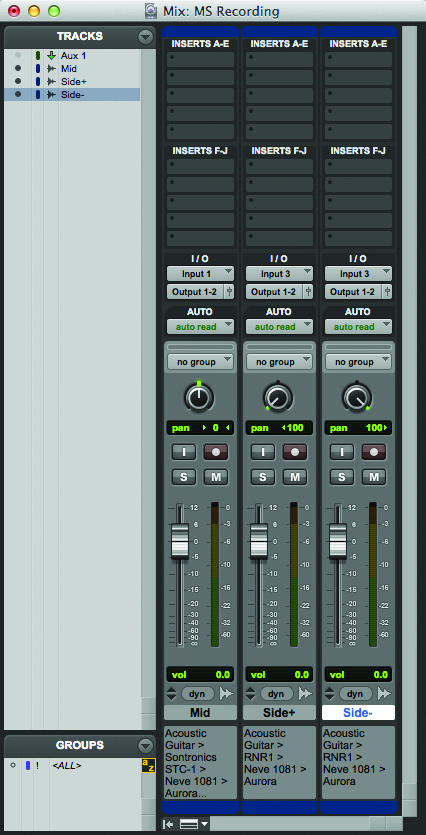
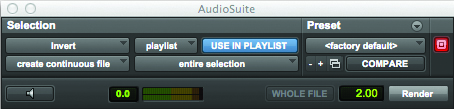
If we leave the two channels in this state we haven’t created any stereo at all, as both the left and right are identical – we’ve simply created a mono signal from two channels. However, if we flip the polarity on the side channel and blend in the mid signal we create a sense of width with a strong centre focus. To flip the polarity you can simply add an instance of EQ3 to the side channel and engage the Polarity switch. However, we prefer to use the Invert AudioSuite plug-in to do this as an offline process.
For the sake of convenience we will generally buss the two side channels to a single stereo side channel, then further buss both the mid and side channels to a stereo channel.
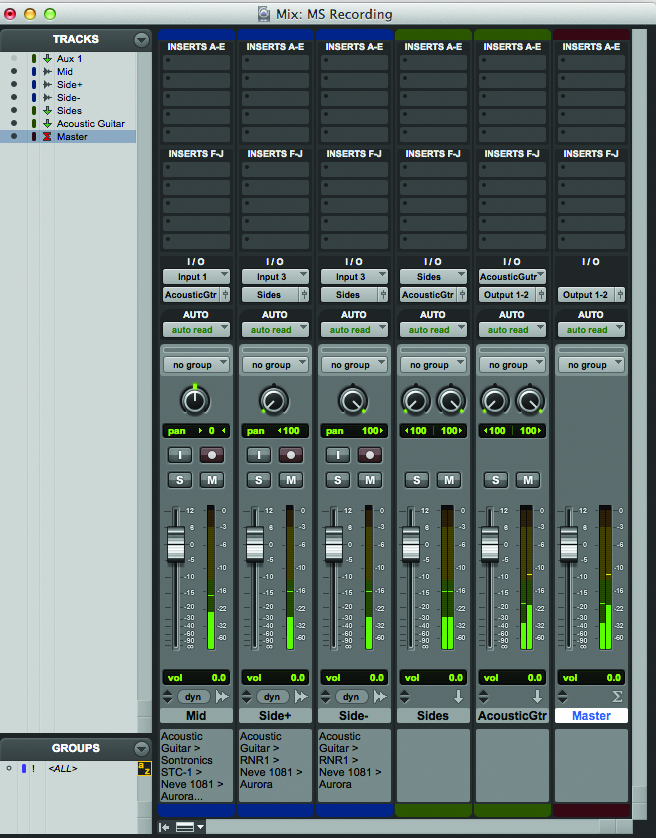
You can then hide the initial two side channels as any further processing, such as EQ or compression, you do in the mix will want to be applied to the side buss to affect both sides equally. Experiment with different blends of the mid and side channels to hear how it affects the stereo width of the recording. Be aware, however, that if you mono the stereo M/S recording the sides will disappear completely, leaving only the mid, so don’t rely too heavily on the sides.
Sum and difference
Some mastering processors, such as the Fairchild 670
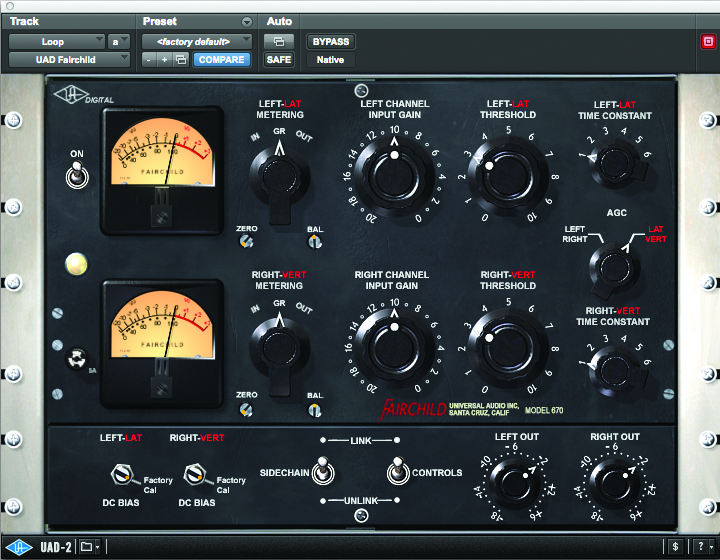
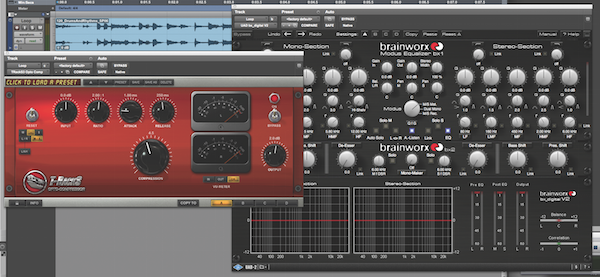
– enable you to use a similar trick to convert left/right stereo recordings into mid and side for processing (referred to as Lat-Vert mode on the Fairchild 670). Some plug-ins also have this mode, such as the Brainworx bx_digital V2 mastering EQ and IK Multimedia’s T-RackS Opto Comp.
However, many plug-ins, including all of those built-in to Pro Tools 10, don’t have this function, so in order to use them you have to create an M/S processing matrix. While M/S matrix plug-ins for splitting the signals to different channels do exist, it’s a fairly simple process to perform on your own using the built-in bussing in Pro Tools.
Open the M/S Processing session file on the DVD/Download. This session is a simple stereo drum loop on an audio channel. The loop itself is entirely ordinary, with no M/S techniques used in its construction.
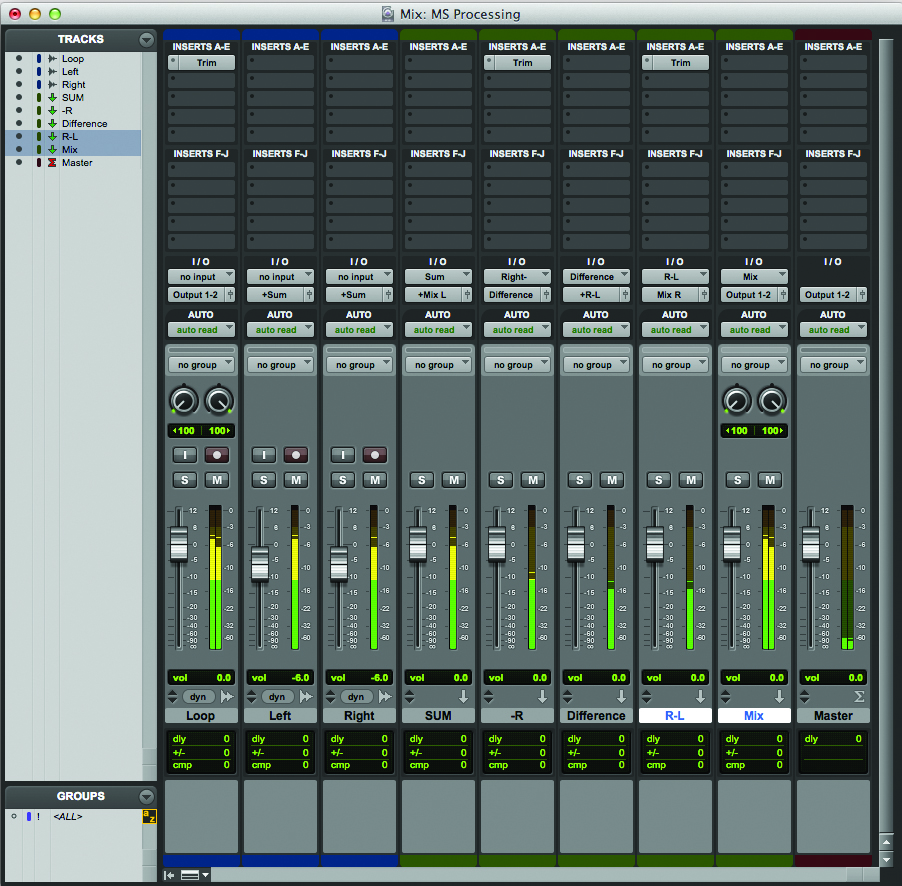
To process the mix in this way we use a sum and difference matrix to create our mid and sides. Note that the mid in this is not actually just the elements of the mix that are centred but a simple mono sum of the mix; equally, the side is not just those elements that are hard panned, but is in effect the difference between the left and right sides of the mix.
There are several ways of creating a sum and difference matrix using busses, but they all involve the same basic maths. The mid (or sum) is 1/2 x (left + right) and the side (or difference) is 1/2 x (left – right). To reprocess the stereo mix the left becomes the mid+side, and the right is mid-side.
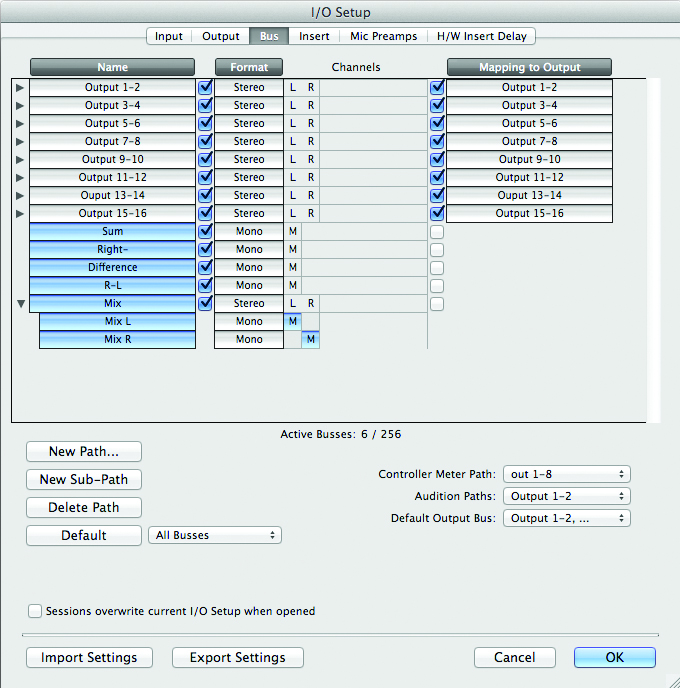
To create the matrix first right-click on the stereo loop audio channel and select Split into Mono. You should now have three audio channels; we’re going to leave the first one untouched to use as a reference later. Name the two new mono channels Left and Right respectively and buss both to a new mono aux channel titled Sum. This satisfies the left+right condition of the formula, but we still need to multiply it by 1/2. This is simply a matter of reducing the level by 6dB. It is best to do this before the two signals are summed to prevent digital clipping when they’re added together. Bring the faders down on both the left and right channels by 6dB each. If you are using a mouse, hold down [Ctrl] (PC) or [Cmd] (Mac) while dragging the faders to get fine control over the fader level.
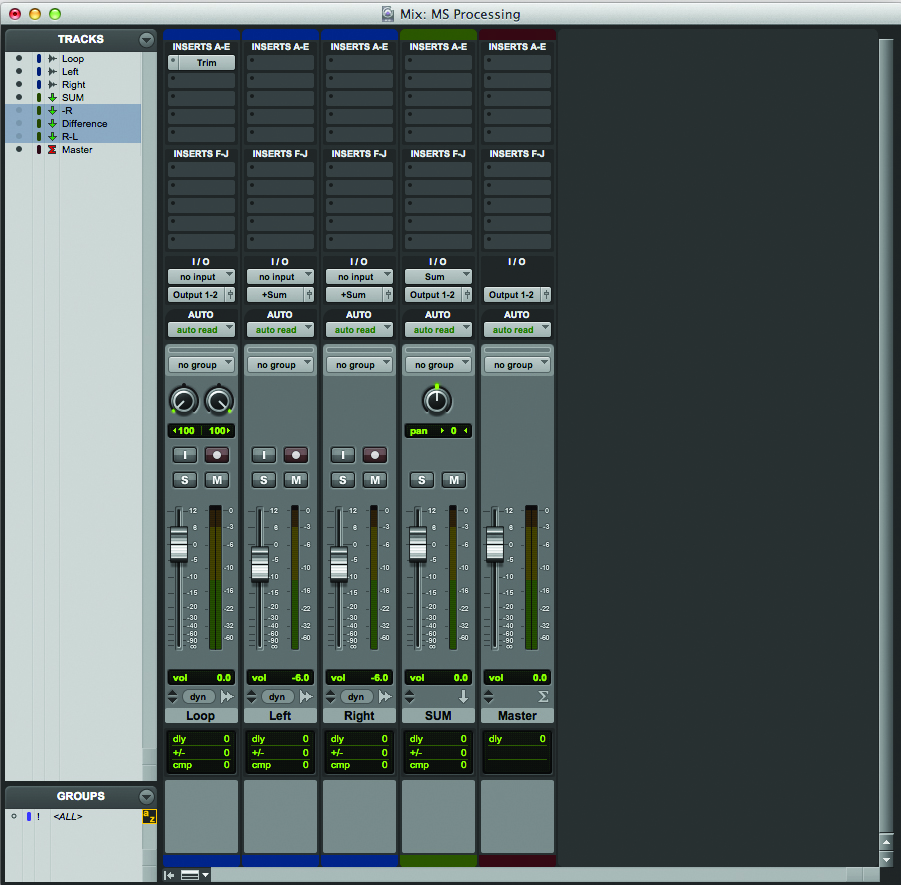
To create the sides – or difference – channel we need to sum the left channel with a polarity-reversed right channel. Hold down [Shift]+[Start] (PC) or [Shift]+[Ctrl] (Mac) and click on the output of the right channel to add an additional output. This time send it to a new mono aux channel titled ‘-R’. Do the same to the left channel and send it to a new mono aux channel titled ‘Difference’ – this is sometime also called ‘L-R’. The left should now be routed to both the sum and difference channels and the right to the sum and -R channels. To flip the polarity of the -R channel add an instance of Trim or EQ3 and engage the Polarity switch. Finally, route the new -R channel to the difference channel. This gives us our left-right condition.
Make a Difference
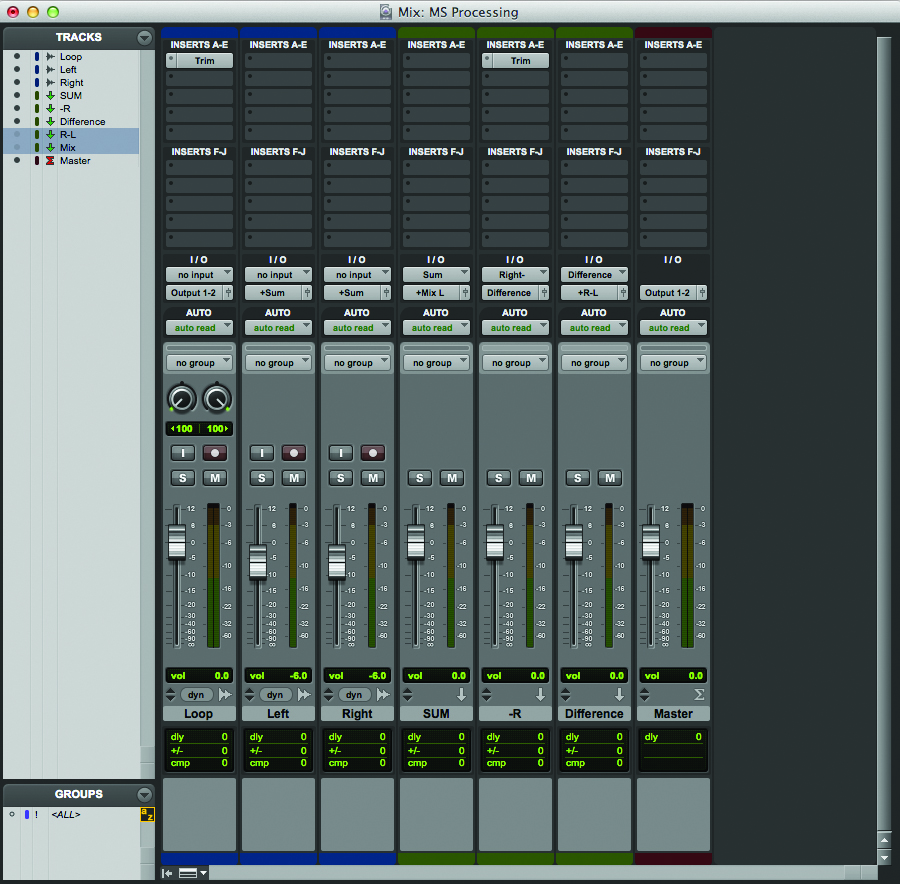
Combining the sum and difference channels to re-create the stereo image is done in exactly the same way as we summed the M/S recording earlier. Take the mid or sum signal and add that to two copies of the side or difference channel, with one panned hard left and the other polarity-reversed and panned hard right. The polarity-reversed difference channel is also sometimes called ‘R-L’ as it is effectively the same as adding the original right channel to a polarity-reversed left channel.
We can create it by routing the difference channel to a new mono aux channel titled ‘R-L’ and flipping the polarity with a Trim or EQ3 plug-in, just as we did with the -R channel.

Re-create the mix by then routing this channel to the right of a new stereo aux, the difference channel to the left, and the sum channel to both the left and right. Note that because of the panning laws in Pro Tools the sum channel must be sent independently to the left and right channels of the mix. If you send it to the centre you will find that if you try to null the new mix with the original that they don’t cancel. If you are using the default -3dB pan law you could also simply lift the sum by 3dB.
However, be aware that this will cease to work if you change the pan law, so it’s good practice to route the signal to both left and right independently using sub-paths in the I/O window.
Parts of the process
Now that you have created your matrix you can go ahead and process the sum and difference channels with any mono plug-ins you like – or even route them out to hardware if you prefer. You will find that this method brings a whole new lease of life to your existing processors, as you can get great results by compressing the mids and sides differently, re-balancing the image, or by adding more sides to your mix to create a wider stereo image.
When using processors, though, be aware that any phasing or latency that isn’t copied exactly onto both sides will smear the image slightly. To prevent this we usually prefer to use linear-phase EQs rather than analogue or analogue modelling EQs.