Pro Tools Tutorial: Cutting Edge Production Techniques – The Multiple Buss Method
Mixing into a single stereo buss isn’t the only approach. Mike Hillier looks at how to work with stems and multiple busses… The stereo buss techniques we looked at last time get a complete overhaul in this workshop, as we look at using a combination of busses in parallel to achieve an altogether different approach […]
Mixing into a single stereo buss isn’t the only approach. Mike Hillier looks at how to work with stems and multiple busses…
The stereo buss techniques we looked at last time get a complete overhaul in this workshop, as we look at using a combination of busses in parallel to achieve an altogether different approach to mixing.
Perhaps the most famous exponent of the multi-buss method is Michael Brauer, whose ‘Brauerize’ technique uses an incredibly complex combination of five mix busses (four processed and one clean), alongside six additional parallel aux busses.
This setup enables Brauer to work incredibly quickly and deliver exceptional mixes, but it’s specific to his hardware collection. Your own multi-buss techniques can be as simple or as complicated as you require. Similarly, you can use whatever plug-ins or hardware effects you have available to you.
Easy Rider
The simplest way of using a multi-buss technique is simply to create a number of stem busses, each with their own processing setups. So a basic pop/rock song might have a drums buss, a guitars buss, a pads/keys buss and a vocal buss, which could each feed into the final stereo buss with its own processing if you require more.
This is a fairly common technique, but it can be a little rigid and can leave you questioning where some instruments should go. The bass, for instance, could be routed to its own buss, the guitars buss, or the drums buss.
An alternative approach is to route things to busses based on their properties rather than simply the type of instrument, and while this may often be the same in many cases it can split up similar instruments in a more musical manner.
For instance, all the high percussive elements with fast transients would be sent to one buss, while low fast-transient material could be sent to another. Similarly, slower, less transient material could be separated by frequency across two or more busses. This way you can tune the processing on each buss to both its transient nature and position in the spectrum.
This method also tends to group most of the drum kit and percussive elements with the bass guitar or synth, which can help to create a solid rhythmic foundation. This way a fast pizzicato part played on the same instrument as a slower legato part will be sent to two different busses.
A string section could be separated out into two or more different busses and may end up sharing a buss with the guitars and keys depending on their musical properties.
Finally, it is important to consider that instruments need not only be sent to a single buss. We have had a lot of success sending the bass guitar to both the guitar and drums buss in a simple rock mix.
This method can become difficult to stay on top of, especially if you want to bring the instrument up or down in the mix without altering the behaviour of either buss. But it can also help the instruments to sit together and work as a mix.
In this example, the bass will come up in the mix as either the guitars or the drums come down, as the buss compression on either channel starts working less hard and will drop out slightly as the instruments come in and push the compressor into gain reduction.
One of the key advantages of multi-buss processing over a single master buss stage is that you can pick and choose the types of compressor to suit the nature of the instrument. Some compressors will add a sonic signature simply by passing audio through them and no gain reduction will be required.
This way you can select your favourite low-end processor for the drums or bass, while something with more top-end sheen can be kept available for vocals.
Pro Tip
Michael Brauer’s ‘Brauerize’ technique not only uses multiple busses for routing audio, but also six send effects (one stereo and five mono) which any signal can be quickly sent to.
Each of these send effects is actually just another compressor, which Michael uses for parallel processing, and by having each of the six on a send effect he can quickly bring up each of the six processors one at a time to see what each one adds to the sound.
You can emulate this in the DAW very easily by simply using six (or however many you want) more buss channels assigned to your favourite plug-in or hardware compressors, and then bringing each one up on a send.
Mixing With Instrument Busses
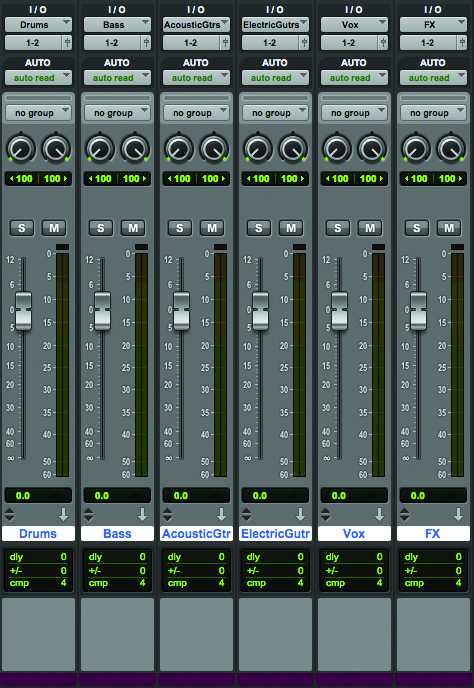
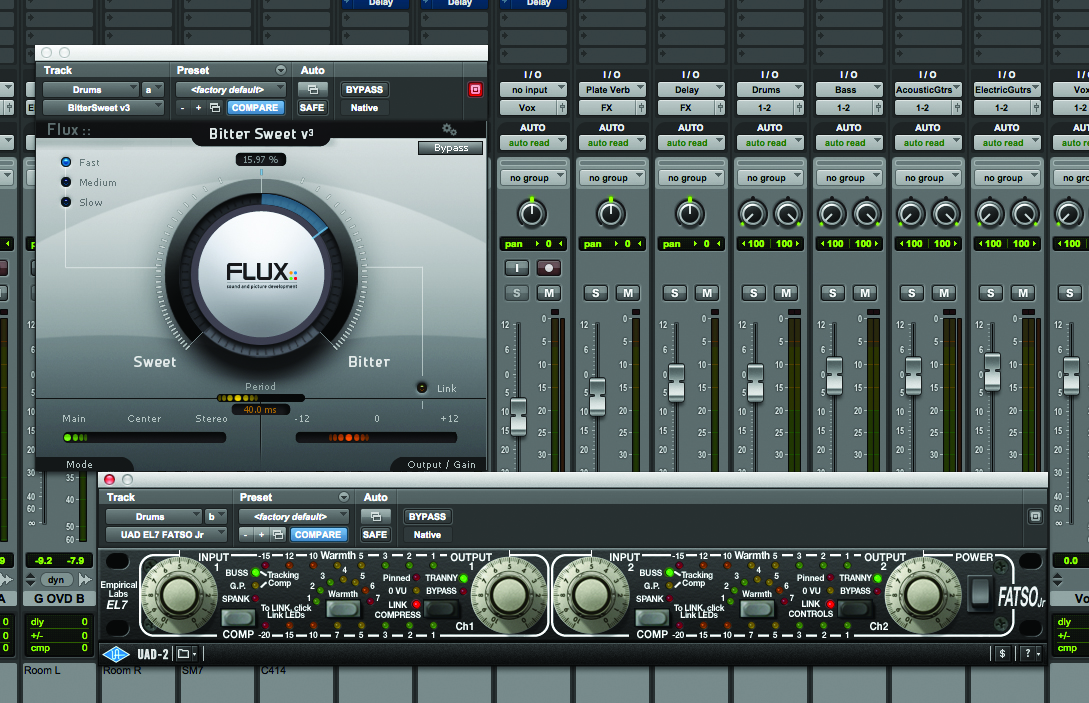
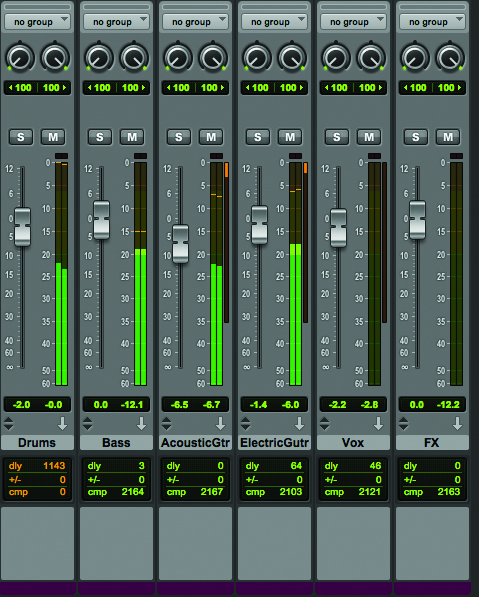
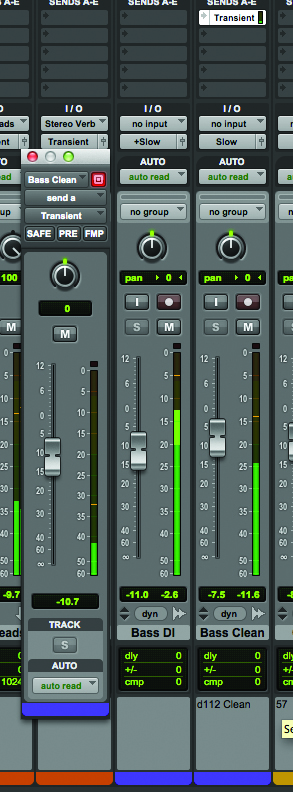
1: Create busses for each group of instruments and place these at the end of the session. We’ve used six: drums, bass, electric guitar, acoustic guitar, vox and FX. Assign an input buss to each
2: Route each channel to one of the output stems. We’ve done some sub-mixing on the drums, but otherwise everything is routed to one of these busses instead of going straight to the outputs

3: We added: Flux BitterSweet and UAD FATSO Jr on drums, EQ and compression on bass, EQ and 1176 emulation on acoustic guitars, compression on electric guitars, and the Eventide UltraChannel on vox
4: Now there’s signal going through the busses, tweak each processor. It can be useful to keep multiple processors open, as any change to one may necessitate a change to another.
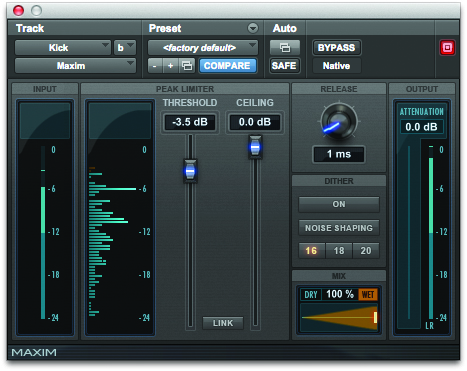
5: If one instrument is pushing the compressor more than the rest, such as a kick drum pumping the drum buss compressor, it can be useful to try and tame it before it hits the buss. Place a compressor or limiter to tame the peaks before they trigger the buss compression
6: With the processing sorted you can adjust the relative levels straight from the buss faders. Bringing up one channel will not have a direct consequence on the others, but you will have to ensure you don’t peak your master outputs
Changing the Buss Assignments
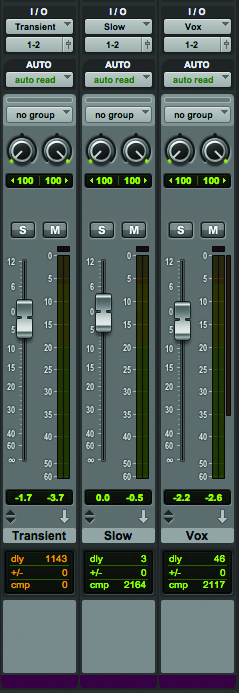
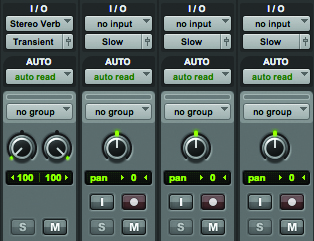
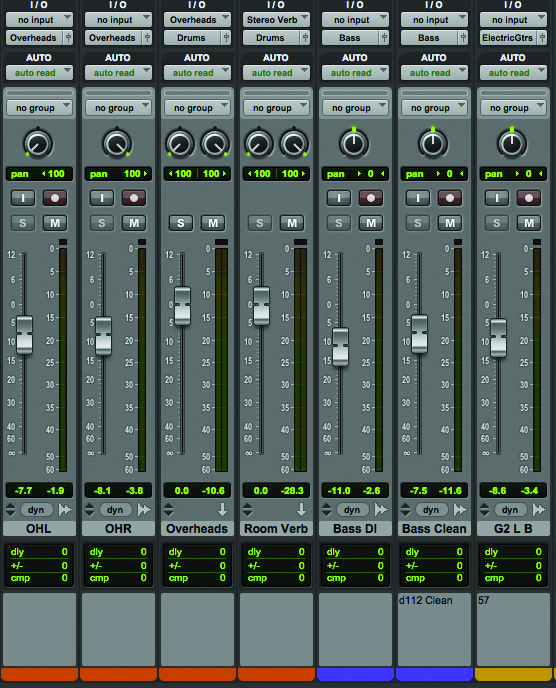
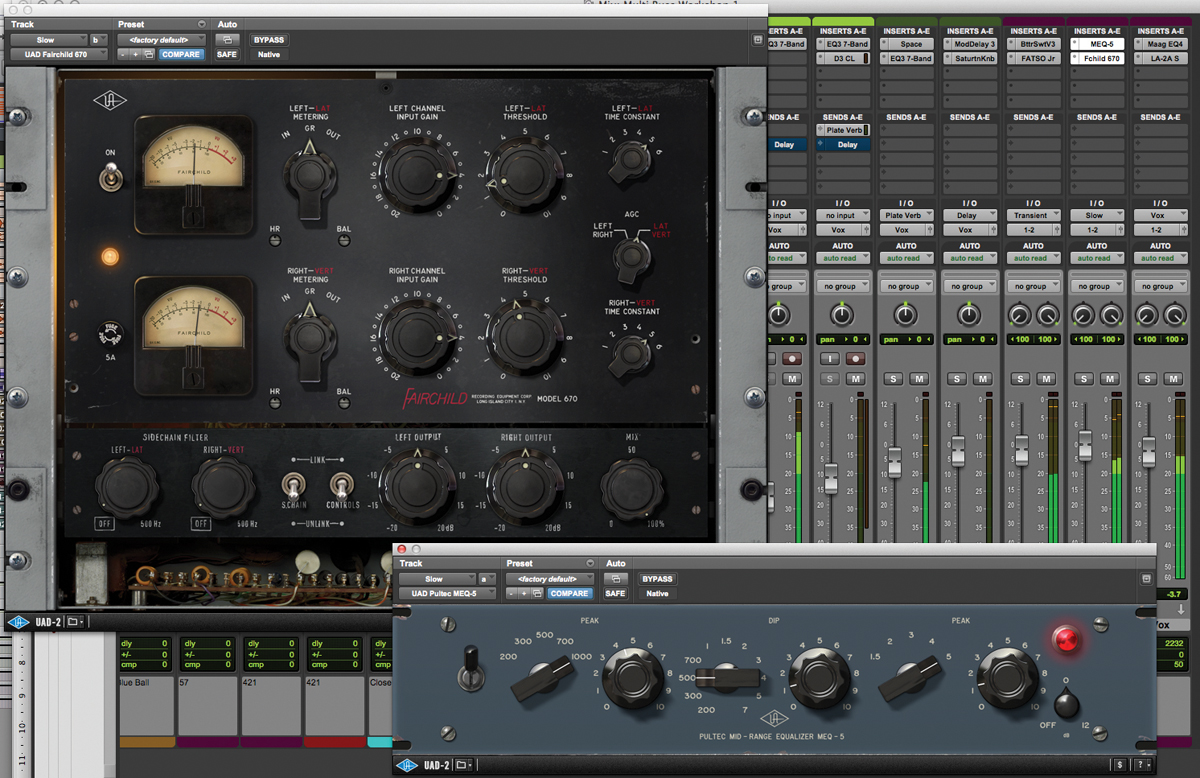
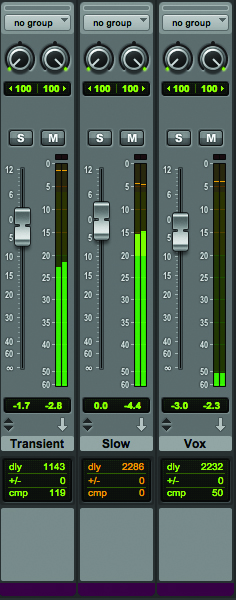
1: Instead of creating stems by instrument type, this time create busses based on the musical properties. We’ve set up one for transient material, one for slower material and another for vocals
2: With fewer busses, elements are combined differently. The FX go to the vox buss, the bass and electric guitars go to the slow buss, and acoustic guitars are routed with the drums to the transient buss
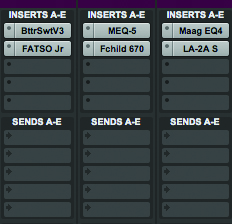
3: We’ve added the transient shaping tool and FATSO Jr on the transient buss; the slow buss has a UAD Pultec MEQ-5 and a UAD Fairchild 670; and the vocal buss has a Maag EQ4 and UAD LA-2A.
4: To make the bass pump in time with the drums, route some of the signal into the transient buss. By using a Send you can also control the relative levels separately
5: With everything routed it can take a while to get the processors properly tuned. You now have to not only consider all the different elements that are making up each buss, but also the different functions of busses that carry a duplicate of a single channel
6: With single channels being sent to multiple busses, balancing becomes tricky; but with the right blend every instrument should have its place. The buss processing should take some of the strain out of the mix, with each compressor helping the instruments sit together

