Pro Tools Tutorial: Getting To Grips With Gain Staging
Setting up your signal chain correctly before you start recording will make for a smoother, less frustrating mixing process. Mike Hillier explains the rules in this Pro Tools Tutorial Proper gain-staging is a key concept within audio engineering, yet it’s one that time and again is misunderstood within the digital world. In […]
Setting up your signal chain correctly before you start recording will make for a smoother, less frustrating mixing process. Mike Hillier explains the rules in this Pro Tools Tutorial
Proper gain-staging is a key concept within audio engineering, yet it’s one that time and again is misunderstood within the digital world. In the ‘good old days’ of analogue recording engineers would have to properly gain-stage their recording equipment to guarantee a good signal-to-noise ratio without distortion. Drop the signal too low and you risk raising the noise floor in your signal path; raise the signal too high and you run out of operating headroom and the signal will begin to distort.
Once the signal has reached the digital domain the noise floor issues aren’t really important anymore. Even entry-level A-to-D converters have a signal-to-noise ratio of over 100dB, and with 24-bit recording offering a dynamic range around 144dB (the new 32-bit floating point format in Pro Tools 10 brings this up to a staggering 1,680dB dynamic range )

The noise floor becomes almost forgettable. This wasn’t always the case: early digital equipment had a very high noise floor, so users had to run equipment as close to 0dBFS as possible without clipping, leaving very little headroom.
However, despite the extra dynamic range of modern digital equipment, many users still try to record as close to 0dBFS as possible, leaving themselves very little headroom before harsh digital clipping occurs. The first rule to good gain-staging in Pro Tools (and, in fact, any DAW) is to record at 24-bit and give yourself sufficient headroom in your initial recording. 0VU on an analogue system equates to around -18dBFS on most A-D converters and there are many engineers who prefer to use this figure as a guide when recording in Pro Tools. The meters might not look like they’re doing much, but at -18dBFS you’re giving yourself a good amount of headroom and you’re still well above the noise floor. There’s no reason to stick exactly to this figure, though; we usually find ourselves aiming for around -12dBFS.

The important factor is to not push the recording too close to 0dBFS. This is especially important when recording singers and acoustic instruments without a compressor in the analogue signal path, as the signal can suddenly leap up – and if you’ve given yourself 12–18dB of headroom, the recording will most likely not clip if it does.
Gain In The Channel Strip
Once the signal is inside Pro Tools there is no excuse for clipping. Any clips that occur after this point can and should be fixed as you go along, unless you are deliberately degrading audio for sound-design reasons.
Understanding where each gain change occurs is key to ensuring you maintain a solid gain structure throughout your signal path. In the case of an audio channel the gain is first determined by the clip (previously known as a region in Pro Tools 9 – a name change which is going to make discussing clipping quite complicated!) itself, which then goes to the inserts and, finally, to the fader. This means that any gain changes made by an insert effect cannot be fixed by simply pulling down the fader. You can test this very quickly by applying a Trim insert to a clip and pushing up the level until it distorts.

Once it’s distorting from the Trim plug-in, pull down the fader and the signal will still be distorting. In Pro Tools 9 and earlier versions the Trim plug-in was an important tool for gain-staging. Placed in the first Insert slot, it can be used to bring down the level of a signal before additional processing, ensuring that even a hot recording was given some headroom.
In Pro Tools 10 the Trim plug-in is still an option, but the new Clip Gain feature lets you dial down the level of the clip directly on the clip itself. This gain occurs before the inserts, and not only does it therefore perform a similar function to the Trim plug-in without using up one of your Insert slots, it also provides visual feedback as the waveform shrinks and grows relative to the clip gain level. What’s more, it can be used to quickly alter sections of clips individually, or multiple clips across multiple channels simultaneously. Simply highlight the clips (or parts of a clip) you want alter and press [Shift]+[Win]+[Up] (PC) or [Shift]+[Ctrl]+[Up] (Mac) to raise the gain; [Shift]+[Win]+[Down] (PC) or [Shift]+[Ctrl]+[Down] (Mac) to reduce the gain.

This is especially useful for vocals, when you would normally ride the fader to smooth out a performance. Now the performance can be smoothed before any processing, requiring less compression and making it easier to set the compressor threshold. To view the clip gain line ensure View>Clip>Clip Gain Line is enabled.

Keeping Headroom Between Inserts
If you don’t leave yourself plenty of headroom in the audio signal before it reaches the Inserts there is a risk that you could push the audio into digital distortion through processing. Even something as simple as applying a high-pass filter or an EQ notch to a signal can push a hot signal into clipping. This may appear counter-intuitive since filtering should reduce the overall signal level, but in reality an EQ will actually boost slightly around the edge of a cut, which in some circumstances can be enough to push a signal into clipping (watch out for this with high-pass filters , which are commonly used to clean out noise below the fundamental but can also sometimes boost the fundamental frequency slightly).

If you’ve recorded with sufficient headroom or used the Trim plug-in or Clip Gain feature to give the signal headroom, you will be able to boost or cut with an EQ without worrying about introducing any digital clipping distortion.
Of course, now that your signal is lower you will notice that any level-dependent plug-ins – such as dynamics processors or saturation effects – will be behaving differently. However, any level-dependent plug-in is also likely to have its own level controls, so it should be possible to control the level going into and from the plug-in directly from the plug-in itself. If you feel that you aren’t getting sufficient level to get the necessary effect, simply boost the level going into the plug-in, but counterbalance this by reducing the level coming out of the plug-in so that your overall level remains in the -12dB to -18dB range. The Bomb Factory BF-76 compressor , for example, doesn’t have a threshold control to set the level at which the compression kicks in, but it does have an input knob that can be dialled up to achieve the necessary compression characteristics, as well as an output knob to control the level coming out of the BF76 and into the next plug-in in the chain.

Leaving this kind of headroom will ensure that you find it much easier to work, especially when EQ’ing, as you should have more than sufficient room to make large boosts without running the risk of pushing the signal too high. Additionally, when working on large projects with lots of busses you won’t risk peaking the signal when summing two or more channels together.
Headroom And The Summing Buss
Aux and instrument channels have a similar gain structure to audio channels, although an aux channel’s basic level is determined by the level of signal coming out of the buss, while an instrument channel’s basic level is determined by the plug-in instrument in the first Insert slot. Master channels, however, have an important difference: the fader on a master channel comes before any Inserts and, importantly, it also comes before any summing, so you can use a master channel to prevent a buss from clipping (not that we would recommend this – it’s better practice to turn down the individual channels going into the buss). As well as the master summing buss, this is useful for any sub-groups or send effects you might have created, as they can be turned down before they reach the aux channel. What’s more, it is useful when using outboard equipment as it enables you to add the outboard as an Insert on the master channel and control the level going to the outboard equipment using the fader, ensuring you work closer to your gear’s optimal input level and you’re not constantly reaching for pads.

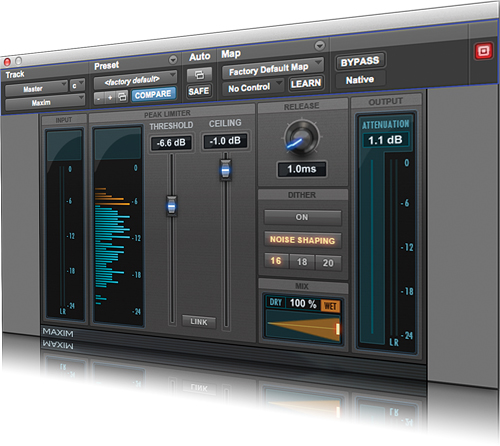
The one place where you do want to see the meters really starting to move is the final stereo output buss. You still don’t want to clip the signal at all, but you can afford to have the peaks much closer to 0dBFS than you would want on any of the individual channels or sub-groups. If you’re producing the final master you want to get the signal as loud as possible, although leaving a little headroom – around 1dB – can improve the quality of any MP3 encoding that might happen to the signal further down the line. If you’re just producing a mix, which will be mastered later on, leaving a little more room is fine. The mastering engineer will also want some headroom to apply EQ and gain changes.