How to bounce stems in Pro Tools
There are numerous ways to share your track’s raw ingredients with other producers. Here, Grammy-nominated mix engineer Jesse Ray Ernster shares his professional approach to bouncing stems in Pro Tools.
In spite of the social isolation we face due to the global pandemic, musical collaboration right now is as present as it has ever been. In fact, thanks to increasing adoption of online and remote-recording techniques, maybe even more so. Even prior to the crisis, the normalisation of collaborative technology within the music industry had been on the rise, as long-distance production became easier and easier to accomplish.
Whether you’re an artist, producer or mixer, the chances are that you have been involved in some sort of remote-recording scenario in which you were asked to share song files or they were shared with you. A common issue that complicates such sharing is that of clashing DAWs. If your DAW is different to your collaborator’s, you’ll have to acquire compatible audio stem files that will allow the work to continue. There are a few methods, and each has its pros and cons.
Everybody bounce now
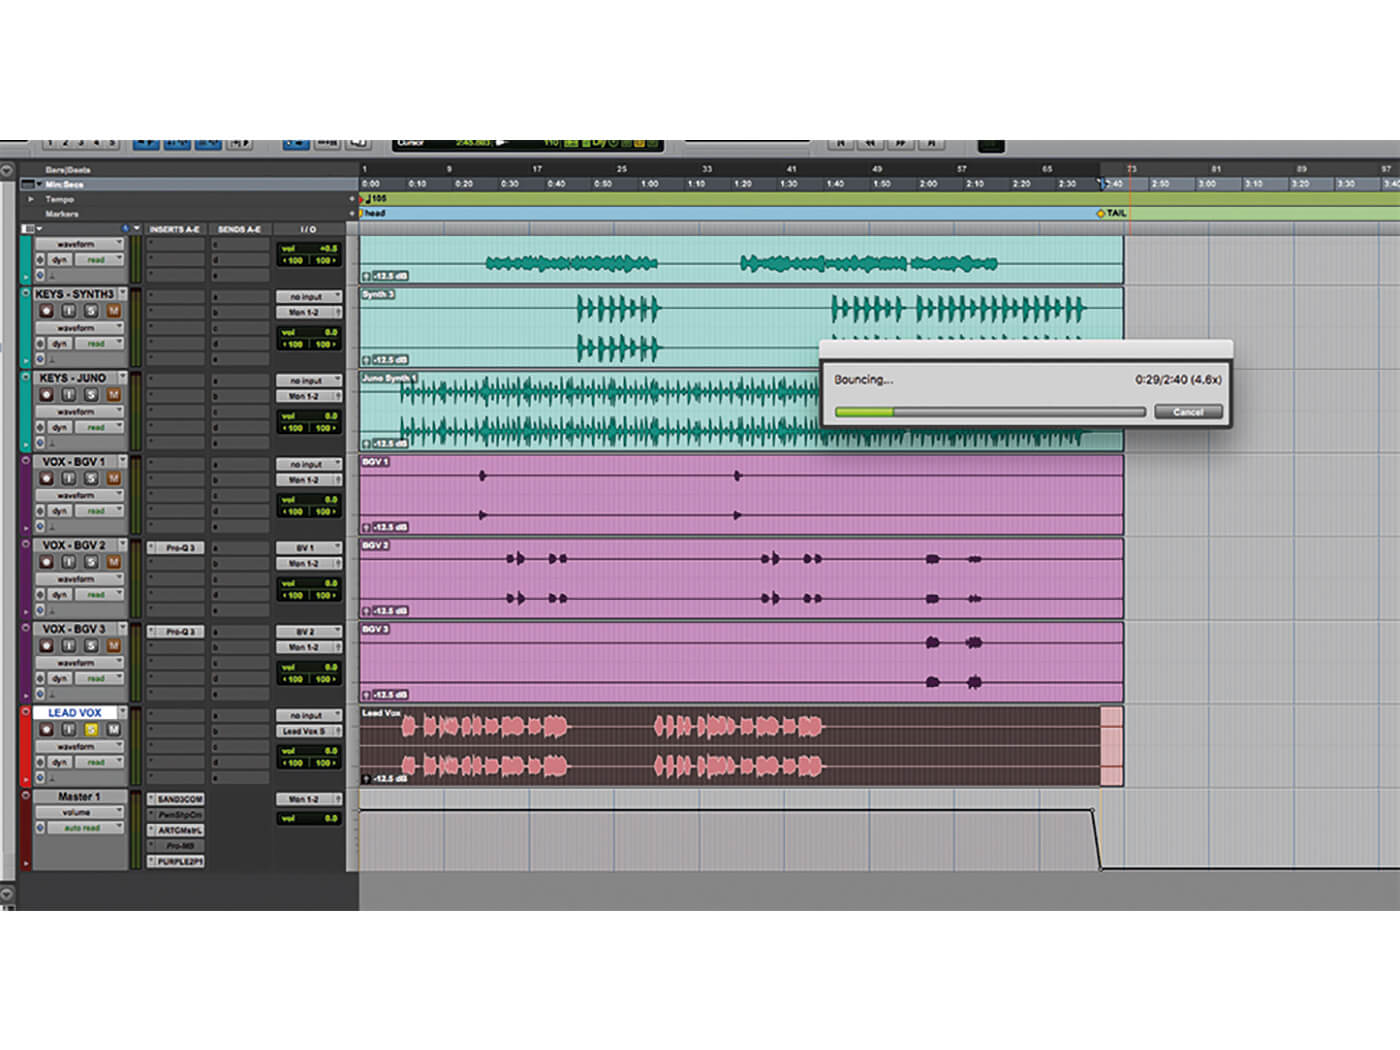
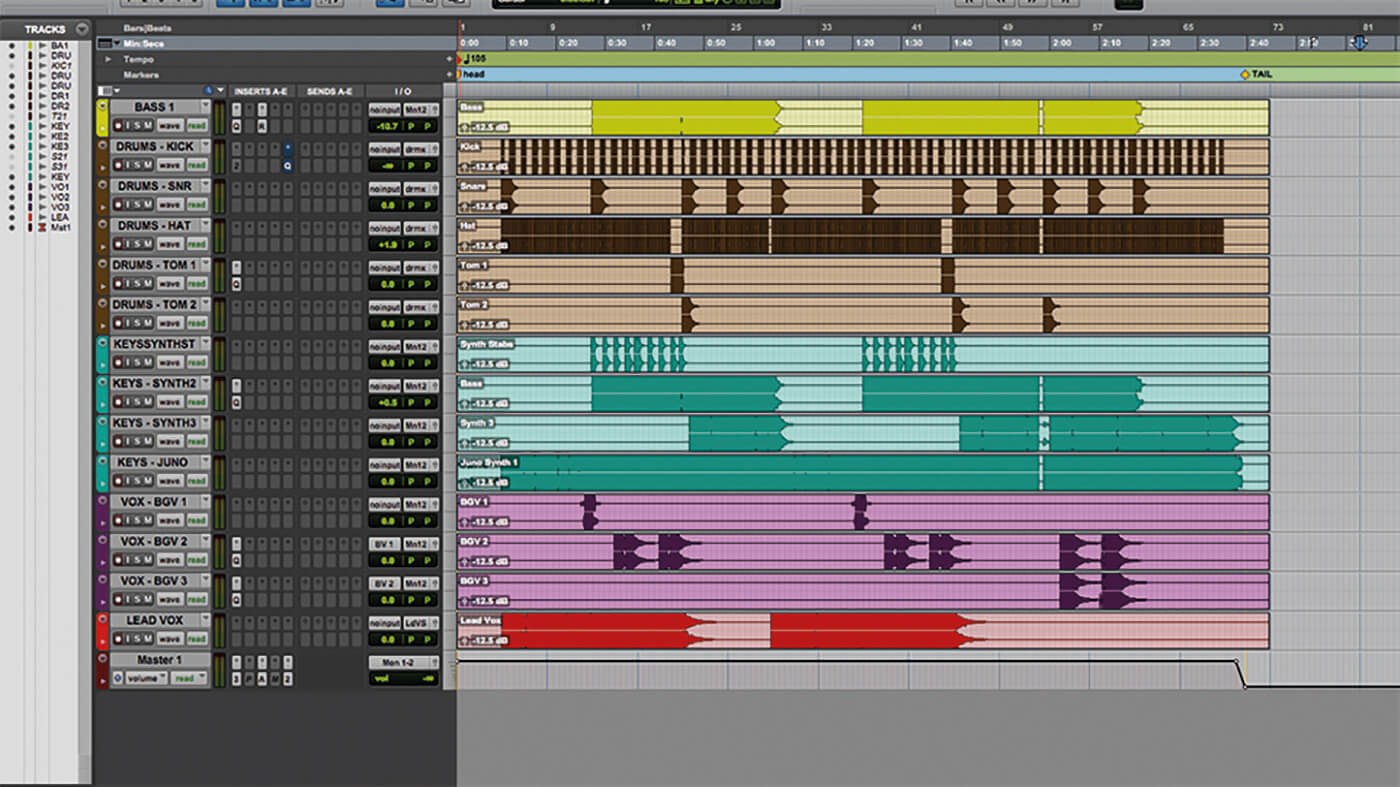
Track Bounce is a common method that we use. It entails selecting all tracks within your session, right-clicking and selecting the Track Bounce option. This method exports every track out of Pro Tools with all processing and automation printed, with the exception of the master bus processing. This essentially prints down all of the processing on each track, consolidates the regions and exports them into a tidy folder of your choosing.
This is a fast and effective method for sharing a worktape with a co-writer, producer or performer that needs a quick copy of the loose stem files in order to fulfil their role in the creative process. Although this is a convenient and popular way of exporting stems, these stems do not pass through the master bus’s chain of plug-ins as they are being exported, which can result in the stems sounding different to when they’re played back in the full mix that was bounced out of the session.
For example, if the song has a mix-bus chain that includes a stereo bus compressor followed by an EQ (with low- and hi-shelf boosts) and a phaser that automates a filter to open up its intro, those integral sonic imprints will not be captured when exporting stems this way. Consequently, your collaborators may miss out on the creative vision.
Producers who have been diligently dialling in their rough reference mixes for weeks will lose the integral sonic glue they’ve grown accustomed to when they send stems to the mixing engineer responsible for final mixdown. For scenarios such as this, we recommend the solo-bounce technique.
The butler did it
Solo-bouncing sees the user solo’ing each track (or group of desired tracks) one at a time and then traditionally bouncing the song using Option-Cmd-B. This is the purest way to ensure that the resulting stems sound as close to the final glued mix as possible. Although this method boasts higher accuracy, it is extremely time-consuming. It can take days to the bounce stems for an entire album.
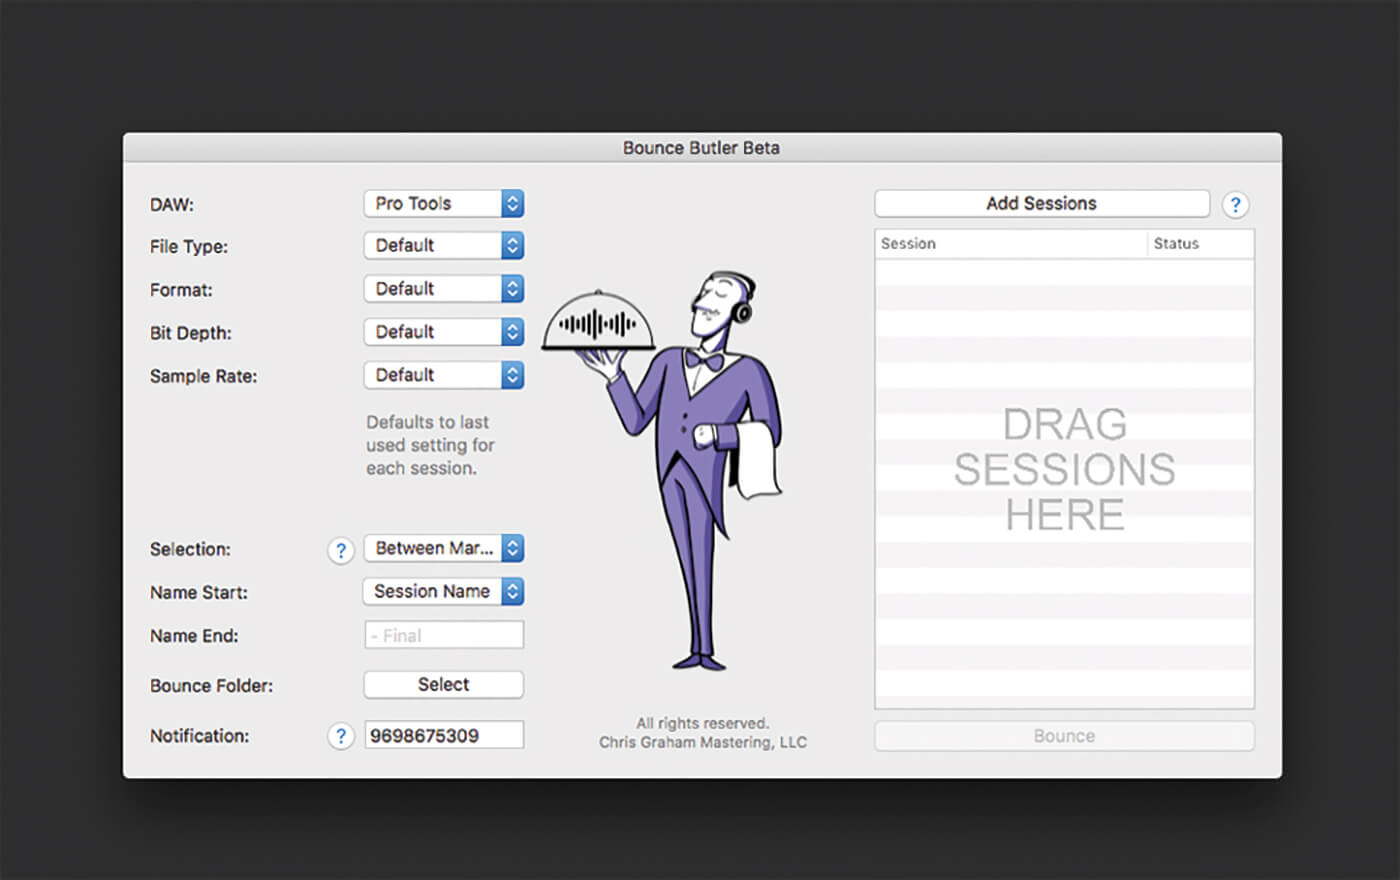
Many top-level producers and mixers alleviate this issue by hiring assistants to handle the delivery of stems after the completion of their role on a project. But you can also employ an automated task assistant within your computer to handle the bouncing of stems. Bounce Butler (bouncebutler.com) is an incredible free tool designed to help artists, producers and engineers save time on the remedial task of bouncing sessions.
The user simply selects which sessions to bounce and Bounce Butler bounces them all out one at a time, before texting your phone to let you know when the process is complete. We recommend preparing every solo stem session by solo’ing your desired tracks and using the Save As function to store and name that session with its coinciding solo’d stem. Any given song can have anywhere from five to 400 stems, so we recommend setting Bounce Butler to work at the end of your workday and letting it run overnight. When you wake up, you’ll be greeted to a set of complete stems ready to be sent out – alongside your invoice.
Leaving aside the convenience and advantages of these stem-delivery methods, the goal here is to provide a quality service that will bring value to our colleagues and collaborators. These tools afford us more flexibility than ever before and enable us to be helpful servants to the artists we are fortunate to work with.
Track bounce
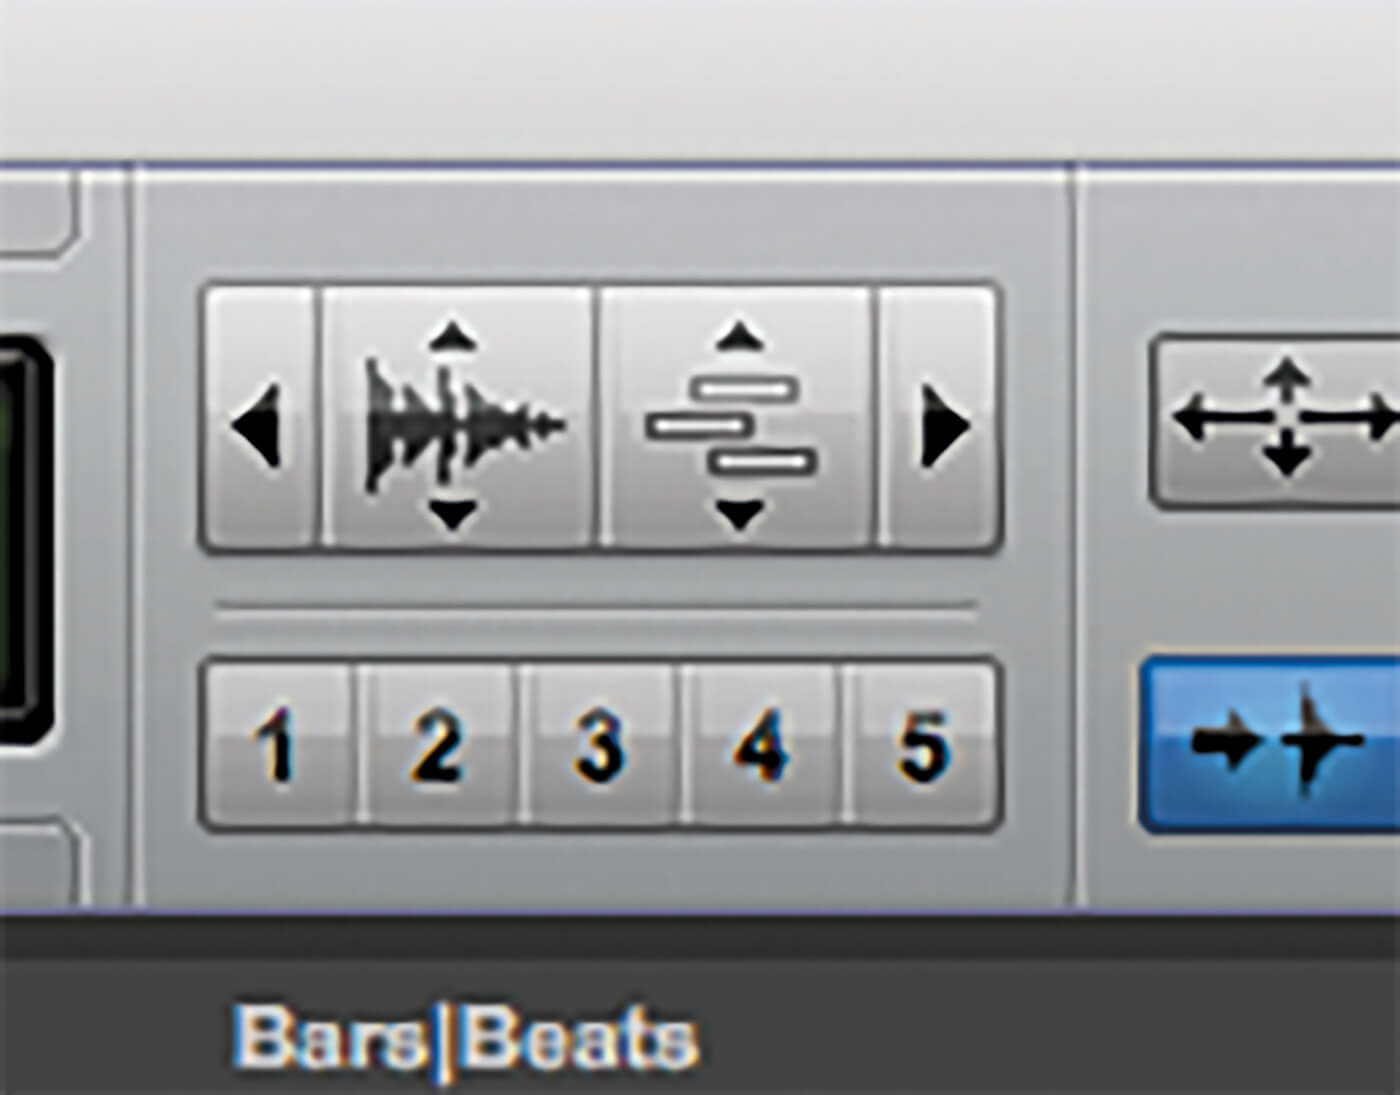
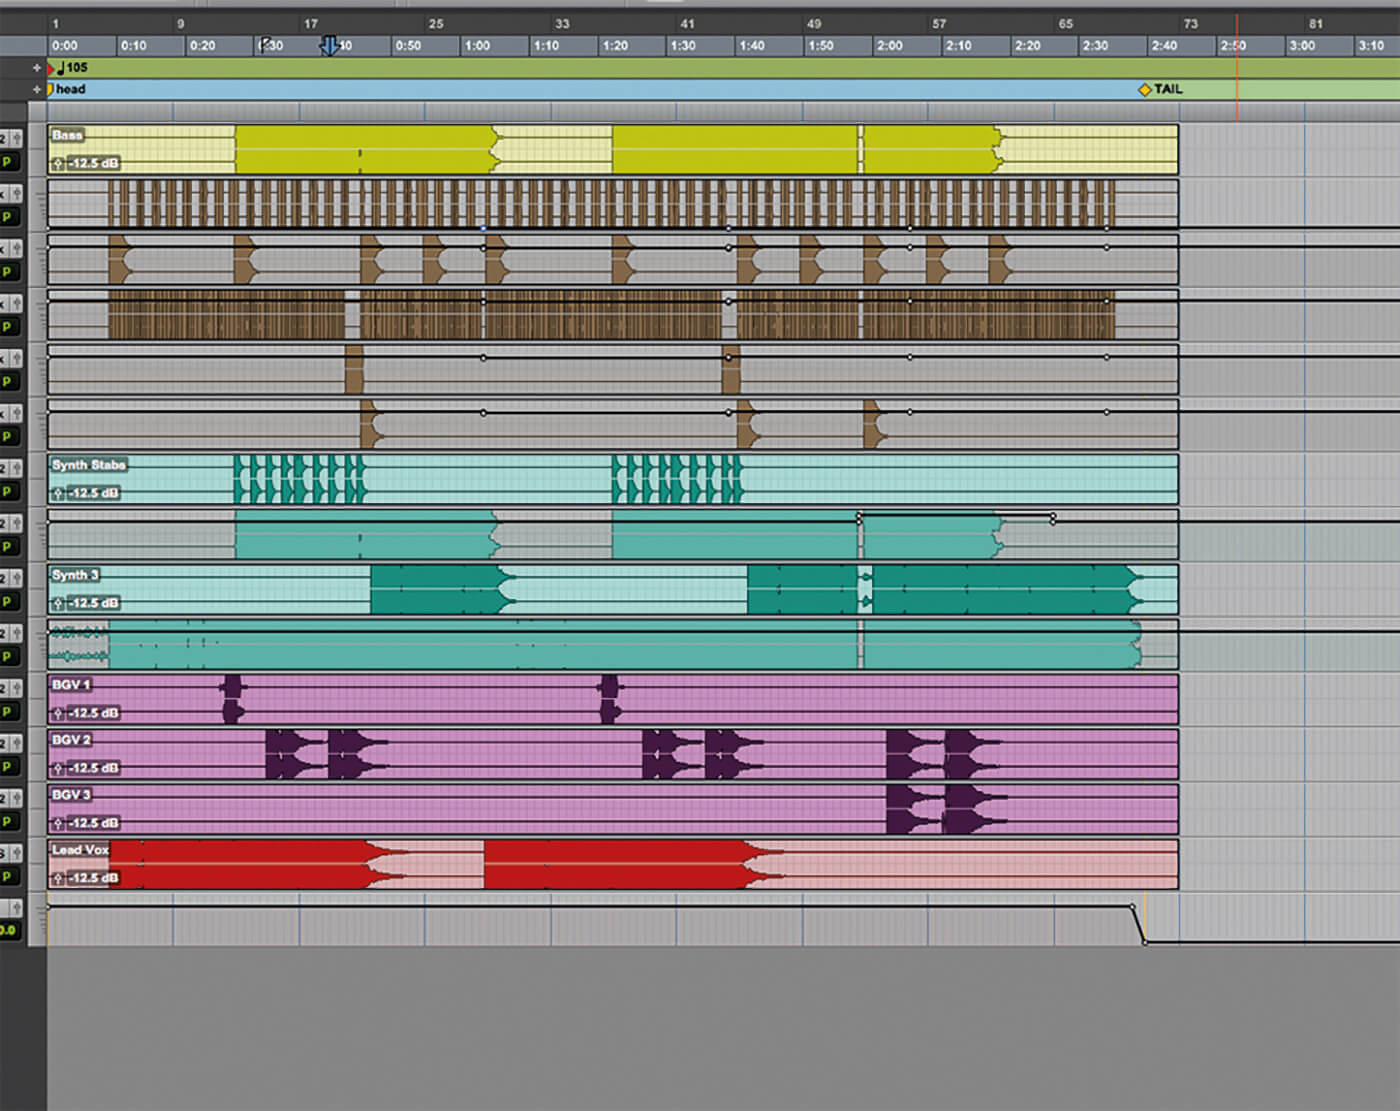
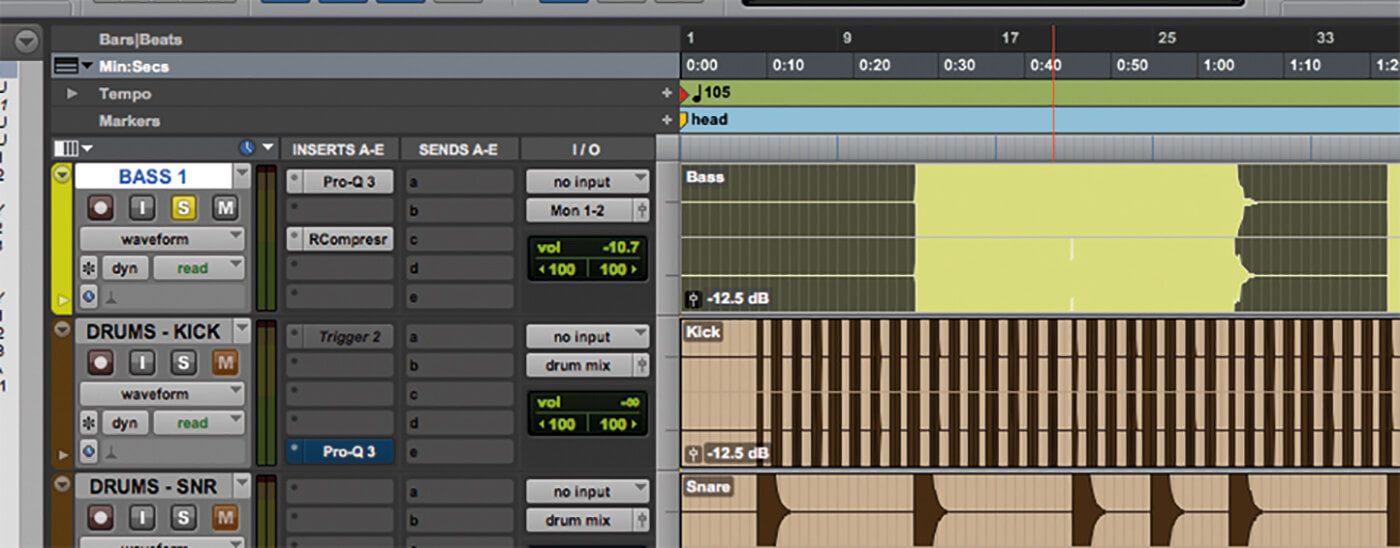
1. Open your desired session and use Audio Zoom to increase the height of your waveforms. Use this visual aid to assist in detecting any noise, clicks or pops before sending your stems.
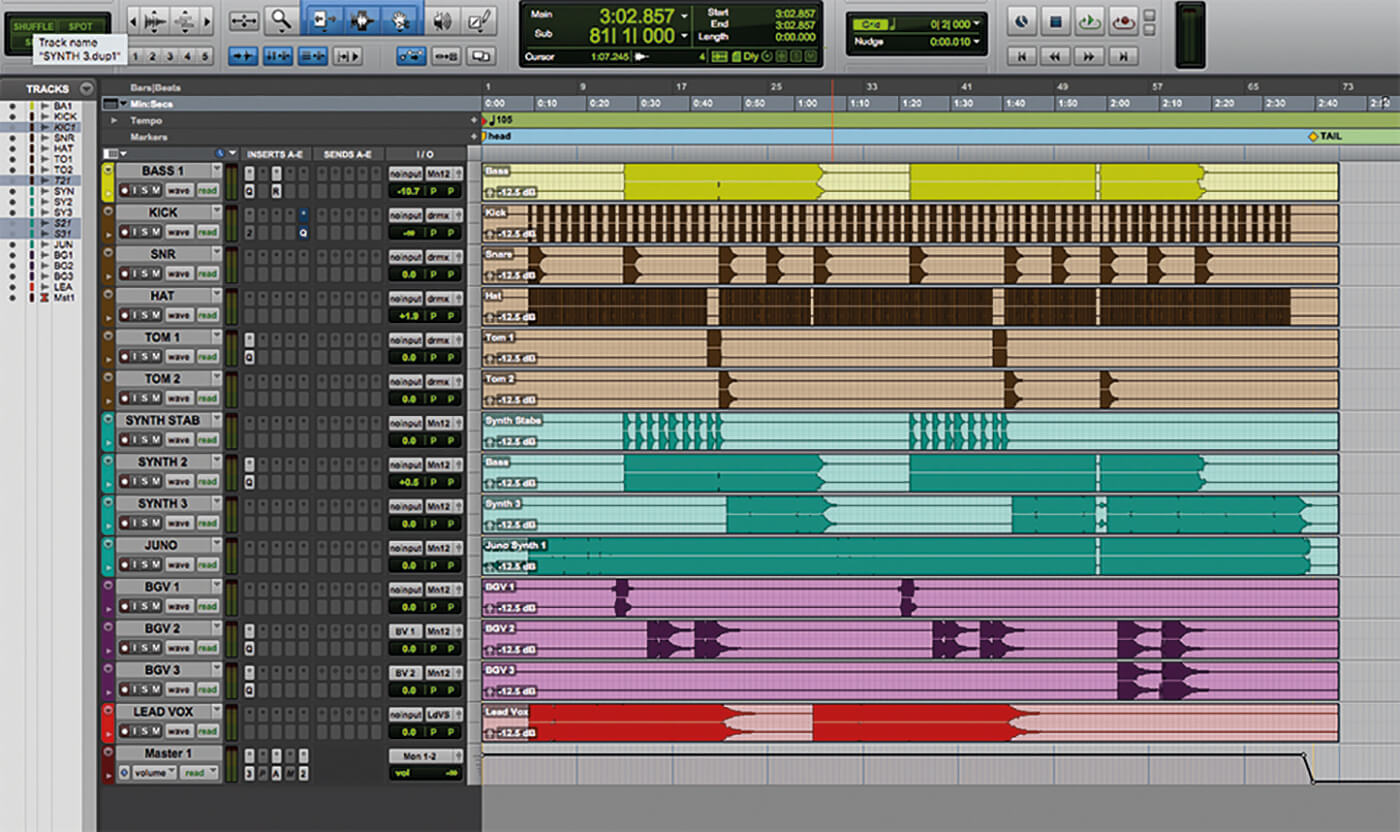
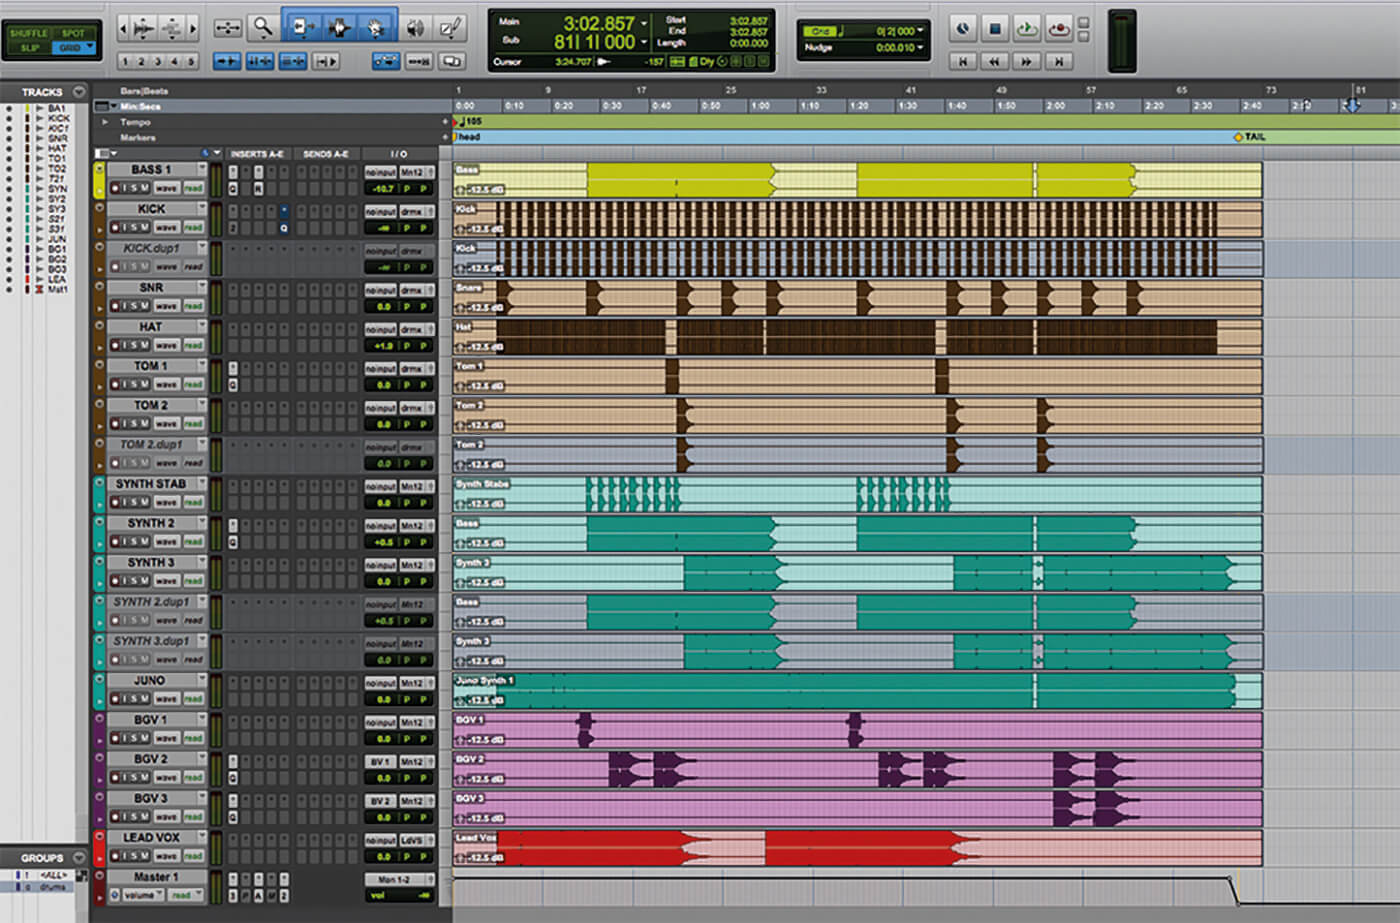
2. Hide all unused tracks that are not pertinent to the stem-delivery task at hand. This may include muted tracks, inactive tracks and unused auxiliaries.
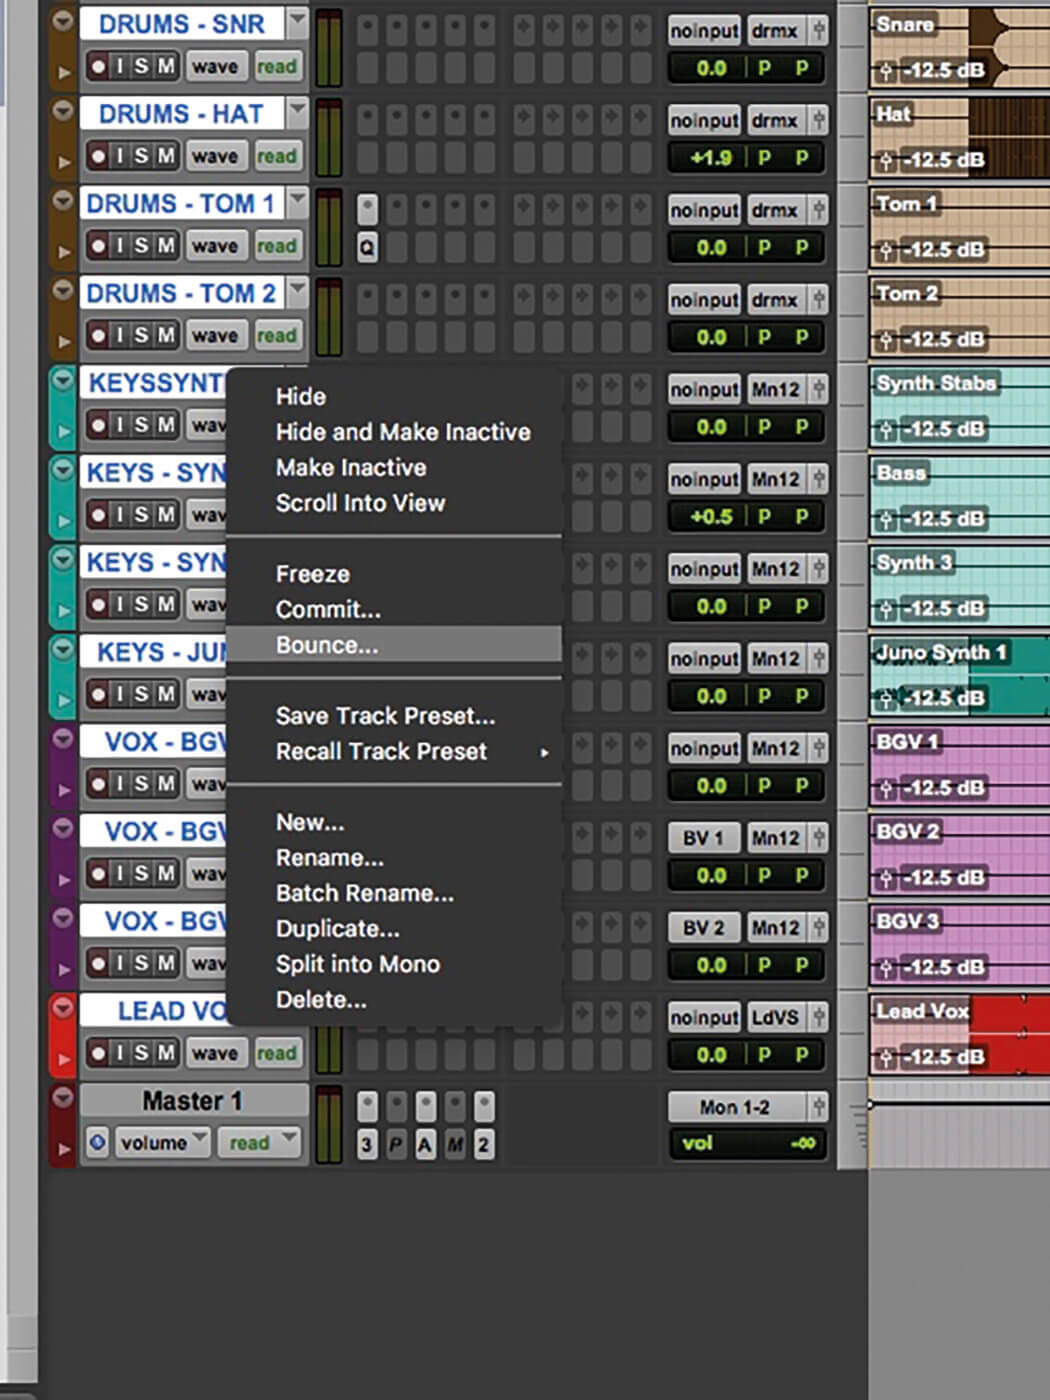
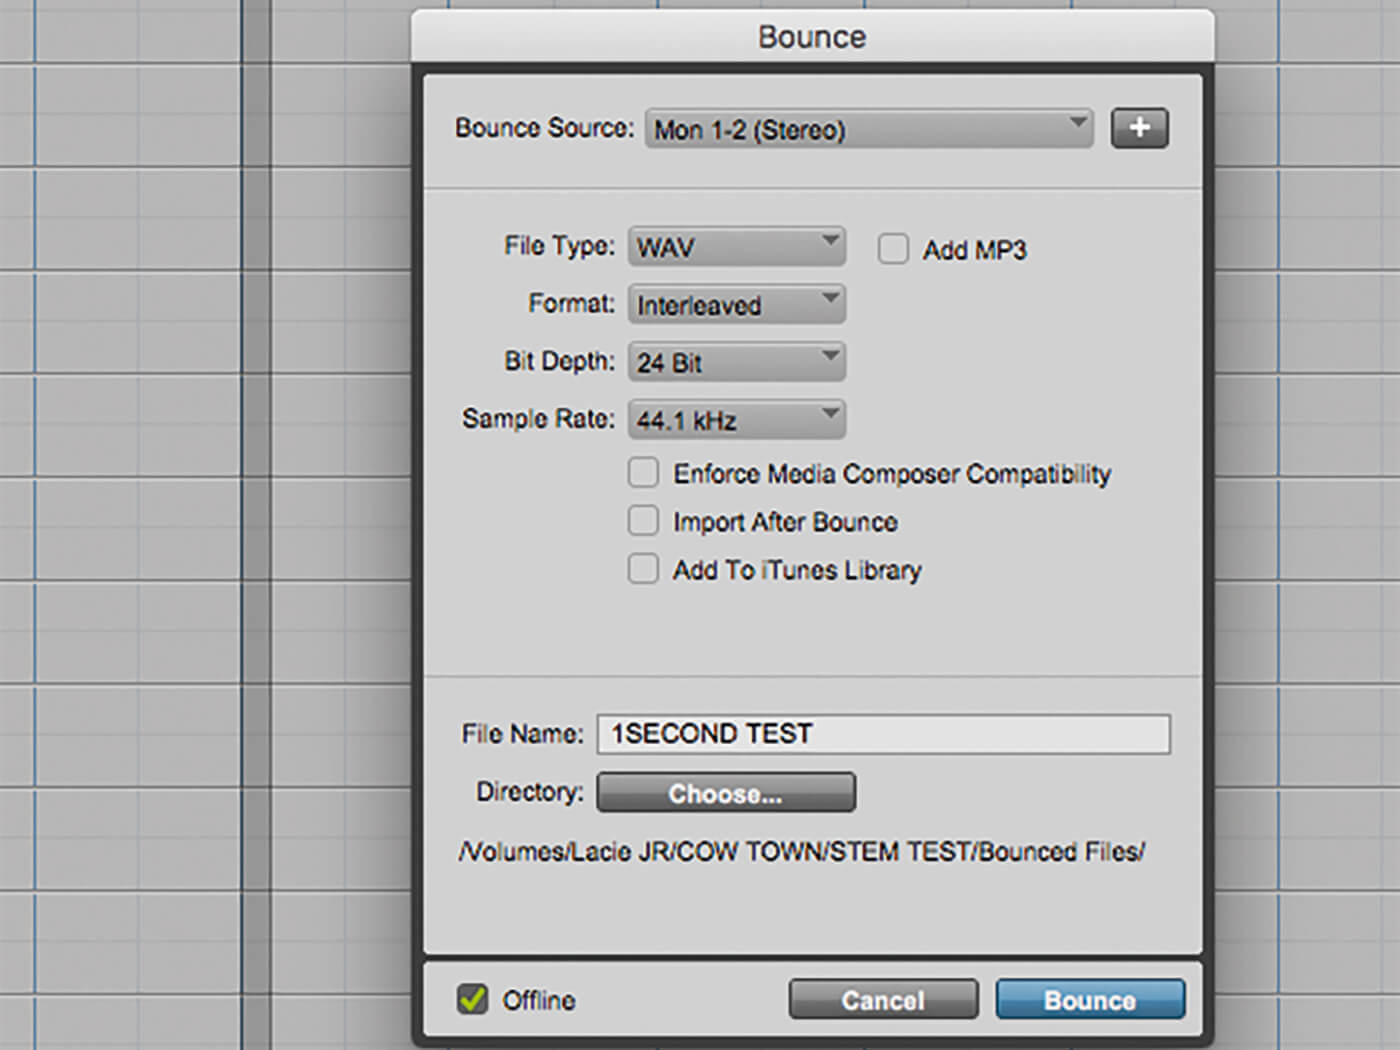
3. Once all tracks are cleaned up and renamed, they’re ready to be exported. Select all tracks and right-click the Bounce option.
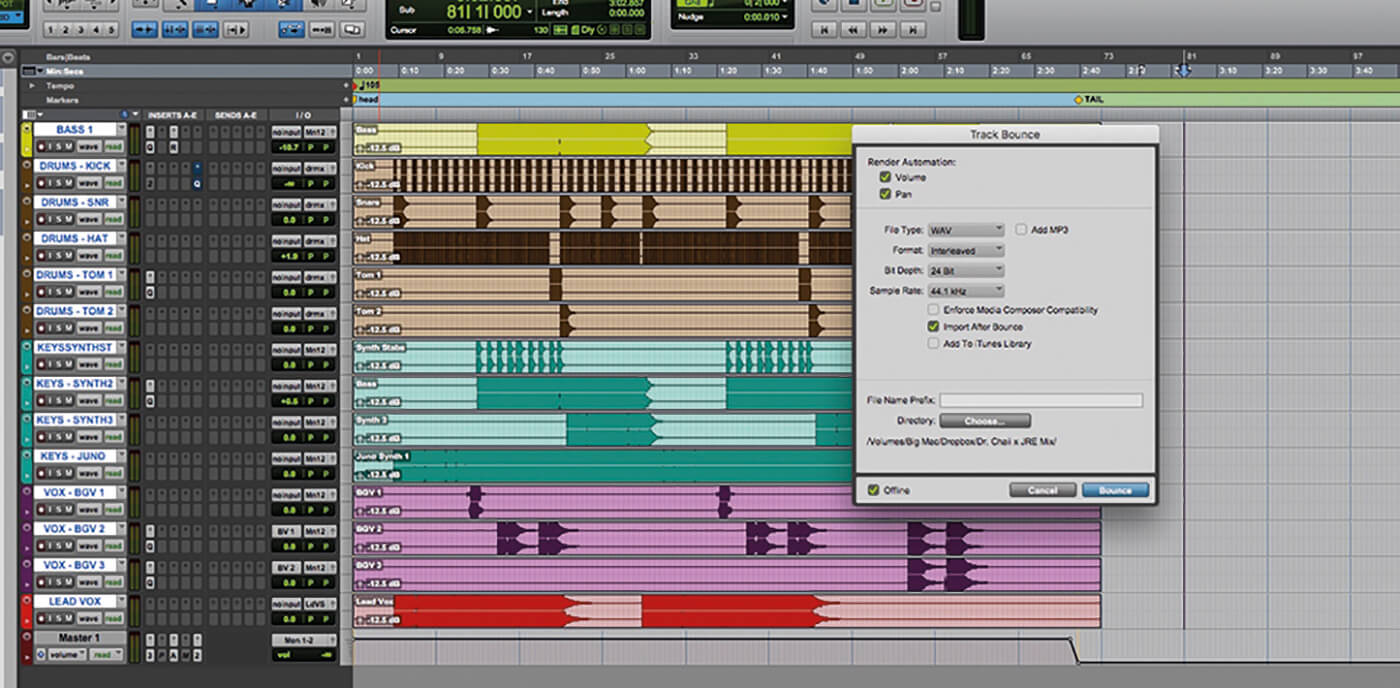
4. Select your desired file format and destination, and keep the prefix field empty. Not doing so would see every stem have additional text in its title.
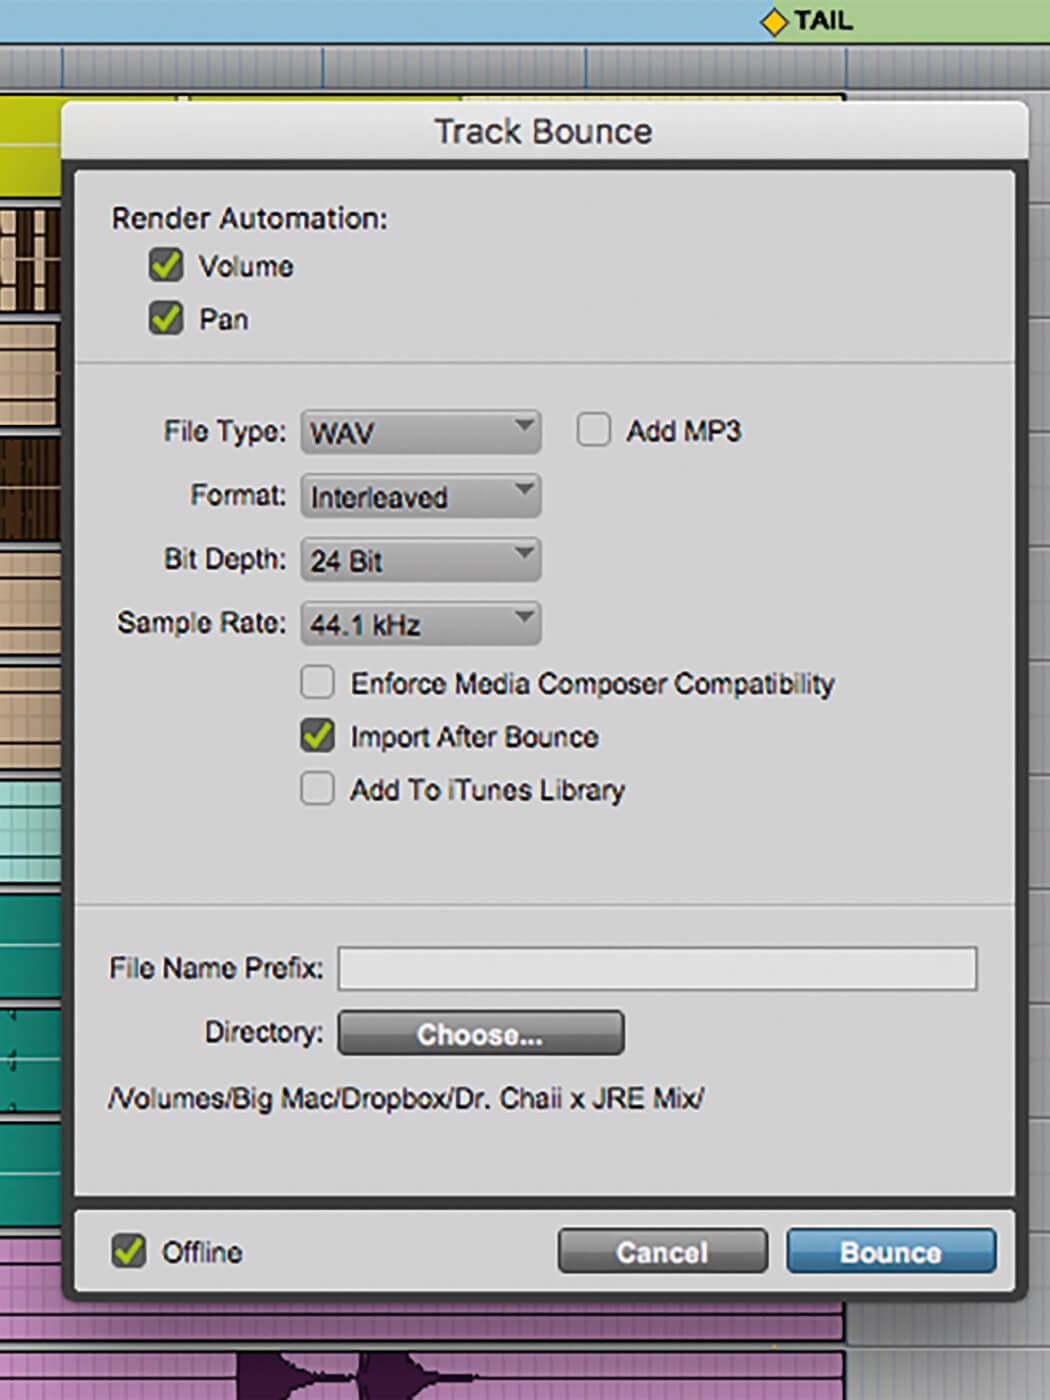
5. Click Import After Bounce and allow Pro Tools to import the stems back into the session after the bounce has been completed. This will be useful later for proofing and double-checking that everything plays back accurately before sending.
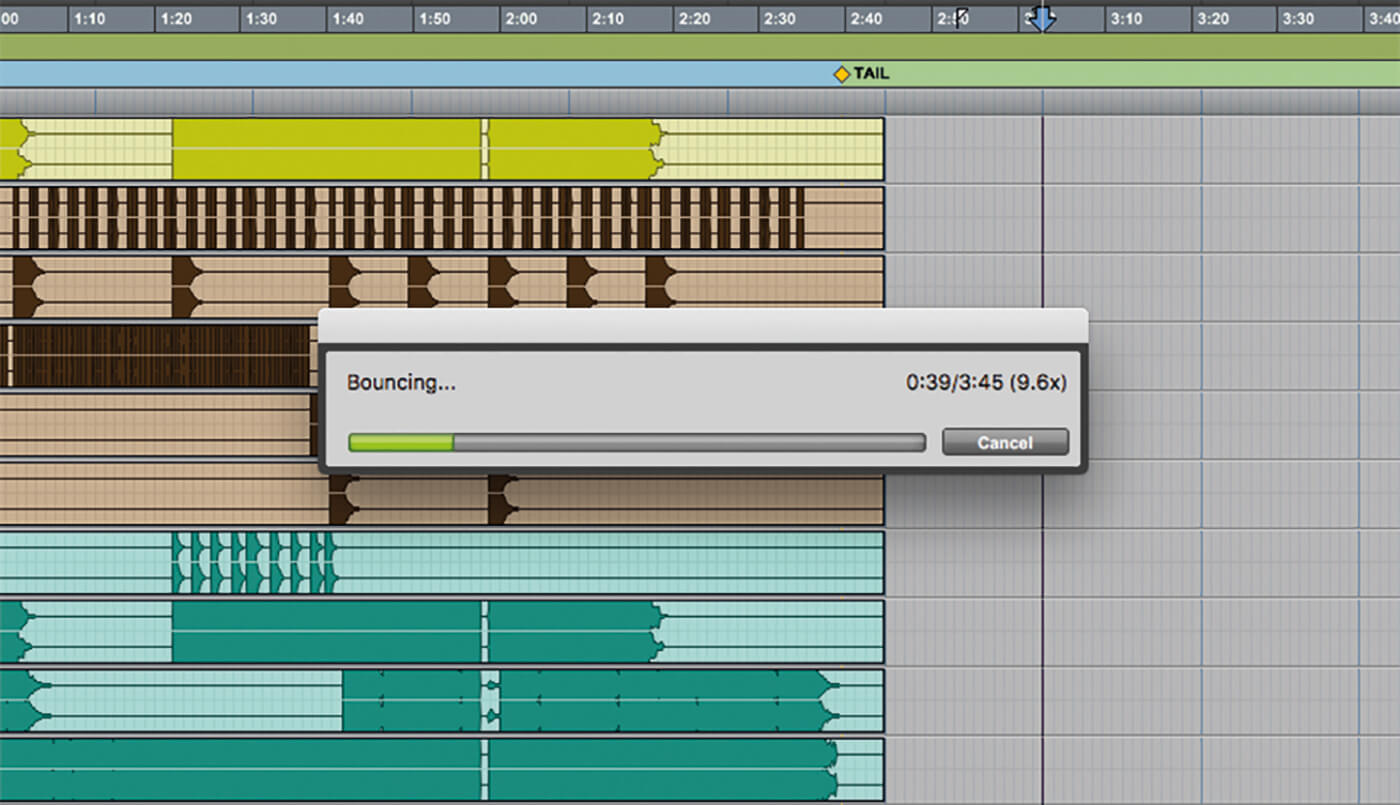
6. Hit Bounce, put the kettle on and enjoy a coffee break. Once the bounce has finished and you’ve confirmed that the stems play back accurately, you’re ready to send them off.
![]()
GOOD IMPRESSIONS Pro Tools’ batch-rename function makes it easy to label the name and instrument category of each stem, and your collaborators will appreciate the organisation. Every file that leaves your studio is a reflection on you and your level of professionalism.
Solo bounce with bounce butler
7. Download the free Bounce Butler program via bouncebutler.com. Once installed, open your desired session.
8. Use Audio Zoom to increase the height of your waveforms. Use this visual aid to assist in detecting any noise, clicks or pops before sending your stems.
9. Double-check all automation, waveforms and edits to ensure that everything in the session is correct.
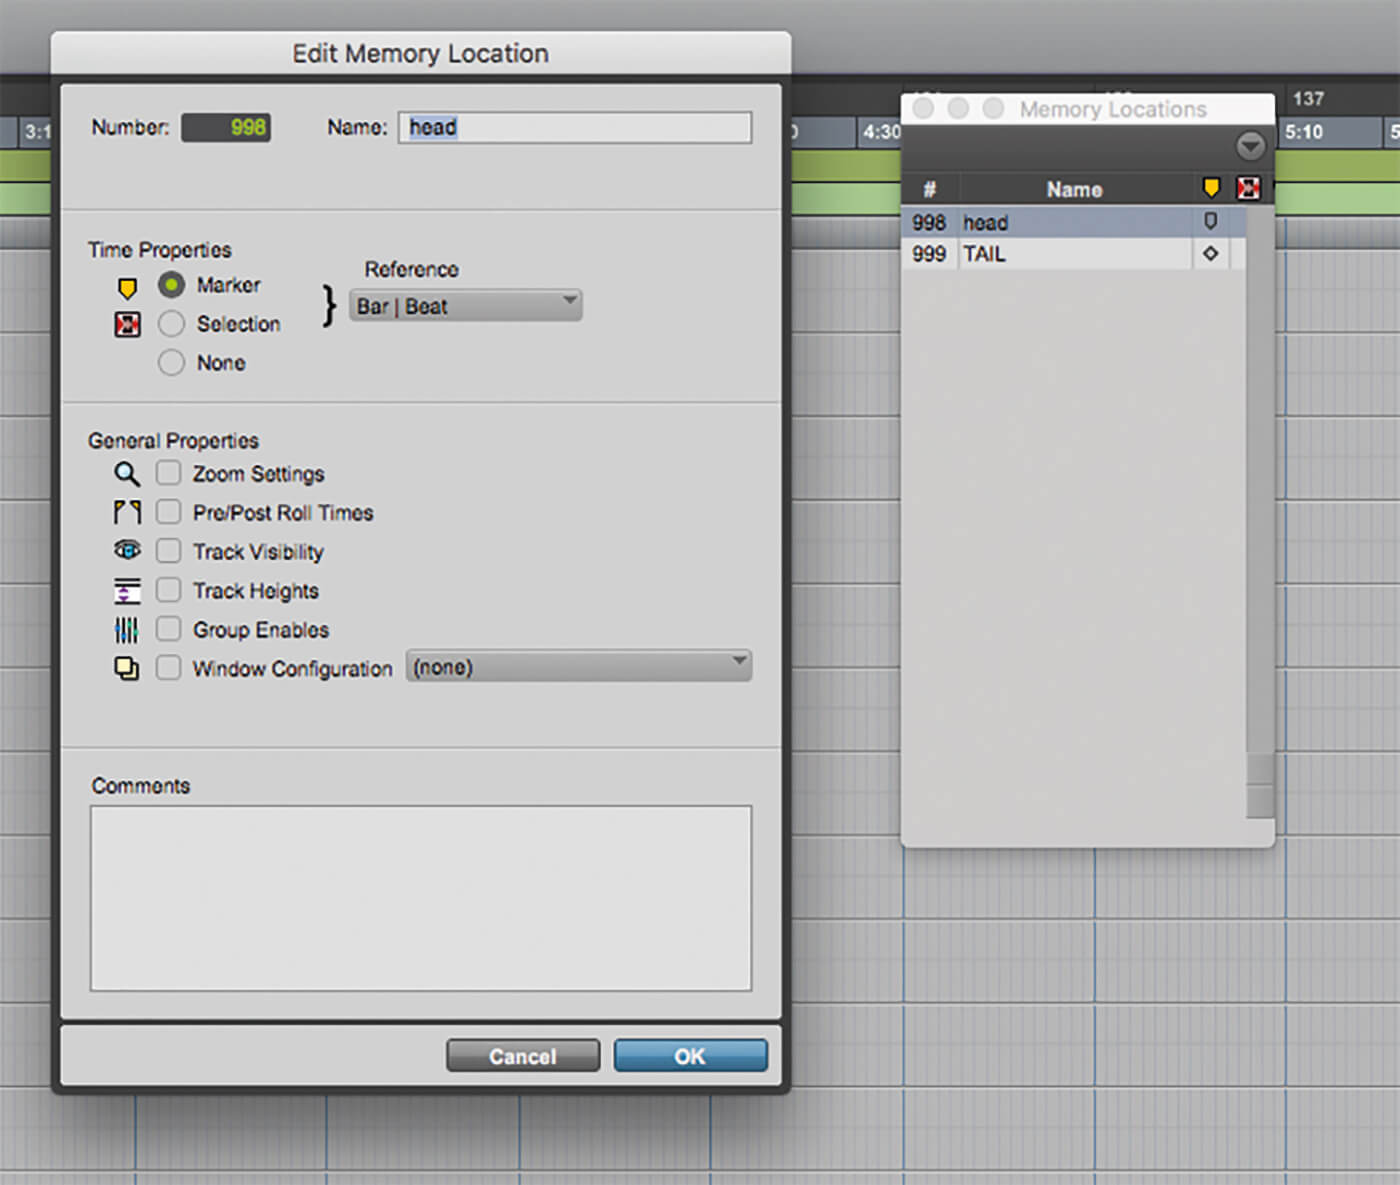
10. Open the Memory Locations window and create two new locations, one for the beginning of the song and one for the end. Label them, for example, Head and Tail.
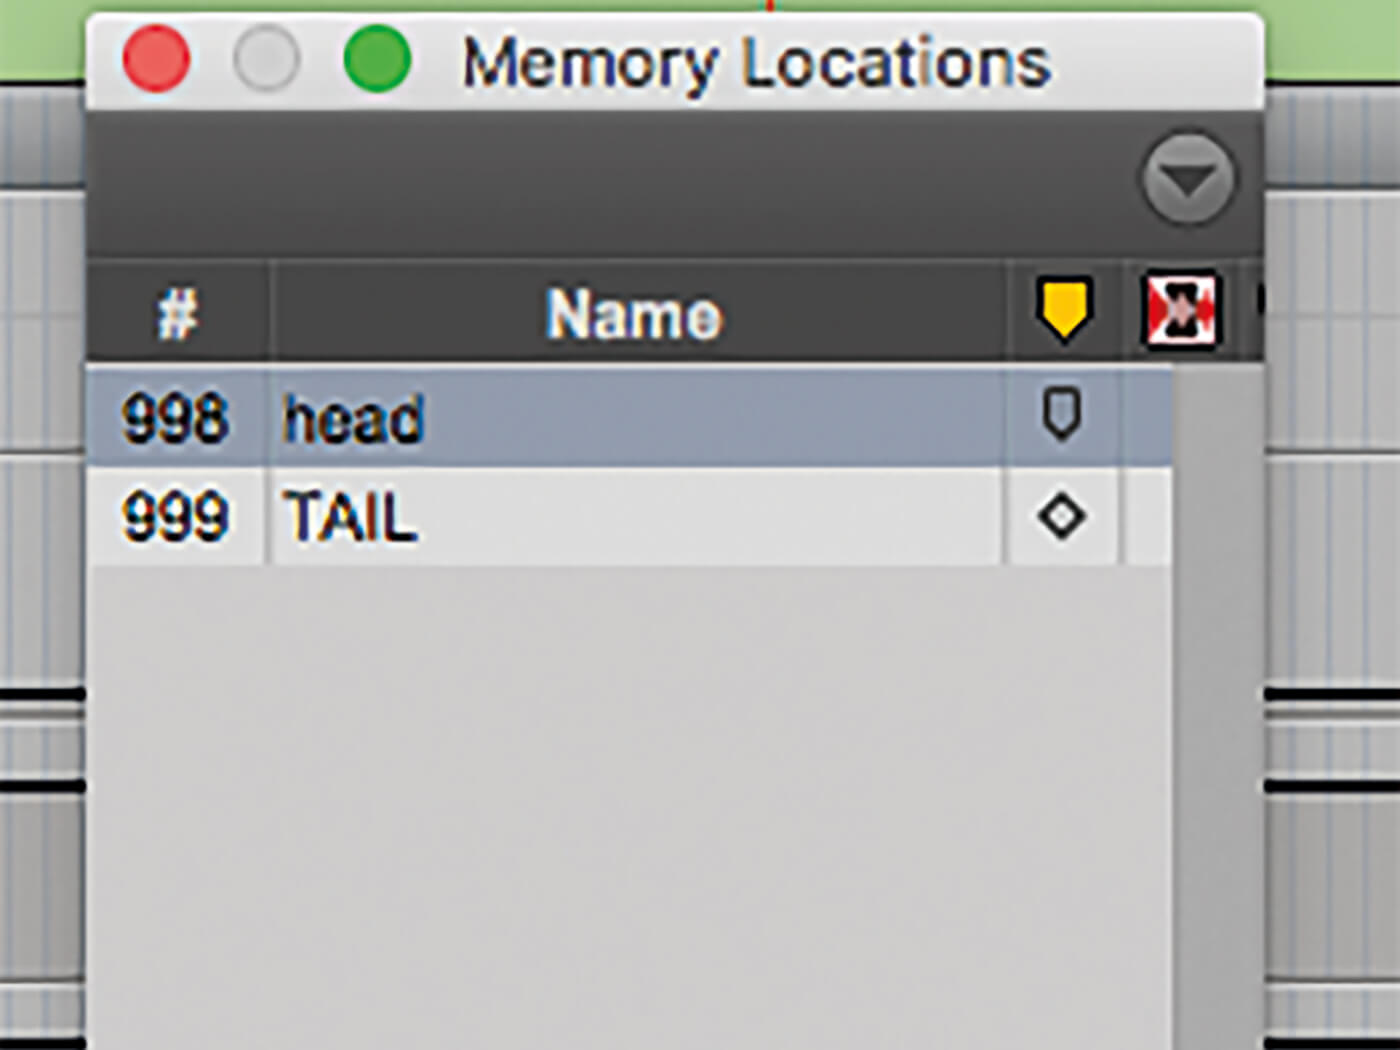
11. Assign the marker number 998 for the start location (Head) and 999 for the end location (Tail).
12. Set up a short test-bounce in order to set and save the destination you’d like your stems to go. This will streamline the rest of the process.
![]()
ALL FOR ONE A big part of what makes a mix feel glued is the way its tracks hit the stereo bus simultaneously. Solo’d stems hit the mix bus one at a time, and the end result is not completely the same as the fully glued mix. When preparing to solo-bounce individual stems, experiment with sending the entire mix to the sidechain input of your master bus compressor in order to retain a bit of the same pulse and feel.
13. Select and solo the first track you’d like to export as a stem. Make sure that any pertinent and relevant auxiliaries or effects busses are also solo’d or set as solo safe.
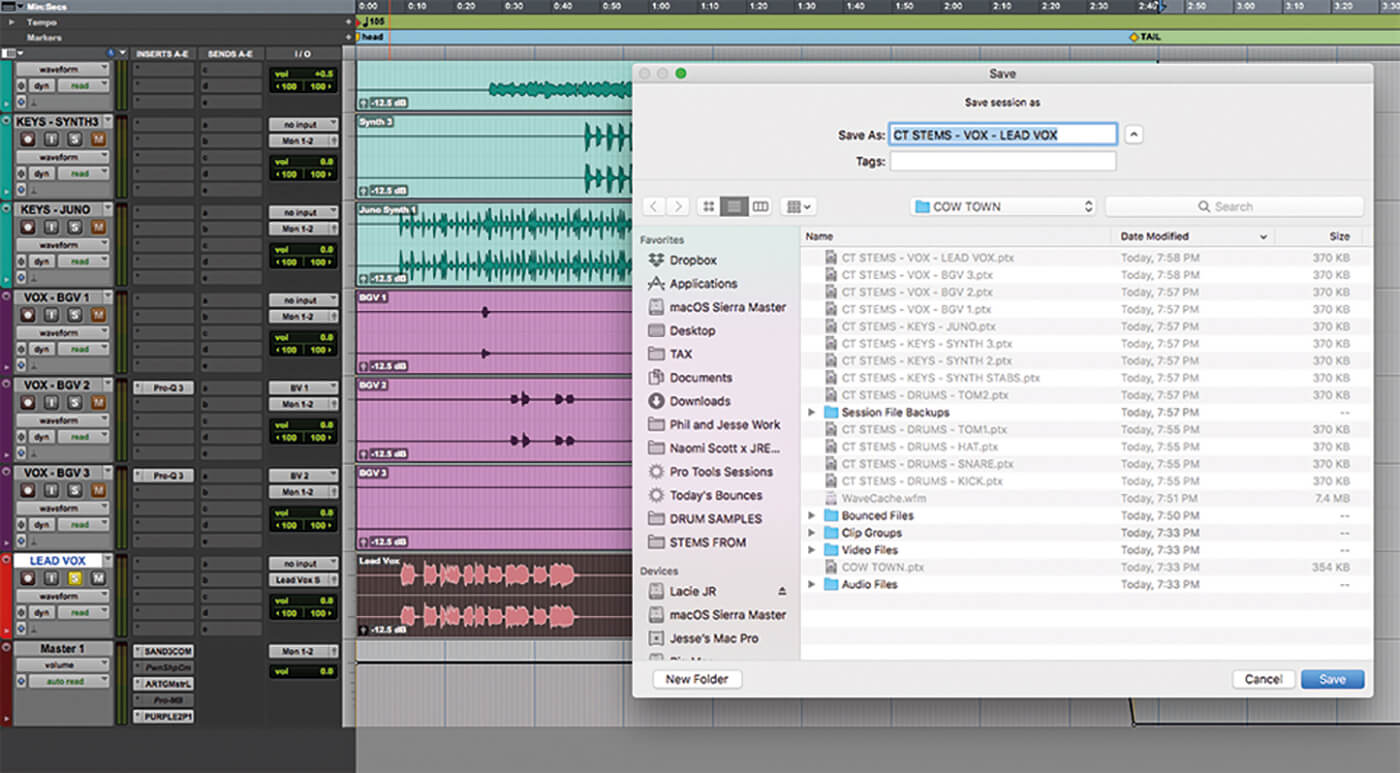
14. Hit Save As to save the session in its current state. Establish your preferred naming convention and label the session as the instrument solo’d.
15. Repeat this process for every track, doing a Save As for every session. Once completed, close Pro Tools and open Bounce Butler.
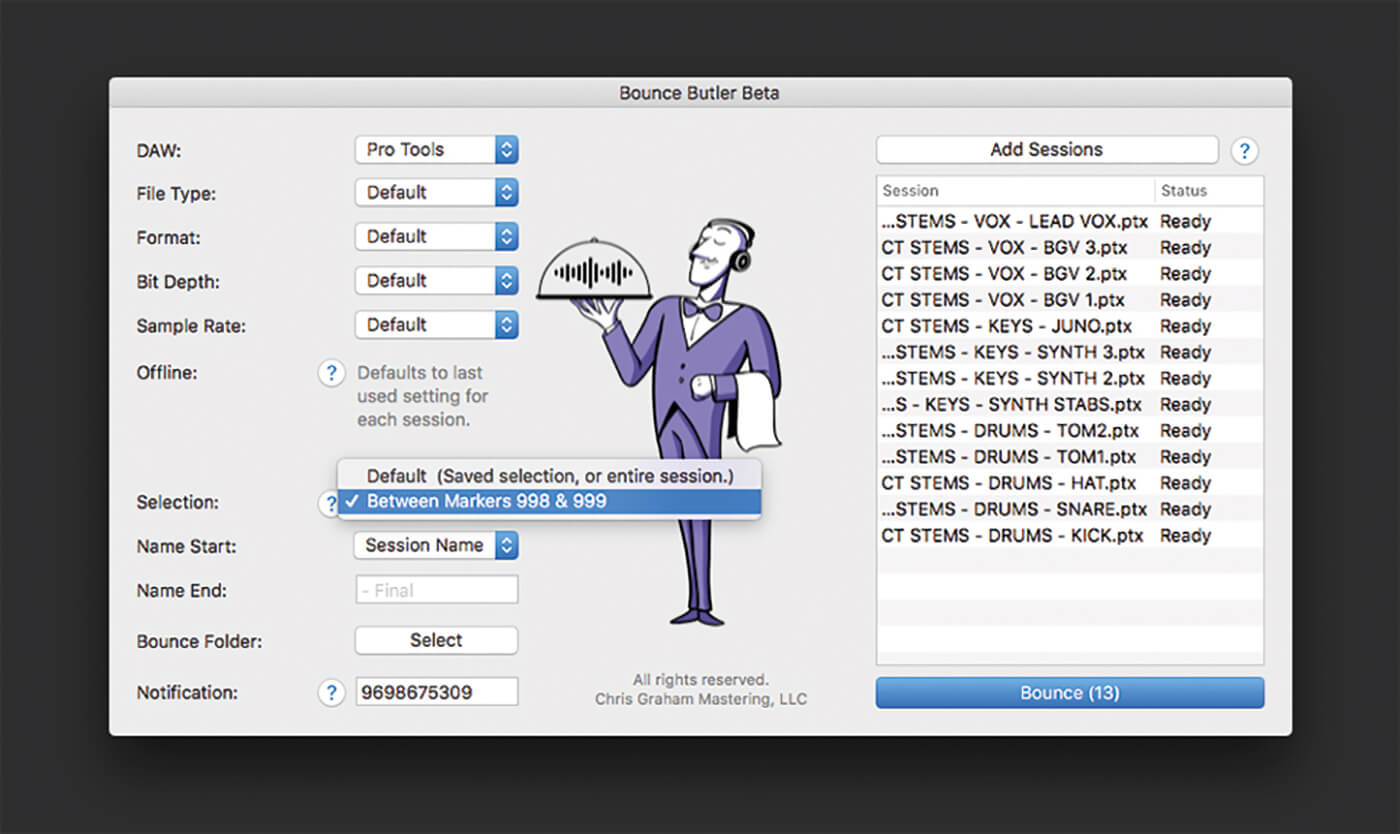
16. Either drag and drop or use the Select Sessions button to choose all stem sessions. Ensure you’ve chosen to use markers 998 and 999 as the start and end points of each bounce – this will ensure that all stems start and stop at the same times, and are all the same length.
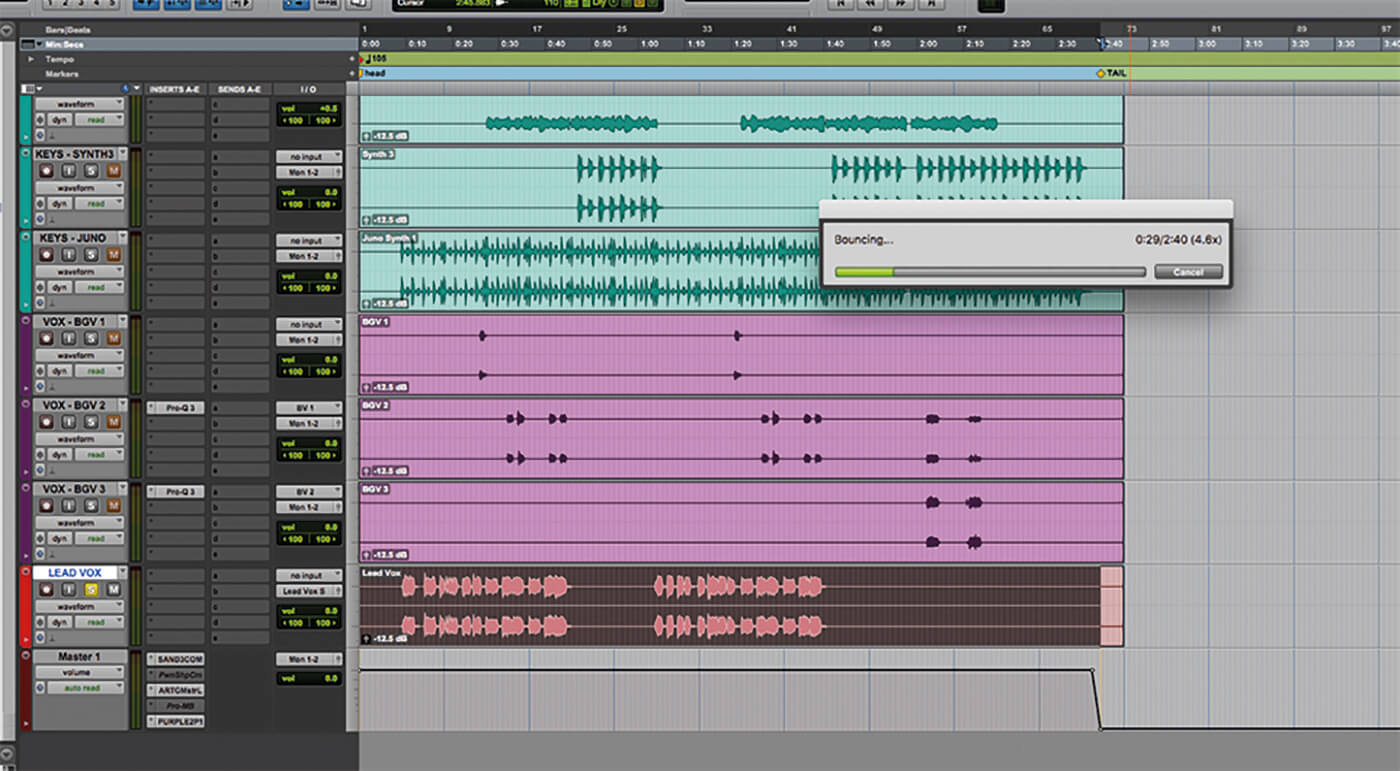
17. Hit Bounce and the computer will do the rest of the work for you. When finished, Bounce Butler will text your phone to let you know that you can come back to the studio.
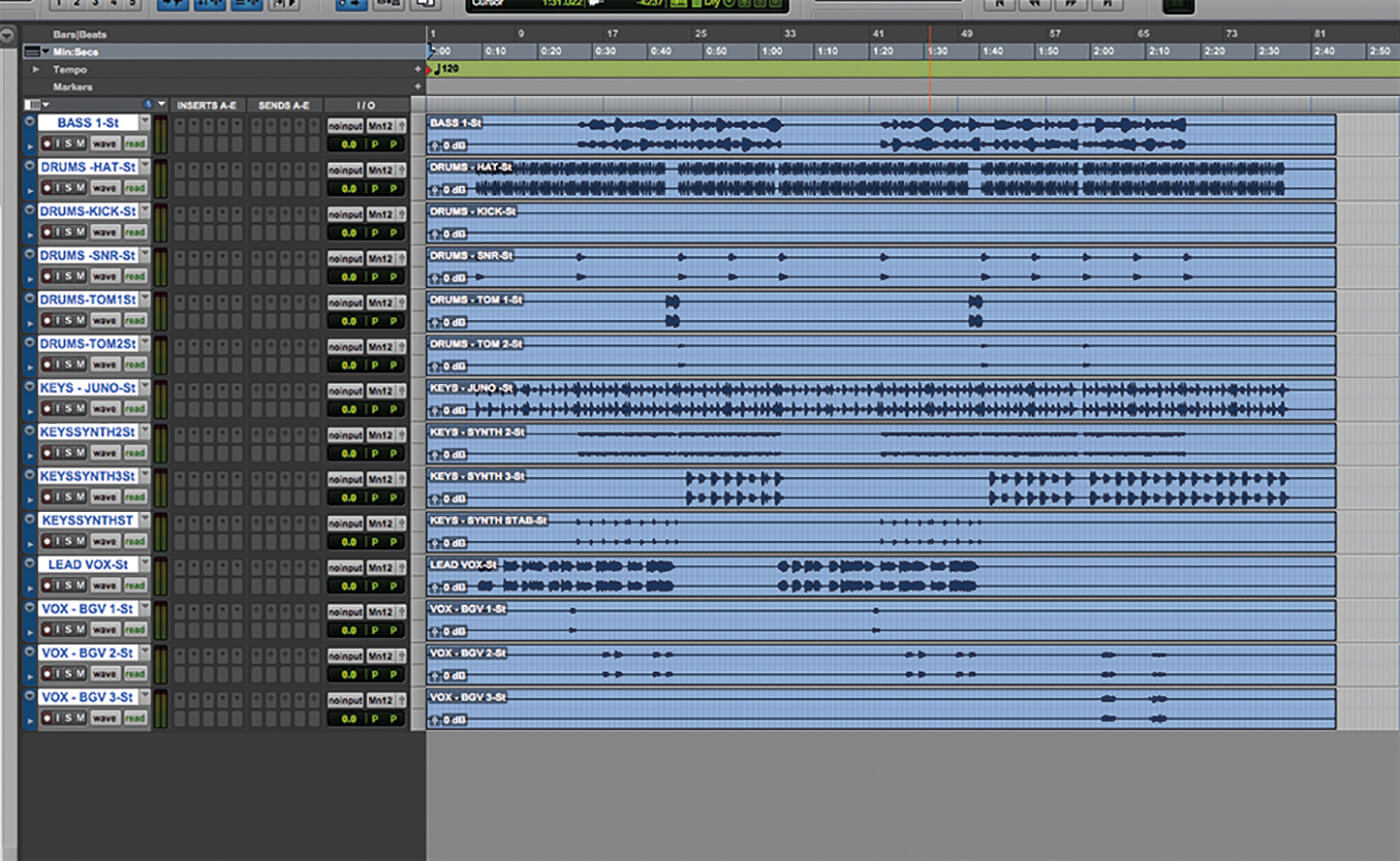
18. Make a new session and import all stems in order to double-check that they are playing back correctly. Once confirmed, send those stems and put your feet up.
For more Avid Pro Tools workshops and tutorials, click here.