Drum-gating techniques in Pro Tools
Grammy-nominated mixer and recent interviewee Jesse Ray Ernster takes us through his favourite drum-gating techniques to help you keep your frequencies mud-free.
When sonic adversaries are storming their way into your live drum recordings in the form of unwanted bleed, the best defence is to raise your gates. The implementation of gates is integral for maximising tonal flexibility in the mixing stage. I vividly recall learning about gates early on. I was mixing a snare and reached for the EQ to boost the top end, which resulted in a mess of cymbal and hi-hat bleed pouring from the speakers.
So I asked a trusted engineer, “How do you handle harsh cymbals that occupy the same frequency range as the snare’s top end?” He responded with three unforgettable words: “Welcome to mixing”. And so began a seemingly never-ending journey to unlock the secrets of achieving separation, clarity and attack by carefully using gates within the mix.
Of course, sensible engineering choices at the tracking stage will by and large make the biggest impact on how easy mixing source tones will be without having to rely on gates. Often, though, mixers like myself have no control over that part of the process and must put on our problem-solving hat. To that end, here are four tried-and-tested gating methods to help you overcome a variety of these frequency-clashing obstacles.
Switch to manual
The first gating solution is simply referred to as manual gating. This is of the most straightforward forms of gating, and sees engineers manually enabling changes in amplitude to the audio track. I’ve found this to be extremely useful for cleaning up vocal performances that have an abundance of crackles, breaths, hum, and headphone bleed in between the vocalist’s phrases.
It’s also my favourite method for gating toms, as it’s usually quite easy to identify and treat where the tom has (or hasn’t) been played. This technique is extremely advantageous for gating tasks that require the utmost flexibility. The downside, however, is that it can be enormously time-consuming.
A more common go-to tactic is the use of a gate plug-in. Plug-ins can be effective methods for getting results quickly and repeatedly. Although this isn’t my first choice for isolating drums from cymbal bleed, it’s common for me to reach for gate plug-ins to tighten up the decay time on lengthy kicks and snares so that they work better with other mix elements. The pros of using a gate plug-in are flexibility, speed and ease of use. The con? They aren’t always effective on dynamic performances that contain extreme variation between loud and quiet moments.
More or less?
Another problem with gating drums is that every frequency area of a drum reverberates differently, and certain frequencies require less gating than others. Drums sound so much more natural if the low end and midrange frequencies are left open and ungated, and are able to breathe. But the top end won’t always play nicely with that same philosophy (largely because of those pesky cymbals).
With that theory in mind, use a multiband expander to quickly gate only the top end of a live snare drum track, letting a mere instant of that high-frequency signal poke through before it closes again, just in time to block out the cymbals. The low end and midrange of the drum are left alone – and it sounds glorious. The obvious advantage to this technique is that the cymbal bleed can be profoundly mitigated without negatively affecting the ring of the drum. The downside is the somewhat unnatural sound of the signal; having a gate exclusively on the top end can drastically alter the perceivable attack and tonality of the drum.
An absolutely golden drum-gating method, however, is to use phase cancellation to gate the top end of the signal, while retaining the openness of the low end and lower midrange. The theory behind this is similar to that of the multiband technique but the resulting sound is different. When altering the phase relationship between any two sources, certain irregularities and anomalies can occur, which in this case results in a peculiar distortion artefact in the top end of the signal. The distortion is a bit fizzy and adds a flavour that helps the snare cut through the mix.
As with all mixing tips, tricks and advice, take and apply these processes delicately and learn how to implement these techniques into your own workflow in your own unique way. You may find it necessary to combine a few of these gating methods and even implement additional automation to get the most out of your drum mixes.
Drum-gating techniques in Pro Tools: step-by-step
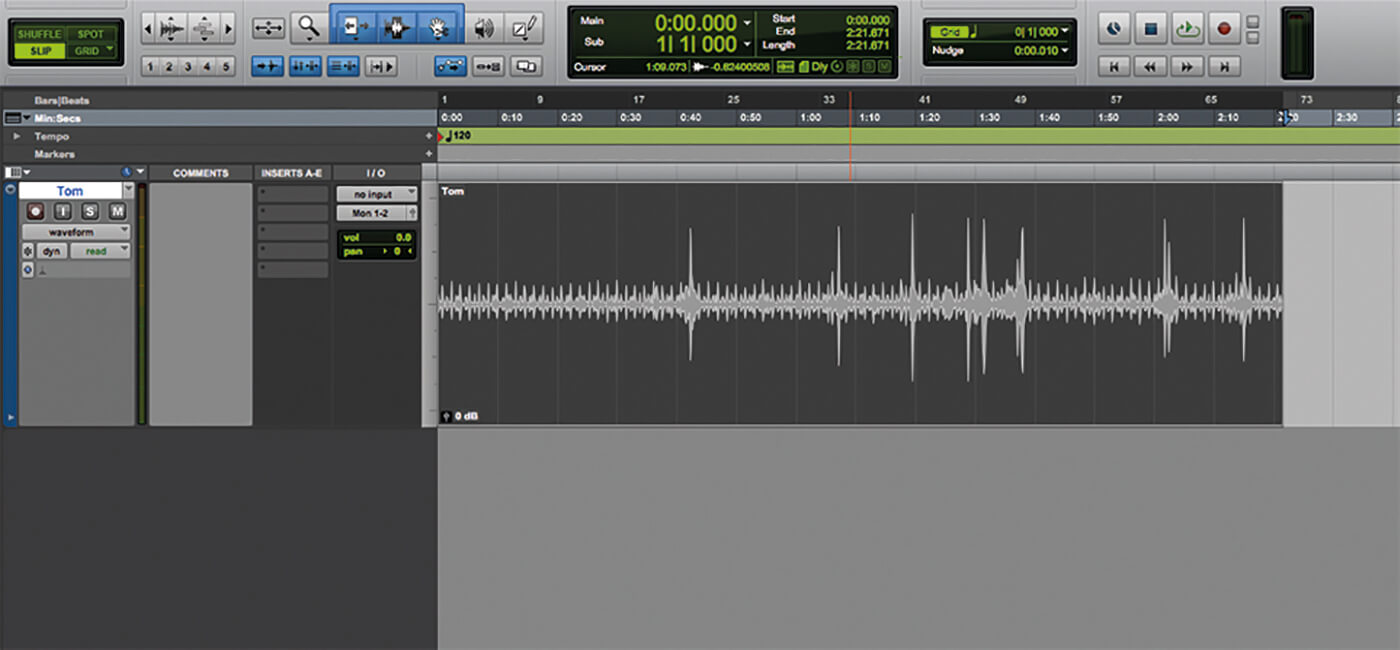
Manual Gating
1. Make sure the Smart Tool and Slip editing modes are active. In the arrange window, select the audio clip you want to gate and use Cmd+M to mute the clip(s) across the entire session.
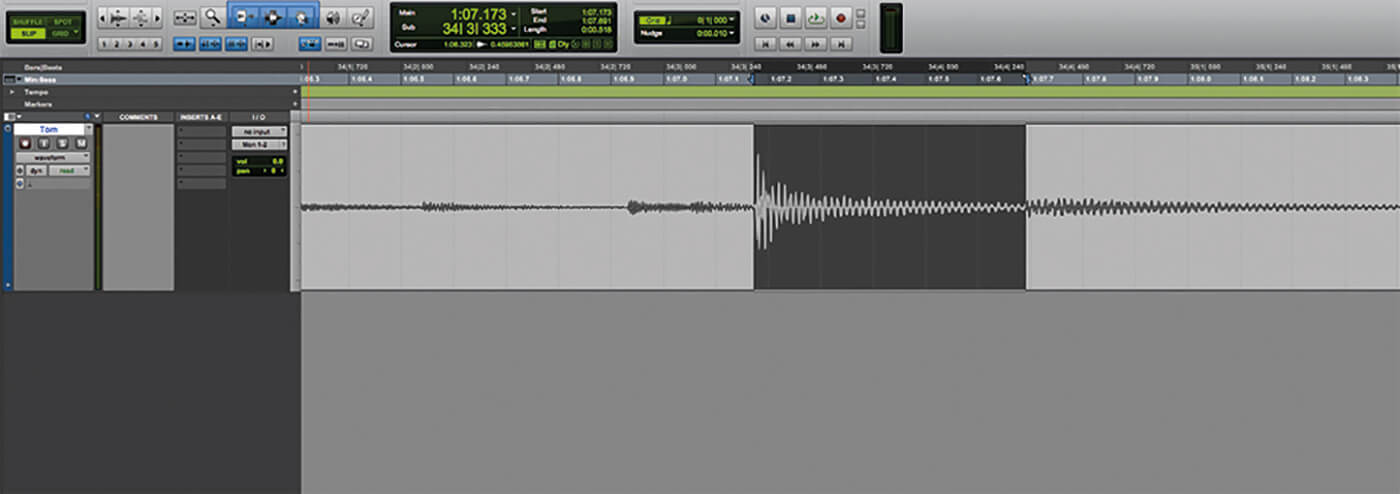
2. Use Tab-to-Transient to locate the initial transient of the drum hit. With that selected, hold shift-click the end of the waveform’s tail to highlight the selected region.
3. Hit Cmd+E to separate the highlighted clip, and Cmd+M to unmute the region. Now you have a perfectly cut region of audio.
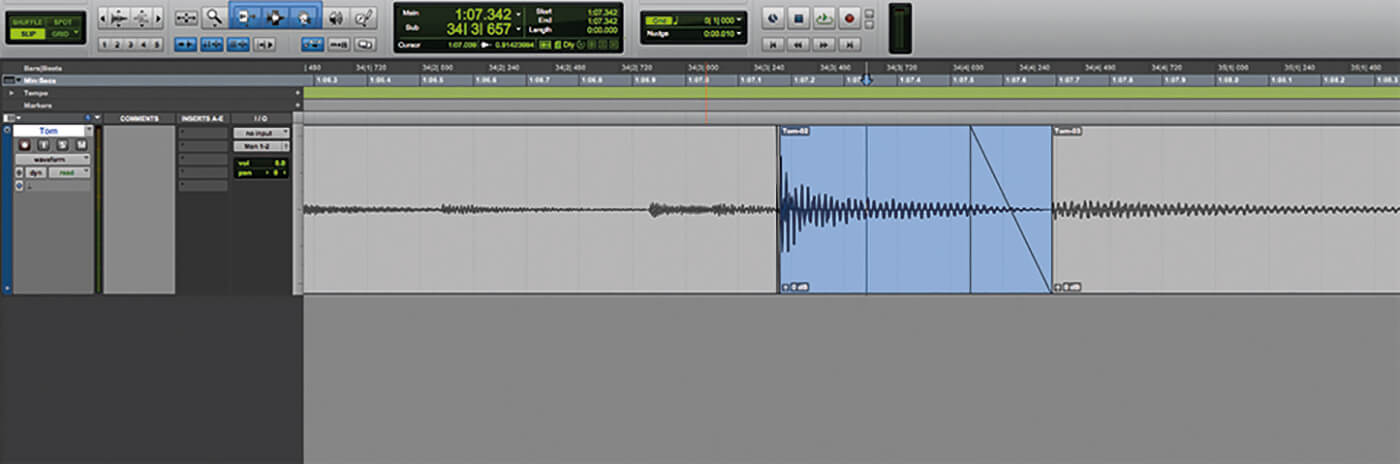
4. Move the cursor to the upper right corner of the new clip to enable the fade smart-tool. Click and drag to draw in fades at both ends of the region. Change the duration by altering the length of your fades.
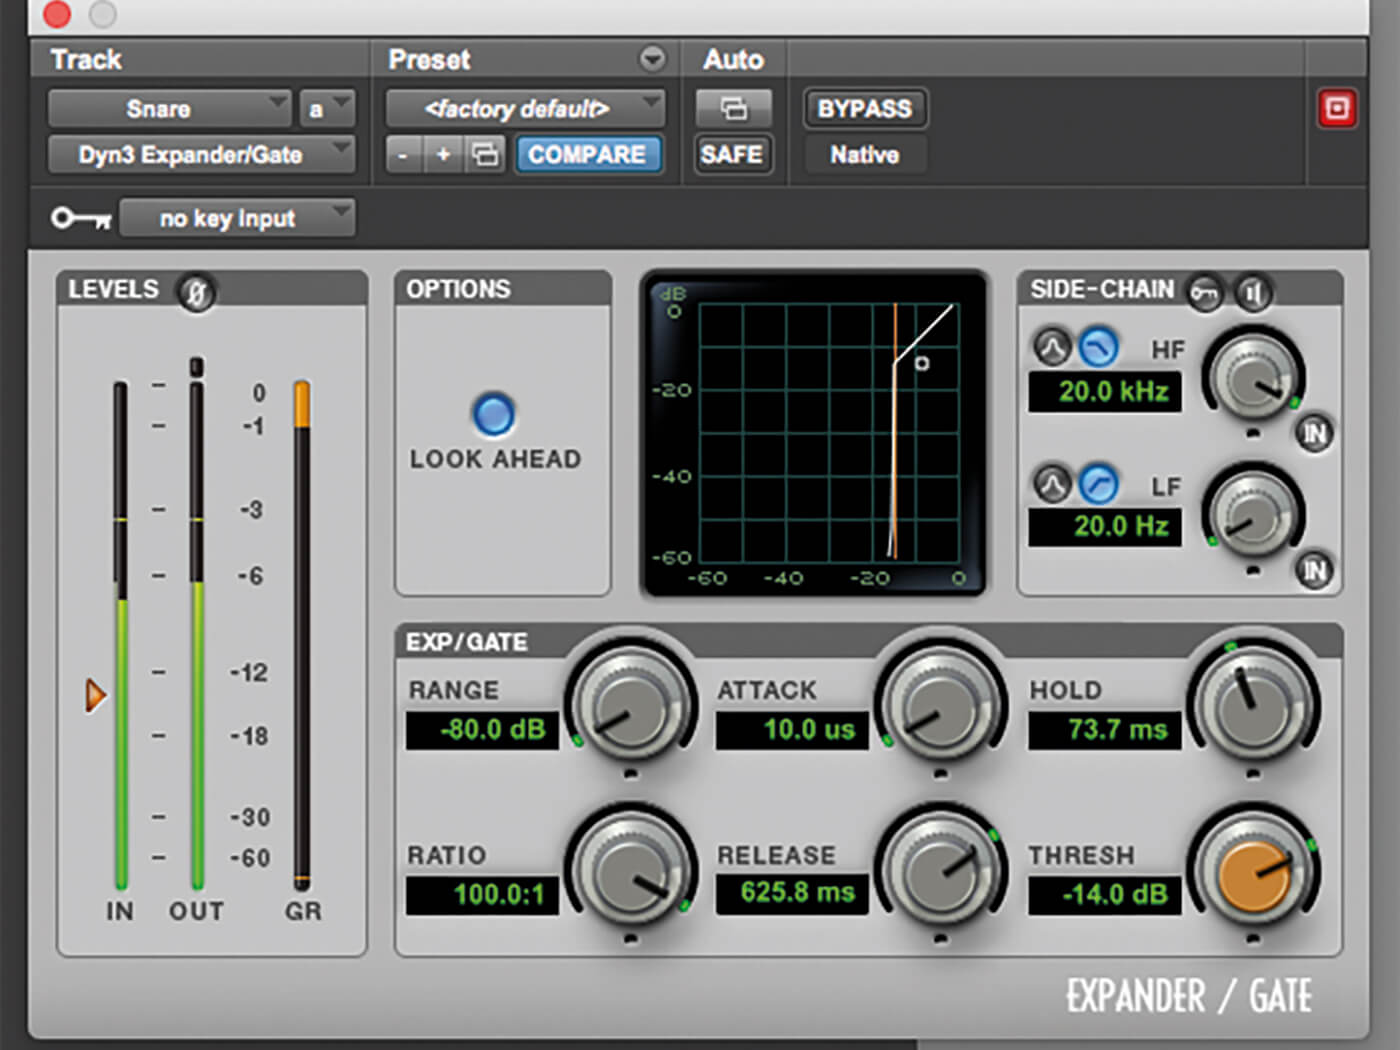
Applying a Gate plug-in
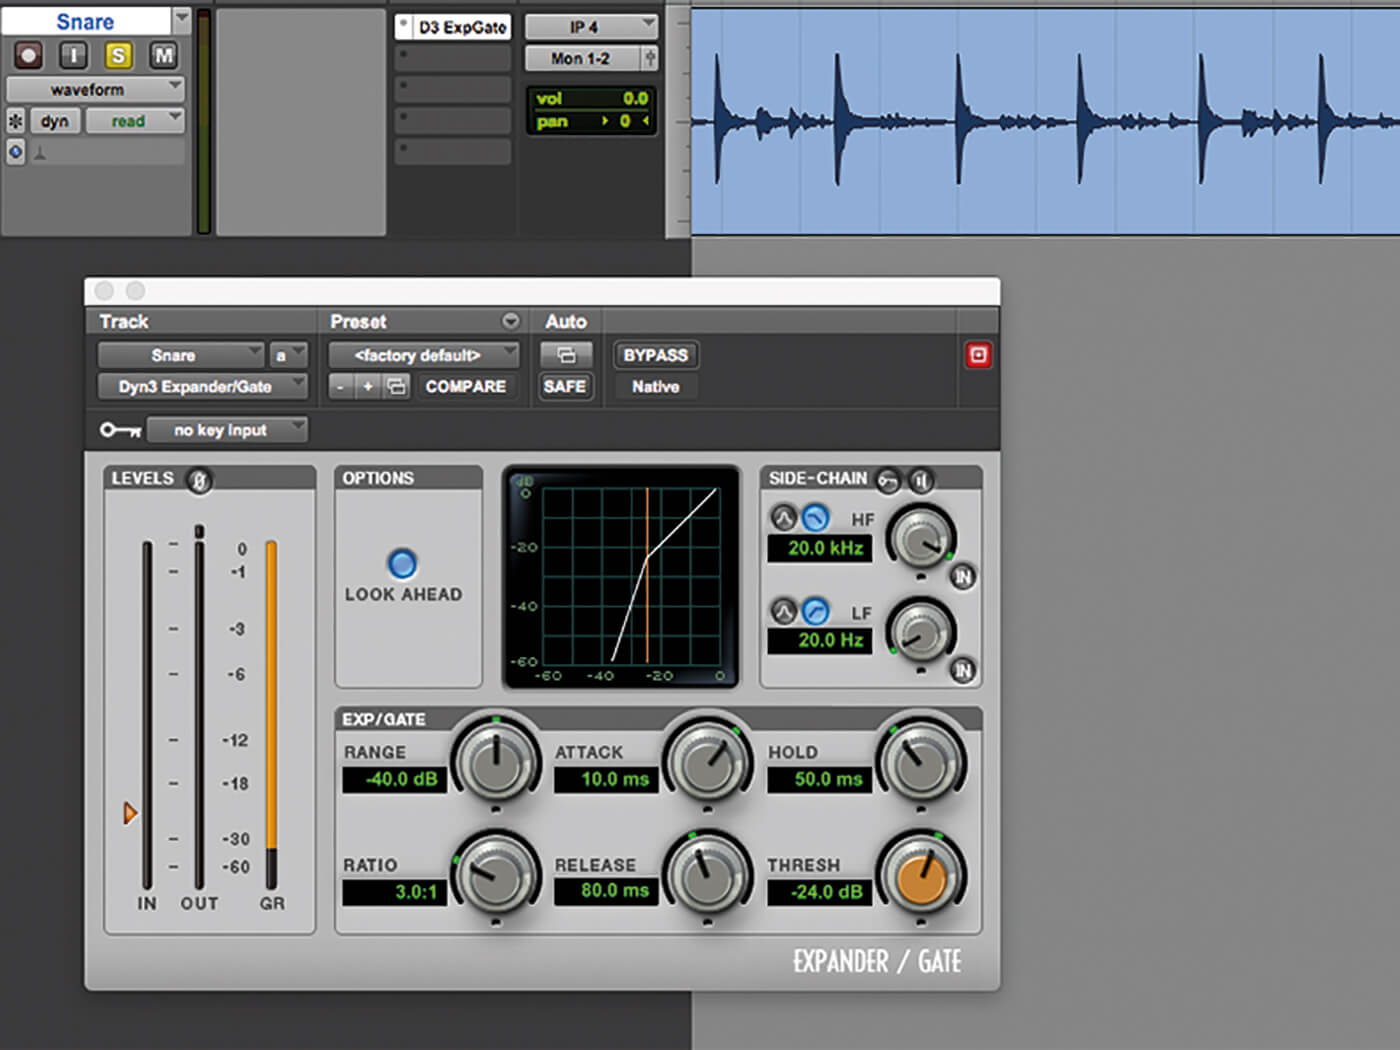
1. Identify the track that needs gating (snares often do). Select your first plug-in slot and apply the Dyn3 Expander/Gate plug-in.
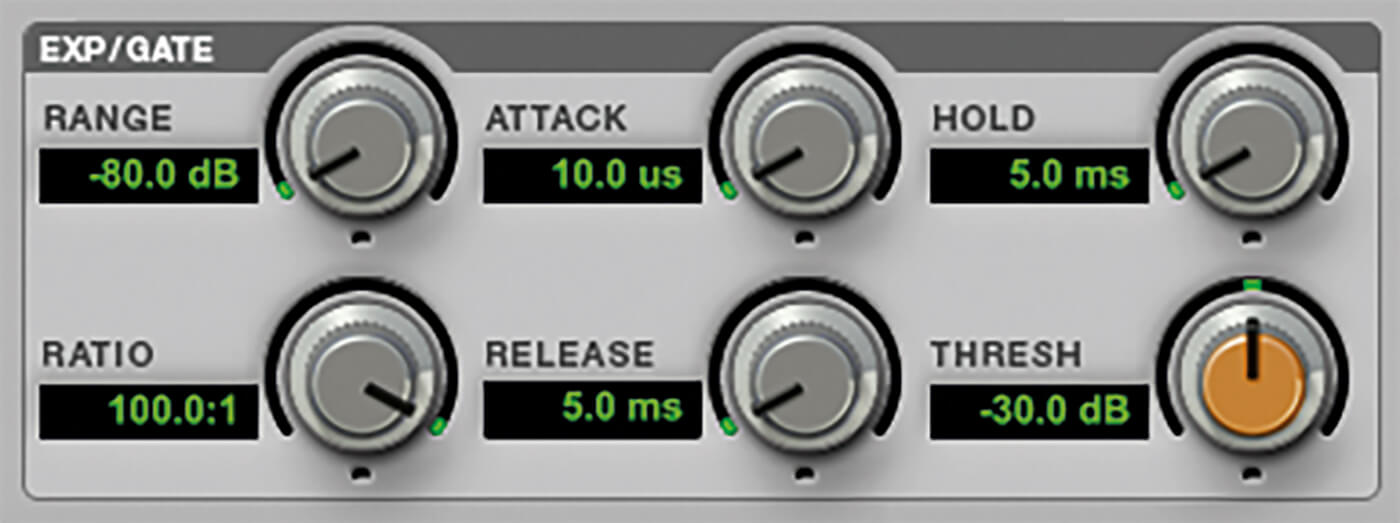
2. Start by zeroing out the gate with these settings: range -80.0; ratio 100:1; attack 10.0us; release 5.0ms; hold 5.0ms; and threshold -30.db. Loop a section of audio for playback.

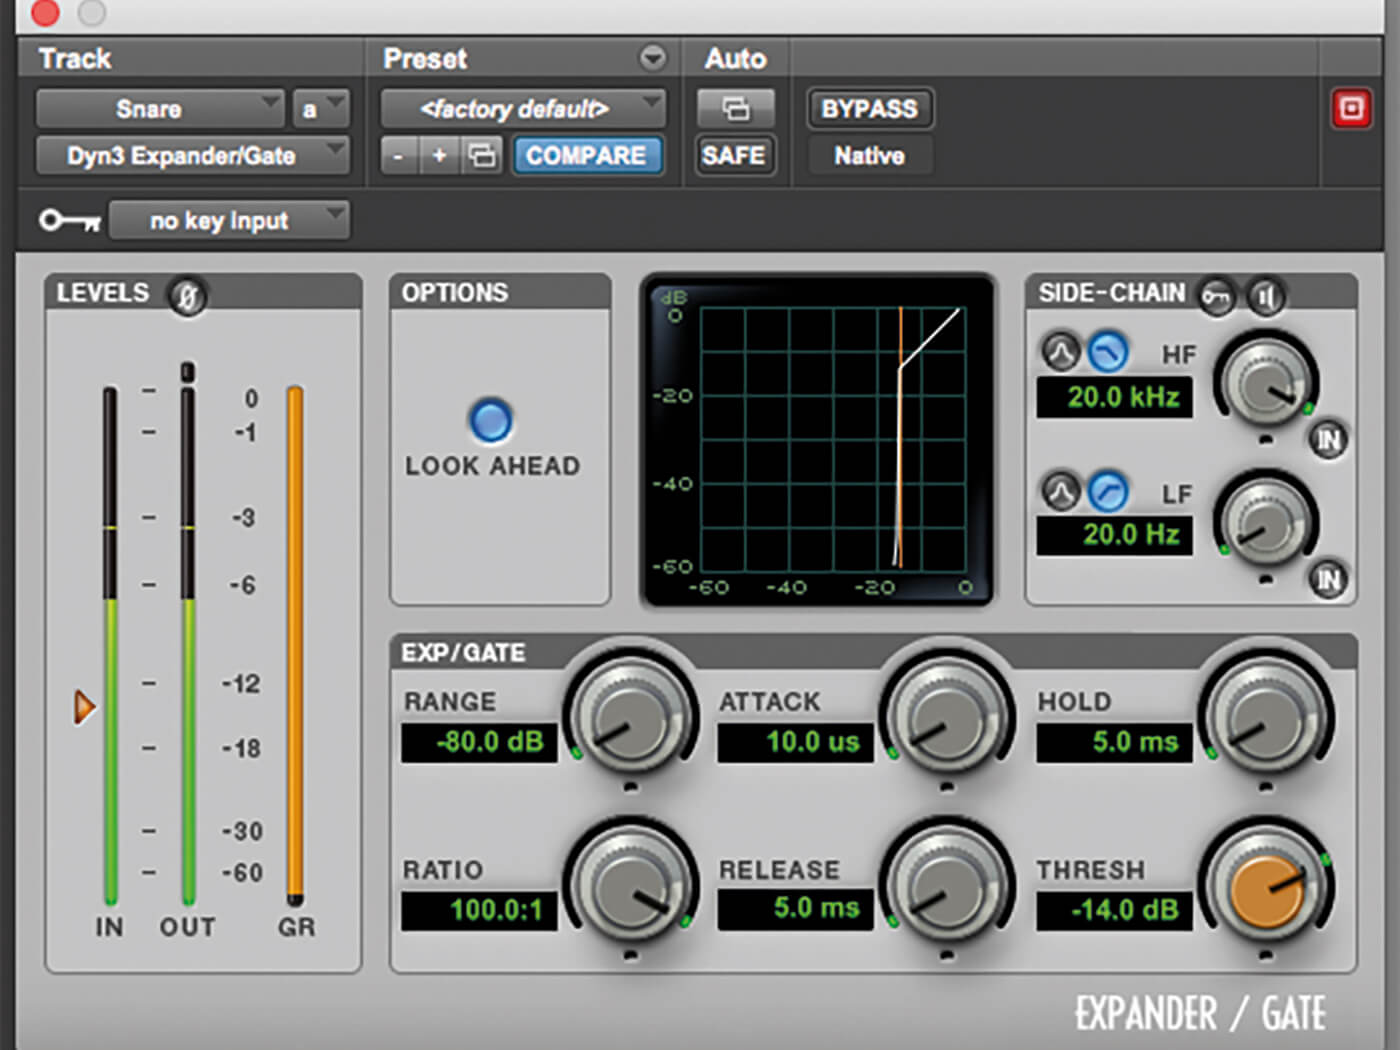
3. Adjust the threshold parameter until the gate is allowing the signal to pass through with minimal cymbal bleed (or noise), while retaining the dynamics and transient attack.
4. Adjust the release and hold parameters until you hear your desired amount of decay/sustain. Keep the attack fast. Experiment with the Look Ahead setting to help retain the integrity of the transient too.
Multiband expansion
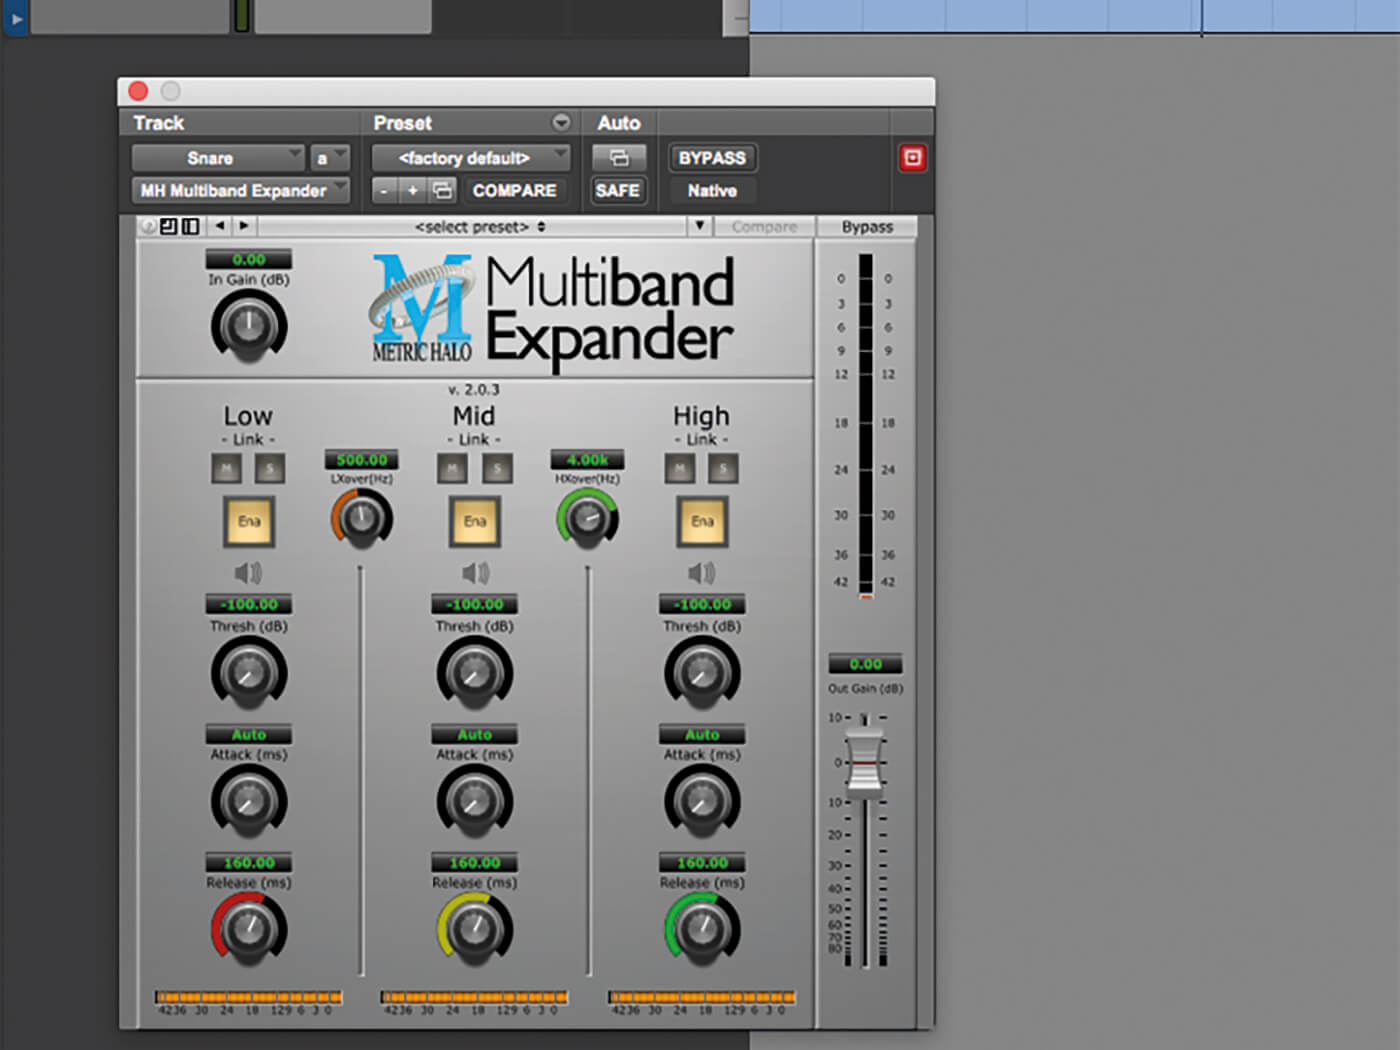
1. Open a multiband compressor/expander such as the Metric Halo Multiband Expander or Fabfilter Pro-MB on your snare track.
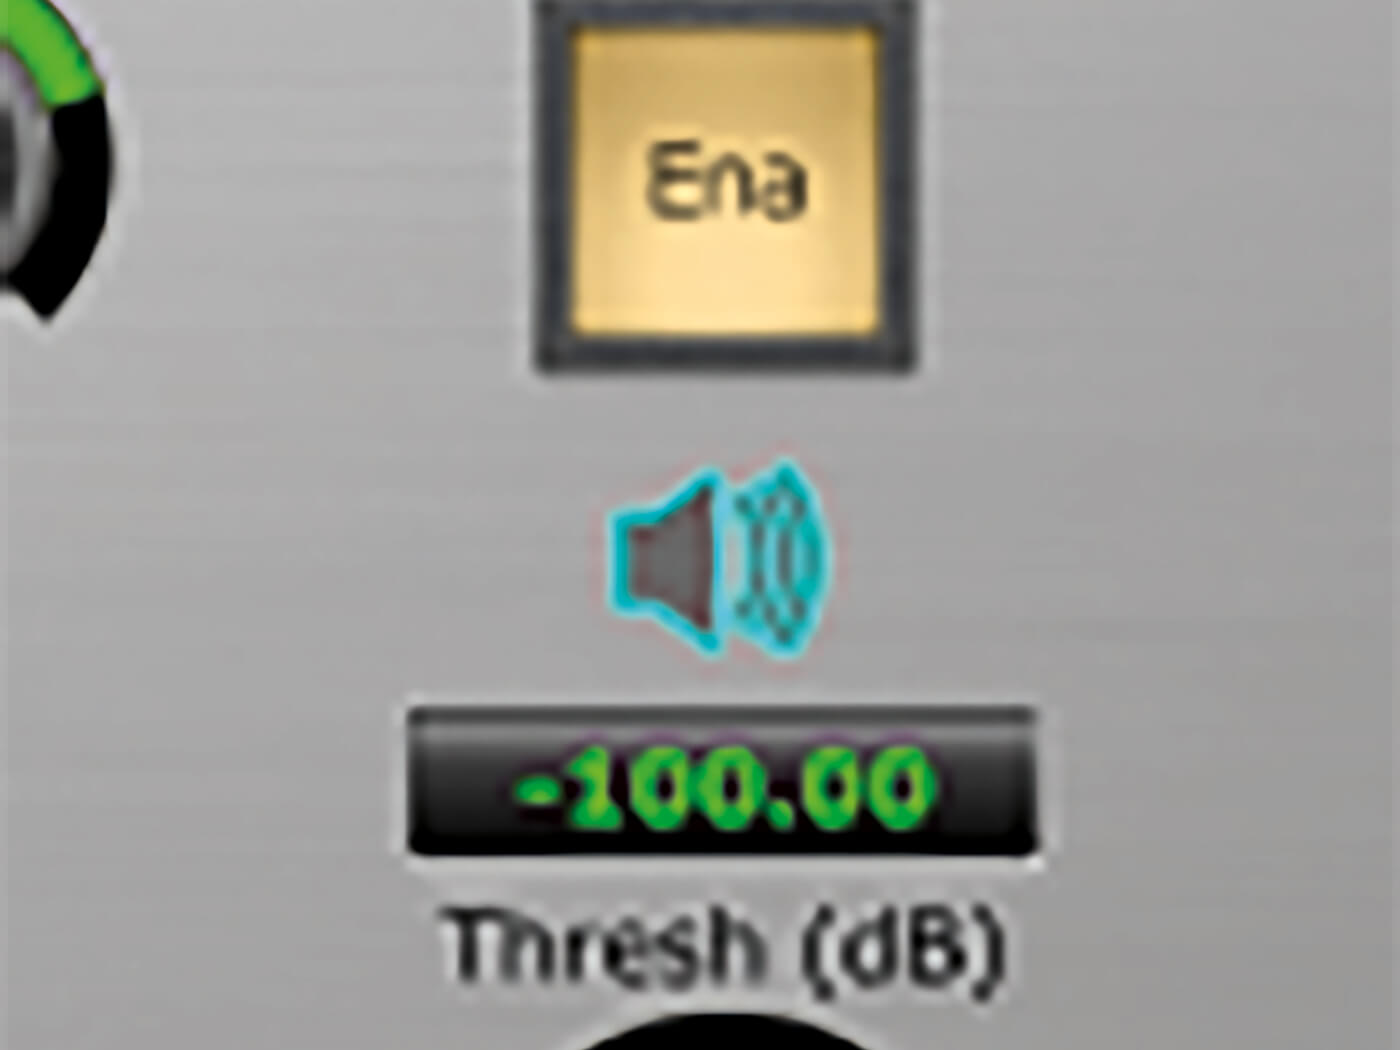
2. Using the high-frequency band, click the audition button to isolate and solo only the high end of the signal. This allows you to hone in on what this processor is doing to the top end.
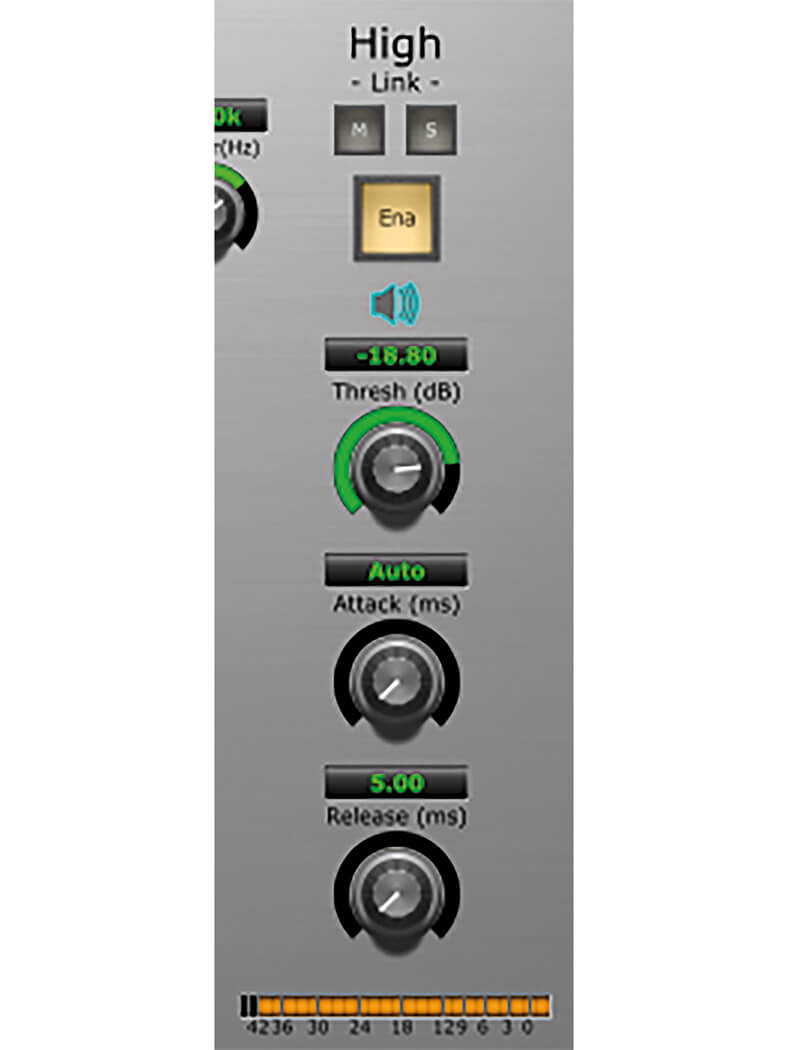
3. With the high band solo’d, dial in the crossover, threshold, and release parameters until you hear the expander opening exclusively for the snap of the snare. Keep the attack time fast to retain the attack.
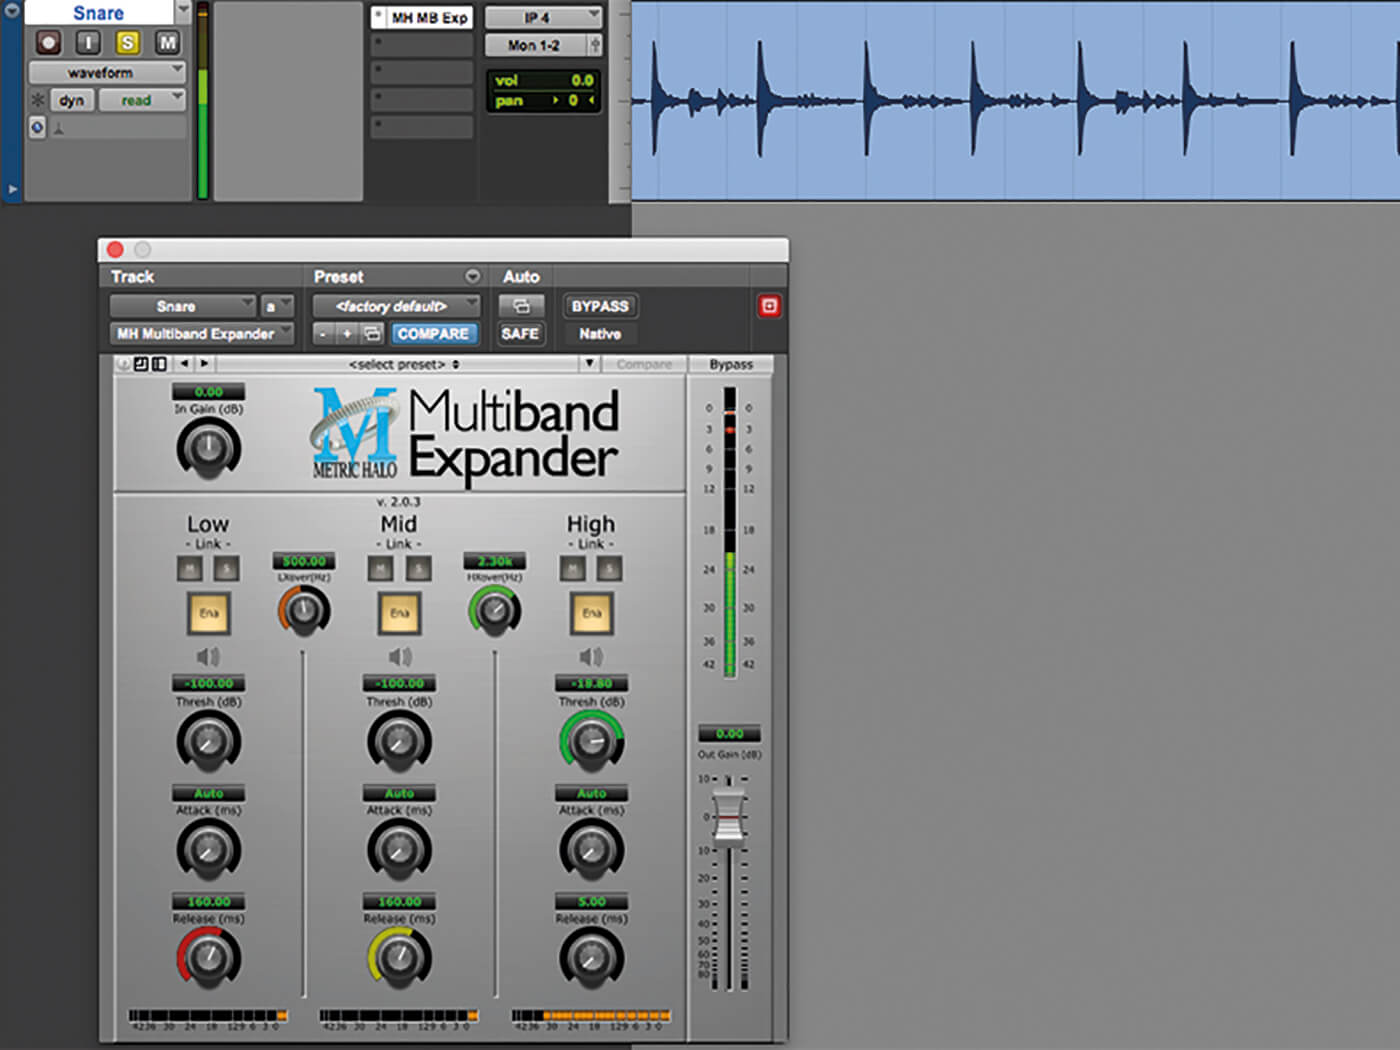
4. Unmute the audition mode and you should be greeted by a glorious snare track that boasts a resonant body and a controlled top end that’s free from cymbal bleed. Again, experiment with the Look Ahead setting to retain transient punch.
The phase/cancellation trick
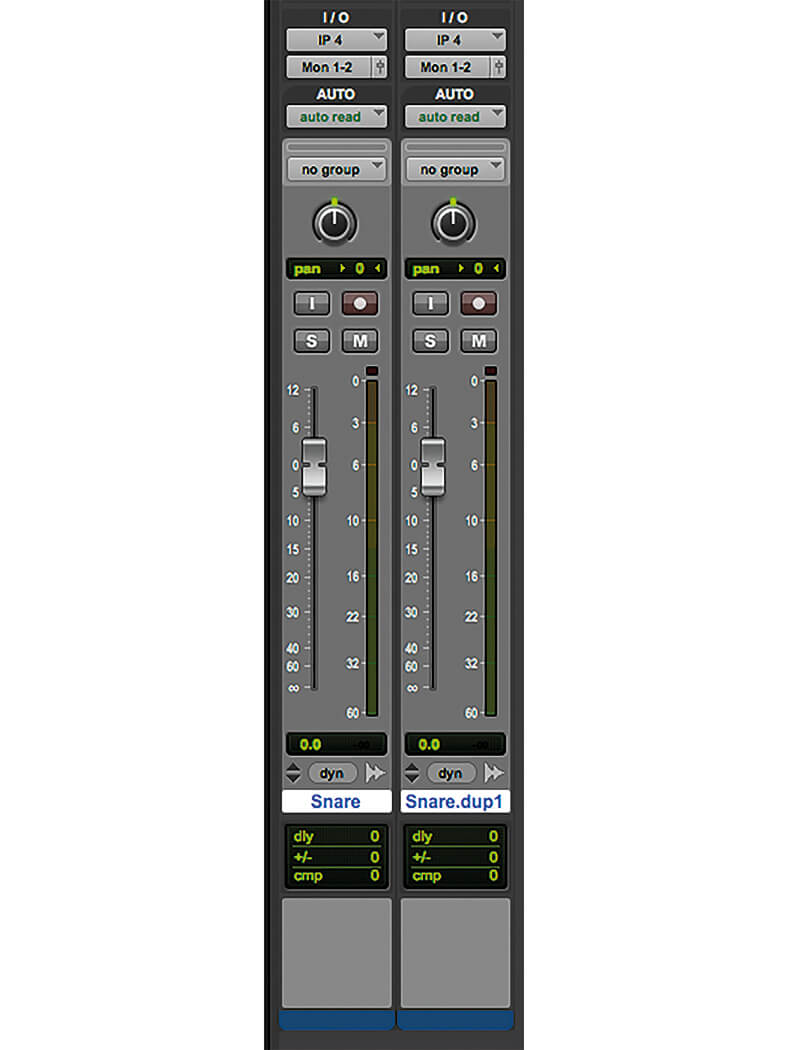
1. Identify the drum track you’re looking to gate (again, a snare will work wonderfully) and duplicate it. Make sure all plug-in slots are cleared on both tracks and then loop a section of audio.
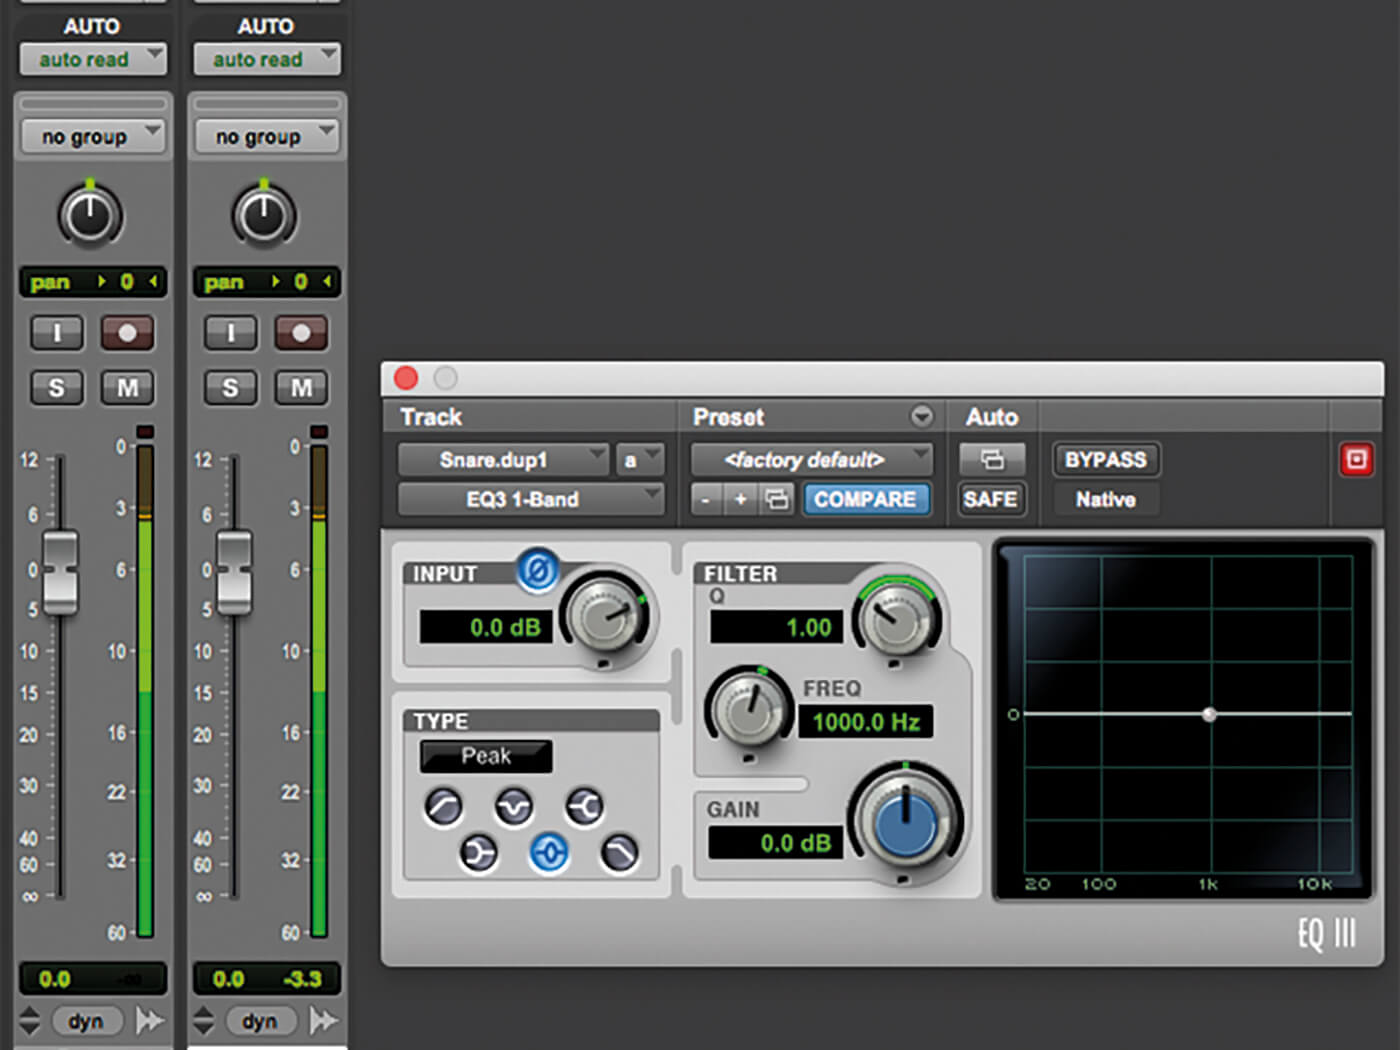
2. Add EQ-3 to the duplicated track and hit the input-polarity button to flip the phase of the signal. This reverses the phase of one of the identical tracks and should result in complete silence during playback.
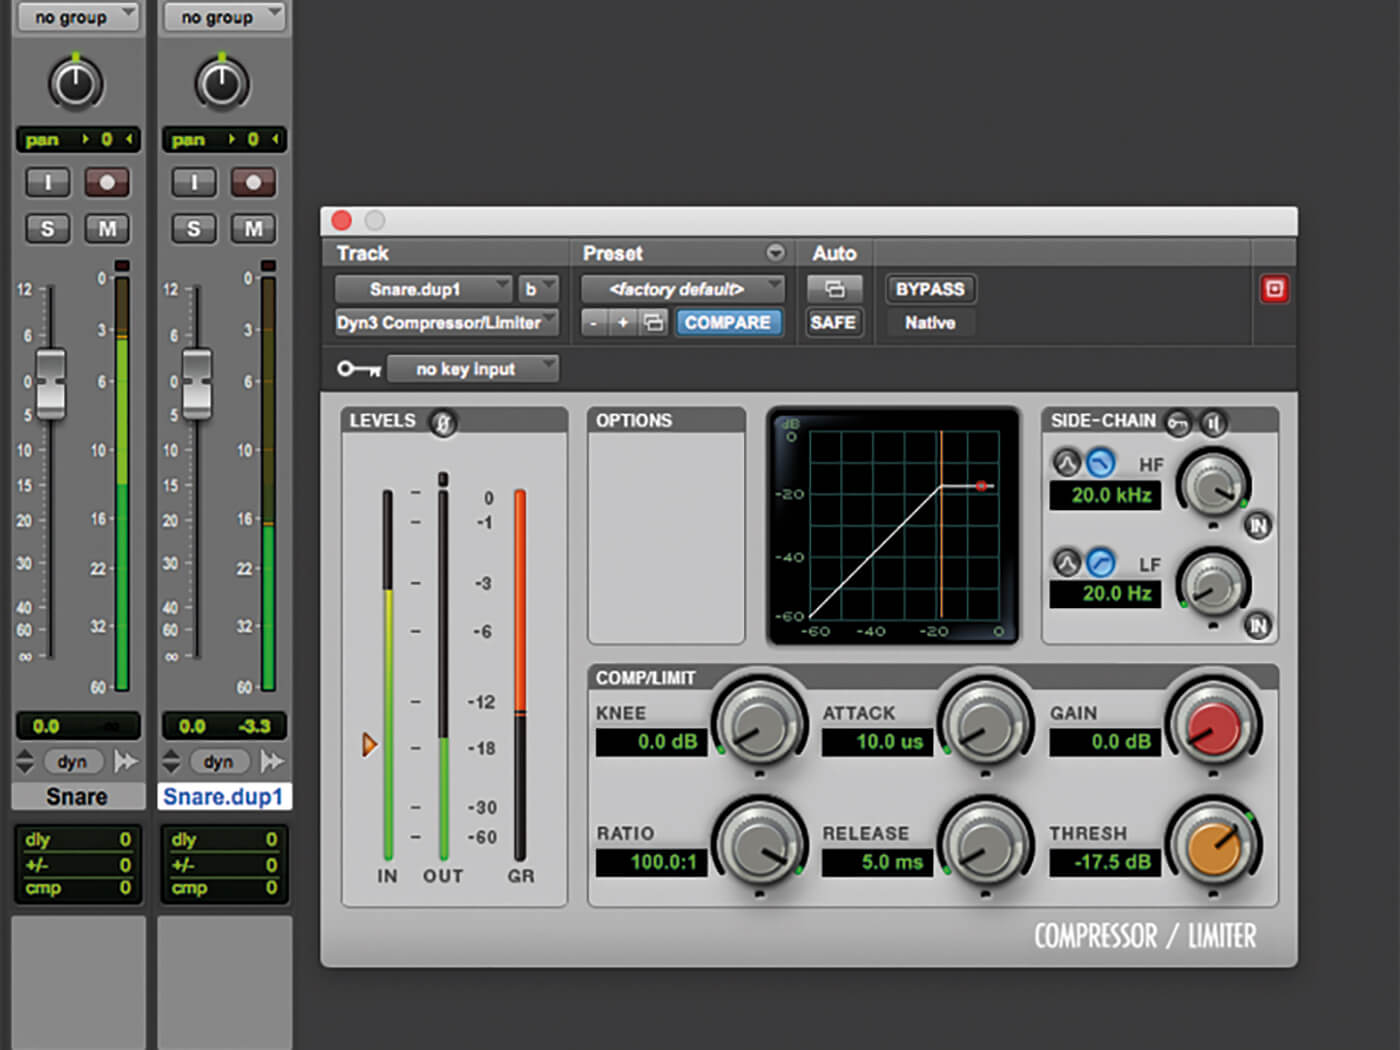
3. Add a Dyn3 Compressor to the duplicated track, with the fastest attack and release settings possible, and a ratio of 100:1. Adjust the threshold until you hear a full snare sound return with no bleed.
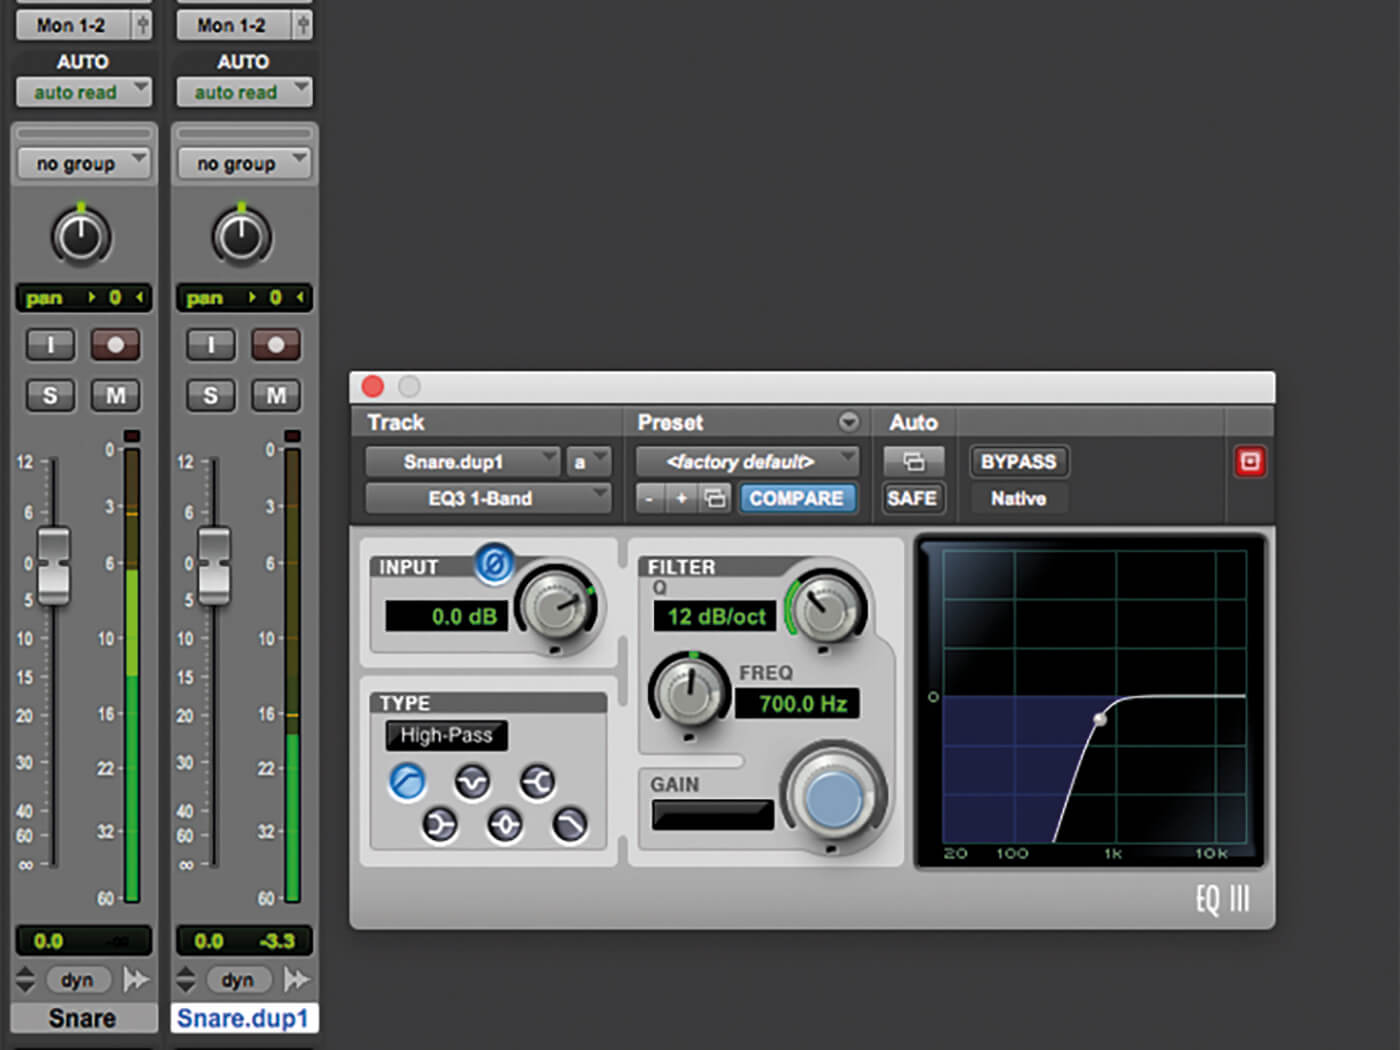
4. Return to the previous instance of EQ-3 and add a high-pass filter at about 700Hz (this frequency can vary). Go back to the Dyn3 Compressor and adjust the release parameter until the top end begins to decay in the desired way (it will vary depending on the drum, tempo, and arrangement).
For more Avid Pro Tools workshops and tutorials, click here.