How to make arrangement changes on the fly in Pro Tools
Don’t let those last-second flashes of inspiration get lost due to time constraints. Let us show you how to reinvent your arrangements.
Whether you’re making a song alone in your home studio or running a large session with a room full of writers and producers at a commercial facility, the situation is the same: inspiration has a time limit, and you can’t risk losing a brilliant idea due to clueless fumbling in Pro Tools. It’s sad – and sadly not uncommon – to see a promising session turn sour thanks to the Pro Tools operator’s inability to keep pace with its many demands. At any stage in the production process, an artist or producer may request changes in key, tempo and, most likely, arrangement.
Even at the very end of the mixing stage, I’ve had artists ask me, “Can you send me four versions of the bounce: one that’s up a step; one that’s two BPM faster; one with a double chorus at the end; and a fourth with all of those changes”. This can be a lot to keep straight, and it’s integral that any producer, writer or engineer operating Pro Tools is able to execute these changes in a quick and timely manner. It’s not rare that this will happen when producing songs professionally.
A big stretch
The Varispeed Elastic Audio algorithm is incredibly valuable for making time-based changes, and can be a lifesaver when you have to change the tempo of a track. The integral component here is the Timebase mode of your elastic tracks: if Ticks is selected, the track will conform when changes are made to the tempo, and when Samples is selected, the track will not respond and morph to changes in tempo. Although Varispeed is incredibly fast and flexible, it’s an imperfect tool. One of its inherent drawbacks are the audible artefacts and glitches within its sound.
Because of this, we highly recommend switching all elastic tracks over to X-Form mode for a final stage of rendering to ensure maximum quality. It’s a higher-quality algorithm that will have a better sound but the render time will be lengthy. Make sure to time this out during a break. Once the processing has been approved, you can save your CPU’s resources by committing the tracks and turning Elastic Audio off. Alternatively, you can simply change the speed of the song’s two-track bounce, as opposed to applying Elastic Audio to every individual track within the song’s session.
Perfect pitch
There are many methods you can call upon when you need to transpose a track’s pitch. Simply applying Avid’s Pitch II plug-in is a quick and simple way to audition the change but its intense CPU usage isn’t worth the convenience (this results in enormous delay compensation and latency that completely eliminates the possibility of a smooth recording experience). Instead, I prefer to use Elastic Audio and X-Form to change the key of tracks by using the Elastic Properties window.
When preparing to transpose the key of a song, it’s important to separate the rhythmic elements from the melodic ones, as the transient rhythmic material generally doesn’t sound quite right after a change in tuning (unless a drum element is particularly resonant and is intentionally tuned to the key of the song). Much like the Varispeed Elastic Audio engine, Pro Tools’ polyphonic mode shares a similar set of strengths and weaknesses, and your final product may have an improved tonal quality if you decide to execute a final stage of X-Form processing.
Smart shuffle
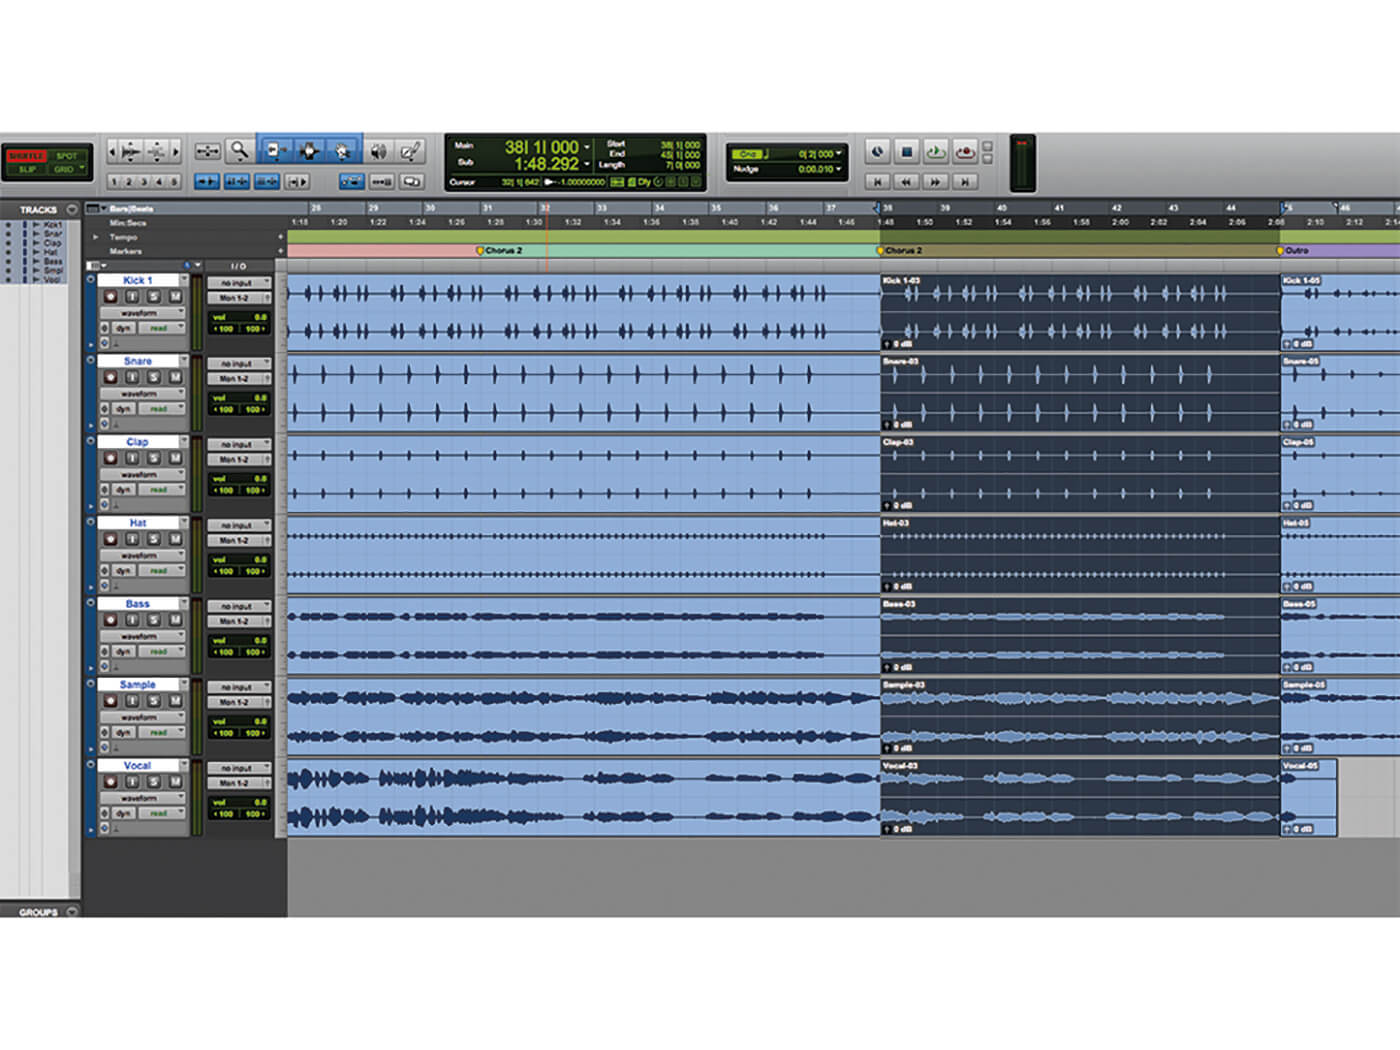
Pro Tools’ Shuffle mode is a crucial component when it comes to rearranging the sections of a song. It’s the Avid equivalent to the Insert key on a PC. When engaged, you can paste clips onto the arrangement window without overwriting clips that already exist in that spot; instead, they simply shuffle over in order to make room for the new clips. This concept works the same way with deleting clips too: when you select and delete an entire section of a song while Shuffle is engaged, the selected section will disappear and the section before it will now flow directly into the section that follows.
Without this humble feature, when asked to perform presumably simple tasks such as doubling choruses or removing a few bars from a bridge section, users would be forced to dive headlong into an unending nightmare of copy-pasting. When moving entire sections of a song around, be sure to select any active hidden tracks visible, and display all playlists to bring all of the backup audio takes to their counterpart’s new locations. Manually dragging these over later, when asked, “Do you have another take of that vocal part?” is no fun. Trust us.
Part 1: Changing song tempo
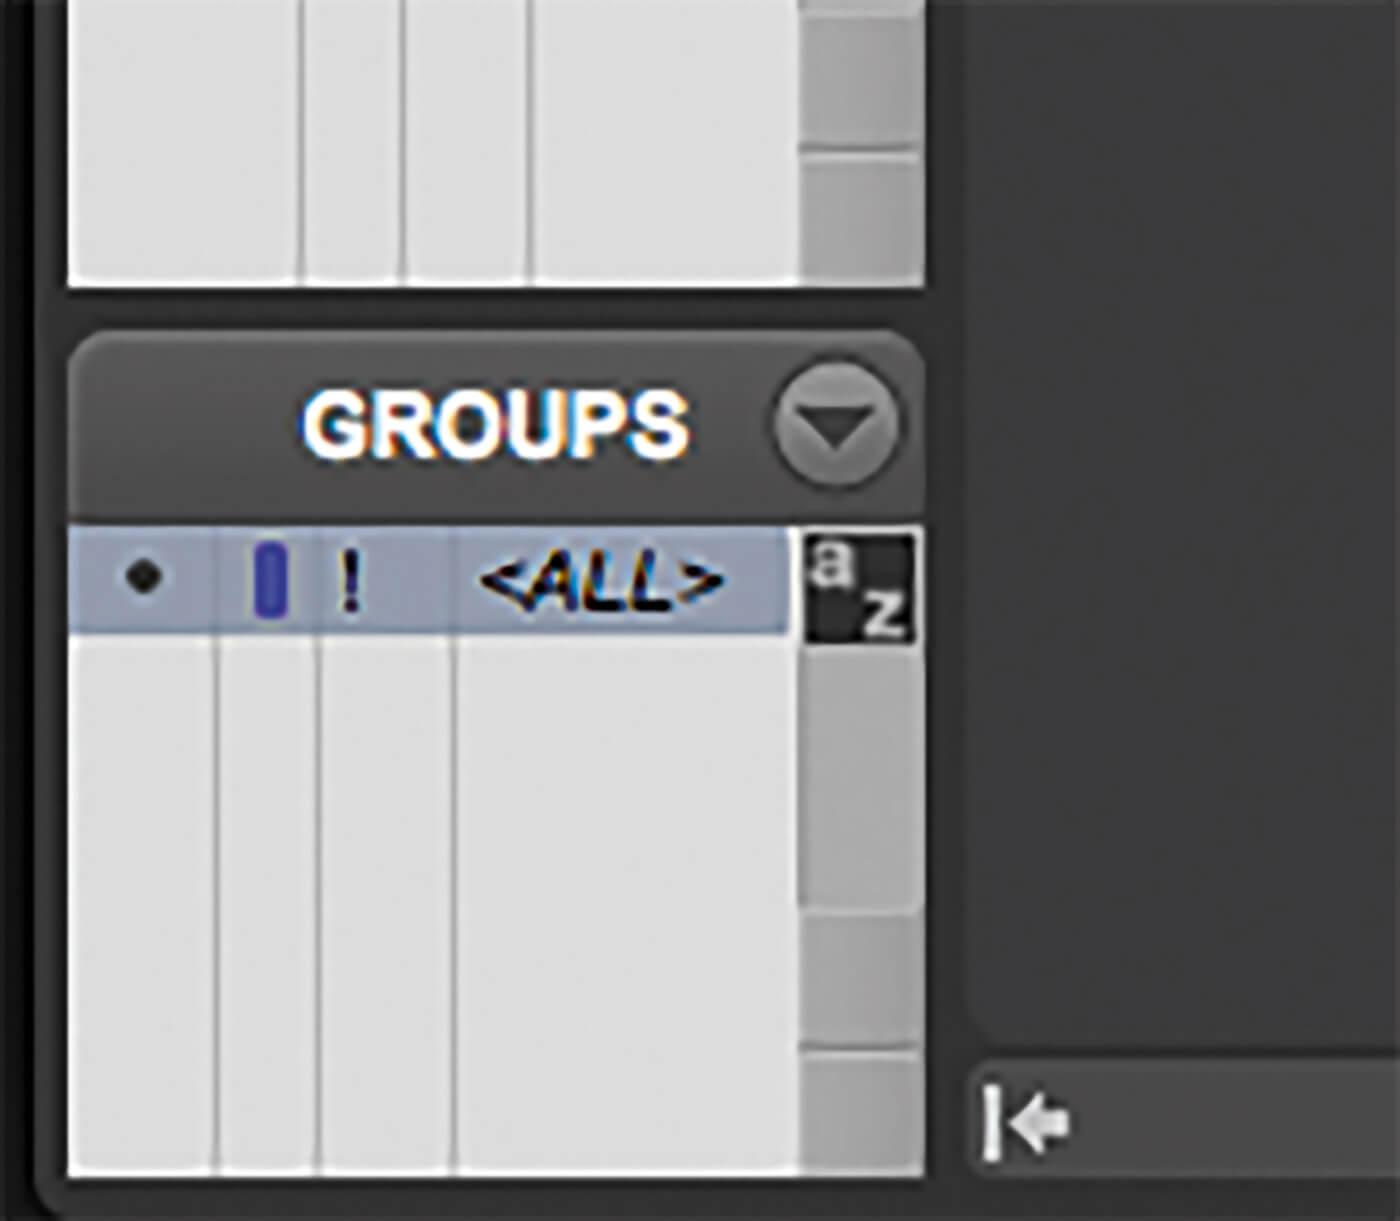
1. In the Groups window, select All to group every track in the session; this will allow global edits to be made to every track.
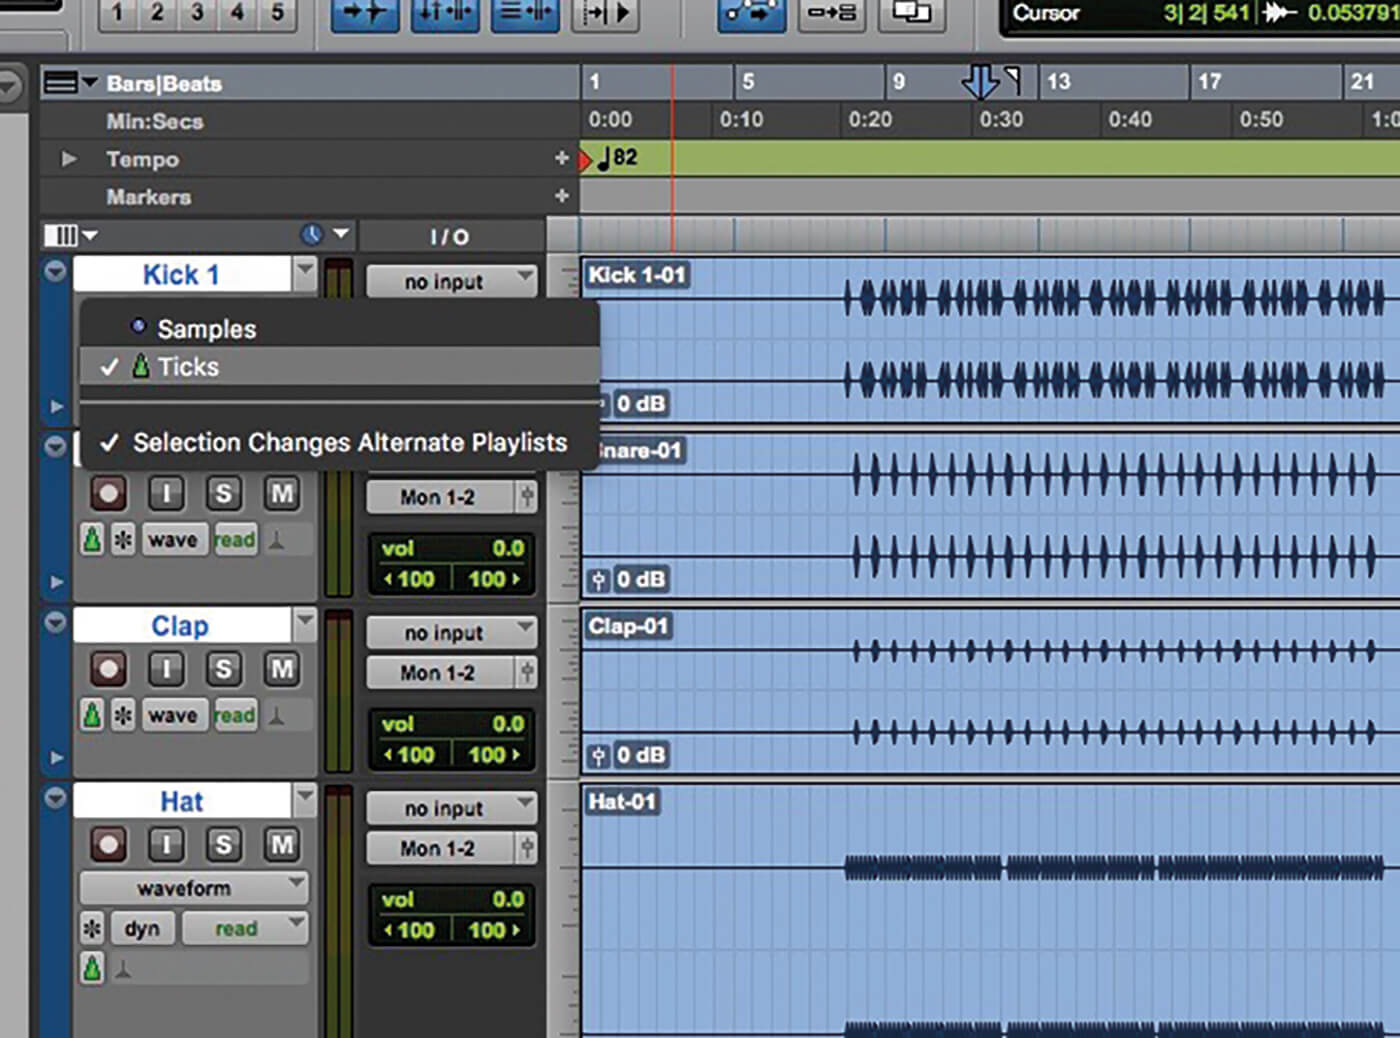
2. With all tracks grouped, click the Timebase selector box to change all tracks from Samples to Ticks.
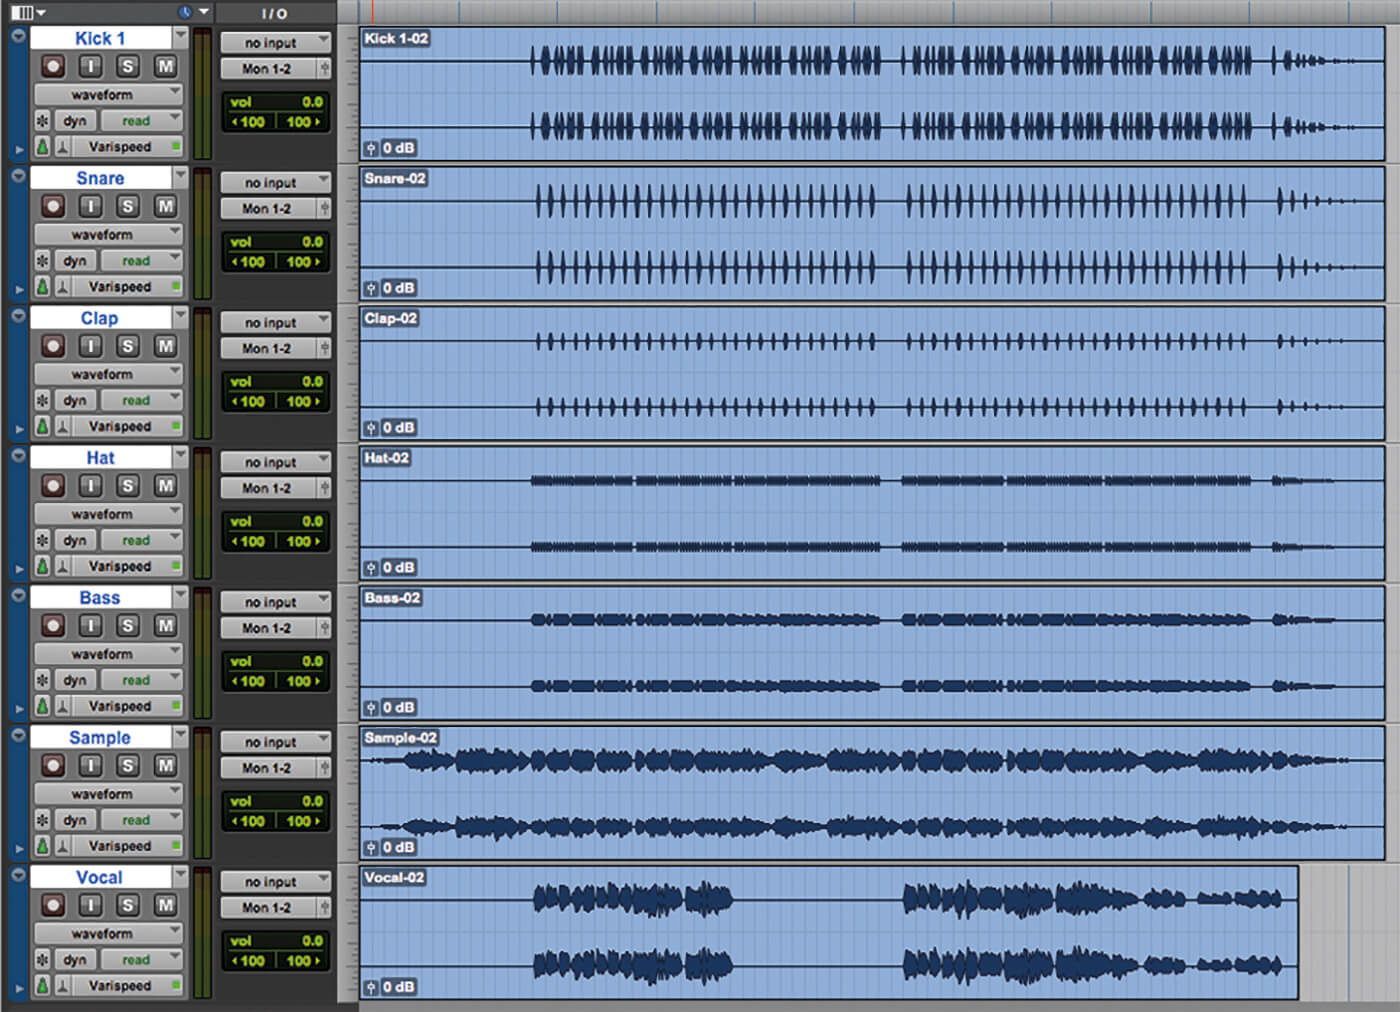
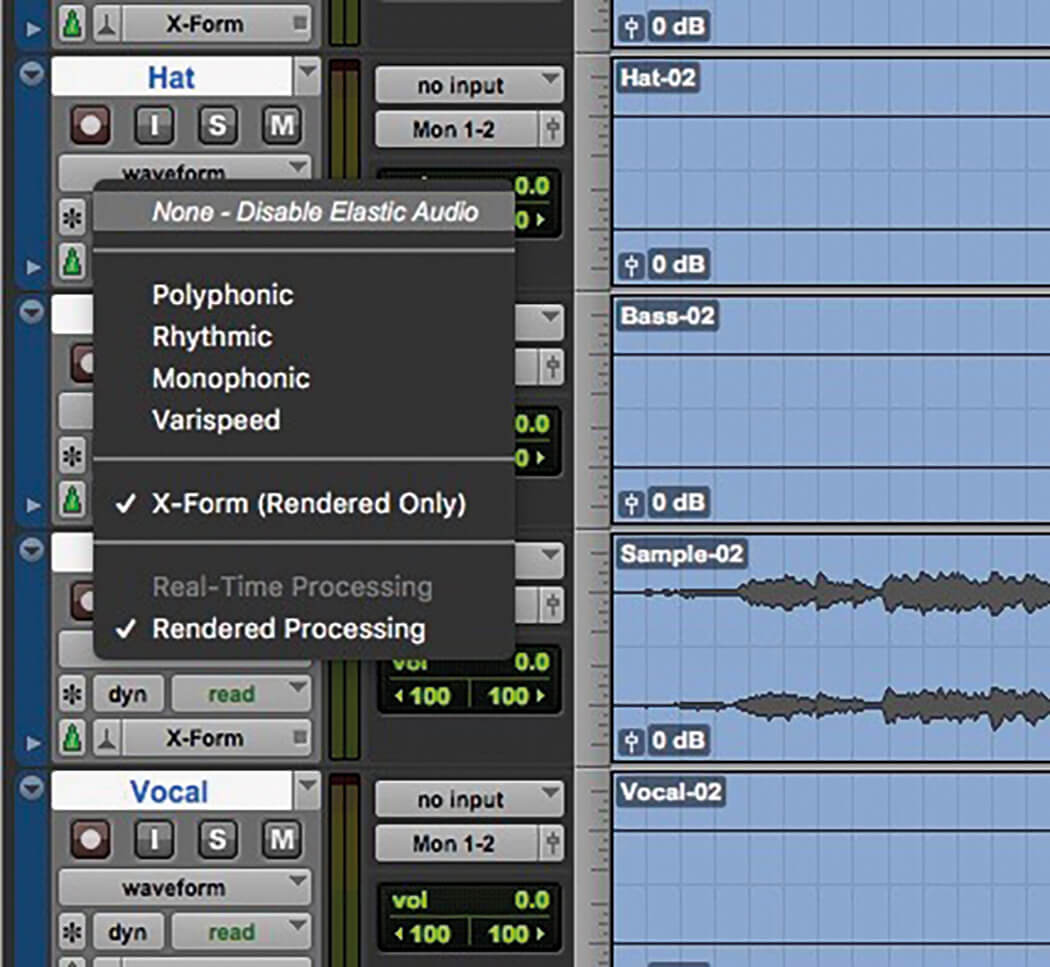
3. With all tracks grouped, click the Elastic Audio Selector to change all tracks to Varispeed mode.
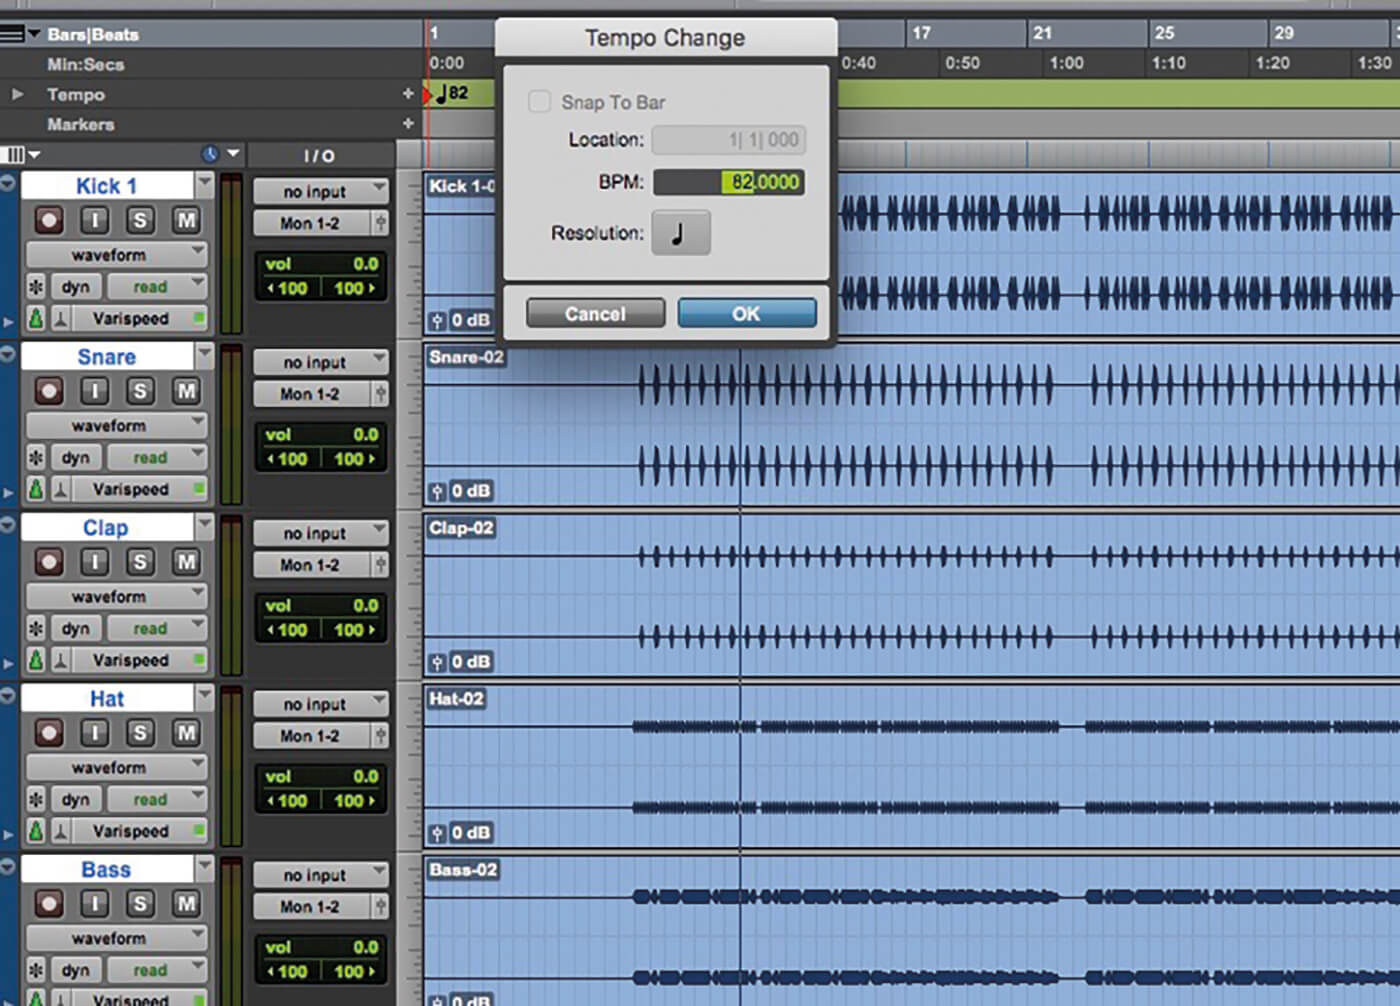
4. Click the Tempo Change button next to the labelled BPM and change it to your desired tempo.
5. When the tempo change sounds right and has been approved, click the Elastic Audio Selector and change all tracks to X-Form mode to perform the higher-quality render. The clips should appear grey until they finish rendering.
6. Click the Elastic Audio Selector and change all tracks from X-Form mode to None, then press Commit to commit the X-Form processing.
![]()
THE CHIPMUNK EFFECT Certain melodic instruments handle pitch manipulation well but its imposition can be especially gruesome and evident on vocals. To combat the chipmunk effect, engage X-Form’s Formant mode, which will restore some of the beefy resonance that gets lost when digitally transposing the pitch of a track.
Part 2: Changing key
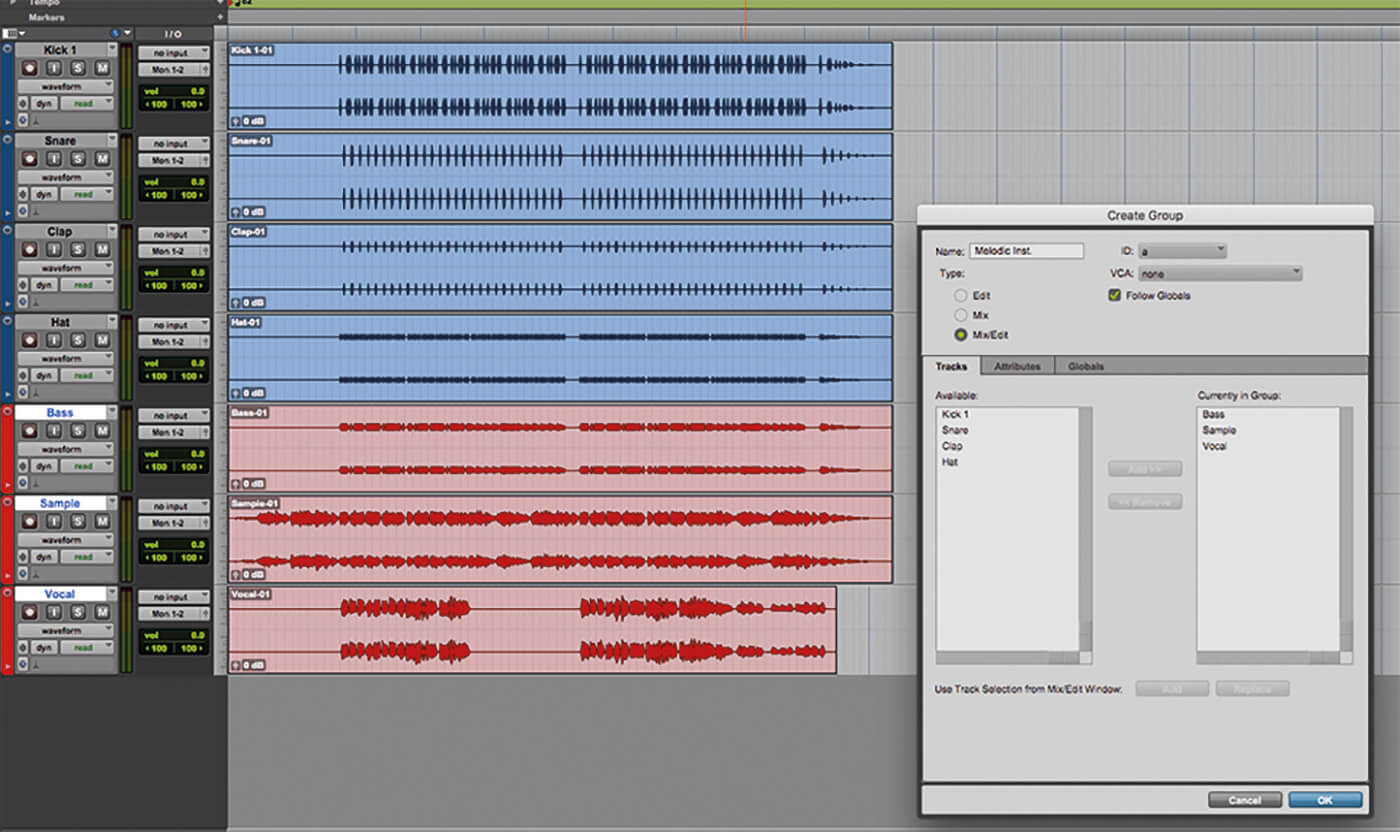
1. Select all melodic tracks that you want to transpose and press Cmd+G to create a new group. Name the group “Melodic Inst” and press enter.
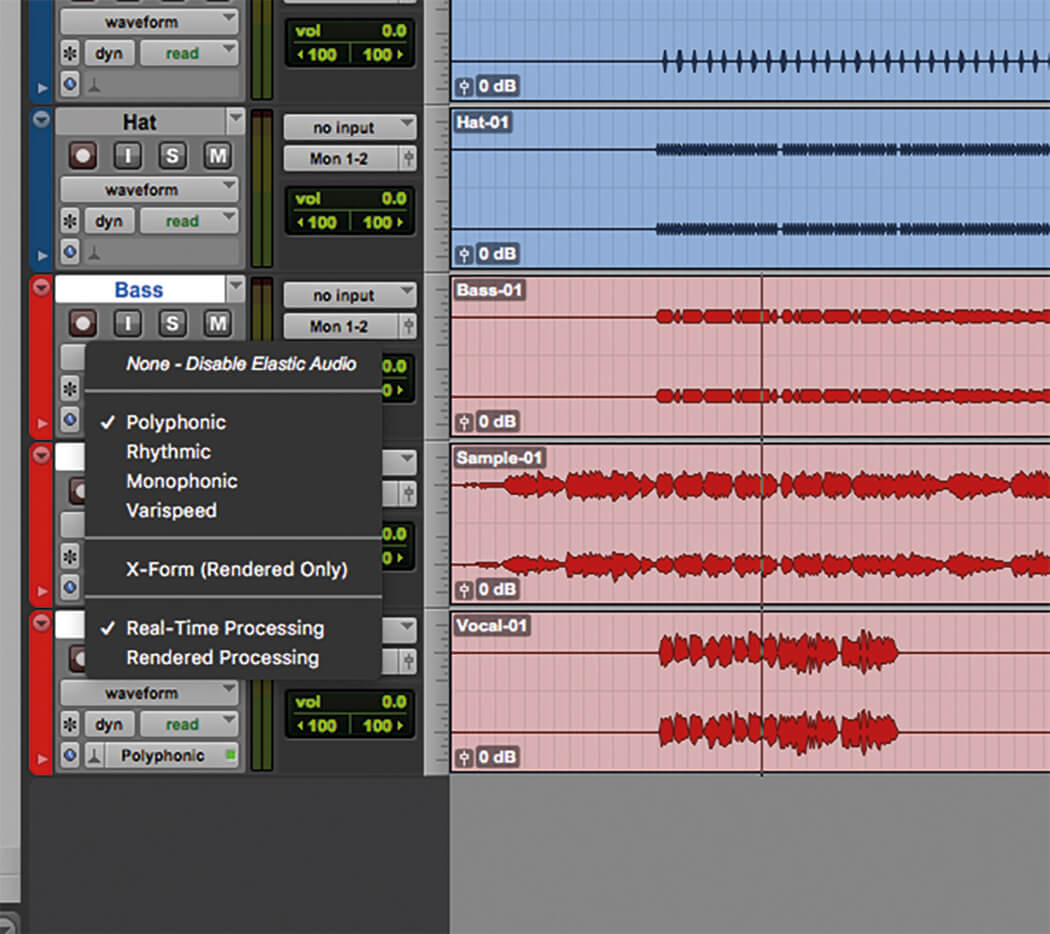
2. Click the Elastic Audio Selector to change your melodic tracks to polyphonic mode.
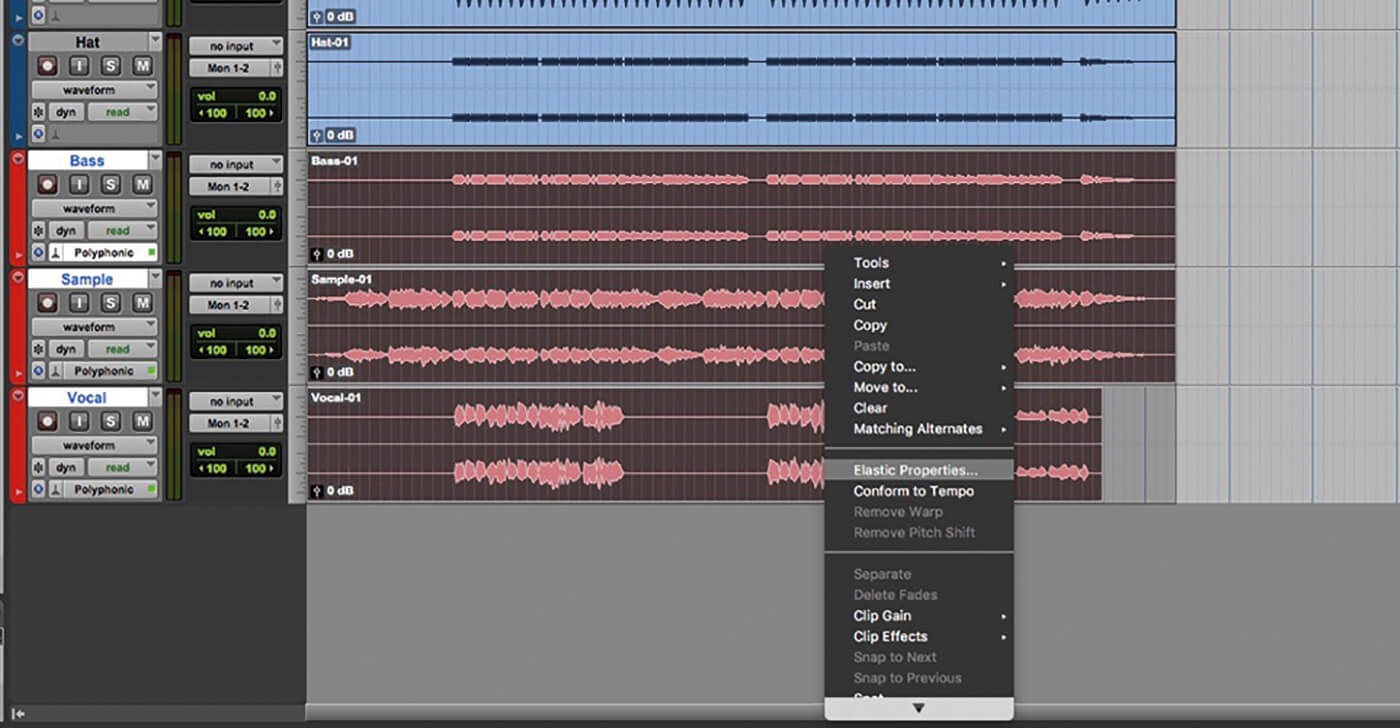
3. Right-click the grouped clips and select elastic properties or hit Option+5.
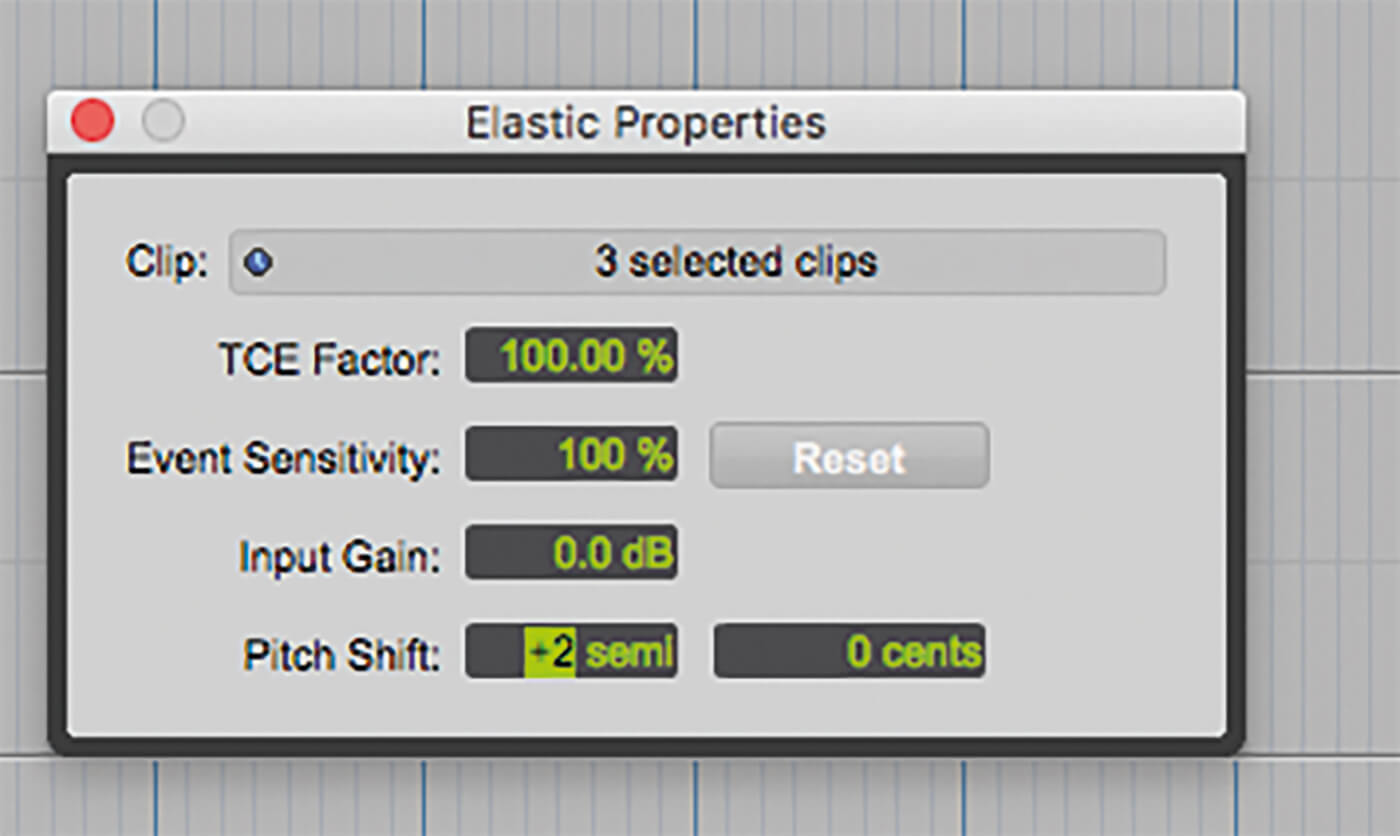
4. Click the pitch-shift field and enter the number of semitones you wish to apply. Hit enter. The clips should appear grey until they finish rendering.

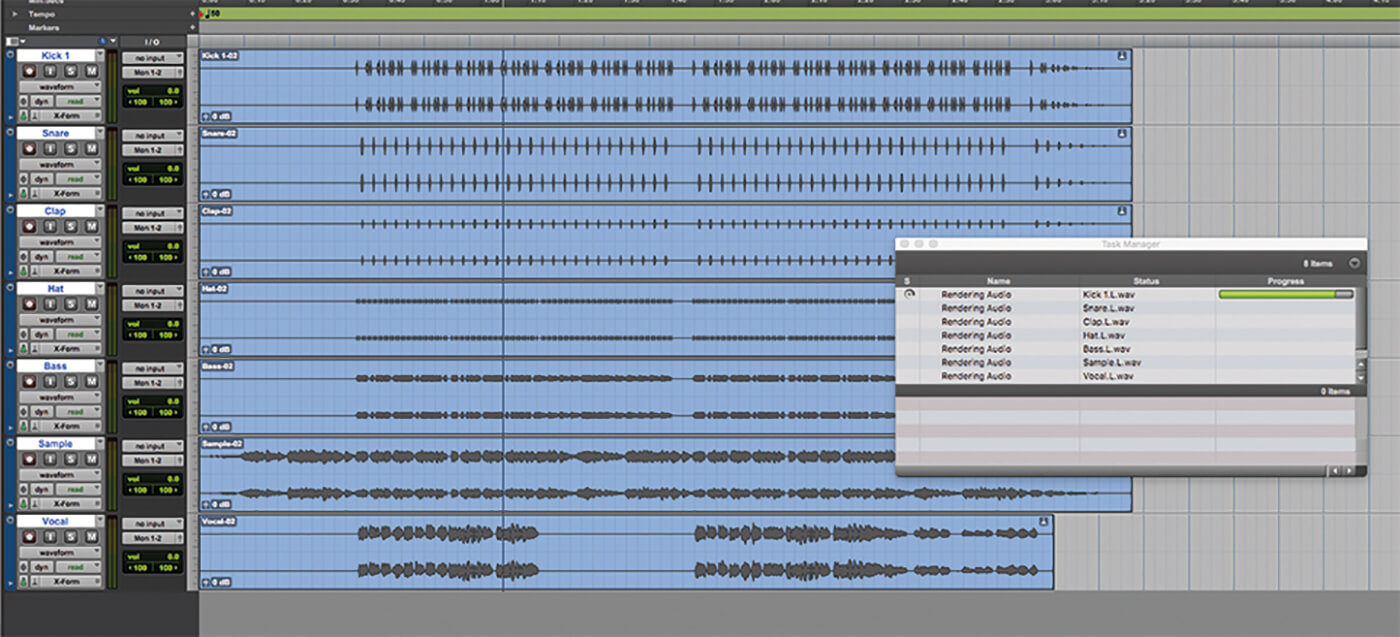
5. Once the key change has been approved, click the Elastic Audio Selector and change all tracks to X-Form mode. Press Option+ to open the Task Manager, and check the progress on the render.
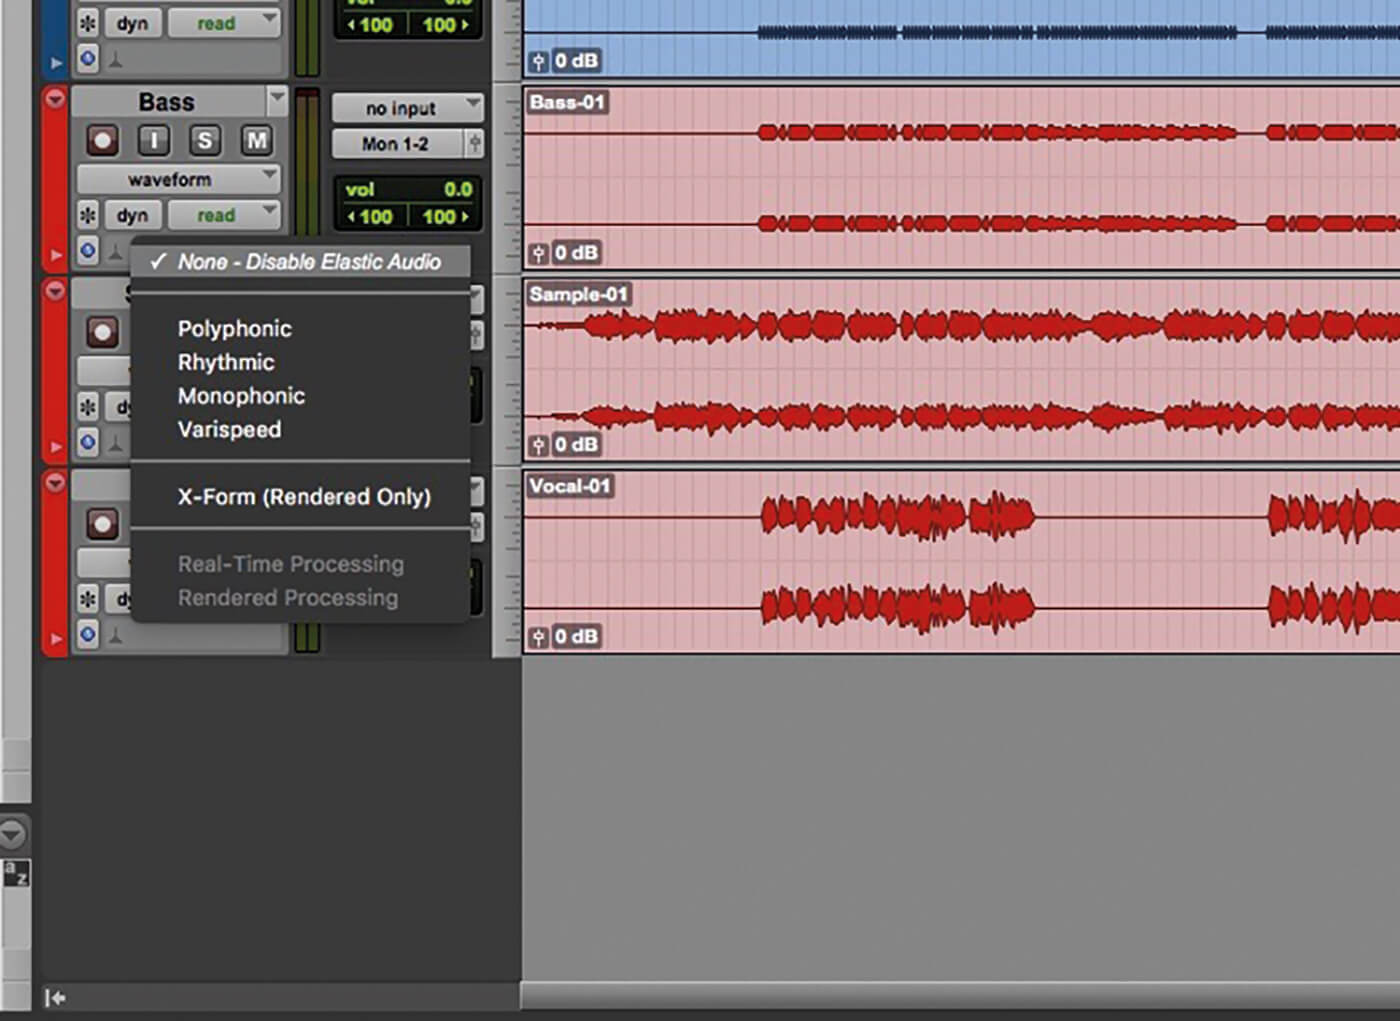
6. Click the Elastic Audio Selector and change all tracks from X-Form mode to None. Press Commit to commit the X-Form processing.
![]()
ELASTIC HEART Using Elastic Audio to change the tempo of drums has an unfortunate effect on their attack, placement, consistency and phase relationship. If possible, request to retrack the rhythmic material. If that’s not an option, manually editing the drums to your new grid will be a better solution to ensure that the drums conform to your new tempo.
Part 3: Arrangement changes with shuffle

1. Use markers to identify and name the different sections of your song. This will help to make future arrangement edits.

2. In the Groups window, select all to group every track in the session, which will allow global edits to be made to every track.
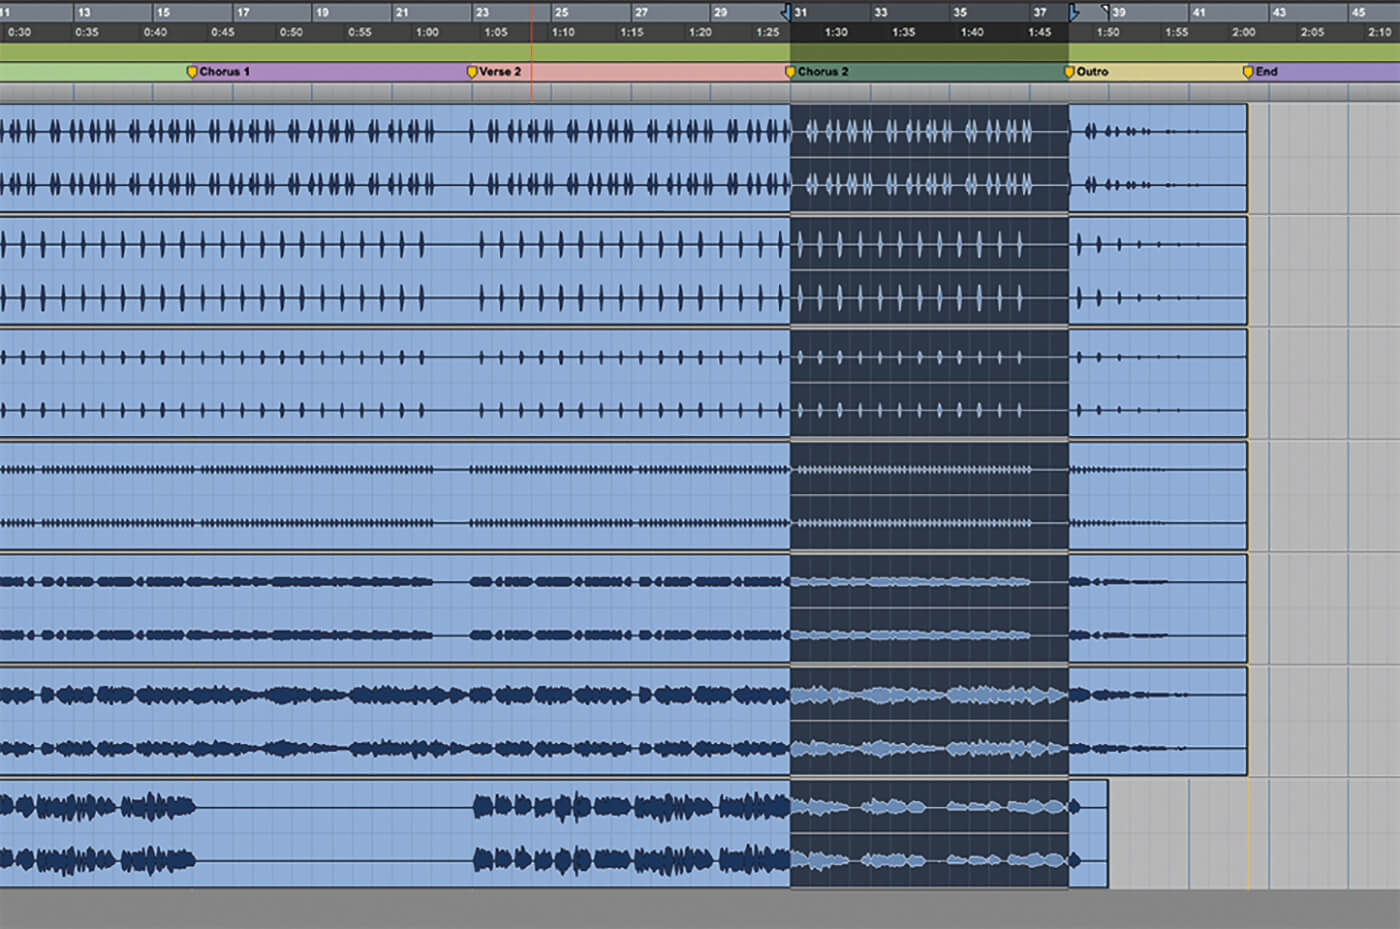
3. In Grid mode (and with Grid View active), select the full duration of the second chorus of the song or whichever section you wish to repeat.

4. With all tracks highlighted and the desired region of the chorus selected, switch to Shuffle mode and hit Cmd+D to duplicate the region.
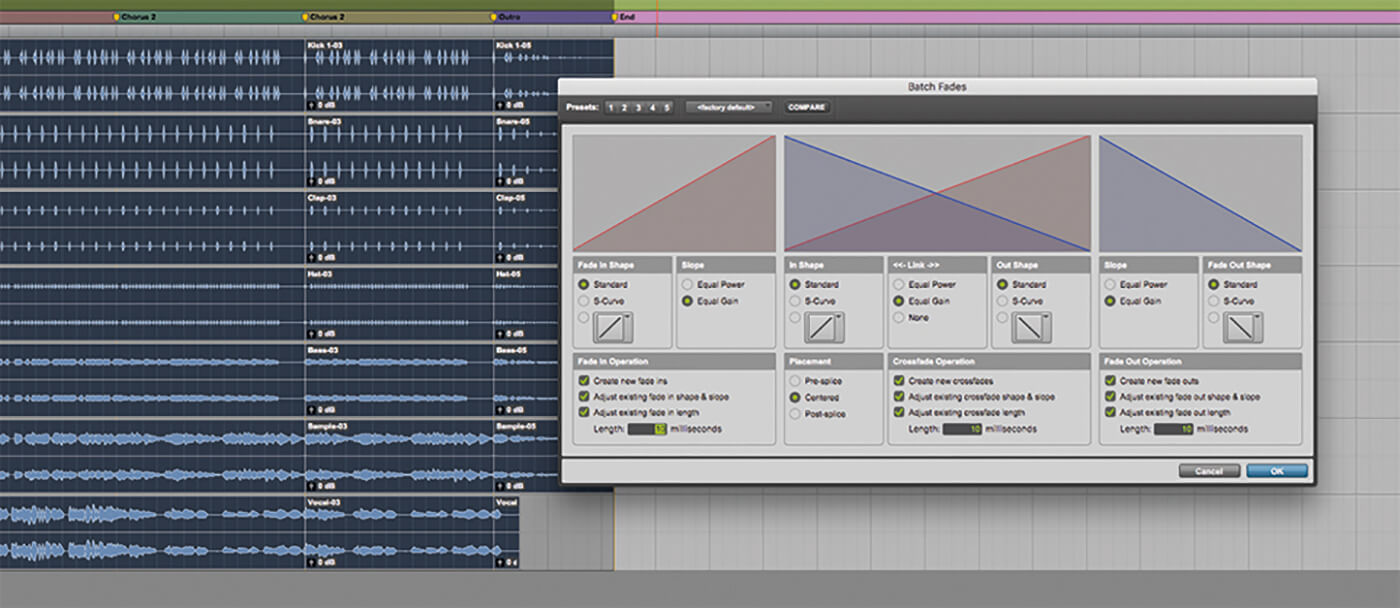
5. Press Cmd+A to select all and then Cmd+F (or just F, if using Keyboard Focus Mode) to apply a batch-fade edit.
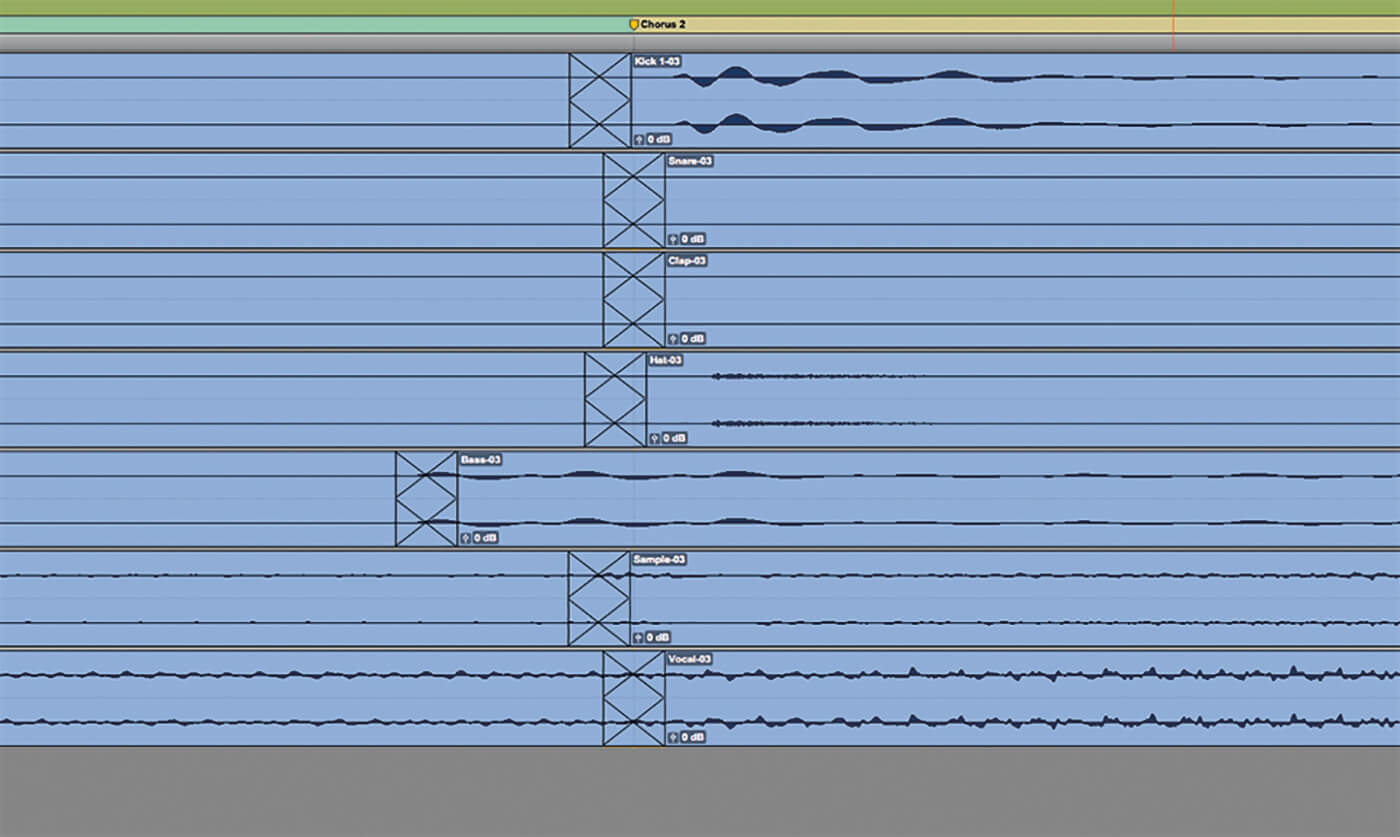
6. Audition the entrance and exit of the edits to ensure that the transitions are seamless. If edits need to be made to individual tracks, hit Cmd+Shift+G to disable all groups, switch to Slip editing mode and peel back the audio at the location of the crossfade.
For more Avid Pro Tools workshops and tutorials, click here.