Pro Tools Tutorial: Become a Power User – Part 1: Setting Up A Power Session
A stress-free session will always make for a more successful one – and good preparation will make them more likely. Mike Hillier keeps his house in order. Tempting though it is when starting a new Pro Tools session to get stuck in and start recording, time spent organising before you hit record can go a […]
A stress-free session will always make for a more successful one – and good preparation will make them more likely. Mike Hillier keeps his house in order.
Tempting though it is when starting a new Pro Tools session to get stuck in and start recording, time spent organising before you hit record can go a long way towards making the project easier to navigate later on. Simple things such as naming every track before you start recording will ensure that all your audio clips have names that correspond to the track names, rather than leaving you with dozens of audio files with meaningless names like Audio 06_02.wav…
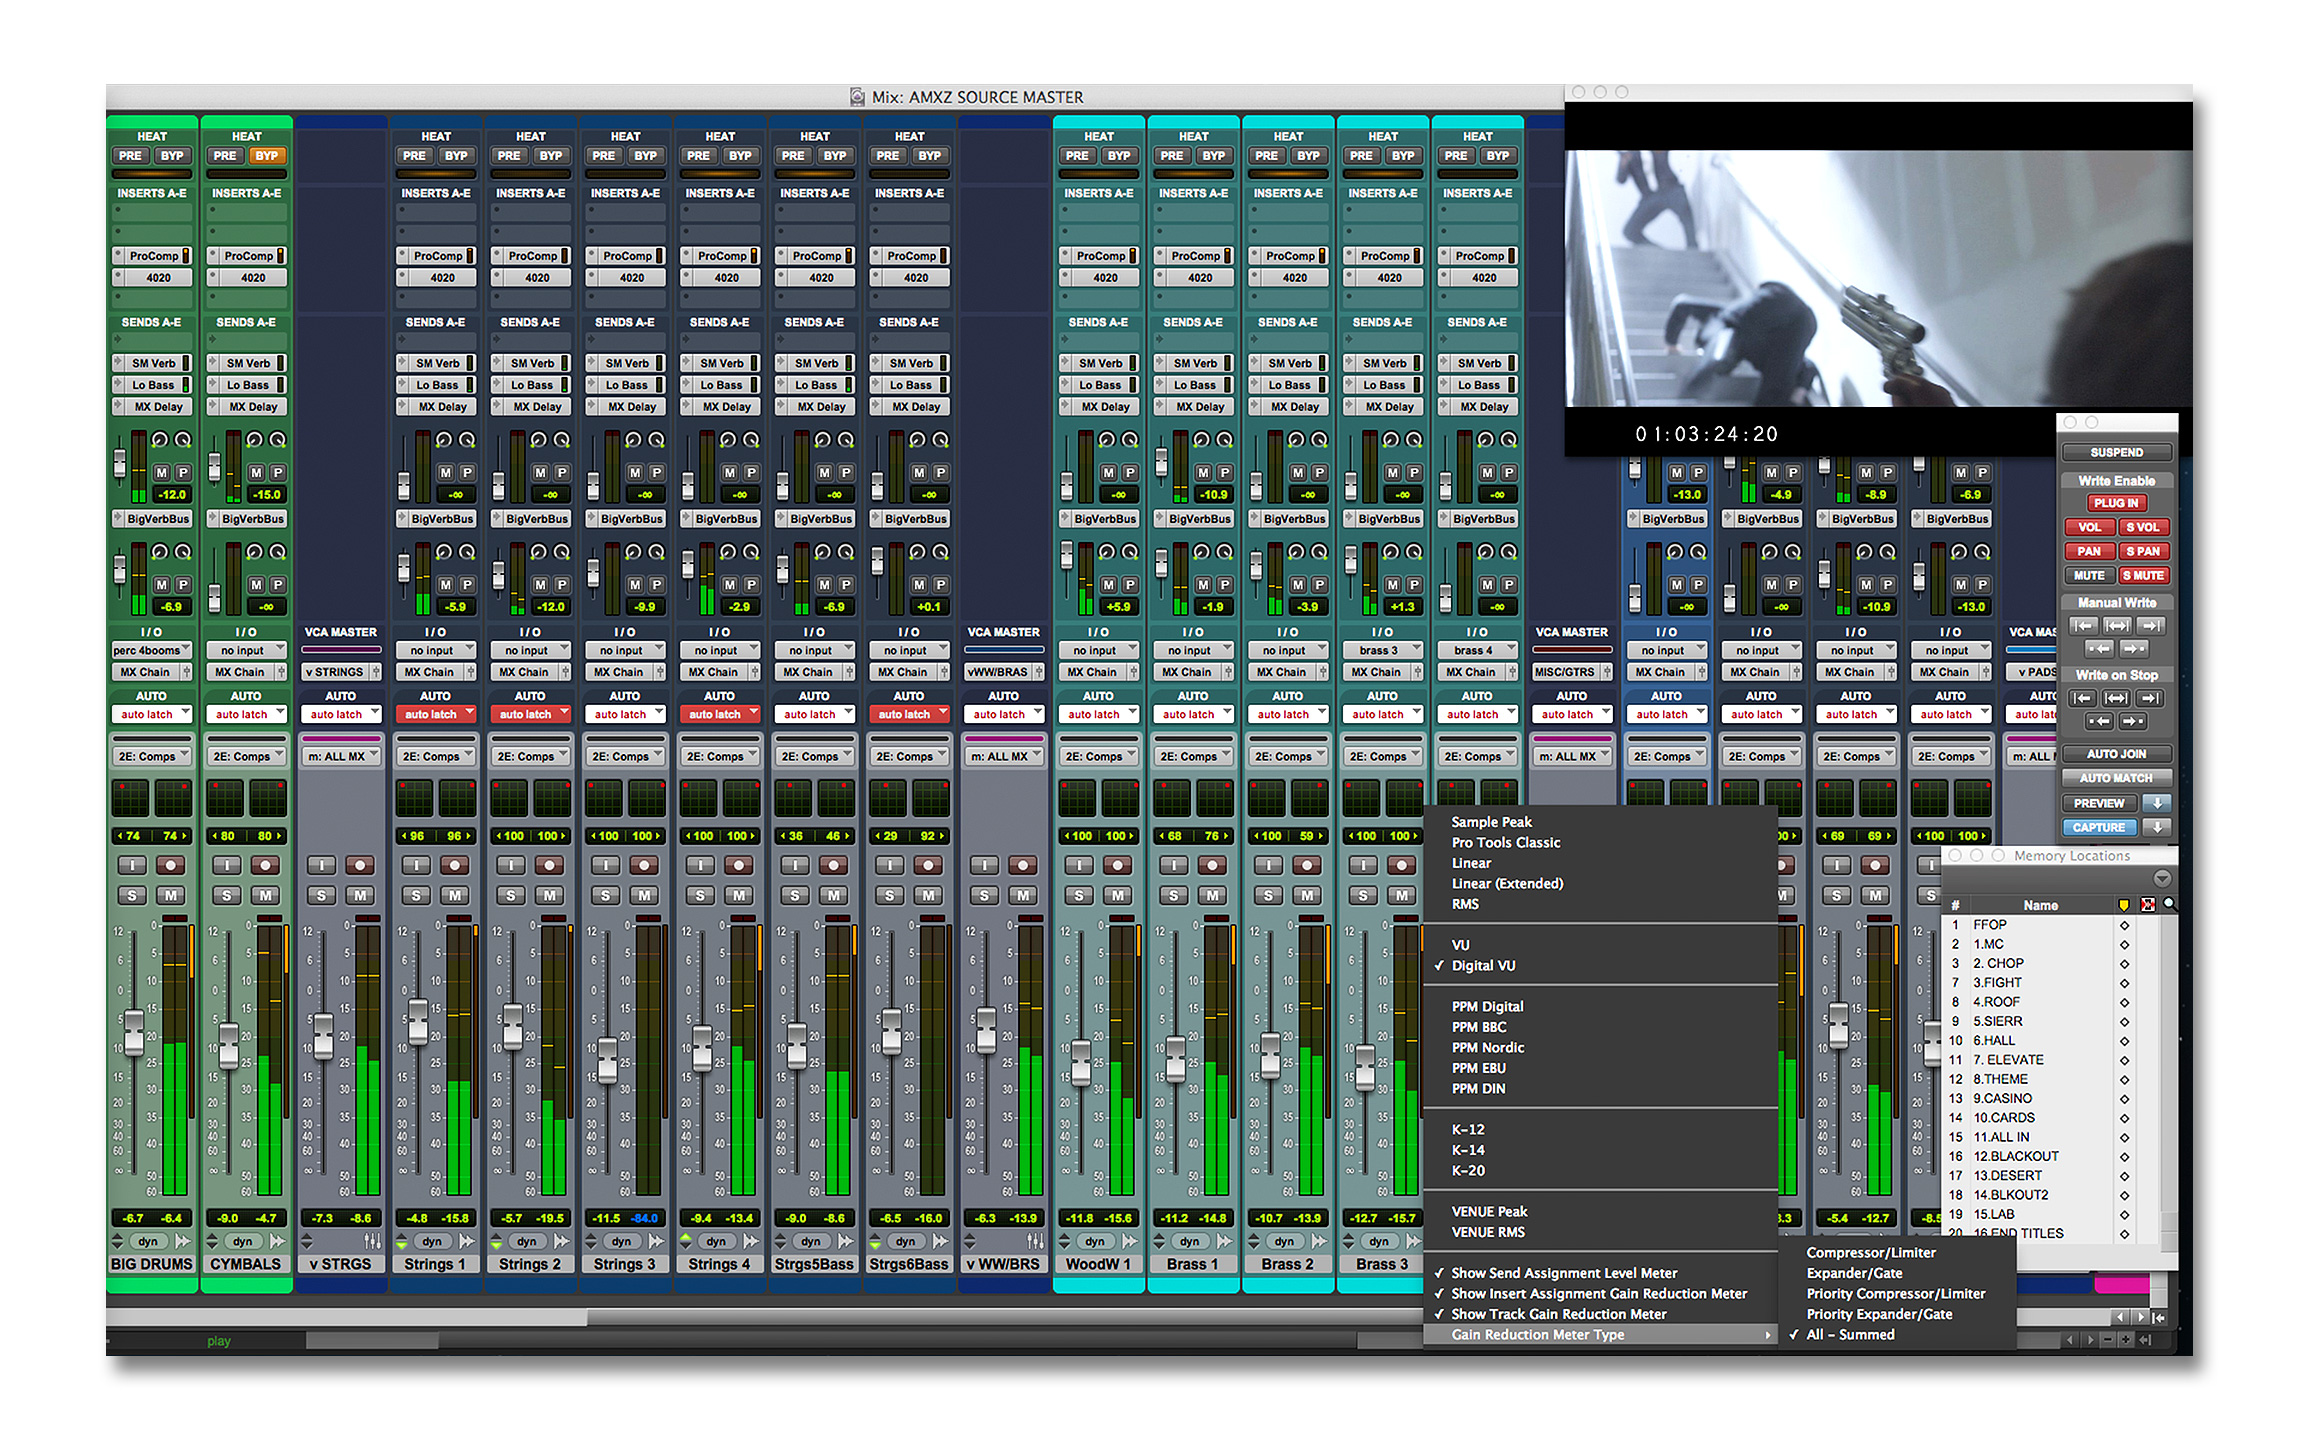
In this tutorial we look at how best to set up your Pro Tools rig for a recording session, focusing on the I/O setup window, routing, preparing a click track and the various record modes available in Pro Tools. To make our sessions run faster we like to get this type of activity completed long before the artist comes into the studio, and we’ve saved as much of it as possible to a template session that we can import from. When starting a new recording session, therefore, we know we can always use the same I/O preset and import a bunch of tracks from the template folder for what we’re recording. This way we can quickly import an entire multitrack drum setup without ever naming or routing any of the channels.
Once the audio has been recorded we will then do more organising: colouring tracks, entering markers and grouping clips such that editing and mixing will be made easier as and when we come to them.
You will often see DAW users recommend an external drive for saving your projects to. This is not because of space issues, but because the first drive will be constantly in use running the operating system, which will interrupt and slow down Pro Tools’ own audio read/write requests. Make sure you use as fast a drive as possible and that it’s not occupying the same buss as high-channel-count interfaces. You might also want to consider backing up your drive as soon as the session is finished. Hard drives die frequently and a backup drive is much less expensive than losing all your recordings and having to redo them.
Project Setup
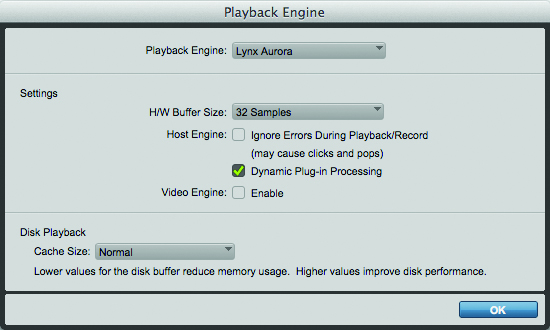
1: The Playback Engine window has altered a little in Pro Tools 11. The H/W Buffer size now applies only to record-armed tracks, so you no longer need to set it to max when mixing and mastering. You should also spot the Dynamic Plug-in Processing option, which turns off plug-ins when they’re not passing audio.
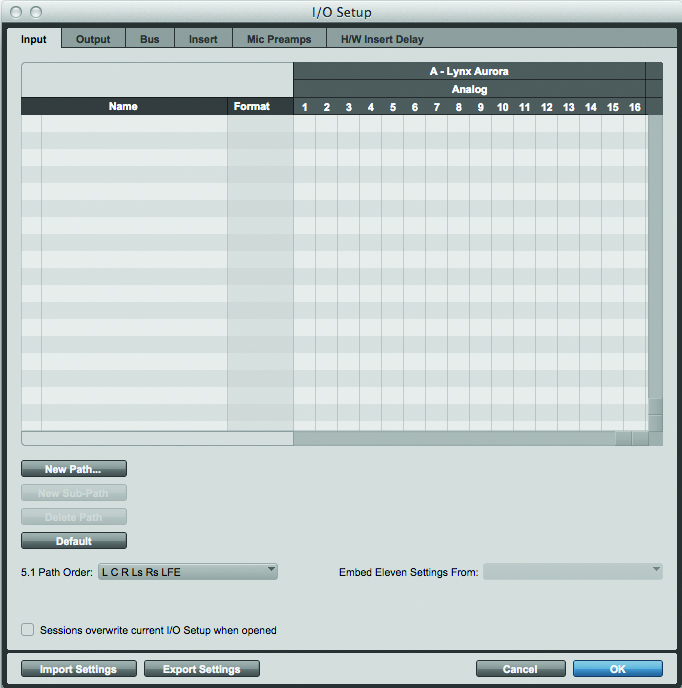
2:If you don’t already have a preset I/O set up for your rig, create one now in the I/O Setup window. In the Input tab, highlight all of the current inputs and select Delete Path. This will delete your current inputs and enable you to reassign them.
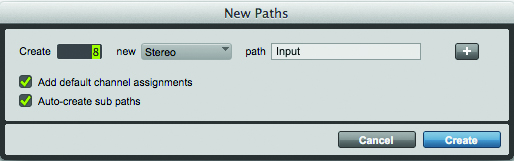
3: Select New Path and create sufficient inputs for your audio interface (for example, if you have an Mbox 3, create two stereo inputs). For our Lynx Aurora 16, we’re creating 8 stereo inputs. To create the mono paths, select the ‘Auto-create sub paths’ option. This will create two mono paths as sub-paths for every stereo path.
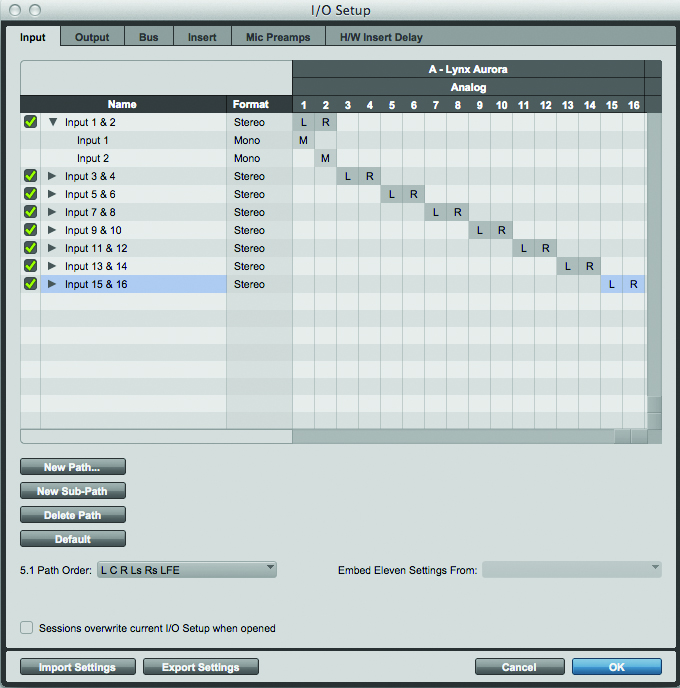
4: Name the inputs accordingly. We name our stereo inputs as ‘Input 1–2’ and so on, with mono sub-paths named ‘Input 1’ etc. However, if you have an Mbox 3 or similar you may want to name your inputs ‘Analogue 1 & 2’ and ‘S/PDIF 1 & 2’. If you have permanently patched gear, you may want to name the channels after the gear – for example, ‘Minimoog’. Repeat this process for the outputs.
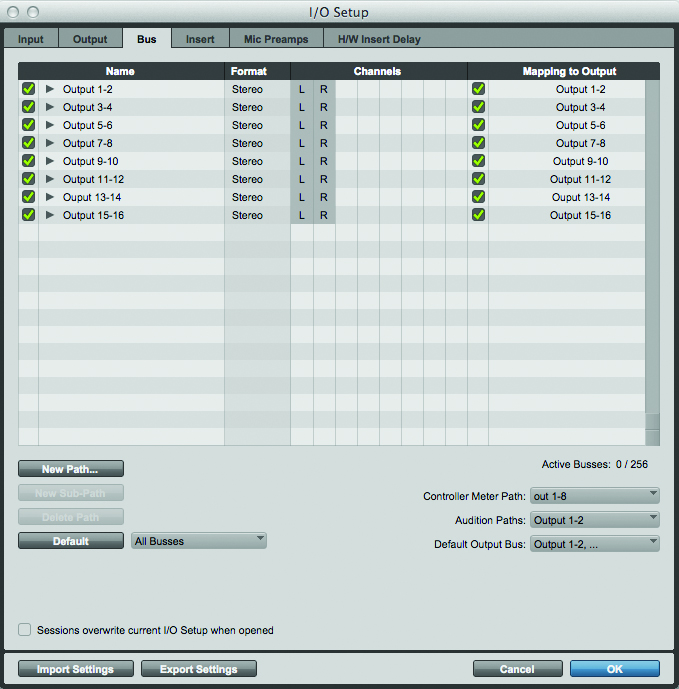
5: We tend to delete all busses other than those mapped to outputs, since we can create new busses in Pro Tools as and when we need them. However, if you always use the same routing it can be useful to set that up here.
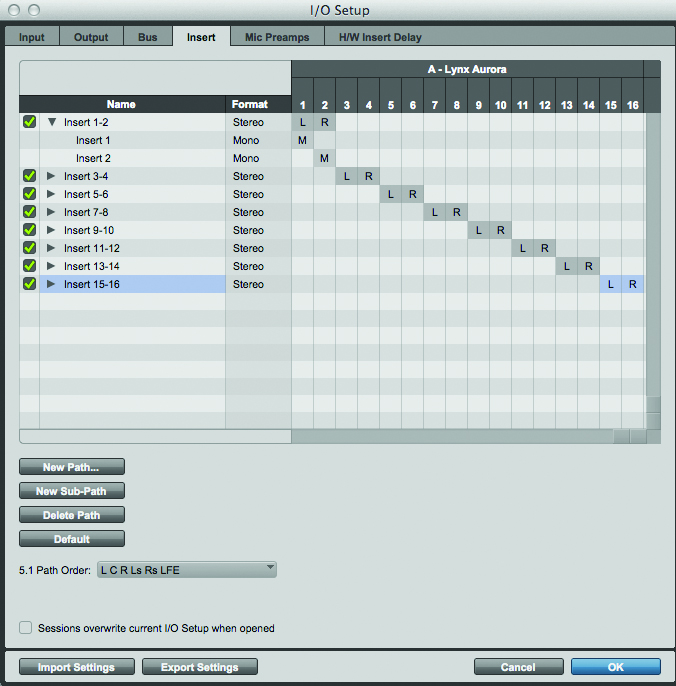
6: If you have any permanently assigned hardware inserts you can define them now, ready to be routed to as an insert effect. Naming them according to the equipment can help to keep track of what is assigned where. We use an external patchbay, so have kept to a simple naming structure. When you’ve finished your I/O routing, save it so you can use it as a starting point for future sessions.
Continue to Track Setup >
