Pro Tools Tutorial: Become a Power User Part 4 – Blending Audio and Samples
Editing isn’t always about removing sounds that you don’t want, it can also involve adding sounds into your mix. Mike Hillier layers it up. For this tutorial you’ll need these project files – Download Here In the last Pro Tools Power User tutorial we looked at how you might go about tidying up a drum […]

Editing isn’t always about removing sounds that you don’t want, it can also involve adding sounds into your mix. Mike Hillier layers it up.
For this tutorial you’ll need these project files – Download Here

In the last Pro Tools Power User tutorial we looked at how you might go about tidying up a drum performance using Beat Detective and the Strip Silence tool. This month we’re going to delve deeper into editing techniques, exploring some of the other tools that we use on a regular basis when editing audio. Modern drum editing involves more than just making sure that everything is lined up to the grid: samples have become commonplace even in rock tracks, with many kicks, snares and toms being completely replaced in the mix with sampled alternatives. It’s not uncommon these days to hear of rock tracks with as many as ten different kick and snare samples blended in with the original recording.
In this step-by-step guide we’ll be taking a kick track and lining up a sample to layer alongside it. Learning to edit and sample/replace drums in this way is just one application for these tools and techniques, and while there are plug-in tools such as Drumagog, Sound Replacer and Trigger that all automate this task to some extent, it is still worth mastering the manual methods for those occasions when the techniques can be applied elsewhere. Once you’ve created the new kick track, see if you can use similar tricks to extend the intro section of the song from eight bars to 16 – cutting after eight bars of drums, moving the latter section back by eight bars, then duplicating the intro to fill the eight-bar gap.
Many of the techniques discussed make use of Alphabet mode, a Pro Tools option that turns the standard alphabet keys on a keyboard into single-key commands. Many of the commands are also accessible via more complex multi-key commands, but learning the Alphabet mode alternatives can speed up heavy editing sessions considerably. Copy, for instance shortens from [Ctrl]+[C]/[Cmd]+[C] (PC/Mac) to simply [C]. To toggle Alphabet mode on/off, click on the A/Z icon in the top right of the Edit window.
Beefing Up A Drum Track
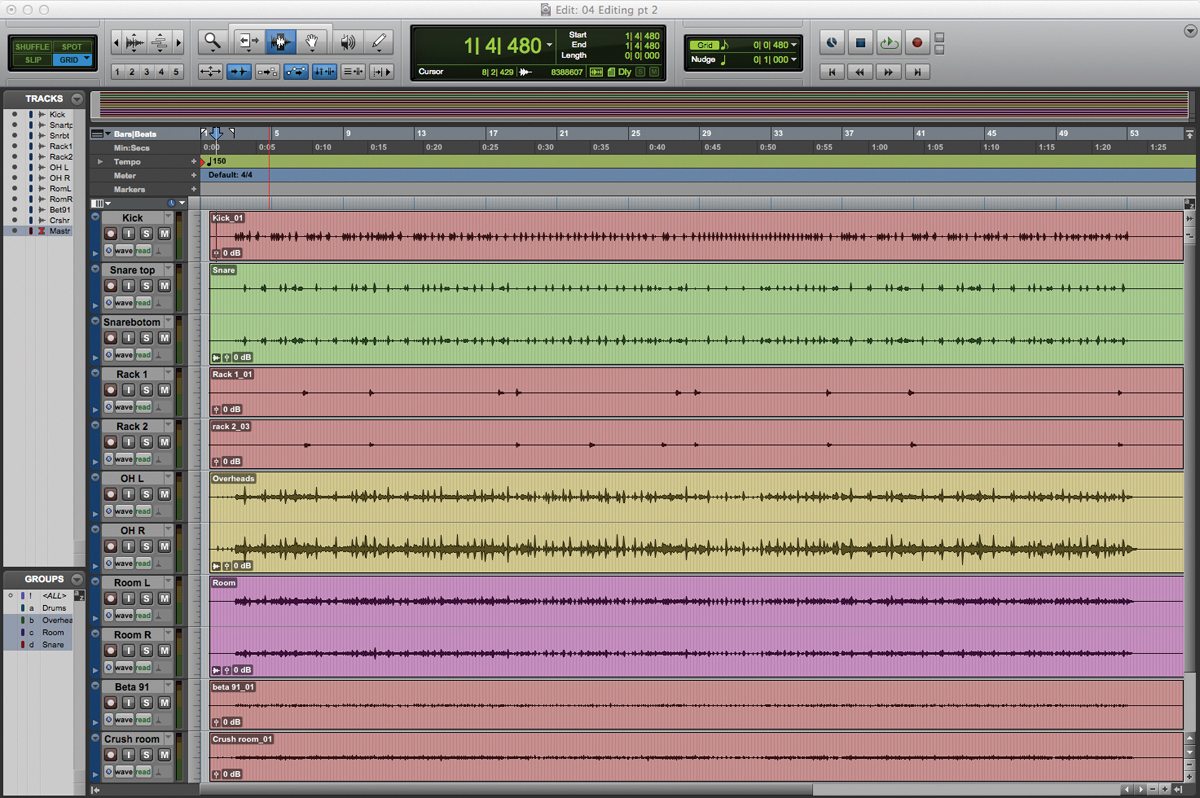
1: Open the 04 Editing pt 2 session file from the project file. The session continues from where last month left off, with the drums brought more into time with the grid and the toms heavily edited, such that they’re silent when the toms aren’t being hit. We’ve also created a quick balance to hear how the drums shape up.
2: The drum tracks have a small-room vibe, which is great for some rock styles; however, modern rock kick drums tend to have a more solid sound than this one. There’s plenty of 4–5kHz attack in it, but it’s not consistent, and the low end is a little flabby. Zoom in on the first couple of bars and use tab-to-transient to line up the Edit cursor with the first kick drum beat.
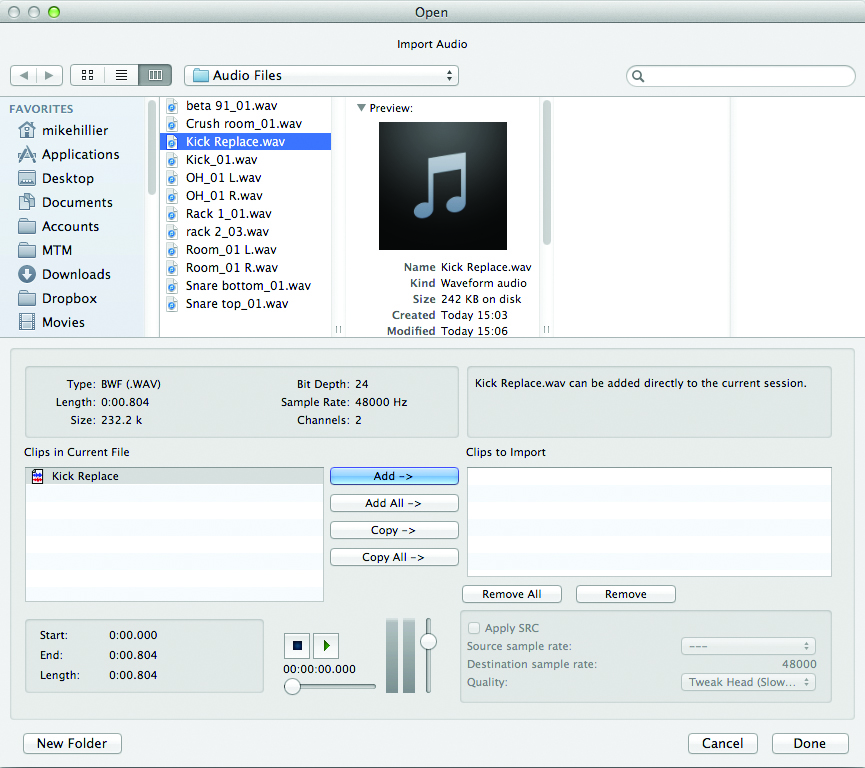
3: To enhance the kick we’re going to import a new sample. Using [Shift]+[Ctrl]+[I]/[Shift]+[Cmd]+[I] (PC/Mac) or File>Import>Audio from the menu, open the Import Audio dialog. From here, navigate to the 04 Editing pt 2/Audio Files folder and find the file Kick Replace.wav. Select this file and add it to the session.
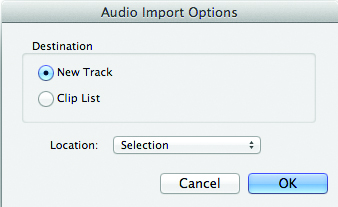
4: In the Audio Import Options dialog, select New Track as the destination and Selection for the location. This will add the sample to a new audio track in Pro Tools, starting at the current location of the Edit cursor.
5: The new kick sample is a little longer than the original sound and we’d need to overlap the clips to line it up with each of the kick drum hits. To shorten it, first we’re going to use the Time Compression/Expansion tool. This can be selected either by clicking on the Trim tool icon and selecting it from the dropdown list, or by pressing [F6] and scrolling through the various Trim tool options.
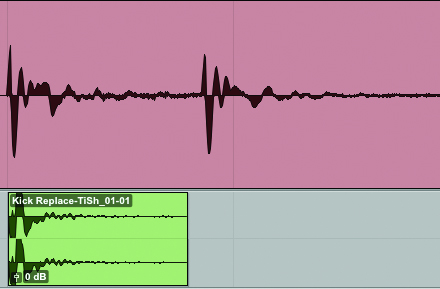
6: Using the TCE tool, we shorten not only the file but the envelope of the kick. Once you’ve matched the new kick with the length of the old one, the clip will still most likely be too long. To cut it, place the Selector tool such that the clip is shorter than the distance to the next beat, then press [S]. This removes audio after the selection (pressing [A] removes audio before the selection; [B] cuts at the selection).
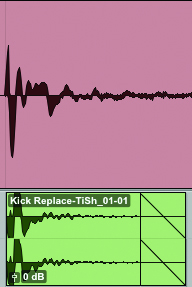
7: Although the kick should mostly have faded out by your edit, it’s important to apply a fade at the end of the clip where you have cut the audio. This will ensure that clicks don’t creep into the mix later on. Select a small section of the end of the audio clip using the Selection tool and press [F] to apply a fade.
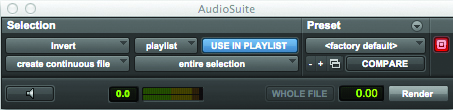
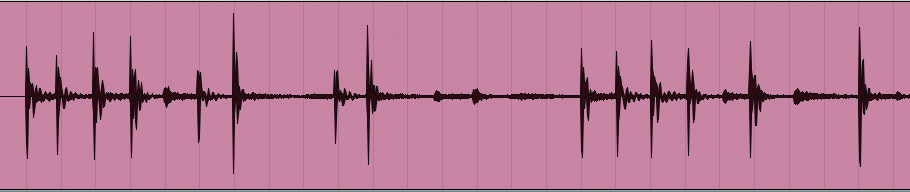
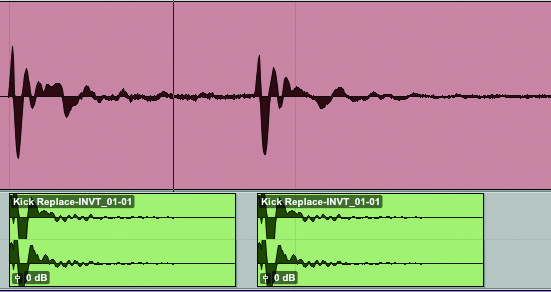
8: Zooming in on an individual kick waveform, you should see that the two kicks have opposite polarity. The recorded kick starts by rising, while the sample kick begins by falling. Highlight the sample clip and select Other>Invert from the AudioSuite menu. Reduce Padding from 2.00 to 0 and Render to invert the polarity (if you invert the kick and not the sample it will be out-of-phase with the rest of the track).
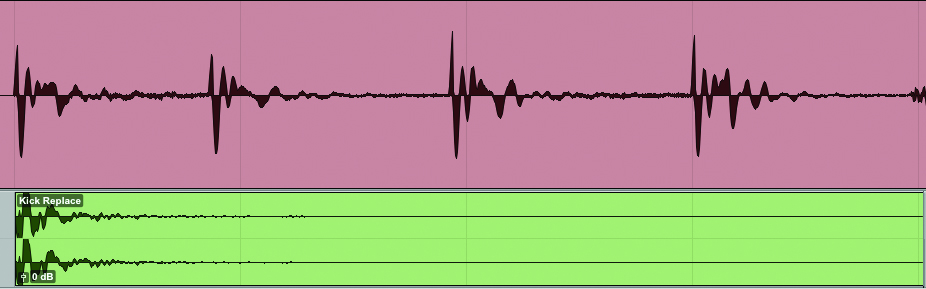
9: That gives us one good kick, but we need it to be on every hit. Copy the sample clip by highlighting it and pressing [C]. Using the tab-to-transient function on the recorded kick channel, move the cursor to the second kick hit. Move back onto the Kick Replace channel using [P] to move the cursor up and [;] to move it down. Press [V] to paste the sample into the new position.
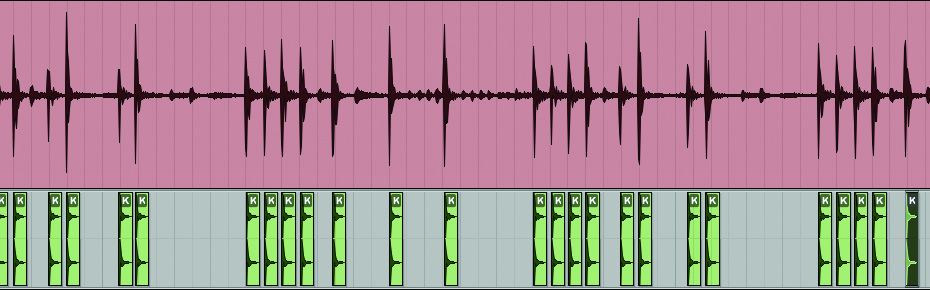
10: Repeat this pattern to place a kick sample on every kick hit. Assuming the Kick Replace channel is directly below the recorded kick channel, there’s a steady repeated pattern of [P], [Tab], [;], [V], which experienced engineers will perform incredibly quickly, adding a sample to every kick in a song in only a few seconds. Watch for stray snares catching out the tab-to-transient function.
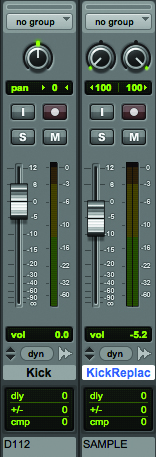
11: We can now blend this new kick track into our mix. Roll off some of the lows on the recorded kick and adjust the balance to taste. We like to keep in more of the original kick than the sample to maintain some of the dynamic performance, while introducing some consistency, especially in the low end.
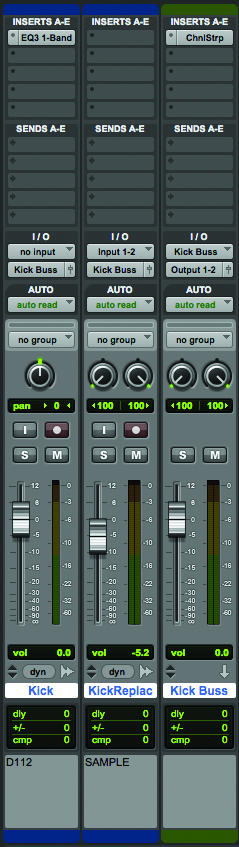
12: Finally, we like to buss the two channels to a single kick buss. This enables us to process the two sounds together, which (especially with compression) helps to glue the sounds together so they sound more like a single kick and less like a kick and a sample.