Reason Tutorial: Beat Programming and Sound Design 1 – Building Multi-Instruments and Effects
It’s another brand new MusicTech series! Beat programming and sound design are fundamental aspects of music production and in this series Hollin Jones will guide you through many aspects of both. In Part 1 he kicks off with multi-instruments and effects… In this new series of tutorials I’ll be focusing on many of the concepts […]
It’s another brand new MusicTech series! Beat programming and sound design are fundamental aspects of music production and in this series Hollin Jones will guide you through many aspects of both. In Part 1 he kicks off with multi-instruments and effects…
In this new series of tutorials I’ll be focusing on many of the concepts behind sound design and beat programming. The thinking is that if you get the fundamental ingredients of a track together at the start of the production process, what you bake (sorry) should come out of the oven [too far now – Ed] in great shape. Or at least better shape than if you just throw some samples together in your DAW.
We’ll be using Reason as our example DAW but hopefully you’ll find the principals can be applied to whatever one you use. So, on to part 1 and we kick off with combining instruments and effects…
Producers who have grown up working with computers and software are often amazed to learn, on working in a hardware-based studio, that you can only use one hardware effects unit for one thing at once. True, you can route several signals through the same effect, but that effect can only have a single setting, and once it’s in use, it’s spoken for.
Instruments fare a little better in this comparison, and workstations and synths have for many years enabled you to create multi-zoned and layered patches, splitting or combining different sounds across a keyboard. But even this is limited compared to the flexibility of software.
In Reason, the Combinator was introduced precisely to give users a new way to use the included modules. And as Reason has matured, so the possibilities for patch-building have increased.
The Combinator is particularly cool since not only does it act as a container for multiple instruments and effects, it also enables you to add mixers and CV splitters and zone and map MIDI input internally, and the whole patch can be saved as a single entity. It’s possible to do this sort of thing in other DAWs, but however you achieve it, using multi-patches has many benefits.
Tuning Up
Let’s start with instruments. Although you can feed in MIDI data on more than one channel to trigger several sounds at once, or route a single MIDI track to multiple instrument modules, many people prefer the simplicity of using a single MIDI channel and keeping an instrument contained within a Combinator.
If you start with a mixer device you can create a kind of sub-project inside the Combinator, adding instruments and effects and using the mixer controls to submix them and then present the summed output to the main mixer as a stereo feed.
Apart from anything else this makes your task of mixing a project much simpler, as all the instruments inside the multi-instrument are pre-mixed and you can control them all from a single fader.
Multi-instruments can also be great fun to play live as they give you much more depth than using one sound at a time. By splitting the keyboard and then using several layers in different zones you can quickly mix and match sounds.
Reason doesn’t call its multi-effects ‘effects chains’, but that’s essentially what they are. In fact if you click on the Edit Inserts button in Reason’s mixer it leaps you straight to a specially adapted Combinator attached to the audio device for that track in the Rack, which is used for hosting chains of effects.
You can achieve all sorts of stuff with effects chains, from advanced guitar processing to specific kinds of vocal treatment and anything else you need. These effect Combis not only have assignable quick control shortcuts but also a modulation routing section so that external CCs and CV input can be used to alter their parameters in real time.
The Combinator is a particularly flexible interface: you can drag devices into and out of it, combine and uncombine groups of instruments and effects, and even break internal routing. So next time you have spent ages zoning and layering a bunch of modules together to create an awesome mega-synth or set up a really cool effects processing chain, remember to save it as a multi-patch.
Even if it didn’t start out as one you can always choose Edit > Combine to create one. Then it will always be available to load in any project, or even to share with other users.
Focus On… Programming
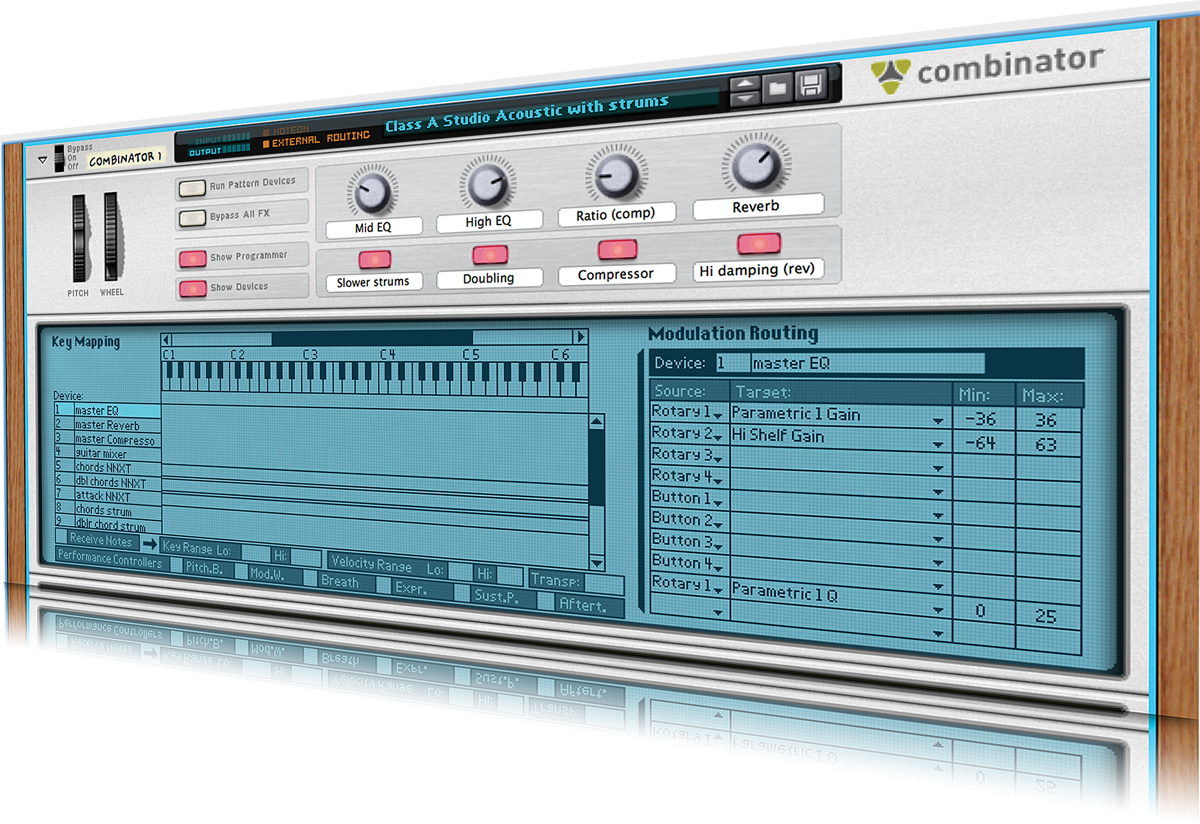
The Programmer section of any Combinator is where you can get creative with how your sounds and effects are put together. In the Key Mapping section to the left you can define which zones of the keyboard will trigger which instruments (remembering, of course, that effects do not have key zones since they are not playable).
Beneath this you can set for any instrument whether it is to receive or ignore various kinds of input data such as notes, pitch-bend, expression and what its key range and transposition settings should be. To the right, the modulation routing section enables you to set on a per-device basis which inputs will be sent to which parameters. You can assign one input to change more than one parameter across multiple modules.
Creating a Combinator Instrument
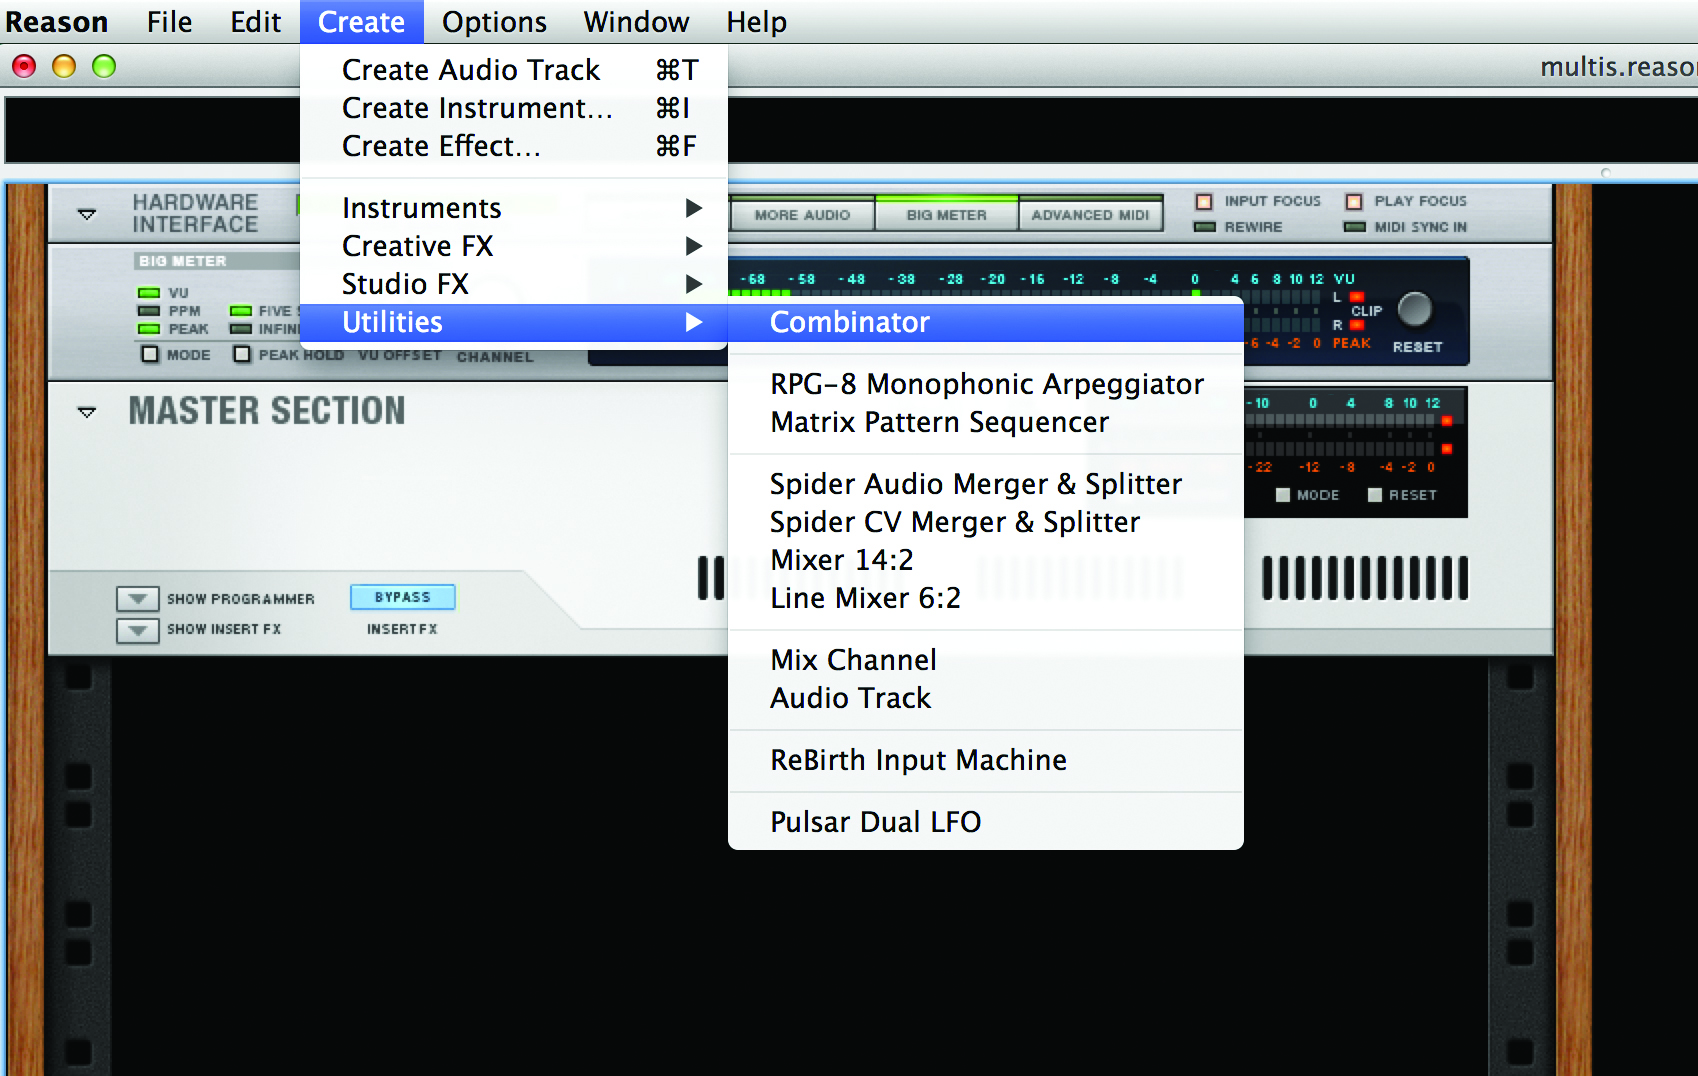
1: Start by creating a blank Combinator by selecting Create > Utilities > Combinator. It’s actually a container for other devices, which is why it’s not initially listed as an instrument, but you will put devices into it next.
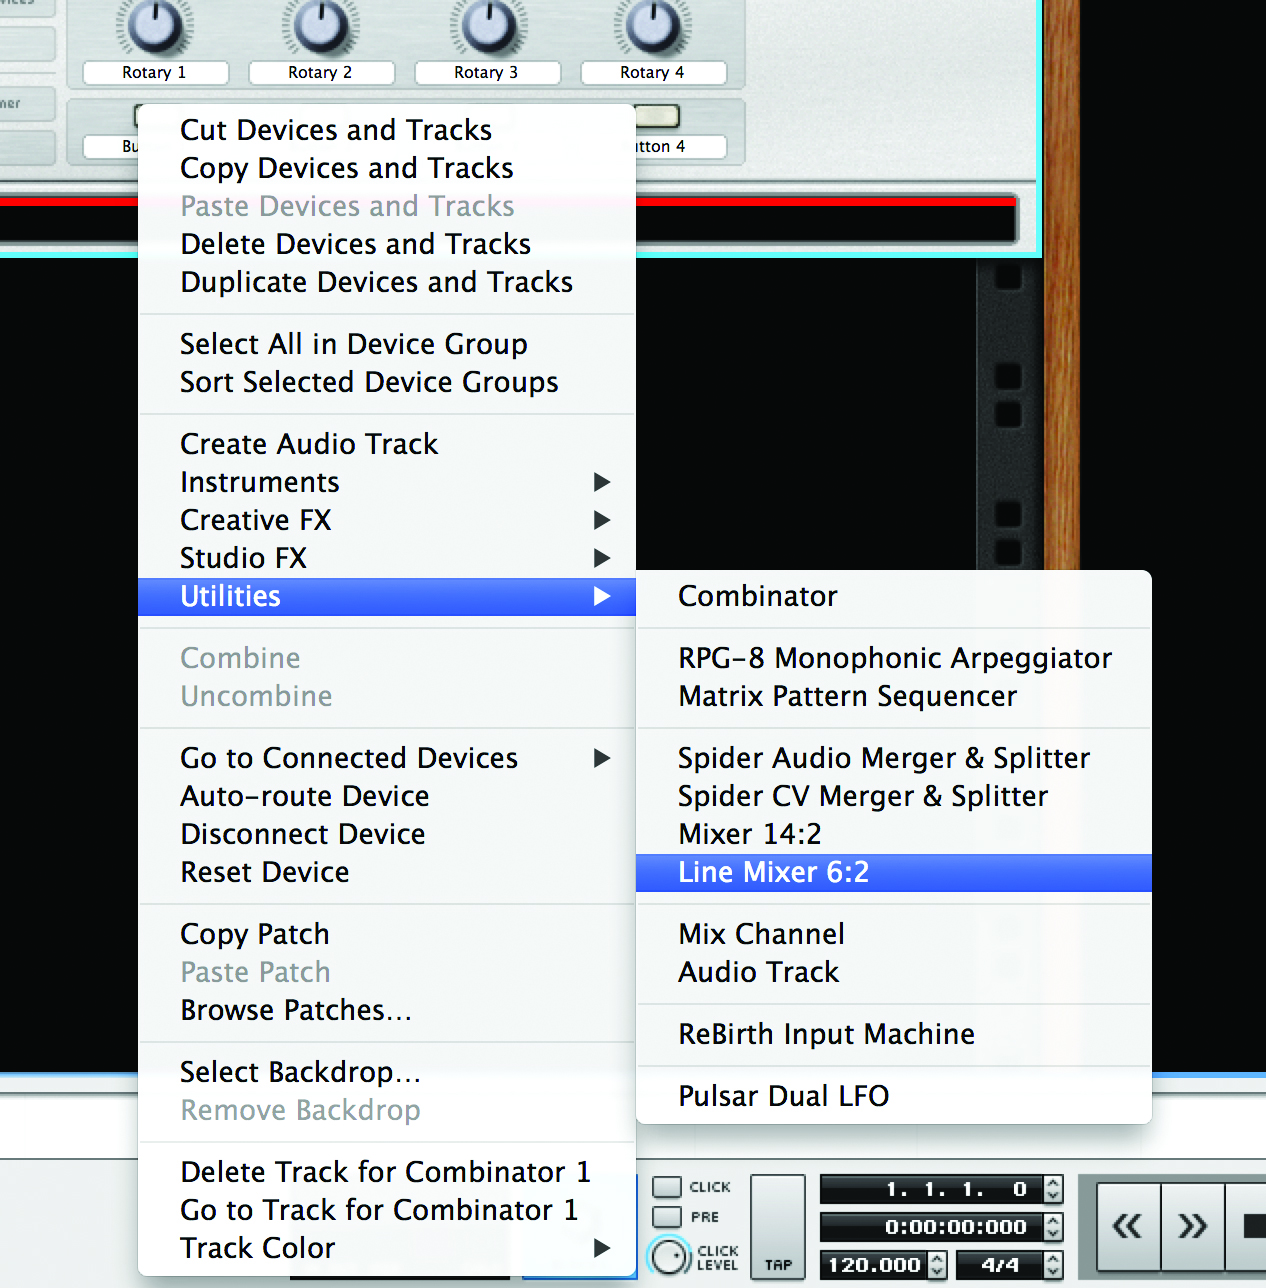
2: Click inside the empty area at the base of the device and a red line will appear. Then right-click inside it and choose Utilities > Line Mixer 6:2. This will add a small mixer so that subsequent devices will be routed to it, and its output passed to the main Combi stereo outs.

3: You could achieve the same using the Create menu from the menu bar, and also either start with a full mixer device if you plan to add lots of devices, or opt not to add a mixer if you’re creating a simpler multi-device.
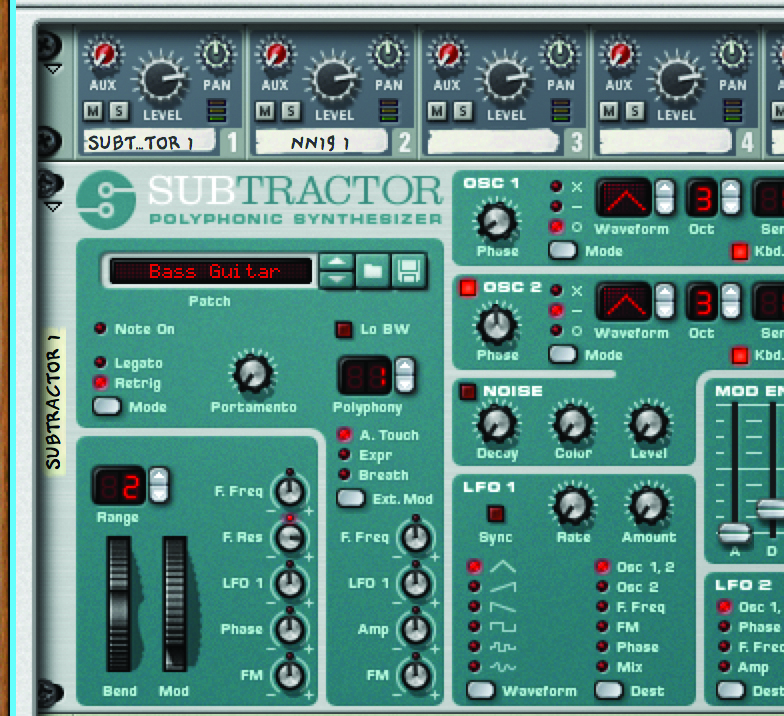
4: Repeat the process and add a Subtractor synth, then load a bass patch into it. You will find this has been routed to the first channel in your combi mixer. Add a second device, this time an NN-19 sampler, and load a lead patch.
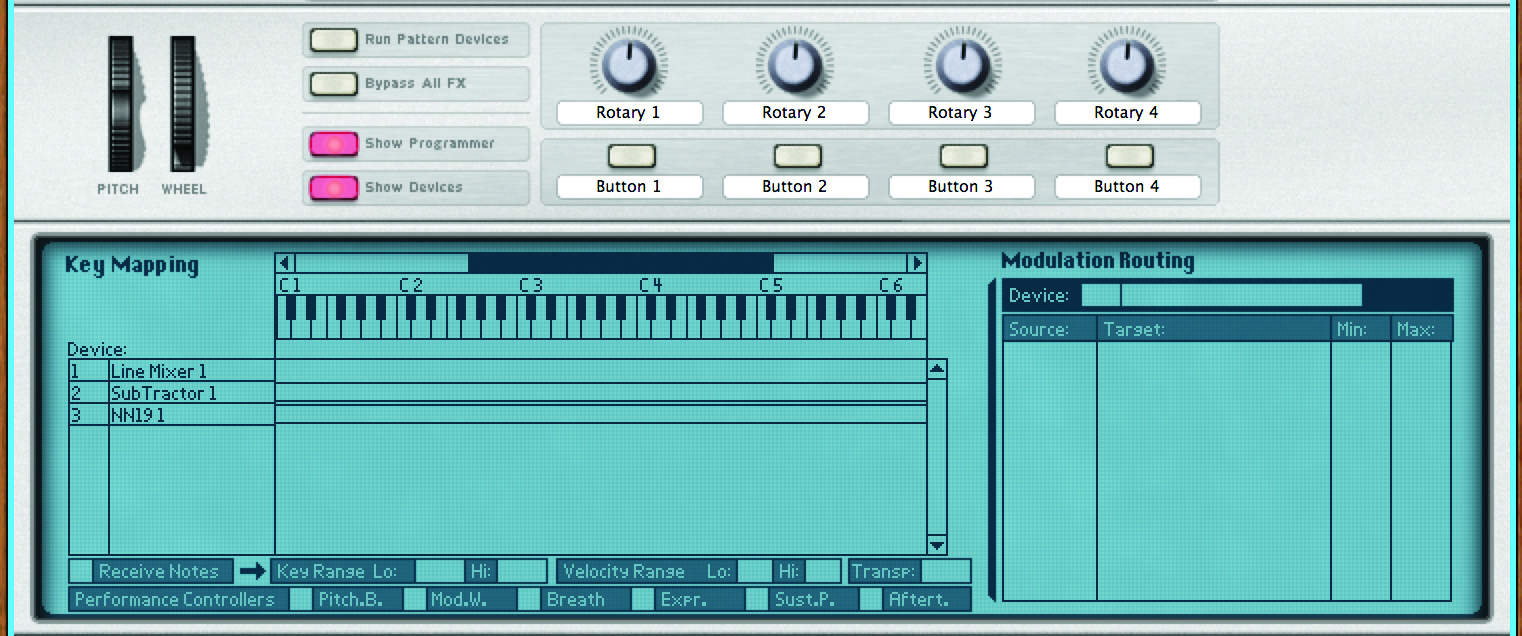
5: By default, playing MIDI notes will trigger both instruments at the same time using the same notes. That’s fine if you want them layered but not if you want them split. Click on the Show Programmer button on the Combinator to make some changes.
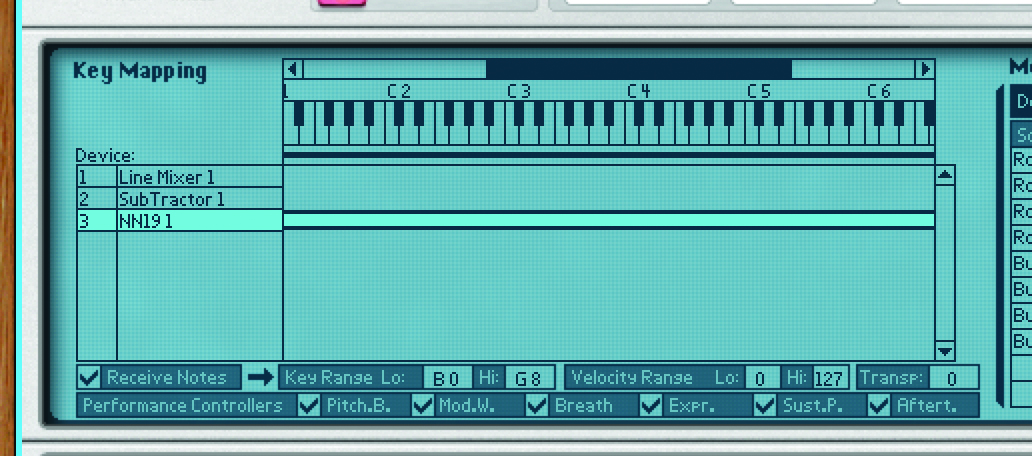
6: Here you will see the devices displayed in a list. In the Key Mapping section, either scroll left and right and pick up the zone handles for an instrument, or select the module and enter values in the Key Range Lo / Hi boxes to set their key zones.
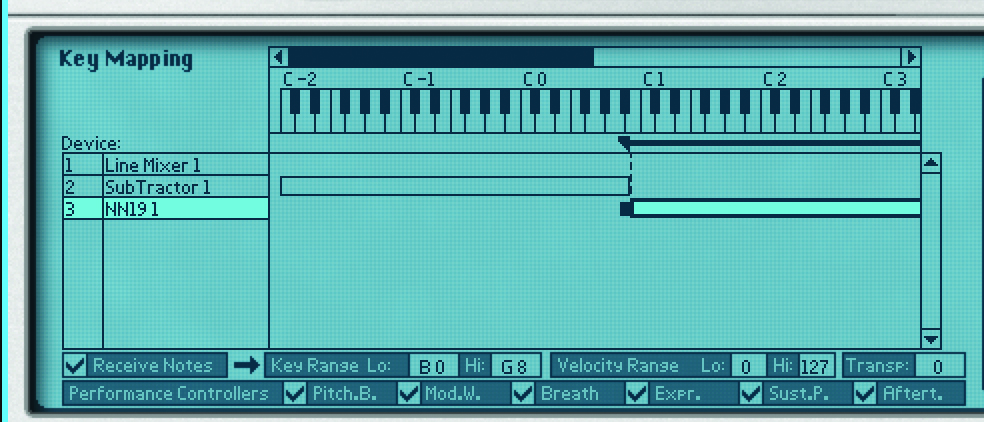
7: In this example we have set the Subtractor to be in the left hand with the sampler in the right, and they don’t overlap. Although you could overlap them if you want some notes to trigger both. You can repeat this with as many instruments as you like, zoning and layering.
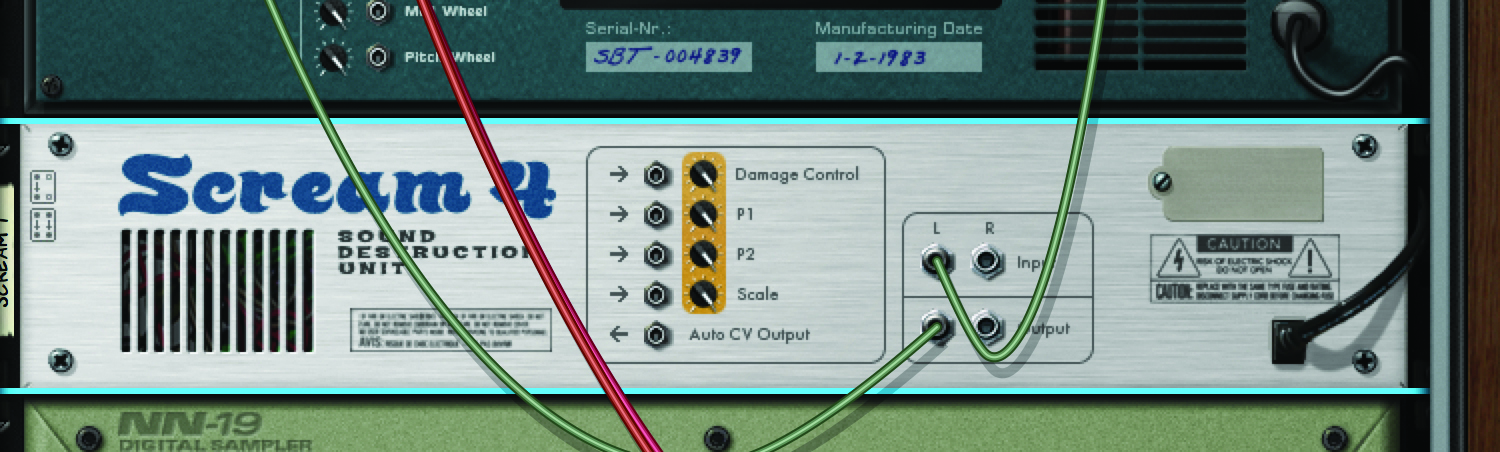
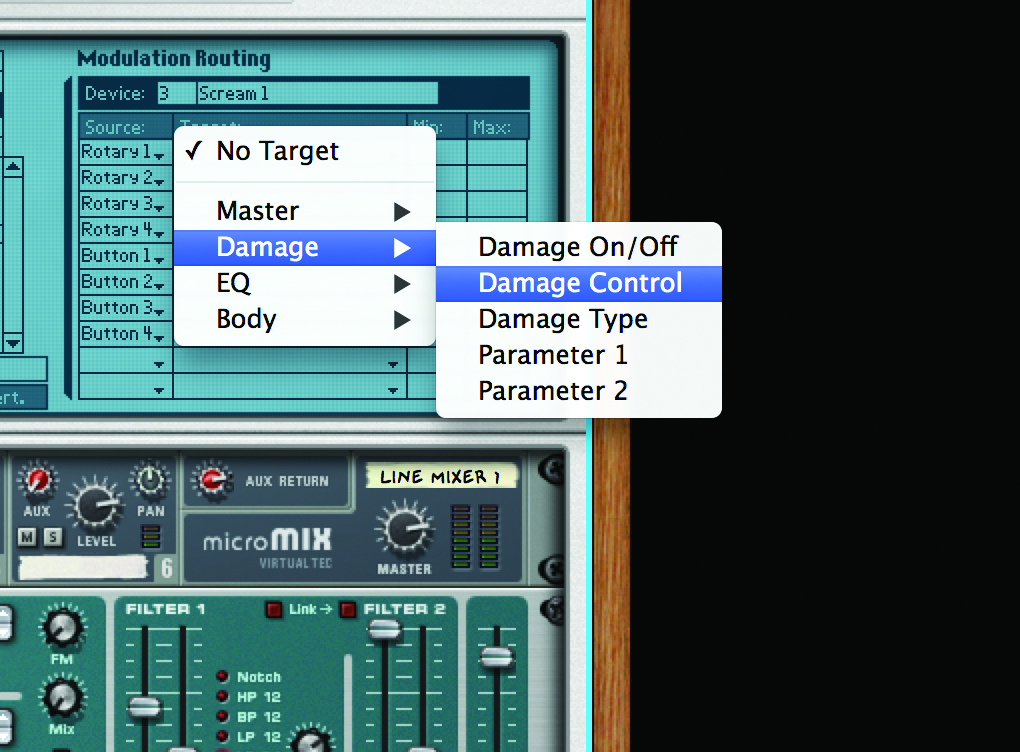
8: Now add an effect to the Combi using the same Add command as before. Here it’s a Scream 4 distortion unit added with the Subtractor selected. You will see that it gets auto-routed, so you don’t have to manually do anything to make it work.
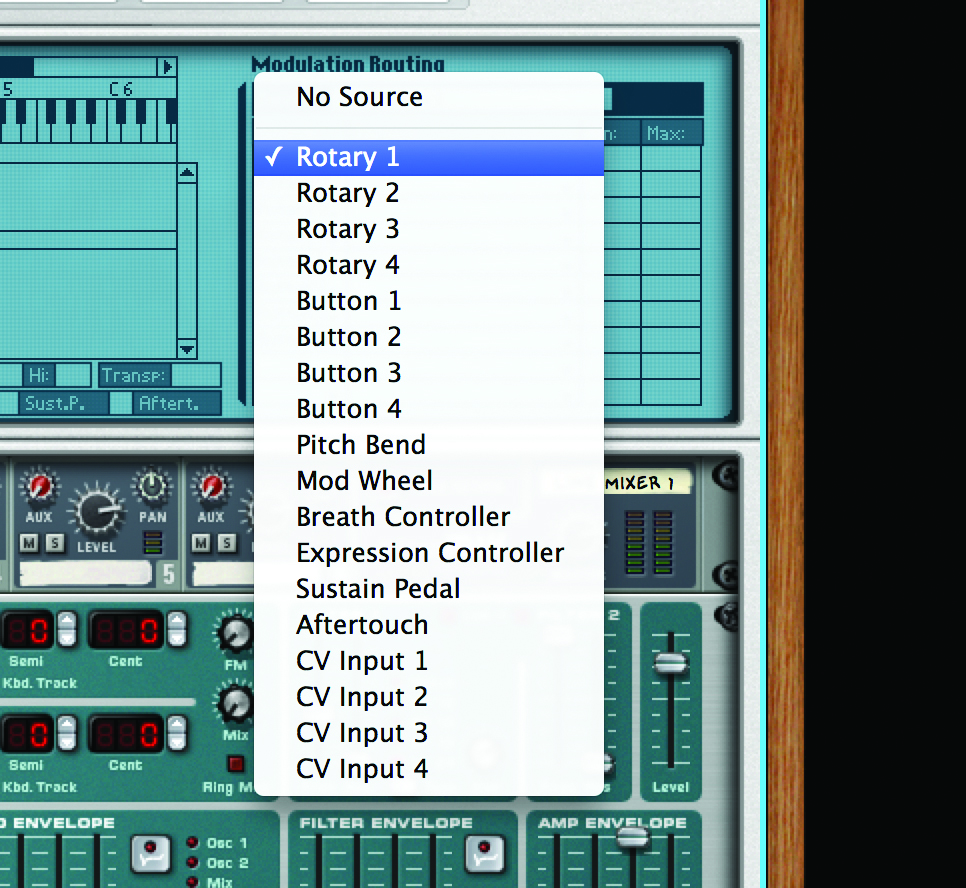
9: Note that the effect device appears in the Programmer but has no zone because it is not playable; however, it can be controlled. Select it and go to the Modulation Routing section on the right and click on the Rotary 1 control.
10: In the Target column, click to assign a parameter that Rotary control 1 will affect. The options available here change according to which module you are working with, so some will have lots of available parameters.

11: Set Min and Max possible values in the box on the right (typically 0 and 127) and you will find that this control now changes that parameter. You can repeat this for as many instruments and effects as you like within a Combinator for great results.
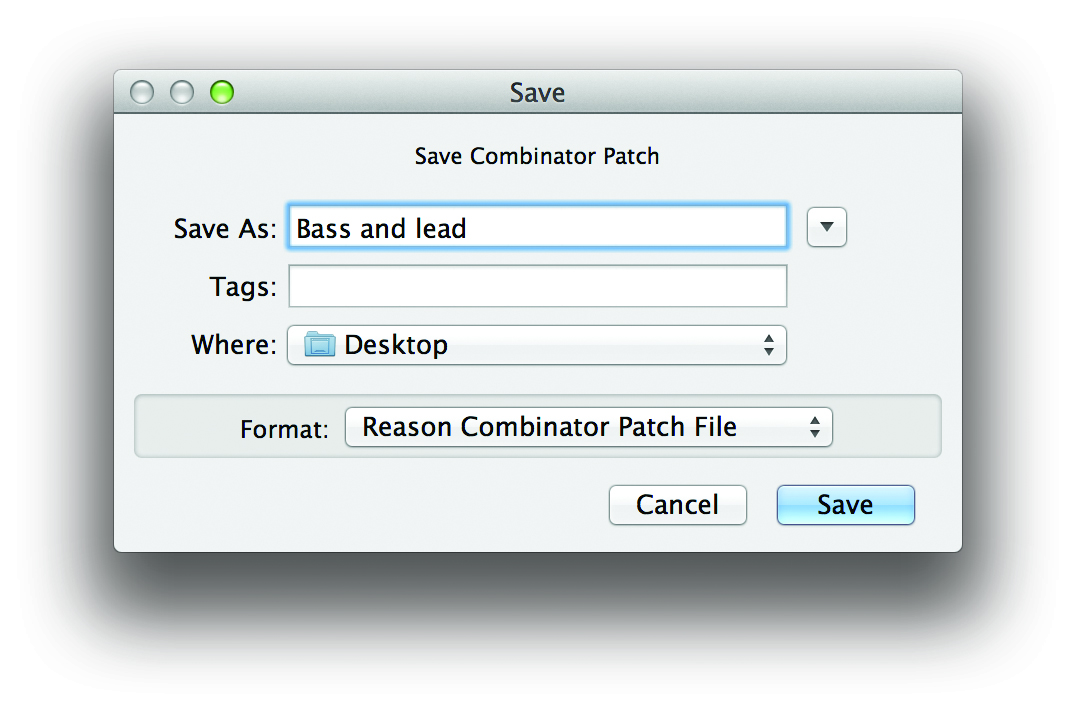
12: Click on the Combinator’s Save Patch button to save it out as a patch that can be called up in any project. Combinator patches are tiny as they are just a set of instructions, and there are, of course, plenty to get stuck into in the Factory Sound Bank.

