Reason Tutorial: Become a Power User Part 12 – Automation and Remote Control
Getting hands-on control of your projects and automating tracks are both great ways to add interest and depth, as Hollin Jones explains… Before software became the most common medium for recording and producing music, automation of your instruments, effects and mixes used to be a complex procedure and something found only in high-end kit and […]
Getting hands-on control of your projects and automating tracks are both great ways to add interest and depth, as Hollin Jones explains…

Before software became the most common medium for recording and producing music, automation of your instruments, effects and mixes used to be a complex procedure and something found only in high-end kit and professional studios. Sure, you could send MIDI messages to switch instrument presets at certain points, but as for varying controls such as dry/wet settings? You pretty much had to do it by hand during mixdown – a nervous moment for any engineer.
Working in software introduced a much easier way to achieve parameter automation. Since your mixer and many of your effects existed inside your DAW rather than outside it, you could get far more control over how things changed over time. A few versions back, Reason switched to a vector-based automation system and now handles parameter changes using automation subtracks connected to regular lanes in the mixer. Practically anything can be automated from your mixer right down to the most obscure synth or effect dial.
Tied in with all this is the Remote system, which Reason has had for a while. This enables you to quickly and easily map hardware MIDI controllers to any parameter inside a project. There’s also surface locking, which enables a specific hardware device to be linked to a specific unit in the rack.
Imagine, for example, that you wanted one MIDI controller to be permanently connected to your mixer, or to a drum machine, but a second controller to follow MIDI focus and thus control whatever you selected. With Remote this is easy to set up, and any changes that you make in hardware can be captured as automation data. Since nobody is perfect you easily can go and edit this data after recording to get exactly the kind of fader movement or filter sweep that you want. Connecting multiple MIDI devices to a single computer running Reason is also a good way to have several people performing at the same time using a single Reason project.
Focus On Routing
One of Reason’s oldest but least-known tricks is its Keyboard Control mode, which can be switched on from the Options window. This is more basic than Remote but it does enable you to assign computer keys to certain parameters on any selected module. If you activate the Edit mode, you will see some of the controls on the selected device gain a small yellow arrow. Double-click on one of these, tap a computer key, and that key is now assigned to that parameter.
Since a key tap is not a variable control you are only able to set buttons to on or off, or set dials and faders to 0% or 100% values using the keyboard, but it’s still pretty useful nonetheless.
Creating Automation Data
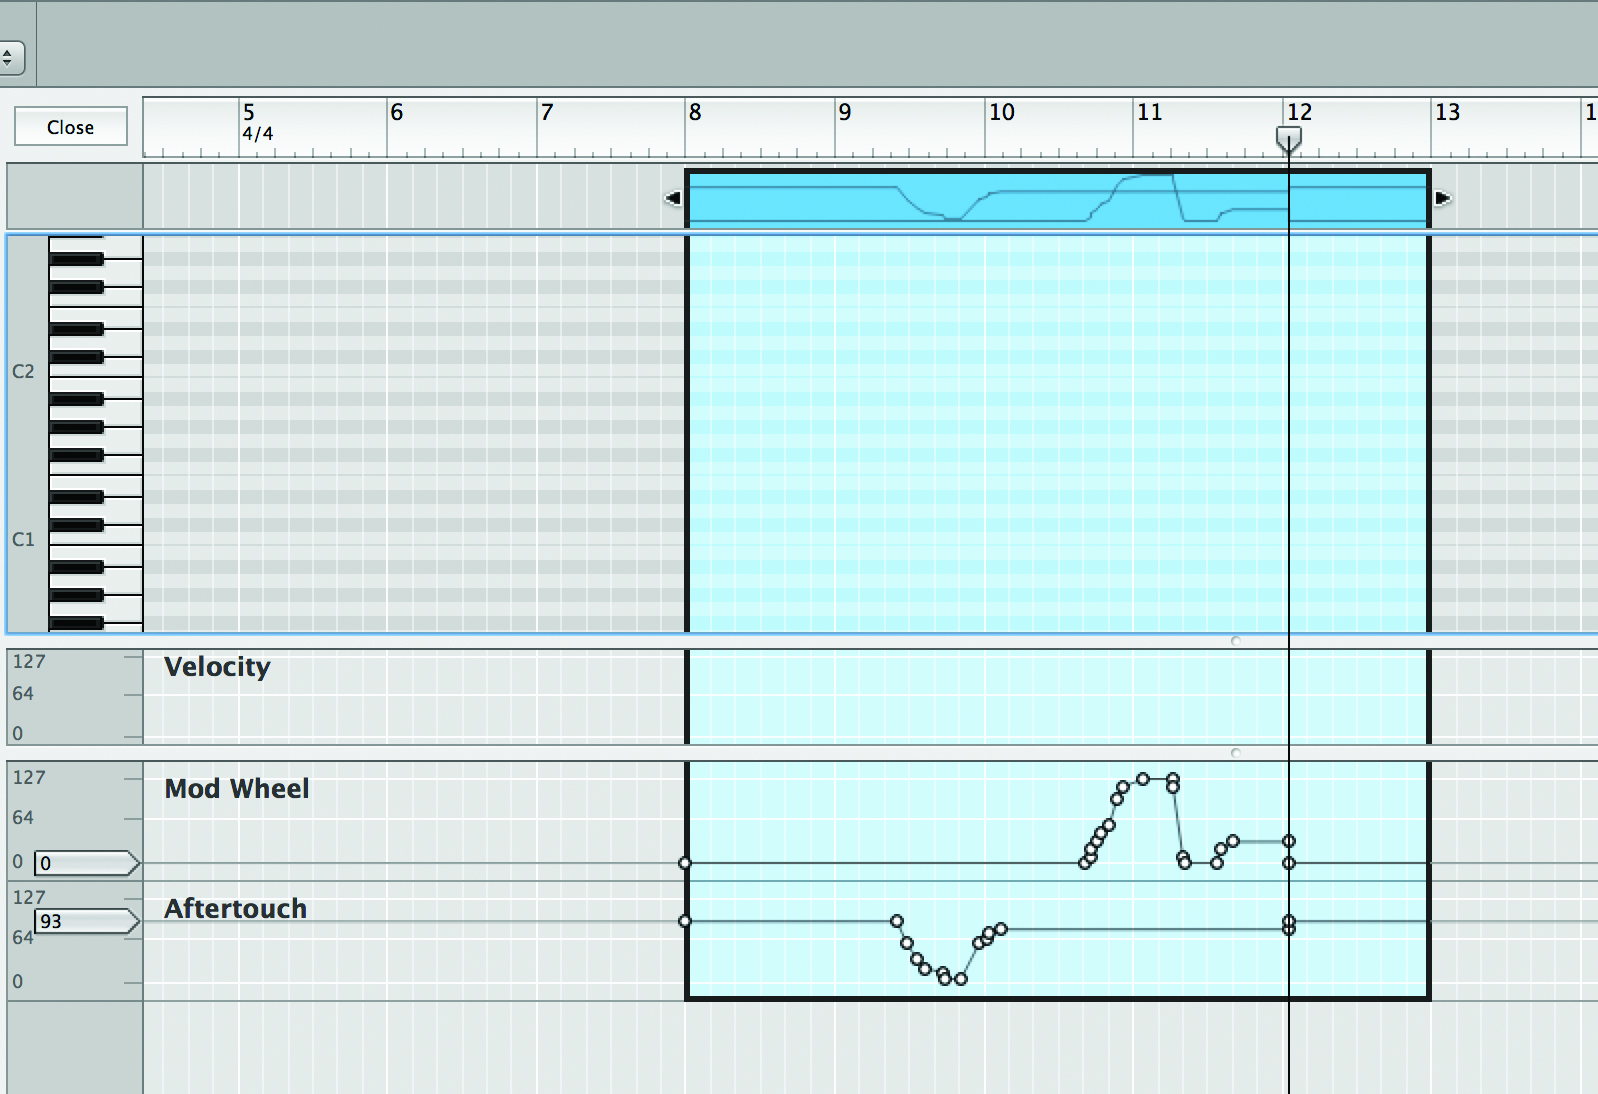
1:Devices that already have a note lane in the sequencer have default automation lanes that are viewable by entering Edit mode. So, for example, here we have enabled parameter automation recording for a sampler and then moved the mod and aftertouch wheels with Record enabled, and automation has been recorded.
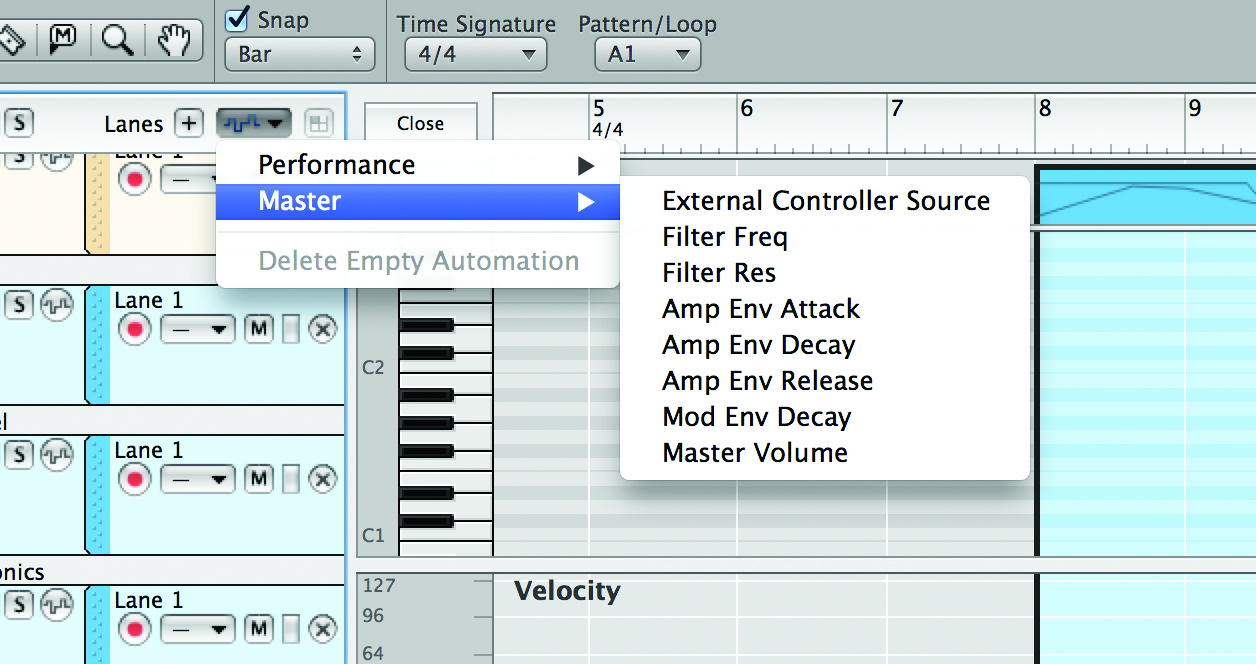
2: To manually add an automation lane or to draw automation data in by hand, open a track in Edit mode and then go to the Track Parameter Automation dropdown menu in the top-left corner of the sequencer. Click on it and this will show you all automatable parameters for the device.
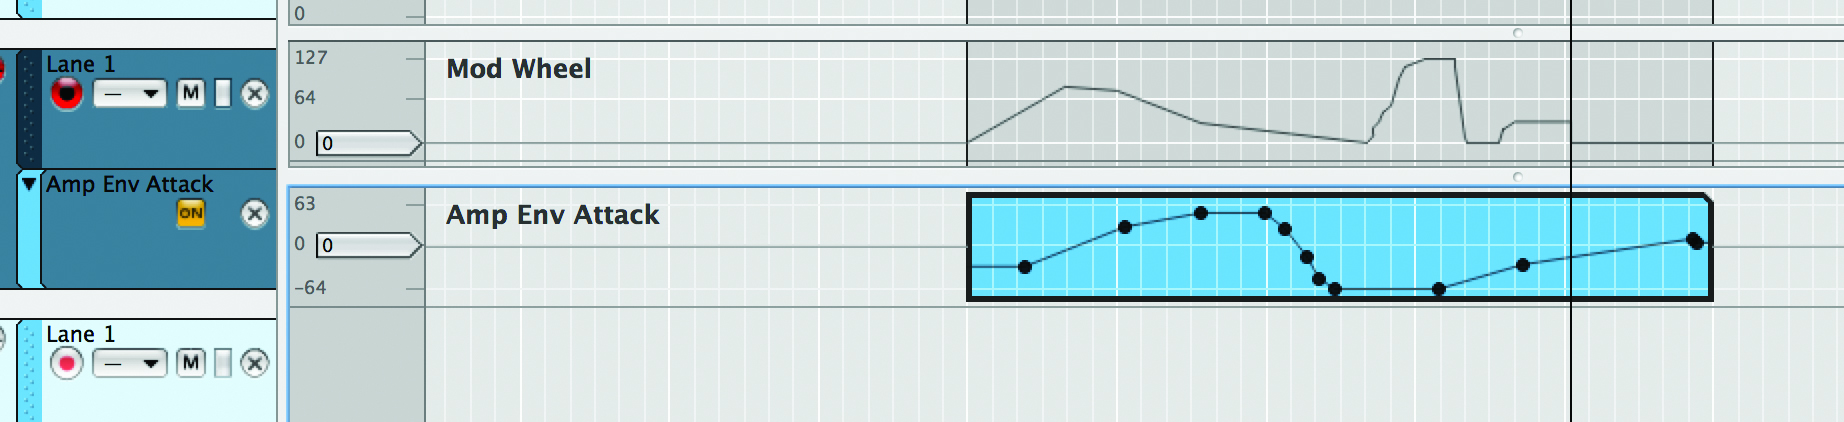
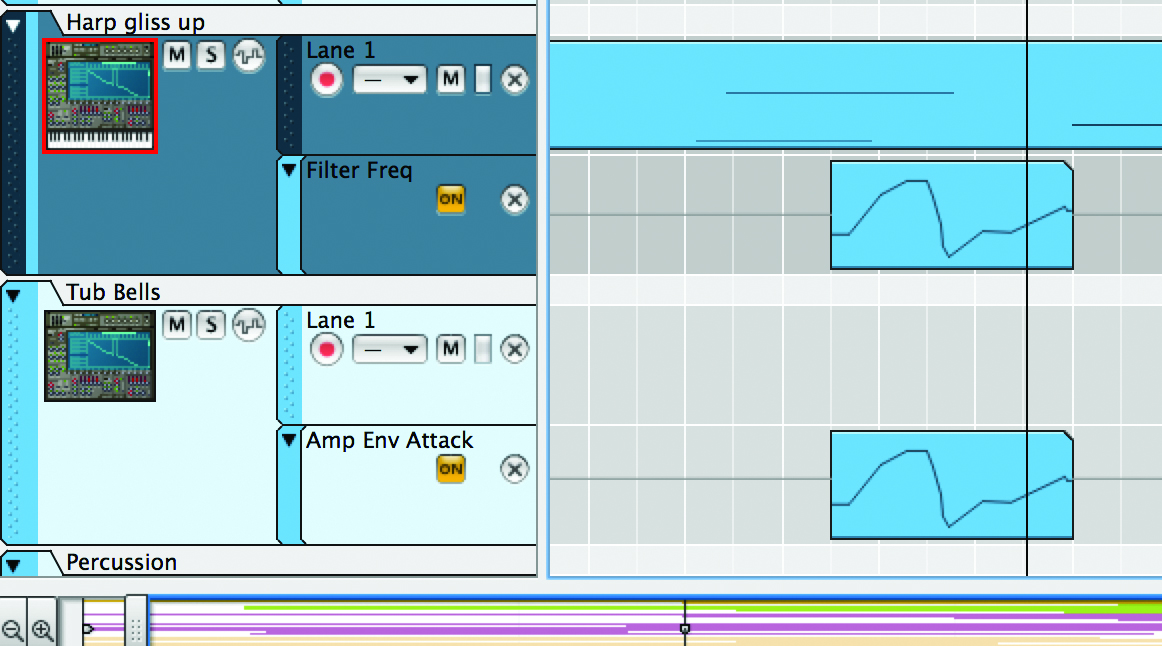
3: Here we have chosen to enable Amp Env Attack and then used the Pencil tool to draw in automation. Notice that because the parameter we have enabled is not one of the standard performance controllers but something we have specifically enabled, it gains its own dedicated lane in the sequencer.
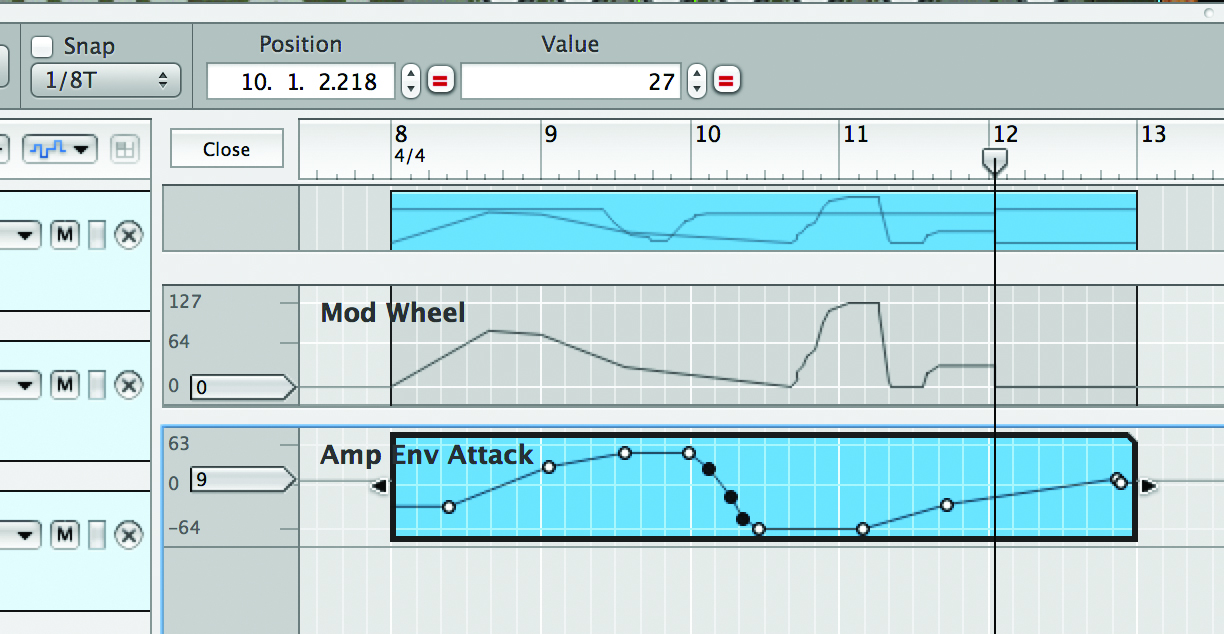
4: Automation is quite easy to edit. In Edit view, use the Pointer tool to select a keypoint. You will see the value boxes above the lane which enable you to set an exact position and numerical value for any given point. If you select multiple points you will be able to change them all to the same value by entering data into these boxes.
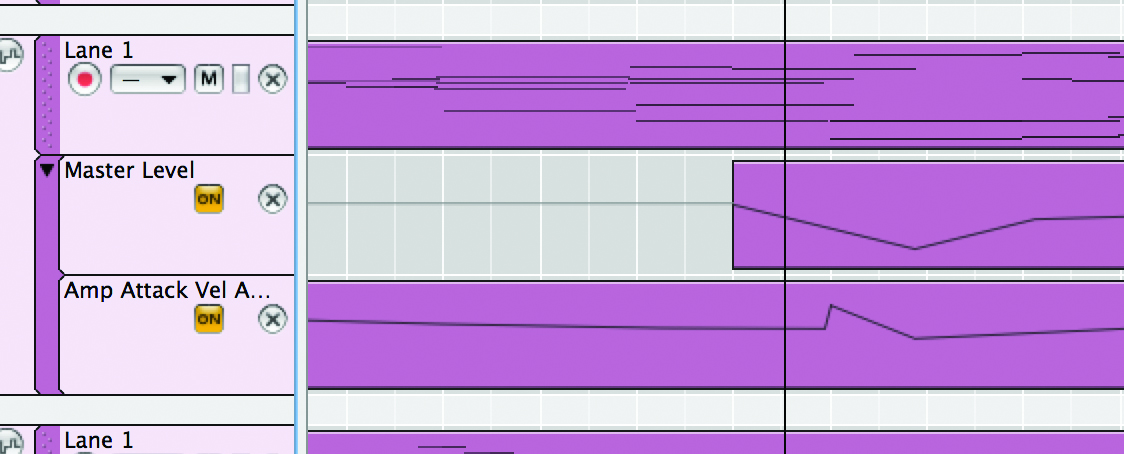
5: Automation data exists independently from the note clip to which it is originally attached, and as a result it can be moved or copied and pasted independently. Here, for example, we have enabled automation on another device and then copied and pasted our original data to the new lane. This is a quick way to duplicate exact sets of parameter changes across different devices.
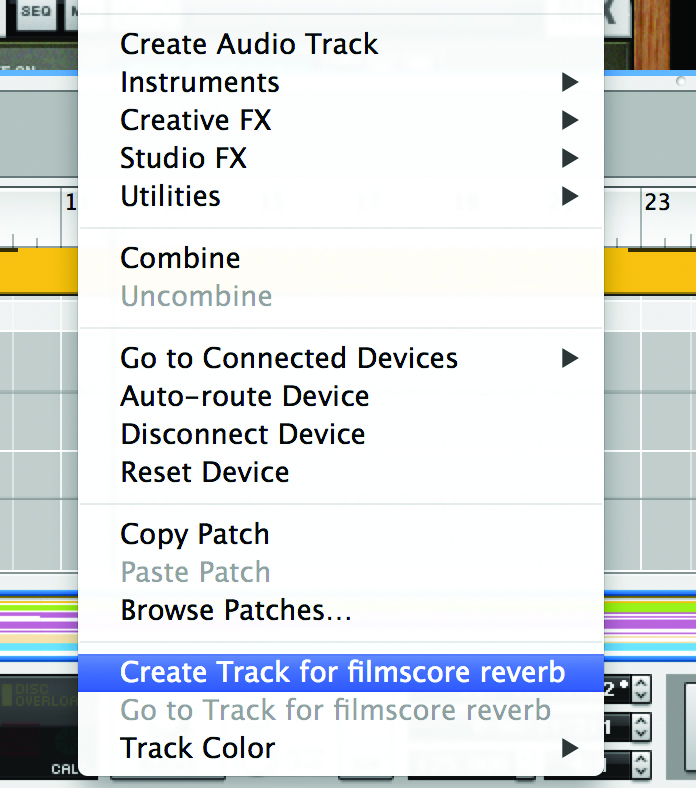
6: For devices such as effects units that don’t have a note lane by default, you can either perform some automation to instantly record-enable it, or right-click on the device in the rack and choose Create Track For… the device. The latter method is more useful if you want to draw changes by hand, the former if you just want to grab a control and start automating.
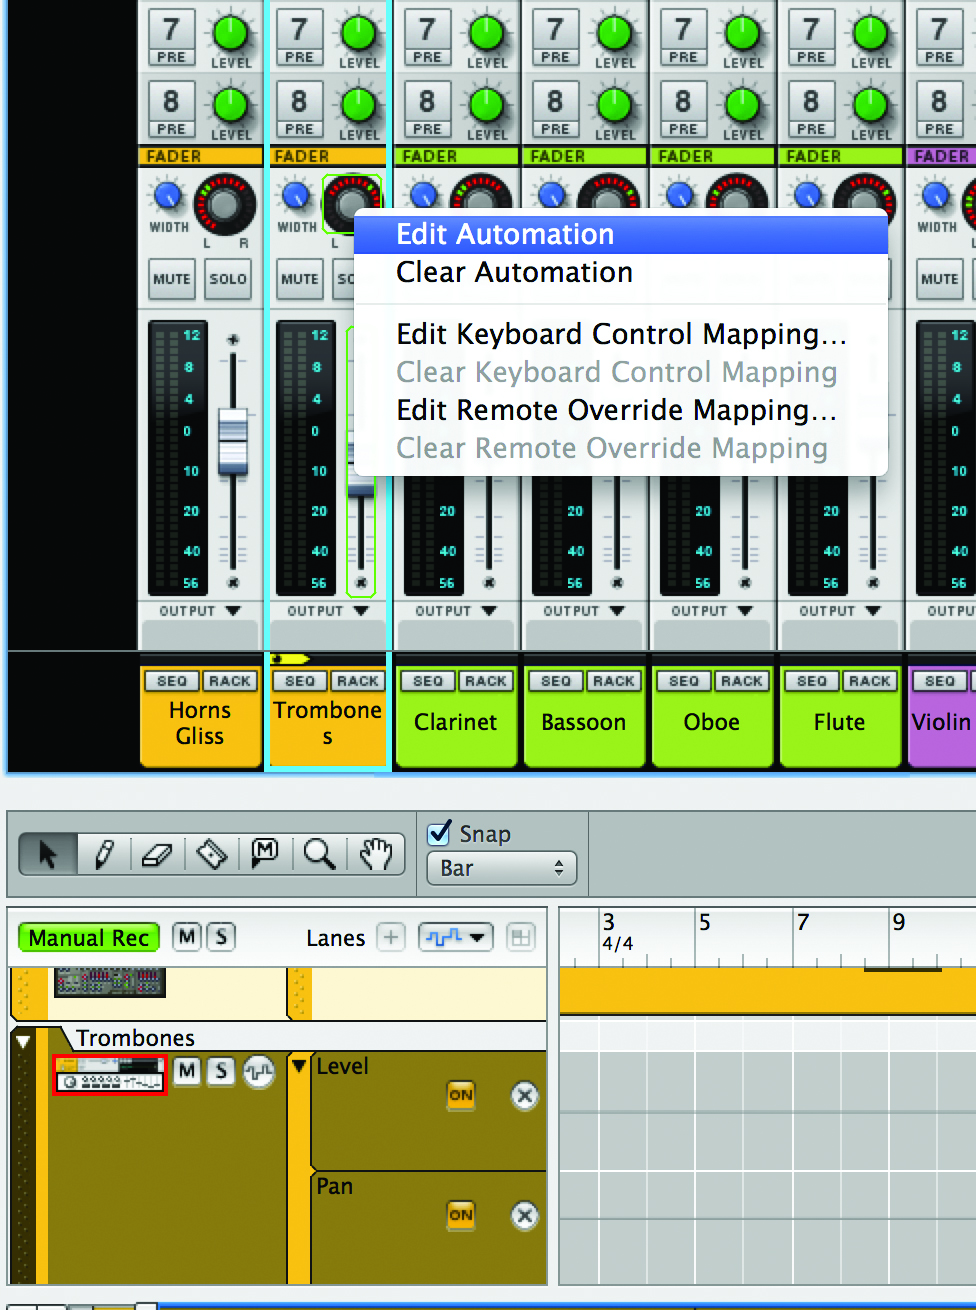
7: Automating the main mixer works in much the same kind of way. Either move a control while recording is active, or right-click on any mixer parameter and choose Edit Automation (even if none currently exists). This will jump you to an active automation lane in the sequencer related specifically to the parameter you selected.

8: When automating you will often want to achieve a much smoother ramp or curve than you can manage by hand. In these cases, go into the automation lane for the parameter you want – here it’s a fader – and click to add one point at the place you want the change to start.

9: Locate the point you want the transition to end and this time click to add a second point, then switch to the Pointer tool and drag the point up or down. This will create a smooth ramp of values. Using Reason’s automation cleanup facility you can also control how many superfluous points are removed.
10: To temporarily suspend automation of any parameter, locate its lane in the sequencer and deactivate the yellow ‘On’ button so it is no longer lit. To delete all automation for a track, click the ‘X’ button just next to this, or delete clips individually by selecting them and hitting backspace.
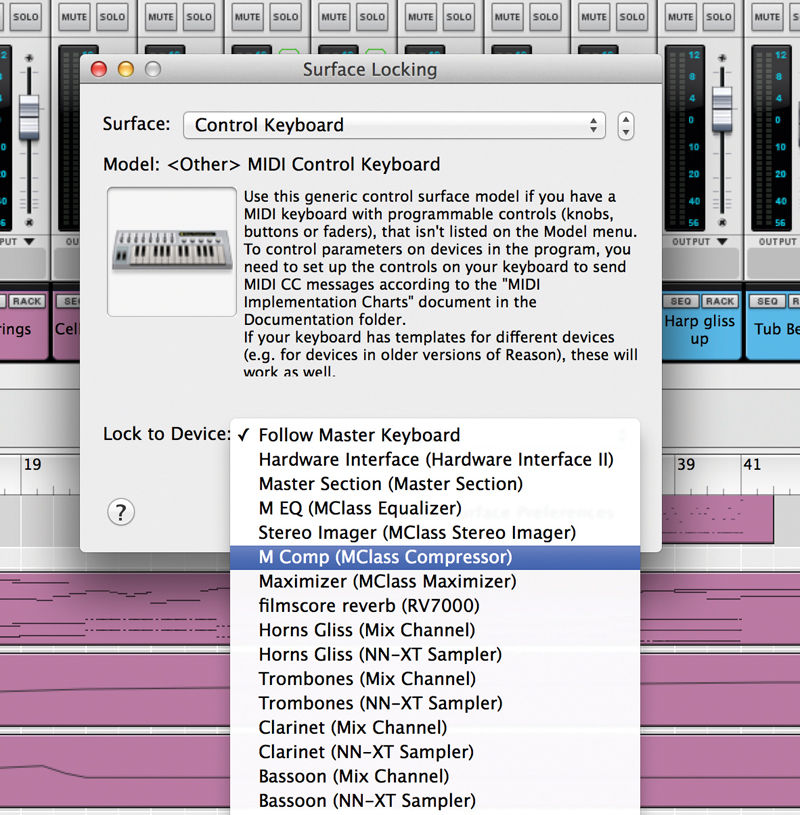
11: To lock a MIDI device to a unit in the rack, go to Options>Surface Locking and select the MIDI device from the list. Then from the Lock To menu, select the device to assign. You might, for example, want to lock a MIDI drum pad to an instance of Kong or something with faders to your mixer.
12: If you select Options>Remote Override Edit Mode you can quickly assign any hardware controller to any automatable parameter anywhere in Reason, independently of the Surface Locking setup. This is excellent for quickly ‘grabbing’ a fader for example and recording automation with it.
