Reason Tutorial: Become a Power User Part 3 – MIDI Recording and Programming
Getting MIDI parts into Reason is a fairly simple affair, but there’s much more to it than first meets the eye. Hollin Jones shows you just how far you can go in the third part of our become a power user of Reason tutorial series… Reason started life as a no-fuss MIDI sequencer with a […]
Getting MIDI parts into Reason is a fairly simple affair, but there’s much more to it than first meets the eye. Hollin Jones shows you just how far you can go in the third part of our become a power user of Reason tutorial series…
Reason started life as a no-fuss MIDI sequencer with a new take on programming. With its Rack of instruments and straightforward approach to recording, it brought MIDI programming to the masses. No longer did you have to understand about SYSEX dumps and CCs if you didn’t want to, you could simply hook up a USB keyboard and start making music. That remains the same to this day, although it has, of course, introduced some great new tools as well.
MIDI recording doesn’t just mean inputting notes – it can also mean recording automation, a key part of producing in any DAW. There’s also the Remote system, a clever way to hook up multiple MIDI devices and controllers and record both notes and automation from them as a project plays back, or simply control existing devices. And in Reason 7 we finally get the option to send MIDI out of the Rack using the new MIDI Out module, enabling Reason to trigger external MIDI hardware such as workstations and drum machines, and their output be recorded back into the program. You could even use external sequencers to trigger Reason devices, and of course we still have ReWire, which enables you to fire MIDI and audio between Reason and any compatible master DAW, such as Logic, Cubase or Pro Tools.
In addition to the conventional ways of getting MIDI into Reason there are also devices you can use in the Rack to generate it for you. The Matrix Pattern Sequencer is as old as Reason itself and is great for building monophonic patterns. Some devices, such as the ReDrum and Thor, have small, built-in sequencers. And the RPG-8 arpeggiator is adept at taking simple MIDI input and turning it into something much more complex based on the settings you make. Taken together, these MIDI tools make Reason one of the friendliest and most powerful MIDI sequencers around. There’s also, of course, the whole audio side of things, which we will touch on in a later tutorial. So hook up your keyboard or controller, load up some instruments and start programming MIDI in Reason today
Recording and Editing MIDI
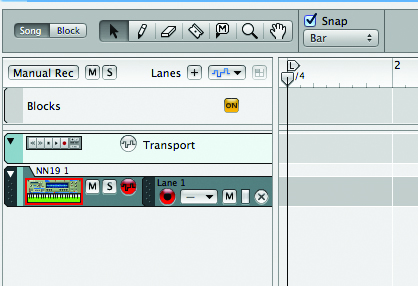
1: With your MIDI controller or keyboard set up as described in previous tutorials, load up an instrument and press a key to check that the signal is being received. Look at the sequencer track’s icon and you should see a green light appear when a note is pressed. If it doesn’t appear, check your MIDI setup.
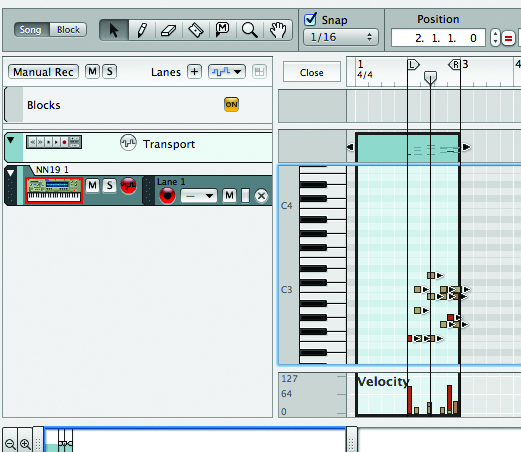
2: To record a simple MIDI loop or clip, set the left and right locator markers and then optionally activate looping in the Transport. Make sure MIDI is being directed to your track – the icon should outline in red – and press the record button on the Transport. Now play in your part. If you have looping engaged it may continue to record in a loop until you stop.
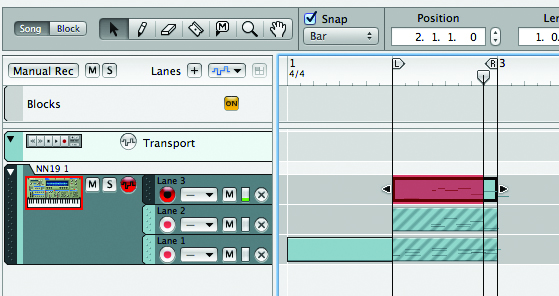
3: There are two methods for overdubbing. In the Transport you will see two buttons labelled Alt and Dub. If you press Alt, a new note lane will be started and the previous take will be muted as you continue to record. If you press Dub, a new note lane is created but the previous take can still be heard. Alt is good for trying out new melodies, Dub is good for building up beats.
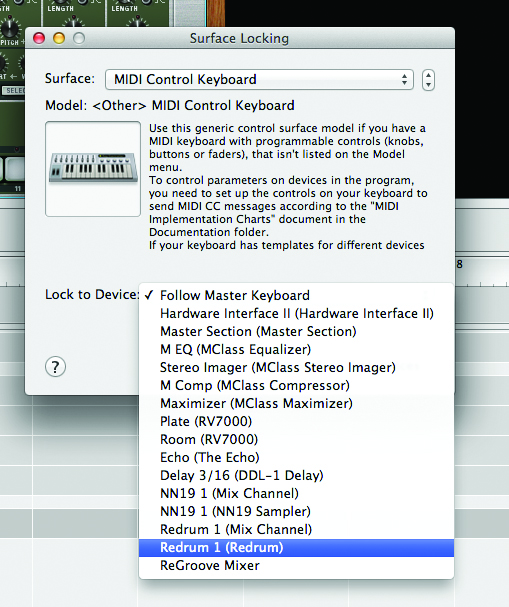
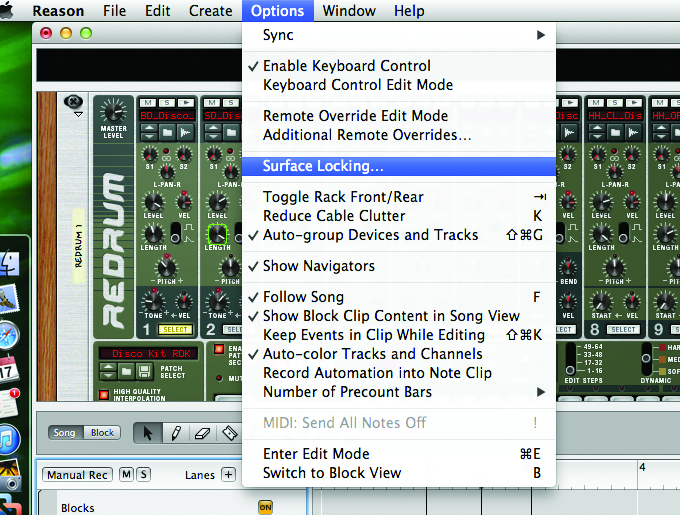
4: To record more than a single device at once, go to Preferences> MIDI, and with extra devices connected, make sure they are recognised. Create another instrument and go to Options>Surface Locking. Select your device and a target device to lock it to. The two are now linked, so when you play the hardware you will be able to record MIDI onto its sequencer track.
5: This also extends to recording automation. For any device in the Rack you can [Alt]-click on a control to enable automation for it. Alternatively, with an input device pointing at a Rack module, simply move a control during recording to activate automation. Automation is recorded as vector information in lanes underneath the main note lane in any sequencer track.
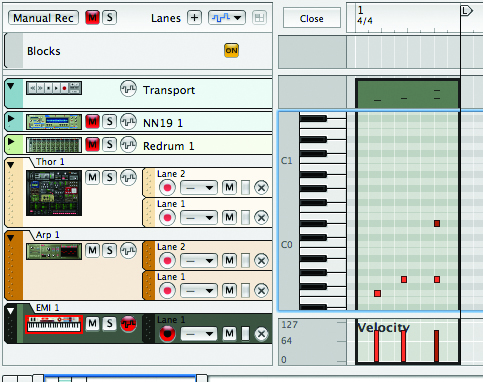
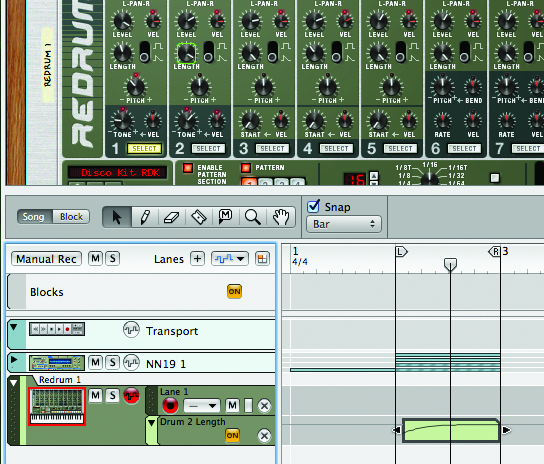
6: You can record-enable multiple tracks both for notes and automation, and also record-enable multiple note lanes within any track individually. Say you had three people hooked up to a laptop, two with keyboards and one playing drum pads. Their performance can be recorded and at the same time you can run backing tracks, change patches and record automation. Simply lock devices to modules.
Continue to Page 2 – Recording and Editing MIDI Continued…
