Reason Tutorial: Become a Power User Part 6 – Composition and Arrangement
Flexibility is key when it comes to arranging – and in Reason there’s much more to it than first meets the eye. Hollin Jones guides you around the building site… The ability to handle MIDI data and track audio are just two of the core functions that any DAW must have – but they’re pretty […]
Flexibility is key when it comes to arranging – and in Reason there’s much more to it than first meets the eye. Hollin Jones guides you around the building site…
The ability to handle MIDI data and track audio are just two of the core functions that any DAW must have – but they’re pretty useless if you can’t subsequently mould your programming or recordings into a sequence to build a song. You may be familiar with the way that most sequencers work – following a linear left-to-right pattern – but in Reason there’s more to it than just that.
Take pattern sequencing, for example, which lets you use patterns stored inside certain modules for a more old-school, step-based approach to song-creation. Going further, there’s the unique Blocks feature, which lets you create multiple virtual arrangements (without having to copy and paste any note data in the sequencer) then flatten your final arrangement onto the timeline.
Helpfully, Blocks mode is not an all-or-nothing affair, and you can override it manually for specific parts of a song. So if you wanted to change a few notes or beats inside one Block but leave the others intact, you can do it.
In fact, Blocks are even more powerful than you might think. When you go into a Block you compose parts inside it and have them stored virtually, so that when you paint Block data into the Blocks lane, you are composing using parts that aren’t yet recorded into the main sequencer. This is a completely different way of working in Reason and, of course, it is compatible with the regular technique of recording into the sequencer as well. That’s the nice thing: you can pick and choose which bits of which working methods you prefer to adopt.
It’s easy to overlook some of the more basic but nonetheless useful tricks when it comes to sequencing. You can hold down the [Alt] key and drag to duplicate one or more parts, or use the copy-and-paste commands to copy sequencer data, open a blank project and paste it in. Reason will copy all connected devices, too, so you don’t have to do any manual relinking. This is a great way to extract raw track data from a project and place it into a new one, perhaps for backup or to send to a collaborator while you work on your version.
Composing With Blocks
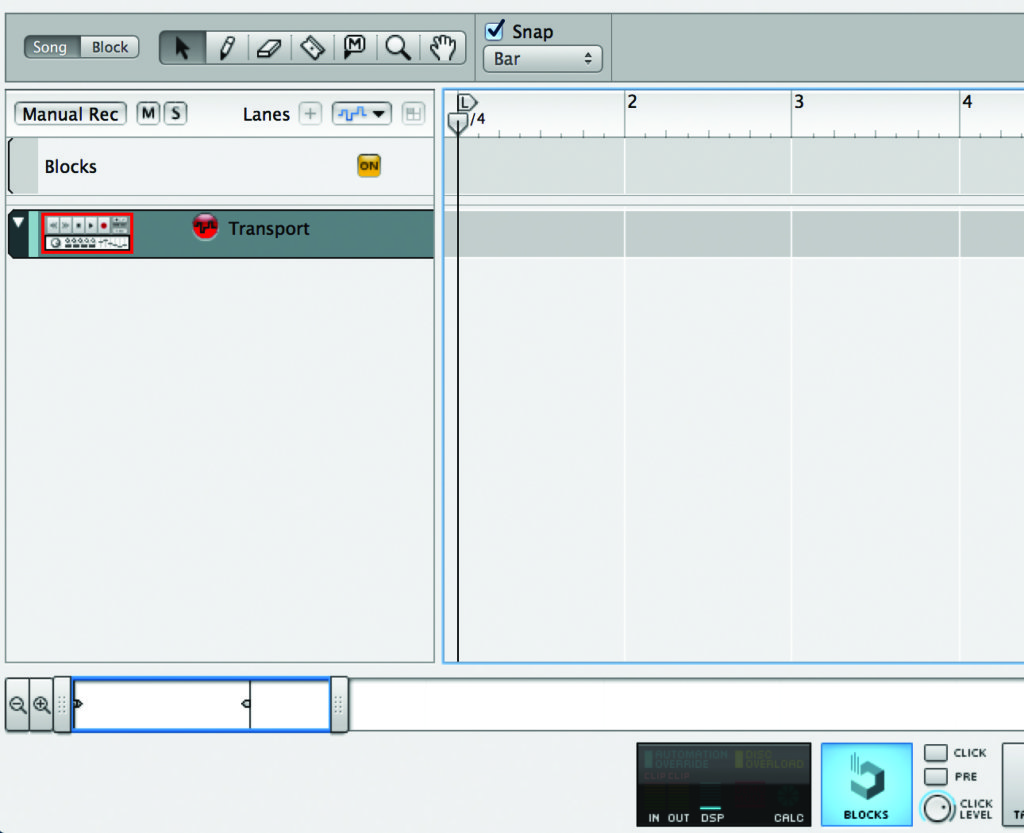
1: Let’s start by composing using Blocks rather than the conventional linear method (the two can be used together, as we will see a little later). Set your project tempo and click on the Blocks button in the transport panel to activate Blocks mode. The Blocks lane will display at the top of the sequencer. Make sure that Snap to Bar is switched on.
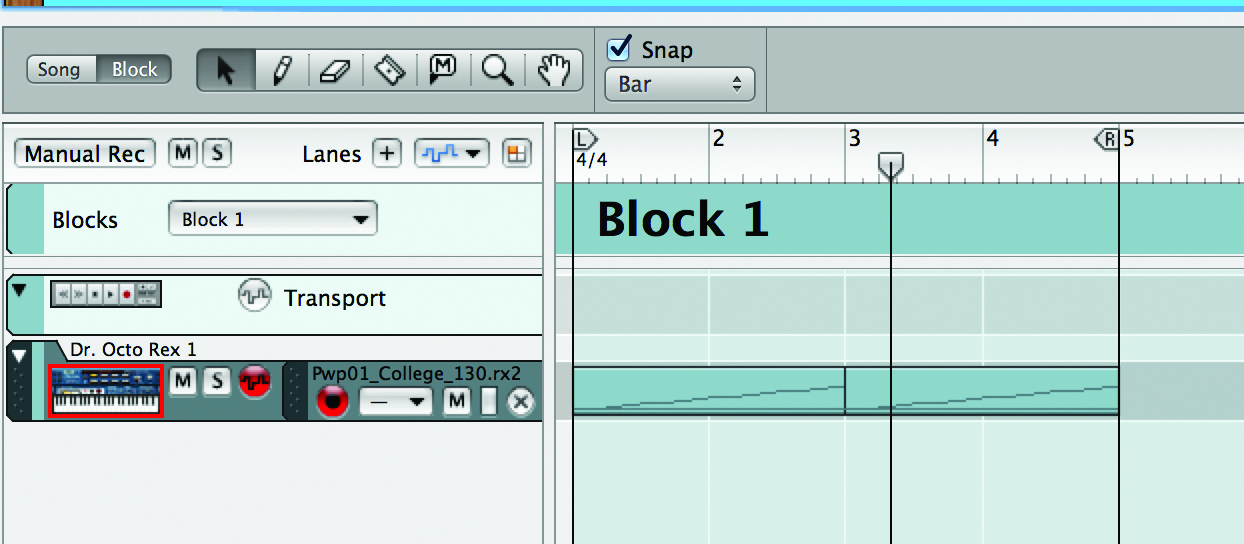
2: Go into Block view by clicking on the Block button at the top-left of the sequencer and add an instrument module. What we’re going to do is compose some ‘virtual’ parts that we can stitch together in the sequencer. Add some note data to your clip inside Block 1. We have chosen to place a REX drum loop into the Block.
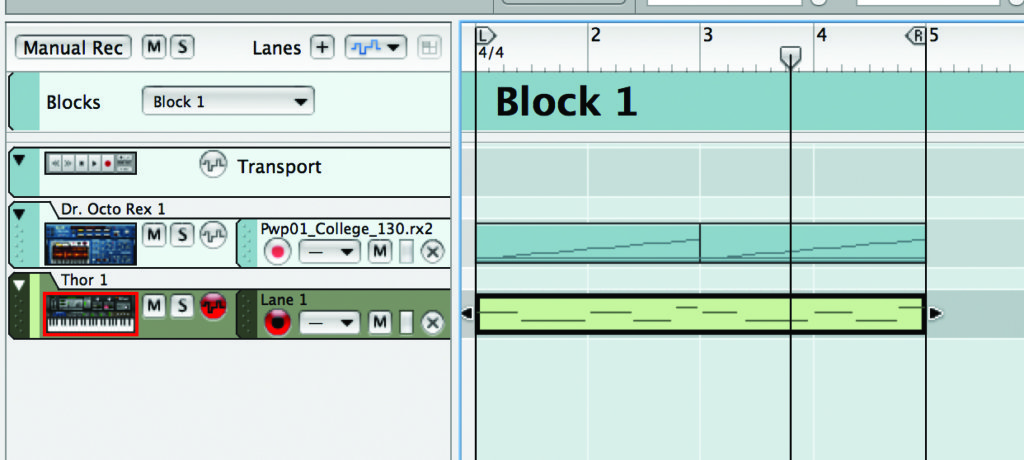
3: Creating a REX loop player has placed it into the Rack, and other modules you create will also be placed into it. Try creating a synth and recording a MIDI part, again while remaining inside Block 1. Your Block length can be as long as you like, but it makes sense to stick to four or eight bars to keep things simple (you can have multiple Blocks).
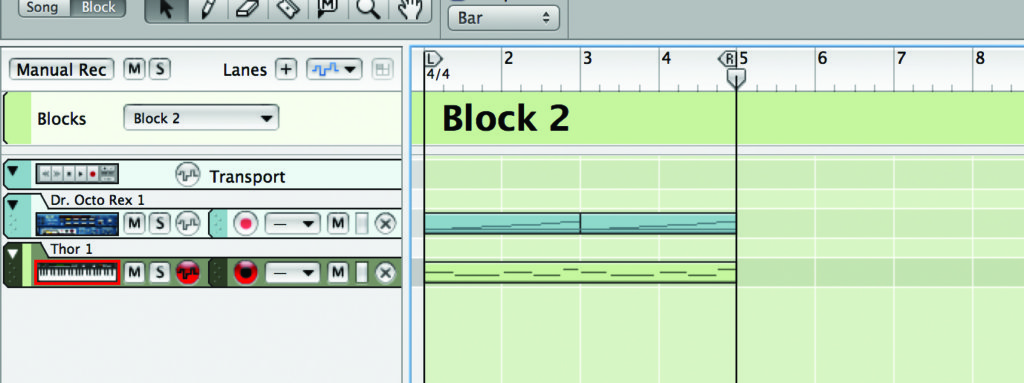
4: You might want to create variations in subsequent Blocks rather than starting each one from scratch. To do this, use the Select All command and copy everything within the Block to the clipboard. Switch to Block 2 via the Block dropdown menu and choose Edit>Paste to paste in the contents of Block 1.
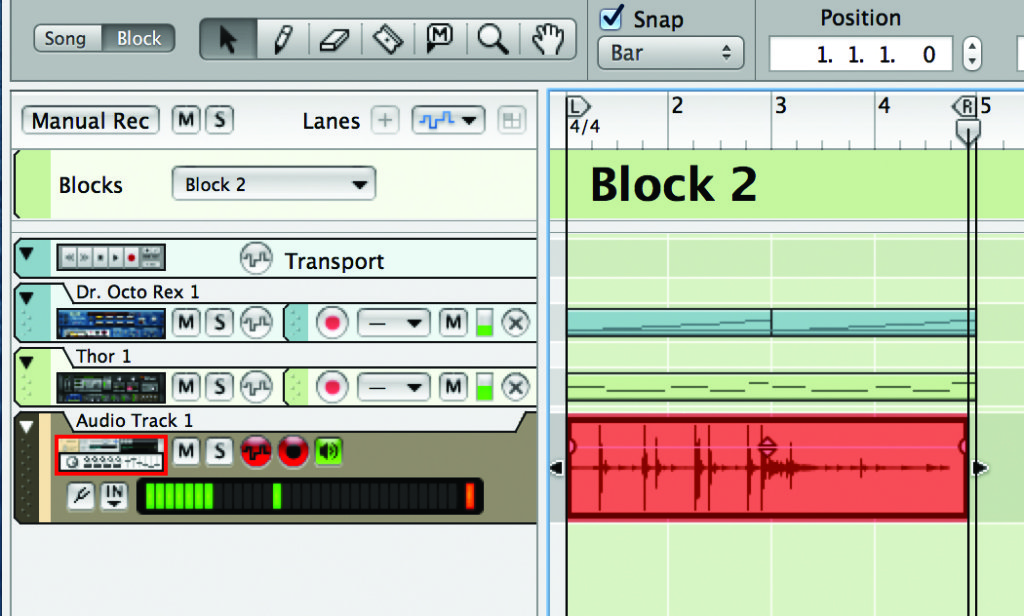
5: Make some edits to the pattern in Block 2 or add more data to build it up into a fuller pattern. You could add more instruments or audio recordings by adding audio tracks to the Block and recording parts into them. Remember that you are recording into a kind of virtual slot, not into the main sequencer yet.
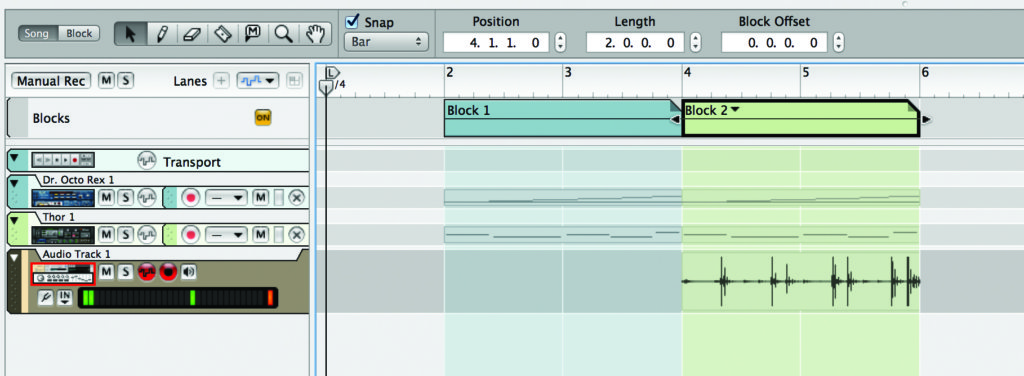
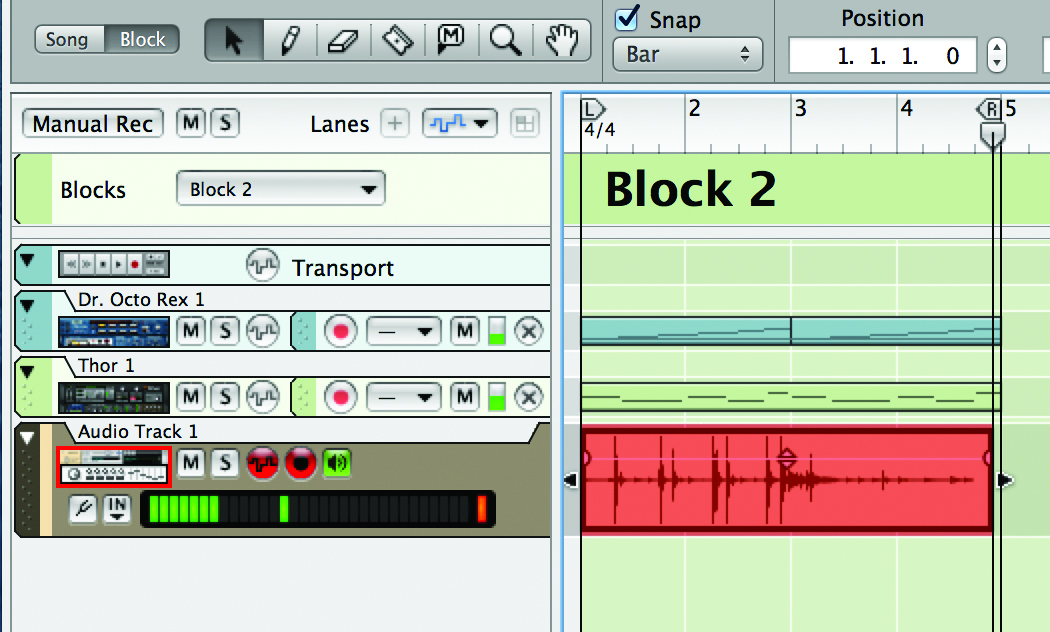
6: Click on the Song button to go back into the main sequencer view. Select the Pen tool from the toolbar and draw in a clip in the Blocks lane. Draw a second clip and then select the Pointer tool and click on the second Block to switch it to Block 2. When you play back now, you should hear the two different sections play under each Block.
Going Beyond Blocks…
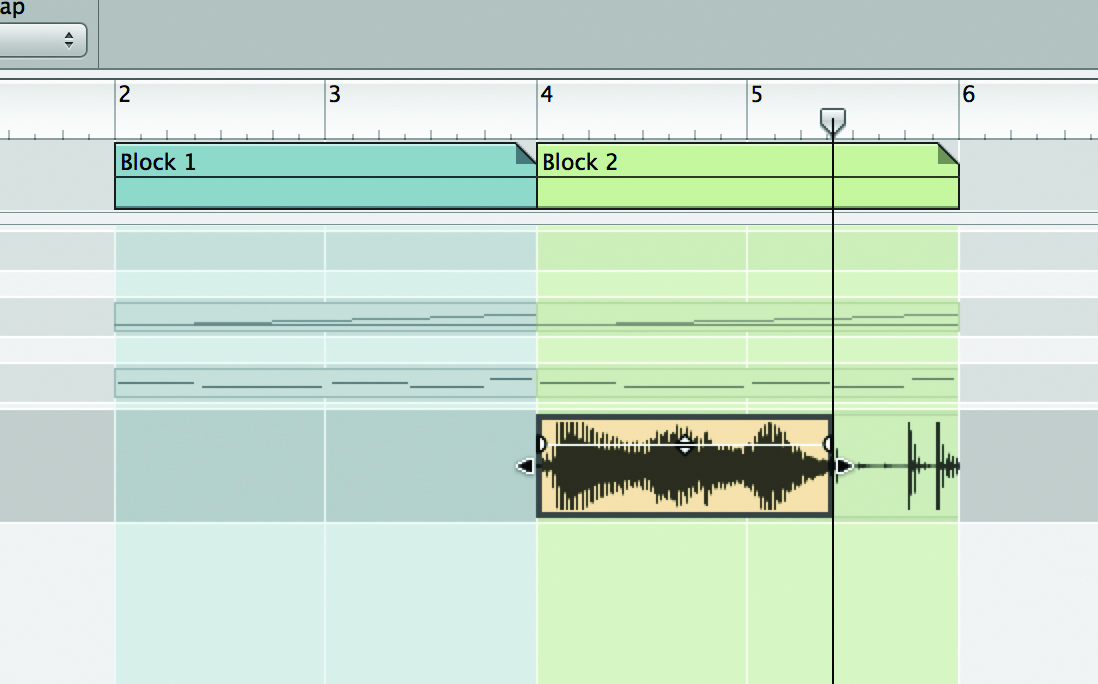
1: You can repeat this process for up to 32 Blocks. Each Block can be different or simply a variation on another; it’s up to you. You will see the data contained within each Block is ‘ghosted’ on the timeline. If you record a new audio or MIDI part in the same location as ghosted data, the new part overrides it, so it’s easy to quickly overdub a part without having to delete a Block first.
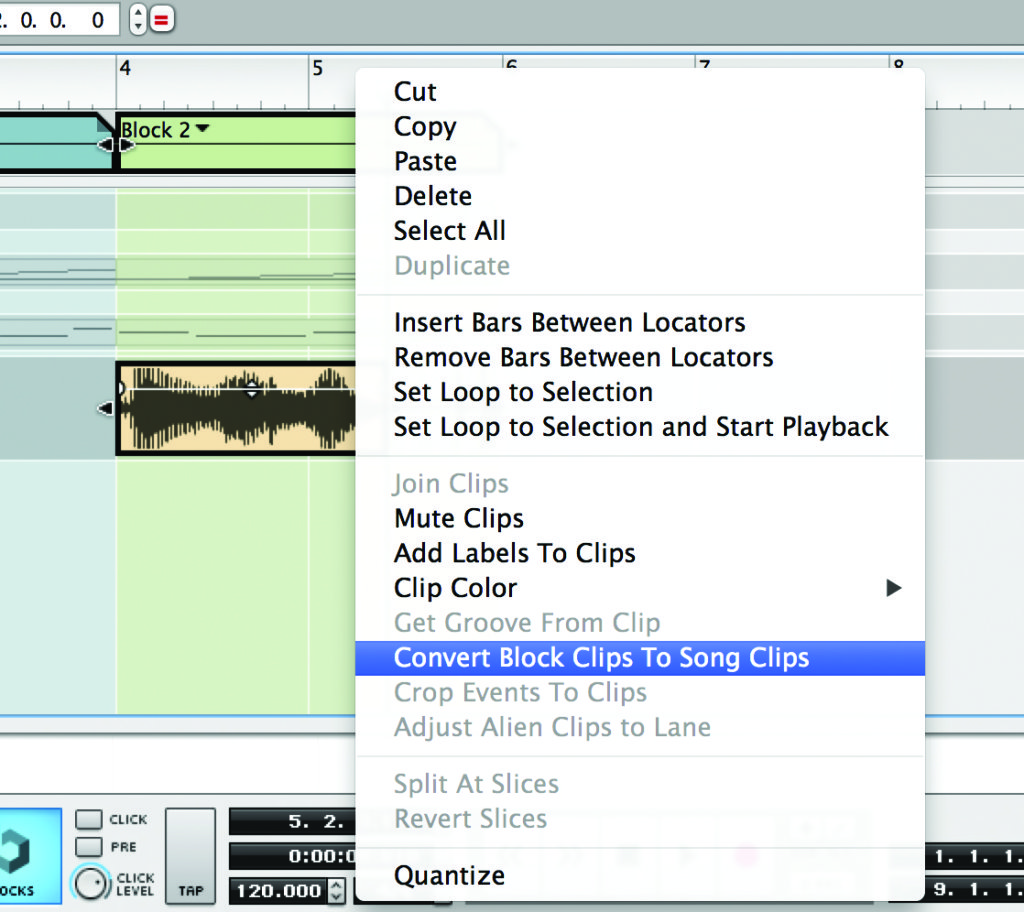
2: To render a Block’s data as ‘real’ sequencer data you can select it and then either right-click or, from the Edit menu, choose Convert Block Clips to Song Clips. This creates an independent clip for each instance of each part within the Block and means that they can be individually edited. You can do this for one, multiple or all Blocks.
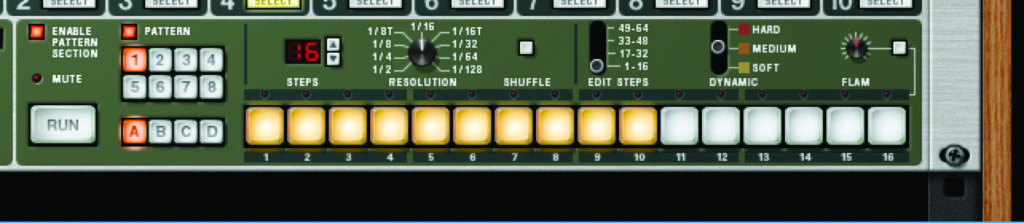
3: Another way to sequence in Reason is to use pattern devices. Take the ReDrum, for instance, which has an onboard step sequencer. Program a beat using the pads, resolution and dynamics controls to create a cool-sounding pattern, then copy and paste or create a couple more using the 32 bank slots onboard the ReDrum.
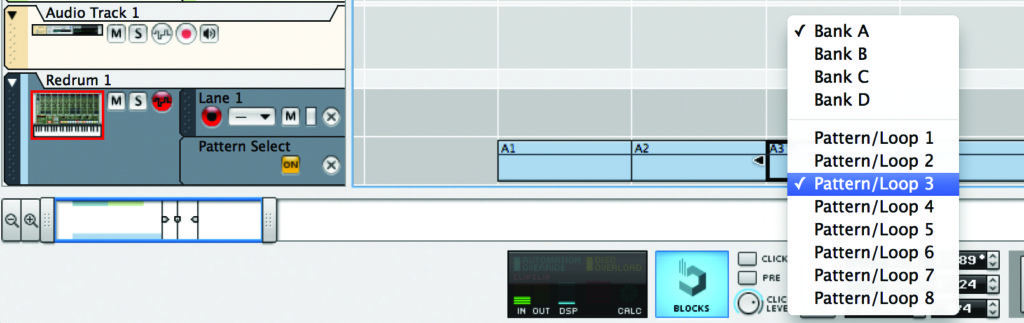
4: Click on the tiny Create Pattern Lane icon in the sequencer or [Alt]-click on the ReDrum’s Pattern button grid to automate pattern selection. An automation lane will appear under the ReDrum’s note lane and, using the same technique as drawing and selecting Blocks, you can enter pattern automation for the ReDrum and have different patterns play back over time.
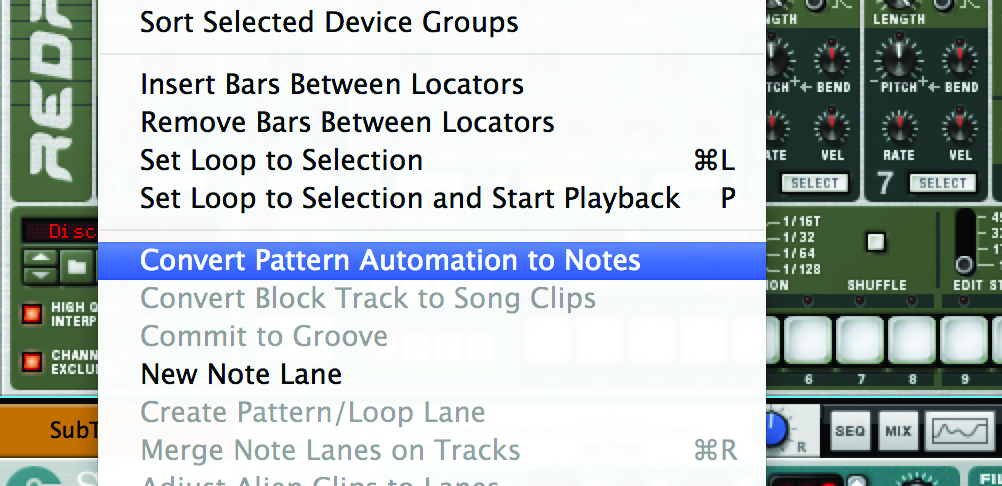
5: The same technique can be used for other devices with pattern-playback capability, including the Matrix Pattern Sequencer and the Thor synth, plus a number of third-party Rack Extensions. It’s a cleaner method of programming than simply playing notes into the sequencer, although you do have the option to choose Edit & Convert Pattern Automation to Notes to make them ‘real’.
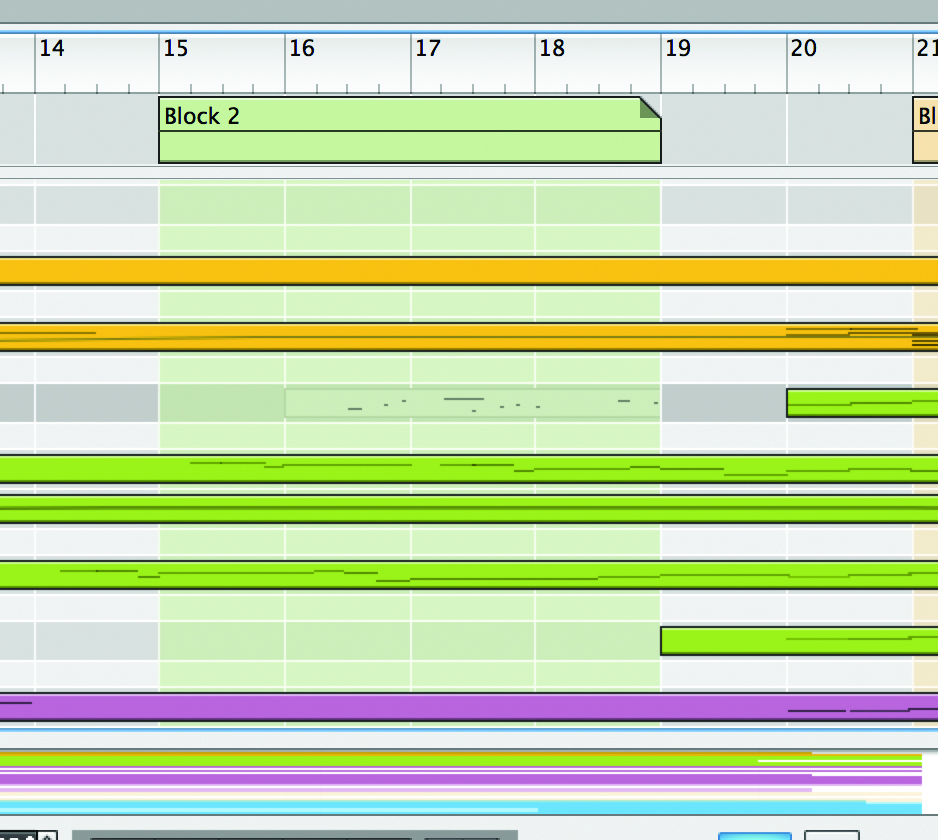
6: You can, of course, mix Blocks and other sequencing techniques. Here, for example, we have a track that’s been composed in a largely conventional way, but a Block has been added to ‘ghost-in’ notes at various points for the purposes of experimentation. These will be audible unless overwritten with data from the main sequencer or deleted in the Block edit view.