Reason Tutorial: Become a Power User Part 8 – Beat Making and Sampling
Reason incorporates a number of powerful sampling tools that are much easier to use than you might first imagine. Hollin Jones gets you started. Sampling used to be something that was both expensive to do and tricky to get right, but the advent of the digital age has done away with both of those obstacles. […]

Reason incorporates a number of powerful sampling tools that are much easier to use than you might first imagine. Hollin Jones gets you started.
Sampling used to be something that was both expensive to do and tricky to get right, but the advent of the digital age has done away with both of those obstacles. Reason has one of the simplest and yet most powerful sampling systems of any software as well as one of the best sets of tools for making beats. In fact, the two are linked, because as well as loading sampled kits and designing your own synth drum sounds you can record any sound into the ReDrum and Kong modules to make your own samples part of your kits – and hence part of your beats.
Sampling in Reason predates audio tracking but its implementation has remained much the same since the days of version 5. Beat making is to some degree tied in with MIDI programming, of course, and you can now also import your own drum loops into audio tracks, whereas before you would have had to load them in a sampler, which brought its own set of challenges.
One of the best things about sampling and building your own beats or instruments is that it can be quick and easy to achieve. Want to build a beatbox kit? Just connect your mic, check the routing and record your samples into a ReDrum, editing as you go. Want to tweak an existing kit? Swap out just a couple of channels instead. Alternatively, create your own instrument by multi-sampling a number of layers into an NN-XT and zoning them across the MIDI keyboard.
The way in which Reason deals with recorded samples is pretty useful, too. Call up the Tool window and go to the Samples section and you can view and edit any sample used anywhere in a project, including samples that are not currently assigned to any modules. You can delete, duplicate or even export them from here, and since Reason stores them all inside the one master project file, you won’t ever lose them. Get to grips with sampling in Reason and you’ll find a world of possibilities waiting for you
Sampling Basics
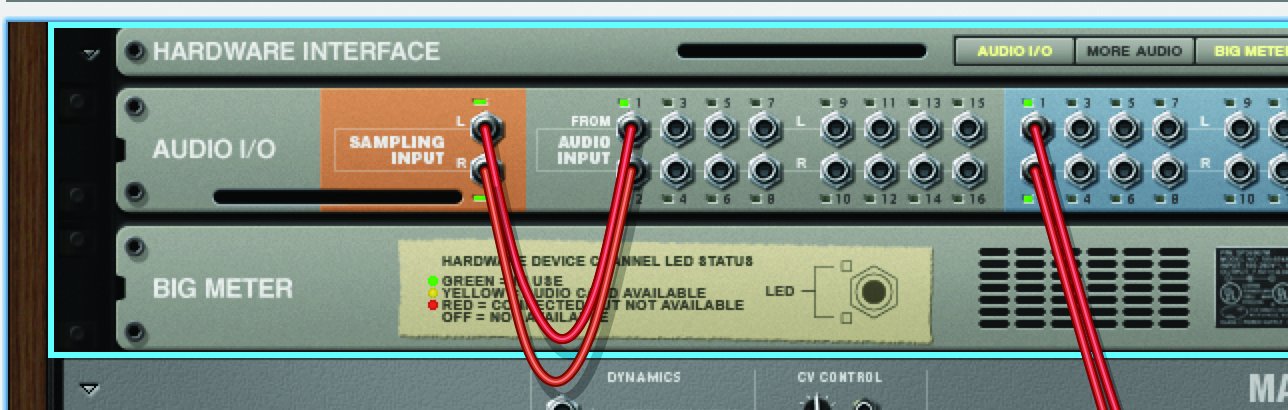
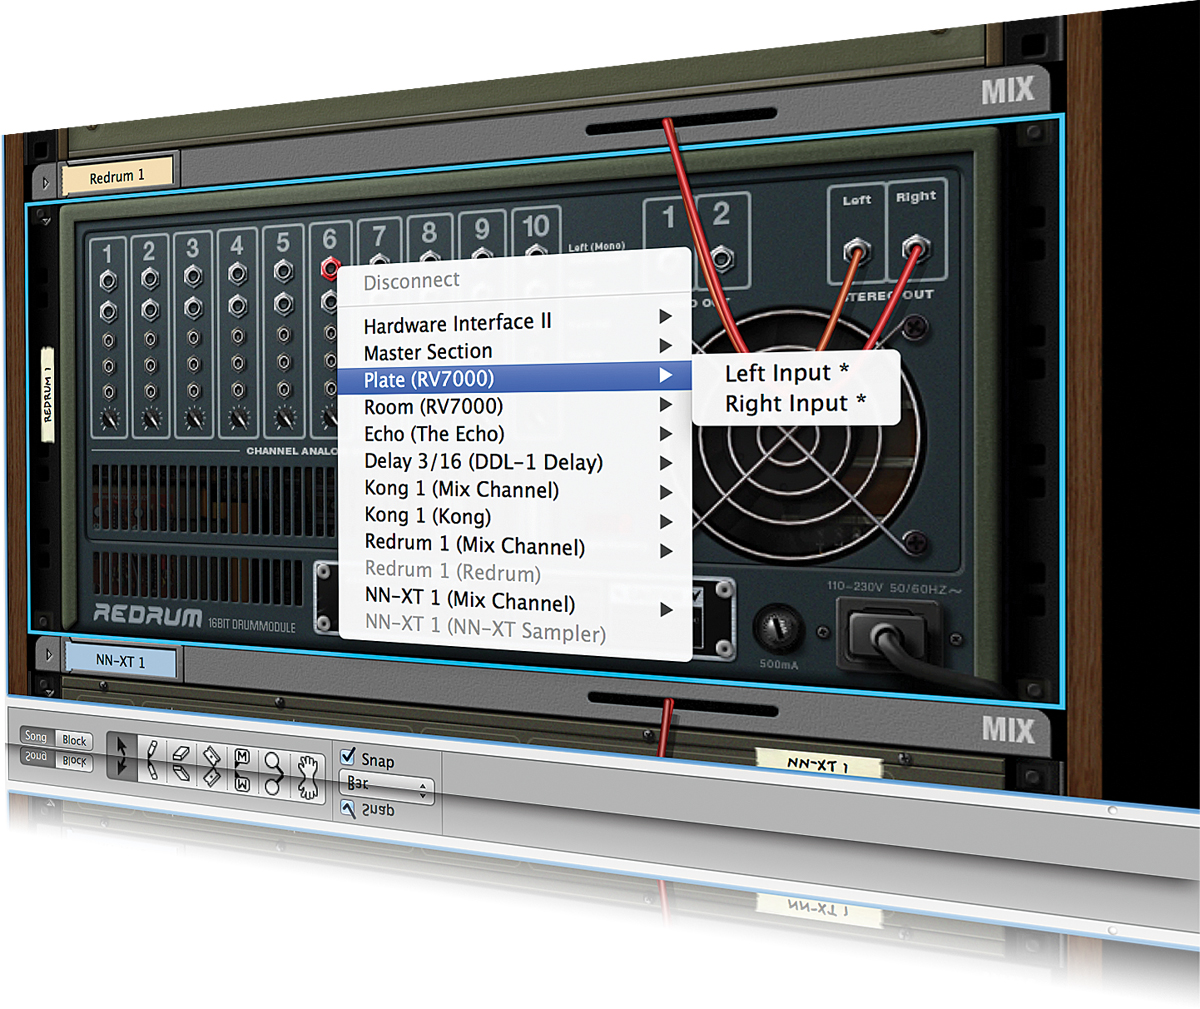
1: Before you start you will want to check that your sampling inputs are correctly routed. This is easy to do by spinning the Rack around and navigating to the Audio I/O section at the top. By default, stereo inputs 1 and 2 are sent to the sampling input, although you can manually reassign these to any input you like
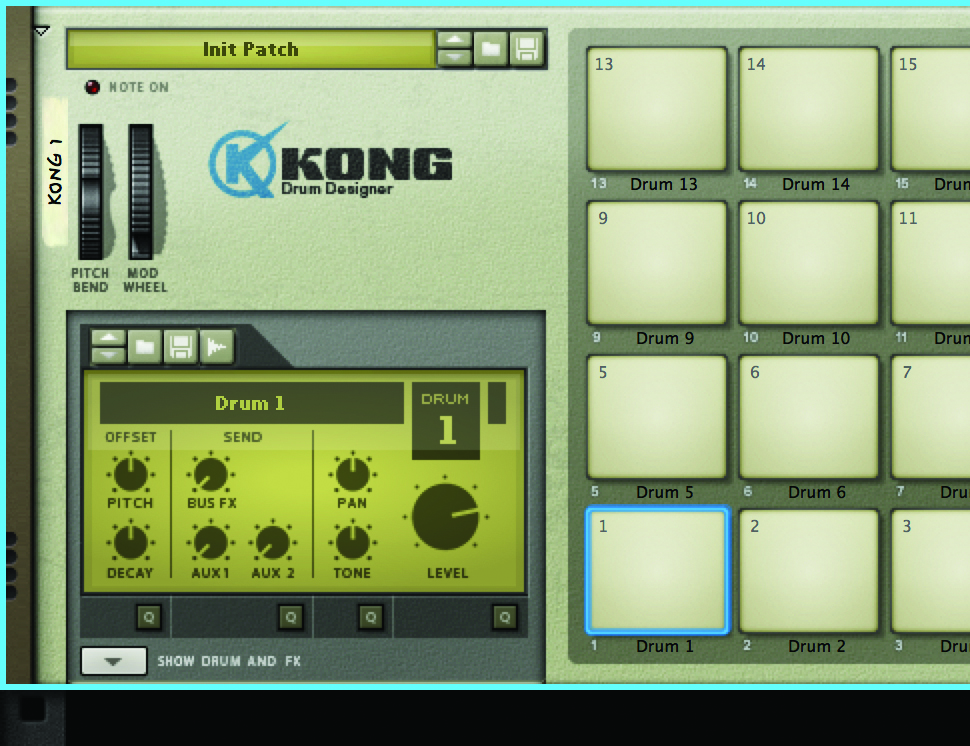
2: The selected input will be available to any part of Reason that has sampling capability. Try loading a Kong then initialising the patch to clear out any existing sounds (choose Reset Device from the Edit menu). Now click on a drum pad – we have chosen pad 1 – and go to the sampling button above the display to the left of Kong.
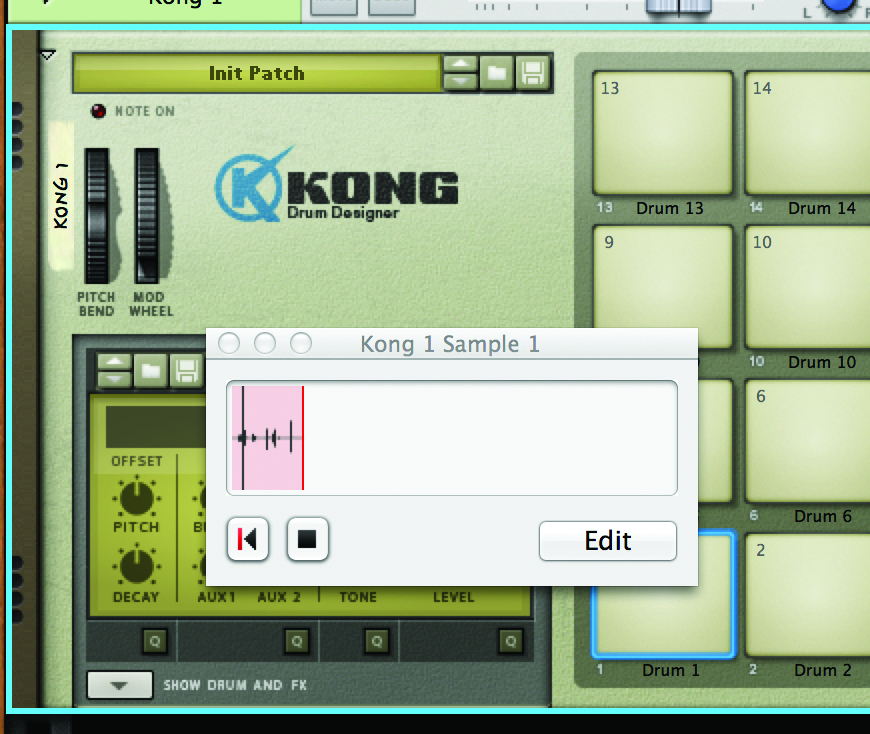
3: Click on the waveform button and sampling begins, using whatever input is connected to inputs 1 and 2; let’s say it’s a mic. Here we record a handclap or a vocal sound and then click stop to finish recording. Triggering this pad will now cause this sample to play back. However, it needs editing, so next we will use the Sample Editor to trim it down.
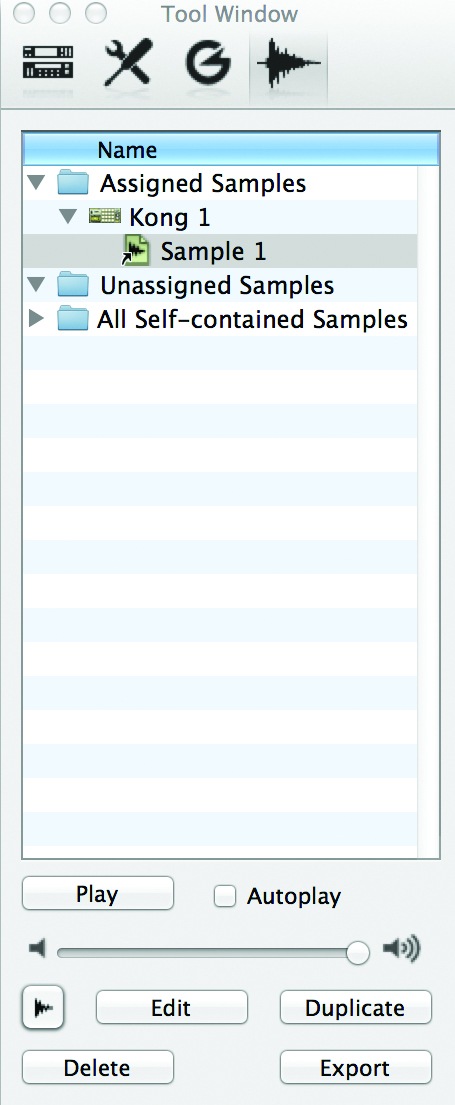
4: Open the Tool window and go to the Sampling section. Here you can see all the samples in a project, grouped by assignment. If we click on the Kong 1 device we can see our sample. Click on the Edit button to open it in the Editor. From here you can also choose to duplicate, delete or export any sample in a project.
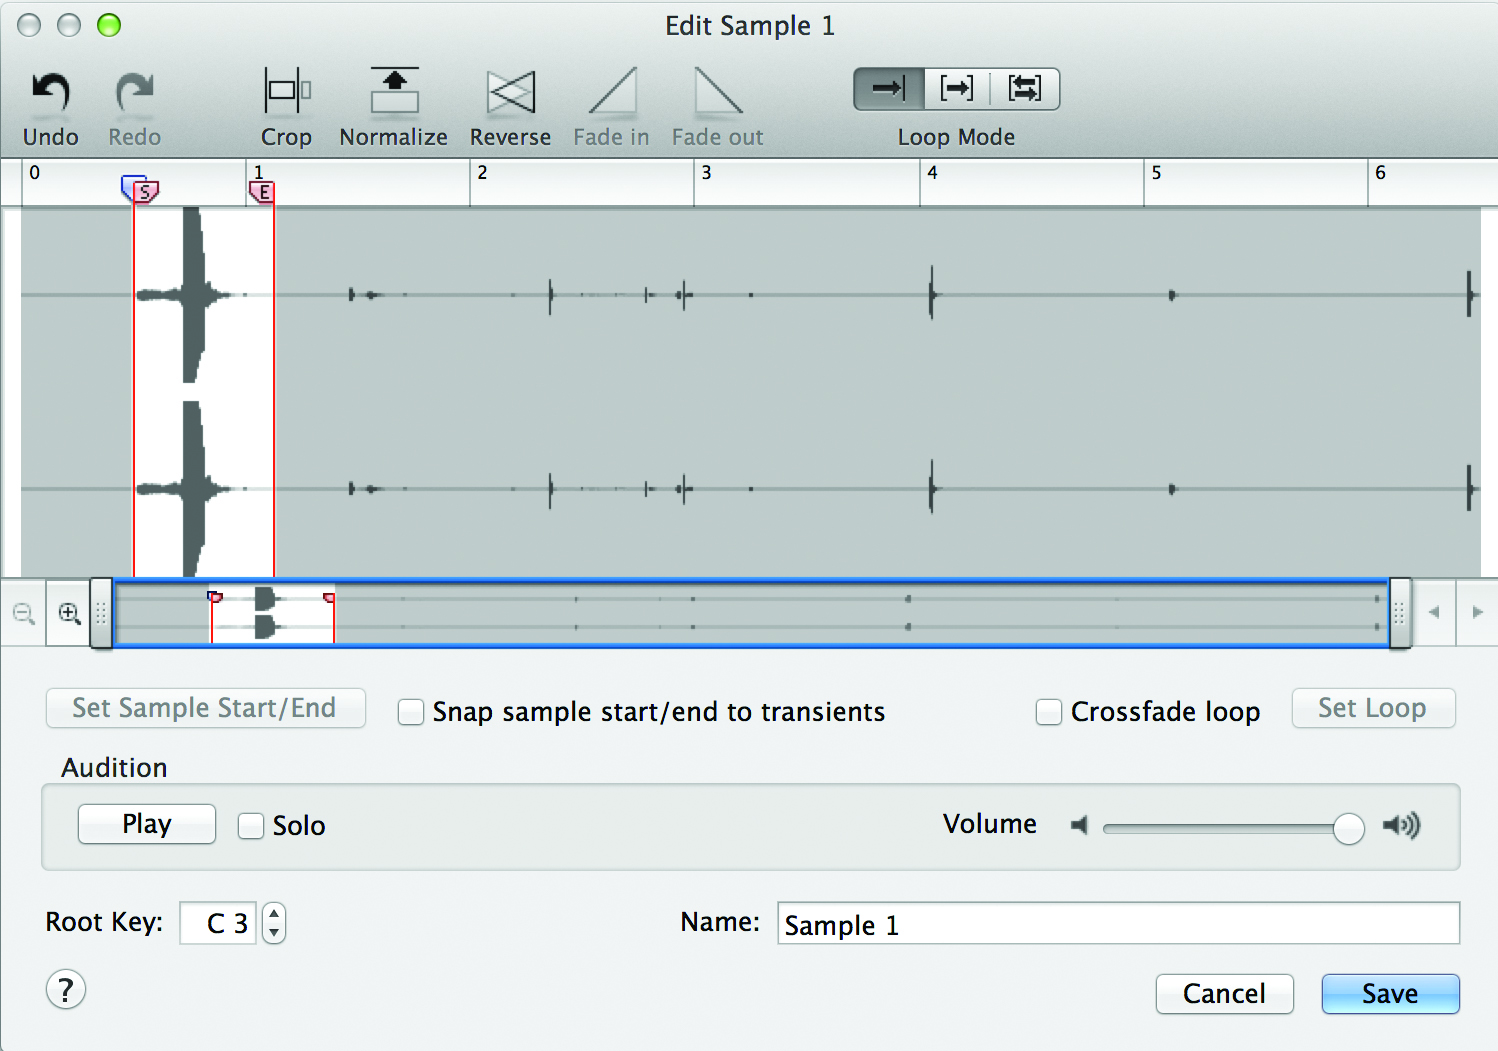
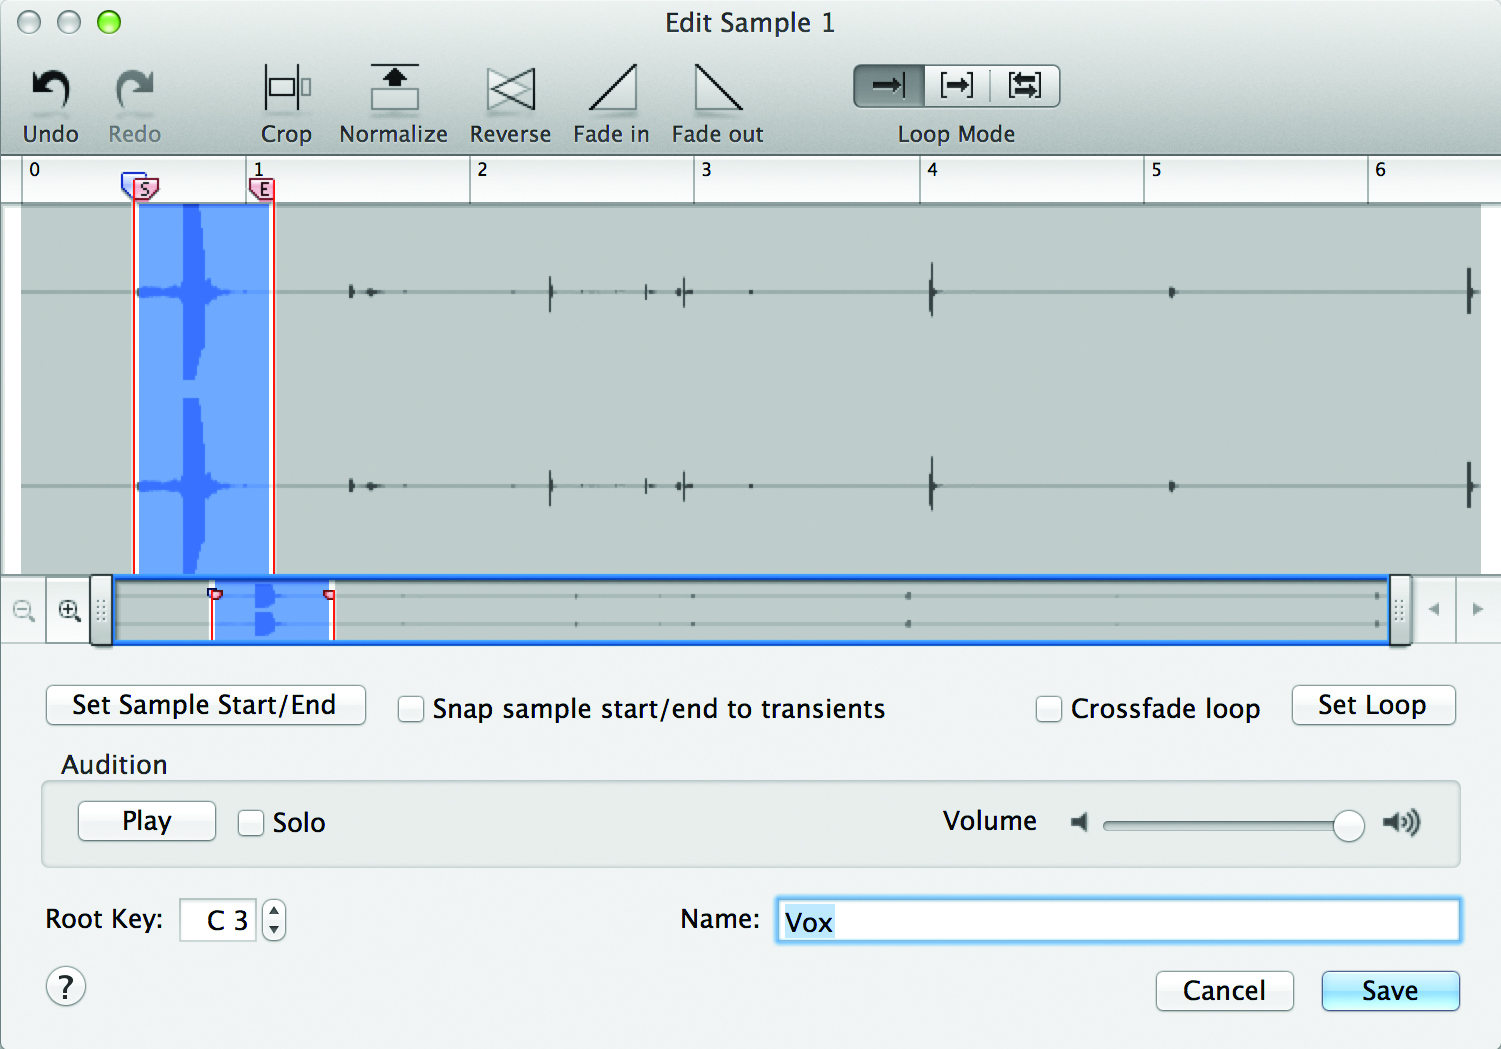
5: You can see our sample represented by the big transient, followed by some unwanted bits of sound afterwards. Use the Start and End handles to draw an area around the part of the sample you want to keep. In the Name area at the base of this window it’s well worth assigning a name to the sample too; once you have several in a project you’ll find them easier to keep track of.
6: By drawing around the waveform itself with the mouse you can perform audio-processing functions on the sound. Here, for example, we select our sound and perform a fade-in and out as well as normalising it. If your sample is a little quiet or has some extra noise at the start or end, it’s easy to fix using these tools.
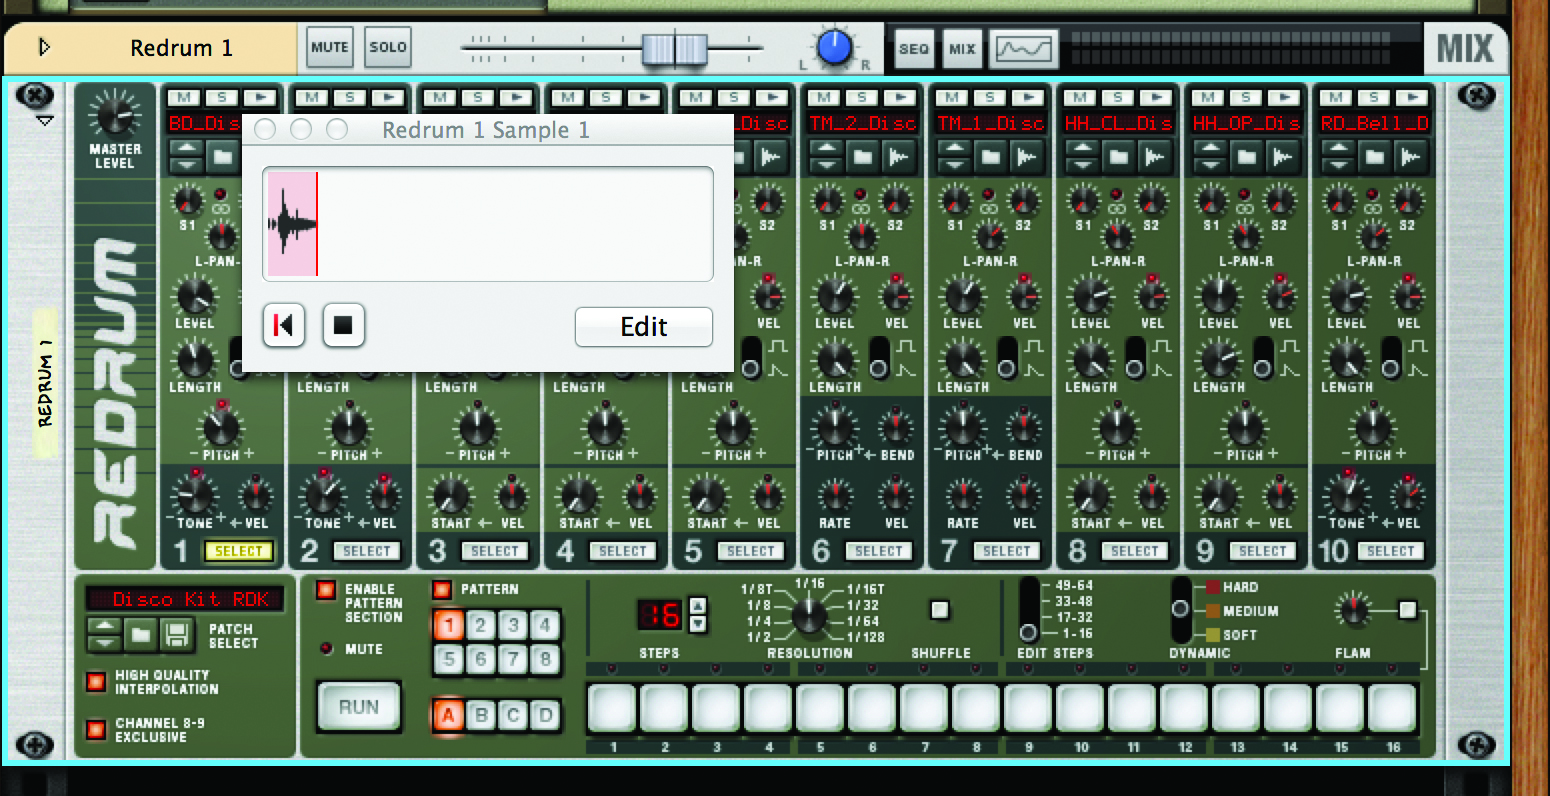
7: You can repeat the sample-recording trick with any of the other pads on the Kong module as well as load any pre-recorded or bought sample you want into a pad. The same applies to the ReDrum module. Try loading one of these and clicking on the waveform icon at the top of any of the channels.
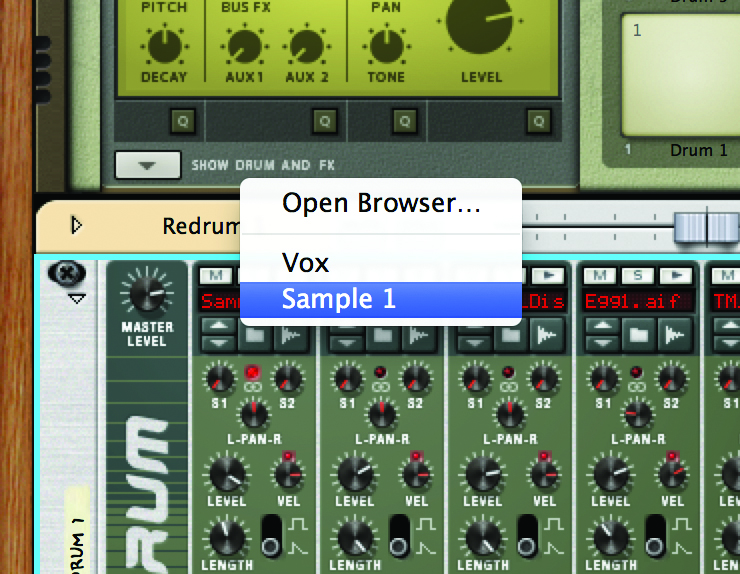
8: The Sample Editor that you accessed previously works for any sample in Reason, so you can use it here to edit your sample down again. If you click on the Sample Load button on this ReDrum channel you will see that it automatically gives you a shortcut to the samples you have recorded yourself in this project.
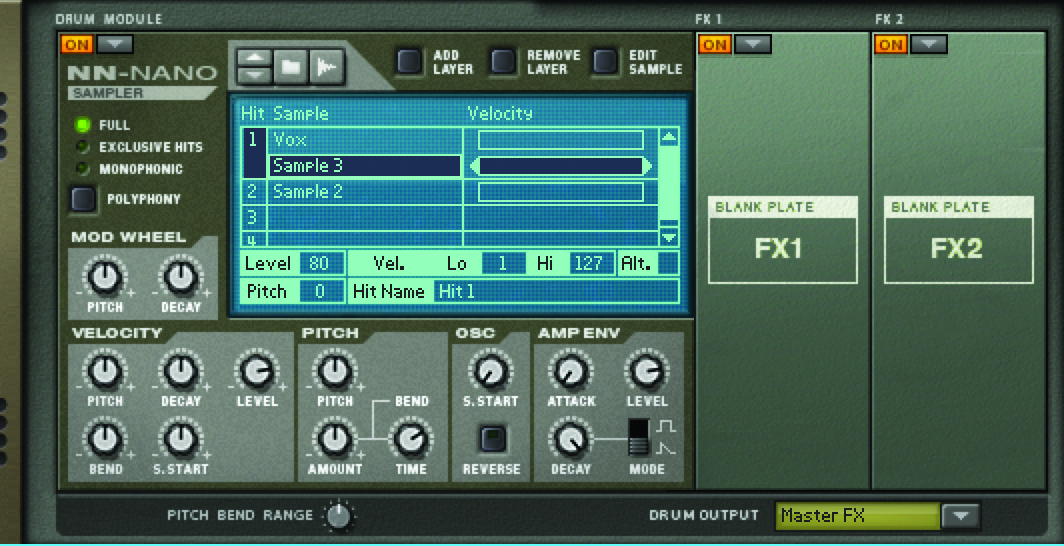
9: Returning to the Kong, click to open the Programmer section and locate the module that is triggering the sample you recorded, which is an NN-Nano module. You will see that this actually has its own full set of controls as well as the ability to hold up to four layers of sound. Try using its sampling capability to record a second layer.
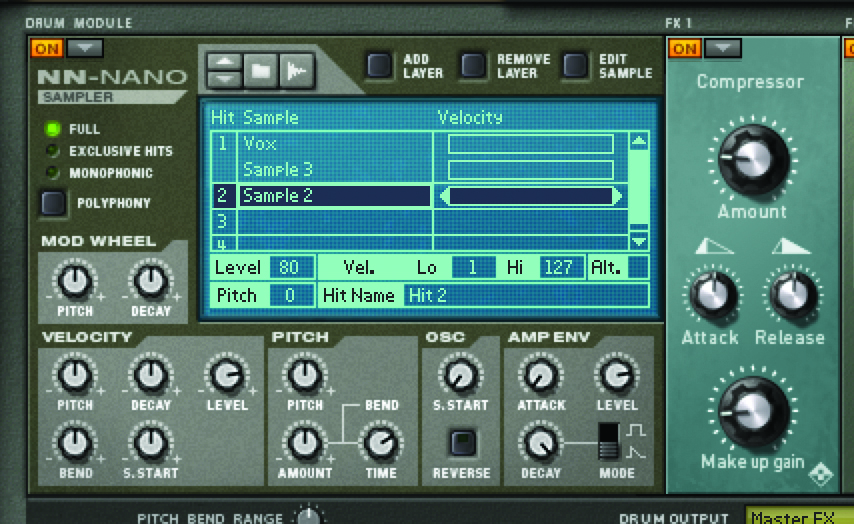
10: You can sort layers by MIDI zone and velocity inside the NN-Nano so it’s possible to create multi drum machines, whereby playing a note at different velocities triggers a different sample – and that’s for every pad! So you can see that the flexibility of sampling into these drum modules is potentially huge.
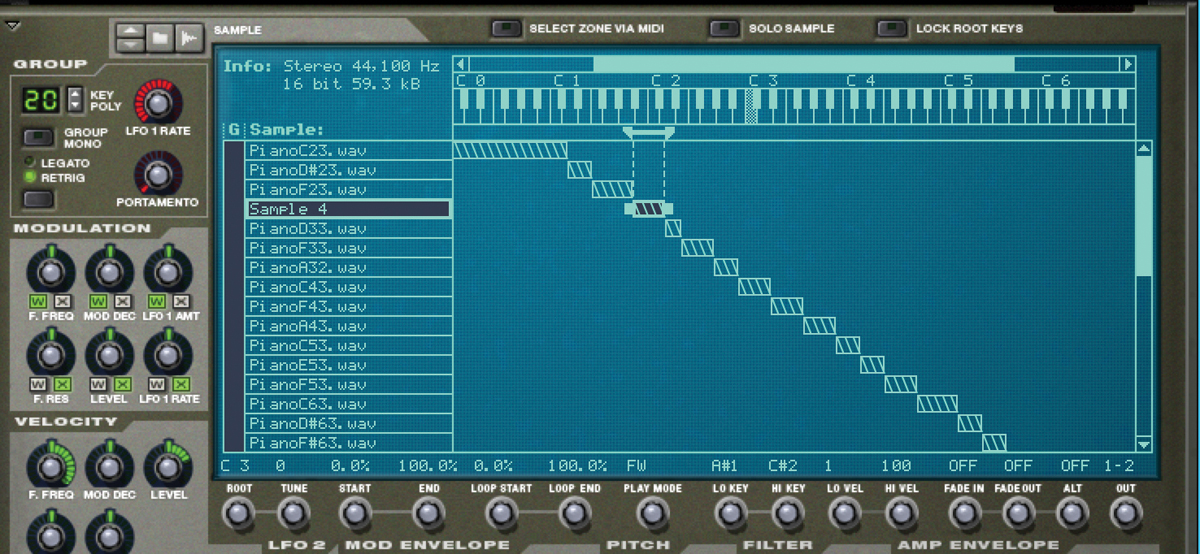
11: Recording into an NN-XT multi-sampler works in much the same way. You can record a single sample into one layer or as many samples as you like by adding new layers, sampling a sound into each one and then either overlapping their zones or assigning each one its own zone, in which case you end up with a sampled instrument.
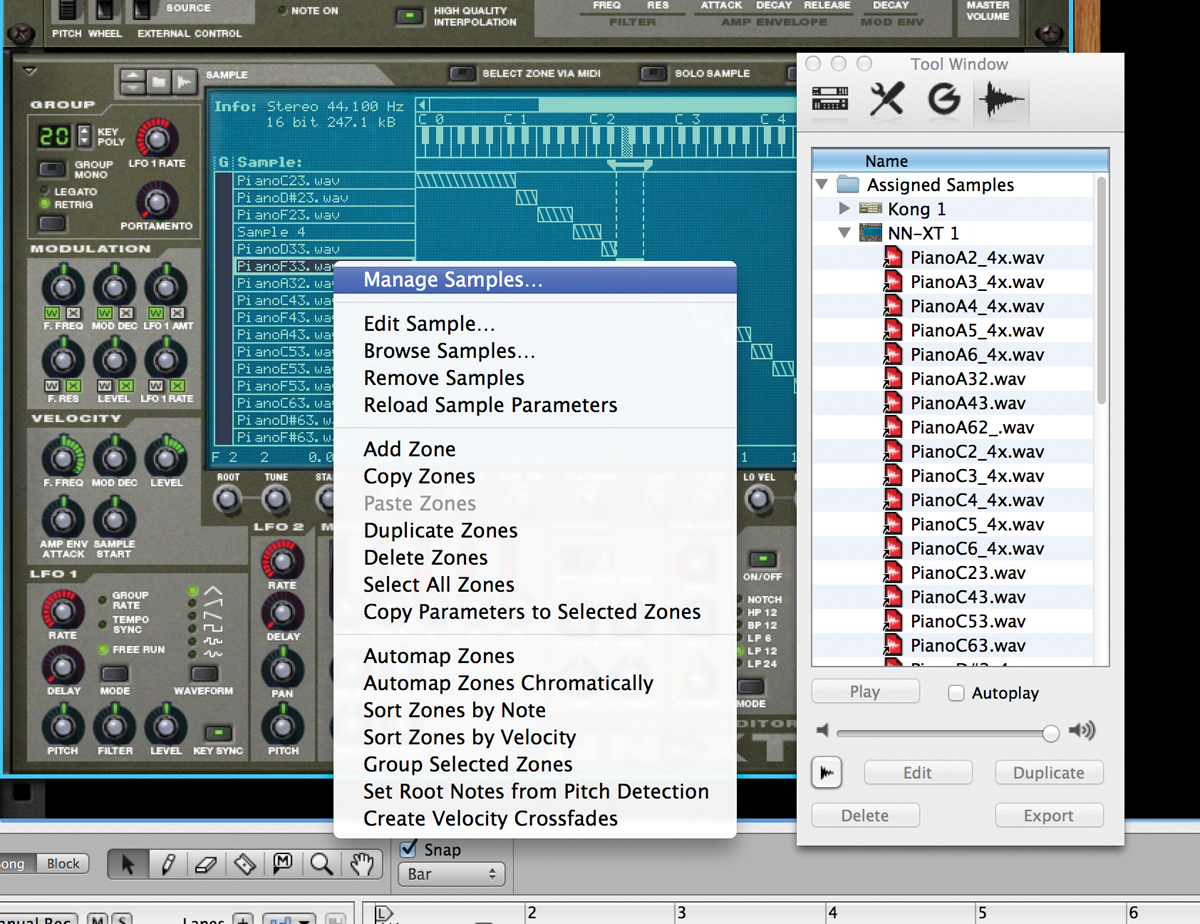
12: When you are dealing with a multi-sampled instrument, the audio samples appear in the Tool window and can be edited like any other sound. Right-clicking on the NN-XT’s Sample section accesses some special functions, such as the ability to auto-map and auto-zone samples for quicker instrument-creation.