Reason Tutorial: Become a Power User Part 9 – Special Effects
There’s more to Reason than just a bunch of everyday studio effects… Hollin Jones shows you how to get creative with the tools at hand. When you’re producing music in Reason, a lot of the time you will be using more conventional effects – compressors, reverbs and EQ, for example. But although these are essential […]
There’s more to Reason than just a bunch of everyday studio effects… Hollin Jones shows you how to get creative with the tools at hand.
When you’re producing music in Reason, a lot of the time you will be using more conventional effects – compressors, reverbs and EQ, for example. But although these are essential components of any track, they have more to do with mixing the sound than affecting it in more extreme ways. In Reason 7.5, however, you get a selection of more creative and out-there effects to play with, and if you factor in the Rack Extensions option, of course, there are even more for you to try out.
By using what you might call ‘special effects’ – modules that interfere with and process your signal in more expressive ways – you can get much more creative and make the effects a part of the music rather than just the production. The Pulveriser Demolition module, for example, is able to apply tempo-based filter modulation to a sound, saving you the trouble of drawing in lots of automation to filter and distortion modules. The Echo is at its simplest a delay module, but can very quickly be turned into a really interesting way to mess with sounds, featuring wow and flutter, pitch-shifting, filtering and distortion as well as regular delay.

The Alligator Filter Gate is another cool effect, adding pulsing gating to sounds to create that classic techno effect of stuttering, stammering and repeated synth lines (or, indeed, any other sound you care to put through it). The Scream 4 and Vocoder modules have been around for a while but are still good for messing with signals, and then there’s the RE Store. Here you’ll find many weird-and-wonderful beat-mashers, slicers, pitch-shifters and more, as well as some made by the Props, such as the Audiomatic Retro Transformer and Polar Dual Pitch Shifter.
Thanks to Reason’s easy-to-understand audio and MIDI routing you can quickly bounce audio tracks out of a project and re-import them, process the input of hardware instruments or bounce effected sounds to REX loops directly on the timeline, then further edit them inside a Dr. Octo Rex. When it comes to creative signal processing, therefore, the sky really is the limit.
Special FX
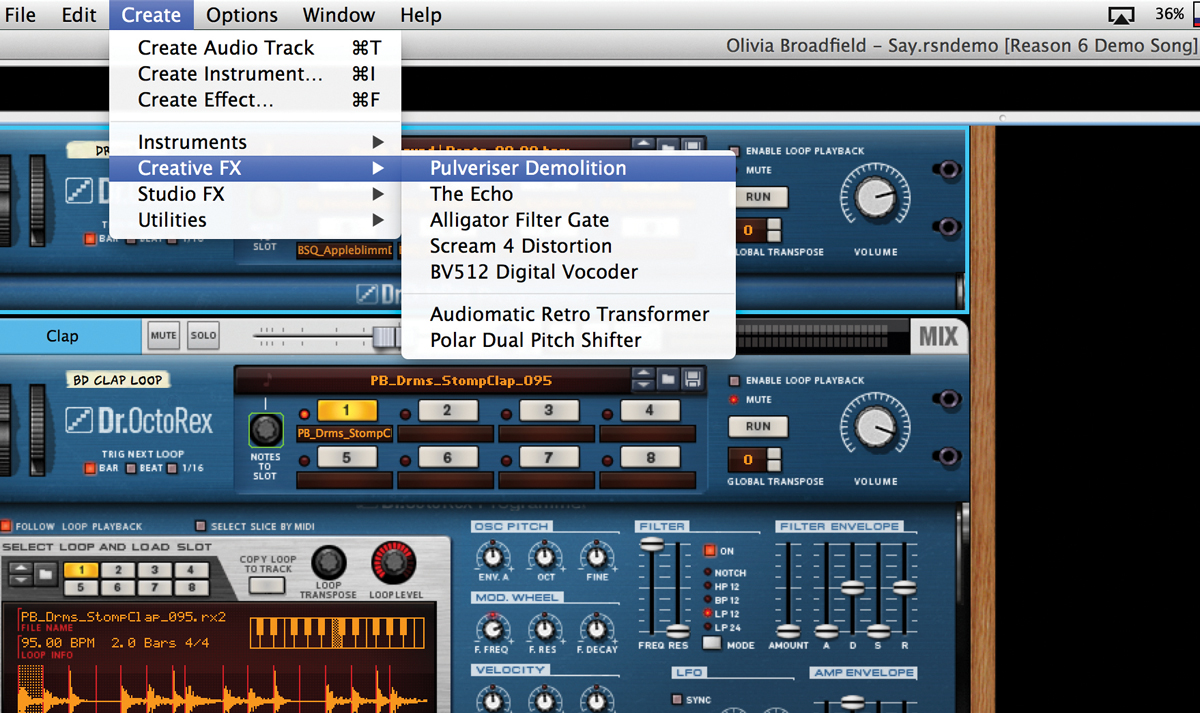
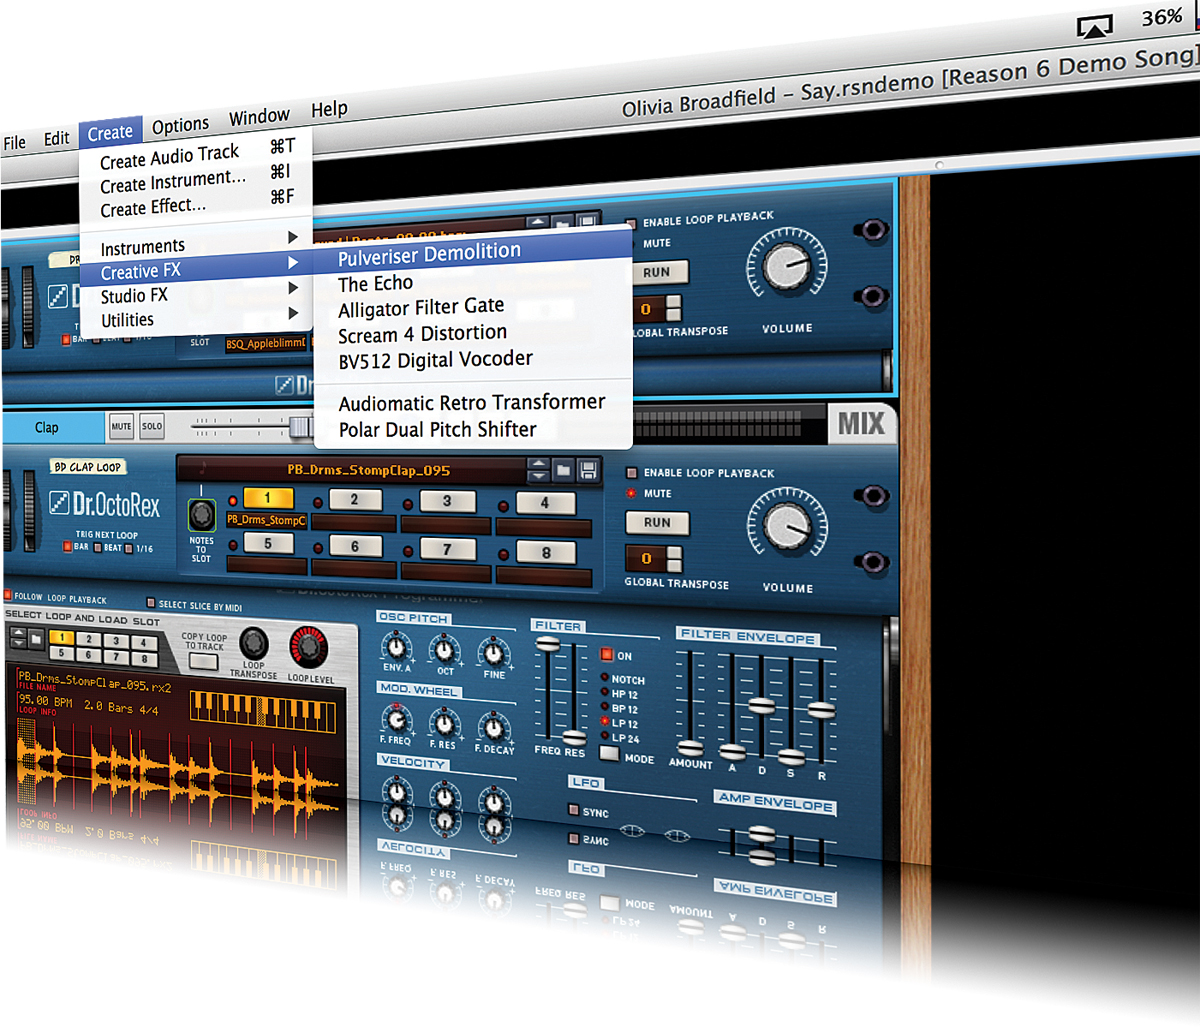
1:We’re going to start by applying some Pulverisation to a drum part, although you can try this on anything, of course. Select the module you want to effect and then go to Create>Creative FX>Pulveriser. We chose a preset called Envelope Filter FM and turned up the Squash and Dirt controls a little.
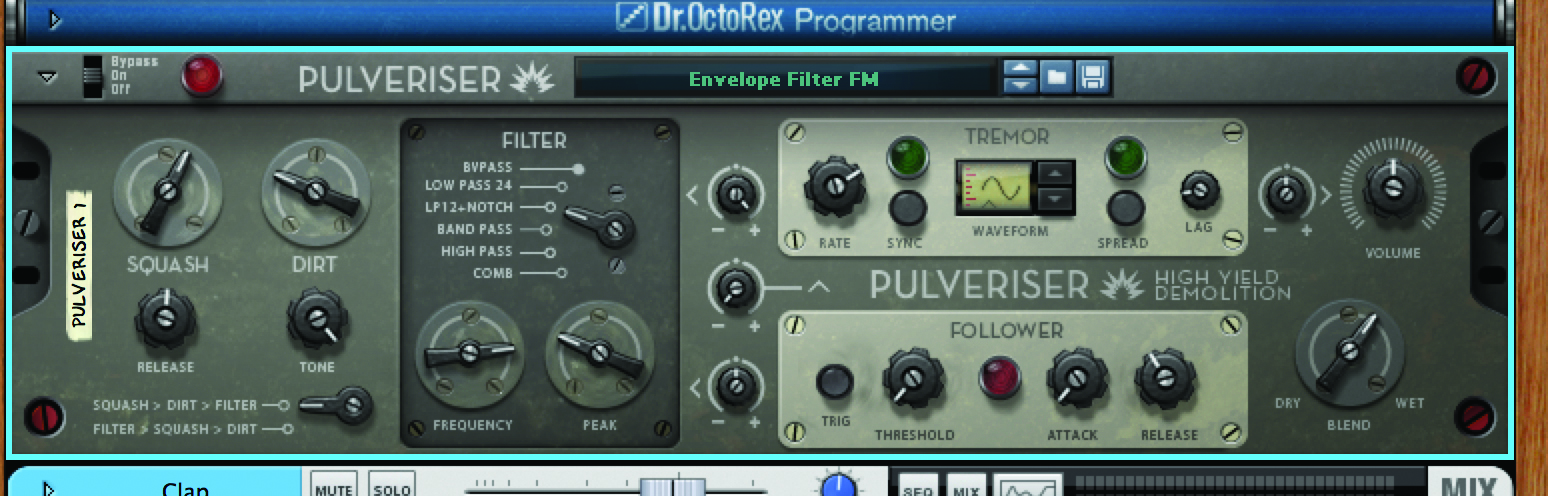
2: By changing the filter type and the Frequency and Peak controls it’s possible to shape the sound, which works well on a drum loop such as we have here. By pressurising the sound we have also increased its sustain. To balance the ratio of wet and dry signals, use the dial to the far right-hand side.
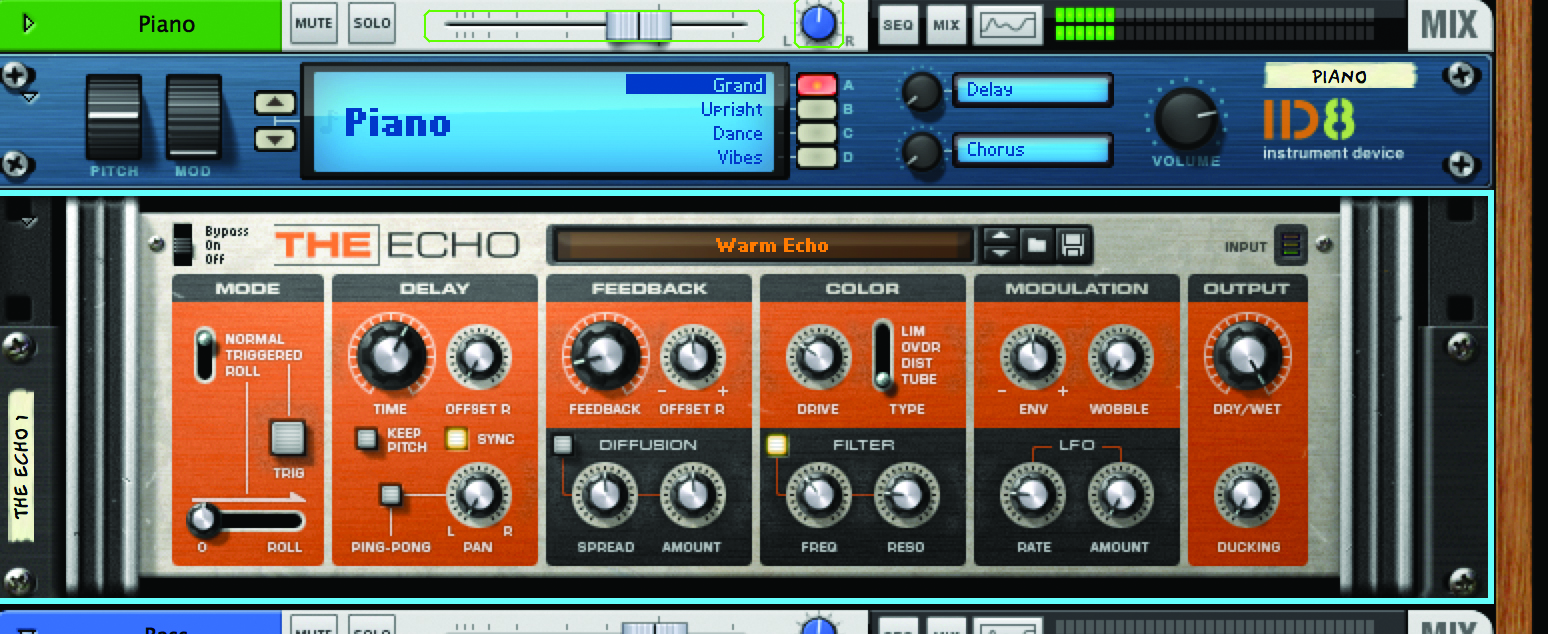
3: Next we’ll try applying the Echo module to something. This works best with anything even vaguely percussive and with a little space in it to allow the echoes to be heard. Here it has been applied to an acoustic piano track as we will be able to make it add depth and interest to an otherwise fairly basic sound.
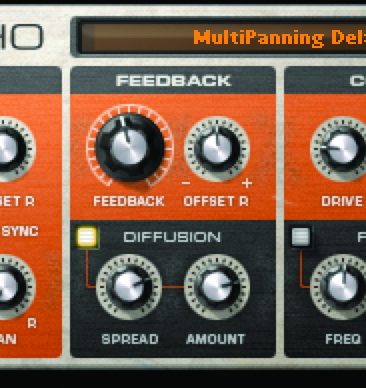
4: With a delay effect selected – we have chosen multi-panning delays – go to the Feedback section and locate the Diffusion controls. These allow you to add stereo spread to the delays and also introduce a little analogue-style wobble into the signal. It works particularly well on pianos, choppy electric guitars and horns.
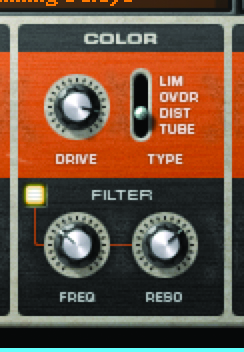
5: To really get an old-fashioned delay sound you can move on to the next section and add one of four kinds of variable drive to the signal via the Color section. Try sticking some distortion on and turning up the Drive knob. Then, from underneath, use the Filter Frequency and Resonance controls to shape the fatness of the sound.
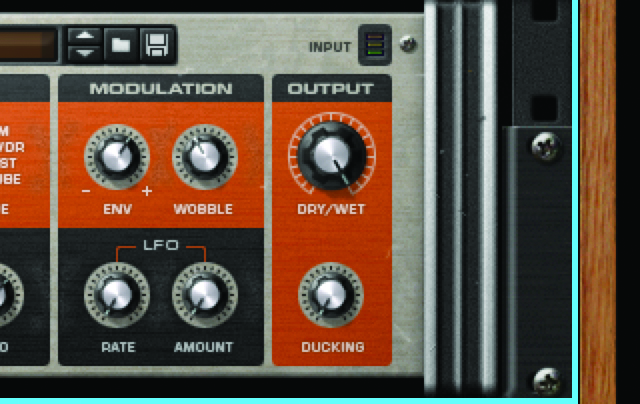
6: To the right is the Modulation section; here you can use a knob to add wobble to the sound. Add a little for analogue-style imperfection or try adding a lot for a really ‘seasick’ effect, if that’s what you are going for. As before, you can use the master dry/wet knob on the far right-hand side of the interface to balance the amount of delay being applied.
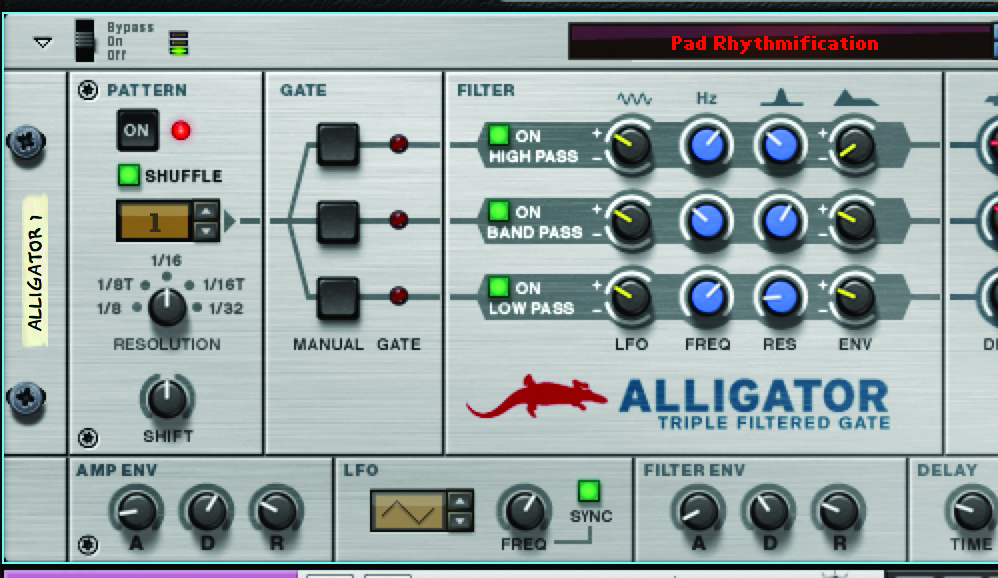
7: Now we’re going to liven up a fairly pedestrian guitar track by adding some gating using the Alligator Filter Gate module. Even just loading it up and using the default preset will often add a rhythmic quality to your part. Altering the Resolution control (on the left) will change the pace of the effect while keeping everything in time.
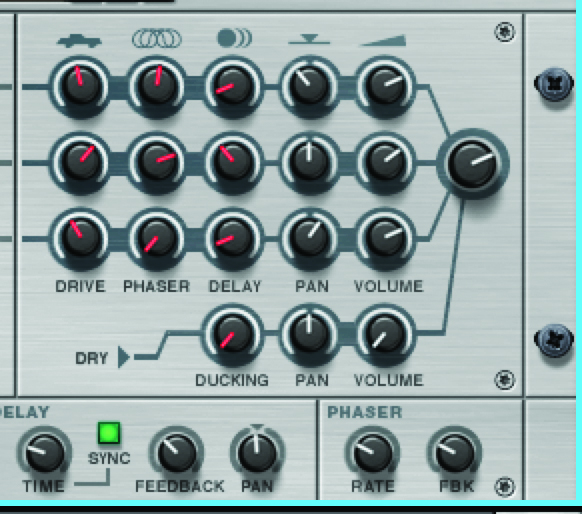
8: The three filters at work here all have tweakable controls – quite a few, in fact. In the centre you can edit the LFO, frequency, resonance end envelope for each. To the right, dial in drive, phasing, delay and pan, and you’ll find it’s easy to create dynamic and interesting tempo-based gate effects quickly.
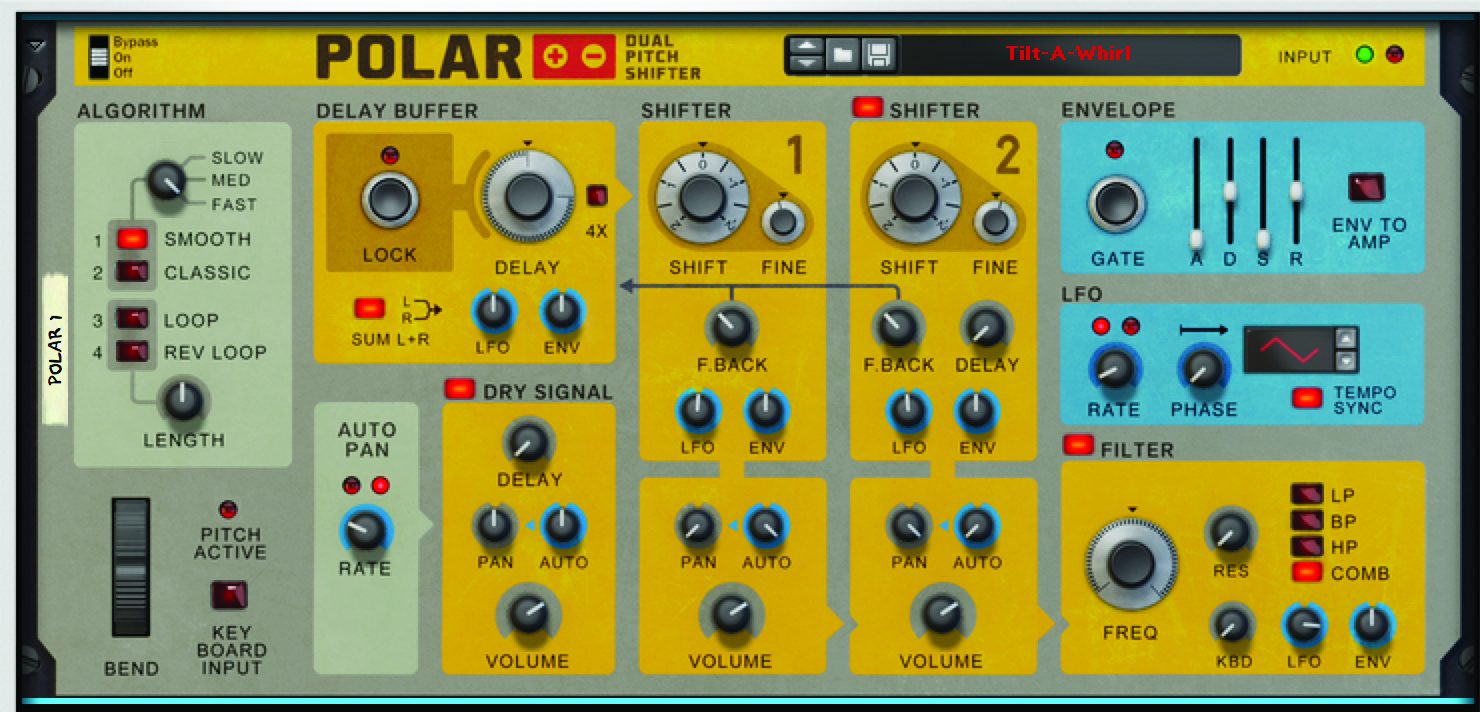
9: There are some cool free effects available from the Rack Extensions Store, as well as trial versions of every effect currently available. Go to the Store and download the Polar Dual Pitch Shifter by Propellerhead. Apply it to a vocal and load the Tilt-A-Whirl preset and you should find that it creates some pleasing phase, flange and doubling effects. Tweak the amount of shifting to affect the tuning.
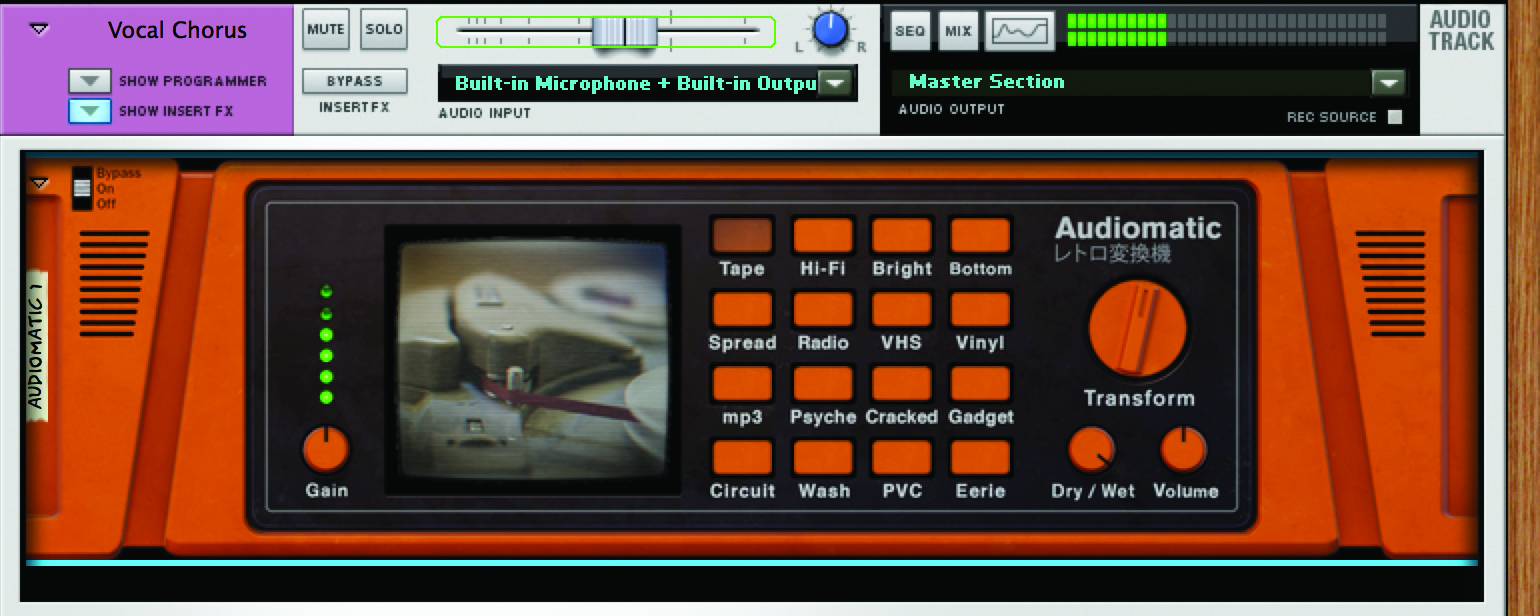
10: Special effects don’t always have to be extreme. Here, for example, we have isolated a lead vocal track and applied the Audiomatic Retro Transformer and switched on the Tape preset. This gives the vocal a slightly worn-down sound that can sound really good in any number of production scenarios.

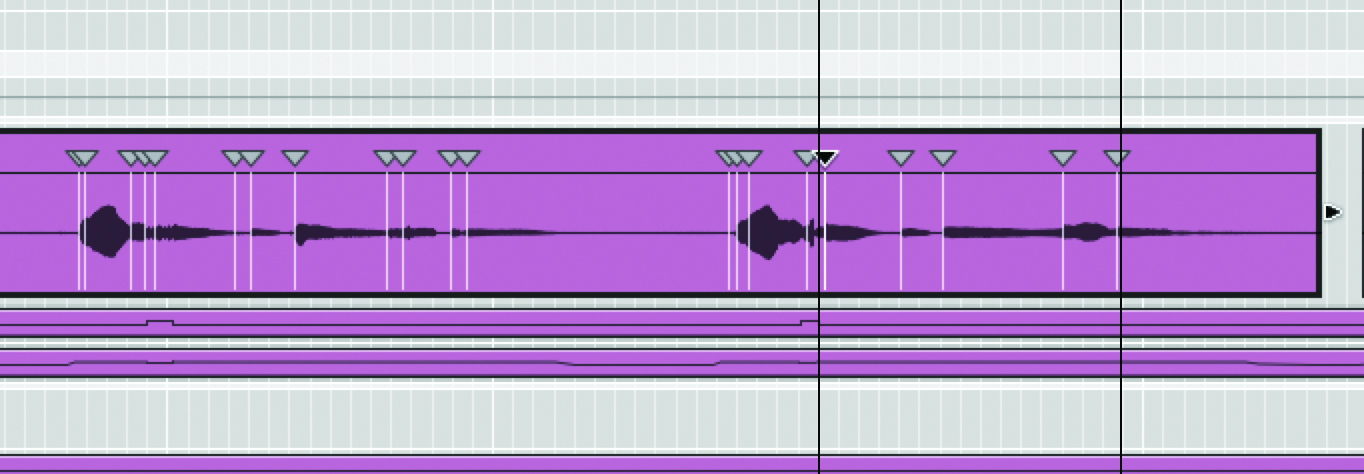
11: Glitching can be fun and there are a number of glitch-based effects available from the Rack Extensions Store. Every one can be tried in fully functional mode for 30 days. Here we have loaded up an instance of Glitch onto our REX-based drum track and enabled it. It works by live sampling sections of the audio, then playing them back in different ways.
12: To the right is the Modulation section; here you can use a knob to add wobble to the sound. Add a little for analogue-style imperfection or try adding a lot for a really ‘seasick’ effect, if that’s what you are going for. As before, you can use the master dry/wet knob on the far right-hand side of the interface to balance the amount of delay being applied.