Reason Tutorial: Working with REX Files – Step-by-Step
Hollin Jones continues his exploration of REX files with a step by step guide to their use… 1: To place an instance of a REX loop into the sequencer, select the slot on the module itself, and then from the Edit menu choose Copy Loop To Track. A copy of the loop will be placed […]
Hollin Jones continues his exploration of REX files with a step by step guide to their use…
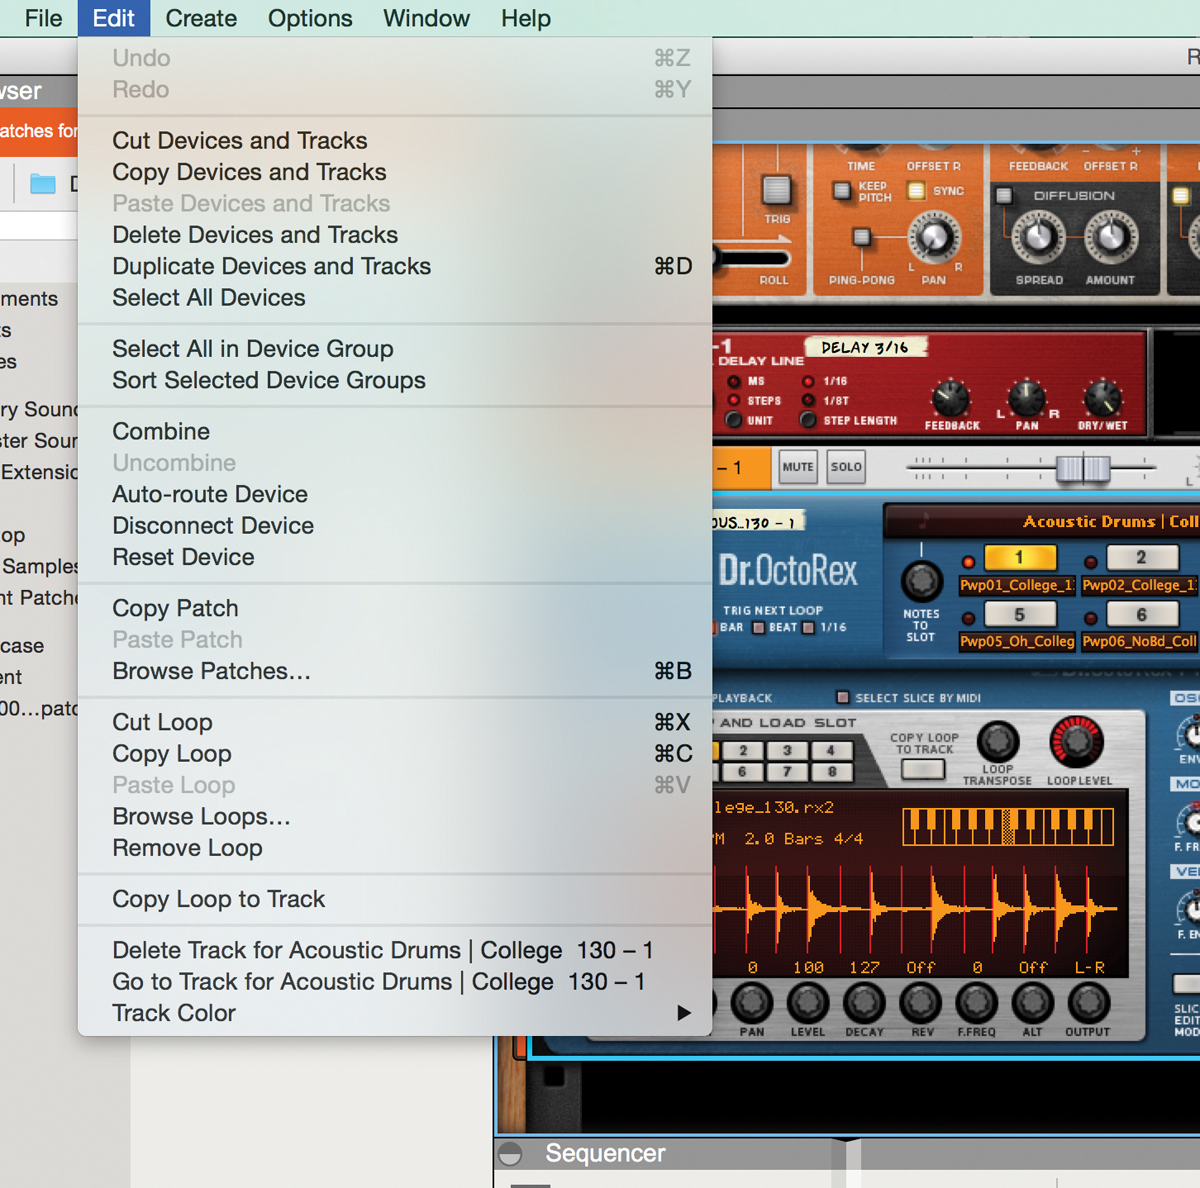
1: To place an instance of a REX loop into the sequencer, select the slot on the module itself, and then from the Edit menu choose Copy Loop To Track. A copy of the loop will be placed between the left and right locators.
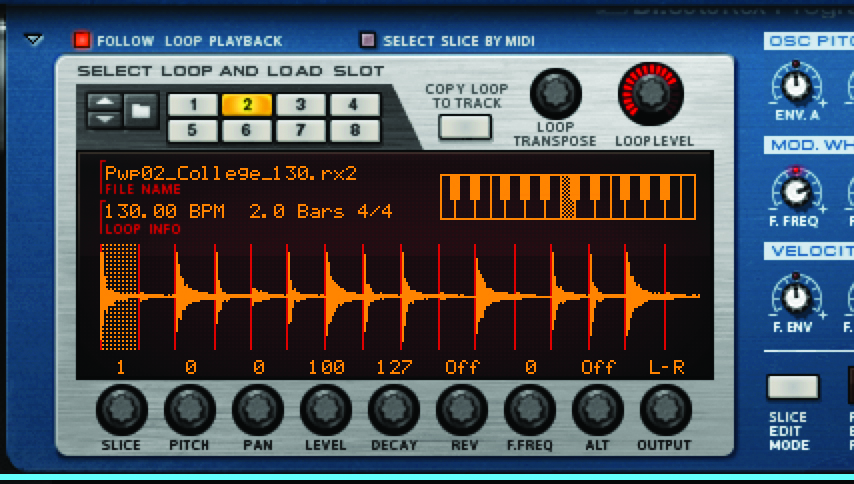
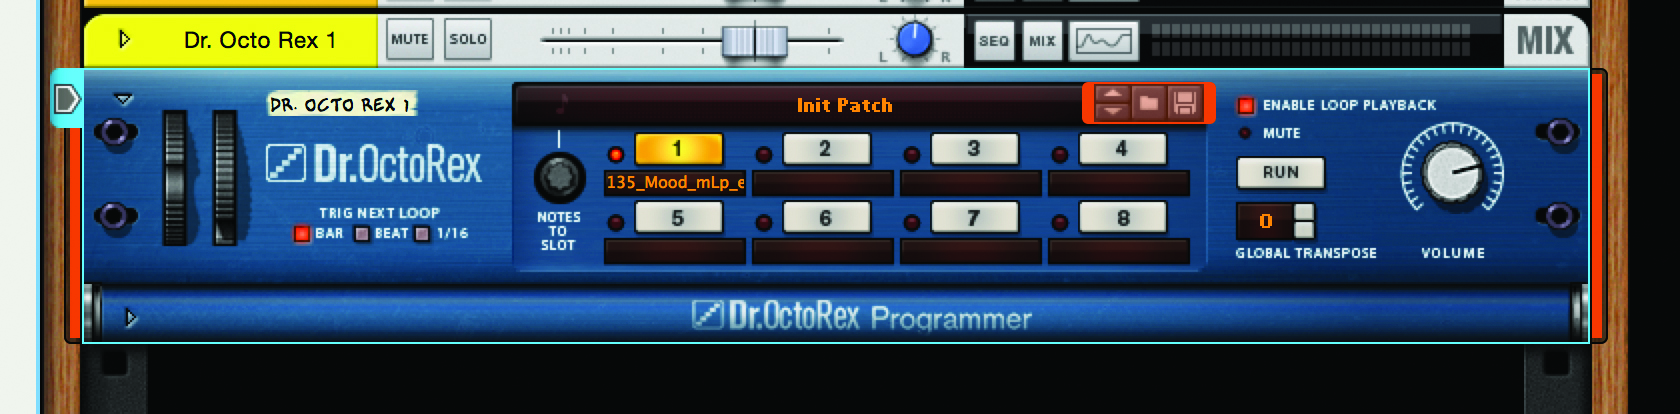
2: Expand the Programmer section and you will be able to view the waveform of any of the eight loops in the slots. You can set a master volume and transpose for each loop individually by using the knobs at the top-right corner of this section.
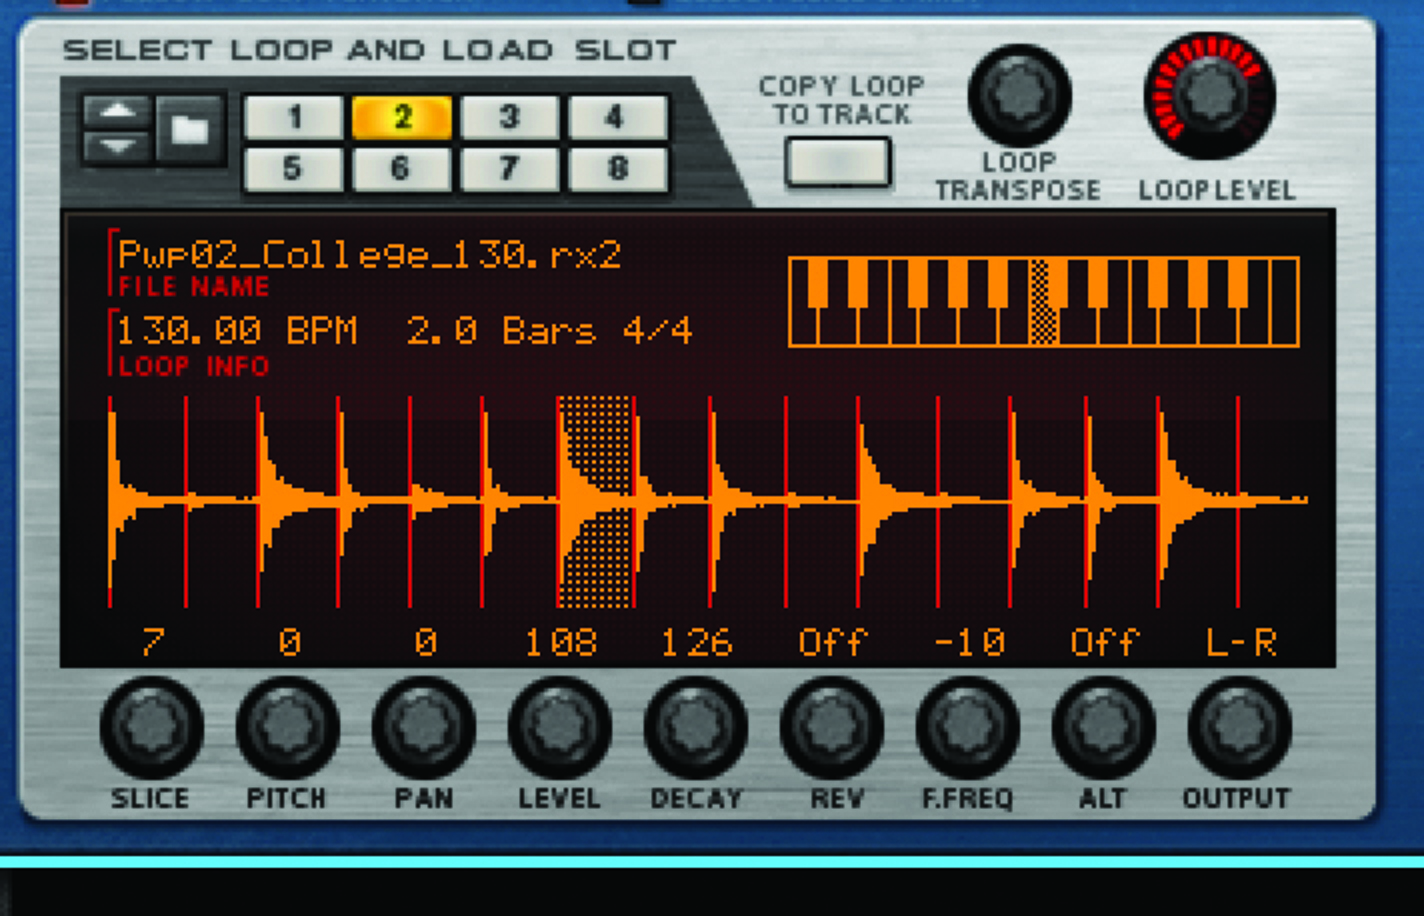
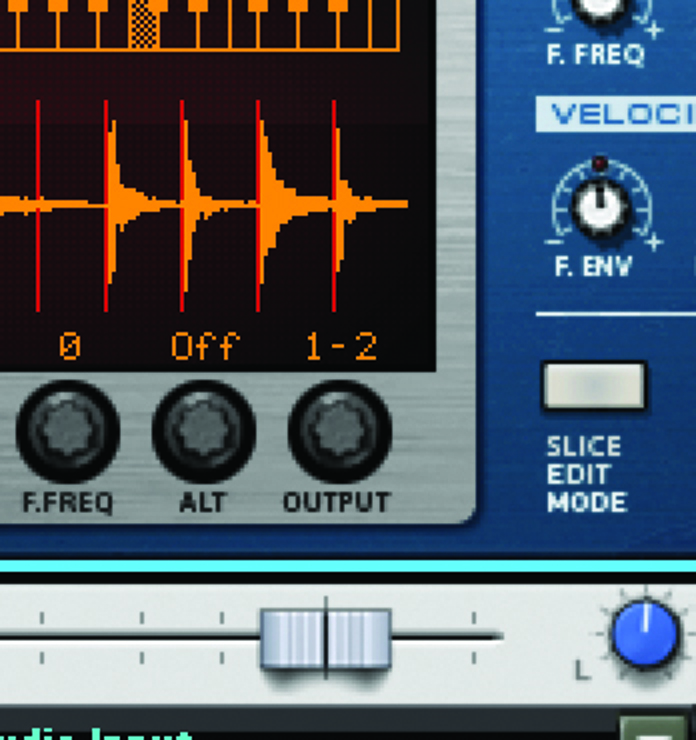
3: Select any of the slices inside the waveform display and the row of controls underneath can be used to tweak any slice individually. Use these to make loops sound much more interesting without doing much work.
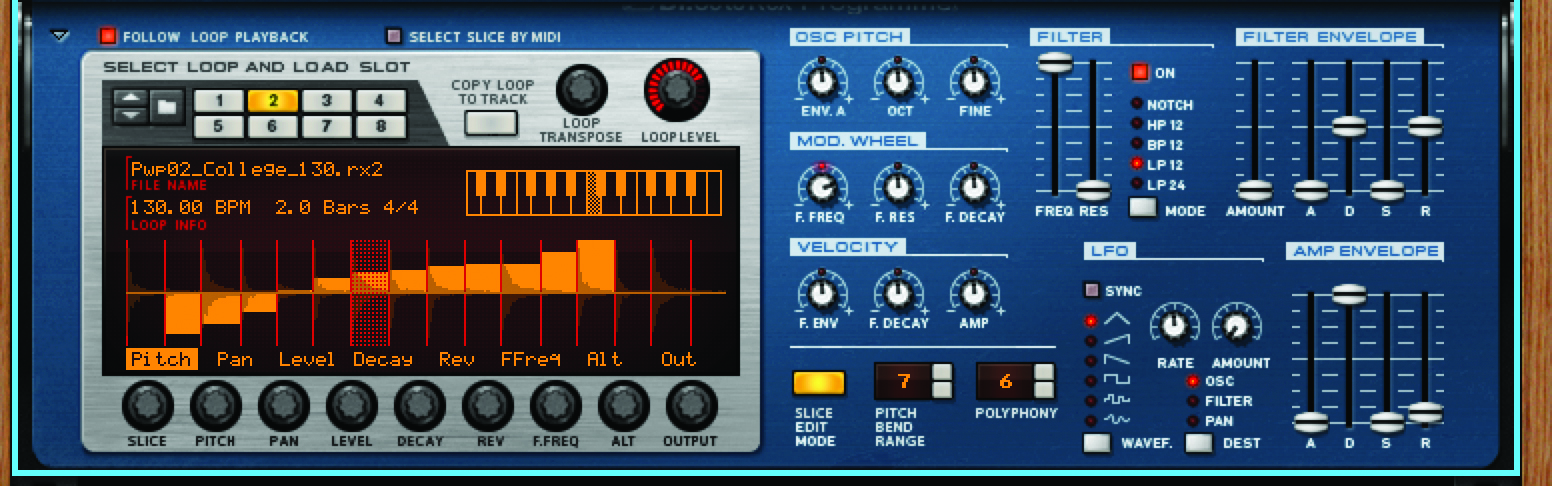
4: Press the Slice Edit Mode button and for the selected slice you get an envelope window for any of the available parameters. Use this to draw in time-based changes, such as filter sweeps or volume curves to any individual slice.
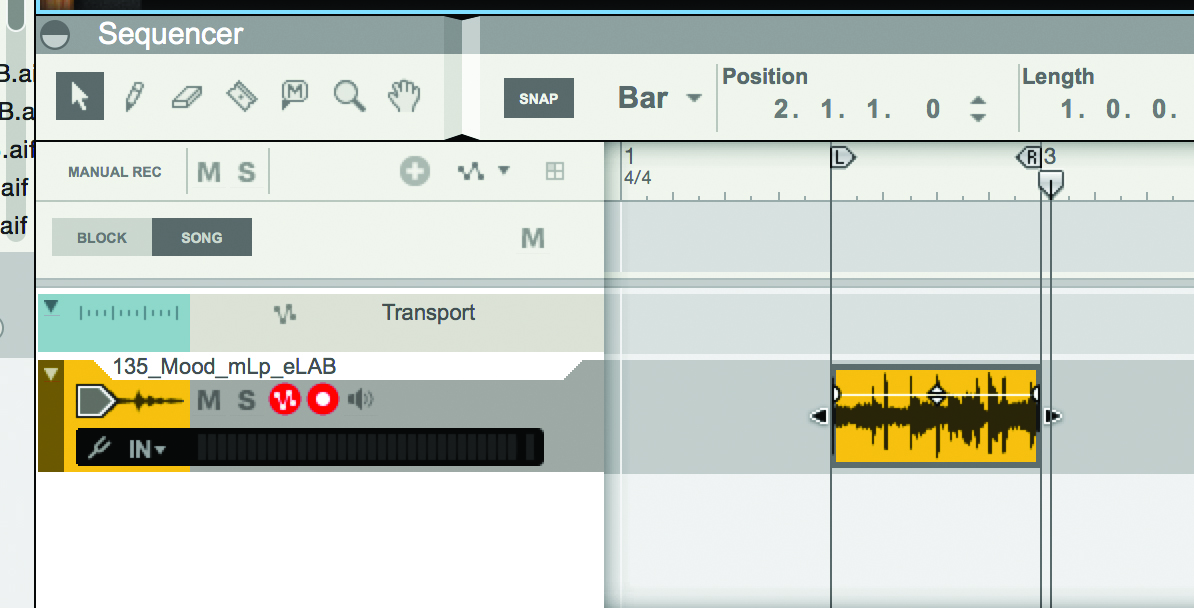
5: Here, we have an audio loop that has been dragged into a project, and we are going to turn it into a REX file with just a few clicks, and without having to export it from Reason first. Make sure it is time-stretched to fit the project before the next step.
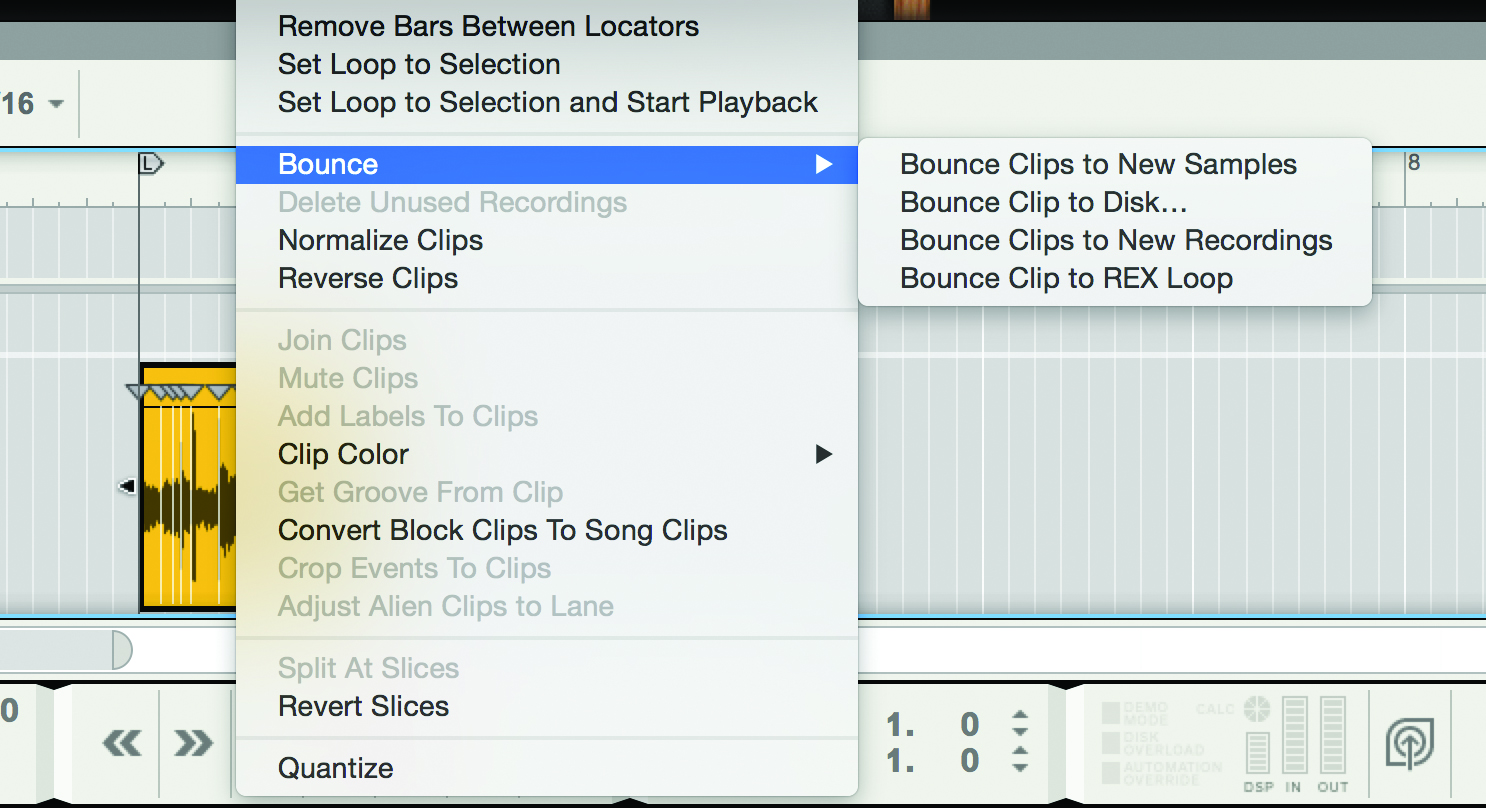
6: Double-click on the audio clip to open it in Edit mode, and you should see the audio slice markers that have been automatically created. Right-click on the clip, and from the contextual menu choose Bounce > Bounce Clip To REX Loop.
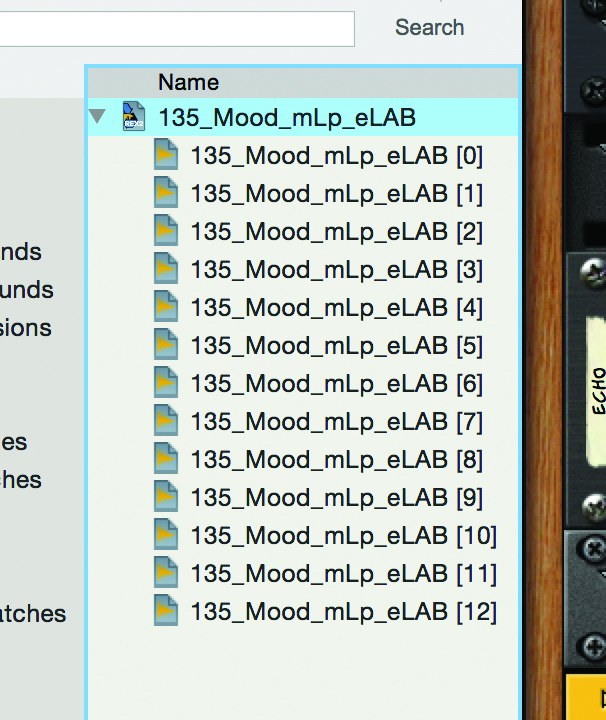
7: When you do this, Reason creates a new self-contained loop, and it appears in the browser at the top-left of the screen. If you expand the loop, you can see each of its slices and audition any of them by clicking on it in the browser.
8: Create a new Dr Octo REX and reset it if necessary. Go to the Song Samples tab of the browser and locate your REX loop. Drag it into the module in the rack and you will find your loop is a fully-fledged REX file, with all the flexibility that entails.
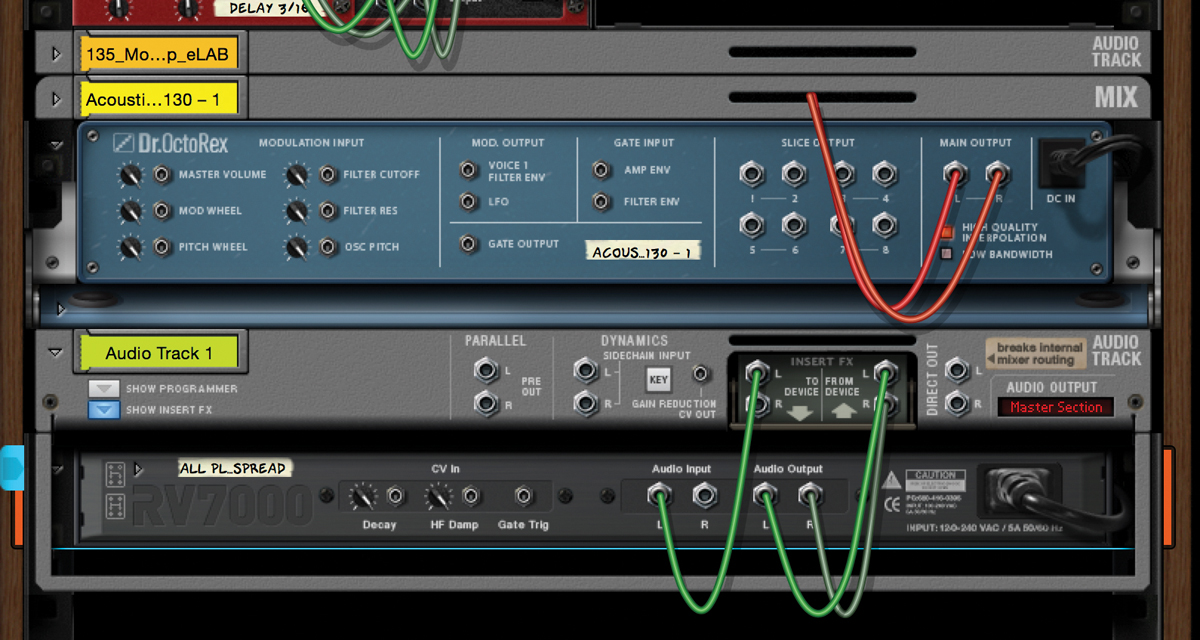
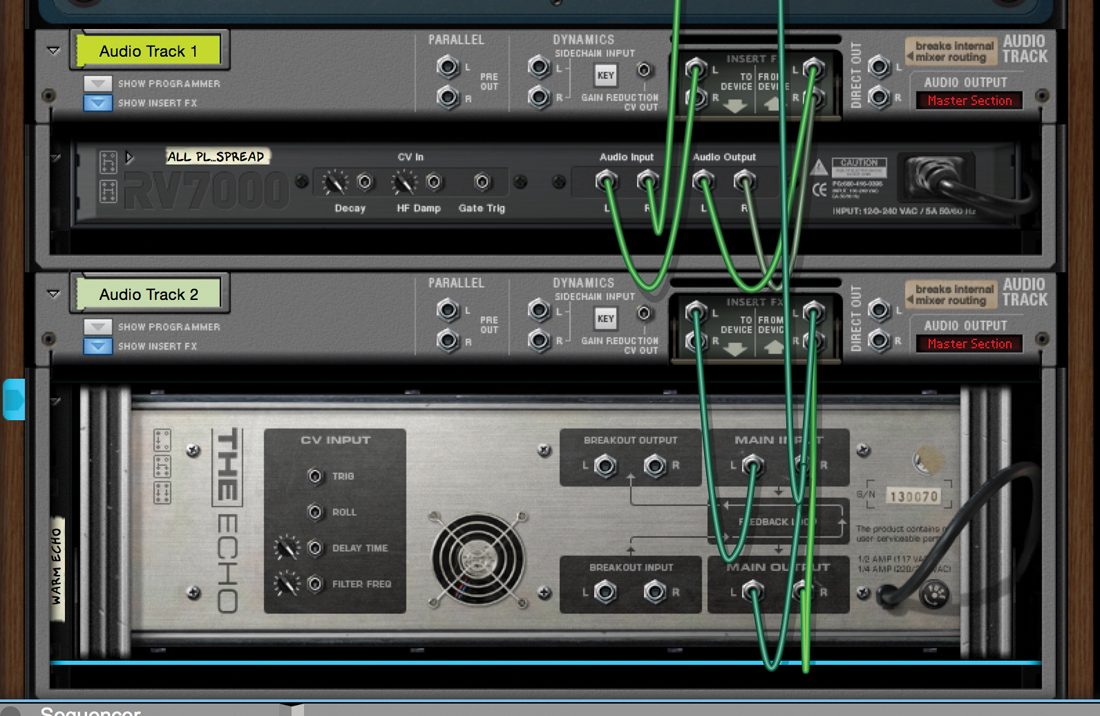
9: Here’s how to process slices of a REX loop separately. Call up a loop with a decent number of slices and then spin the rack around. Create a new effect module attached to an audio track.

10: Now connect slice output 1 to the audio input on the audio channel module, with the effect attached as an insert. The output routing
should be taken care of automatically. Then spin the rack around and go to the REX module.
11: Select the slice you want to route out and go to the slice edit window of the Programmer. Turn the dial to send it to outputs 1 and 2 and you should hear the slice now processed through the effect during playback.
12: You can keep going, adding more effects modules to new audio channels and sending slices to them. In this way, you can create a cool multi-effected drum kit while maintaining total flexibility to keep editing the MIDI part in the sequencer.
