Reason Tutorial: Bigger Beats Part 2
Hollin Jones continues the latest Reason Tutorial – building Bigger Beats King Kong The Kong Drum Designer is really quite different, being more of a sound-design tool and less of an old-fashioned beatbox. A quick tour of the front panel will reveal that each of the 16 pads has a Level control and a number of others like pan, sends and […]
Hollin Jones continues the latest Reason Tutorial – building Bigger Beats
King Kong
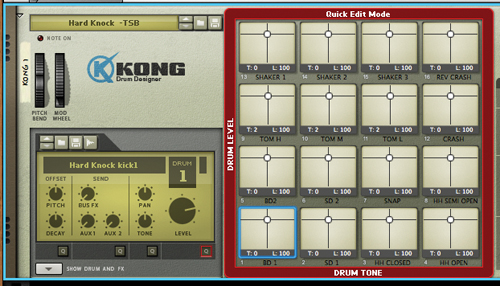
The Kong Drum Designer is really quite different, being more of a sound-design tool and less of an old-fashioned beatbox. A quick tour of the front panel will reveal that each of the 16 pads has a Level control and a number of others like pan, sends and decay accessible from the main screen. Tap the one of the ‘q’ buttons and you enter Quick Edit mode for whatever parameter you have selected. For example, if you press the one under the Level control, the pad grid turns into an X/Y grid of level and tone controls. Quickly edit the sound of any pad by dragging its control, and repeat for any other parameters including pad settings, grouping and hit types. These make it fairly simple to customise kits once you know your way around them.
It’s when you dive into the Programmer section by pressing the Show Drum and FX button that Kong really comes to life. You will see that by hitting a pad you reveal the way in which the sound is being generated. Each slot can generate sound using a number of methods: a mini sampler or loop player or a selection of physical or simulated drum models. You can switch any one by selecting a new model.
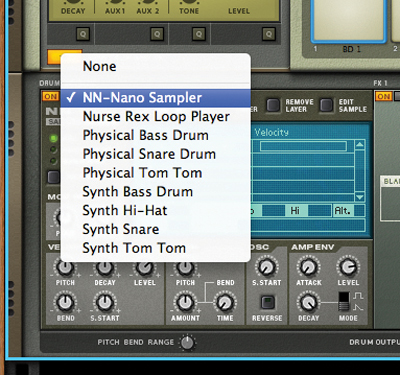
Of course, if you load or record your own sample, you will need to use a sample-based module. But if you go for a synth you can make more interesting sounds, and you can mix any modules you like within a Kong.
Try mixing and matching different sound modules in Kong to get some really interesting and unique results. Create a synthesised kit but with a real snare, for example, or a more acoustic-sounding kit with electronic kick drums. The synth modules are particularly cool and easy to tweak, and you will find that by adding effects to any of the 16 drum slots you can shape the sounds, beef them up and make the kit as whole sound cooler.
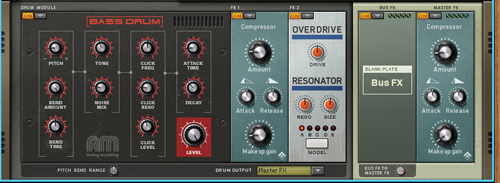
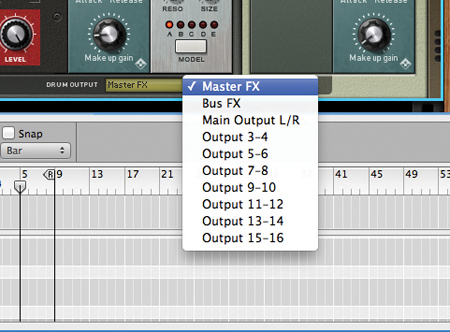
There are also master effects that can be used to process the whole sound plus the same separate output routing that you get in ReDrum. There’s also the ability to assign multiple drums to specific outputs, which is even more flexible for sub mixing and processing.
Kong is excellent for modern, electronic beats like grime and dubstep as well as techno, house and even ambient styles. Program it using your MIDI pad or keyboard for input, or even drag MIDI parts from other tracks to trigger it. Consider locking a dedicated pad device to Kong for more intuitive, hands-on control.
Loop it up
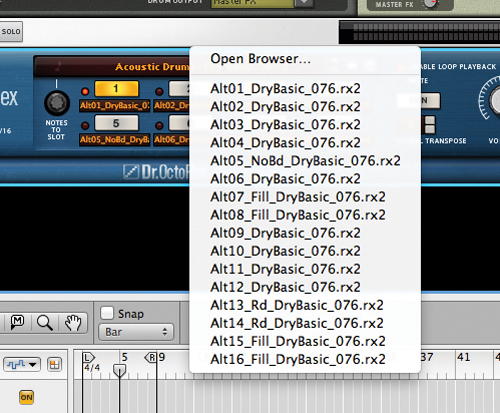
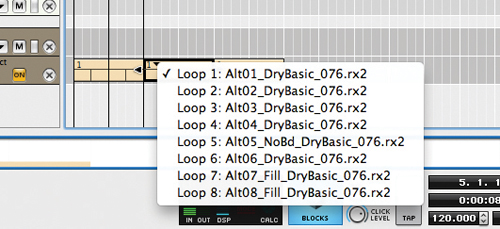
Last but not least is Dr. Octo Rex, a beefed-up version of the reliable old Dr.Rex loop player. This is great for a couple of things: quickly building music beds and backing parts that sync and time-stretch effortlessly, and creating more cut-up effects and instant variations for inspiration. Load an instance and you will find in the libraryanumberofready-made‘sets’of beats that are designed to be used in the same project and are pre-loaded into the eight slots. Select any one to replace it with a new loop.
Many sample collections come in REX format and the ready-sliced approach to using beats and other loops means it’s simple to layer up beats into intros, verses, choruses and so on. In the case of ready-made loops these are often collected together into sets.
You can program drum parts by simply automating the Pattern Select section in the main sequencer, just like you can with the ReDrum. Create blocks of data and then assign them to play different loops at specific times. Alternatively, copy pattern data to MIDI data in the sequencer using the Edit>Copy Loop to Track command and then work with it like regular REX data.
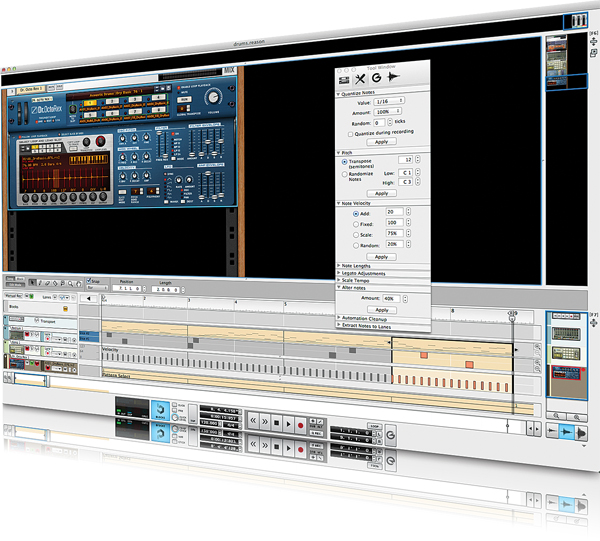
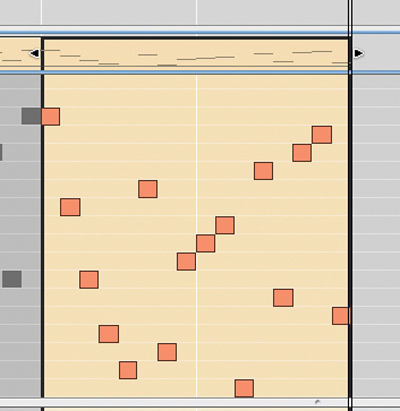
Open the REX edit lane and you will find the slices of a loop laid-out in a linear fashion with equal velocities. Along the left, a piano roll-style grid lets you manually play each slice. If you pick up the slices and rearrange them you can easily make whole new beats out of existing ones. You might want to play with velocities, too, to create more variation. Open the Tool window and go to the Sequencer Tools section, then find the Alter Notes tab.

Select some notes and choose an Alter amount, then press Apply. Reason will create a new beat for you that sounds different but remains in time.
Repeat to keep on creating new beats. Explore Reason’s beat-making tools and you’ll find a world of rhythm just waiting to be discovered.