Reason Tutorial: Modulation – Step-by-Step
Hollin Jones begins his step by step guide for adding modulation… 1: Load up an instance of Thor, and either reset it or load a simple patch. Here we’ve chosen one called Eight Pole Lead which is static and will suit our purposes. Press the Show Programmer button to expand Thor’s sound designer sections. 2: […]
Hollin Jones begins his step by step guide for adding modulation…

1: Load up an instance of Thor, and either reset it or load a simple patch. Here we’ve chosen one called Eight Pole Lead which is static and will suit our purposes. Press the Show Programmer button to expand Thor’s sound designer sections.

2: At the base is the modulation matrix, and you can start by introducing some movement into the sound. Go to the LFO 1 row and turn off the Mod Wheel option, which removes the parameter from control by the mod wheel.

3: Now change the Amount slider in this row to 100 to have the LFO applied fully to the filter 1 frequency. There are Amount controls for both the source and destination so you can precisely control how much is applied.

4: Since you have assigned LFO1 to control the filter frequency, altering LFO1 will change the modulation. Go to the LFO1 section in the synth and turn on tempo sync, then try changing the LFO rate to alter the speed of the modulation.

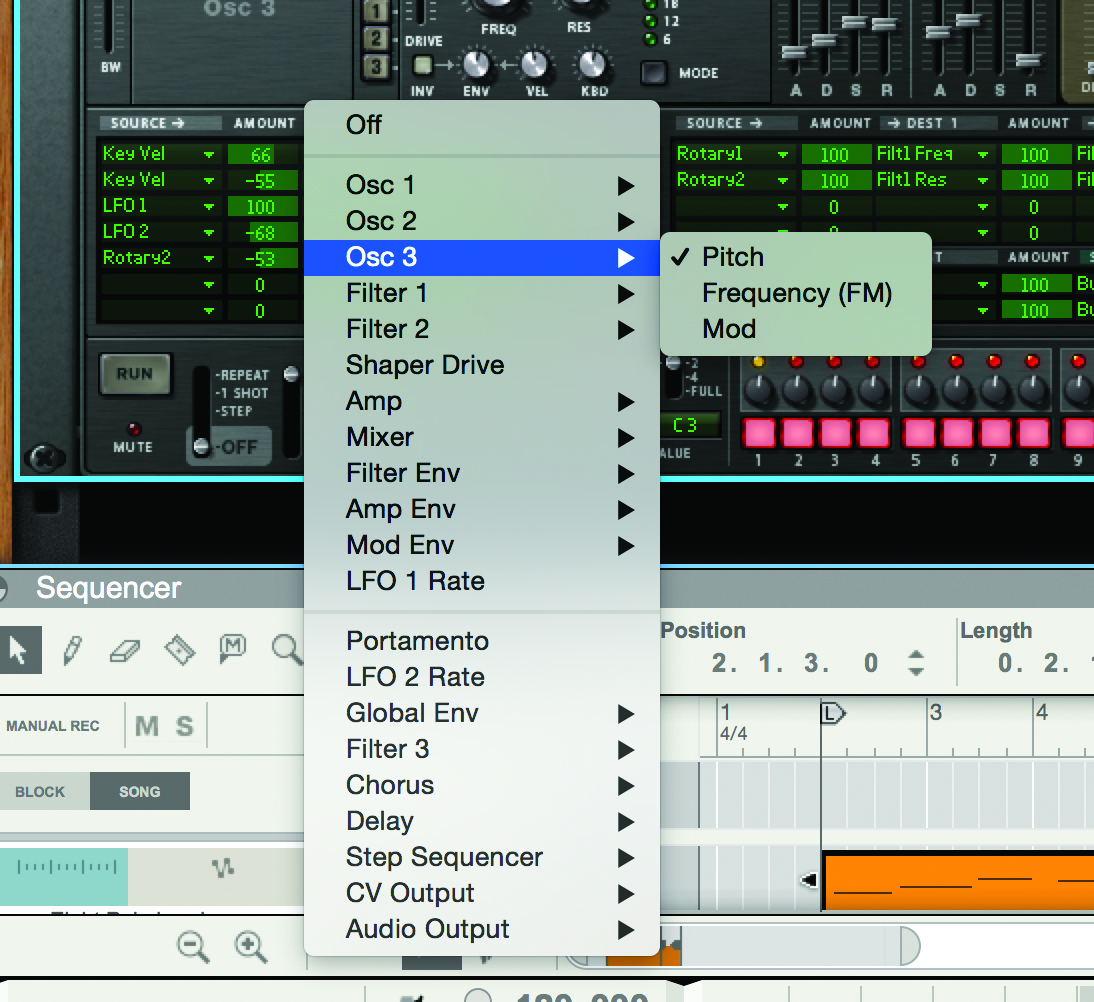
5: In another example, try assigning LFO2 to the delay dry/wet control. Click on the source column in any slot to choose LFO2, then in the destination column, select Delay > Dry/Wet and then make the relevant settings on the two synth sections.
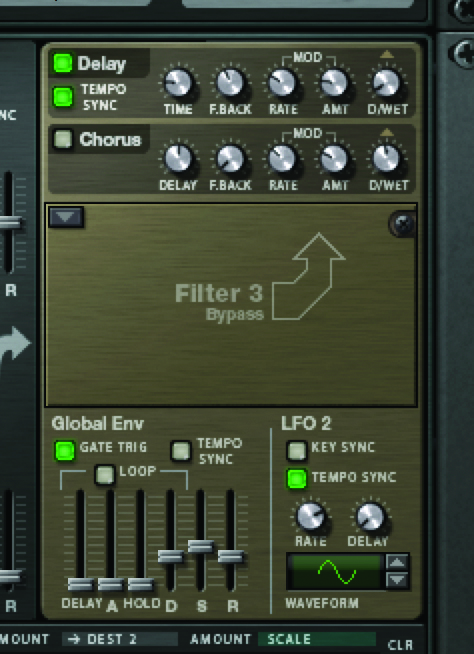
6: What you’ve done is kind of automated the delay amount on and off in a regular pattern based on the LFO2 settings, but without having to perform any actual automation. Try it with any internal effect parameter.
7: There’s much more to modulation assignment than just LFOs. Try assigning one of the rotary controls to an oscillator’s pitch. Now when you move that control you can change the pitch of one of the components of your sound in realtime.

8: To restrict the amount of change it’s possible to make, use the Amount sliders in any particular row. So you might set the maximum amount to 30 for example, to ensure that only moderate modulation is ever possible for that control.
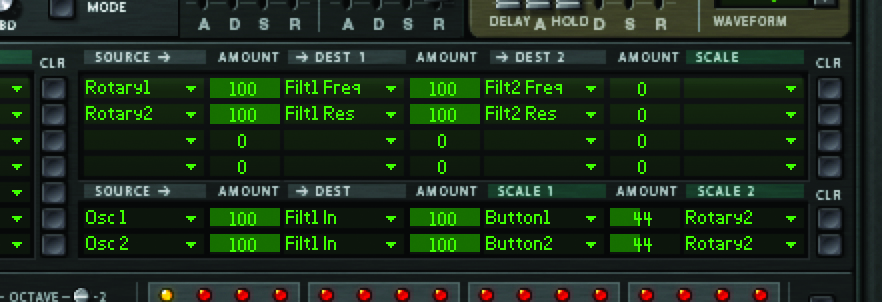
9: The area to the right on the mod matrix has more columns and this is because it adds a second destination column. So you can take any source just like you’ve already tried but this time assign it to two things at once, with variable amounts.

10: Assigning buttons as mod sources can be useful for making quick changes. Here for example, a button has been assigned to toggle between two filter frequency states. Pressing the button zaps between two completely different sounds.

11: All these modulation options have a Scale column and this can be used to assign the Amount parameters to another control such as the mod wheel, a performance input such as aftertouch or breath, or an envelope or CV input. This opens up even more possibilities.

12: For really interesting results you can choose Thor’s step sequencer as a modulation source, choosing from several of its parameters and assigning these to destinations. So you can effectively design your own step-by-step modulation.
