Reason Tutorial: Programming Electronic Beats
Software is the perfect way to build beats for electronic music. Hollin Jones shows you the fundamentals… The growing popularity and affordability of drum machines from early in the 1980s gave rise to a whole new form of music that was based around the metronomic sound and unwavering rhythm of electronic beats. Of course some […]

Software is the perfect way to build beats for electronic music. Hollin Jones shows you the fundamentals…
The growing popularity and affordability of drum machines from early in the 1980s gave rise to a whole new form of music that was based around the metronomic sound and unwavering rhythm of electronic beats. Of course some real drummers could have played those patterns (Krautrock, anyone?) but not using those kinds of sounds – ways of hooking MIDI drum kits up to sound modules would not be invented until many years later.
With the emergence of rave, acid house and the many kinds of electronic music that would follow them from the late 1980s onwards, producers started to create beats that real drummers couldn’t play. There were too many layers, they were too fast and the sounds too complex.
Although the term ‘electronic beats’ can encompass a vast range of different sub-genres of electronic music, from minimal techno through to epic club floor fillers, these kinds of rhythms are now almost exclusively software-driven.
Even though you might be using an emulation of a classic beatbox, it will probably be in software rather than hardware form. There’s a good reason for this, and it’s that software makes creating electronic drum patterns really accessible. Creating variations and layering up and arranging different parts while keeping everything perfectly locked in sync is what DAWs were born to do.
Back to Basics
Probably the simplest form of electronic drum pattern, and still as widely used as the day it was thought up, is the four-to-the-floor kick drum: think New Order’s Blue Monday, but without the stuttering repeats. Dance drums are almost always in 4/4 time, except perhaps for the more experimental and ambient stuff, and they are generally uptempo somewhere north of 100bpm. The standard tempo of a blank DAW project has often historically been set at 120bpm, which is a pretty common dance speed.
Some virtual drum modules such as Logic’s Ultrabeat or Reason’s ReDrum have built-in step sequencers, and we looked in a previous workshop at how you can use these to create patterns. Just as powerful is the more generic method of building drum parts up using the Piano Roll editor.
Individual drum hits tend to be mapped to separate piano keys and these are all arranged next to each other when you select a patch. Recording in a loop lets you build up your pattern over time and you can quantize either the whole part or individual notes or sets of notes by going into MIDI edit mode.
In some DAWs you also have the option to use sequencer note lanes. These are particularly handy because they let you record separate drum sounds in different note clips while keeping them all associated with the same instrument. The benefit of this approach is that it lets you edit and quantize different drums – kicks, snares, hi-hats – in different ways; or mute, copy or move them individually to experiment with different beats.
Sounding Off
Dance beats are also much more flexible than other kinds of drums in terms of how you put your kits together. Where an acoustic or rock kit pretty much has to sound broadly like you’d expect, electronic drums can encompass literally any combination of thuds, cracks, bleeps and squeaks as long as they follow the basic convention that you probably need something thumping away at the bass end, something to hit the offbeat (typically a snare) and maybe a cymbal or shaker to punctuate the alternating 1-2 of the kick and snare with sixteenth hits.
That’s a basic, classic dance pattern, and what you add to make it your own is entirely up to you. Since dance kits aren’t limited by the same restrictions as conventional drums, there’s no real restriction on the number of different sounds you can assign to pads. Want to throw some distorted sine waves into a pattern? Go ahead!
When it comes to creating variations you can do this by hand or use built-in randomizers and other similar tools. If your beats are being generated by some kind of MIDI plug-in this is even easier. Sometimes electronic drums need to be absolutely rigid in their timing and feel, and other times you might want to add just the slightest human element or a touch of swing to them to alter the feel of the music. Beats that are quantized to 100% sound very mechanical, and a lot of producers will use just a dusting of swing, or quantize to 90% instead, to help the overall vibe of a track.
One of the secrets of electronic production is that you can often get away with just trying stuff and seeing how it works out. If you kind of randomly enter note values for a rock kit it’s going to sound fairly awful, but the nature of a lot of electronic music is such that the weird and wonderful can work really well.
That’s not to denigrate it – indeed a lot of great programmers spend a huge amount of time making beats, sometimes with the aim of making it seem thrown together even when it is quite the opposite. However you go about it, making electronic beats is fun and easier than you might think.
Focus On – Rise Of The Machines
Sometimes, simply quantizing a MIDI beat to 100%, 1/16 resolution is too mechanical, even for electronic music. In this situation you have the option of quantizing it to a value of less than 100% and also of using a triplet or shuffle value to snap it to time while holding on to a little of the human element.
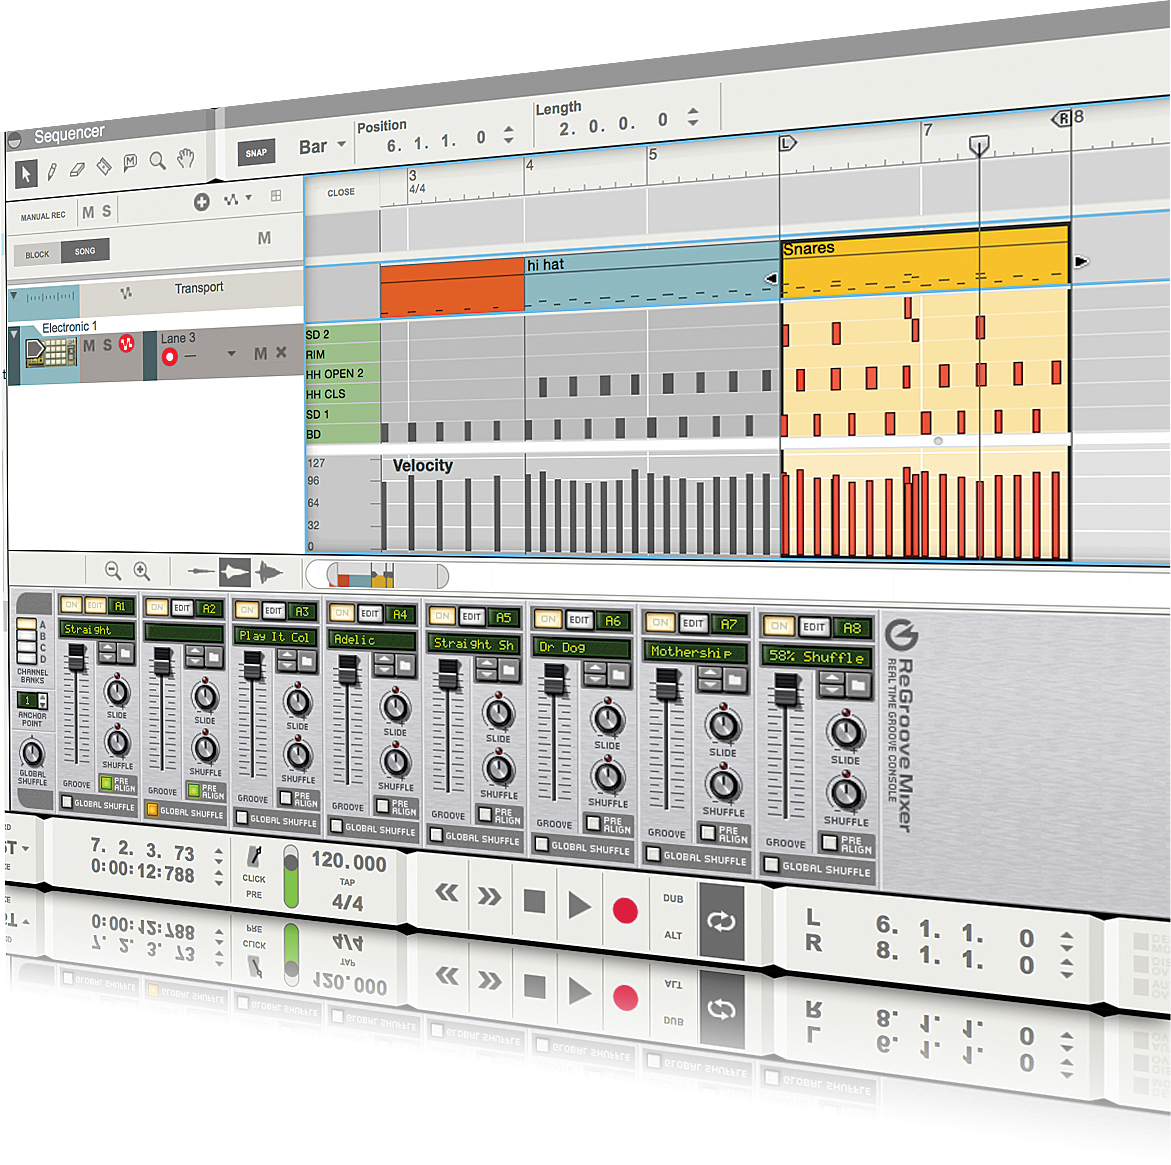
One of Reason’s great tools is the ReGroove mixer, which is a sort of real-time, on-the-fly MIDI quantizer that lets you dial in all kinds of timing changes until you hit something you like. Just route a beat through it and play around until you find a feel that works, then if you like you can render the timing changes down into the MIDI clip to make them permanent.
Constructing a Loop
1: Start with a module that suits the kind of music you’re working with. We’ve loaded an instance of Kong to program with the piano roll editor and a MIDI keyboard. You can use a MIDI pad too.
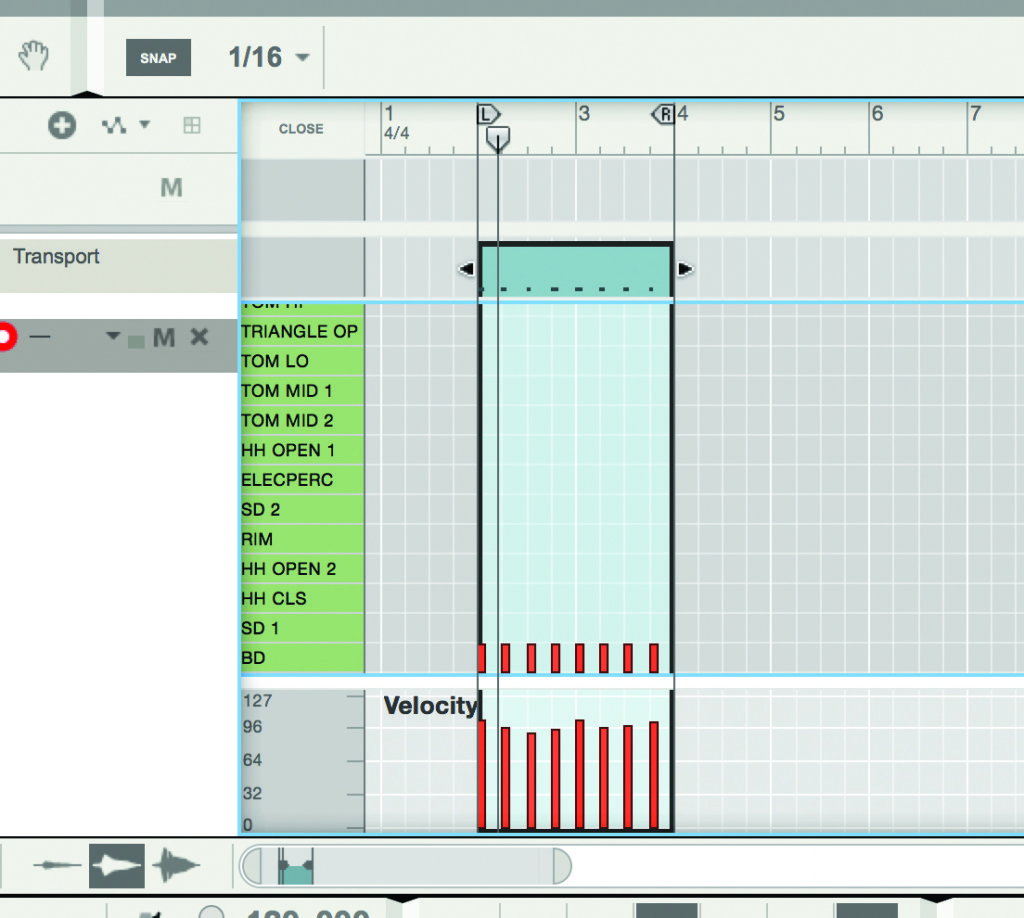
2: Set the tempo and create a loop using the left and right markers. A conventional dance beat might have a 4/4 kick drum as its bedrock, so begin by recording one.
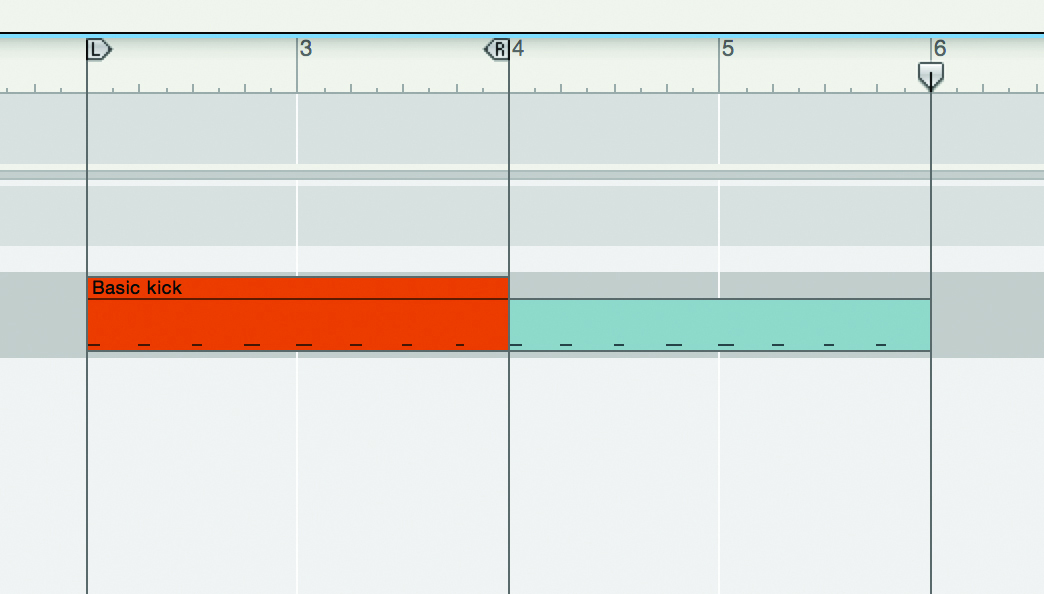
3: Since so much dance music involves building beats up and down, it makes sense to keep this loop as the core of your beat and then modify copies of it so you have options as you build the track. Copy and paste an instance, and then label them.
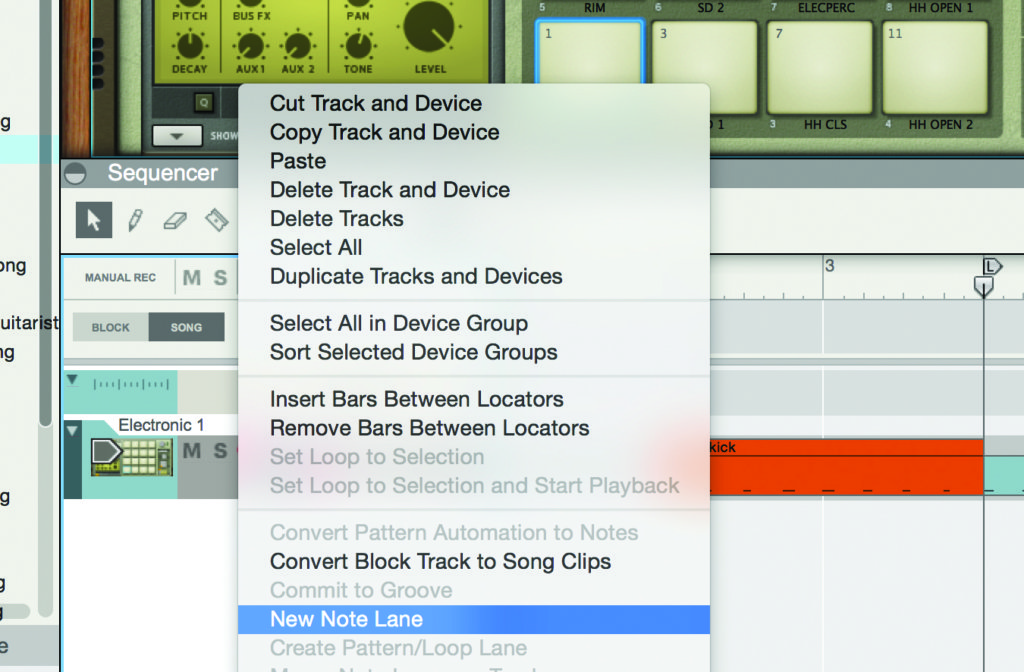
4: Now add a new note lane by right-clicking on Kong’s sequencer track to find this command. You could record into the same note clip you just copied, but this technique lets you edit notes more easily – you can merge them all later.
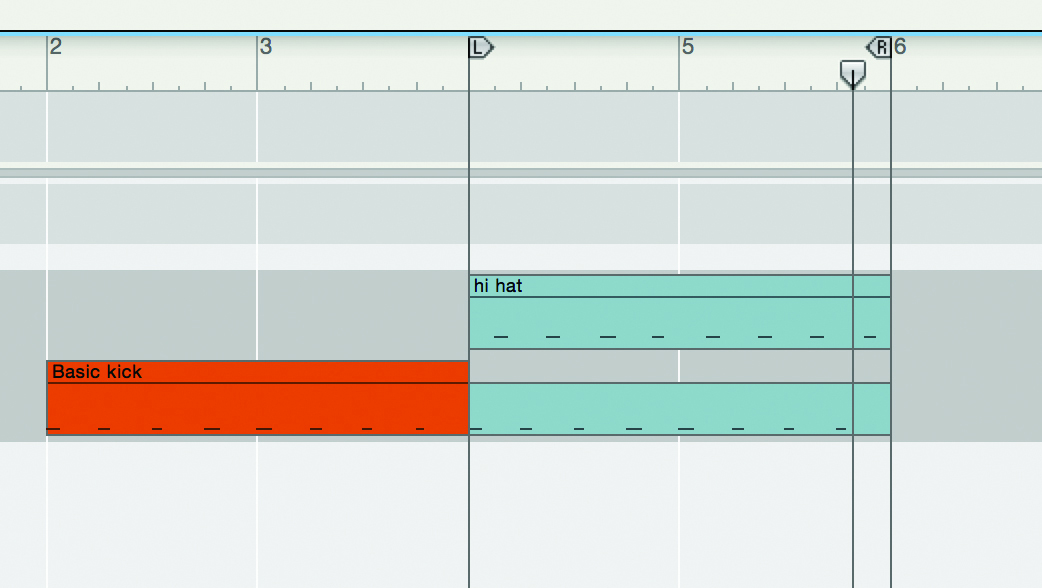
5: Now over the second instance of the kick, add a hi-hat part on the offbeat. You can also colour and/or label this new clip. This isn’t essential but it can help you keep track of what sounds are associated with which clips.
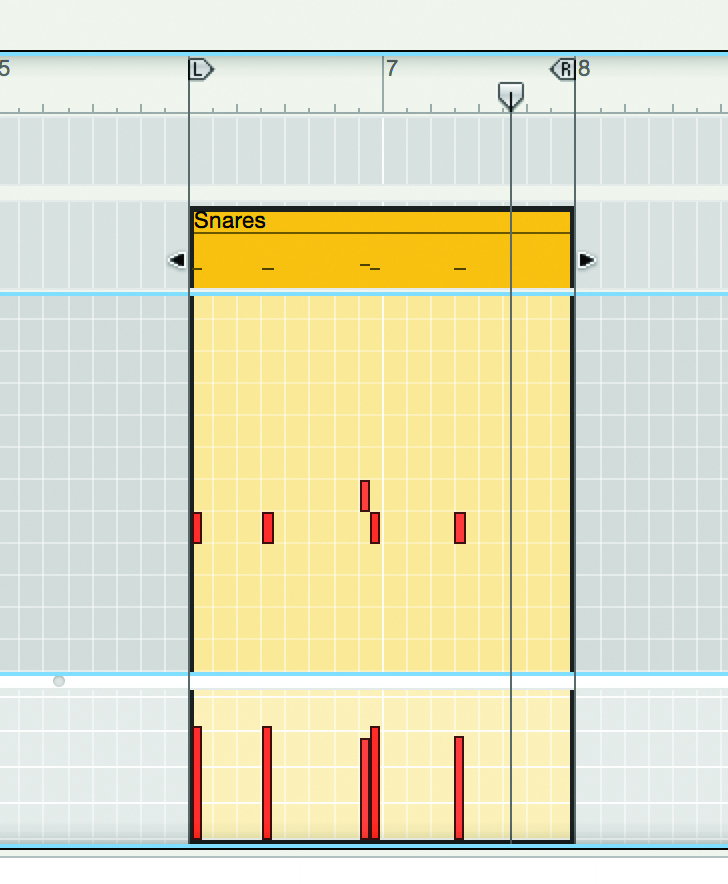
6: Now add another lane and this time add a snare to the beat. You can add any number of different sounds to any clip, so here we’ve added two differently pitched snare sounds and then quantized them.
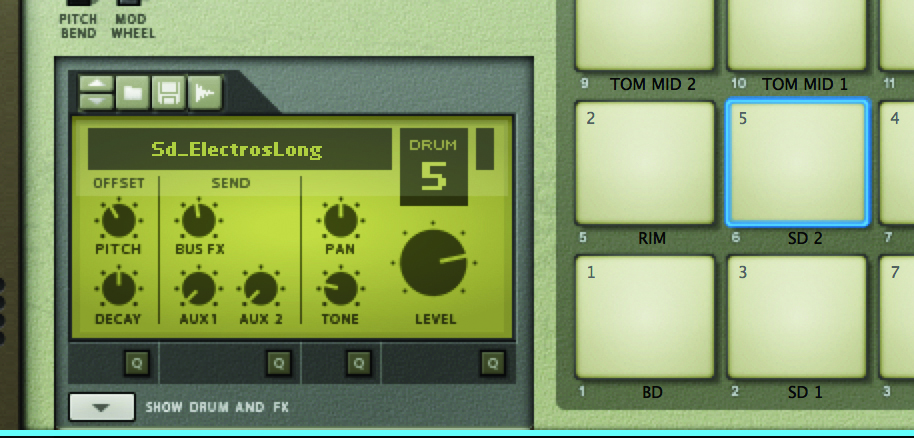
7: One of four snares sounds a bit odd, so we need to go into Kong to edit it. Locate the pad with the sound associated with it and use the quick controls panel on the left to tweak its tone, pitch and volume to make it sit better with the other hits in the beat.
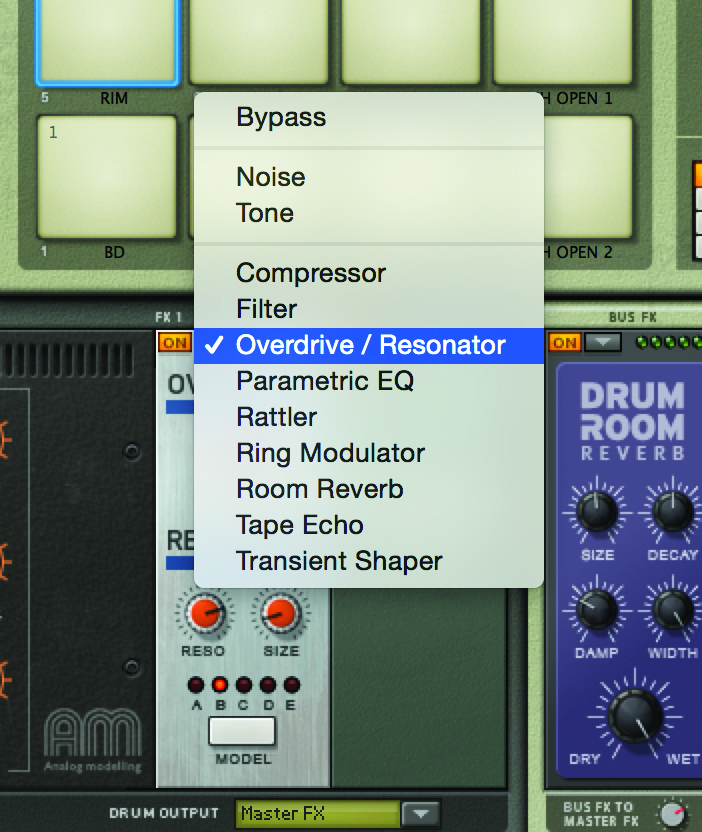
8: To go even further, open the programmer section and add or tweak effects for the snare sound. You can repeat this for any of the drum sounds by selecting its pad, and there are master effects too so you can really tailor your drum sound.
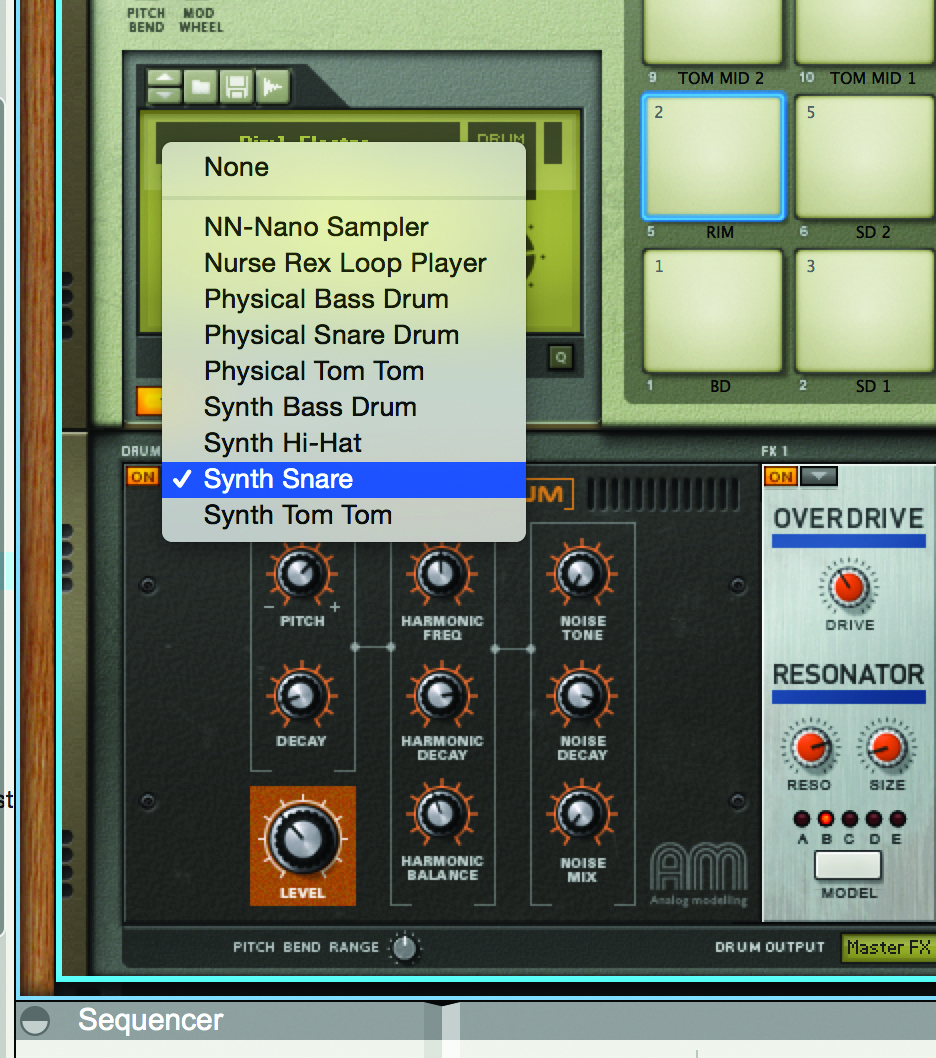
9: Where a drum sound is being generated by a synth module you can really play with it to make it sound exactly how you want. Alternatively, swap out the module to create a whole new kind of synth drum, or use a sample-based module in the kit.
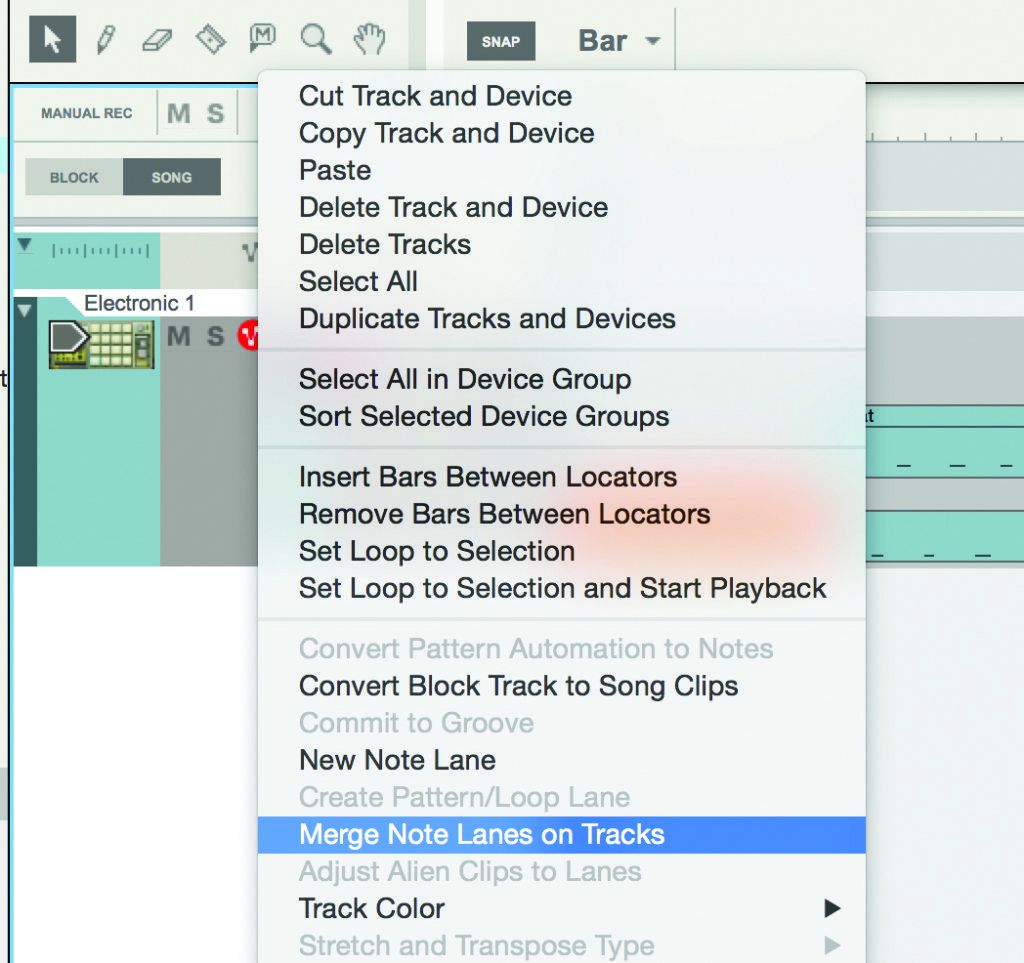
10: Although composing in lanes is useful there may come a point at which you want to deal with a whole drum part as a single clip. To do this you can usually merge the lanes together. Here in Reason it’s accessed by right-clicking on the sequencer track.
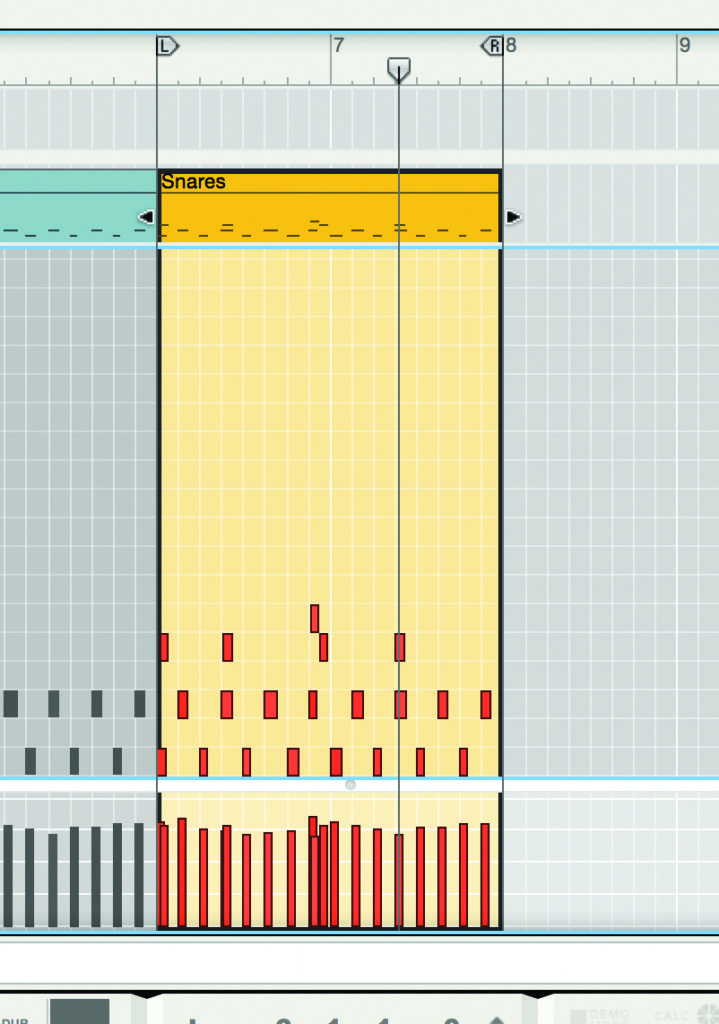
11: Once a MIDI part has been merged down you will see all the notes clustered together into a single clip. This makes it easier to quantize a whole part, render it out as audio or export it as a separate MIDI file.
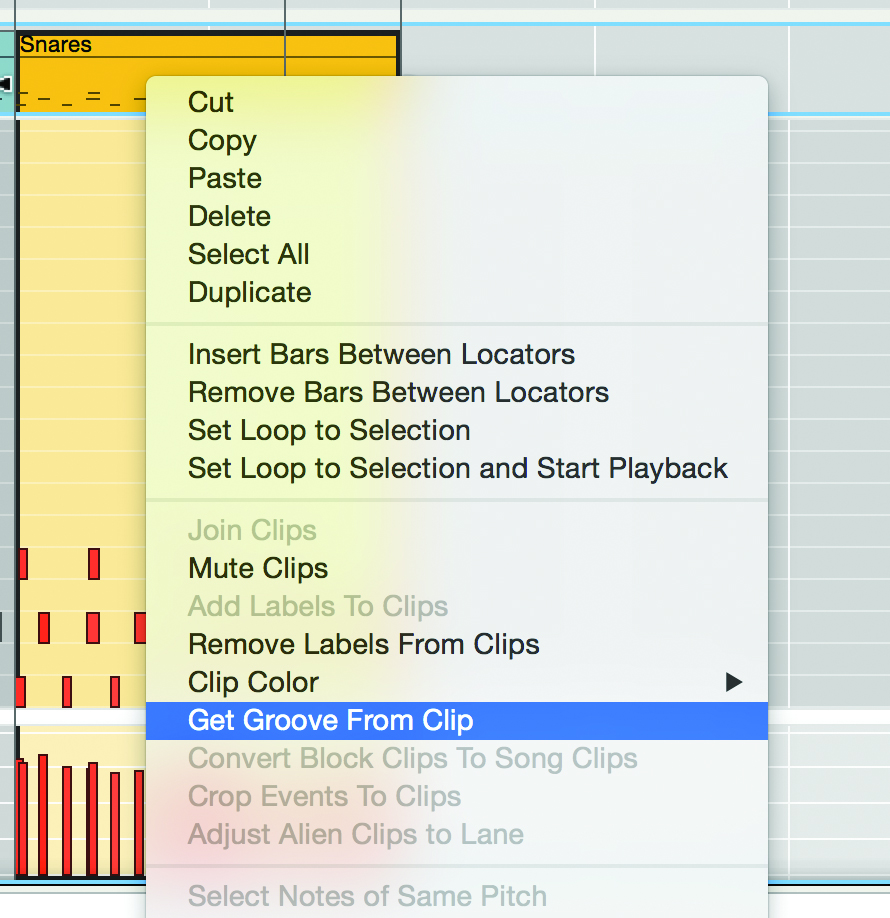
12: With any MIDI clip in Reason you can extract its groove, and this is usually possible in other DAWs too. This can be handy for taking the feel of a drum part and applying it to another rhythmic part, a trance gated synth or something similar.

