Reason Tutorial: Become A Power User Part 1 – Creating Efficient Projects
Careful preparation and an understanding of how Reason deals with inputs and outputs is key to smooth sailing, as Hollin Jones explains in the first part of our new series of Reason Tutorials focusing on becoming a power user. One of the most fundamental tasks to smooth music-making is ensuring that everything is […]
Careful preparation and an understanding of how Reason deals with inputs and outputs is key to smooth sailing, as Hollin Jones explains in the first part of our new series of Reason Tutorials focusing on becoming a power user.
One of the most fundamental tasks to smooth music-making is ensuring that everything is set up properly before you start. That might sound obvious, but you may be surprised by just how much a less-than-perfect setup can hamper you in terms of performance and workflow. And while the mechanics of how an application deals with templates and data I/O might not be the sexiest-sounding subjects on earth, investing a little time in understanding them can save you a lot of time further down the road in terms of potential problems avoided.
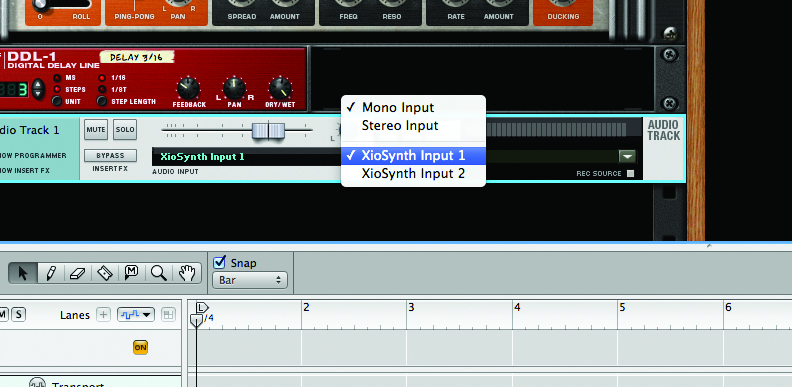
Given the multitude of devices now available for getting sound and MIDI in and out of your Mac or PC, it’s well worth knowing how best to set them up. In fact, Reason natively supports multiple control surfaces both for parameter tweaking and MIDI note and automation recording using the Remote system. It also records audio, of course, so getting your buffer settings right is vital. If you happen to be using Propellerhead’s own Balance interface you can take advantage of nifty features such as Clip Safe mode, which records a secondary version of any take at a pre-determined optimum level to avoid clipping.
Reason stores everything inside a single project file, so there are no folders or file paths to worry about. This means that if you want to get at content such as loops you either have to export from inside the app in one of several different ways or use tricks to access the guts of the project file – and we’ll show you how.
Template files are another great way to start projects quickly – just spend time setting them up and they’ll always be there when you need them. It uses ReFills as sound banks and these are unique to Reason, but you can create your own, which we will touch on as well. Starting efficiently in Reason requires only a few steps but they’re important ones, so read on to find out how to do it as quickly and efficiently as possible.
General Setup
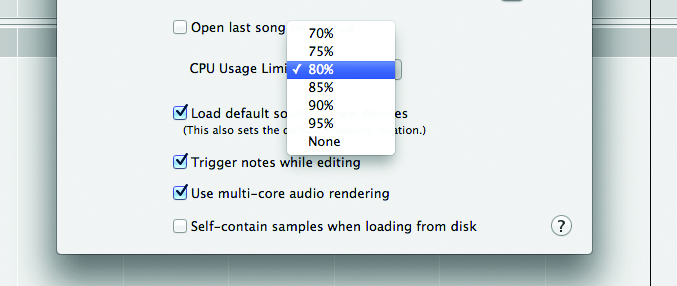
1: The Preferences section contains various tools, so start with the General tab. The first important thing to look at here is the CPU usage limit, which can be set anywhere from 70% to ‘no limit’. In the case of most newer computers it’s safe to leave this fairly high, but if you’re running in ReWire mode, consider imposing a limit on Reason’s resource usage.
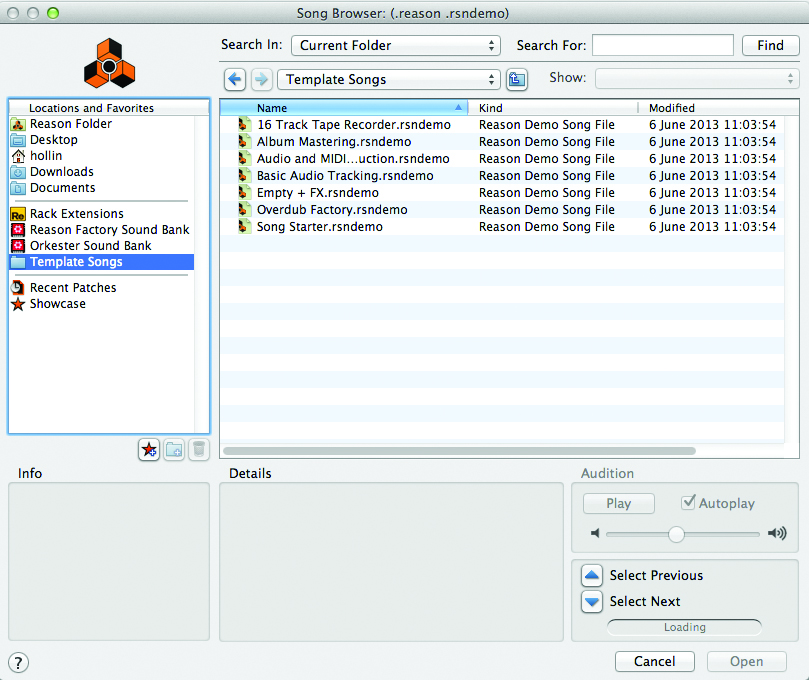
2: The second important option here is to tell Reason what to do when you boot it up. If you like a completely blank canvas, leave this set to ‘Empty Rack’. If not, click on the file browser icon in the Default Song section and specify a file to use as a template. The Factory Sound Bank has a shortcut to the Templates folder.
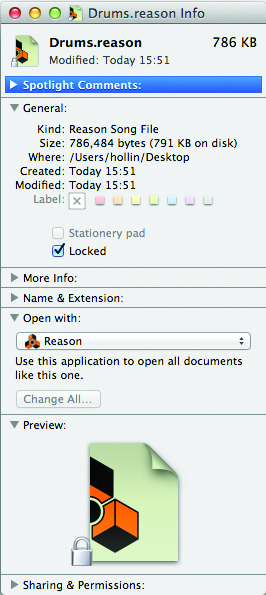
3: To save a project as a template file, first set up a blank project to your liking. For example, you could create a couple of drum machines and some audio tracks and synths configured to use your audio/MIDI input devices. Save the file and lock it using your operating system’s Get Info or Properties window. Place the file somewhere sensible, and every time you open it, resave it under a new name.
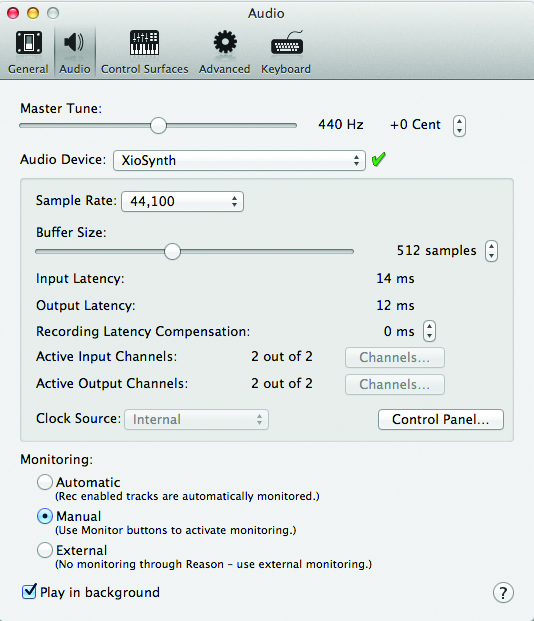
4: Moving on to the Audio panel, you can tell Reason which audio device to use. Select your connected device from the list and set a sample rate (this will usually be 44.1 or 48kHz but may be higher if your device supports it). In the Active Input/Output Channels section you can manually set which ins and outs are used.
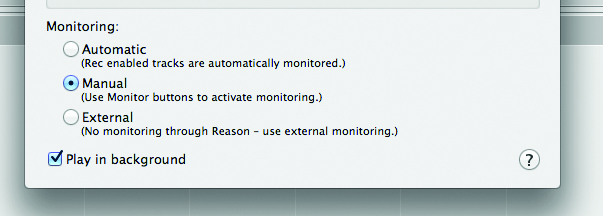
5: From the Monitoring section it’s possible to control how audio is monitored. Probably the most useful option here is Manual, since it means that tracks won’t automatically be monitored but rather only when you specify that they should be. If you have Reason plumbed in to a desk, choose the External option to bypass internal monitoring.
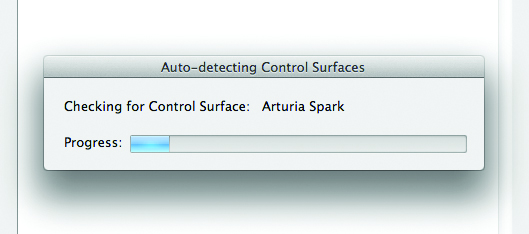
6: Now go to the Control Surfaces section. This refers to any connected MIDI devices, be they simple keyboards or advanced controllers. Some devices are supported natively, so you can try hitting the Auto Detect button to see if Reason will pick up and load the drivers for yours by itself. If it doesn’t, don’t worry.
Continue to the next page – Controller Setup, Latency, Appearance and ReFills >
