How to use the Reason Rack Plugin in your DAW
We explain how to get the rack up and running in Reason 11 and how you can start exploring its options – it’s not just about great instruments.
Reason 11 was announced a few months ago and the huge news was that the best bits of it can now run as a plug-in instrument rack – called the Reason Rack Plugin – within other DAWs. This means that you can run the software’s best parts – its instruments, effects and utilities – in a channel in your DAW as a VST instrument (with AU compatibility promised imminently).
The Reason Rack Plugin is compatible with the latest versions of the following VST3-compatible DAWs, according to its makers: Ableton Live, FL Studio (Windows), Studio One, Cubase, Reaper and Bitwig. For the purposes of this tutorial, we’re running through how you can load the new Rack up in Ableton Live, but many of the principles will apply to whichever VST3 DAW you own.
Whatever your DAW
… you will have to ‘prepare’ it for the Reason Rack Plug-in. That might be a simple matter of scanning for it (although most DAWs automatically scan for new plug-ins on boot up), or in Live’s case, making sure that it is ‘looking’ at the correct VST3 plug-in folder. Otherwise, you might simply find that neither the VST3 folder nor the Reason Rack Plugin are visible in the standard Live browser, where all the other VST instruments are found.
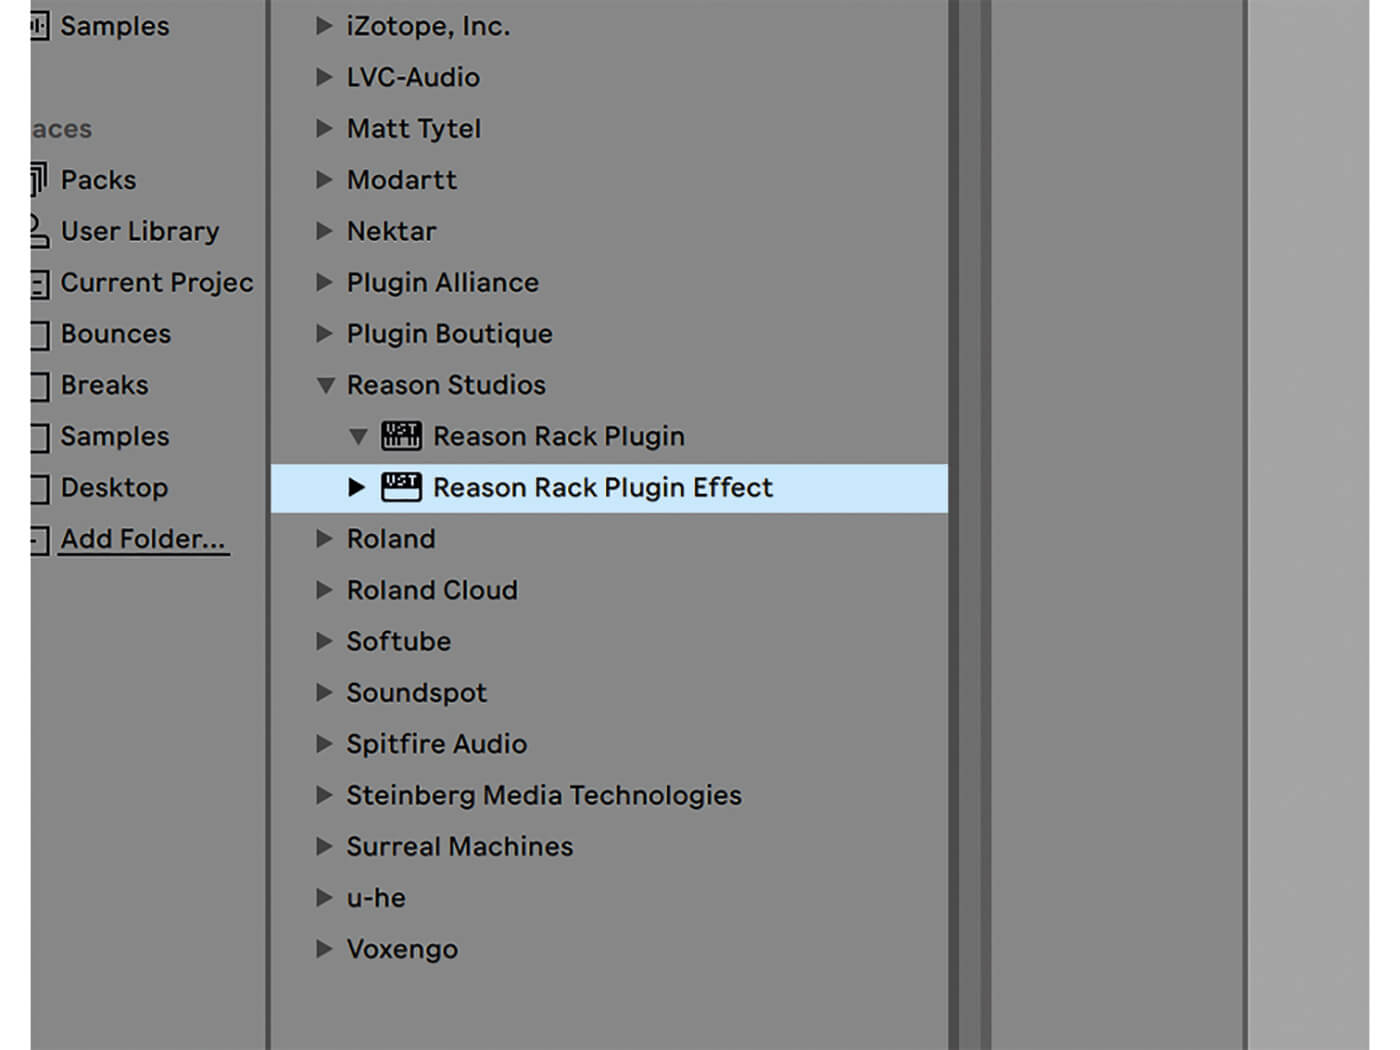
Once loaded in, you will see the Reason Rack Plugin and Reason Rack Plugin Effect. Drag or load the former in as an instrument and you will be faced with a selection of great Reason instruments to click on, but that’s not the end of the story – there’s plenty more where they came from in the main browser.
Hit the Browse Instruments option to reveal a top-line list of Reason Instruments, Effects, Players and Utilities. You can either control-click the Rack to open a drop-down menu to load in instruments or simply drag them in. Now you suddenly have Reason classics like Thor running in your VST3 DAW – what more could you ask for? A lot more as it goes. Reason Rack is not called a ‘rack’ for nothing; those Players and Utilities almost make it a DAW within your DAW.
More than an instrument
There are two ways to enjoy Reason’s effects in your DAW, the first being to simply load them in within the main Reason Rack instrument plug-in. Here they will act on whatever Reason Instrument you have loaded in the Rack. However, cleverly, Reason Studios has also developed another plug-in that we mentioned earlier, Reason Rack Plugin Effect. This brings the effects in as a separate plug-in rack which you can insert wherever your effects go in your DAW (in Live it can be per track).
You can stack up multiple effects, the same way you can with instruments, but the best part is, because they are simply being used as effects, you can load in whatever instruments you like on the same channel and enjoy Reason effects on instruments that might never have employed them before. In our workshop example, we load in a Native Instruments Absynth instrument to run through the Reason Effects Rack. You could run VSTs in Reason before, so could have enjoyed this combination, but certainly not running within Ableton Live!
Talking of combinations
There are two further sets of tools to use in the Reason Rack that we detail in the workshop: Utilities and Players. In the first folder, you’ll find Utilities such as the Combinator, which we have talked about a lot in previous Reason workshops. This nifty shell-like tool allows you to house instruments and effects, and not only route them cleverly with separate line mixers but control multiple parameters on each and every one with single Combinator controls. The level of flexibility this introduces – particularly for controlling multiple sources, automation and creating big sounds – is huge, and guess what? You can do the whole lot in the Reason Rack in your DAW!
Finally, we also look at the Players, the Drum Sequencer in particular, which lets you sequence within a sequencer for the most flexible, er, sequencing ever! The Reason Rack comes as part of Reason 11, available as Intro (from £69, which includes 33 Devices); Reason 11 Standard (£309 for 57 devices); and the top-end Reason 11 Suite (£499 for the Rack Plugin and 73 devices including Rack Extensions to the value of $1200). We’ll have more on Reason 11 next time!
The Reason Rack Plugin in your DAW: step-by-step
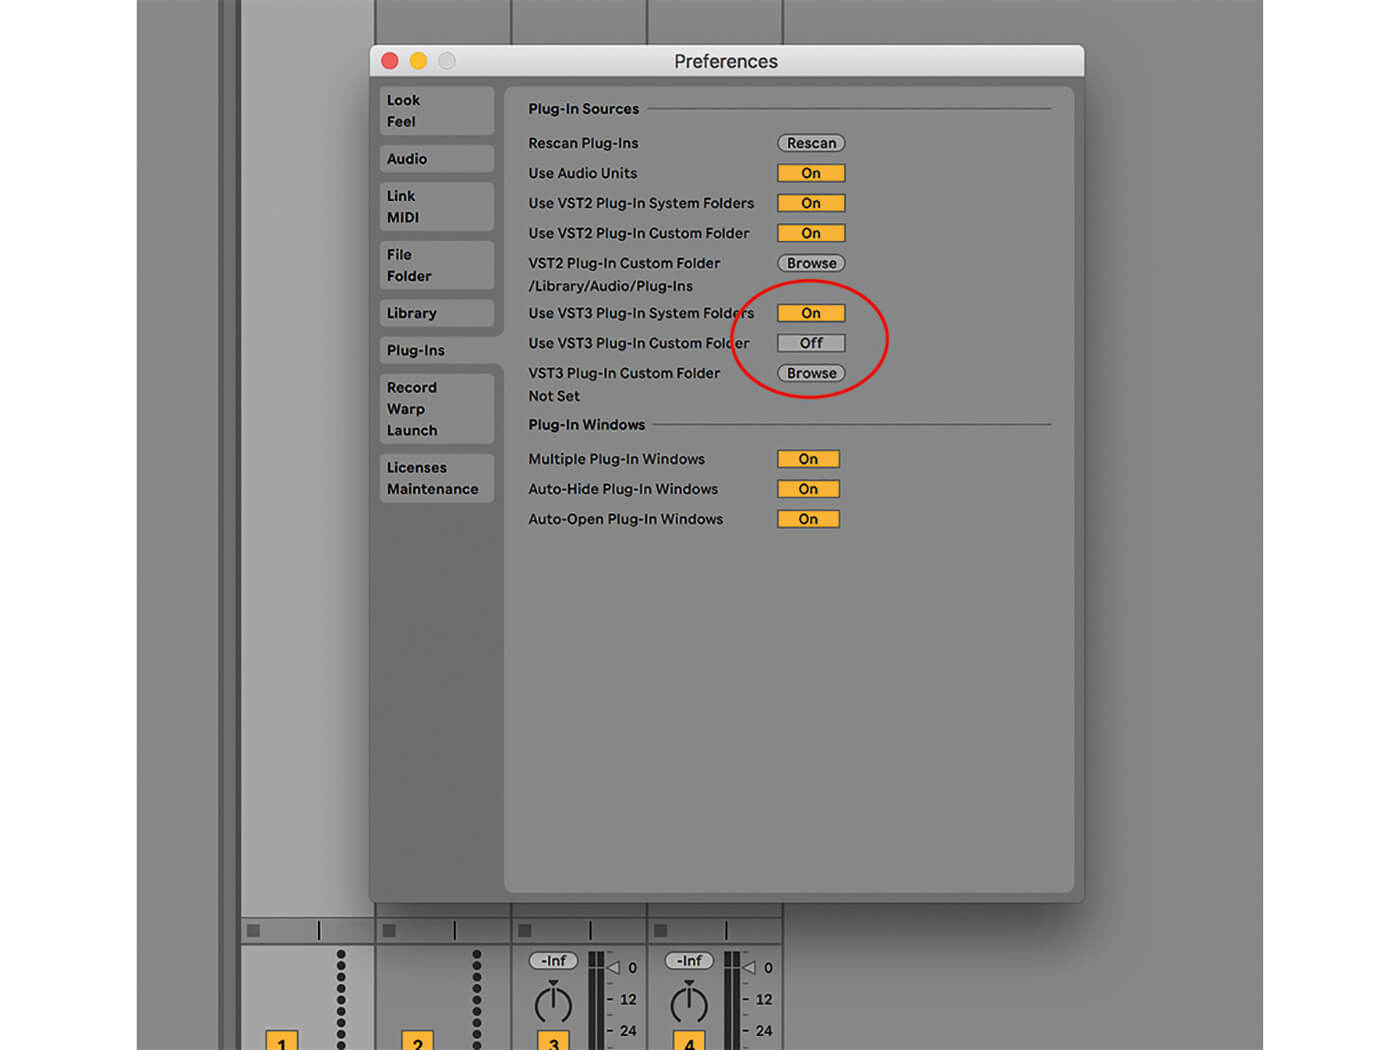
1. We’re using Ableton Live as our DAW to run the Reason Rack Plugin as it is VST3 compatible. You might have to nudge it to read VST3 plug-ins in the Preferences menu as shown. Just click to highlight the option.

2. A VST3 folder should then appear in your Live browser with all of your VST3 plug-ins. The Reason Rack Plugin is in the Reason Studios folder, the new name for Reason’s developers (ex Propellerhead Software).
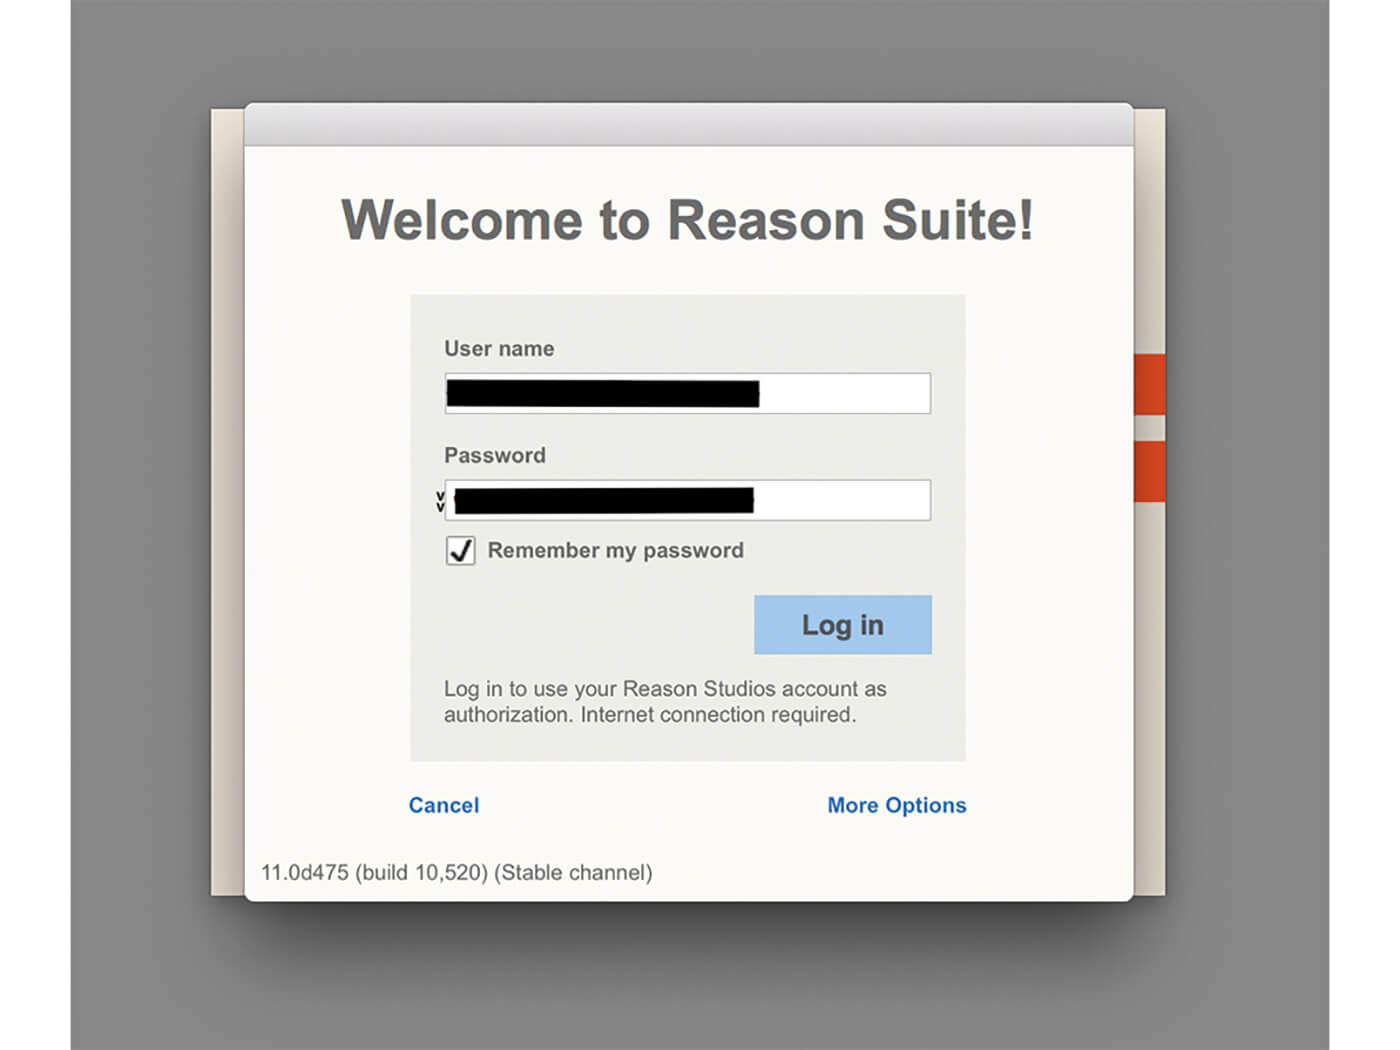
3. Now simply drag a copy of the Reason Rack Plugin to any MIDI track in your DAW. You will probably be asked to log in to your Reason account – as you are whenever you boot up Reason – so make sure you have internet access.
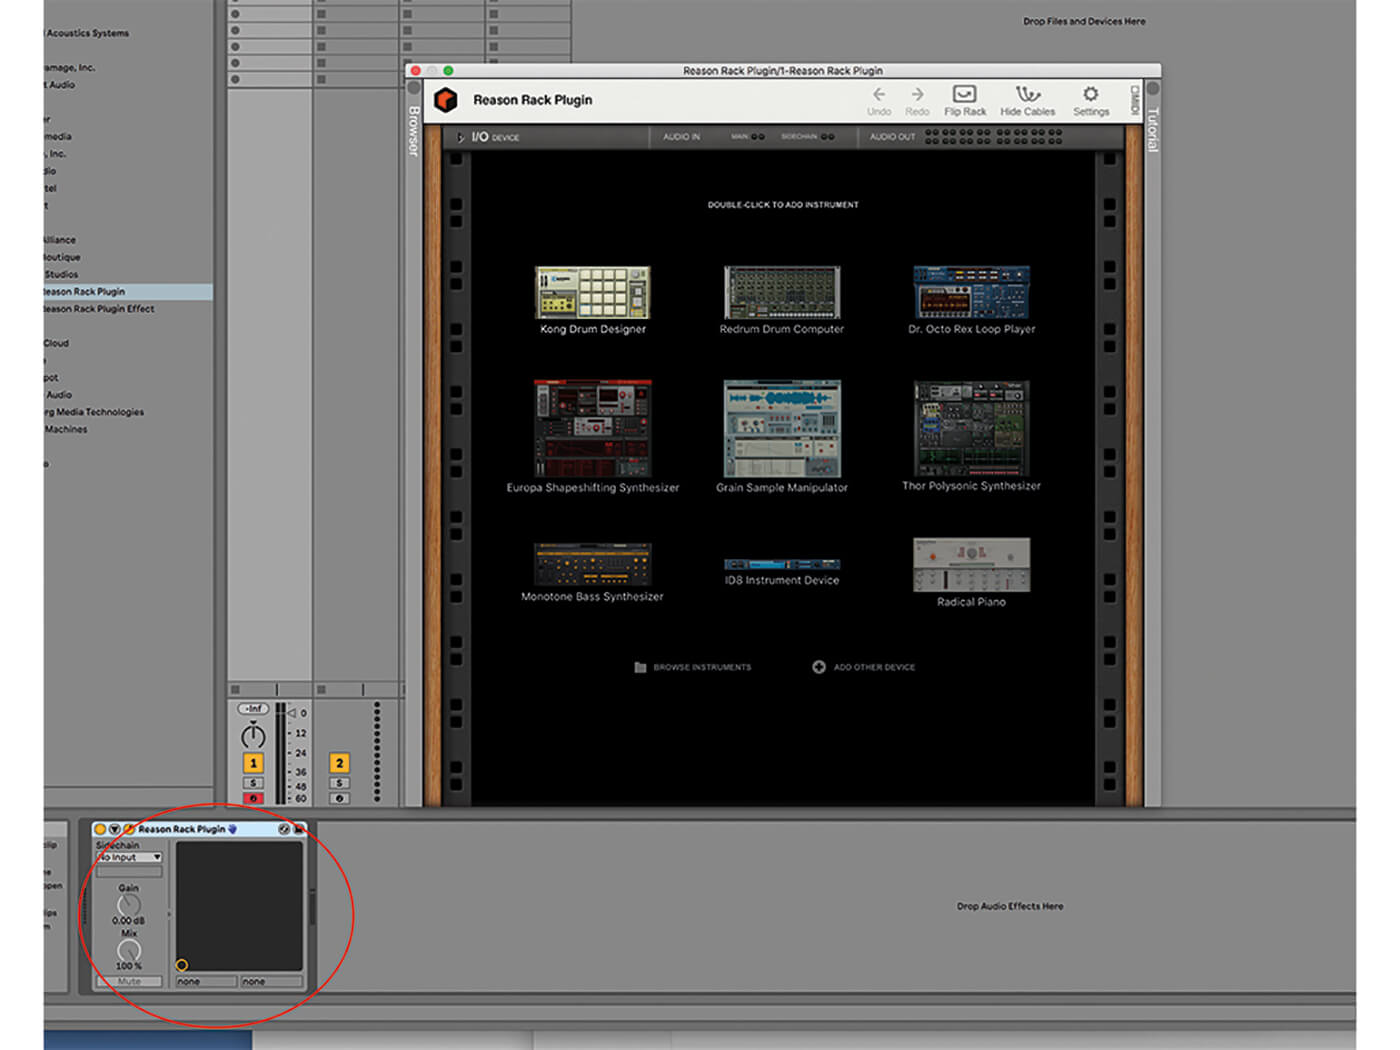
4. The Reason Rack Plugin will now appear as a standard instrument (as circled). Click on it (in this case the Open icon in Live) and the Reason Rack should appear with all instrument options available as shown.
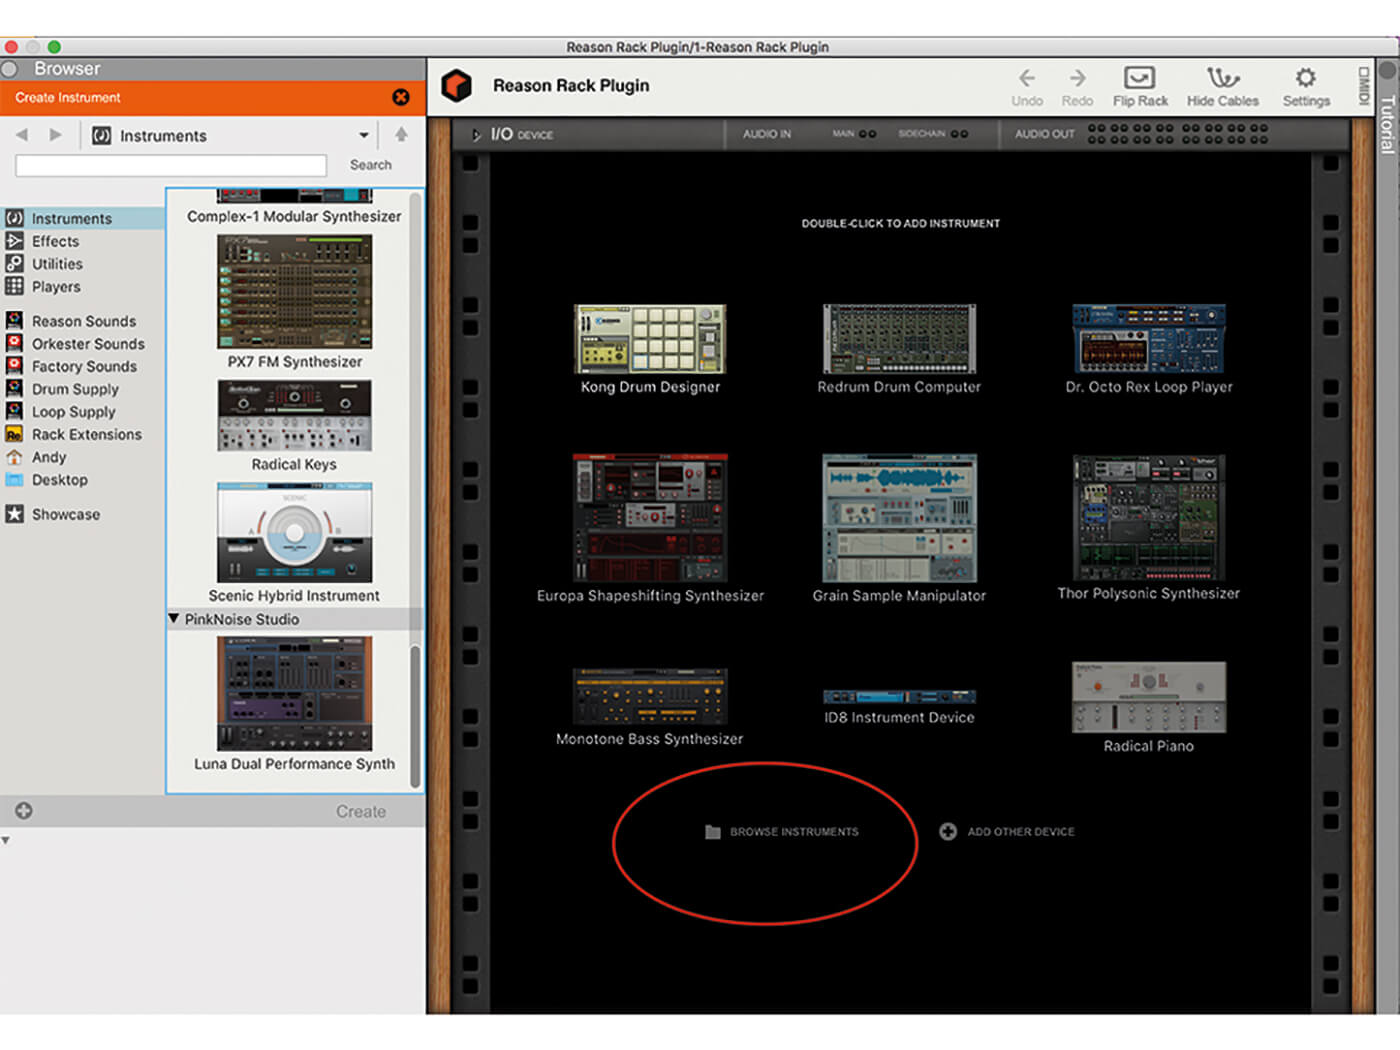
5. At the moment the Reason Rack Plugin is not showing all of your instrument and effect options, so hit the Browse Instruments icon to reveal the main browser for Instruments, Effects, Utilities and Players.
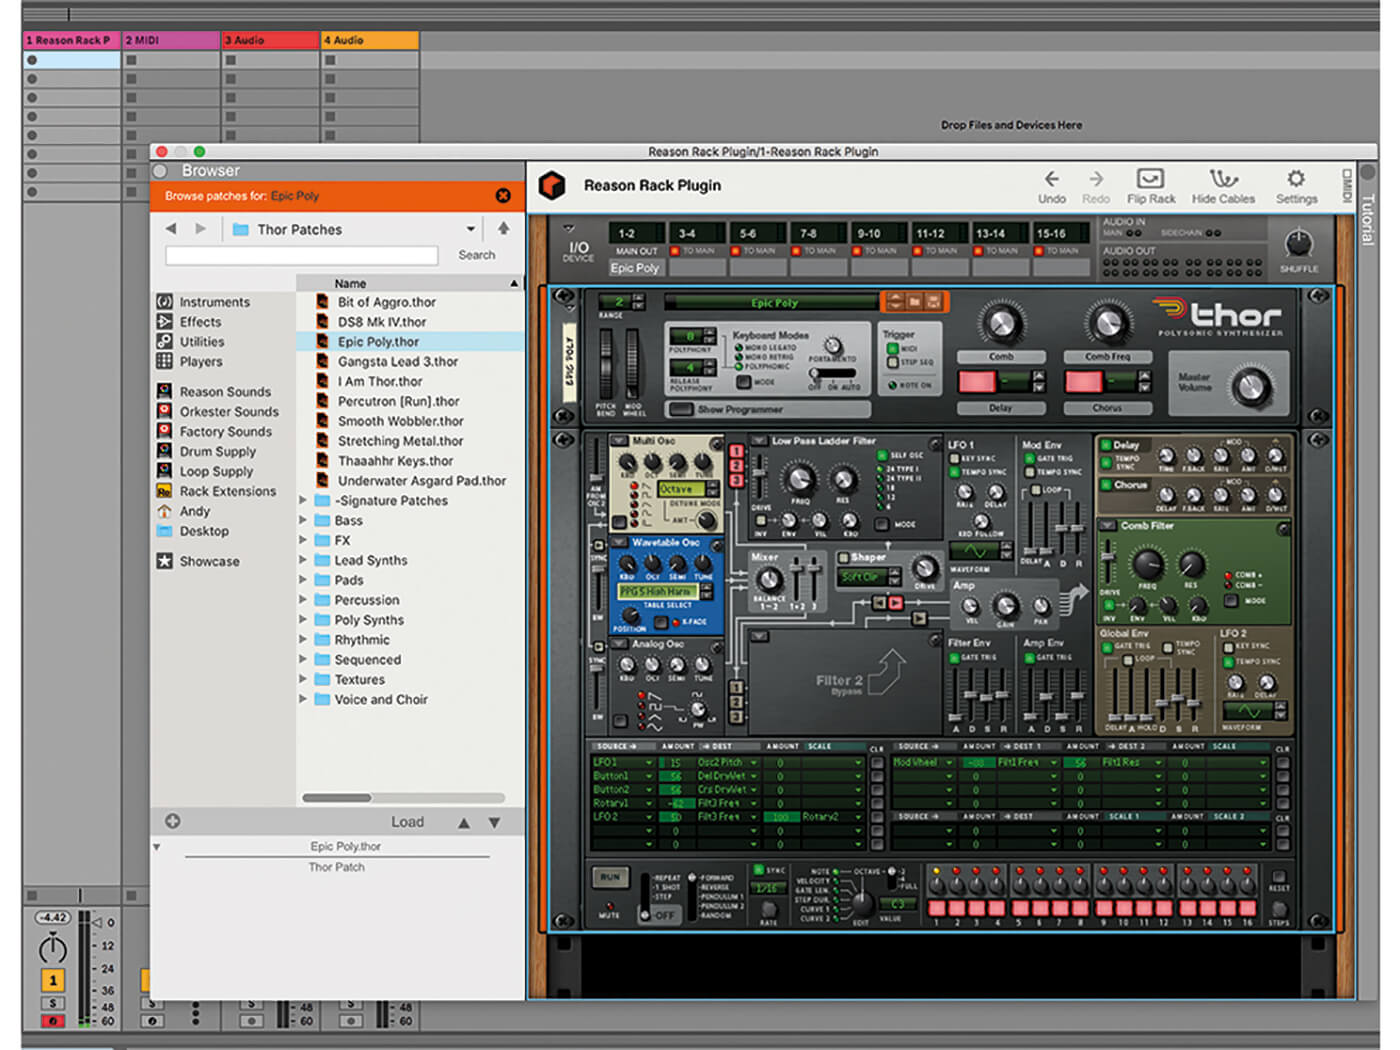
6. If you are a Reason user, it’s now just a matter of using the Rack as normal, dragging virtual instruments into it. Here we have dragged the mighty and classic Thor. That’s Reason’s Thor playing in Ableton Live!
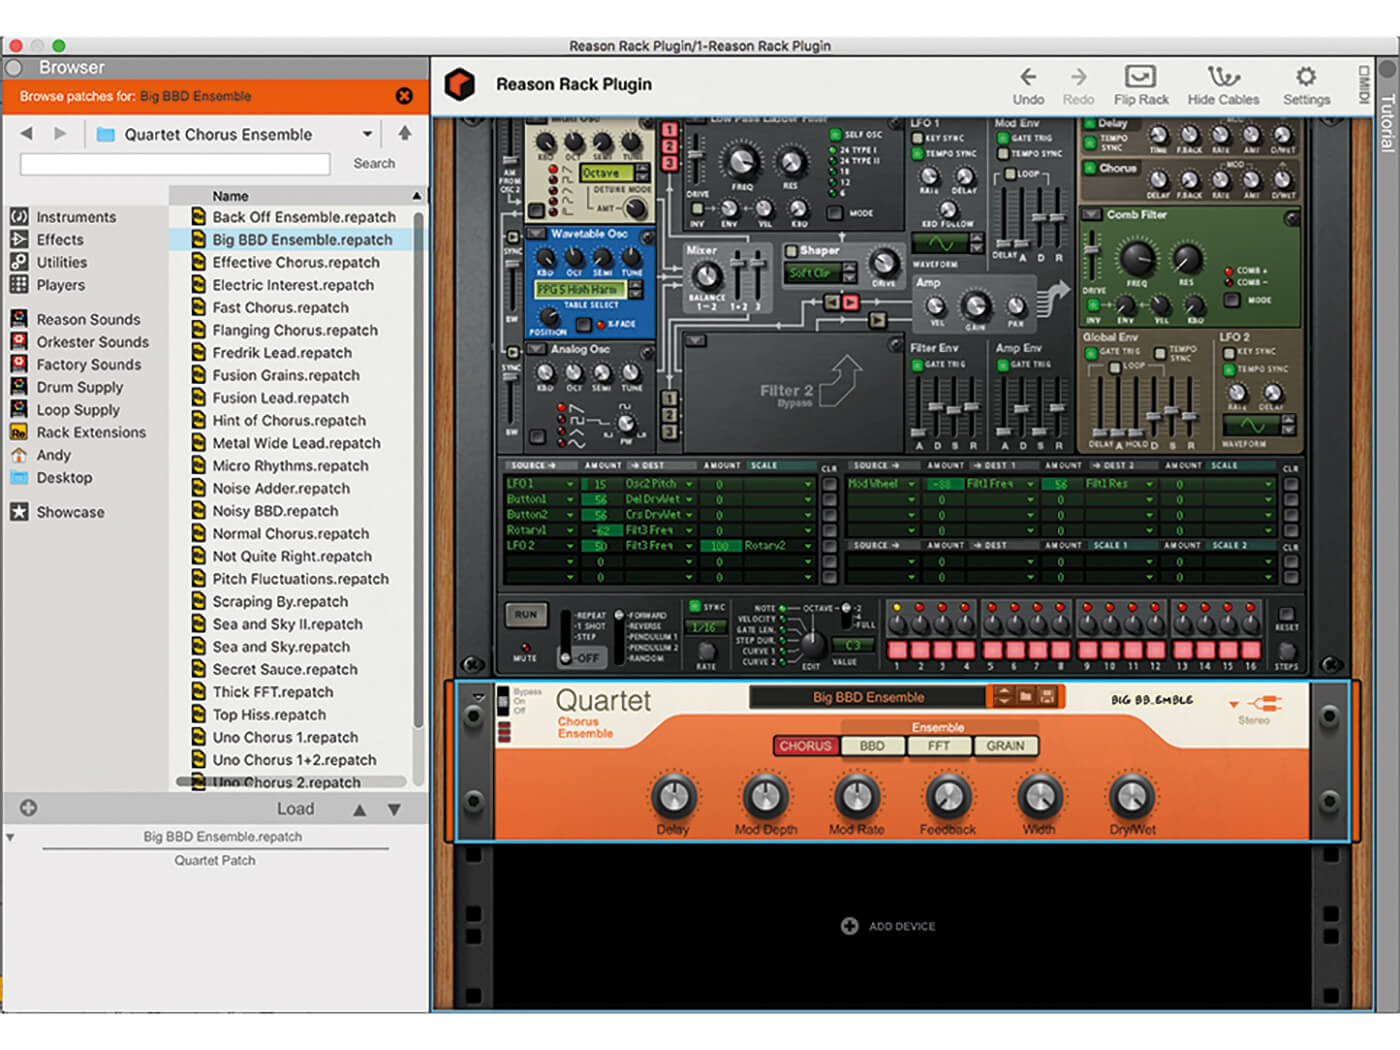
7. Adding effects is also just a matter of dragging them in. Here is the new Quartet Chorus Ensemble, one of the new effects plug-in highlights in Reason 11 being used with Thor.
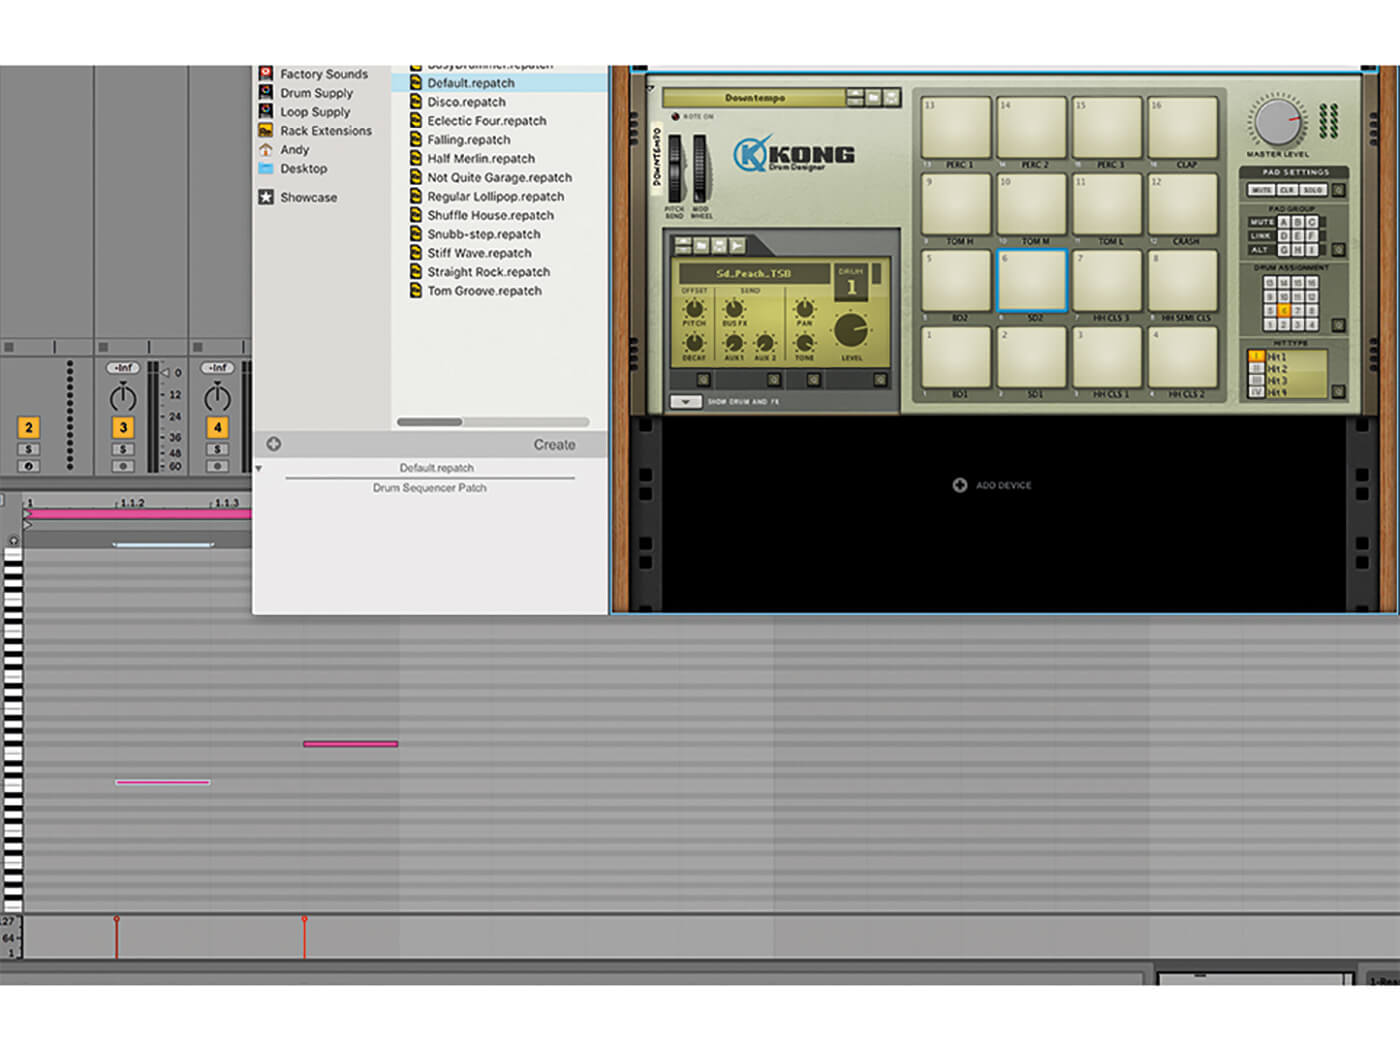
8. The drum instruments are there as well and, as with the synths, you can record notes into Live or whatever DAW you use, triggering them as normal devices. But the Rack Plugin also has some other creative tricks up its sleeve.
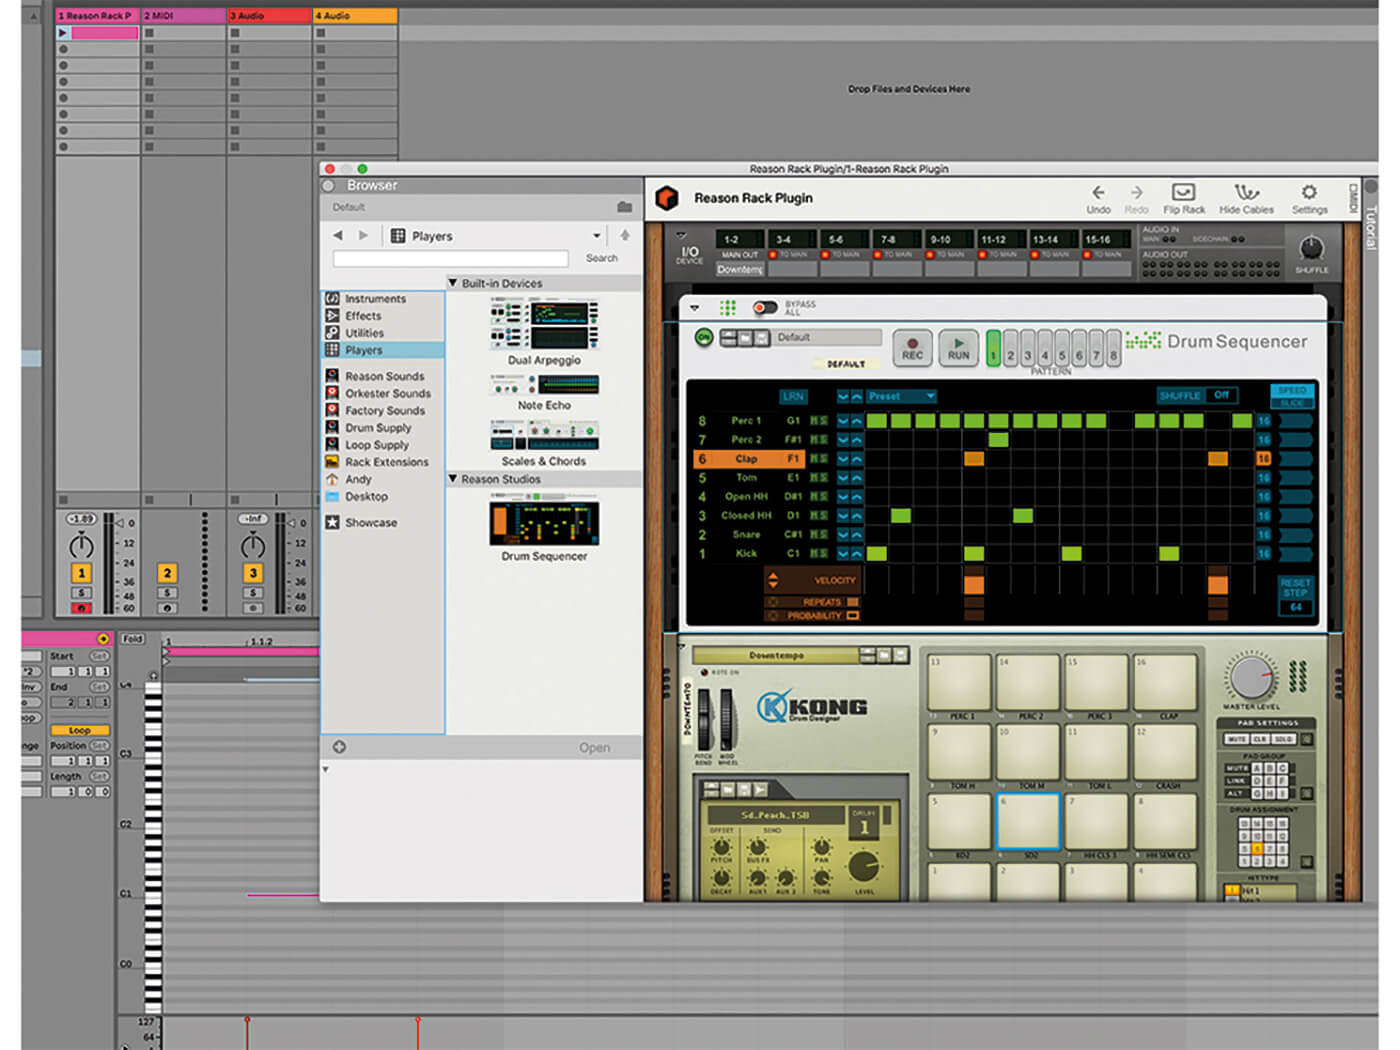
9. You can also load in other Players, so here we have the Drum Sequencer making up a sequence of Kong Beats, within a Live Clip. Now when you press play in either Live or the Rack, the sequence of beats will play.
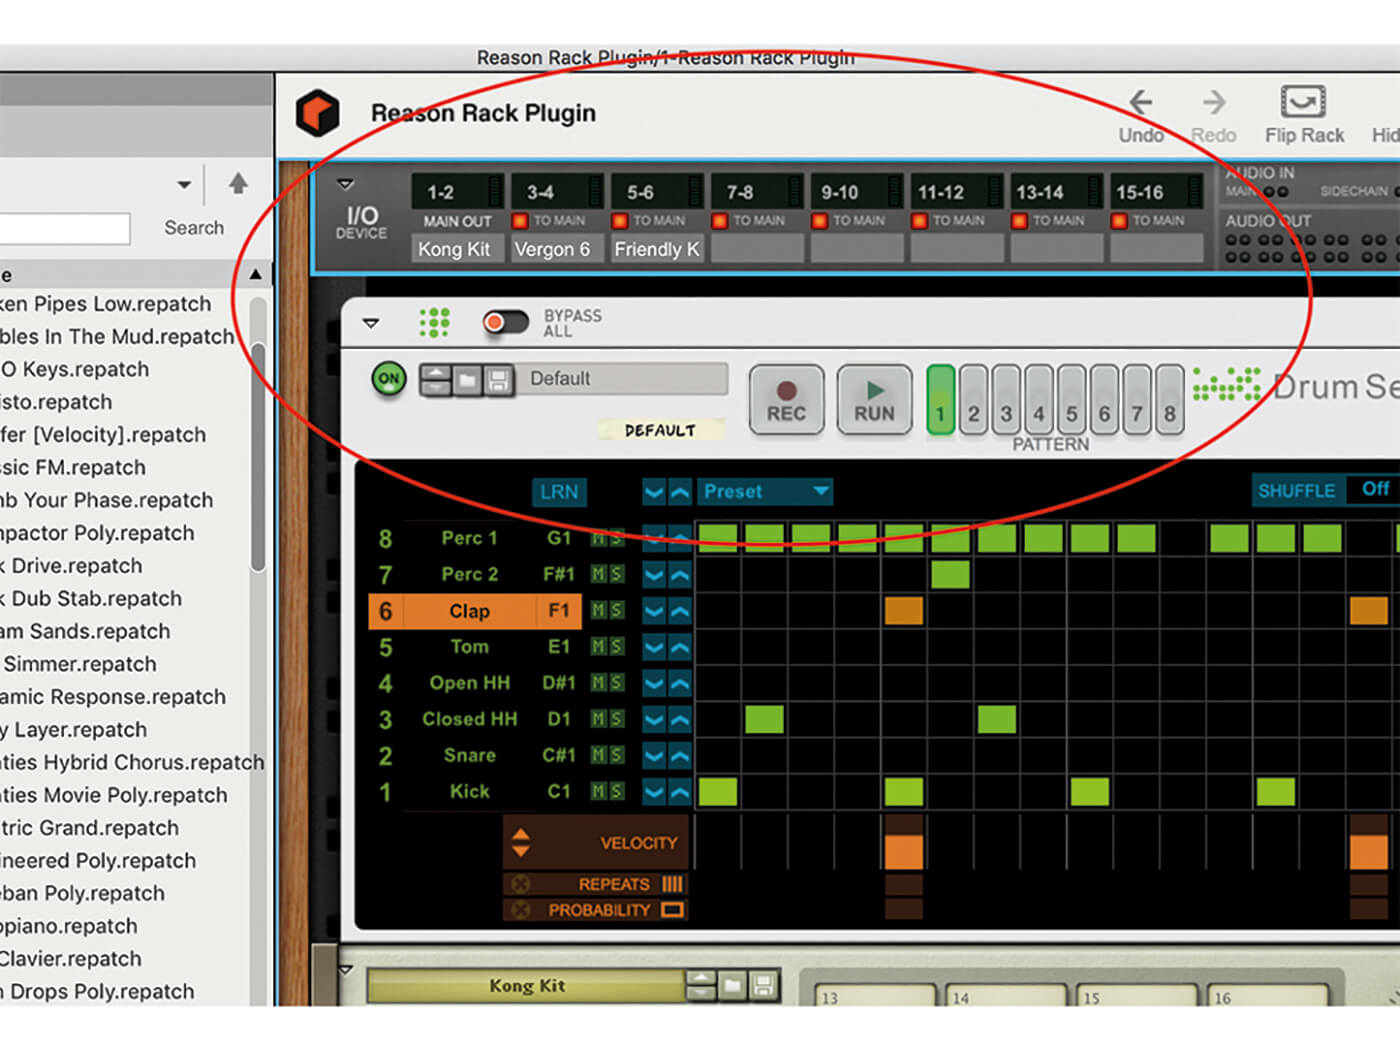
10. You can play multiple instruments together in one instance of the Rack by simply dragging them in. Each will automatically be sent to the Main Output of your DAW. You can see this on the top I/O Window.
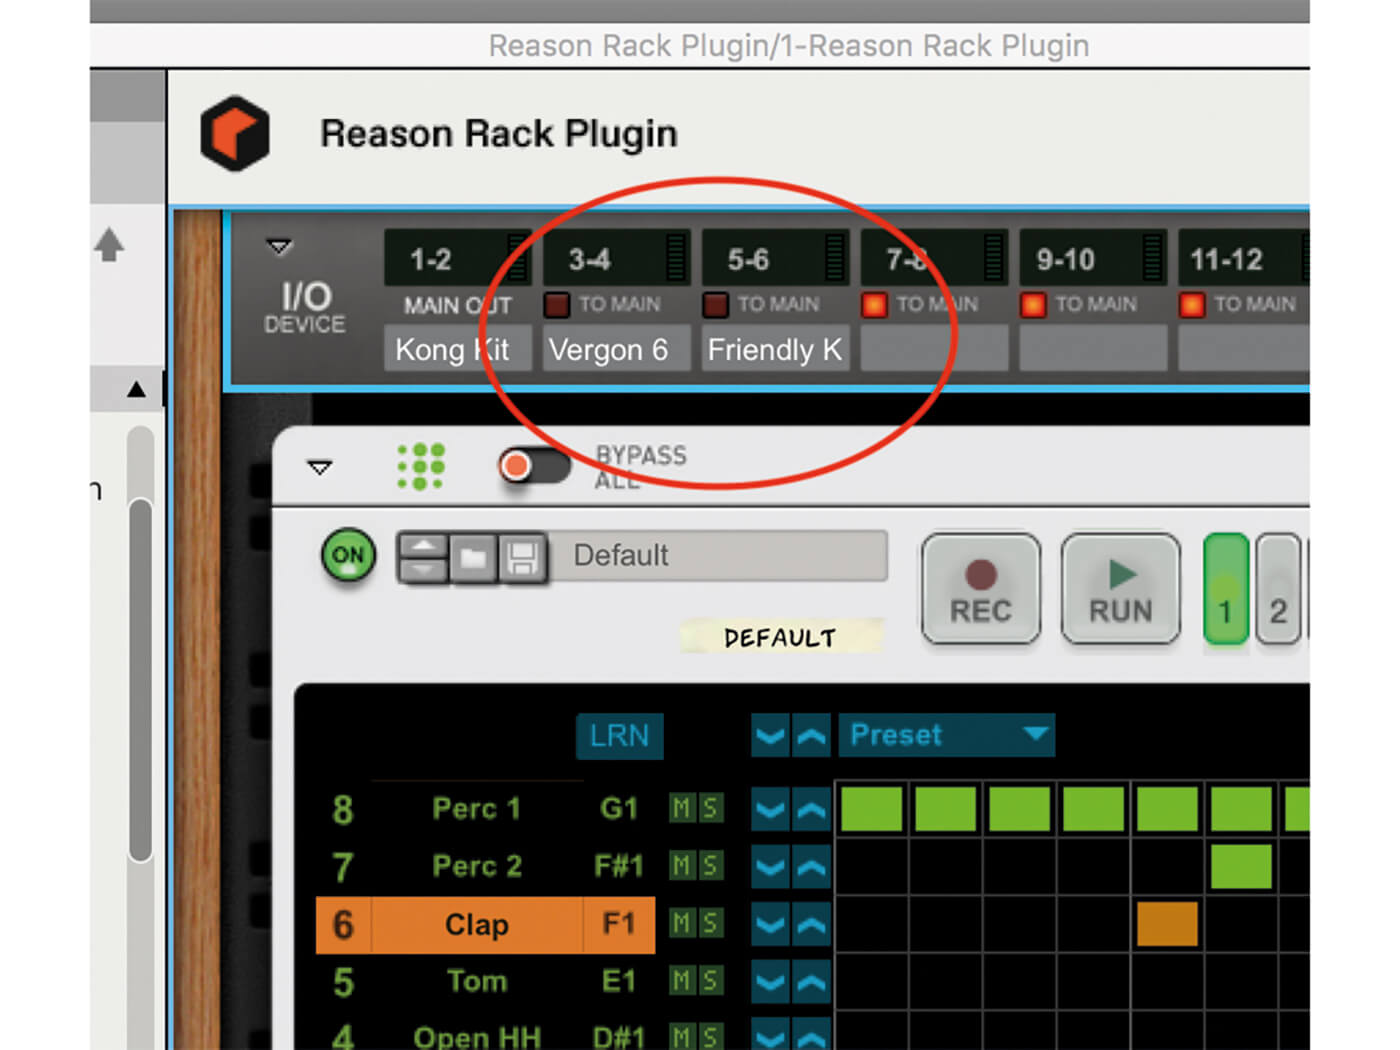
11. You can send your new devices to different outputs by clicking off the To Main icons, so now the second and third instruments are being sent to DAW outputs 3 & 4 and 5 & 6 respectively.
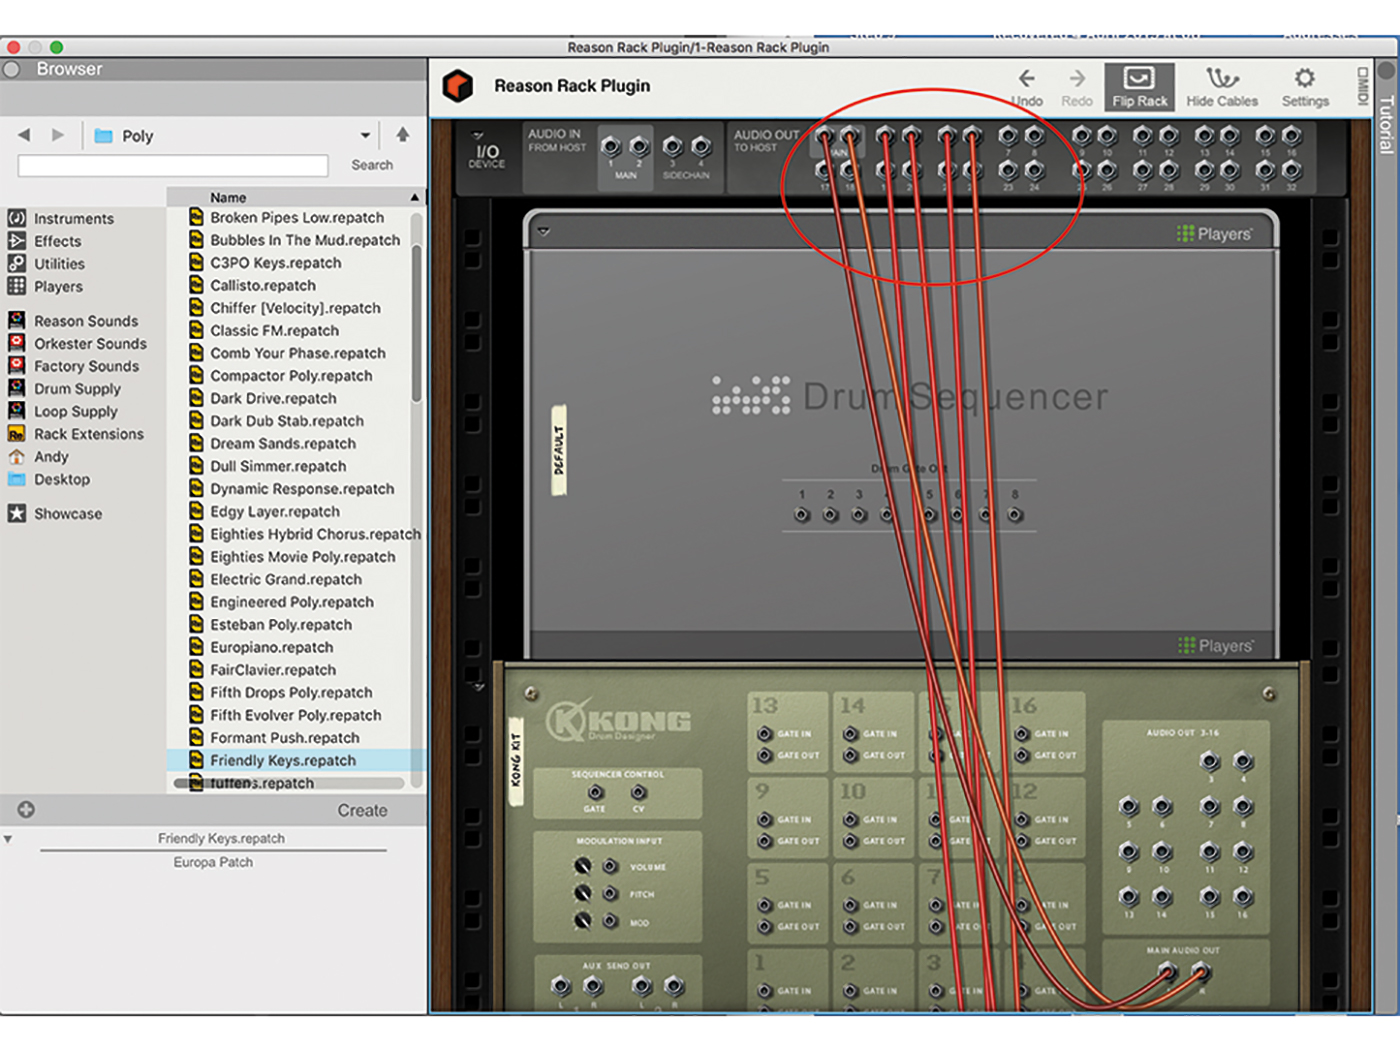
12. You can see this routing more clearly by flipping the Rack (using the Flip Rack button) so, as in Reason, you can see the virtual wiring around the back of the rack and the ‘wires’ from the three devices routed to channels 1 to 6.
![]()
IMPROVEMENTS Other reason 11 improvements. We ran through the rest of the Reason 11 updates last month, but essentially there are new effects and lots of tweaks to the workflow features such as audio editing.
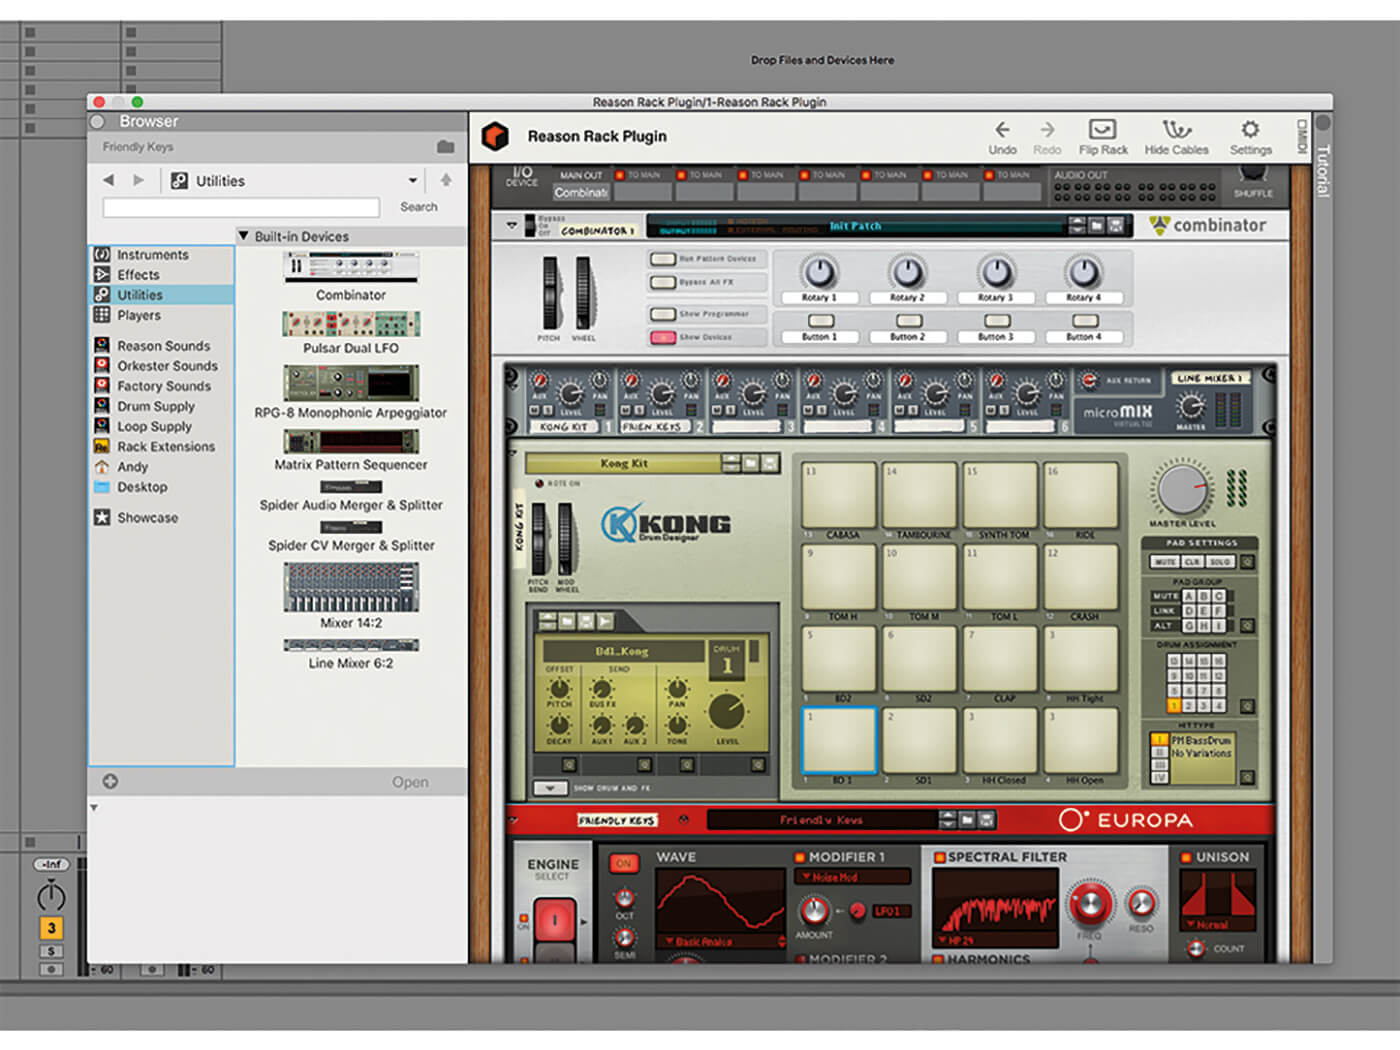
13. For even more control over your instruments and routing, it’s a good idea to use the Combinator. Here we have Kong and Europa instruments routed through a Line Mixer 6:2 all sitting in a Combinator in one channel of Live.

14. You can assign the Combinator rotaries to control different parameters on the instruments within it, so here Rotary One is changing the tone on a drum pad and 2 is controlling the filter on Europa, all in Live!
15. The other VST3 Reason Studios device that comes loaded is the Reason Rack Plugin Effects, which is simply all of the Reason effects which you can use as normal in your DAW.
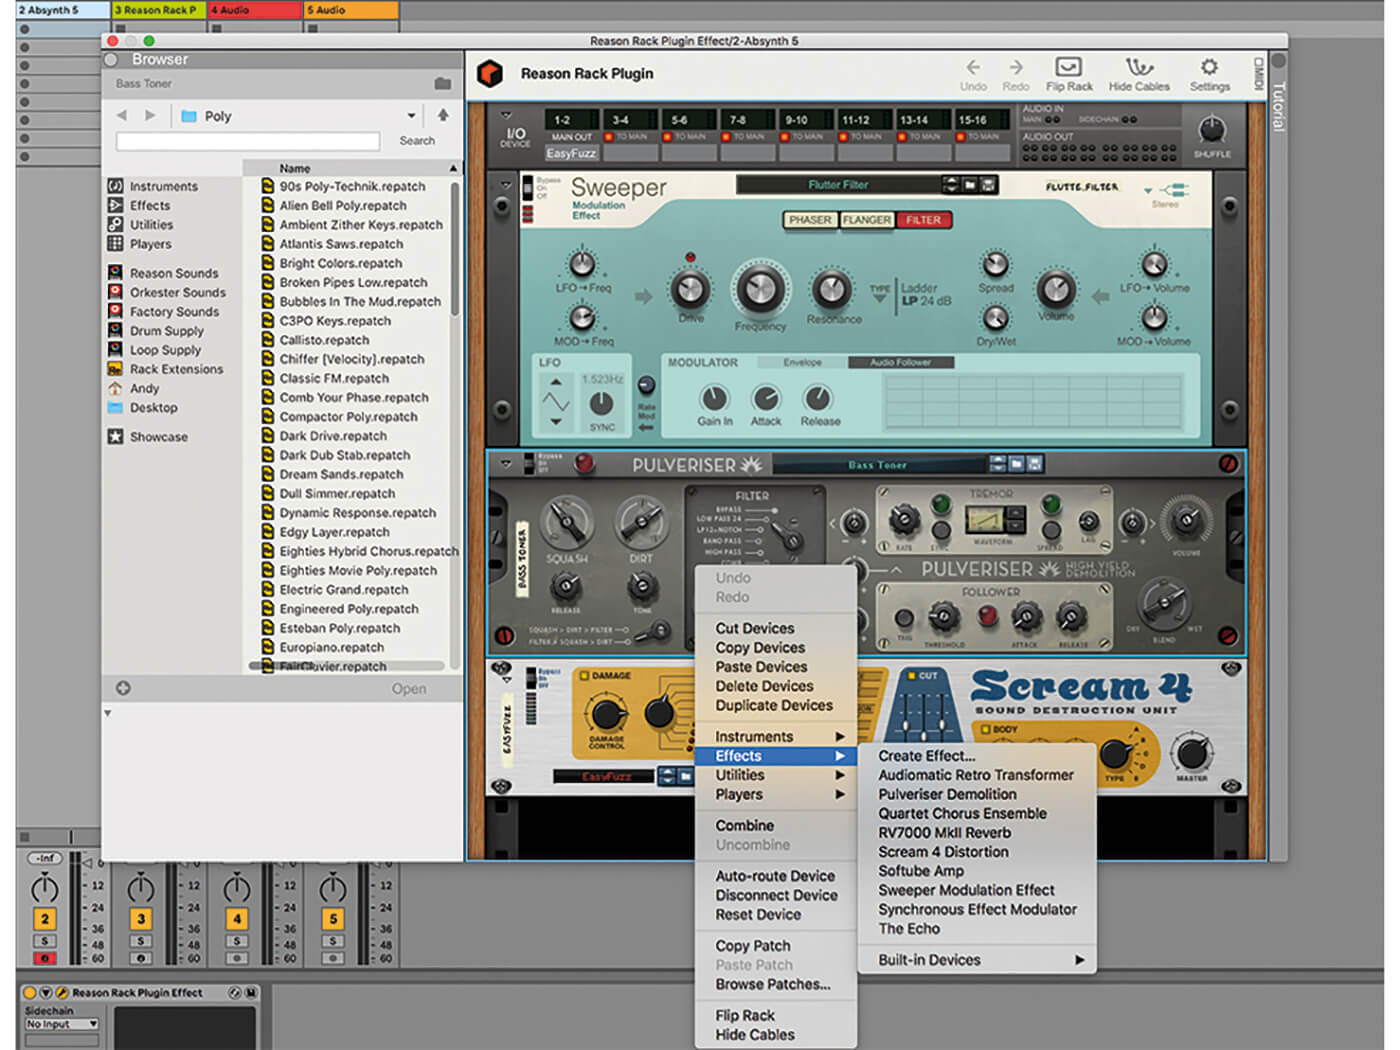
16. Here we’ve loaded them in as a VST3 effect in our second Live MIDI channel. Open them up as normal, then add other effects by dragging in or control-clicking. (You can actually add instruments too!).

17. Chain effects together as one massive effects rack. Again, all of these effects will apply to the Main Outputs of your DAW, but you have some routing flexibility too (which can be increased using a Combinator again).
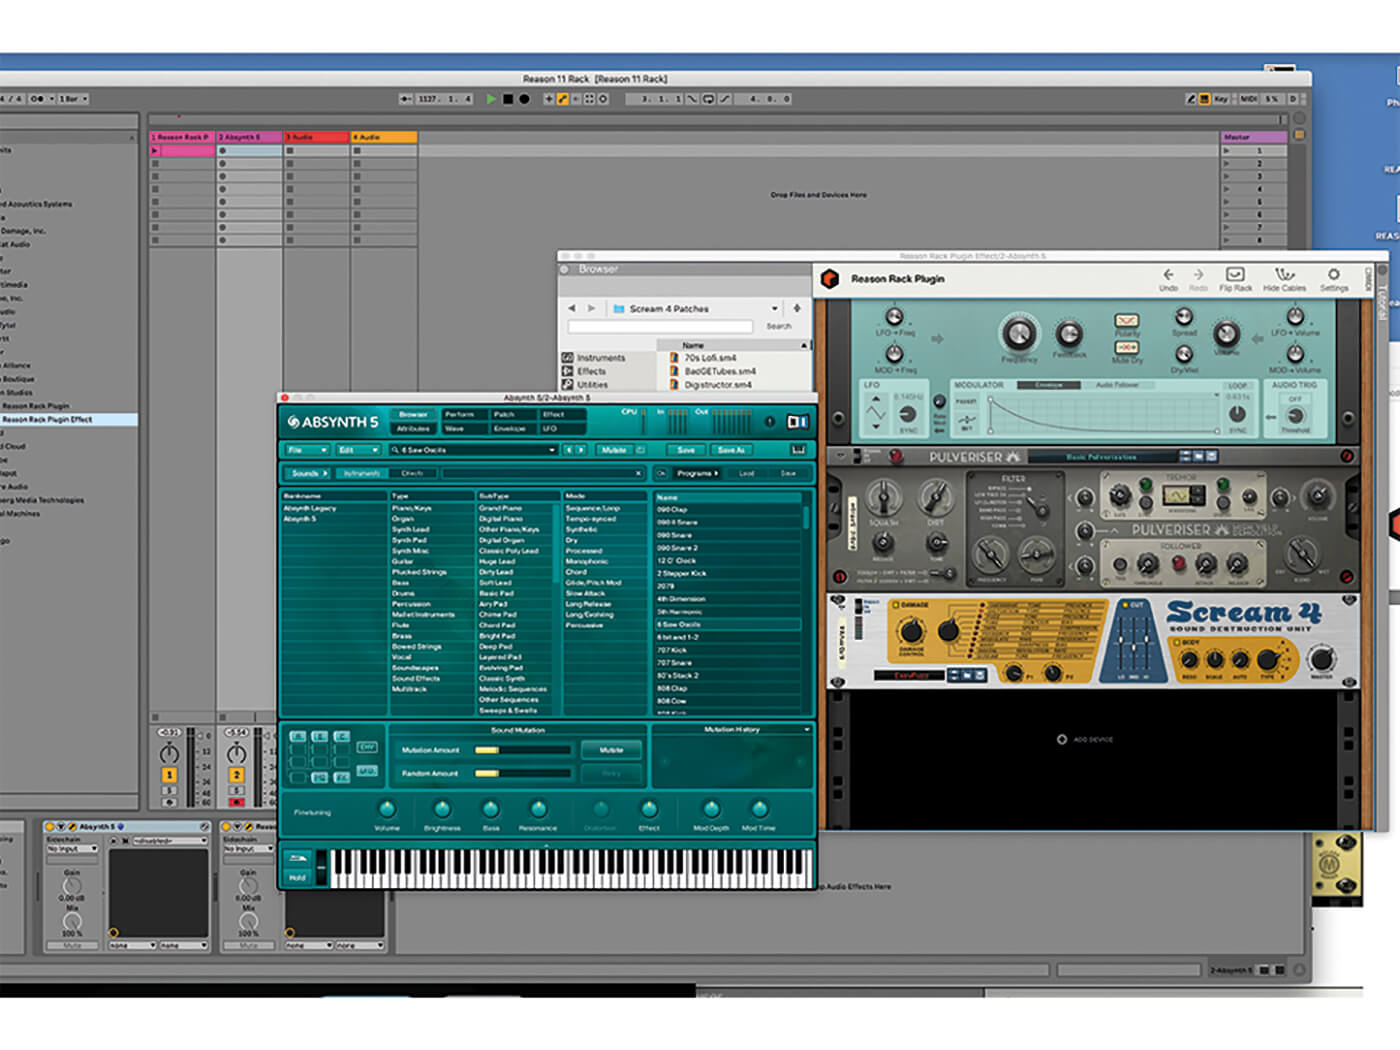
18. Finally, now we’ve added a VST instrument, Native Instruments Absynth, and are running it through Reason’s effects live… in Live. Who’d have thought that one day this would be possible?!
Get to know all the new features in Reason 11. For more Reason tutorials and workshops, check here.