Remixing Tutorial: Remixing Using DAWs
While we’ve previously explained remixing in principle, Here we bring you step by step gudies to remixing in some of the most popular DAWs When it comes to remixing, your DAW already offers most of the tools you will need. Naturally they all take a slightly different approach but the basics are the same. Set […]
While we’ve previously explained remixing in principle, Here we bring you step by step gudies to remixing in some of the most popular DAWs
When it comes to remixing, your DAW already offers most of the tools you will need. Naturally they all take a slightly different approach but the basics are the same. Set up the project based on the format of the material you have received – for example 120BPM, 48kHz, 24-bit files – and then set the left marker to a definite bar marker, ensuring that snap to bar is switched on.
Then import the audio stems all at once, making sure they start at the left marker. If the person supplying the material has done their job you should find that the audio tracks are all in time and perfectly synchronized. That’s ‘if’ they have done their job…
If this doesn’t happen you might be better off asking for properly exported files. If that’s not possible you can expect to have to spend some time looking at waveforms and trying to work out why the timing drifts off as the stems play back. You can use your own click track to work out how badly off the timing is if this happens.
Most DAWs are pretty good with time stretching though it can still be a pain to align entire tracks to your musical grid. In the event that you haven’t been told what tempo the stems are at, a beat calculator will usually let you tap the tempo to work it out, though again you’ll have to spend time realigning and stretching parts.
If things get really fiddly, one trick is to cut parts up and stretch sections individually then reassemble them in the correct tempo, but it’s a hassle. Like we say, don’t be afraid to ask for what you need…
How you proceed depends on what your aims are for the remix. You may want to, for example, mute everything but the vocal and then bring in completely new beats underneath it to start with.
If you’re planning to time- or pitch-stretch the vocal track, now is the time to do it to cut down on work later. If you pull a vocal up by 10BPM or a couple of semitones, it will be easier to start building the new track around it from this base rather than changing lots of tempos later.
Some DAWs will make life a lot easier even if you do change your mind later. Reason, for example, renders all audio elastic, so tempo changes en
masse aren’t too arduous.
Much of the time you may want to keep hold of the basic character of the track by keeping certain elements in place such as a bassline, synth or guitar hook if they are particularly good. But you can mess with them for example by adding effects like delay or distortion to alter the feel of the track while maintaining its basic melody.
A common technique when producing electronic remixes of rock or indie tracks is to identify the hook and then repeat it creatively. Drums might be replaced or supplemented to beef them up, and arrangements altered to change the structure of the track. Of course you could take the opposite approach and substitute new melodies, beats and basslines and simply keep a few key elements of the original – the choice is yours.
1: Remixing in Cubase
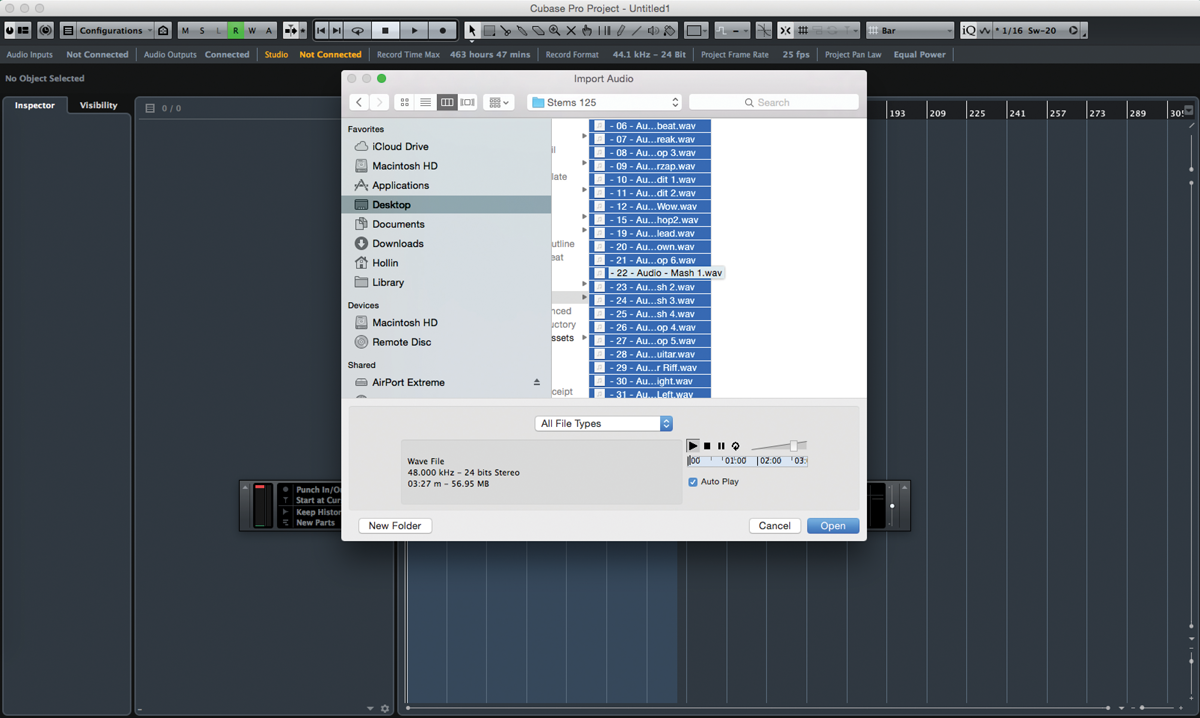
1: Start a new project and set it up in the Project Setup menu to match the format of the audio stems. Then set the left marker to a bar and choose File > Import Audio File. Navigate to your stems folder.
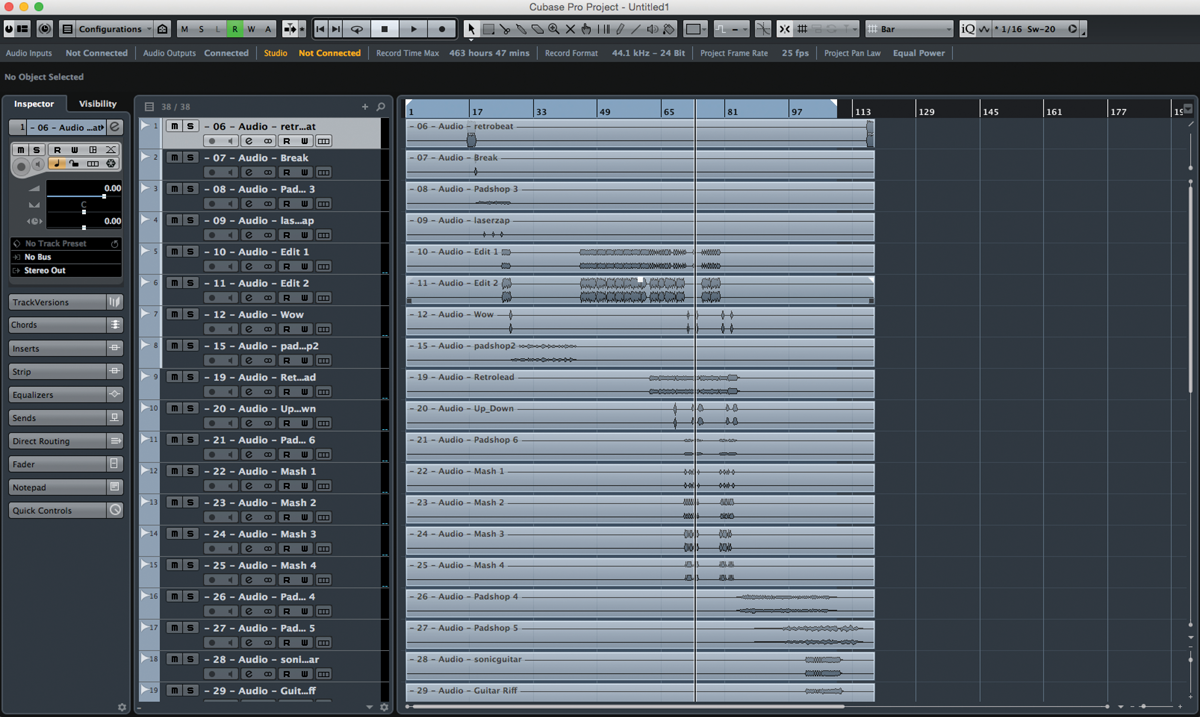
2: Your stems should import (choose import to multiple tracks) and be in time. The tracks will be named according to their source files. Use the click track to check that sync has been maintained.
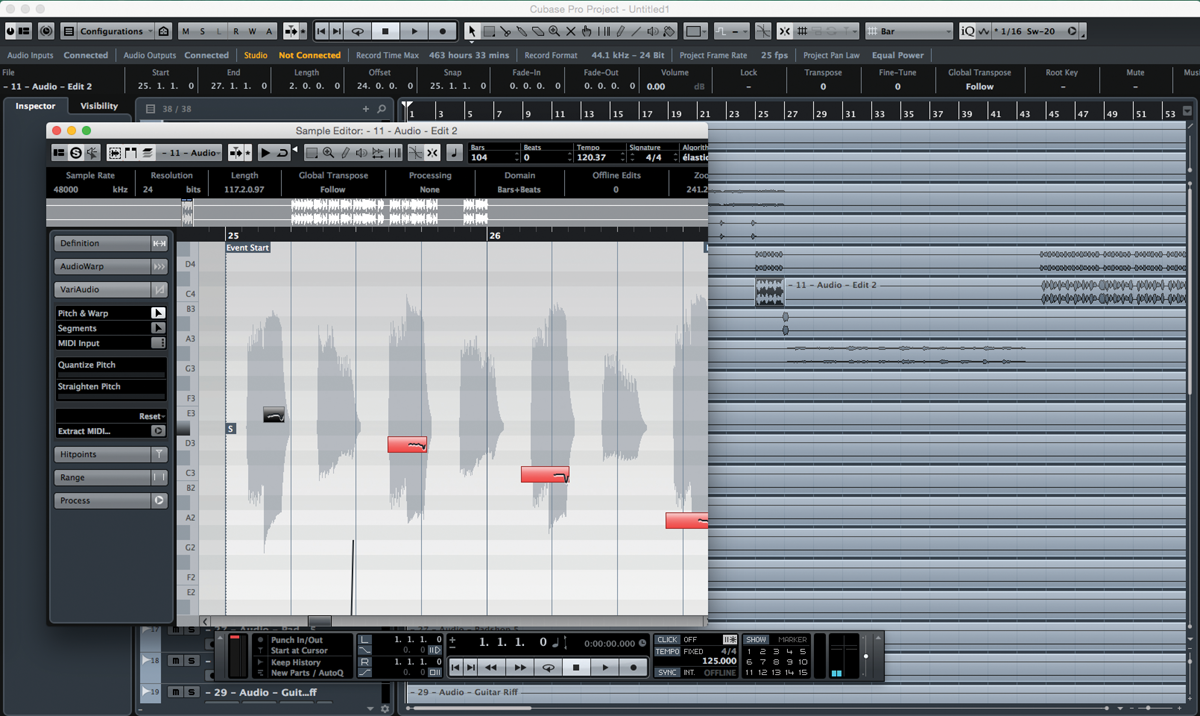
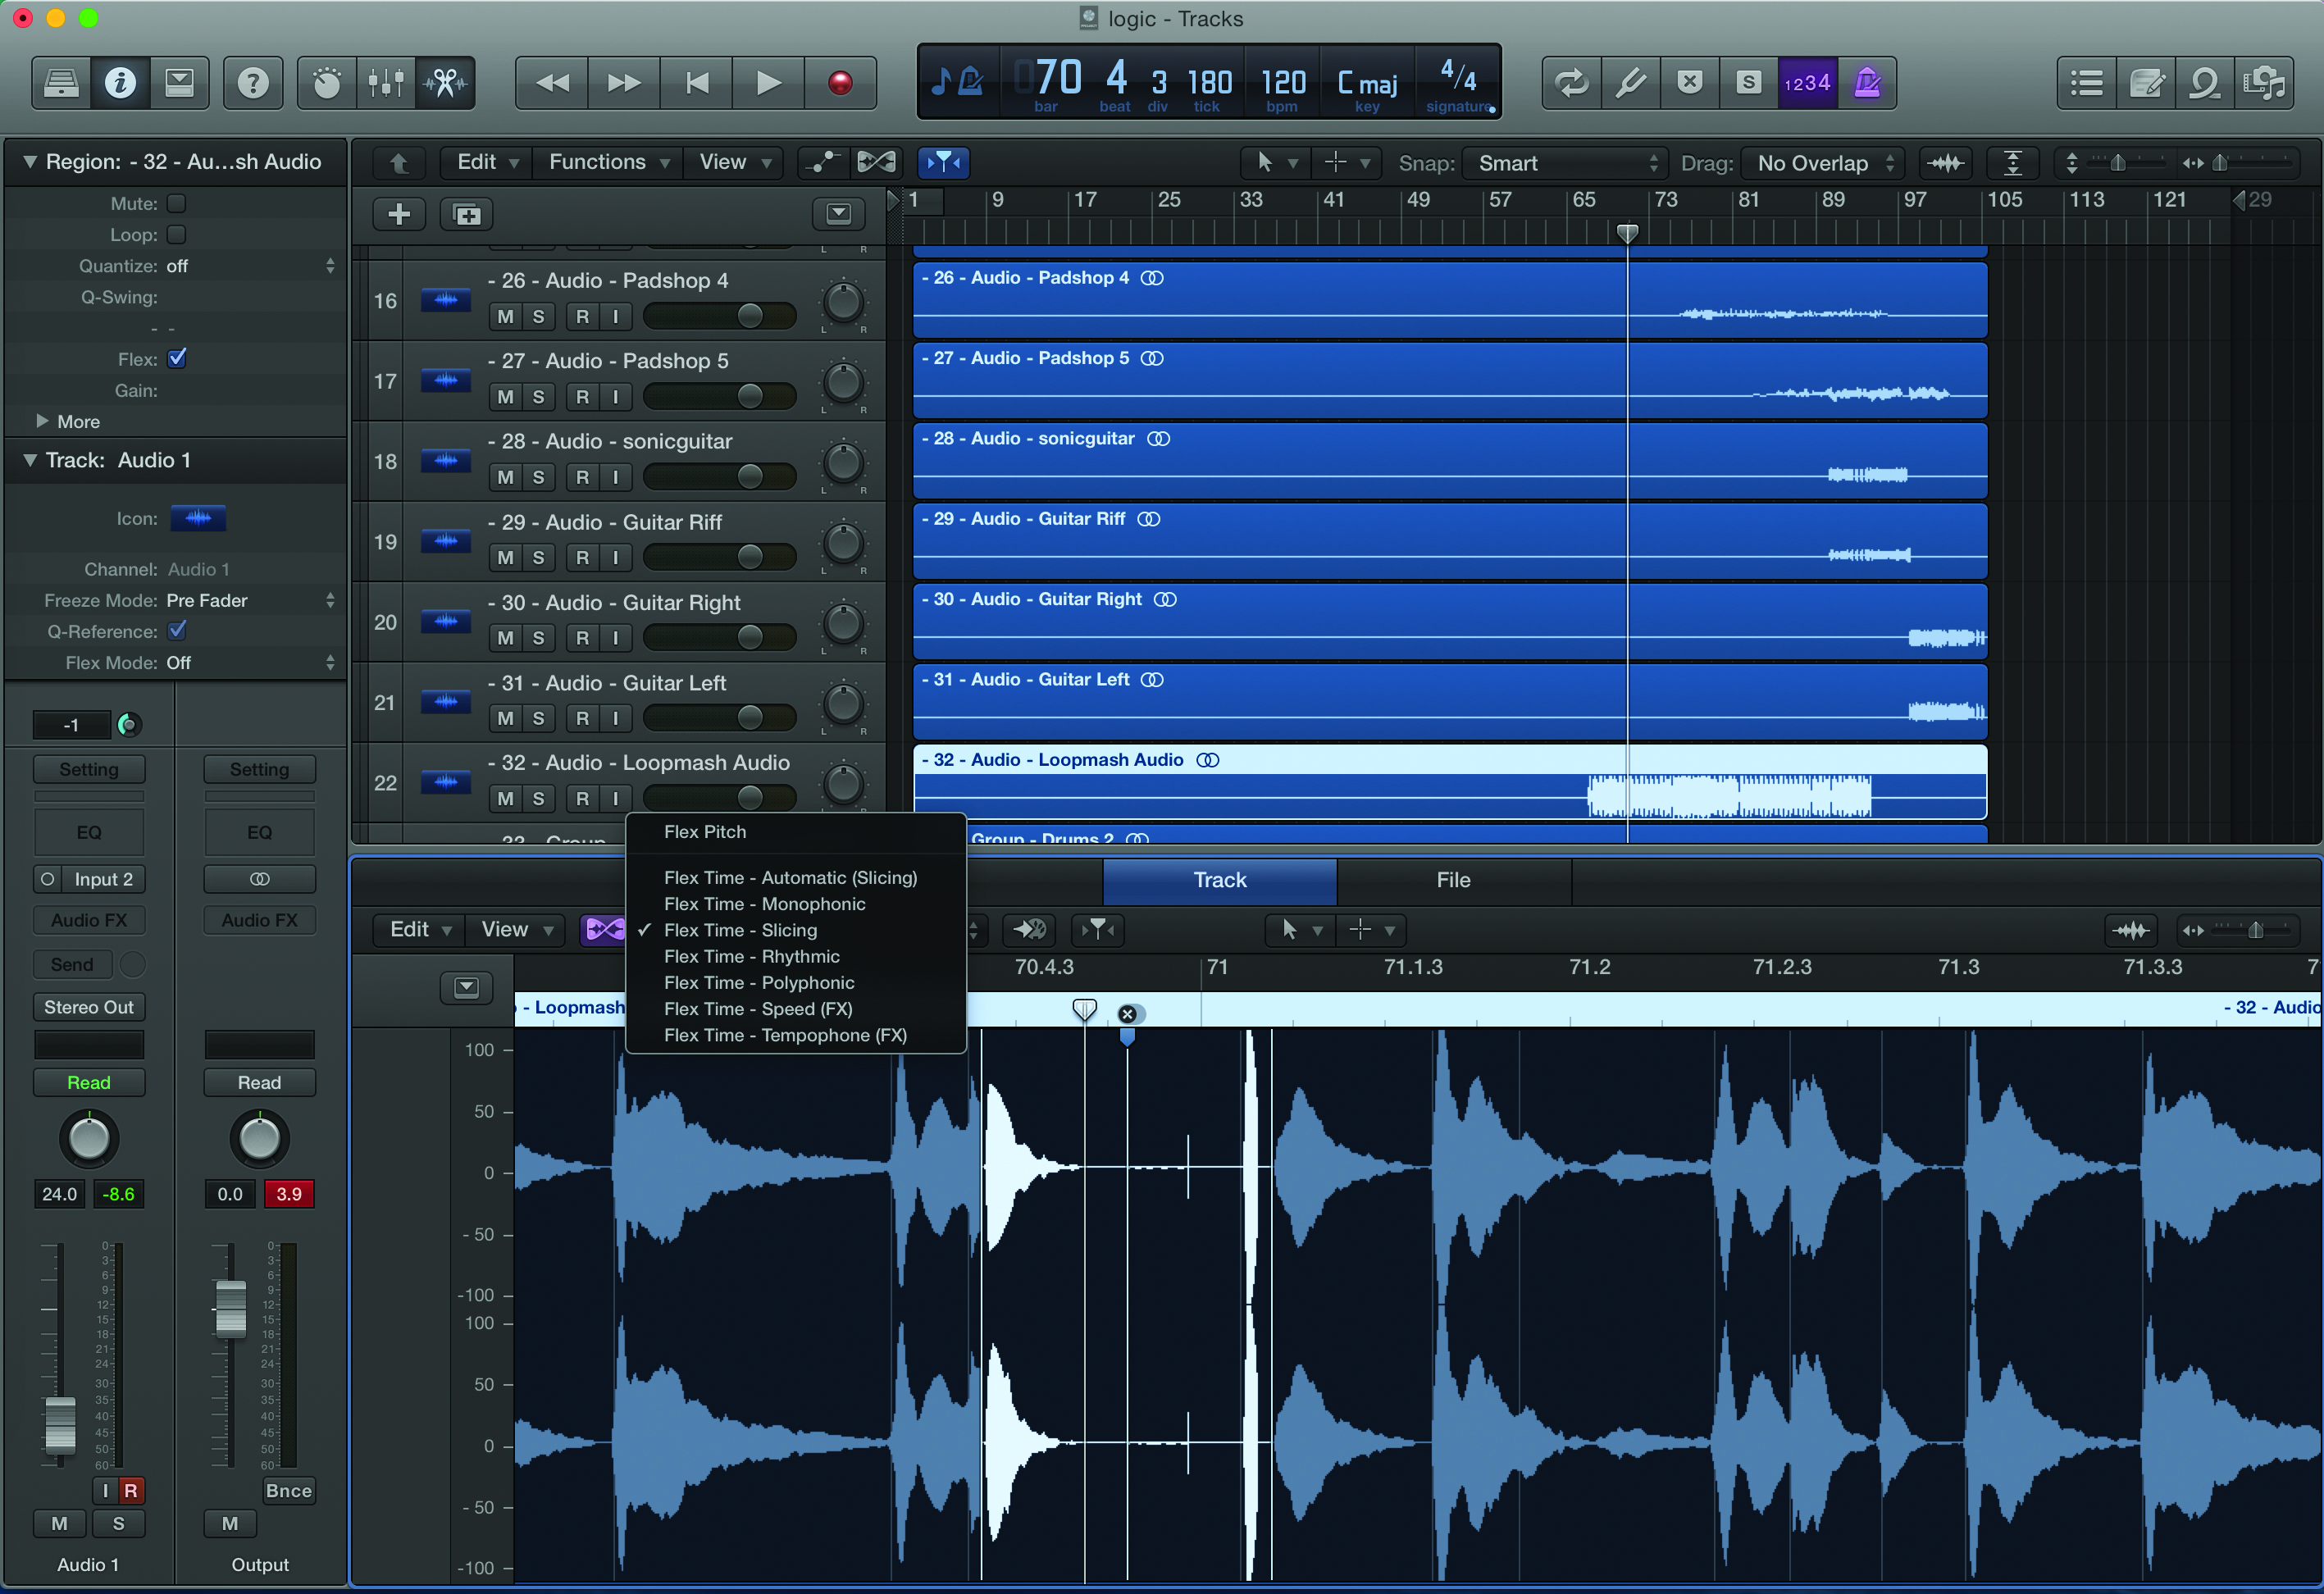
3: Now you can start cutting up audio parts, making sure snapping is switched on to stay in sync. Use Cubase’s Pitch and Warp features to manipulate and slice parts to mash them up. Loopmash is a great bundled plug-in for remixing in Cubase.
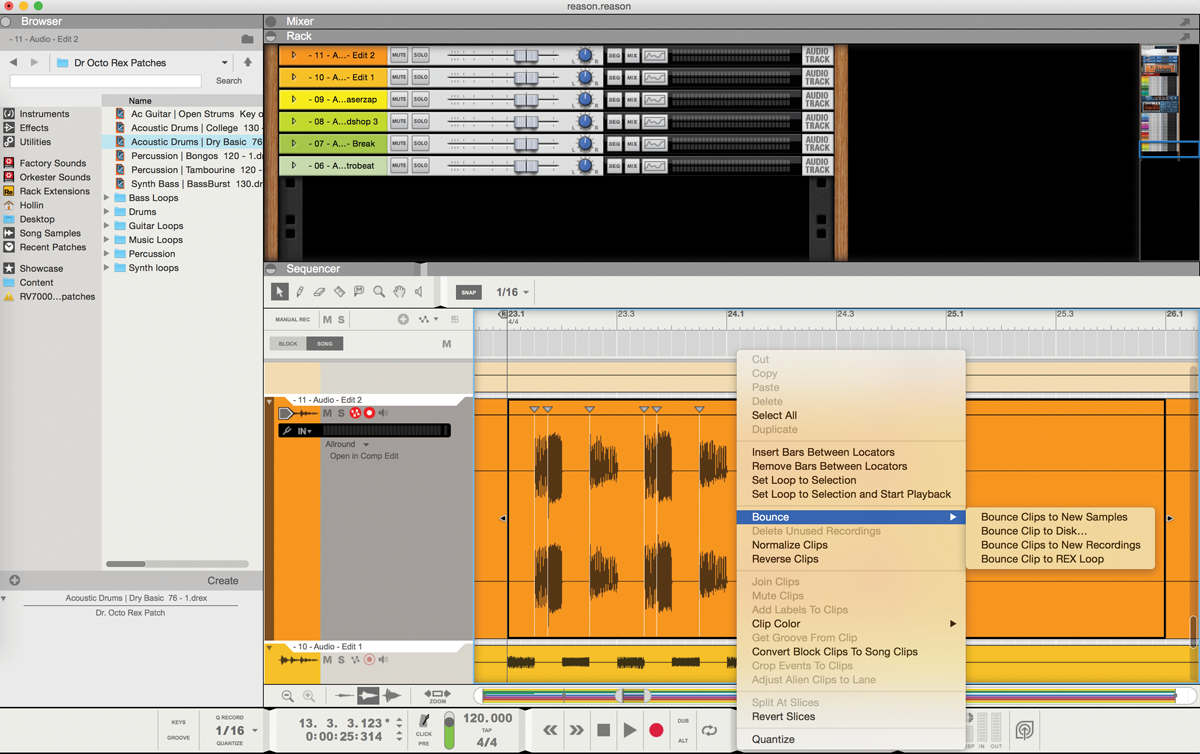
2: Remixing in Reason
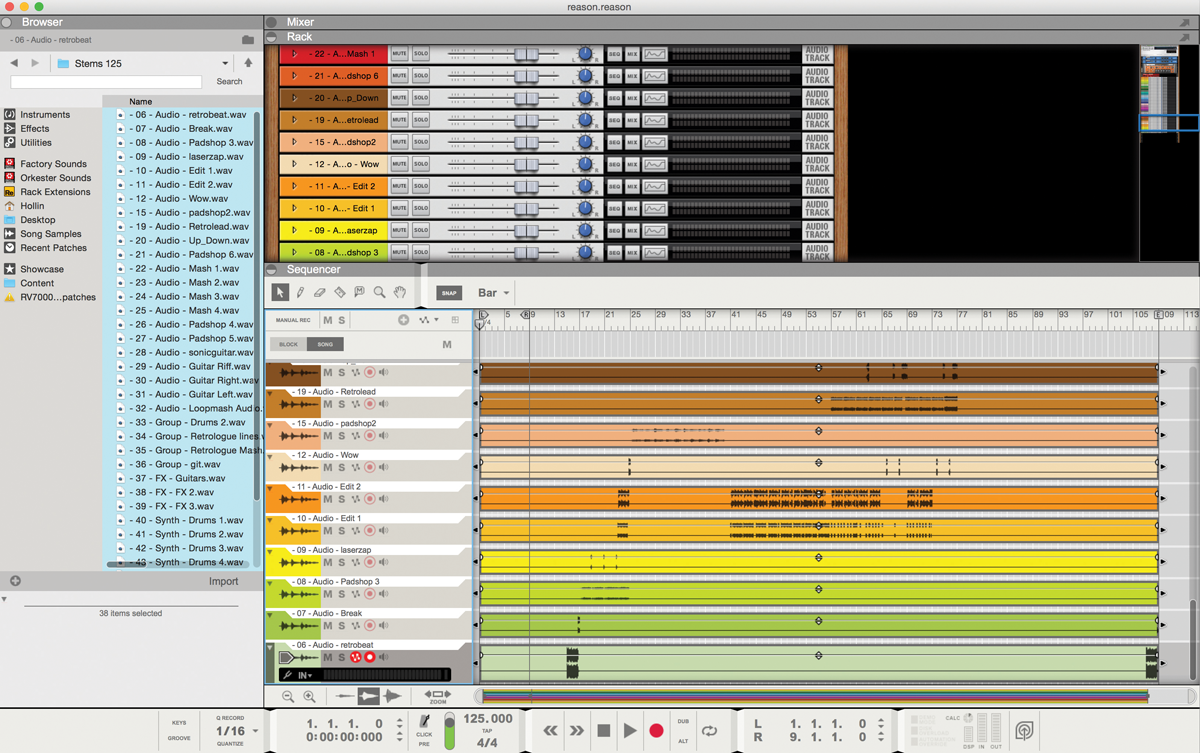
1: Import your stems into a blank Reason project and the software will create Rack and sequencer tracks for each one. Reason makes all audio elastic so you can change the project tempo and all the tracks will automatically adjust speed but not pitch.
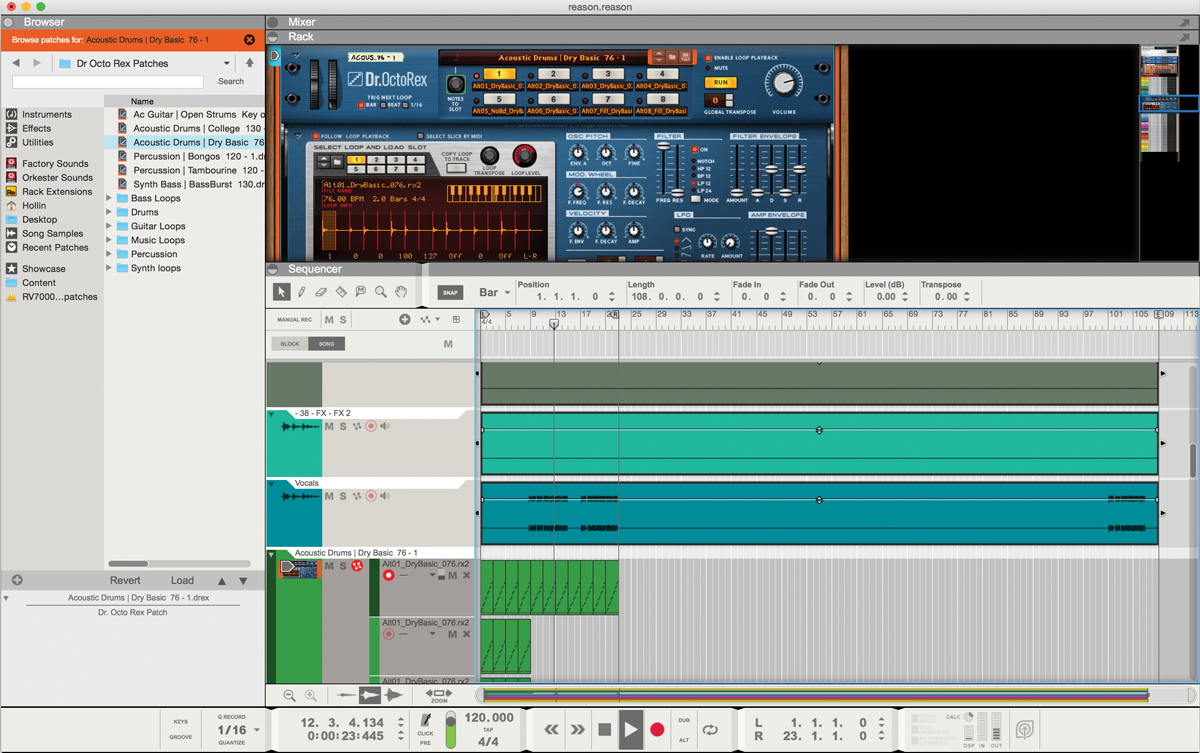
2: Mute the existing beats and then locate the vocal take. Try adding a new beat to the project by dragging a Dr Octo REX in and copying its loops to the track. Give the song a new feel by taking a different approach with the new beats.
3: Double click an audio clip and enter edit mode. Cut a section of the clip to define it and then note the slice markers. Right click and from the Bounce menu, choose to bounce to a REX loop. This lets you cut up any existing audio in a REX module for greater flexibility.
Click Here To Continue
