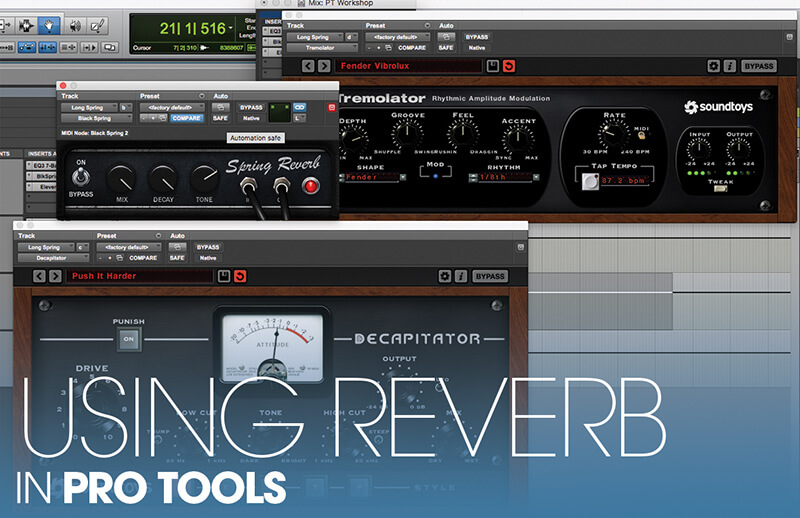
Regaining Space – Using Reverb in Pro Tools: Black Spring
With so many virtual instruments, DI’d guitars, or close mics in dry rooms a sense of space is being lost. Mike Hillier finds the reverb tools in Pro Tools to bring back the room. Reverb is one of the most creative tools available to you as a mix engineer. From simple room sounds, to long […]
With so many virtual instruments, DI’d guitars, or close mics in dry rooms a sense of space is being lost. Mike Hillier finds the reverb tools in Pro Tools to bring back the room.
Reverb is one of the most creative tools available to you as a mix engineer. From simple room sounds, to long evolving modulated halls, short gated drums to exotic reversed effects, reverb is one of the areas that can define a mix. Used well, reverb can be almost invisible or it can be one of the primary elements of the mix.
With so many songs now being recorded in small project studios, where the natural room acoustics are far from ideal, and therefore reduced wherever possible, where guitars are often recorded with a DI and then re-amped with an amp simulator, and where dry virtual instruments and synthesizers form a large portion of the instrumentation, it is of enormous importance to be able to use reverb effectively, and to have a selection of different styles available to you.
Lucky number seven
In Pro Tools 2018 there are seven different reverb plug-in options, from the classic D-Verb, to the three AIR reverb effects, Avid Space and the Avid Black Spring and Studio Reverb plug-ins, it can be easy to feel spoilt for choice, especially as many plug-ins duplicate the sounds of others.
In this tutorial we will walk through some of the options available for adding reverb to a guitar signal, recorded straight in through the line out on our Audio Kitchen The Big Trees amp head. This is a 2.5W amp head that’s ideally suited for recording and re-amping, as well as capable of being used as a preamp pedal before a larger amp.
In the first example we explore the different tones that can be achieved using a typical spring reverb effect on guitars placed both before and after the speaker. Spring reverbs are popular in many guitar amps, and are usually placed in the FX loop of the amp – between the preamp and power amp stages. We’re emulating this effect by placing the effect before the speaker emulation.
Placed after the speaker emulation the spring reverb responds to the already coloured signal, whereas before the reverb is working on a more full range signal, and the resulting signal is itself then coloured to produce subtly different textures.
Send effects
In the next two examples we explore two different styles of reverb: algorithmic and convolution, using both as send effects on their own Aux. channel. Using send effects has the obvious benefit of enabling you to send multiple sources to the same reverb, placing multiple instruments into the same virtual space without having to use multiple instances of the same plug-in on each channel. But more importantly than this, using an Aux. channel enables us to process the signal feeding the reverb both before and after the reverb.
This allows us to shape the signal going into the reverb with EQs and dynamics processing. On an electric guitar signal like this one, we’d most likely start with just a simple top-and-tail EQ, using high- and low-pass filters. But for vocal reverbs, particularly lead vocals, we might spend more time focussing the EQ on exactly the part of the vocal we want in the reverb, as well as compressing and de-essing the signal before it hits the reverb.
Processing the return
In addition to processing the send you can also process the return by placing EQs, dynamics and other processors after the reverb. Again the differences between processing before and after the reverb can be huge. A compressor on the reverb send will smooth out the dry signal, resulting in a smooth consistent reverb, with no individual notes blooming above the rest of the signal, potentially drowning out the next few notes. But placed across the reverb return a compressor will smooth out the reverb tails, adding additional sustain to the reverb, and lengthening the tails. Your explorations shouldn’t end there though.
Processing the reverb return with distortion can help to bring life to a reverb, and ensure that you don’t need as much of it in a mix. In fact many of our favourite hardware reverbs are dear to us simply because of their poor fidelity and the resulting charmingly grotty sound.
As much fun as it can be to explore different reverbs, unless you are trying to wash out your recordings, be careful when you’re finished finding the right sound to turn the return channel down in your mix. Leaving in too much muddy reverb is a common mixing mistake.
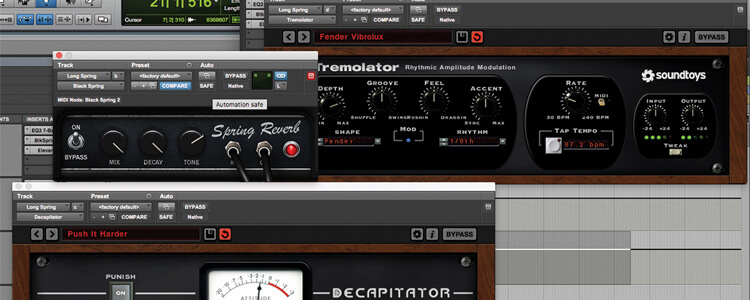
Using reverb in Pro Tools: Black Spring – step-by-step
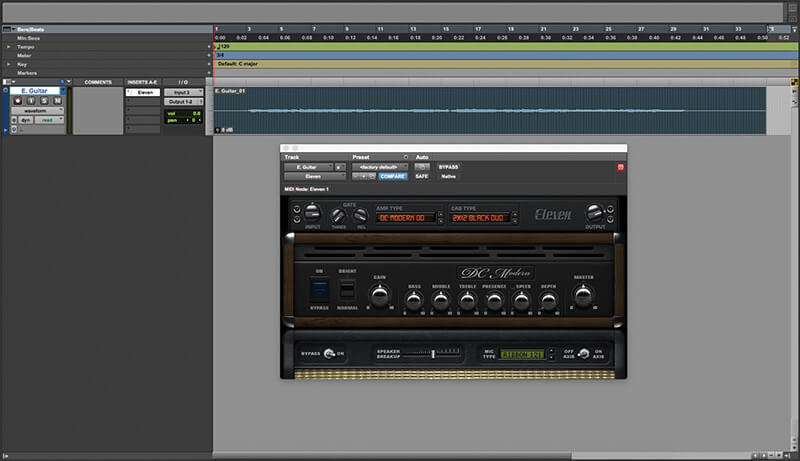
1. We’ve recorded an overdriven electric guitar signal through our Audio Kitchen: The Big Trees head straight into Pro Tools. Before we add reverb we’ve added an instance of Eleven Mk II, using the cabinet emulation to shape the signal.
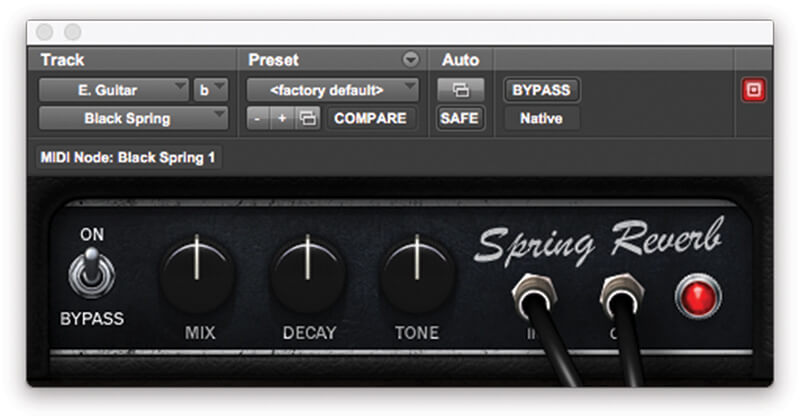
2. Guitar signals like this often benefit from a little spring reverb, and Pro Tools 2018 comes with Avid Black Spring, which is a fantastic emulation of a Fender spring reverb. We’ve added this to the signal chain to give the guitar more depth.
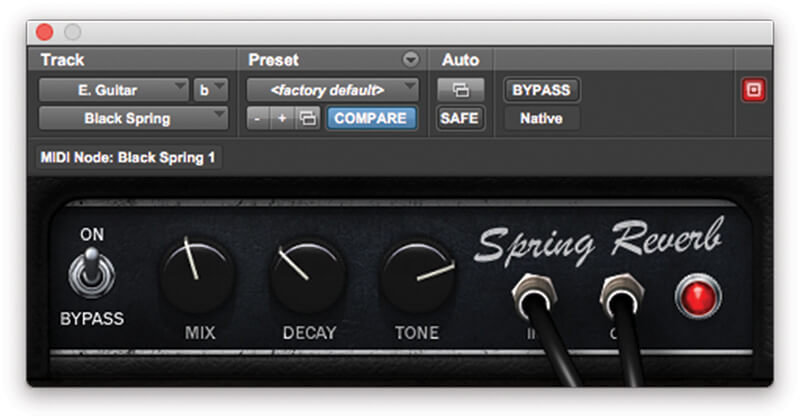
3. There aren’t many parameters on Black Spring, just a decay time control, a tone controller and a mix knob. We’ve dialled in a short, bright reverb, but longer, darker tails can work just as well.

Convolution also allows you to load almost any WAV file in as an impulse response, putting the impulse characteristics of nearly any sound onto your signal. This doesn’t always work effectively, but can result in some unusual textures. Try loading some of your own impulse responses into Space.
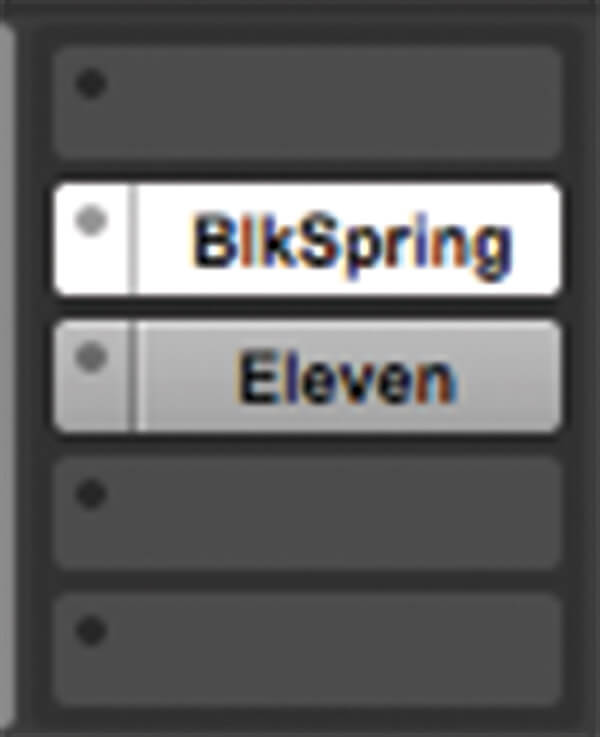
4. Placed after the cabinet emulation, it models what a spring reverb would sound like used as an effect after recording. We can model this by switching the order of the plug-ins, placing Black Spring before Eleven Mk II in the signal chain.
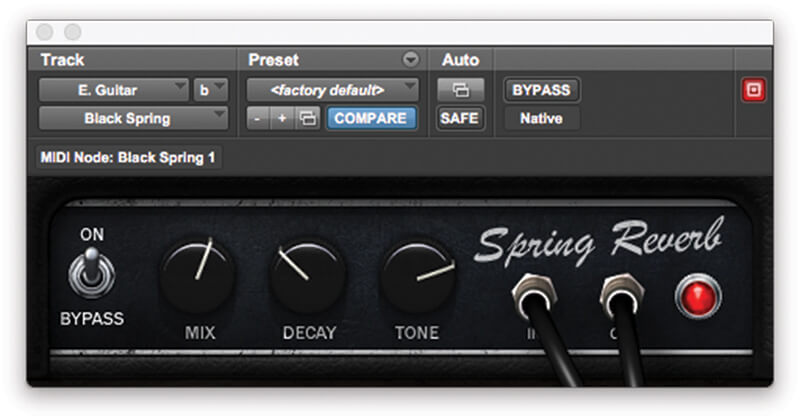
5. In this position, the reverb is coloured by the cabinet simulation, and isn’t quite as bright. We’ve further tweaked the effect by dialling up the mix and tone controls.
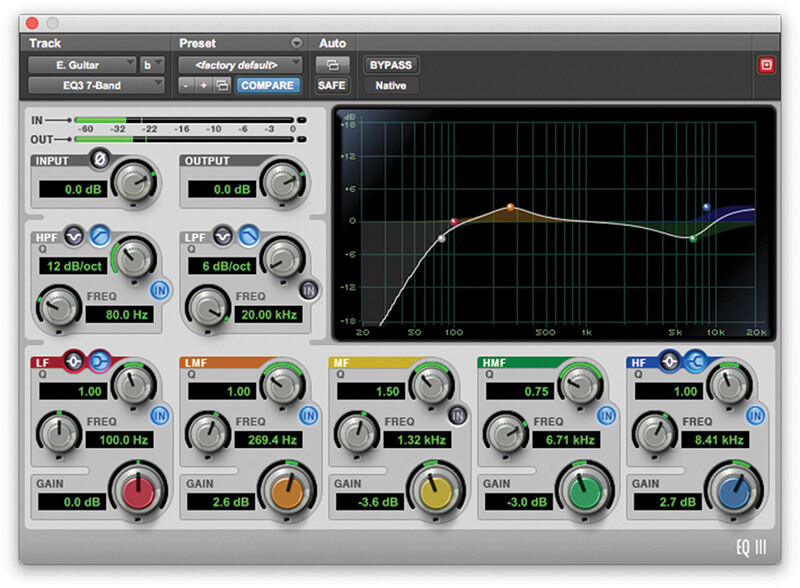
6. Finally we’ve opted to shape the signal a little going into the chain by adding an instance of Avid EQ III. Cutting some of the thumb noise from the upper harmonics, and boosting the darker wooden tones around 400Hz.