Routing in Cubase in Cubase 9.5
Routing signals in Cubase is not always as straightforward a process as it can be in other DAWs, so Adam Crute is going to take you on a bus tour… no, not that kind of bus! All DAWs provide a full studio solution incorporating recording, mixing, effects and instruments, and when thought of in these […]
Routing signals in Cubase is not always as straightforward a process as it can be in other DAWs, so Adam Crute is going to take you on a bus tour… no, not that kind of bus!
All DAWs provide a full studio solution incorporating recording, mixing, effects and instruments, and when thought of in these terms alone there’s really not a huge amount to choose between any of the main players. Where DAWs tend to differ – often markedly so – is in the way they handle signal routing, and this is so fundamental to everything else a DAW does that in many ways routing bears responsibility for the differences between the various DAWs. As such, routing can even be considered as a key driver for why a given user prefers DAW A over DAW B.
Cubase’s routing capabilities are determined by the underlying Virtual Studio Technology on which it’s built. VST is a fabulously scalable system, able to function on anything from low-powered machines that lack dedicated low-latency audio hardware, all the way to high-powered, multi-core, multi-processor behemoths connected to banks of high-quality audio I/O. VST can even be interconnected with additional computers to provide more processing horse-power to a setup. But when it comes to signal routing, VST isn’t as transparent and intuitive as some other DAWs, so let’s take a look at the options.
Physical connections
The most important of Cubase’s routing tasks is to gather signals from, and return other signals to, the outside world. It does this via your audio interface hardware, of course. However, multi-channel audio interfaces have their own dedicated mixer/control panels, so it’s important to appreciate how these relate to the audio inputs and outputs available in Cubase.
The specific details differ from one model of interface to another, but in general you should think of your interface’s mixer as being separate and distinct from Cubase: it receives the signals arriving at its audio inputs, it drives signals to its audio outputs, and it provides internal busses through which signals can be routed. Cubase then connects these internal busses to get signals to and from the outside world.
Cubase isn’t connecting directly to sockets on your audio interface. Rather, it’s connecting to the audio interface’s mixer, which in turn is routing the signal to one of its physical connectors.
Cubase audio connections
The Audio Connections panel is at the heart of routing within Cubase. We looked at its External FX and External Instruments sections a few months ago, and saw how to use these to patch outboard processors and synths into Cubase, and use that external hardware as a software plugin.
The Input and Output tabs of the panel are where we create Cubase input and output busses and connect these to the busses (or ‘ports’, as Cubase calls them) provided by your audio hardware. You can name the Cubase busses however you like, but I recommend you avoid using the same name as the audio interface bus that you’re connecting to, if only to reinforce the difference between Cubase busses and audio interface busses.
FX and group tracks
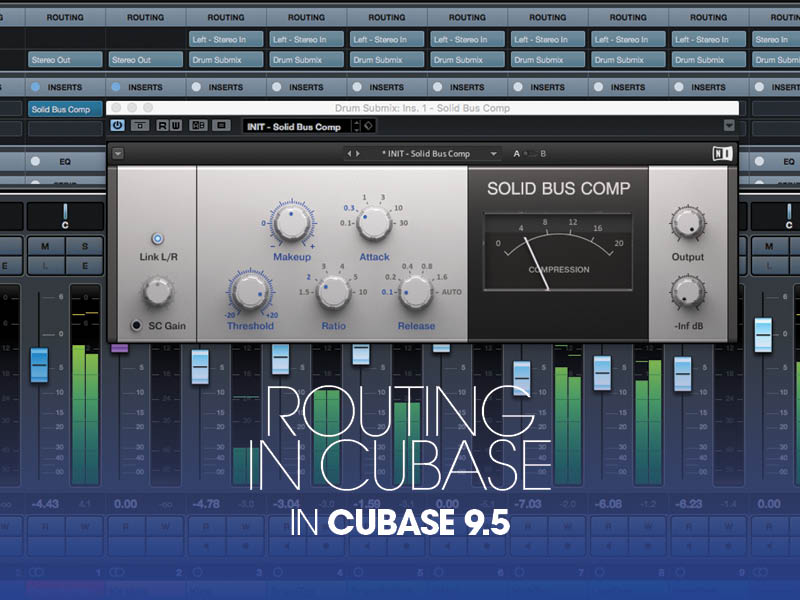
FX tracks can be created directly in project or mix windows, or in the Audio Connections panel. FX tracks are used to host a single instance of a plug-in effect or processor and show up as a routing destination in Cubase. You can bus an entire track or multiple tracks to an FX track, but it’s more common to use them with track Sends to feed the signals from many tracks to a single FX Track. The plug-in you assign to an FX track appears as an insert on the track. You can add further inserts if you wish to create a more complex processing chain.
Group tracks are functionally identical to FX tracks. The only real difference is their name and intended use: where FX tracks are intended to be fed from track Sends to create common effects processors available throughout a project, Group tracks are intended to be used as an output routing for tracks that you wish to include in a sub-mix. Inserts and further routing can be applied to a Group track, just as they can be to an FX track.
It’s hard to fathom why Steinberg impose this tenuous differentiation on these two track types. Surely, lumping them together under a banner of ‘Auxiliary Tracks’ (or similar) would be a much simpler and more concise way of doing things.
OK, let’s see how all of this works by setting up a multi-track drum session…
Routing in Cubase: step-by-step
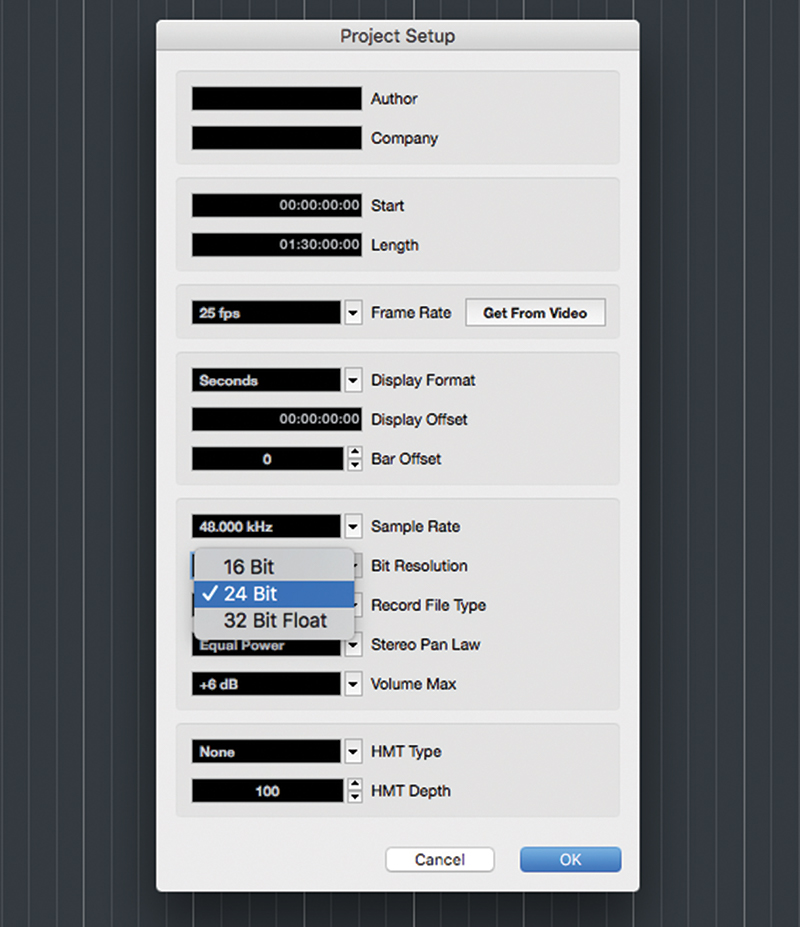
1. Fire up Cubase and create a new, empty, project. Open the Project Setup panel (Project -> Project Setup) and set the sample rate to 48kHz and the bit resolution to 24-bit. Close the panel when done.
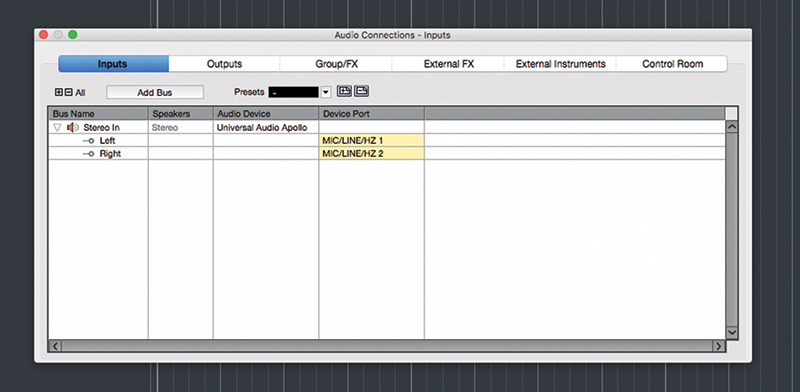
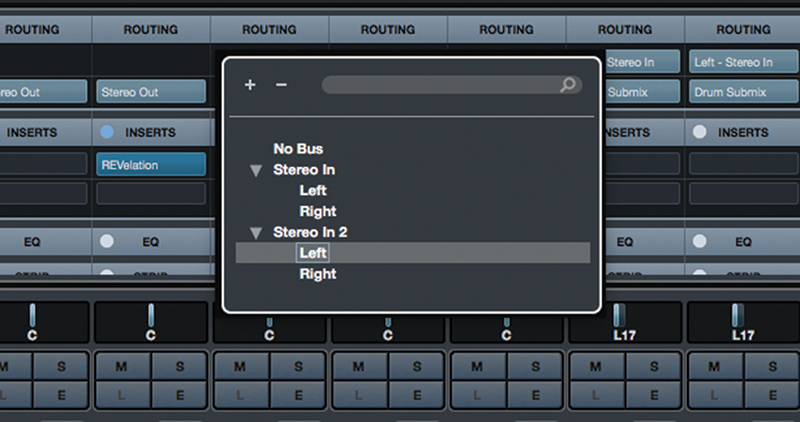
2. We’ll start by creating some busses. Open the Audio Connections panel (Studio -> Audio Connections) and select the ‘Inputs’ tab. Cubase will create a default ‘Stereo In’ bus for you, routed from your interface’s primary inputs.
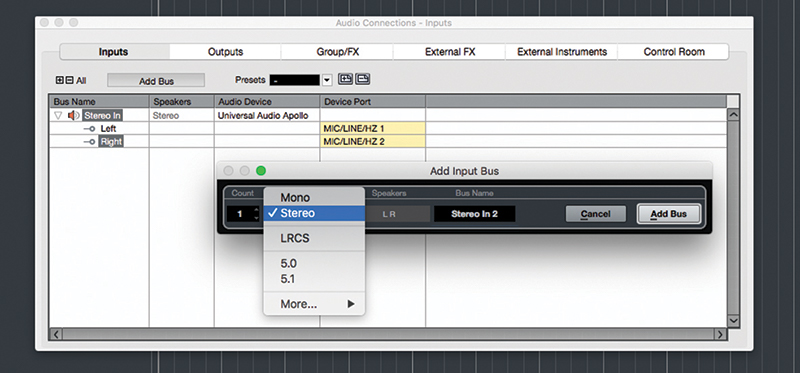
3. Click the ‘Add Bus’ button to open the ‘Add Input Bus’ panel. Select ‘Stereo’ from the ‘Configuration’ drop-down menu, enter ‘Stereo In 2’ in the ‘Bus Name’ field
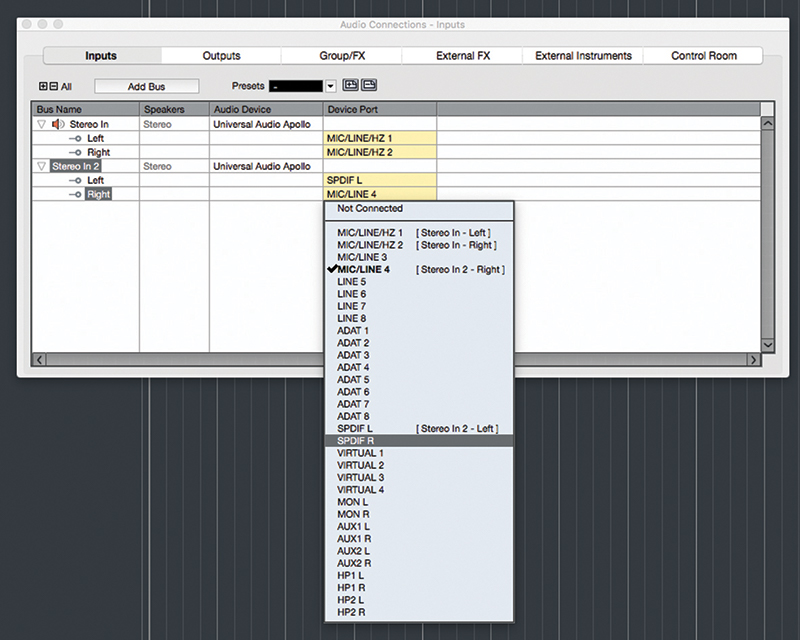
4. Back in the Audio Connections panel, check that the ‘Device Port’ assignments for your new bus are appropriate; if not, click the port names to drop-down a list from which you can select the desired port.
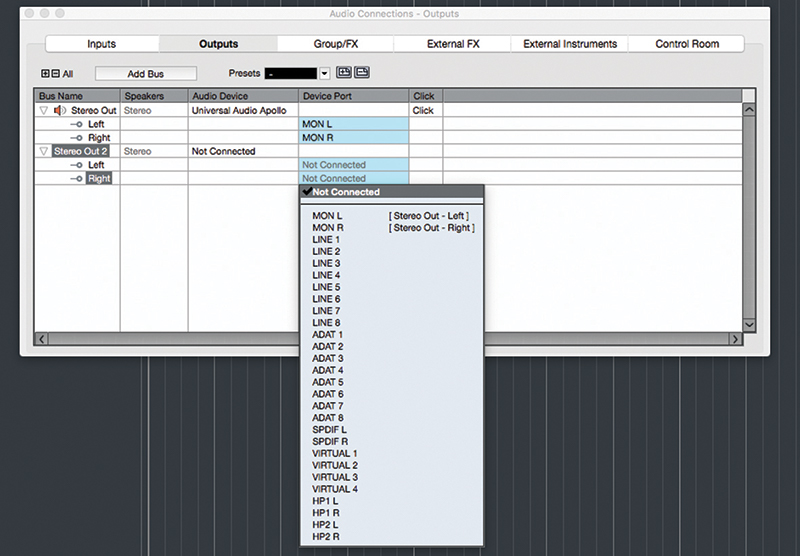
5. Switch to the Outputs tab. Follow a similar method to the above to create a new output bus called ‘Stereo Out 2’. (BTW, you can use ‘Not Connected’ for these new busses if your hardware lacks multiple I/O.)
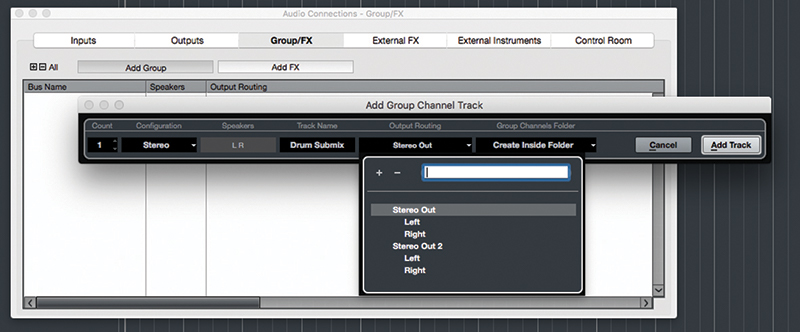
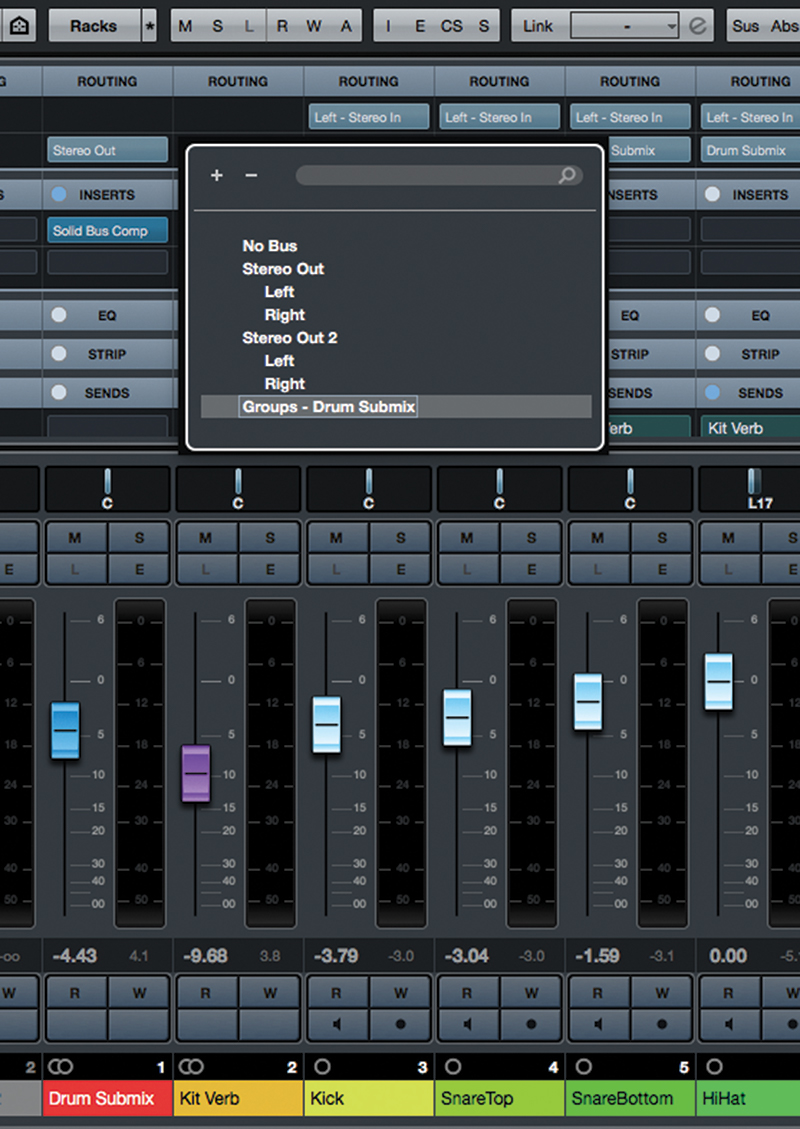
6. Switch to the ‘Group/FX’ tab and click ‘Add Group’. Use the panel that appears to create a stereo group called ‘Drum Submix’. Route the group to your main Stereo Out, but notice ‘Stereo Out 2’ is also available.
![]()
What causes input latency? When an incoming audio signal is digitised, a ‘buffer’ receives the digitised bytes. Once the buffer is full it is passed into the system for mixing and bussing, and the buffer fills again. Input latency is caused by the time it takes for the buffer to fill.
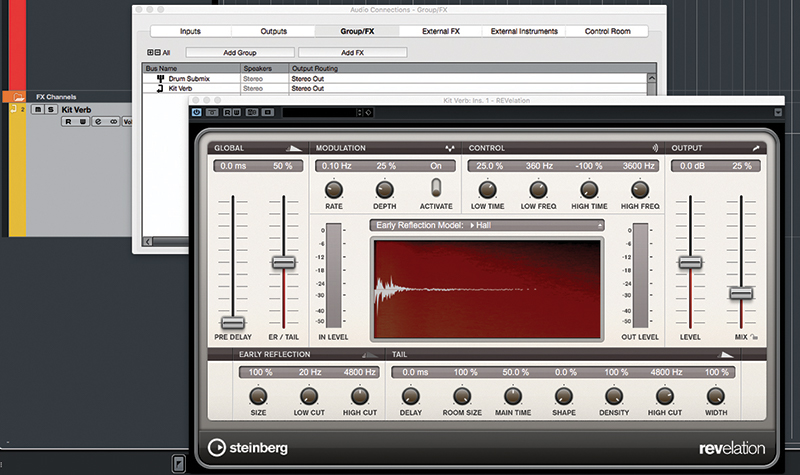
7. Click ‘Add FX’. Use the panel that opens to create a stereo FX channel called ‘Kit Verb’, routed to the main Stereo Out. In the ‘Effect’ drop down, select a reverb plugin. Click ‘Add Track’ to complete the operation.
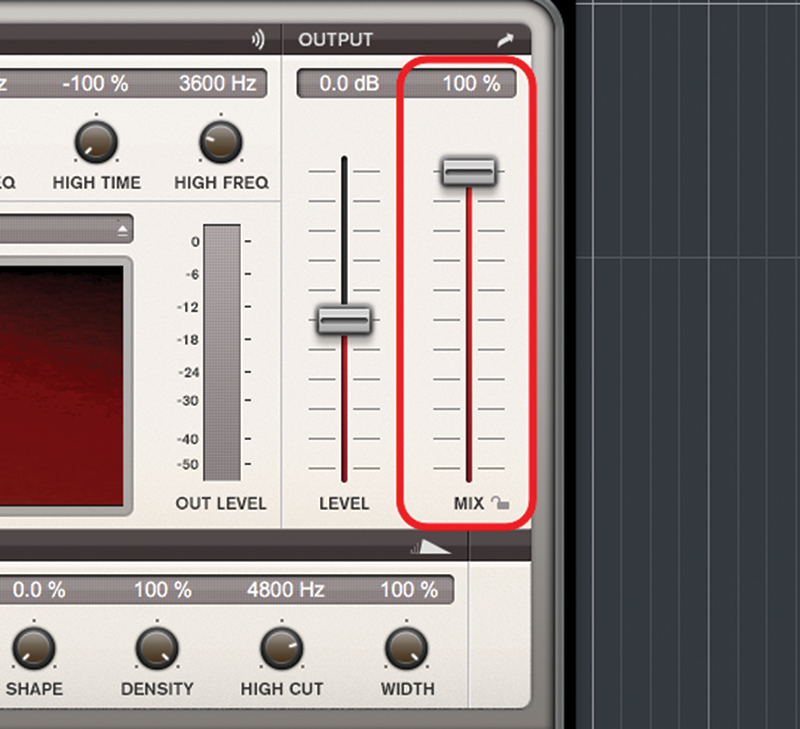
8. We’ll be driving the ‘Kit Verb’ FX channel from track sends, so open the reverb’s panel (if it isn’t already open) and set its mix setting to 100% wet (if it isn’t already set to this).
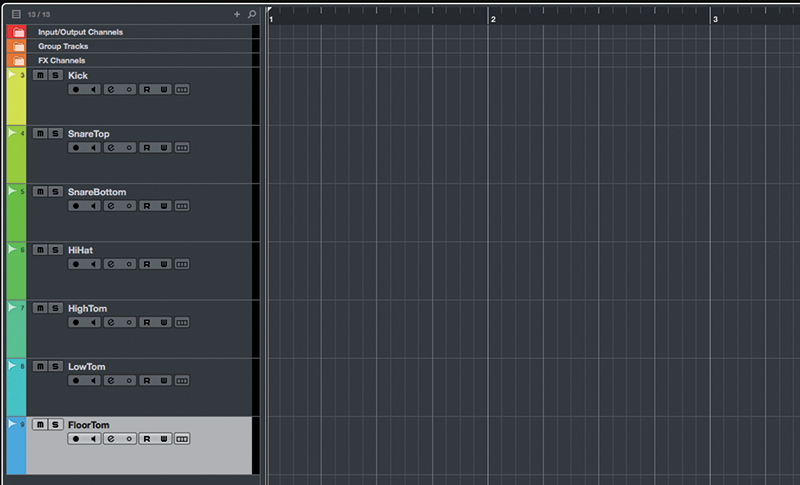
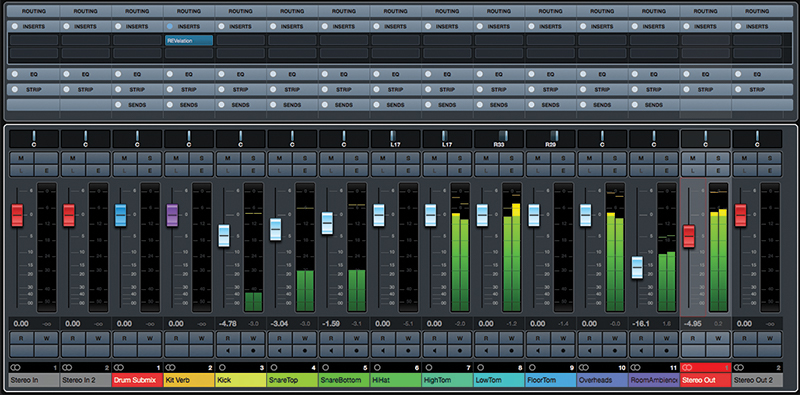
9. Close the reverb plugin and the Audio Connections panels. Create seven mono audio tracks and name them as follows: Kick, SnareTop, SnareBottom, HiHat, HighTom, LowTom and FloorTom.
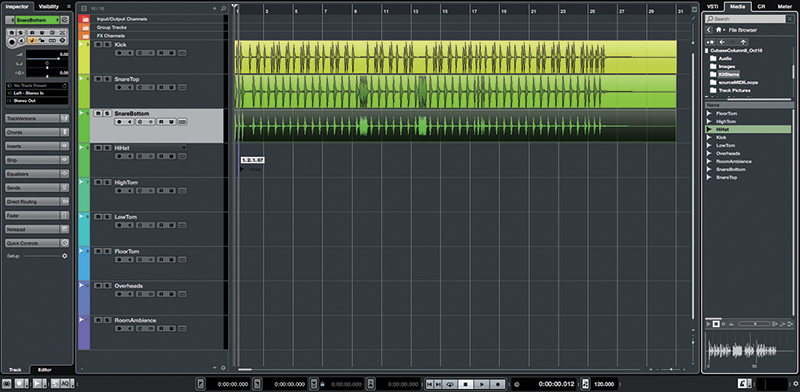
10. Create two stereo audio track and name them Overheads and RoomAmbience. On the disc are stems of a multi-tracked 120BPM drum part. Locate these and drag each to the start of the track of the same name.
11. Switch to the Mix Console (hit key [F3] if it’s not visible). Hit play and set a nice balance for the drum kit, and add a bit of panning where appropriate (on the hi-hats, for example).
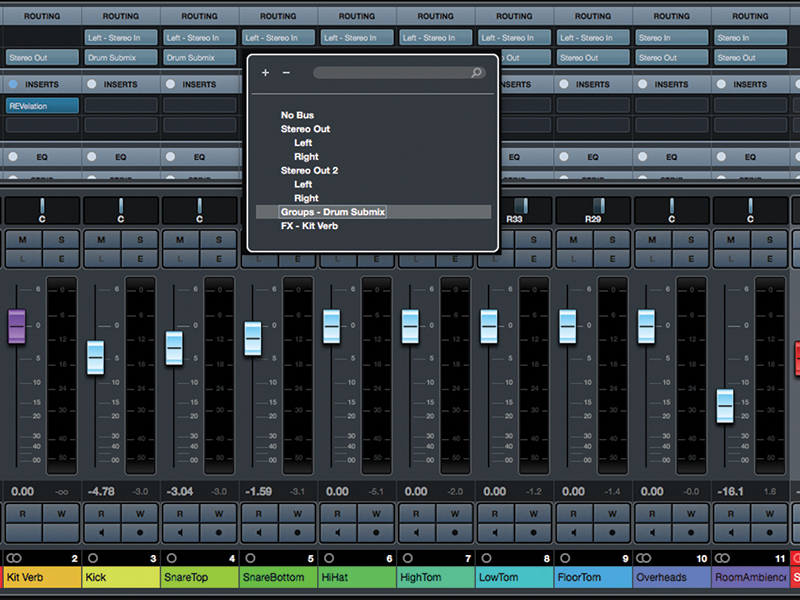
12. Open the routing view by clicking the ‘Routing’ section at the top of a channel strip. Locate the Kick track and change it’s output routing to ‘Groups – Drum Submix’. Do the same for each drum track.
![]()
How does low-latency input monitoring work? To avoid input latency on a live input signal, many audio interfaces provide a low latency ‘direct’ monitoring mode. This mixes an input signal feed with Cubase’s output signal. The input’s digitised version is bussed to Cubase for recording.
13. Notice that the input and output busses we created in steps 2 to 5 are available in each track’s routing drop-downs. We’re not going to actually use these; we created them for example purposes only.
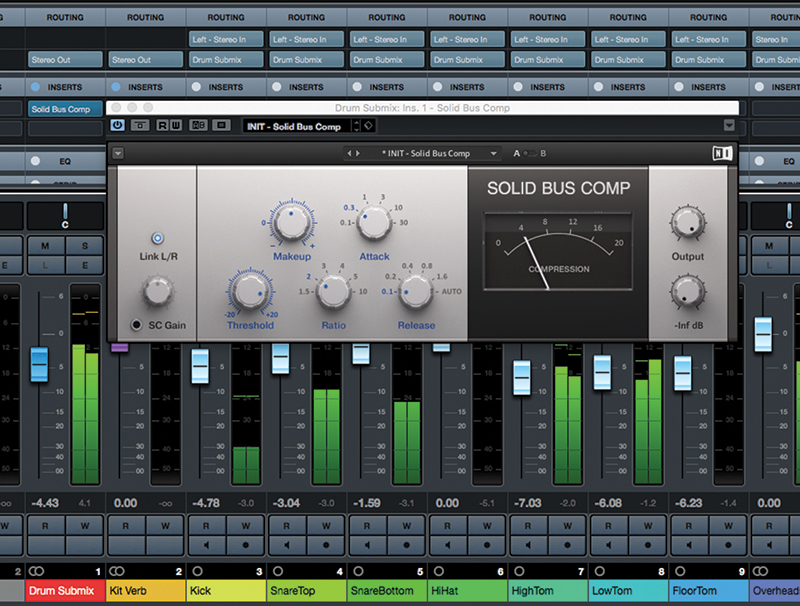
14. Hit play and notice that the drum tracks are all now routing through the Drum Submix group track. Add a multi-band or buss-style compressor plug-in to the group track and use it to fatten the kit’s sound.
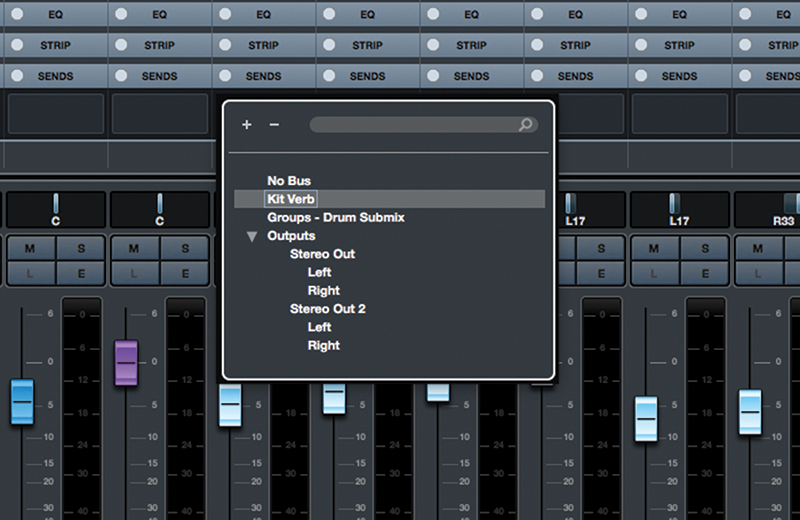
15. Open the ‘Sends’ section of the Mix Console. On the Kick track, click the first send ‘slot’ and route it to ‘Kit Verb’. Hold the mouse over the slot again, and click the power button in its upper-left.

16. Notice also the icon alongside the power button; if the dot is rightwards of the semicircle then the send is post-fade, which is what we want. Clicking the icon toggles between pre and post fade.
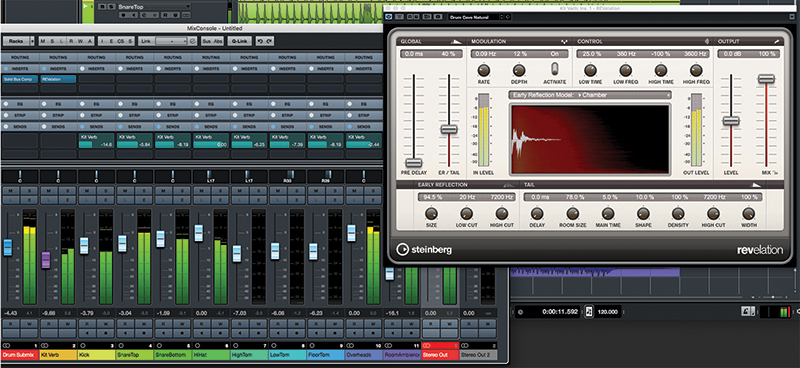
17. Add sends to all of the drum tracks (but not to the group track). Play the track and adjust the send levels, Kit Verb track level, and the reverb plug-in settings to get a sound that you like.
18. Route the ‘Kit Verb’ output to the ‘Drum Submix’ group so that it’s also controlled and processed by the group track. This may affect the relative volume of the reverb, so adjust the track’s level if required.