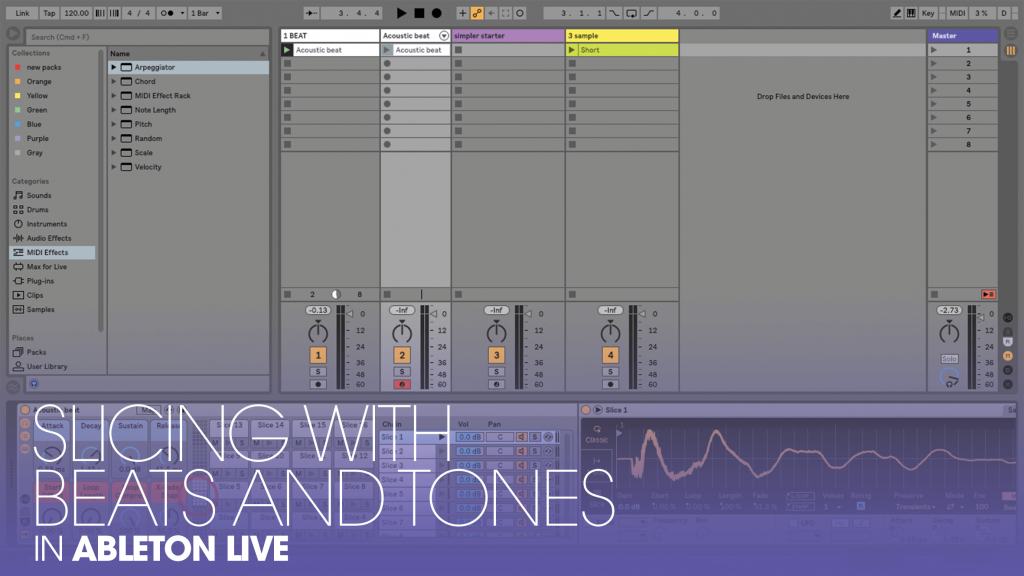
Slicing Samples with Beats and Tones in Ableton Live
Slicing a sample can involve anything from simply chopping a beat, to creating wild swarms of randomised noise. Martin Delaney tries both! Slicing audio is a vital part of the sampling workflow. Even though we can time stretch audio quite freely, the process of slicing it gives us different ways to dig deeper and manipulate […]
Slicing a sample can involve anything from simply chopping a beat, to creating wild swarms of randomised noise. Martin Delaney tries both!
Slicing audio is a vital part of the sampling workflow. Even though we can time stretch audio quite freely, the process of slicing it gives us different ways to dig deeper and manipulate the material.
This can be something as simple as slicing and rearranging a drum beat, right up to chopping field recordings into tiny slices and using randomisation and effects to mix them and spray them out into a whole new structure. Live has the necessary tools to slice audio any way you want with Simpler and Sampler, and it’s an enjoyably mouse-free experience for Push users.
Slice and dice
From now on, all of our Ableton Live tutorials will be based around Live 10, and that goes for any demo material we supply as well. After all, 10 is the current version, and if you don’t have it already, you can always try the demo, which is fully functional for 30 days (system requirements for Live 10 have been bumped up from Live 9, so check before you download).
We begin by slicing an acoustic drum beat; this can be more or less a one-step operation, although there are plenty of customisation options available. Our source beat is very straight, being programmed in the first place, so it slices easily. In the real world, not every drum loop is like that, but it’s possible to customise the slicing results and manually edit the start and end of each slice – they’re all contained in Simplers, after all.
Once your beat is sliced, there are so many things you can do to it; my favourite part is applying different audio effects to individual slices. This can involve practical effects like compressors or EQs, or more noticeable ones like delays on percussion hits.
There’s nothing to stop you from dropping an entirely different sample on a particular slot, or even replacing the Simpler entirely with another software instrument, whether it’s a synth like Wavetable or one of Max for Live’s new DrumSynth instruments. Sliced beats are automatically installed into a new drum rack, with convenient macro controls preconfigured and ready to use – as always, macros are most handy for use with hardware controllers, including Push.
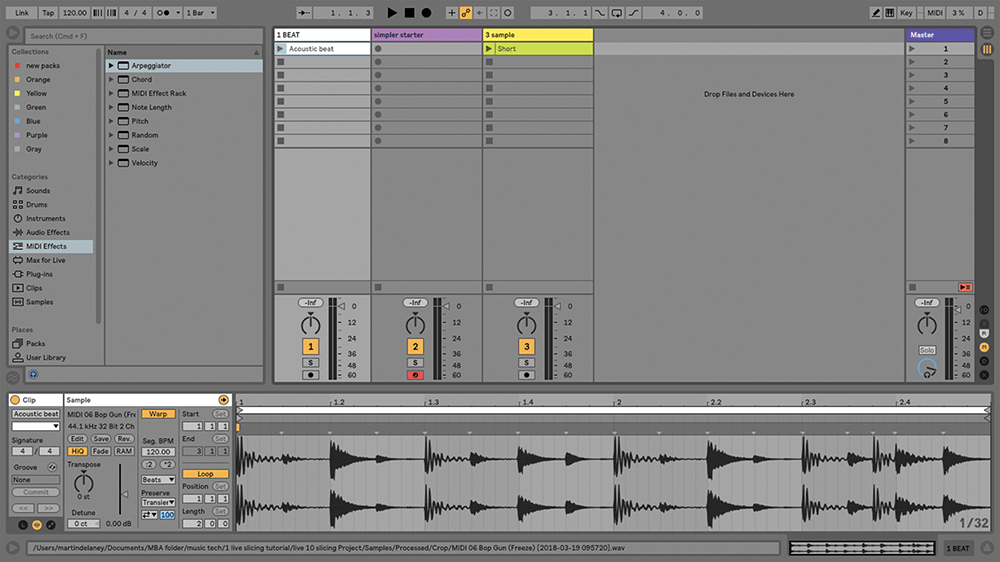
Slicing isn’t just about drums; our example Live set includes a Simpler that’s pre-loaded with a 1-bar sample that we can divide into regions. Unlike with the drums, we’re not dividing the sample into separate items; it’s retained within a single instance of Simpler, but separate areas of it can be accessed individually, as if they were distinct samples.
Regions can be split evenly, with a value between 2 and 64, or inserted and repositioned manually. What floats my boat on this is that the original sample can be very short – a single beat for example – and it can still be sliced into 64 regions. You can make very tiny slices indeed!
If your source sample doesn’t have much variety over its duration, the individual slices might be quite samey; if it same has more going on, you’ll get more diversity and development in the slices as you play different notes.
Our next step is to create an instrument rack that contains the first Simpler, then to add another chain that can be loaded with another sample. You don’t have to create an empty Simpler first, just drag the sample into the rack’s drop area and it’ll do the rest. By changing the time values of the various devices you can get some interesting textures and crossovers between the different samples.
It doesn’t always sound good, but it’s a worthwhile experiment, and when you get a combination of samples that work together, it’s rewarding. I skew towards using field recordings and machine noises, but try it with whatever you have available. My personal taste here is not to add too many effects, but there are no rules.
The walkthrough mentions adding Auto Pan after the rack, which adds another point at which you can introduce timing (as well as stereo) madness, as it flips left/right between different sounds, but again you might find that’s overkill.
Overall, this second slicing exercise is all about movement, these little waves of slices are more interesting and dynamic when they are offsetting against each other in different ways. Live 10 has LFOs available as MIDI and audio effect devices, and they are useful for situations like this.
As I mentioned earlier, ‘slicing’ doesn’t always have to mean creating a separate entity for each portion of the sample; Slice to New MIDI Track will put each segment into a new Simpler, whereas loading a sample directly into Simpler and chosing Slice Mode keeps it all in one place.
There’s a lot of crossover between these techniques. Push users are more likely to be working with the single-sample-in-Simpler option. Either way, sample slicing is a great way to rearrange source sounds into something new.
Slicing with beats and tones: step-by-step
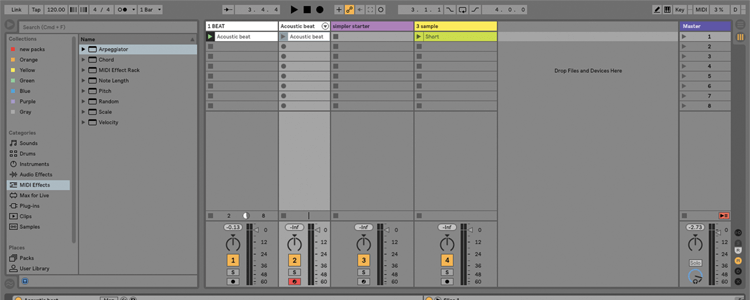
1. Load our example project ‘Live 10 Slicing’. To open this one, you’ll need to use the latest version of Live 10 – you can download the demo from www.ableton.com if necessary.
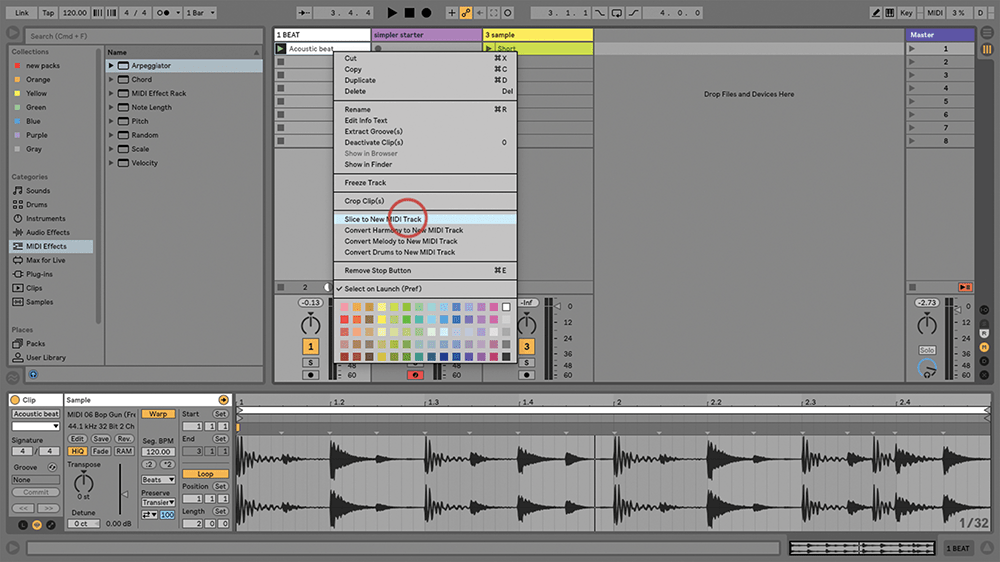
2. Track 1 contains a clip called ‘Acoustic Beat’, which was made using one of the new Live 10 drum kits. Preview it, then right/control-click on it and choose ‘Slice to New MIDI track’.
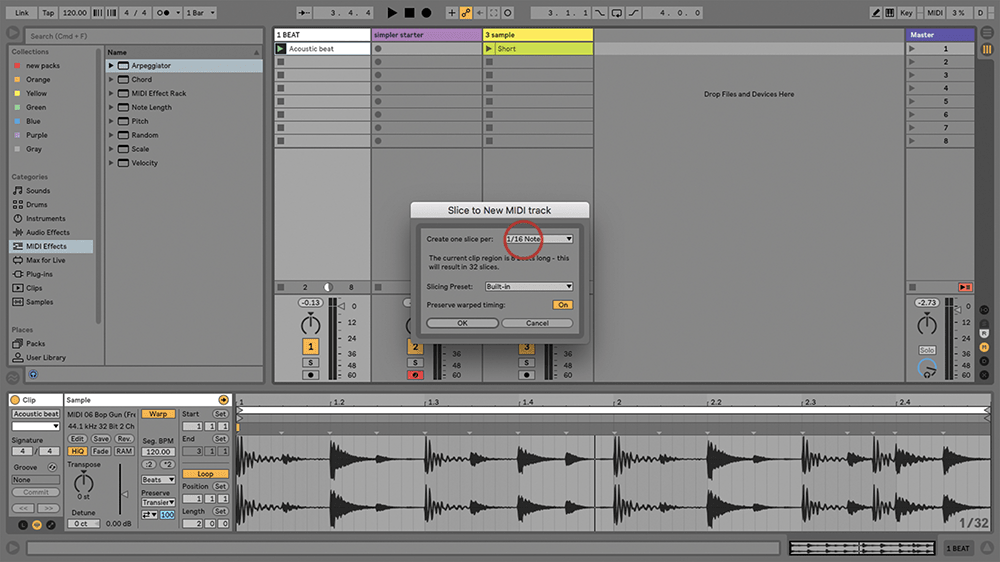
3. From the window that pops up, choose ‘Create one slice per 1/16th Note’, and for the slicing preset select ‘Built-in’. Live will create a MIDI track with a kit loaded and a MIDI clip.
![]()
Push it If you’re sampling and slicing in Live, no hardware controller works as effectively as Push. We’re not trying to sell you one, but it’s the only hardware device fully optimised to work with Simpler. Sampling is an area where no hardware can really compete with what software does.
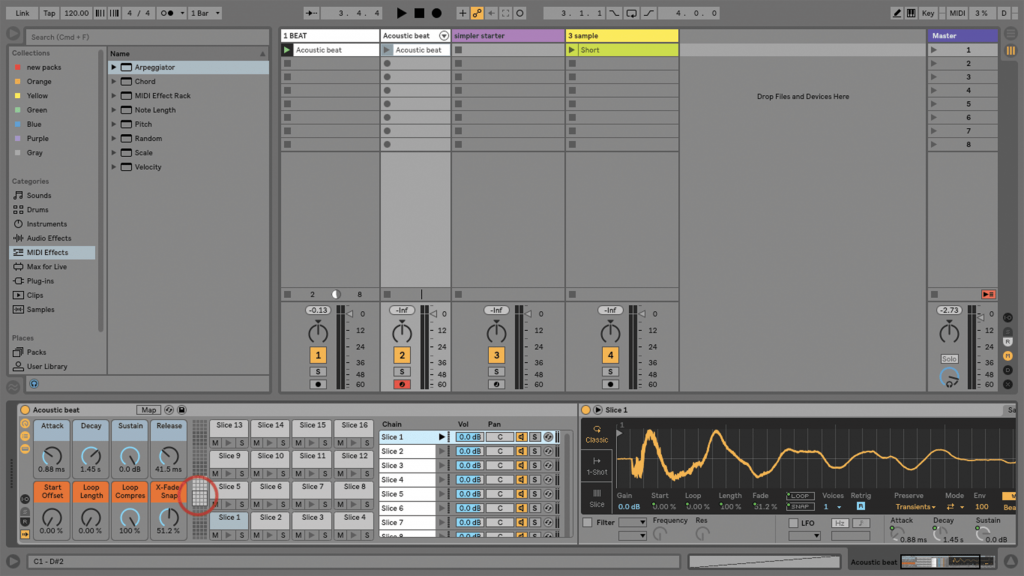
4. The kit hosts a number of Simplers (32 in this case), each containing a slice of the original audio sample. Launch the clip and you should hear the same beat as in the original sample.
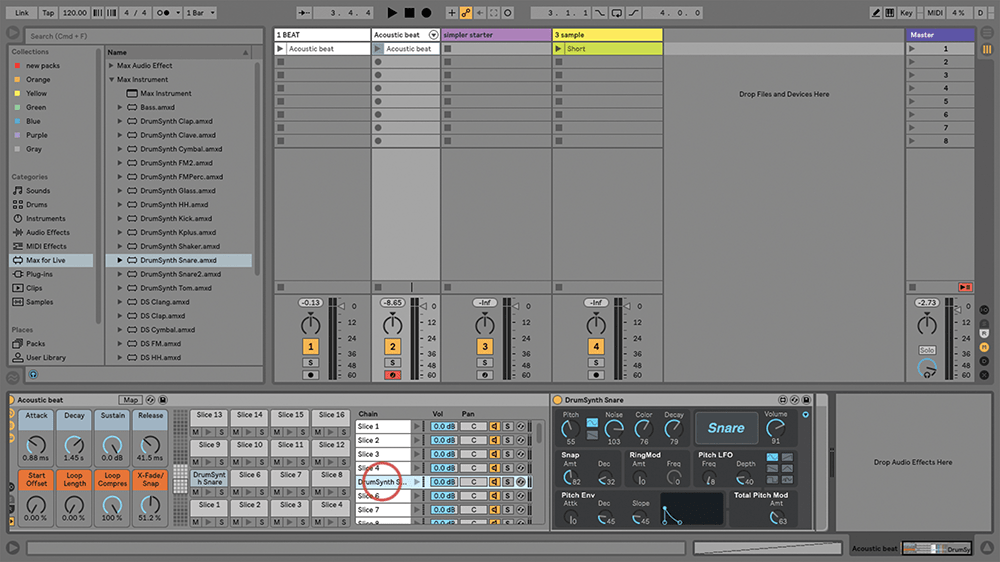
5. You can rearrange the notes in the clip to rearrange the beat. You can also edit the sound of the beat, by dragging new samples onto individual chains in the drum rack – or even a software instrument.
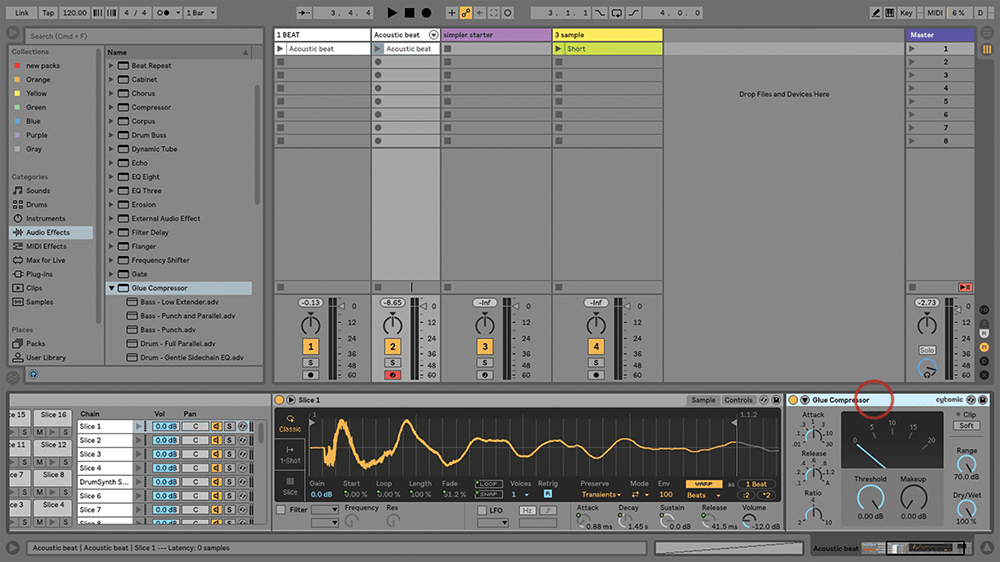
6. Slicing a beat also enables you to isolate individual hits for effect processing – you can add a compressor, an EQ, reverb, or delay, to individual drum hits. As usual with Live, there’s no limit!