Basic Song Arranging in PreSonus Studio One
In our first two Studio One workshops we’ve created a few MIDI and audio song parts, now we’re going to expand them into a song, using some of the DAWs basic arrangement features… In the first two parts of these Studio One workshops, we took you through the basics of what sequencing is and how […]
In our first two Studio One workshops we’ve created a few MIDI and audio song parts, now we’re going to expand them into a song, using some of the DAWs basic arrangement features…
In the first two parts of these Studio One workshops, we took you through the basics of what sequencing is and how Studio One can help you produce music with ease. Last time we explained the difference between audio and MIDI tracks and recorded some basic parts.
This time around it’s time to use some of Studio One’s many and varied features to flesh them out to create an arrangement which gradually starts forming a complete song.
All DAWs are great at arranging parts into songs – it really is what they are all about. You can repeat notes so you don’t have to play the same ones over and over, and you can also easily repeat parts of songs or even entire tracks.
This means that you could load in a drum loop, for example, and repeat it for the entire duration of the song with one easy command. The same applies to a simple bass line or guitar part. Of course this will probably result in something fairly dull so it’s always good to add some fills and variations along the way to give the song a lift with added dynamics.
This time around, though, we’re concentrating on the easy repeating parts, and how you can quickly create entire tracks for your song from some small ideas. First of all we’ll cover how easy it is to repeat notes, and then complete parts. As with many other DAWs, there are several ways to do this but we’ll show you a few examples so you can choose one that suits your way of working.
Audio file management
Along the way, we’ll be dragging some audio loops into our song from Presonus’ excellent pool of audio that comes with the software, so make sure you have downloaded some of those into your DAW’s browser so you can follow along.
You needn’t use the exact same audio files that we’re using as we’re just showing you some basic edits that you can do to any file. Again we’ll show you how to repeat the audio and how to match it to the key of the song you are working in either using some basic transposition or by matching it to the key of the song.
We’ll also be using Studio One’s Chord Track feature which only made an entrance with version 4 of the software but everything else we show you should be relevant to whatever version of the DAW you are using. (For more on the different versions of Studio One, head on over to the first part of these tutorials.)
By the end of this workshop your track should have a pretty decent arrangement, or at least enough parts to create a song of sorts. Next time around we’ll look in a little more depth at arranging and start mixing using some of Studio One’s effects, so join us again then!
Basic song arranging in Studio: Step-by-step
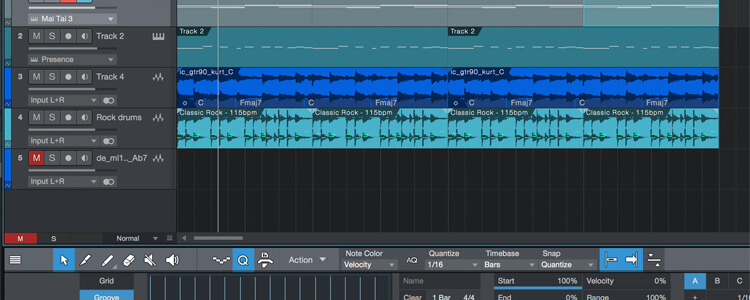
1. Last time around we had a couple of audio tracks and a couple of MIDI parts triggering some bass notes. We’ve added some rock drums as audio and also some acoustic guitar and strings. It’s still cycling around just a couple of bars though.
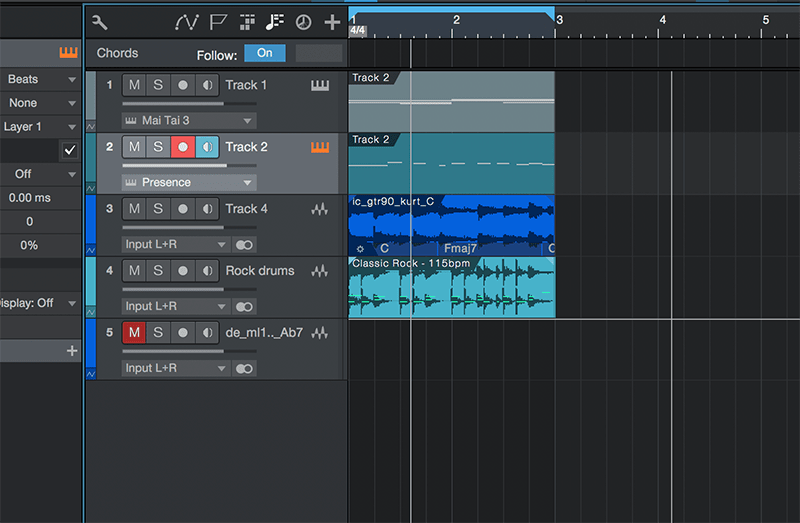
2. Click on the end of one of the parts (we’re doing the part on track 2) to double its length. Double click the part to open the edit window so you can edit and play the notes simply by clicking on them or the keyboard.
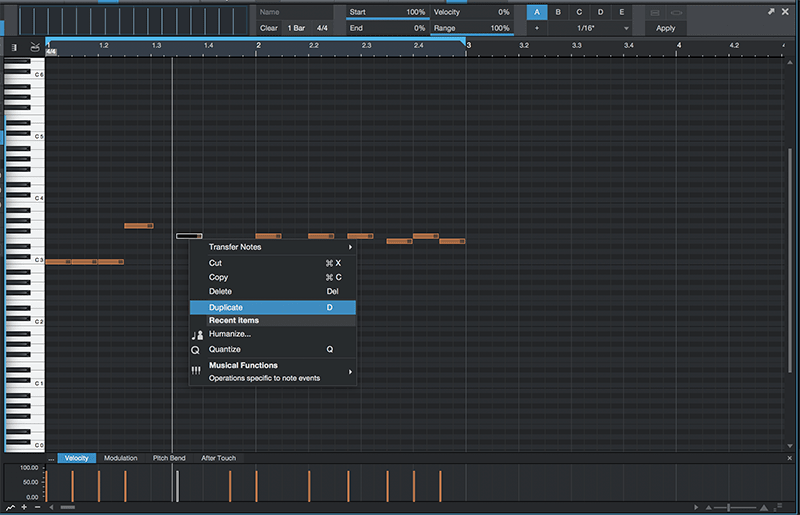
3. If you Control click on any note you get a drop down menu of options including delete, copy or duplicate notes along with key commands. Use these commands (like D to duplicate) or drop down to select options. Quantise (Q) will also put it in time for you if you’ve played it incorrectly.
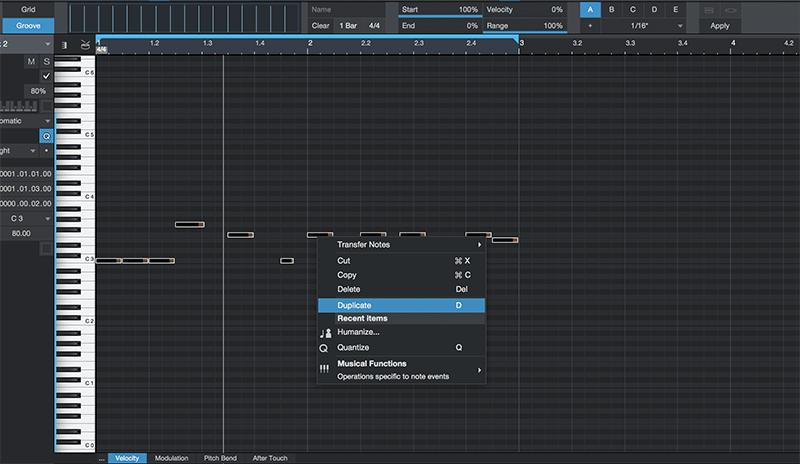
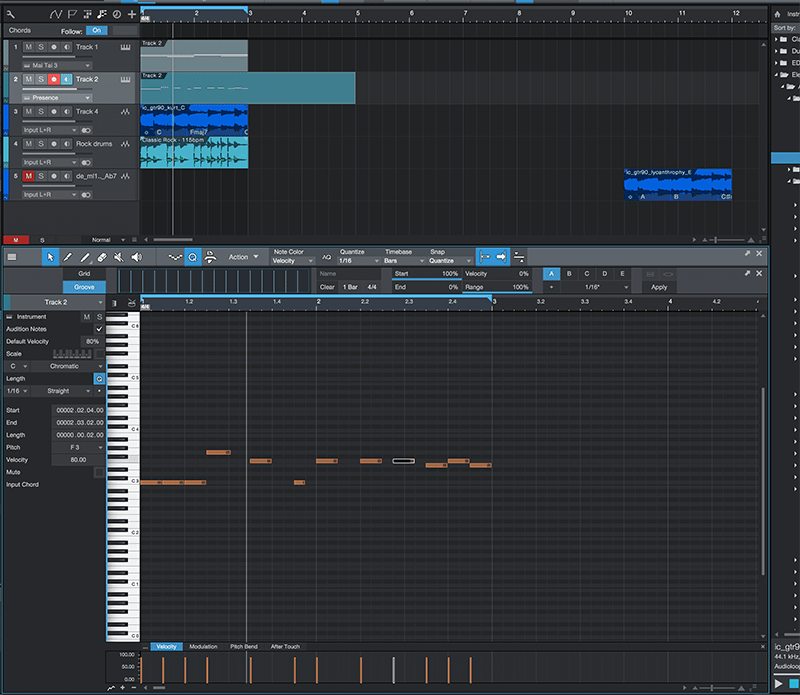
4. Now select all of the notes (Cmd>A), Control click on any note to get the drop down menu and select Duplicate (or D). You can also Option click and drag on any note or group of notes to repeat them but make sure you hold the Option key down before you let go or it won’t copy them.

5. All of the notes within the looped area are now duplicated and dropped into the next two bars, this filling up the extra space you created!
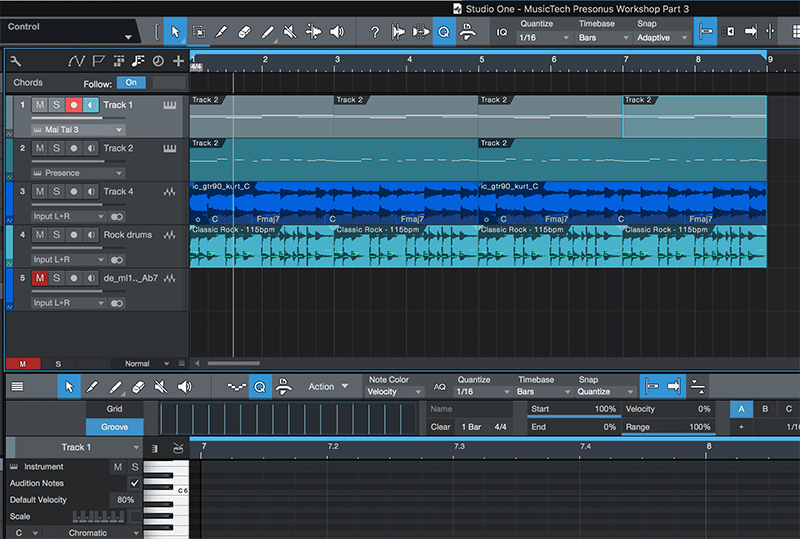
6. Even better you can use any of those options to repeat entire parts or tracks to make an arrangement. Our two bars have quickly expanded to eight using this method simply by selecting a part and pressing D.
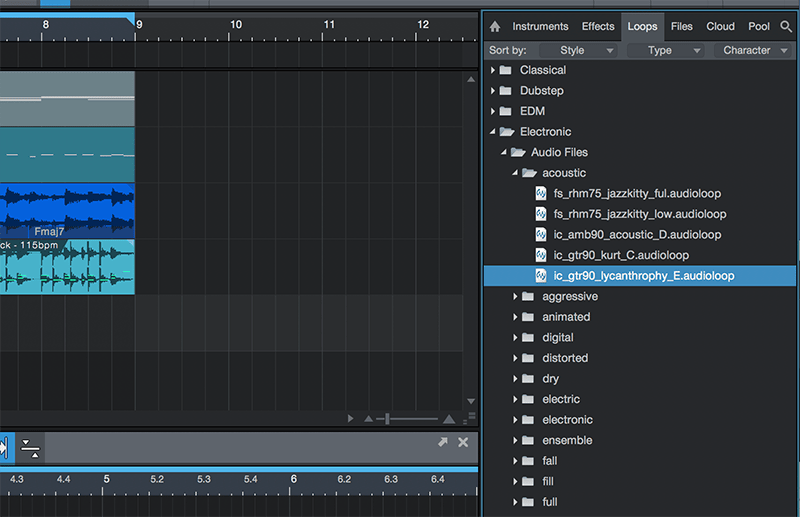
7. Now we’re going to flesh out the arrangement using some of Presonus’s excellent loops that come with the software. Click the Loops tag to see what you have, all laid out by sound type.
8. We’re loading in a great acoustic guitar loop that should go nicely with the one we already have. Hit D four times to extend it to fill the eight bars. Oh dear, it sounds out of tune…
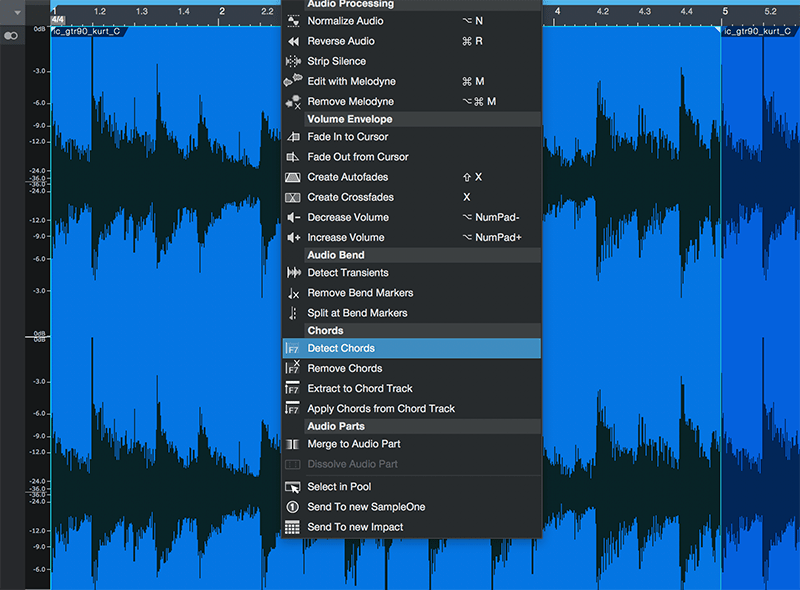
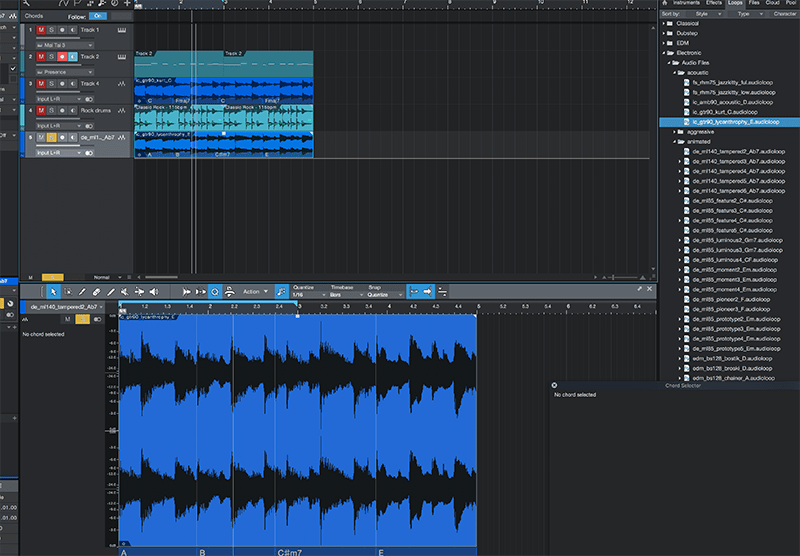
9. Select the new audio and then in the Action drop down menu in the edit window, select Detect Chords. In our case the loop goes from A to B to C sharp as it progresses, very much at odds with the chords in our first loop which go C major to F major 7.
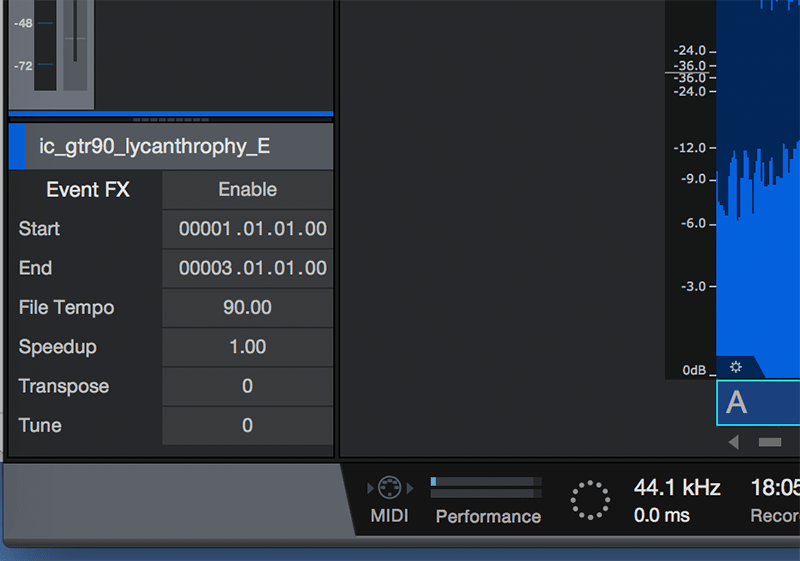
10. There are a few ways around solving this tuning issue. If it was single notes we’d recommend trying to transpose the new loop up and down using the Transpose option in the menu bottom left.
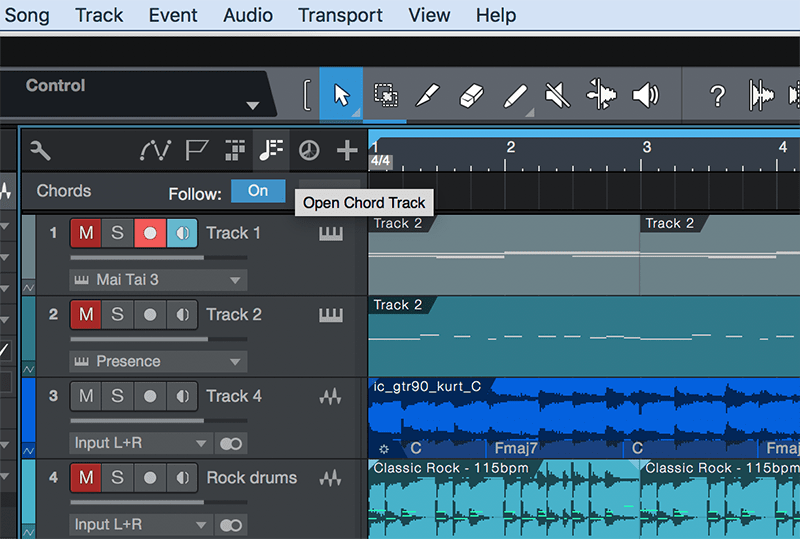
11. However the latest version of Studio One has a Chord Track option in the menu as shown. Select it and a new track appears in which you can place a new song chord progression simply by double clicking ranges.
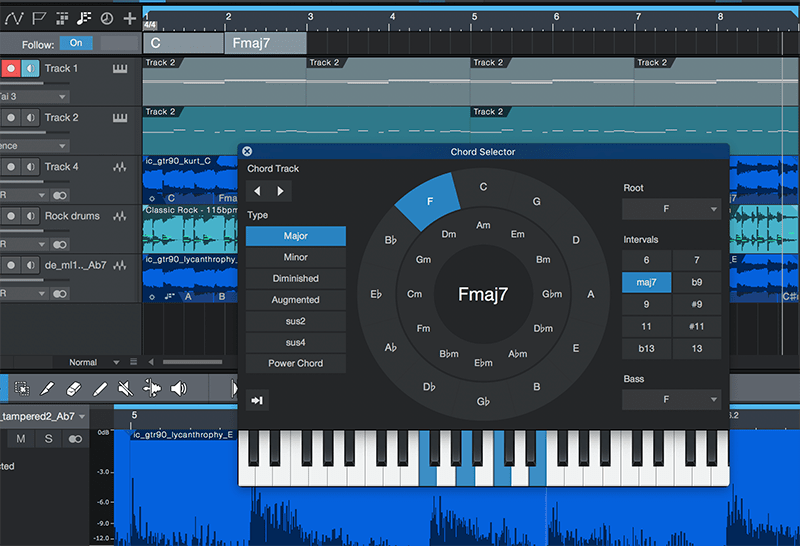
12. In this case we’ll make it follow the progression in our initial sample, that’s C major to F major 7. Here’s the excellent Chord Finder which you use to select your chords.
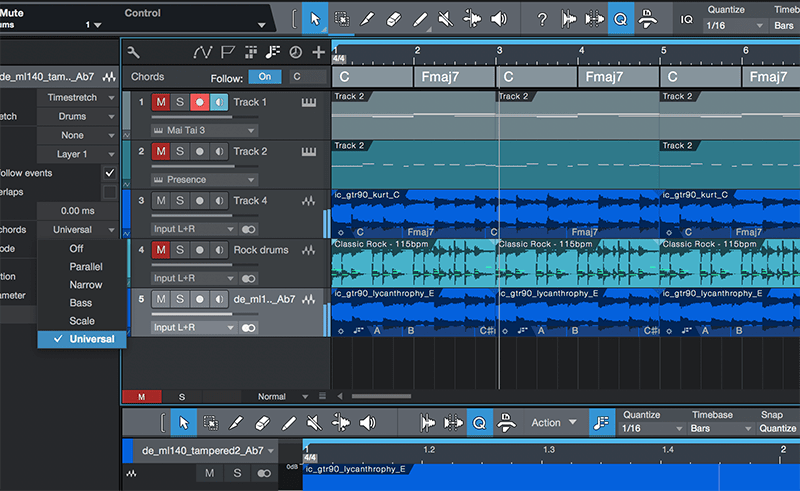
13. Now select the track with the new out of tune loop and go to the ‘I’ tab and select Follow Chord Universal and your new loop will follow the loop of the song, as will any other loop you load in (and select Chord Follow on the track). It’s a very fast way of creating arrangements from the supplied loops!