Sound Design in The Combinator
It’s part 2 of our Reason sound design series, Andy Jones continues exploring the Combinator as a creative tool, introducing more motion to our music… In the first part of this sound design series we looked at some very basic synthesis and sound design options in Reason, before opening up the Combinator to offer you […]
It’s part 2 of our Reason sound design series, Andy Jones continues exploring the Combinator as a creative tool, introducing more motion to our music…
In the first part of this sound design series we looked at some very basic synthesis and sound design options in Reason, before opening up the Combinator to offer you a tantalising glimpse into its world of big (very big!) sounds where you can layer and control in ways you might not believe.
So what exactly is the Combinator? It’s listed in Reason as a Utility but that’s doing it rather a disservice. The truth is, the Combinator can be used as an effect, as an instrument, and almost as a mini version of Reason in itself. Basically, it’s an extraordinary rack box which you can fill with just about anything you want.
The beauty of it is that you can do everything on one channel and control everything you do put in Combinator – instruments, effects, and so on – all from a couple of dials and switches. The best bit is that all this can all be automated, as well as having individual effects applied to each instrument.
In this way you can create huge, moving patches of sound. It’s a sound designer’s dream, and the aspect of Reason we’ll be focussing on this time around.
Combine to impress
We’ll quickly get you up to speed with where we left off last time as we open this new workshop, creating a huge combination of instruments within a single instance of the Combinator. We’ve chosen the Malström and Subtractor synths plus the newer Klang percussion module. From each, we have selected presets that you can hear very distinctly against one another, so when all three are played together you can hear what is going on.
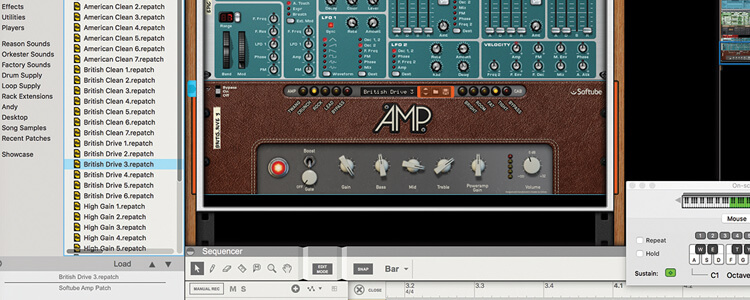
Within the Combinator it’s very easy to apply individual effects to each instrument you have loaded up, simply by dragging effects units directly on to each one. We’ve added some very obvious delay, phasing and amp effects to our three instruments so, again, you can easily distinguish each one.
The best part about using them in the Combinator is that you can then control parameters on the effects units with a single Combinator control.
We briefly covered how to control dramatic synth parameters in this way last time and it’s a similar process with the effects, simply assigning a Combinator control (in this case Rotary One) to a target parameter of your choice.
Again we’ve gone with some pretty big and bold sounds with the effects, so with the Phaser effect, for example, we assign the Rate of the phasing to Rotary One for maximum impact (and it does get very ‘maximum’, we can tell you!).
We continue in that vein, adding more effects to each of the other instruments until we’ve got something complex. It might not sound that pretty, but with any control within Combinator assignable to pretty much any parameter within our combined sound, we now have total control over it. So it might sound big, ugly, rough and ready, but we can easily bring it in-line with a few tweaks here and there.
Layering and evolving
Combinator makes the simple process of layering sounds together – the most basic and easy way to design sound – a breeze. At this point, then, it might be a good time to step back and actually choose some sounds that you’d like to layer together rather than ours which were picked specifically to highlight parts of the tutorial.
In general, when combining sounds it is always good to pick those that don’t mask or clash with one another. It’s best, then, to choose sounds of differing frequencies – a pad underpinned with a smooth bass, with perhaps a piano interjecting here and there, for example. That way your frequencies and timbres will clash less but you’ll be safe in the knowledge that your range of frequencies is covered.
Also, try to think of your sound in terms of its time envelope – how it evolves. So pick a sound that will give it a good attack, another for the sustain and one for the release. You can add as many sounds as you like making up the envelope.
One thing that we found with our experiments with effects within Combinations, is that you’ll likely end up with something that will truly move and evolve. These are sounds with dynamics and atmosphere, so if this what you want to bring to your tracks, then you’ve come to the right place. What also helps here is automation, which we touched on last time but explore further here.
With one knob controlling three synth and three effect parameters, we finish by automating just that knob to bring the entire effect in, from a gentle percussive clang to total sonic mayhem!
Next time around we’ll explore some more of Reason’s incredible sonic potential. Until then, happy designing!
Sound design in The Combinator: step-by-step
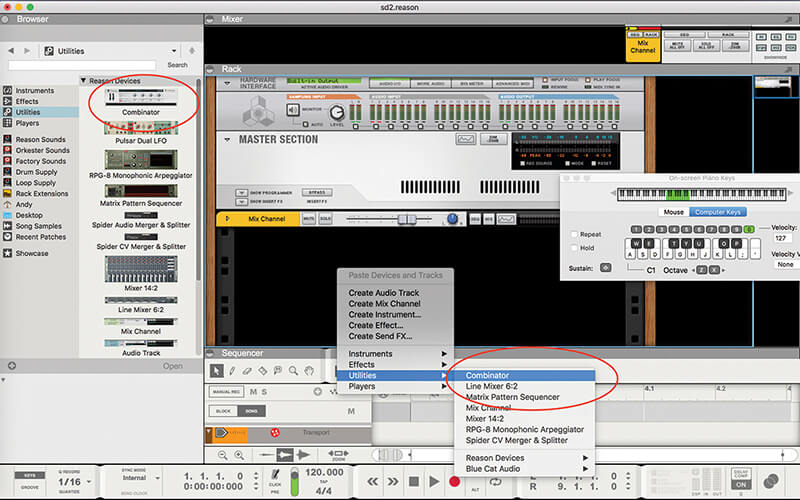
1. Starting with an empty rack, load in a Combinator either by dragging one in from the Utility folder in the Browser or Control-clicking to open the drop down menu. Again, just add one in from the Utility menu.
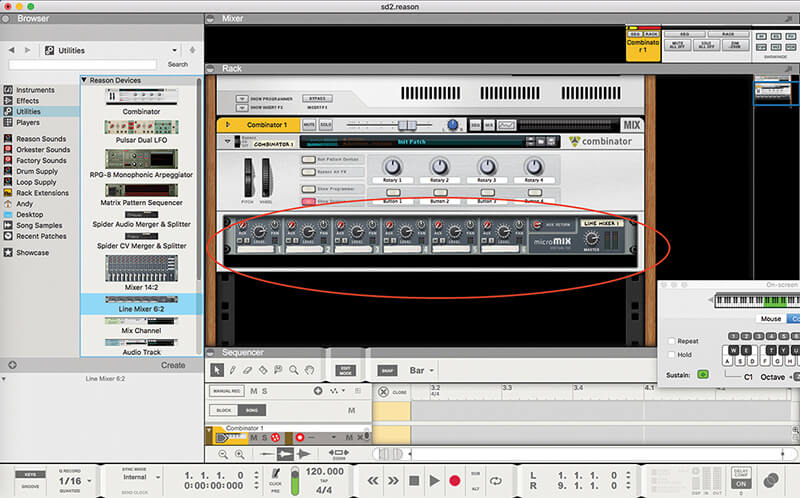
2. Either Control (right)-click on the Combinator to select, or drag a 6:2 mixer into the Combinator slot. This is effectively our mixer within a mixer and allows us to stack sounds and effects up within the Combinator.
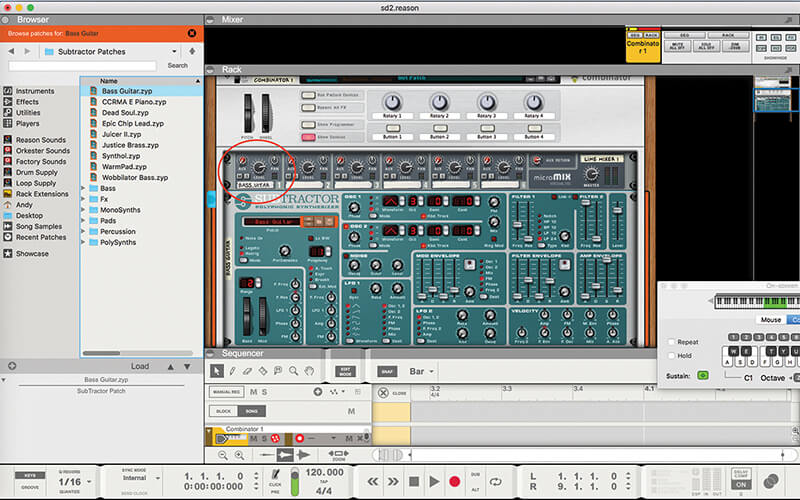
3. Now we simply need to fill the mixer with these instruments. We’ll start by loading in a Subtractor synth on the first channel. Either Control-click on the channel to load or simply drag it onto it.
4. Keep on loading in some of your favourite synths or instruments. Don’t worry too much about the sound layering up too quickly, as you have total control over it with the 6:2 mixer.
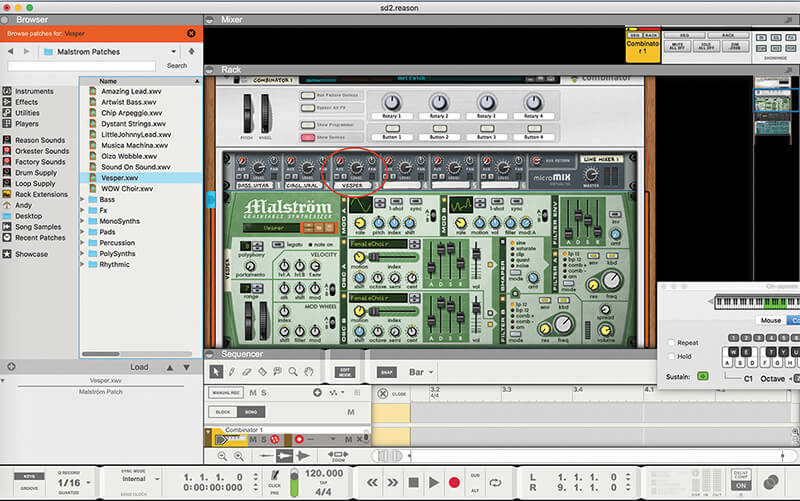
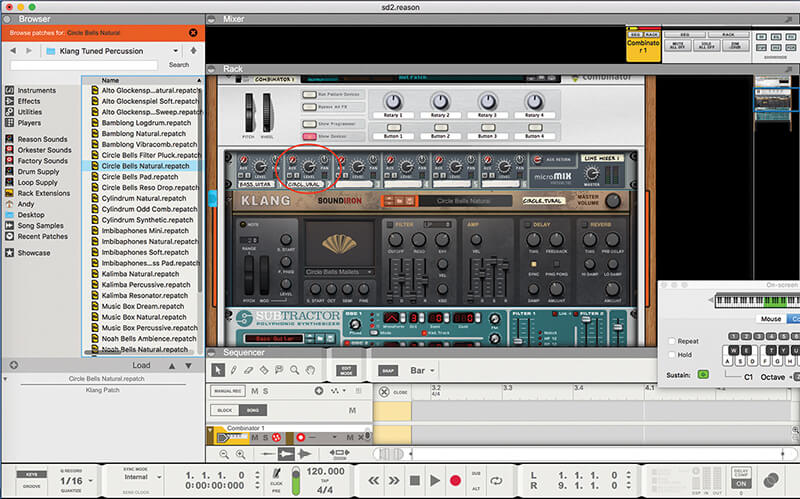
5. We’ve loaded in the Klang percussion module and finished with a Malström synth. Remember to drag the instruments directly onto the mixer channels otherwise they might not sit within Combinator and open as individual tracks.
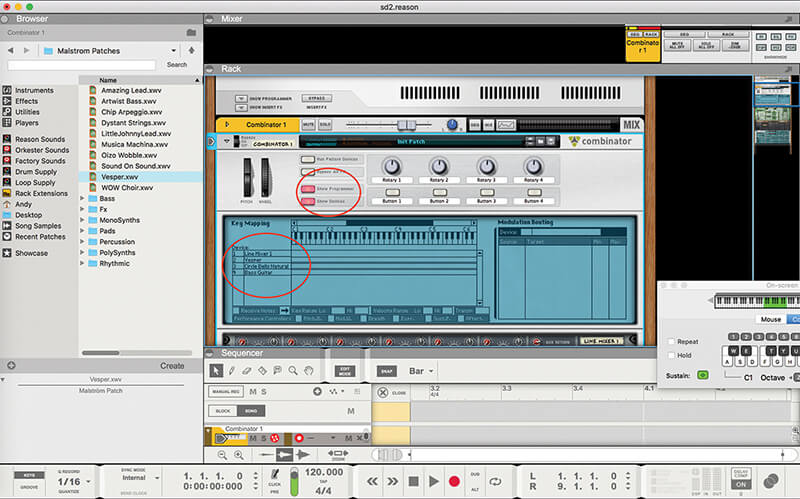
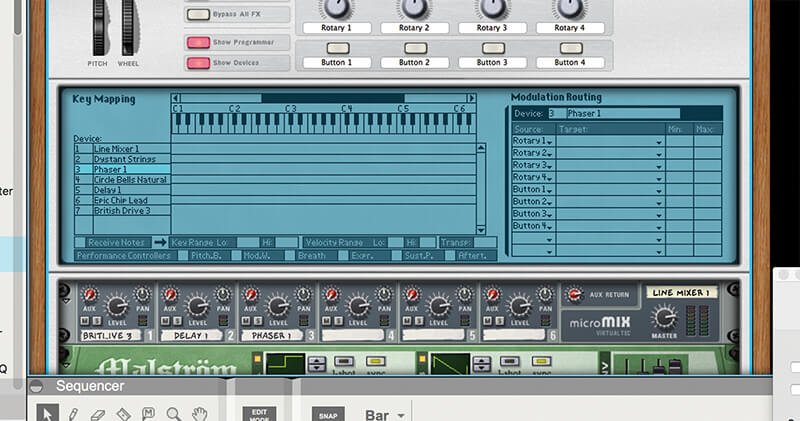
6. Now you’ll want to see an overview of all of the instruments that you’ve loaded. Hit the Show Programmer button and the mixer and three instruments are shown along with their presets.

Individual effects Within Reason’s Combinator we’ll show you how easy it is to apply individual effects to each instrument, but there’s no reason why you can’t double up and add another effects unit to the Combinator output (but do be careful – it’s easy to go too far!).
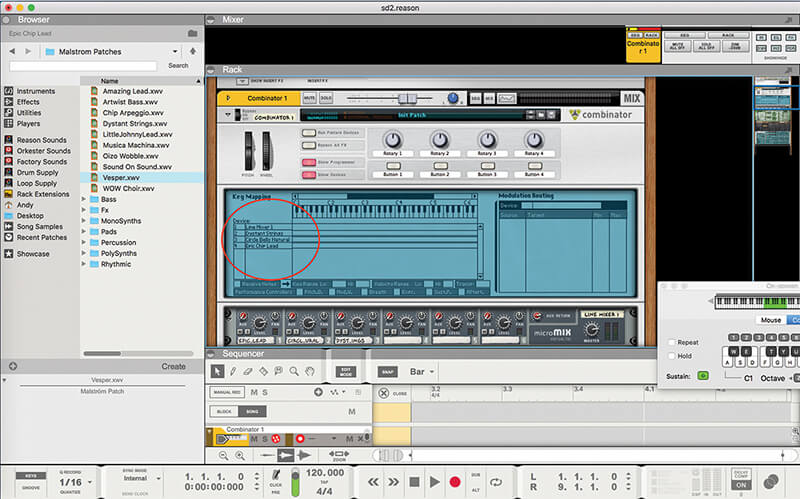
7. Now it’s time to select the patches within the instruments that you want to layer up. We’ve chosen three sounds that you can hear relatively distinctly within the combination so you’ll easily hear changes from now on
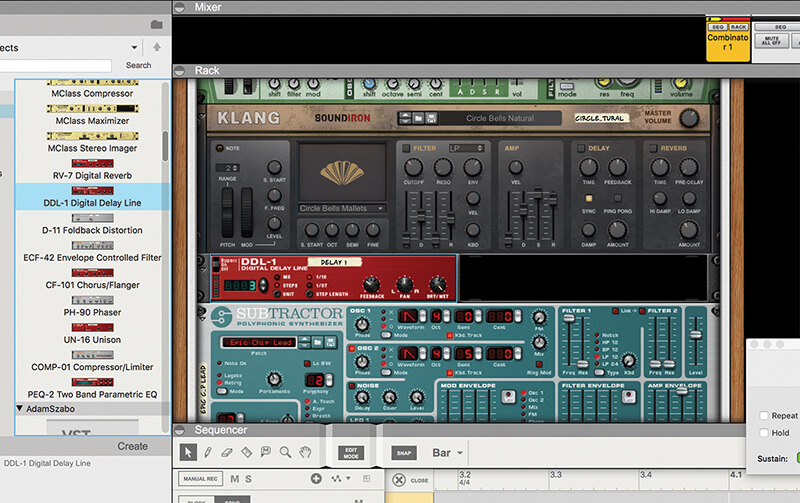
8. A great feature of the Combinator is that you can add effects to each instrument individually, simply by dragging an effect device in (or Control-clicking). We’ve added a DDL-1 delay to the Klang instrument.
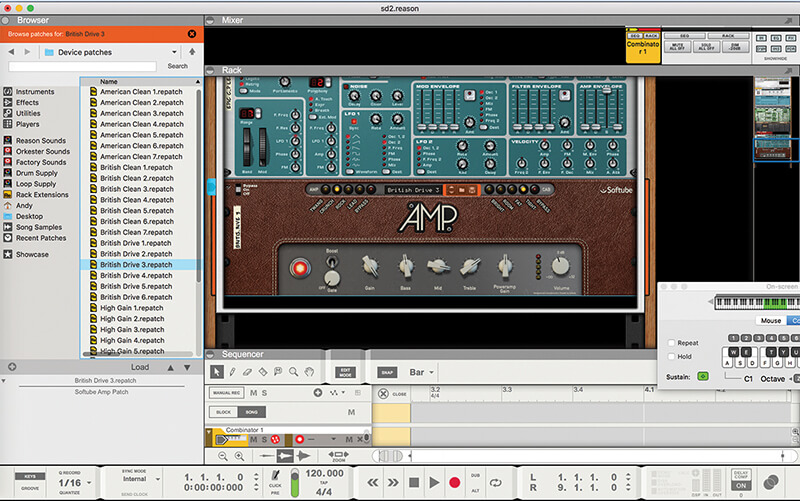
9. Next we’ve added a harsh amp to Subtractor. Again this is not subtle stuff, as we want you to hear all of the individual components in action when we start to control lots of elements at once later.
10. Finally we’ve added a Phaser to the Malström synth to give it a distinct swirling sound. Now we’re going to get one knob to control everything, so go back to the Combinator and now you’ll now see the effects within it.
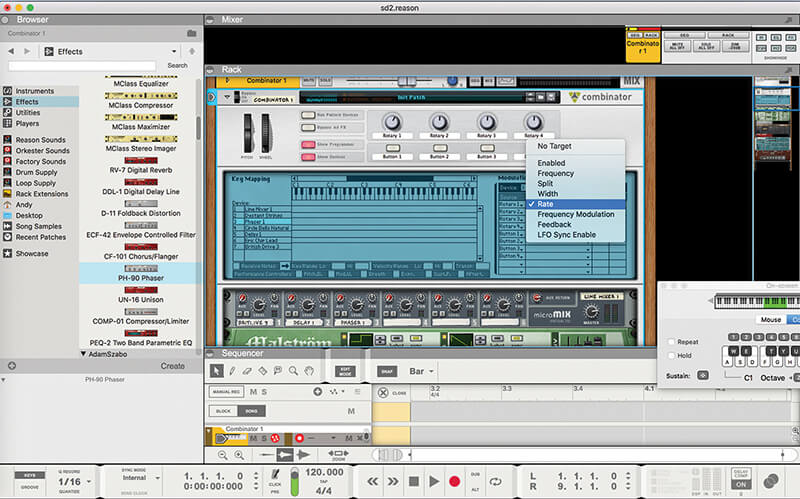
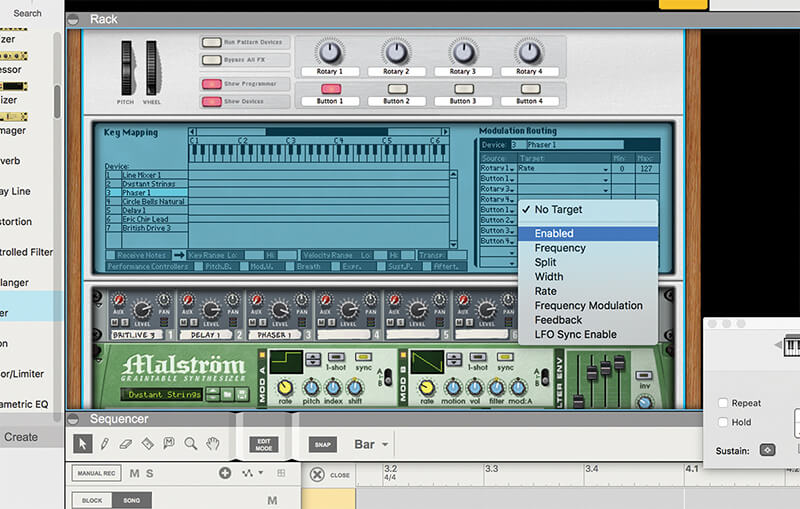
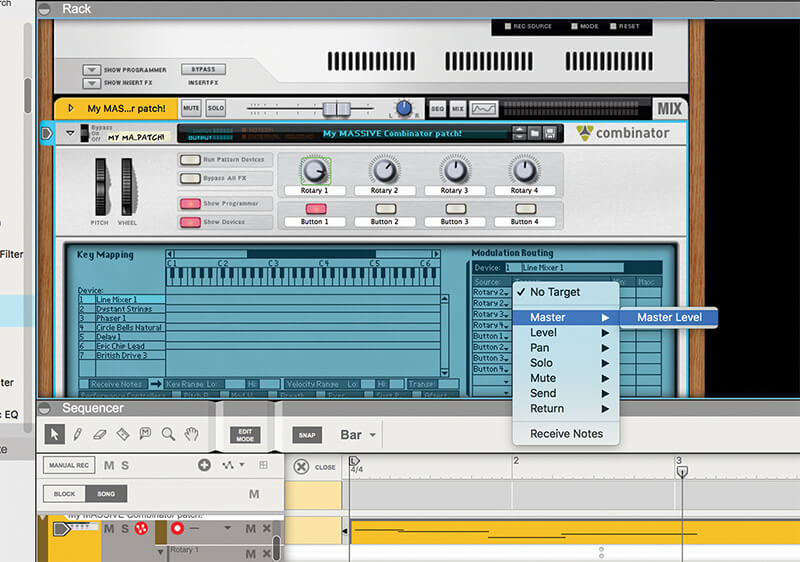
11. Now we’ll assign one Combinator knob (Rotary One) to individual controls in every instrument and effect. Start by clicking the Target area within the Phaser. From the drop down menu, select Rate.
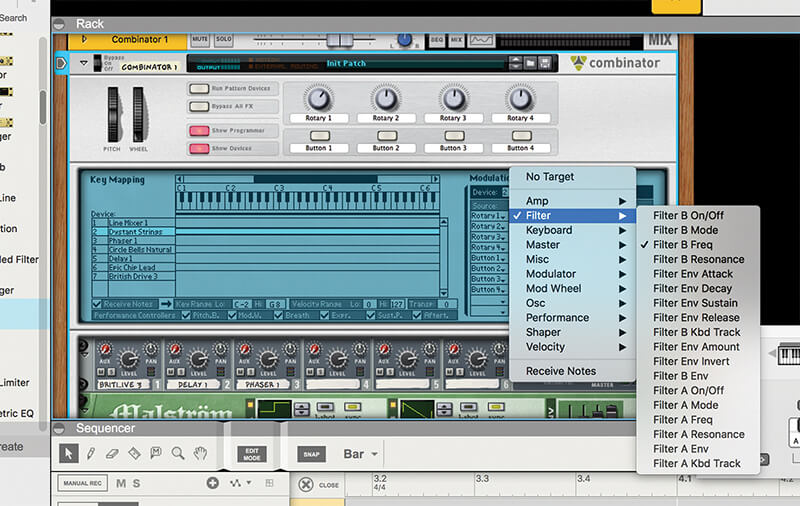
12. Within each synth, assign the Target to a control like Filter Frequency, as we did in Part 1 of this series. Again it’s one of the most dramatic- sounding controls so you’ll hear it big time.
Layer cake Try to use different effect types for each sound as some effects, delays especially, can quickly get out of hand if more than one instrument employs them. Again, with all effects, it can be easy to go too far so make sure you have a Combinator dial controlling ‘Amount’!
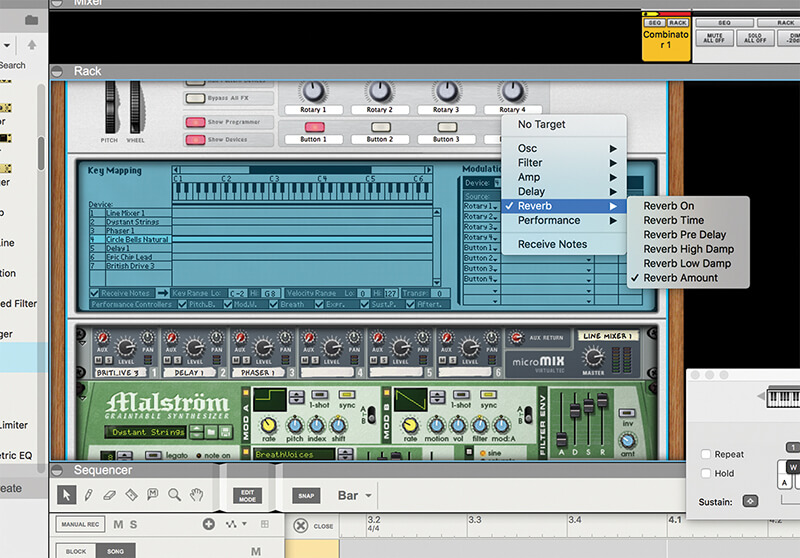
13. We’ve continued to assign different effects to Rotary One so that it ends up changing everything. We’ll finish by getting it to control the Reverb Amount on the Subtractor synth.
14. Another neat feature in the Combinator is that you can also get the buttons to control anything, so in this case we’ve assigned Button One to switch off an effect that was getting a little too in your face…
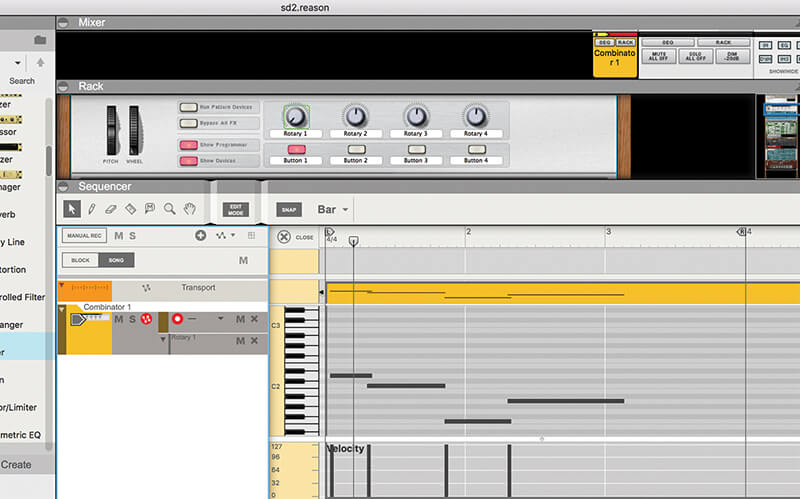
15. The Combinator also includes automation. We’ve recorded a few notes of our massive sound and with everything assigned to Rotary One we can show you just how powerful it is. Start recording with it at a minimum…
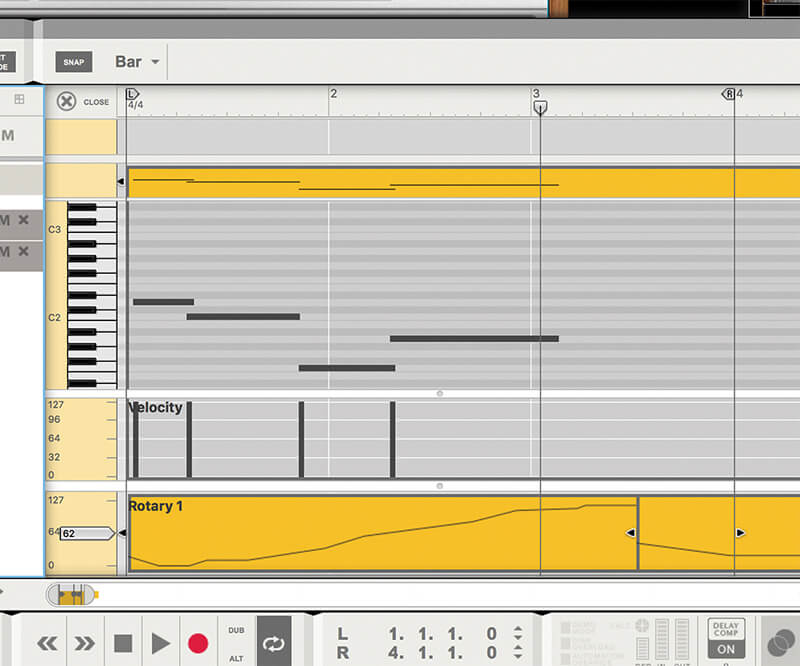
16. … and then dial it right up to the maximum. It starts with a gentle bell sound and then everything gradually – and not so gradually – comes crashing in towards the end of the loop.
17. So that is just one sound within one Combinator. Now imagine stacking up Combinators within Combinators! At this stage, to reign it in you might want to assign the mixer levels to Rotary 2 so you can easily reduce them.
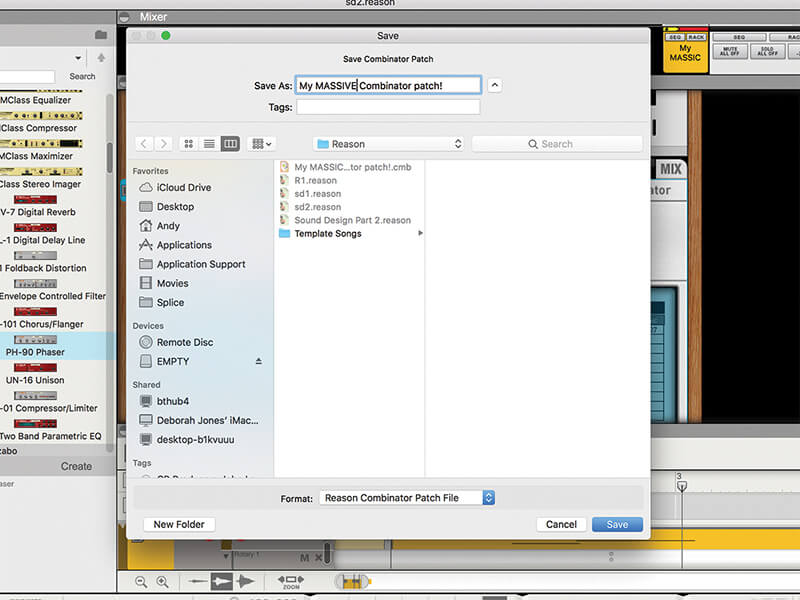
18. Finally save your patch as you would any other. Simply hit the File button in Combinator and name it something suitable so you can revisit its girth again, but load it in an instant next time