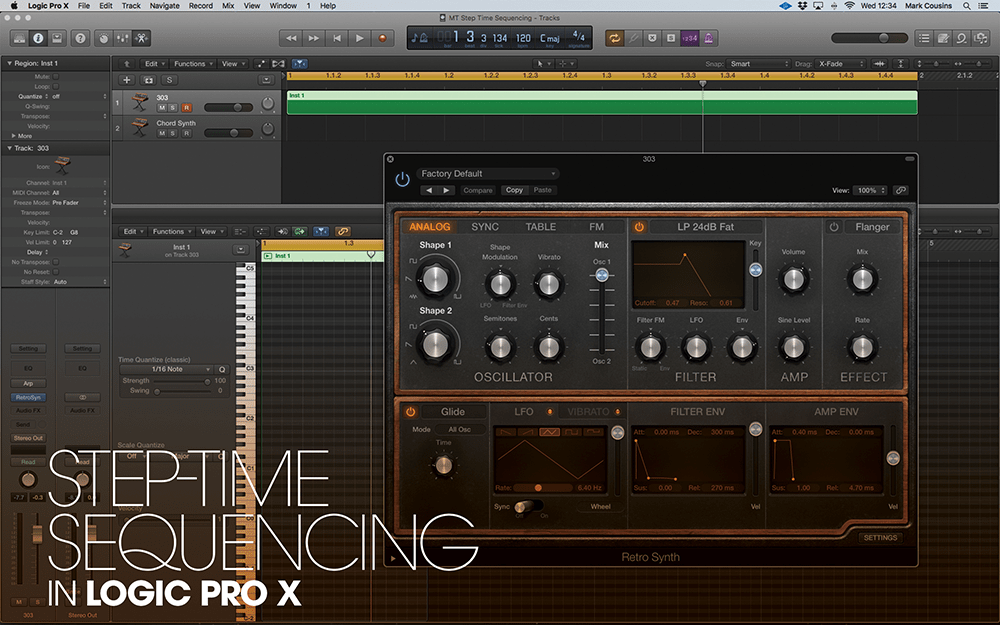
Step-time Sequencing in Logic Pro X
Step-time sequencing is the backbone of electronic-music production and a great way to create exciting keyboard lines. Take your first steps with Mark Cousins… The humble step sequencer has proved itself to be an integral part of the world of electronic music, from the chugging modular Moogs of Tangerine Dream in the 1970s, through to […]
Step-time sequencing is the backbone of electronic-music production and a great way to create exciting keyboard lines. Take your first steps with Mark Cousins…

The humble step sequencer has proved itself to be an integral part of the world of electronic music, from the chugging modular Moogs of Tangerine Dream in the 1970s, through to the squelchy TB-303 sequencer lines that are still popular today. At its heart, of course, a step sequencer negates the need to be a proficient keyboard player – simply enter the pitch of each step, press play and enjoy a fast-moving, mechanically precise synth line! In Logic Pro X, you’ll find many ways to explore step sequencing, fusing synthesis and music creation in an exciting and dynamic way.
We’re going to explore the process of step sequencing by recreating the sound and performance of a TB-303. For the uninitiated, the Roland TB-303 was originally designed as a ‘budget’ combination of step sequencer and synthesiser, with a relatively simple control set that lent the unit an instantly recognisable sound. Replicating the classic TB-303 sound, therefore, requires both an understanding of its synthesis architecture and the unique features of its step sequencer.
Step by step
Replicating the sound of a TB-303 using Retro Synth requires little more than a few tweaks to the basic preset. The sound uses just a single oscillator, set to either a Square or Sawtooth waveform, which is shaped by a resonant low-pass filter. The envelopes are also straightforward, with a Gate for the amplifier, and a simple A/D setting for the filter. The most important element is to ensure Retro Synth is set to monophonic legato mode (also disabling any unison voicing) with a small amount of Glide. This will help create the distinctive glide effect that’s intrinsic to a TB-303 sequence.
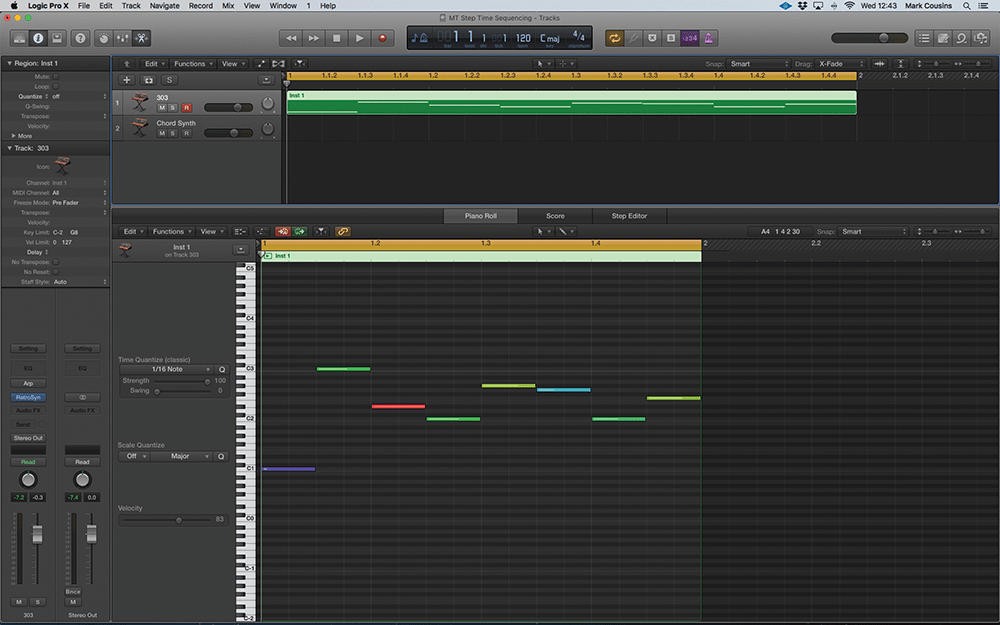
Logic’s step-time sequencing is found as part of the Piano Roll editor. Clicking on the MIDI In icon will engage a step-time sequence. Once engaged, press a key on your MIDI keyboard to assign a pitch for each step, or press down on a sustain pedal (if you have one attached) to enter a silent step. If you want to change the rate from the default 1/8th setting, open the Step Input Keyboard and vary the note setting accordingly. For a basic 303-type sequence, enter a 16-step 1/16 sequence, with a succession of notes that would form a typical bassline sequence – octaves, fifths, minor thirds and so on.
The next steps are vital to a real 303-like authenticity and involve understanding both the Slide and Accent controls. On the TB-303, pressing the Slide button would join two steps together – ignoring the filter trigger on the second step and also applying a small amount of portamento between the notes. We can approximate Slide by extending the length of some of the notes in the sequence, which in turn, work with the legato and glide settings established on Retro Synth.
Next to consider is Accent, which would raise both the amplitude and amount of filter modulation applied for ‘Accented’ steps. To achieve this, we first need to flatten the MIDI velocities, which is probably quickest done using the MIDI Transform Window using the Fixed Velocity present. Once the notes are flattened, select three or four notes in the sequence (possibly the notes you’ve applied the Slide to) and raise their velocity to 127. To achieve the right audible response from Retro Synth, you need to balance Cutoff with the amount of Velocity-tracked filter modulation, set using the Velo fader in the filter section.
It’s well worth exploring other parts of Logic Pro X that exploit machine-driven music creation. The Arpeggiator MIDI Effect Plug-in, for example, works as a hybrid Arpeggiator and Step Sequencer, assuming the Grid function is engaged. In this example, the Arpeggiator’s Grid works like a CV Sequencer, with each step having its own Velocity setting. Map the Velocity dynamically to the synth that’s receiving it, and you can recreate the distinctive effects created by CV sequencers.
Another neat feature of the Arpeggiator Grid mode is the ability to specify whether each step is set to single note, or the full chord. With this, the chords can define the main rhythmic focus and the remaining single-note steps appear to leap around the keyboard, especially when you use some of the larger octave ranges. From a relatively simple chord sequence, you can create complex machine-like synth lines that sound like full step sequencers.
Using techniques like Step Sequencing can open new ways of writing music that take you away from needing to ‘play’ each musical part. Although we’ve looked specifically at the TB-303, you don’t need to restrict yourself to its design limitations – add additional oscillators, for example, or different step rates, to expand on the basic sound that it offers.
Step-time Sequencing: Step-by-step
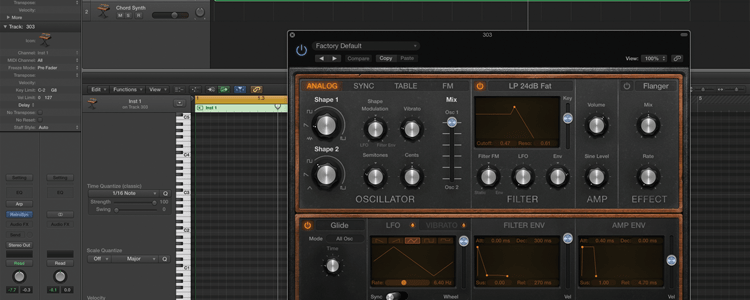
1. Before we delve into step sequencing, let’s take a look at the 303-like Retro Synth Synth sound on Track 1. It’s a simple one-Osc patch, using a resonant 24dB Fat Filter alongside straightforward Amp and Filter Envelopes.
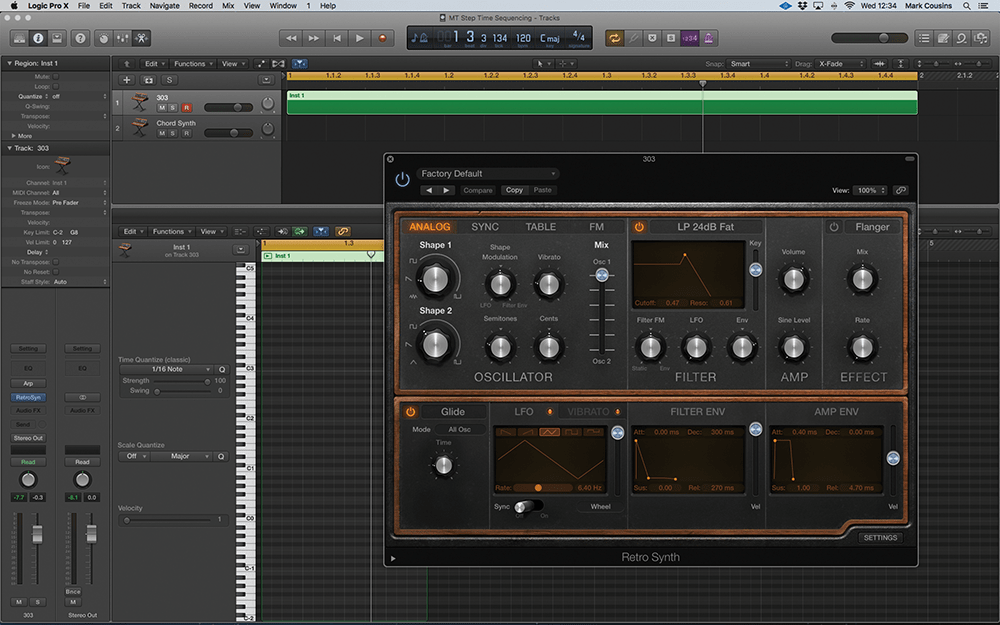
2. Another crucial part of the sound is its monophonic behaviour – with Voices set to Legato and the unison feature turned off. It’s also important to activate Glide, so that the synth applies a soft portamento between notes.
3. Now let’s create a basic step-time sequencer. Open the Piano Roll editor and engage the MIDI In at the top of the window. Playing notes on your MIDI keyboard will now enter notes sequentially on 1/8th steps.
![]()
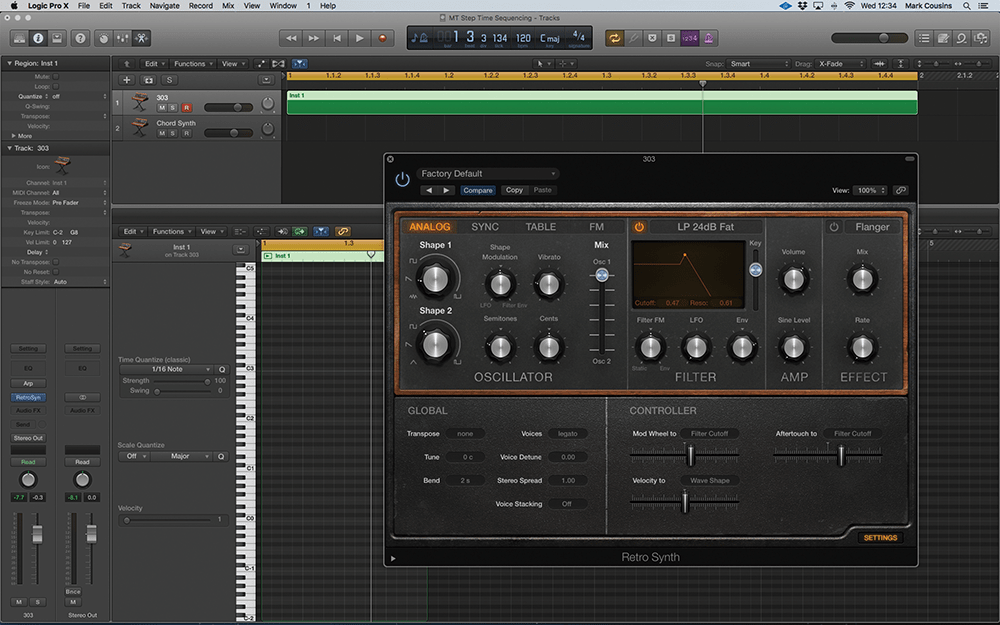
Retro Controller Retro Synth’s Controller section (found under the Settings page) is useful for using the Arpeggiator’s Velocity Grid as a dynamic sound modifier. Possible destinations include Wave Shape, which sounds great when using Retro Synth’s Wavetable (Table) synthesis mode.
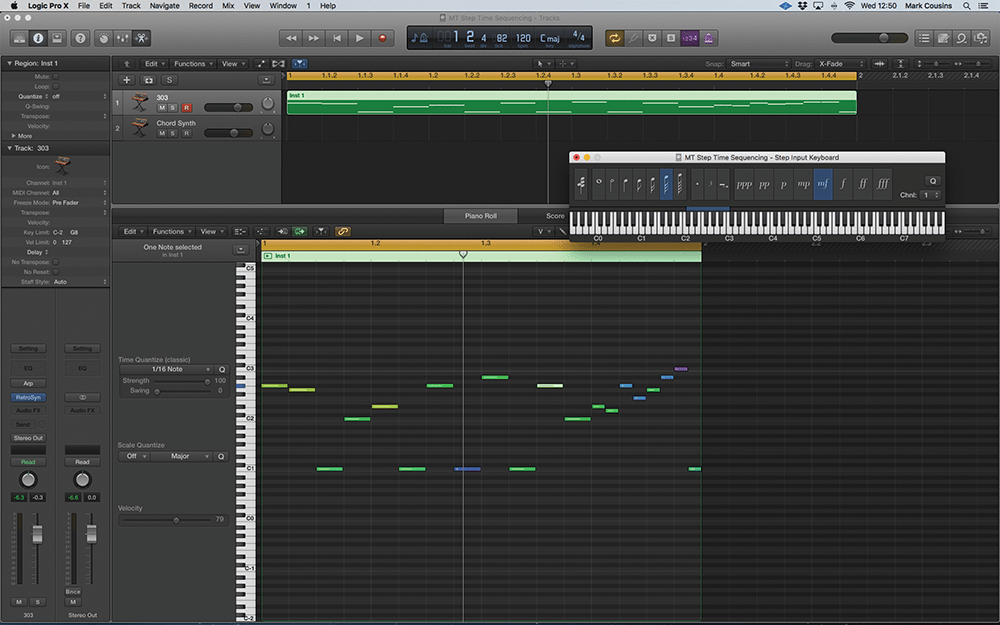
4. You can vary the step rate away from the default 1/8th setting by opening the Step Input Keyboard (Window > Show Step Input Keyboard). Try creating a 303-like 1/16th sequence by changing the note value to semiquavers.
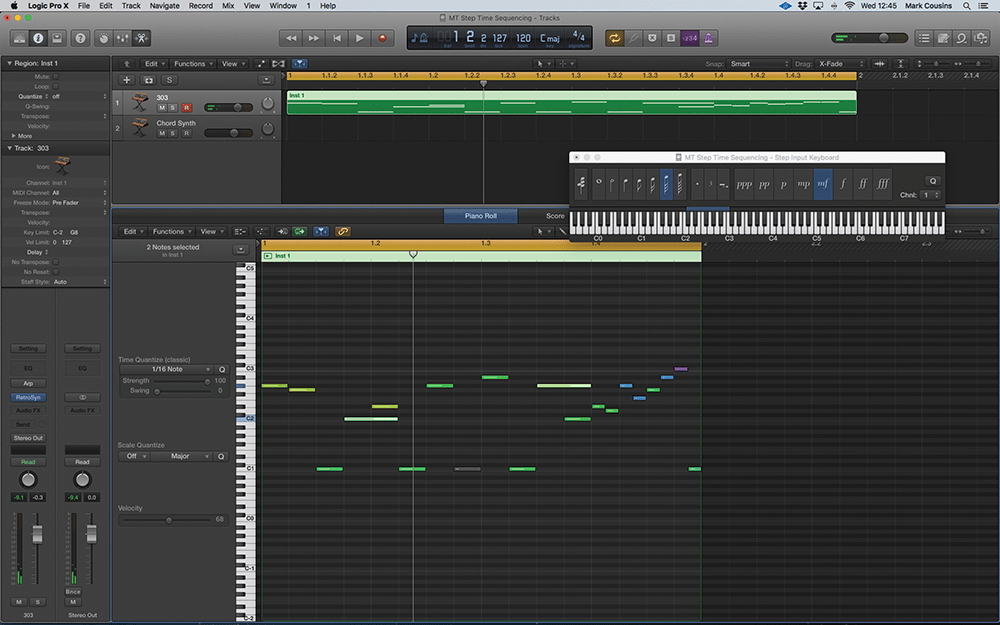
5. ‘Slide’ was an important part of a TB-303 sequence. We can imitate this by stretching notes over into the next step. Note how the envelope isn’t retriggered, with the pitch gliding between the two note pitches.
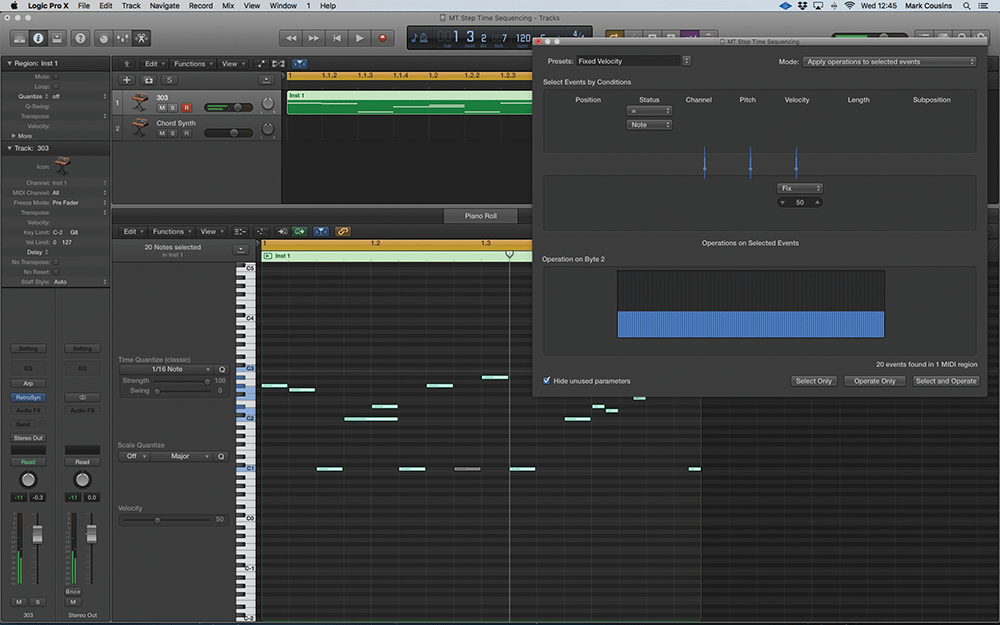
6. Another important part of a TB-303 sequence is the Accent feature. To recreate this, we first need to flatten the current velocity settings (to around 40) using the Fixed Velocity preset as part of the MIDI Transform window.
Click here to see how to add more effects to your step-time sequencing
