Creative sidechaining in Studio One
Using sidechains can elevate your productions into the stratosphere – and it’s really not as complicated as it sounds. Studio One makes the process simple, so there’s no excuse not to master it.
Broadly speaking, music production can be understood as taking a musical theme or idea and turning it into something interesting. We might have an idea that sounds good but there are certain techniques that can turn ‘good’ into ‘excellent’. In this tutorial, we’re highlighting a couple of techniques that can really add interest to your tracks using a gate and the sidechain functions in Studio One. These sidechain functions can be harnessed via several of the effects in Studio One 5, including gate, compressor and various effects such as autofilter, channel strip, expander, fat channel, multiband dynamics, pro EQ, and Tricomp.
Yanking your chain
A sidechain is an input into a processor, and allows you to use one track’s audio to trigger a processor on another. For example, you can feed the audio from a hi-hat track into a gate on a simple pad track to give the pad a choppy, rhythmic quality. Technically, the audio through the sidechain input adjusts the threshold of the processor, which, in turn, affects the audio on the track where the processor exists.
One of the coolest tricks that can help add life and movement to stale pads, especially in dance music, is adding a gate as an insert on a pad or string track and using some kind of rhythmic track to feed the gate’s sidechain input. The key to success with this type of processing is to get the attack and release times just right. This requires listening to the processed track while adjusting the parameters.
Careful tweaking of these parameters can lead to interesting results. But it’s easier to apply these effects to audio tracks than to instrument tracks, although it’s possible to do this on instrument tracks too.
What if you don’t want to hear the track that’s being used to trigger the gate? Simple. On the send of the track you’re using as the sidechain, just click the pre/post-fader icon and select pre-fader. This allows you to use the send slider to adjust the volume of the signal being sent to the gate. Now you can lower the volume fader for the trigger track all the way down – et voila! Now you can have a gate trigger without an annoying cowbell track in the mix – unless you like that sort of thing…
Duck for cover
Ducking is another common use of the sidechain function. In this case, the difference is that you’re using a compressor. The compressor still goes on the track that you want to modulate and is fed by a track that triggers the compressor. For example, you might have a mix that sounds great but the lead vocal is getting lost amid the strings and backing vocals. To solve the issue, you could group the strings and backing vocals together on a bus (or even on a bus for each), add a compressor to the bus, then use the sidechain input from the lead vocal to duck those instruments whenever the vocals comes in.
Compression lowers the volume of instruments being compressed, so you would adjust the release time here to allow the instruments to come back up in volume right after each vocal phrase or word ends. Experimenting here will reward you with vocals that sit much better in the mix and are much clearer to listeners. This method can also be used to prevent kick drums from overpowering bass in the mix. You can use this technique to compress the bass (triggered by the kick drum) so that the bass continues to punch through the mix.
Heavy hitters
Another old-school 1980s-style trick involves gating reverb to get massive snare sounds. But this trick isn’t just for snares. It can be used creatively for anything. It involves inserting a gate after a nice big reverb on an effects bus. Although this can be done by just adjusting the gate parameters to allow through the amount of reverb you want, it can also be sidechained to allow another track to control the threshold. Again, experimenting with the hold and release functions of the gate is the key here.
You can use the same concept to move delay out of the way of a vocal. If you sent a vocal to a delay on an effects bus, it’d sound fine. However, the delay would bounce over the vocal and effectively wash it out. You could automate the delay to turn on and off but it will sound more natural if you sidechain the vocal to a compressor on the delay track.
These are but a few ways to sidechain creatively. Take these concepts and experiment with them in different scenarios using Studio One.
Creative sidechaining in Studio One: step-by-step
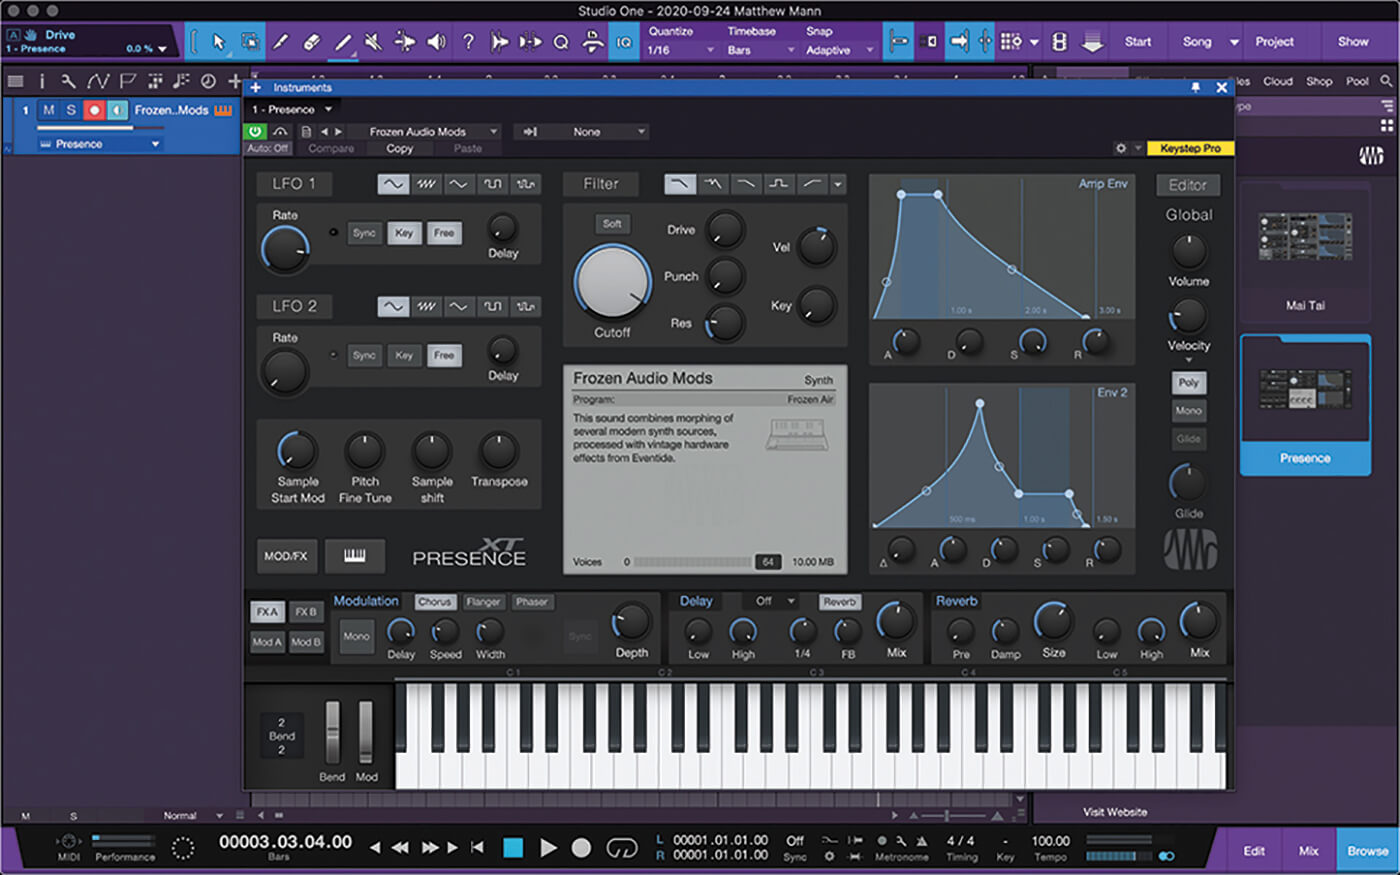
1. Start by adding a pad instrument to a new instrument track. Here, we chose the Presence patch Frozen Audio Mods from the Deep Flight One soundset. (Hear this pad by playing sound example 1 on the disc).
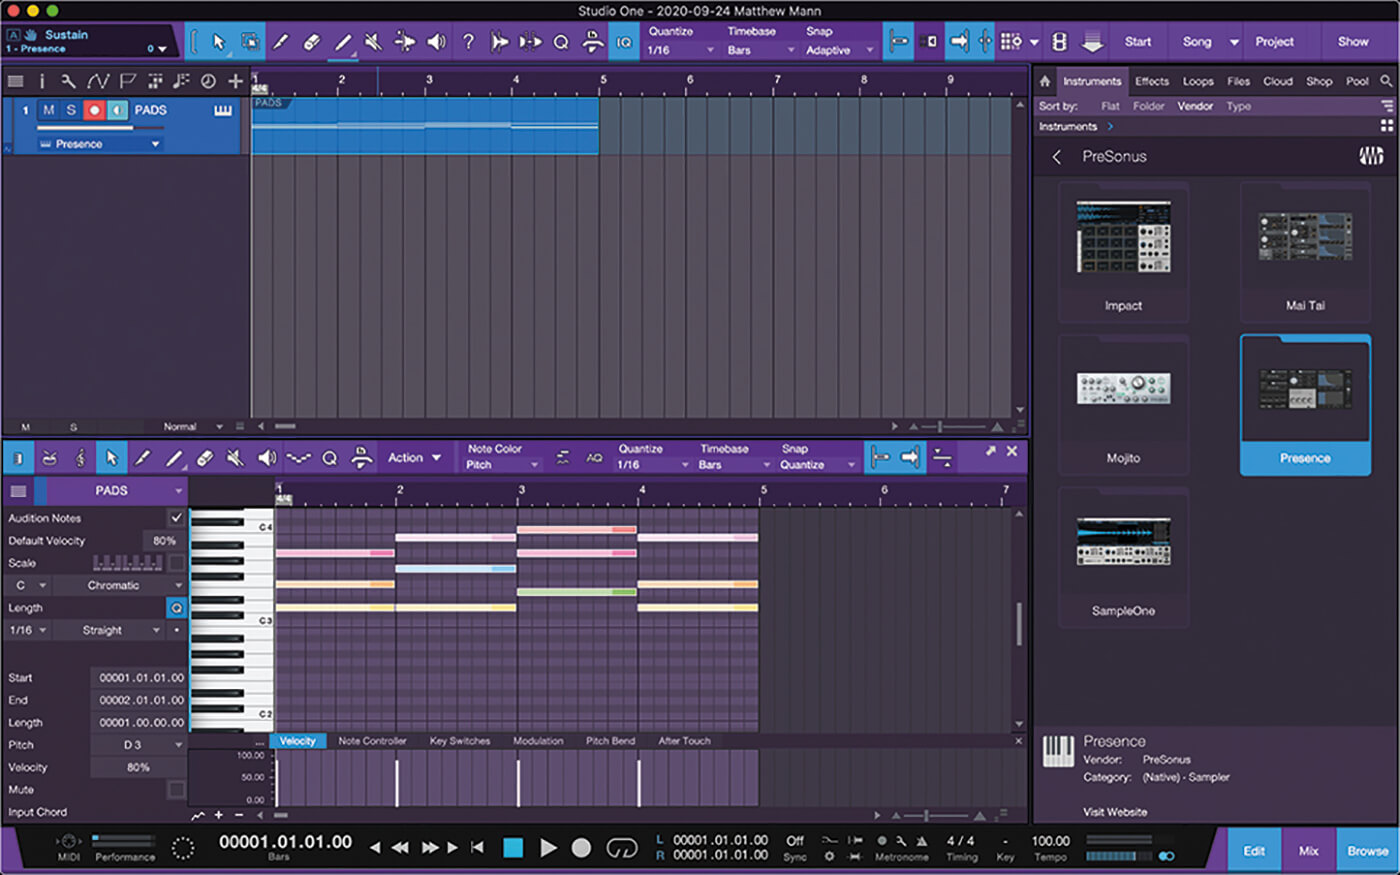
2. Create a lush chord progression across four bars to better hear the gate effect working later. We used Dm-G-Am-Dm6 for this example but any progression will do.
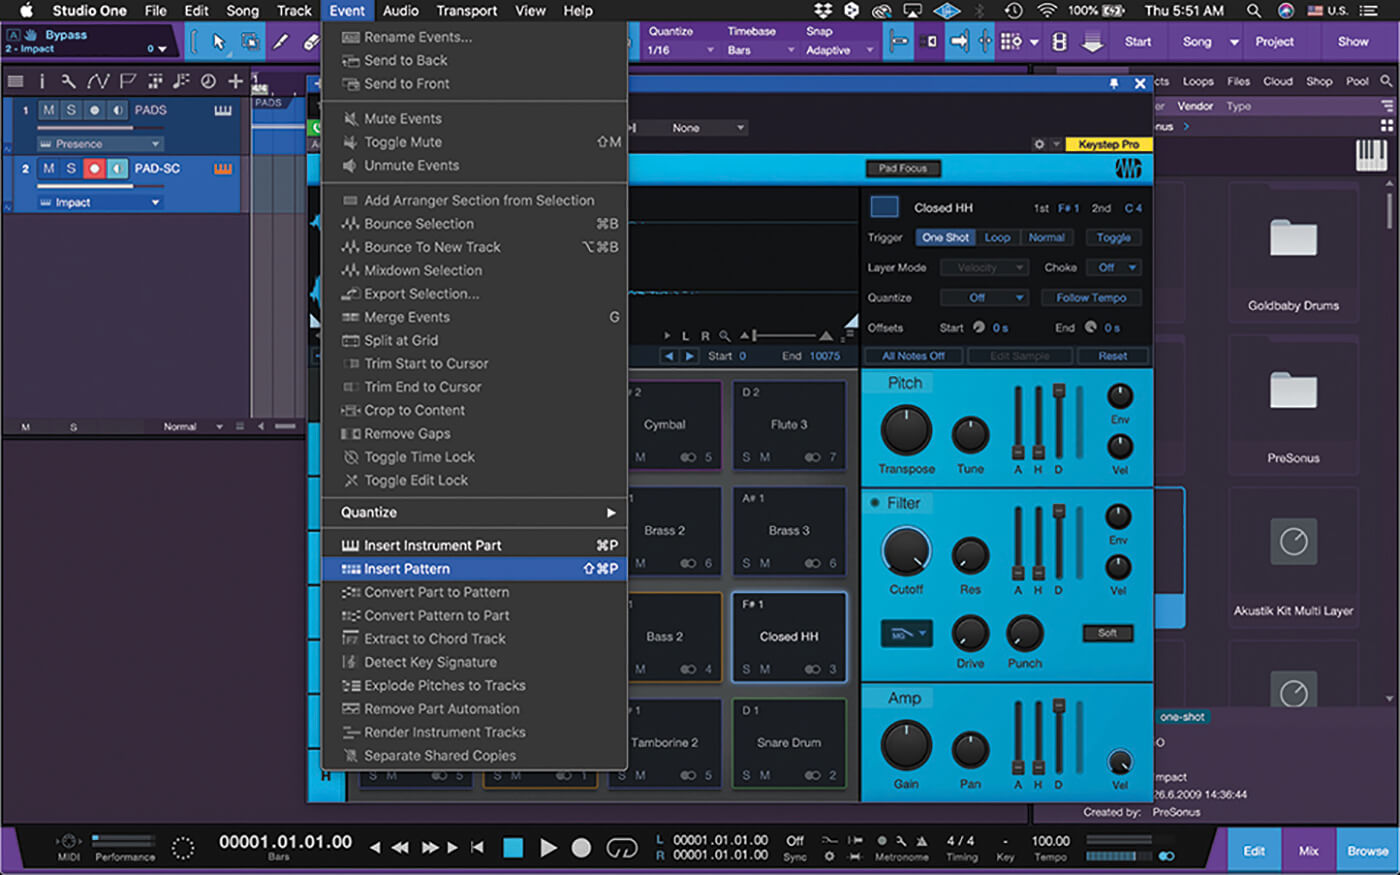
3. Add a trigger source. Drag a copy of Impact onto the arrange area to create a new track. Choose Insert Pattern from the Event menu or by hitting shift-ctrl or cmd-P.
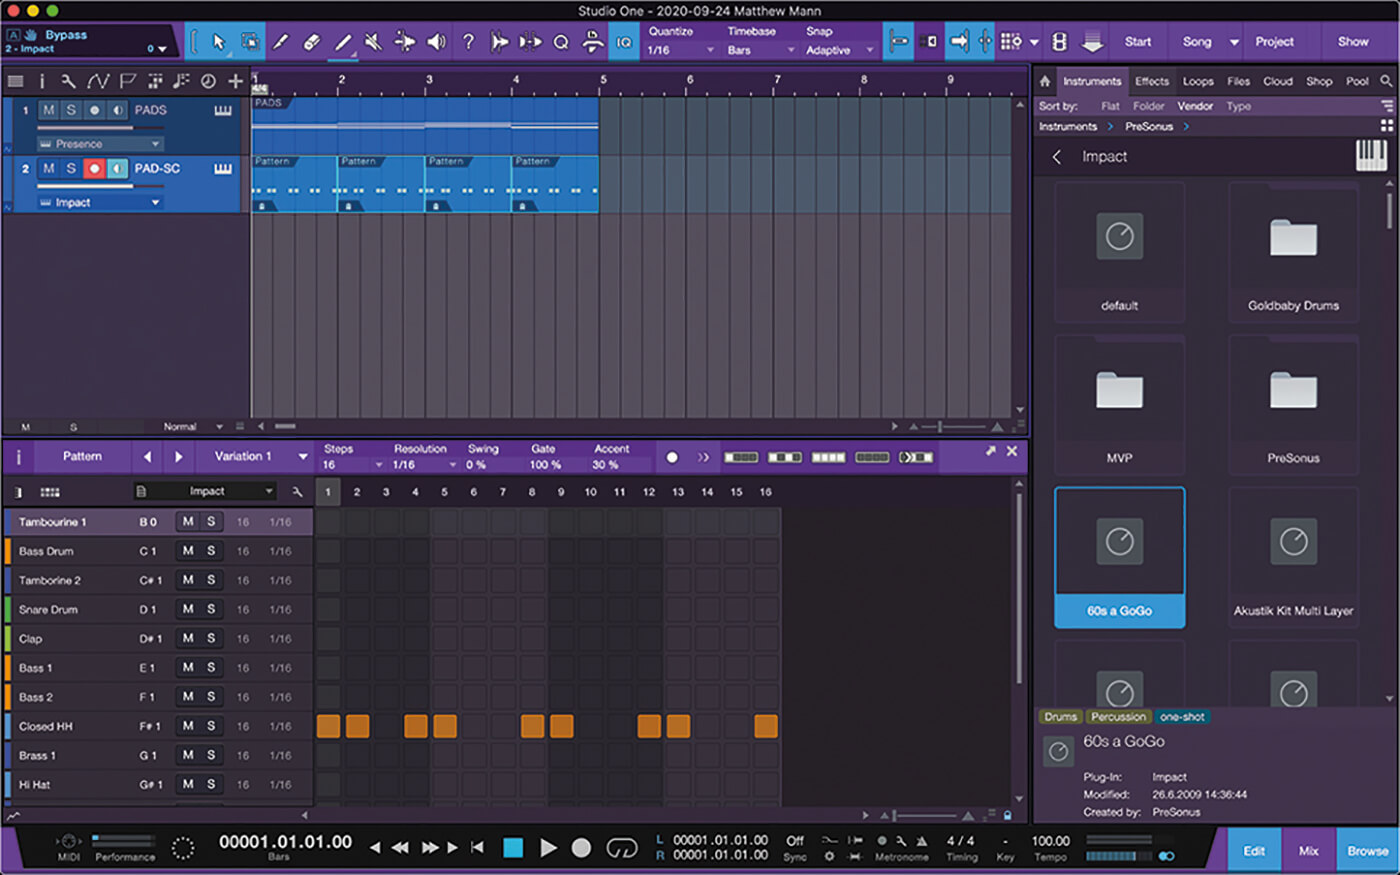
4. Create a rhythmic pattern with a little space in it. Here, we used the hi-hat to create the rhythm. It doesn’t have to be the same pattern as your percussion track.
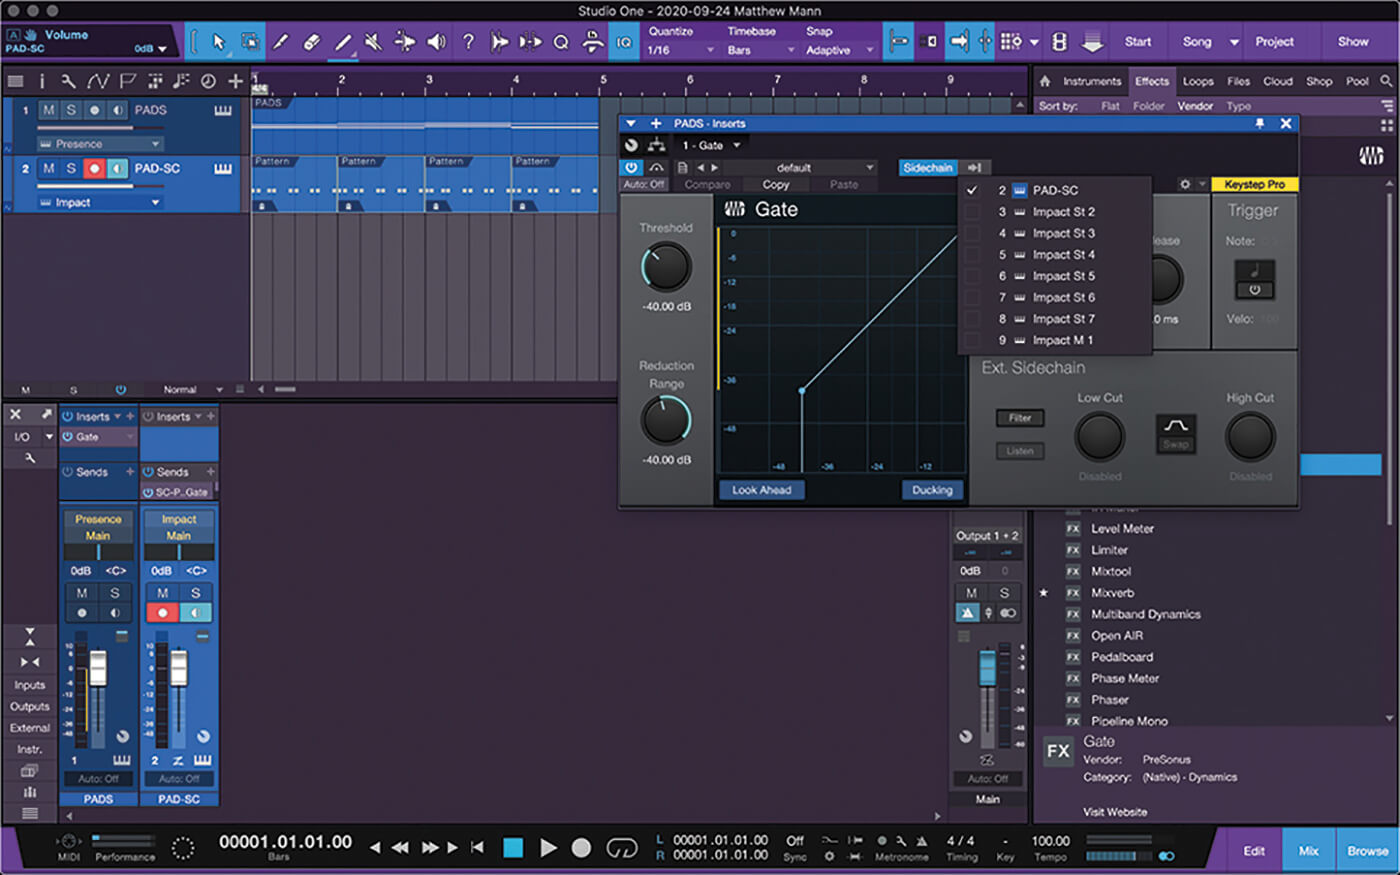
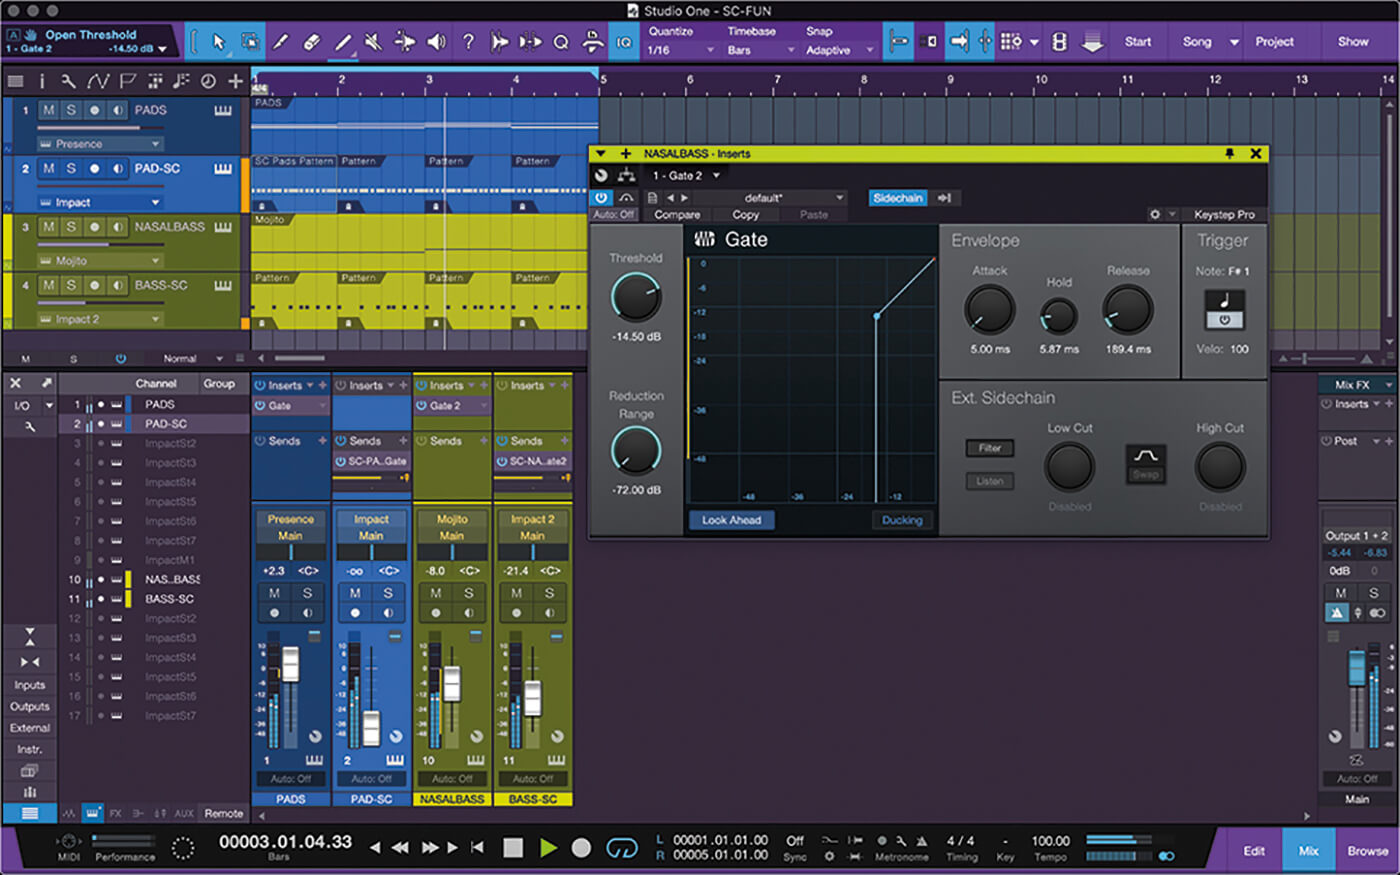
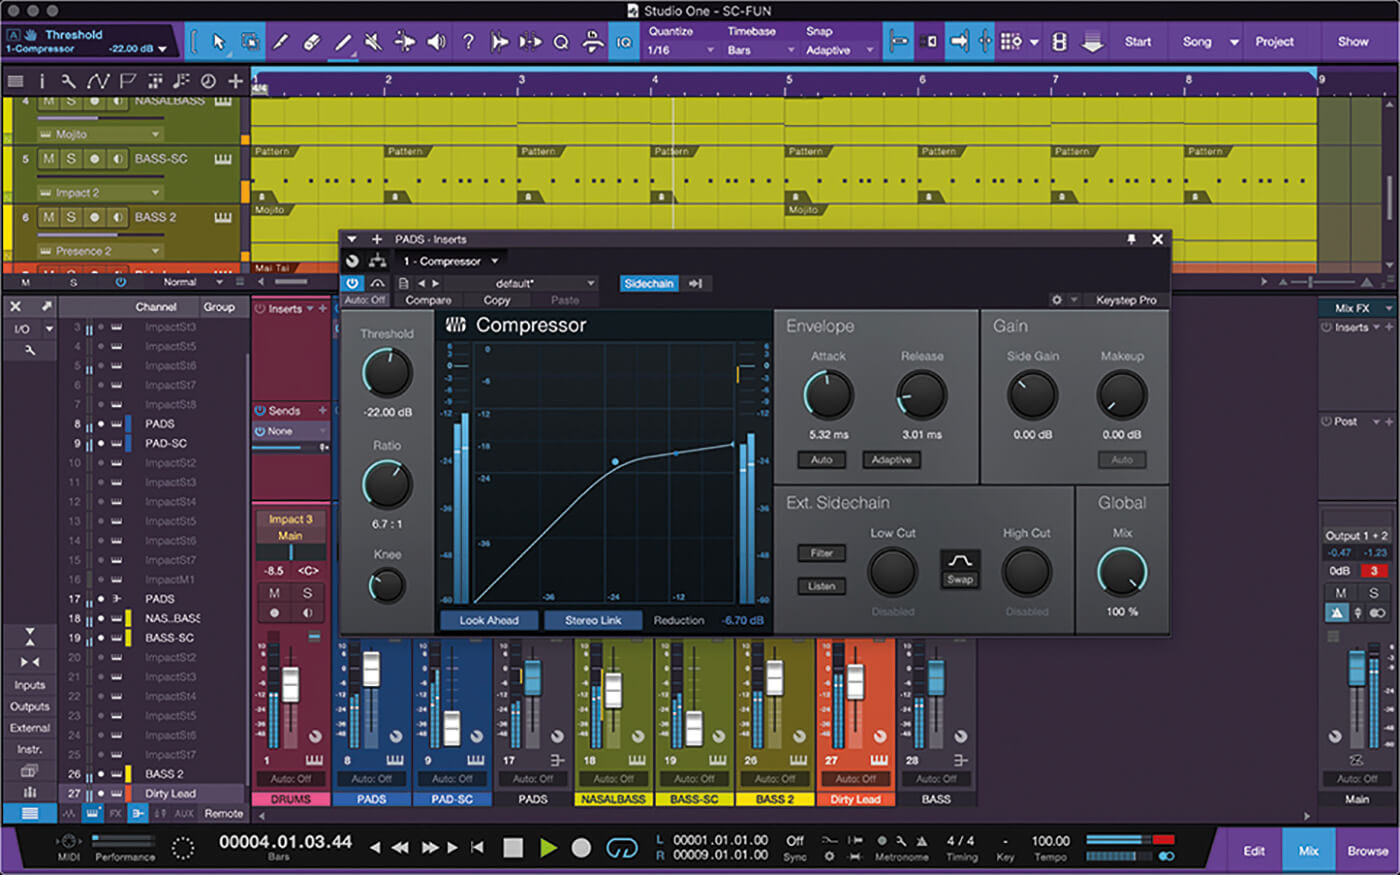
5. Open the console and drag a gate onto the pad track. Open the gate and click the Sidechain button. Click the arrow beside the sidechain button to select the source track (listen to sound example 2).
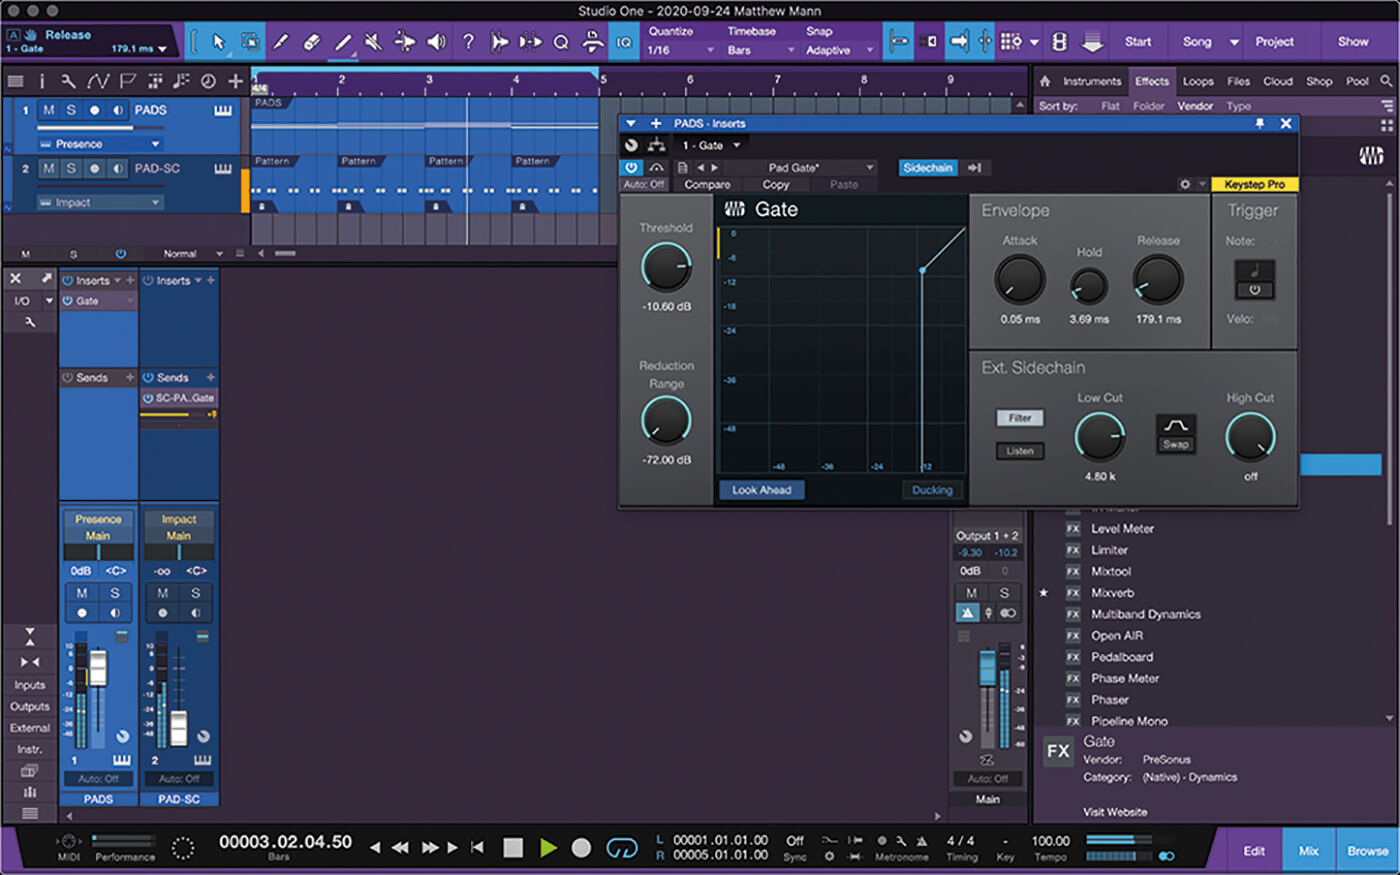
6. Click the pre-fader in the sidechain send. This lets you lower the fader on the PD-SC track. You’ll be left with only the rhythmic pads. Adjust the hold and release to taste.
![]()
GATE-KEEPER Insert the gate on an instrument track with a drum plug-in like Impact or EZdrummer. Clicking the trigger button on Gate lets you select a MIDI note number to trigger each time the gate opens. This is great for drum replacement or enhancement when a kick doesn’t have enough weight
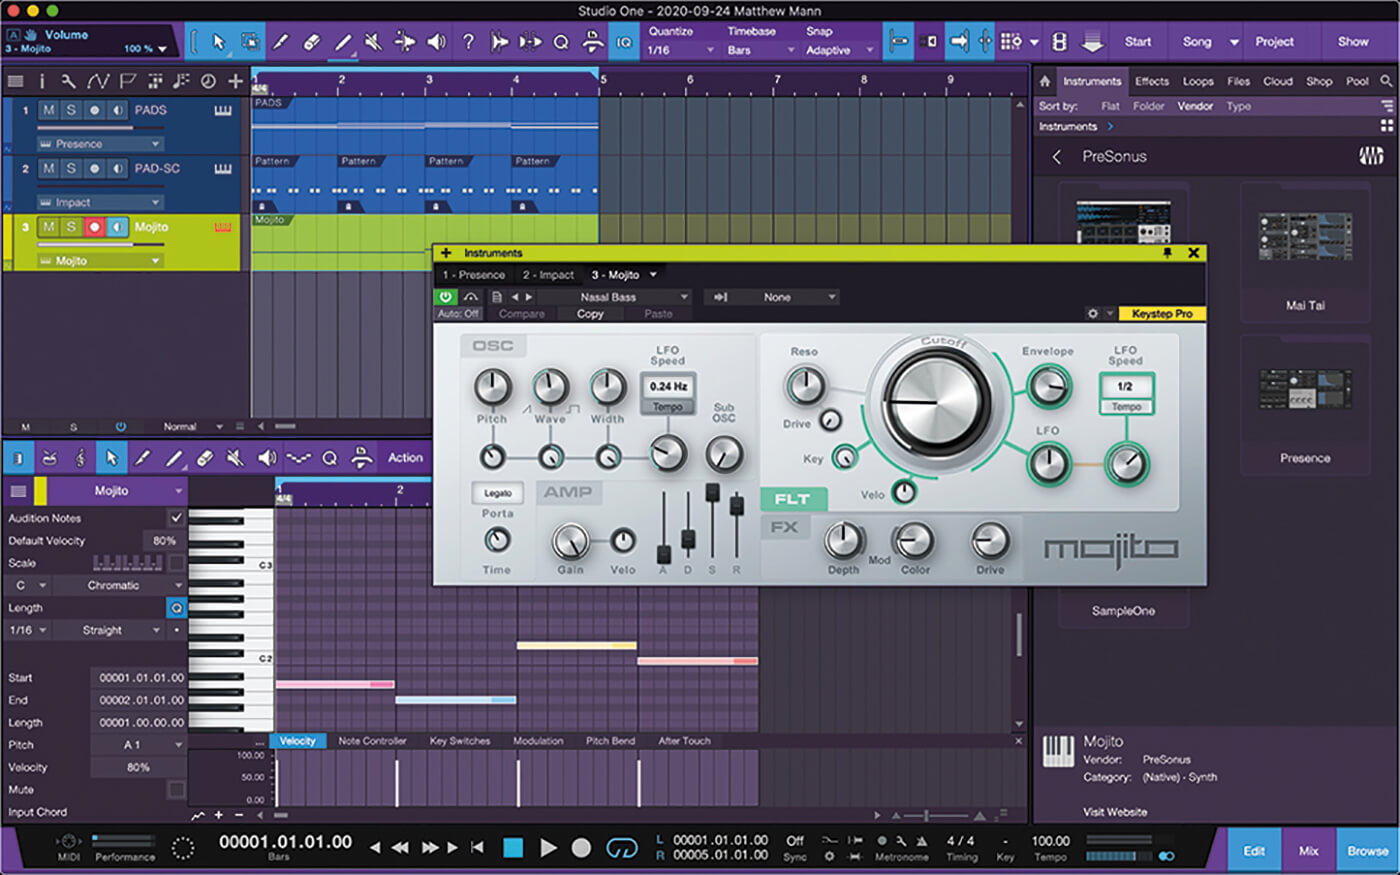
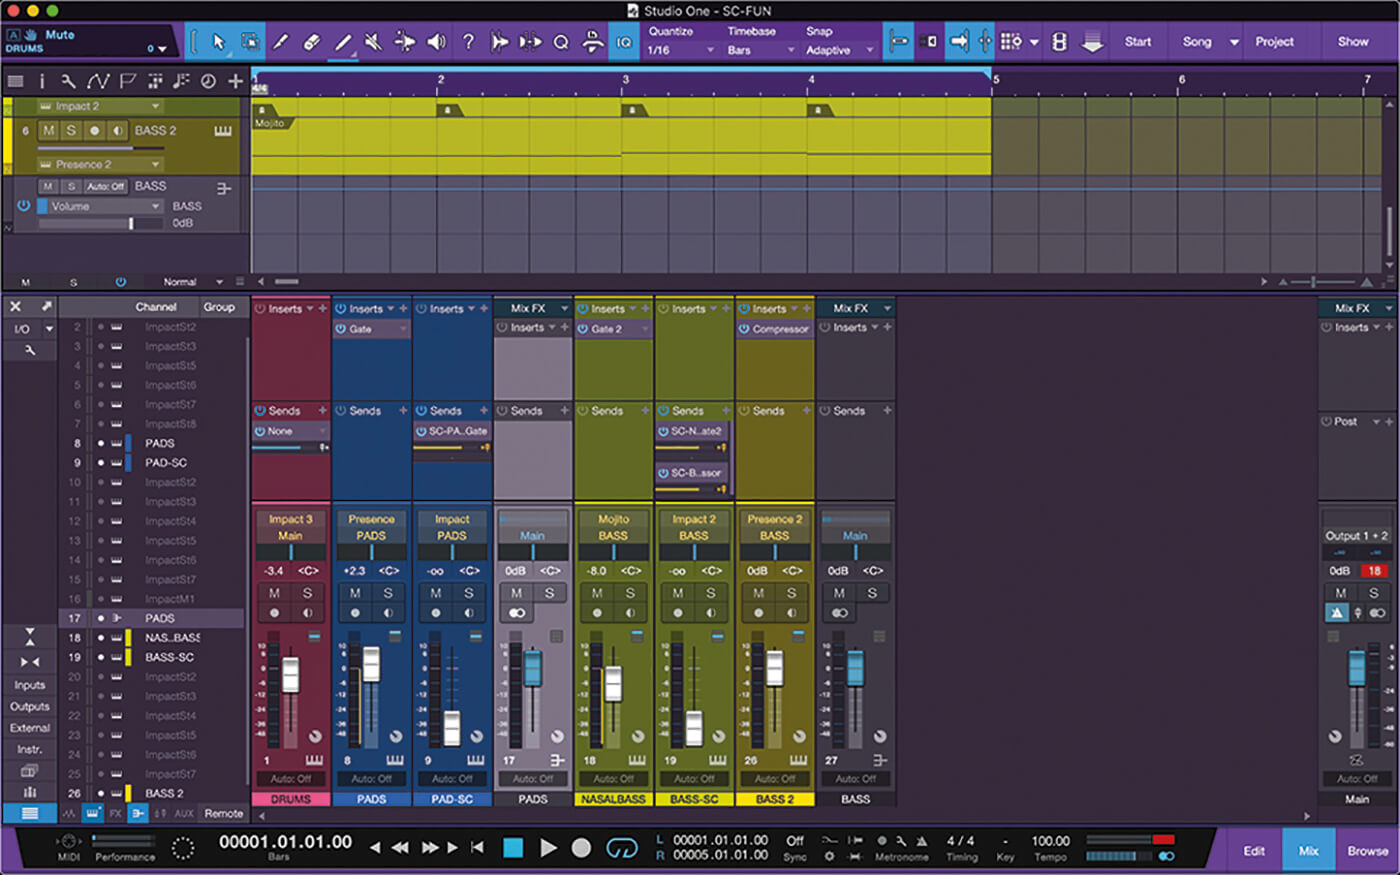
7. Work on a bass track. Add an instance of Mojito. Create a simple bassline that’s complimentary to your previously created pad track. We used A, G, D, C here (listen to sound example 3).
8. Add another rhythm track with Impact. Create a rhythm to drive the bass track. Add a gate to the NasalBass track and enable the sidechain. Click pre-fader and adjust hold and release to taste.
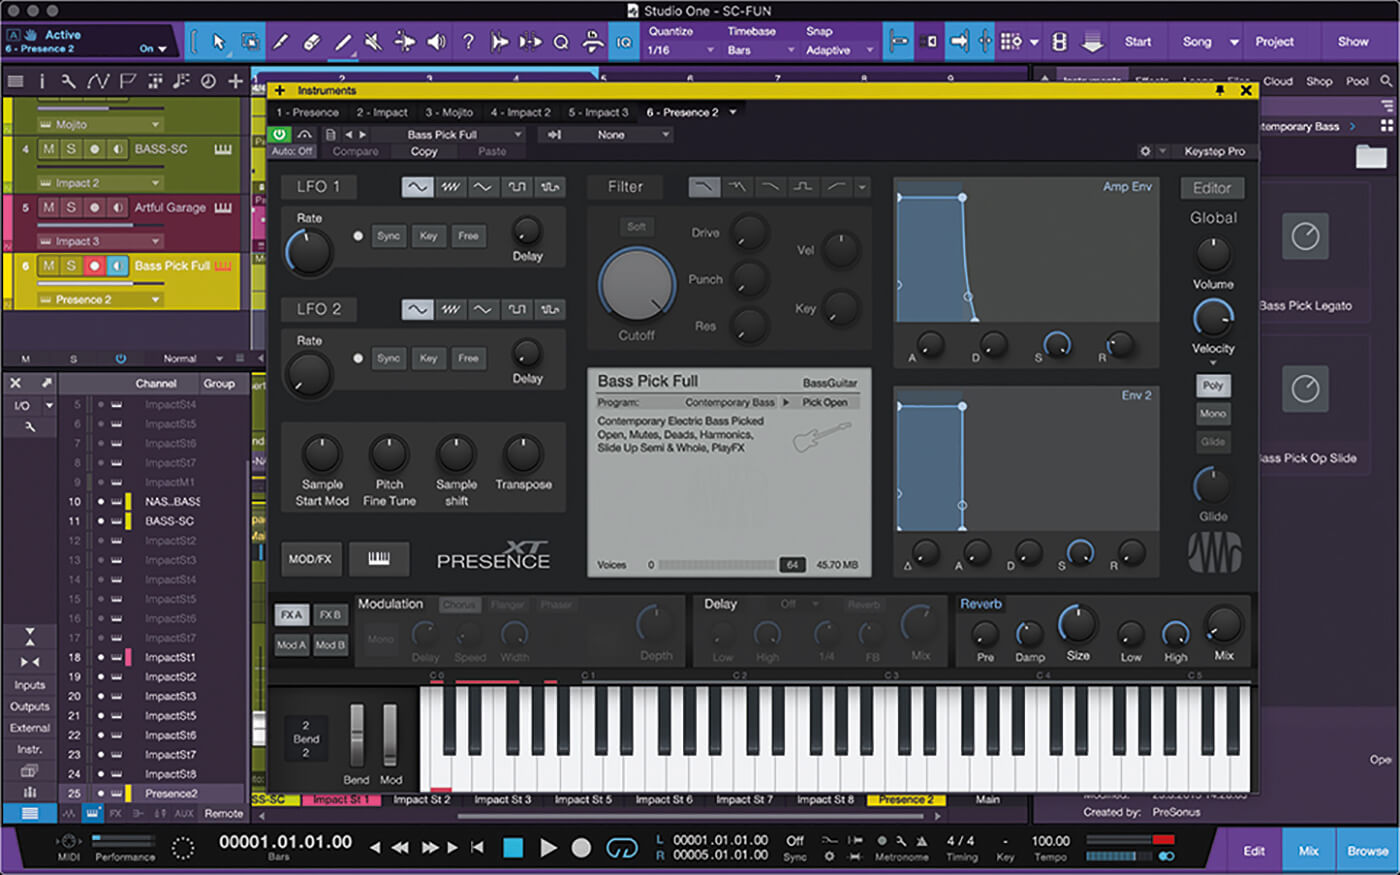
9. The bass track will have too much mid-range at this point. Add another bass track with a fat patch to thicken the song. We used Bass Pick Full (you can hear the bass with sidechain gating by playing sound example 4).
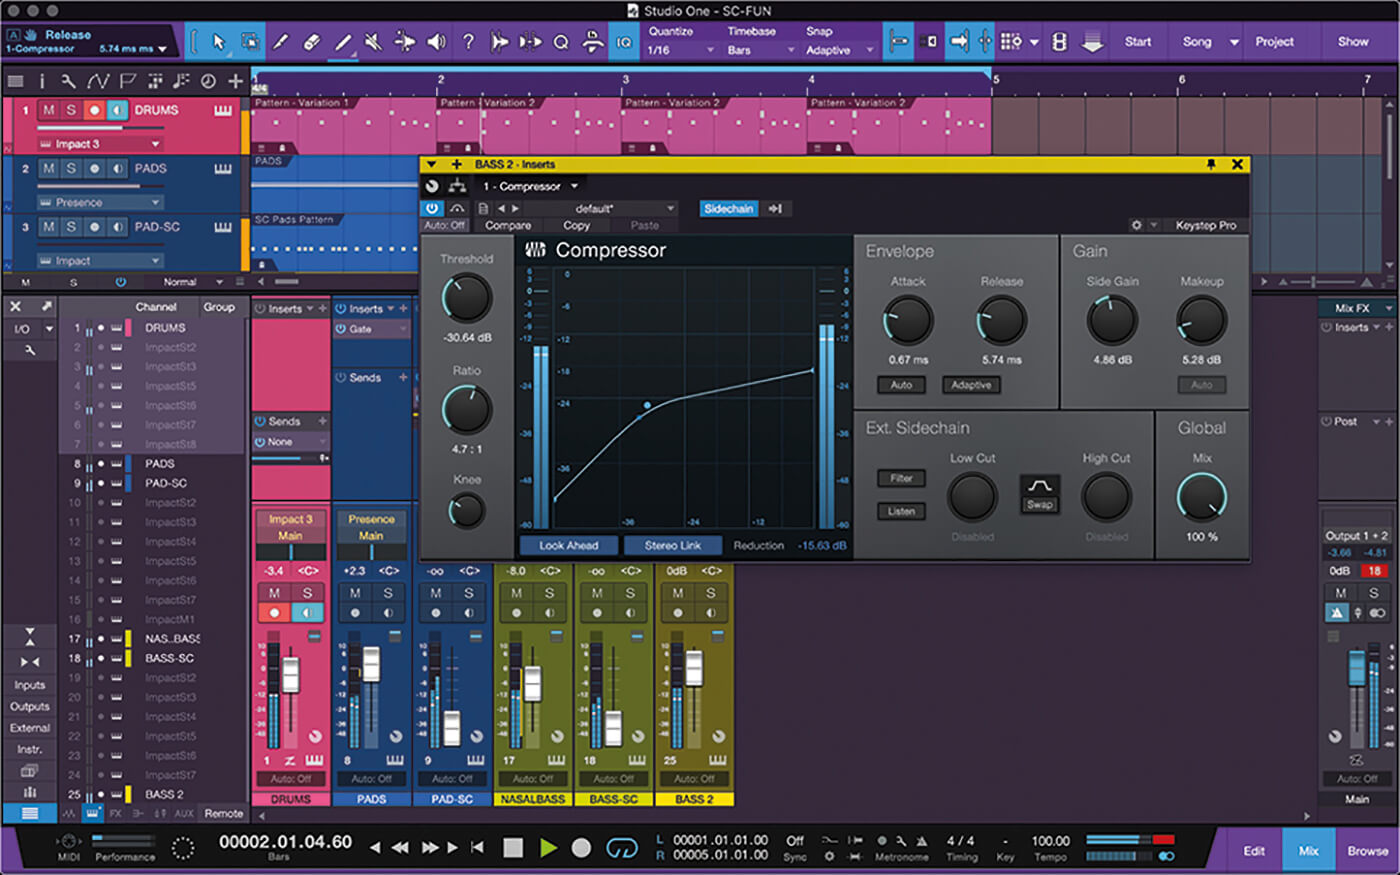
10. Add a compressor sidechained to BASS-SC and set it to compress the bass track so that it sits under the first bass track but adds more weight in the bass frequencies (listen to sound example 4).
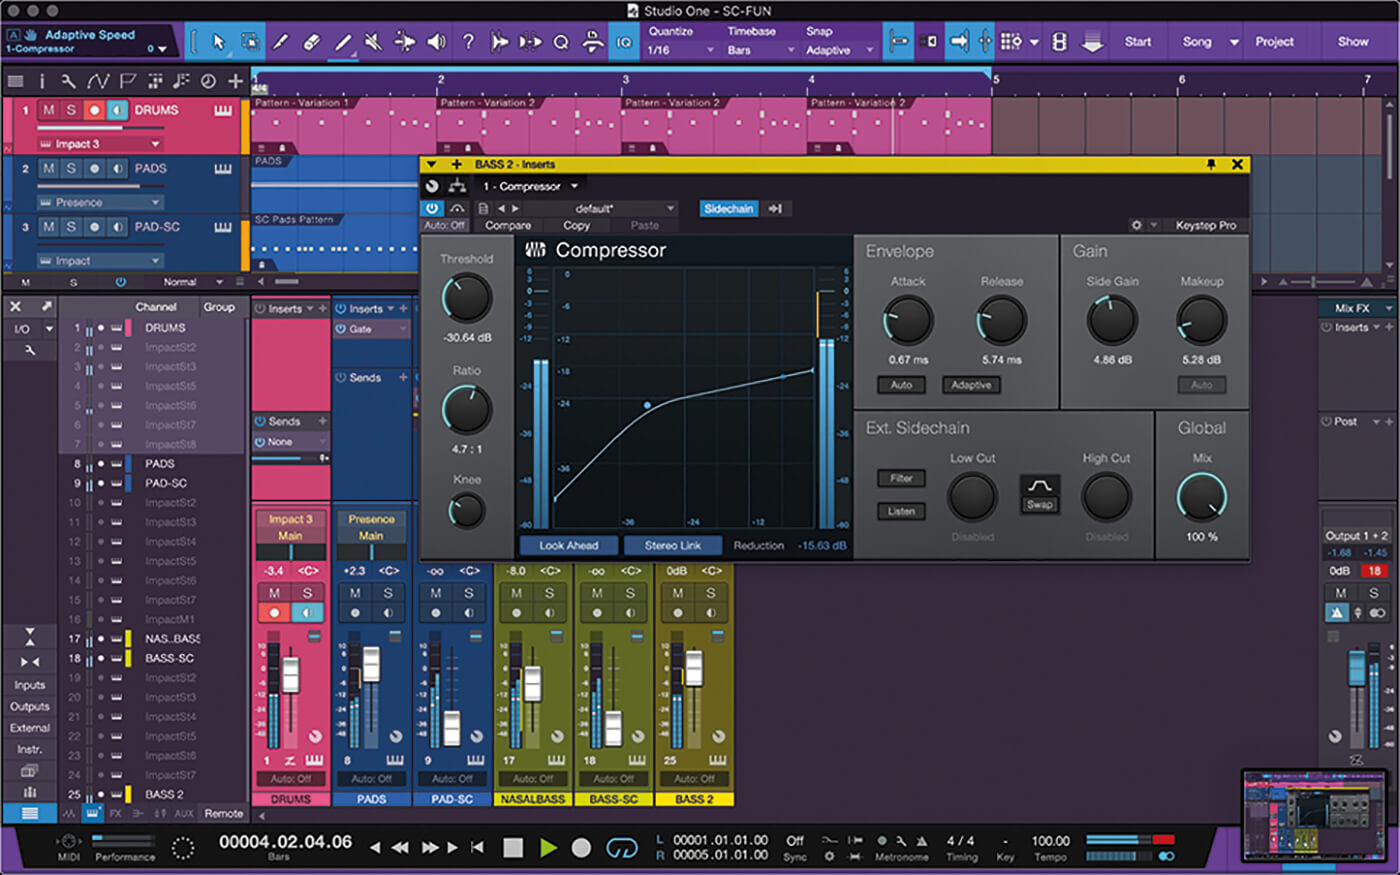
11. Adjust the attack and release of the compressor, and tweak the make-up to make up for the loss of volume after compression. Hear the bassline and kick without and with compression by playing sound files 5 and 6.
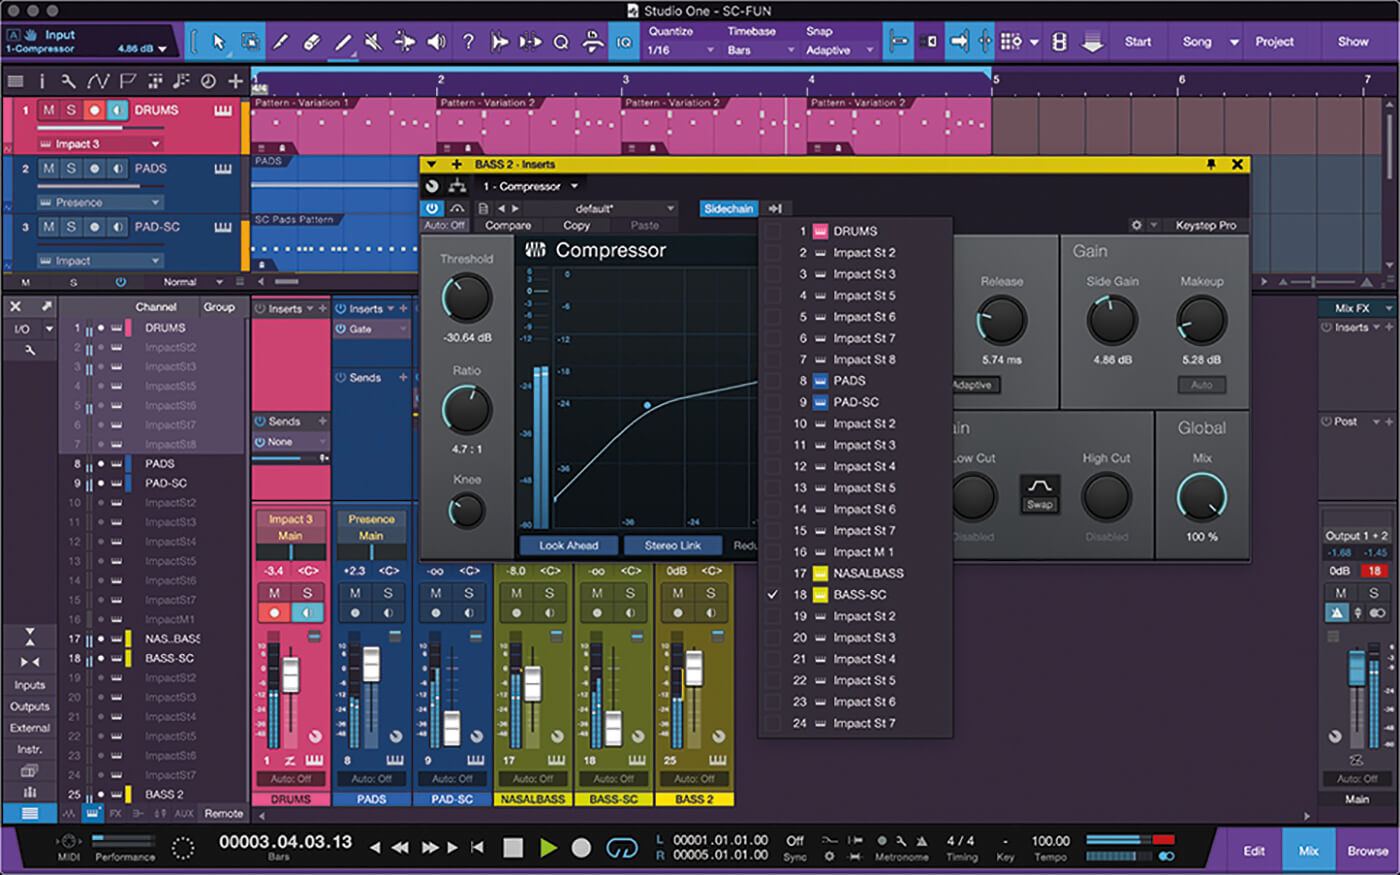
12. Once the bass is compressed and sitting where you want it, select the original BASS-SC track as the sidechain trigger signal. Now the bass should bounce along just under the original.
![]()
DON’T FORGET THE AUTOFILTER Alongside compressors and gates, there are other powerful processors that can be controlled using the sidechain input. Autofilter is a useful plug-in for filtering out frequency content. Using a trigger track to trigger the envelope is another way to get interesting results.
13. To edit MIDI parts in detail, try exploding pitches to track. Drum tracks can be separated into multiple tracks by each drum instrument. Right-click the MIDI part to find that option.
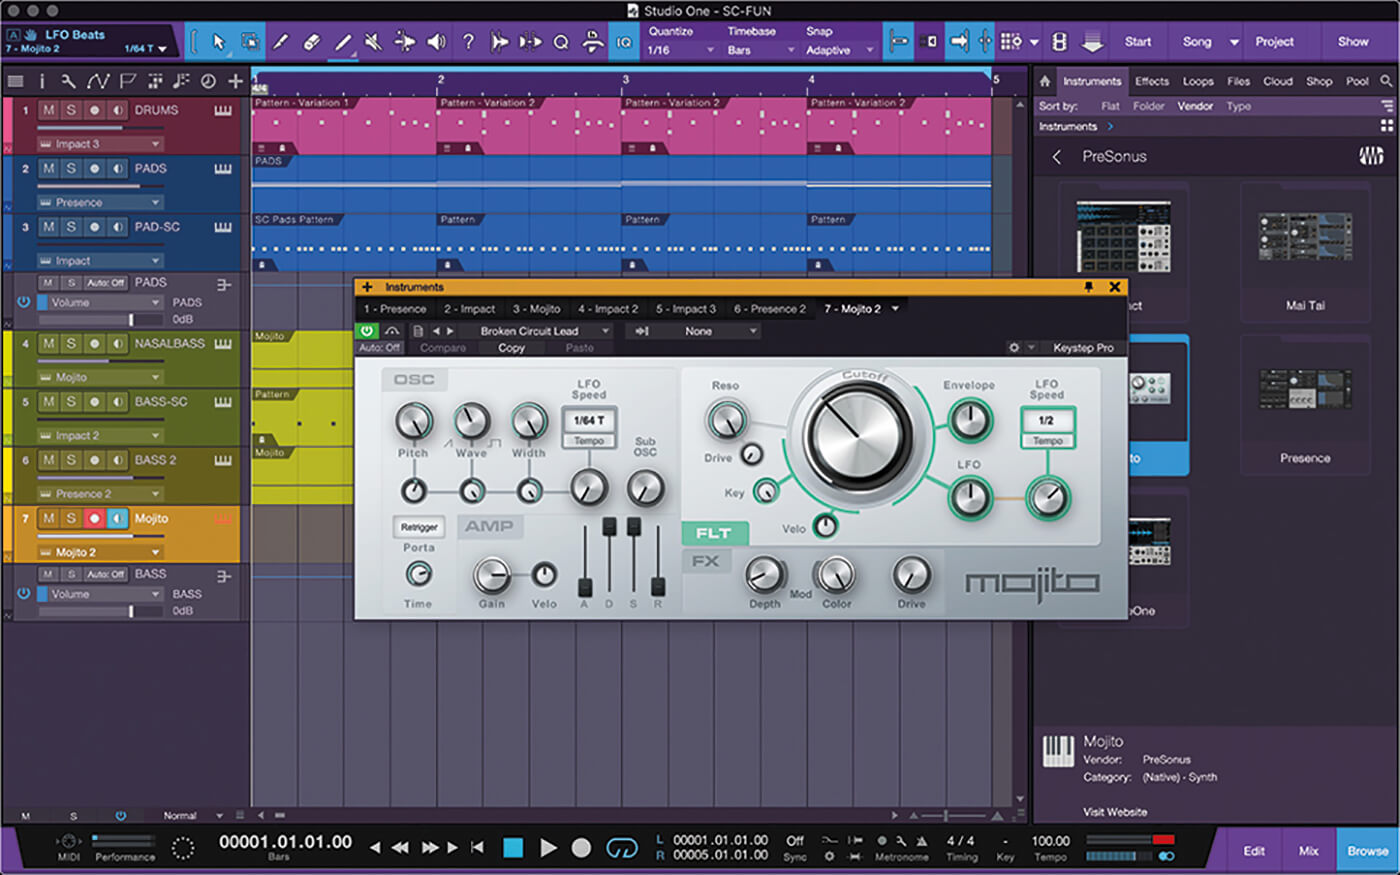
14. We used Mojito to create a melodic part for the song. Having created our melody, we set up a ducking compressor to help Mojito sit in the mix with our other instruments.
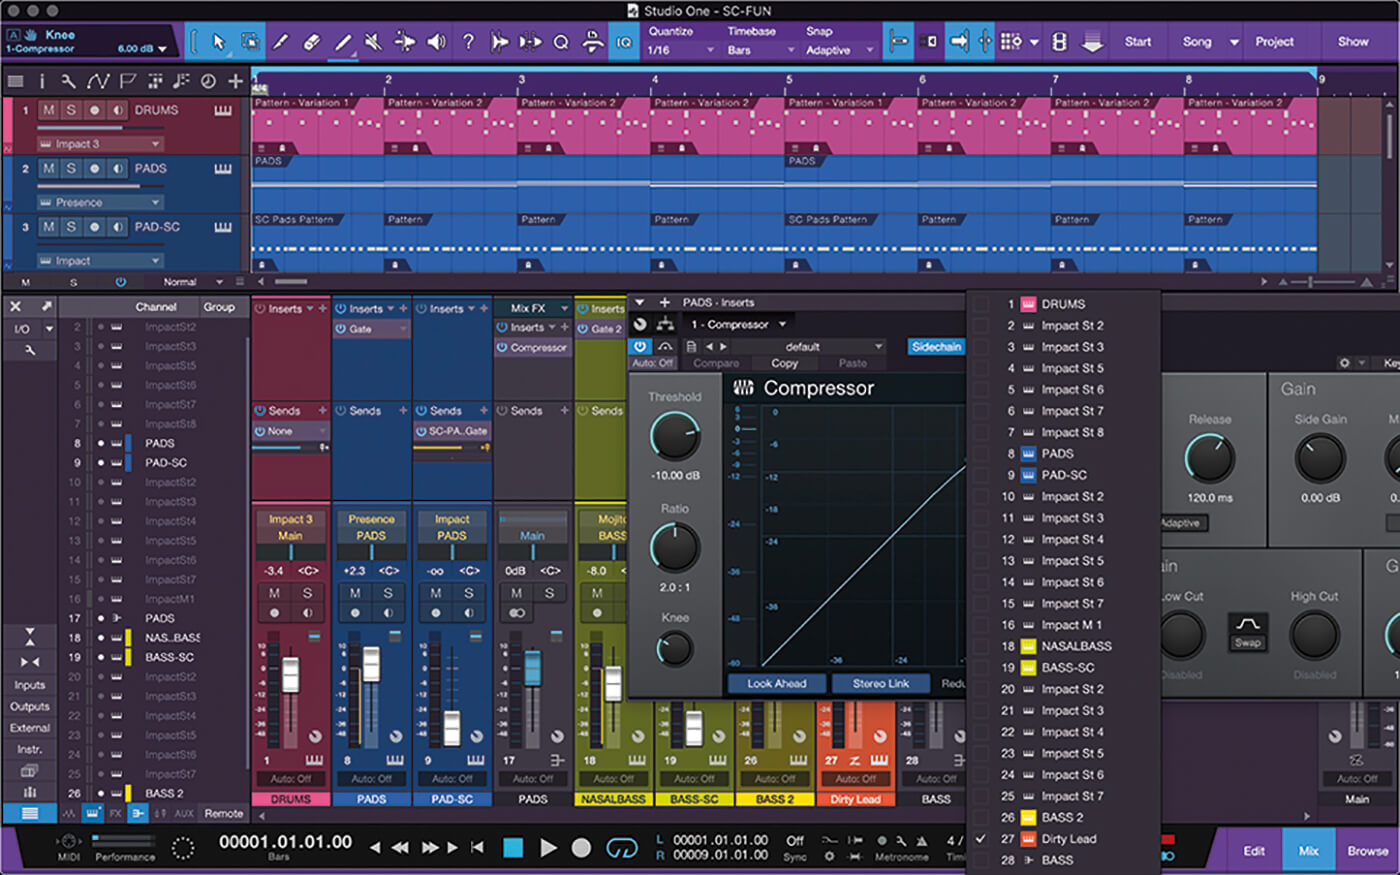
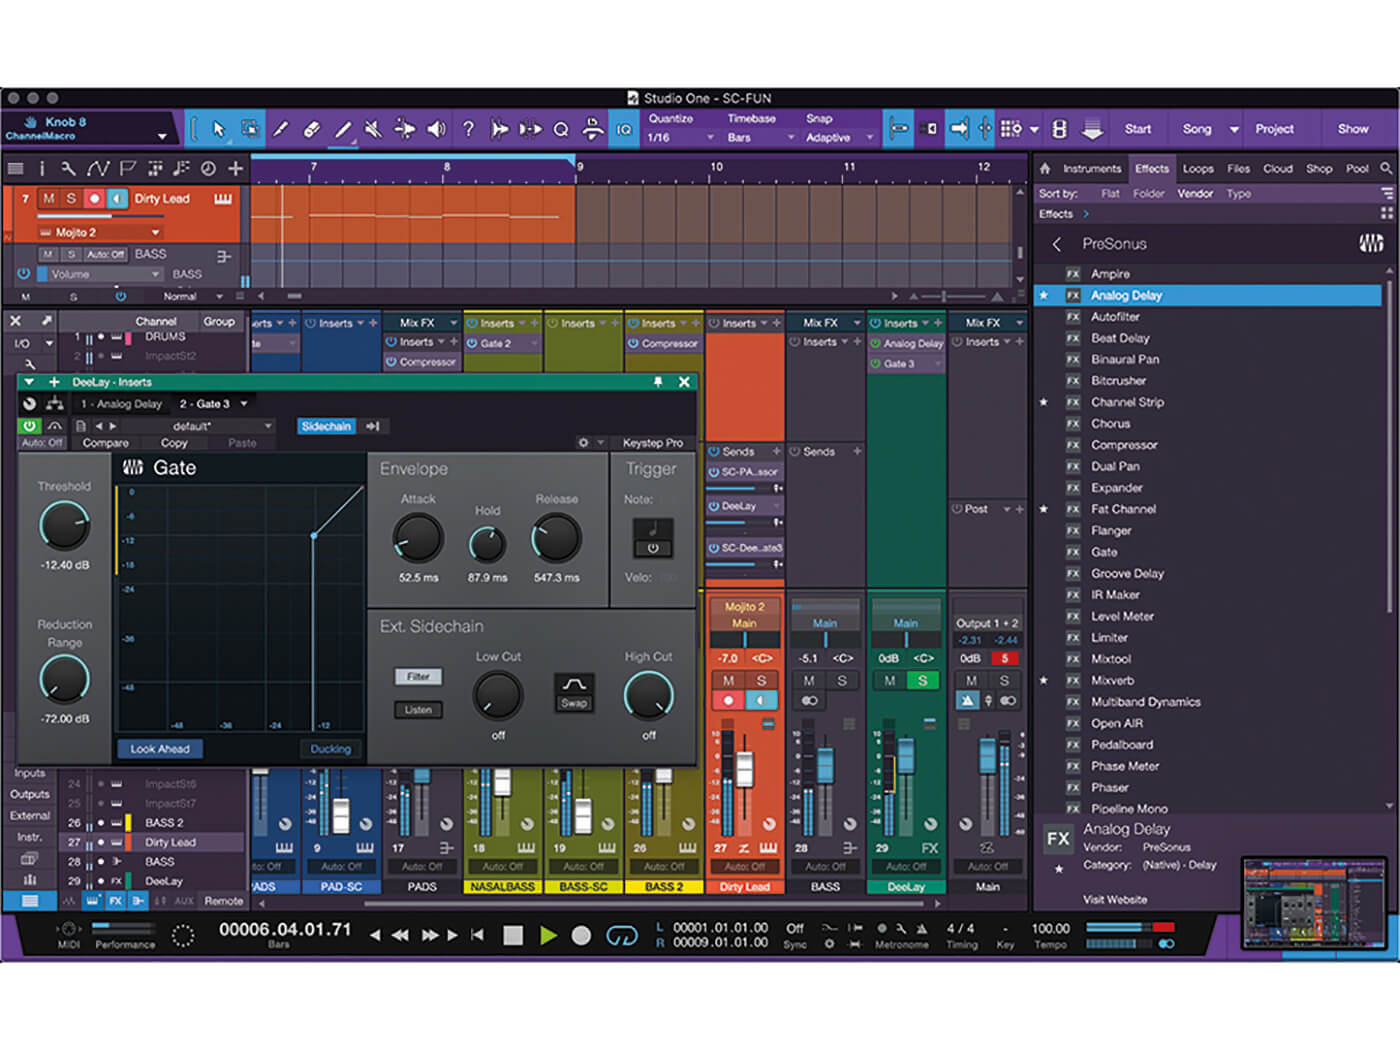
15. Create a bus for the pads and drop a compressor on it. Now turn on the sidechain and assign it to the Dirty Lead track. Adjust the threshold and ratio for 3-5dB of gain reduction.
16. Adjust the attack and release times so that the pad’s volume dips when lead notes are played but returns quickly to a normal level between these lead notes. This should help give your lead line some space.
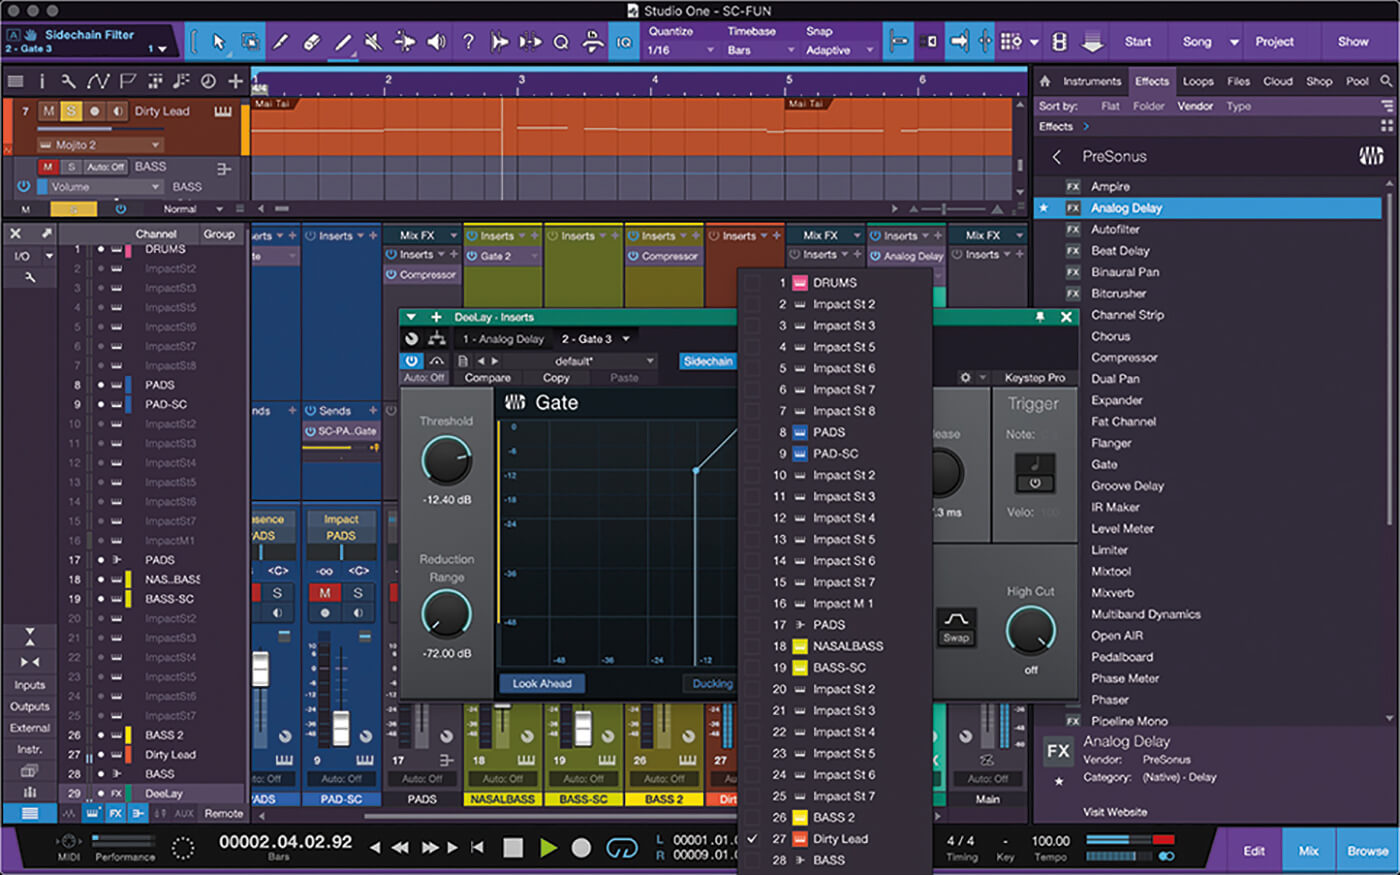
17. Add analogue delay to an effects bus and create a send from Dirty Lead to the delay. Add a gate after the delay sidechainedto the Dirty Lead track.
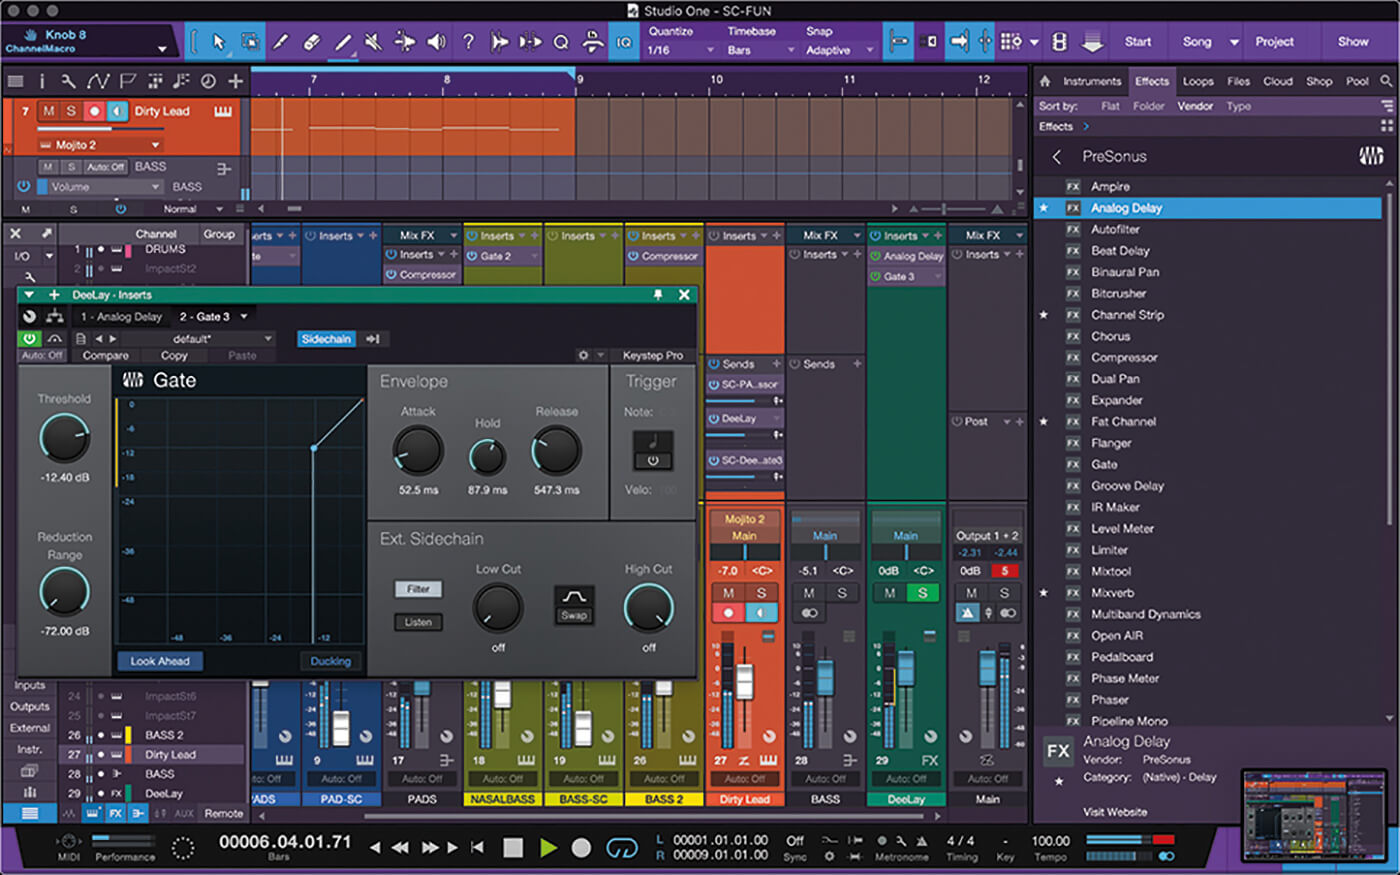
18. Adjust the hold and release on the gate so the delay only comes through between the notes and is lowered in volume while the notes are playing. Hear the final track by playing sound file 7. Play file 8 to hear the extra bass.
For more PreSonus Studio One tutorials and workshops, check here.