Simple hacks for better productions in Studio One 5
Though the updated version of Studio One is loaded with all manner of new selling points, these tried-and-tested methods can help minimise your stress and increase music productivity.
It doesn’t matter whether you’re just making your first tracks or you’ve been producing music for decades, there are always things that can improve your sound, workflow and the general grooviness of your recording and production projects.
Studio One 5 provides all the tools required to make music, alongside features that with a little setup can minimise any cumbersome technical issues and let you concentrate solely on the music. There are some simple tricks that can inspire you to stretch your musical muscles and push your productions further too.
Kick it
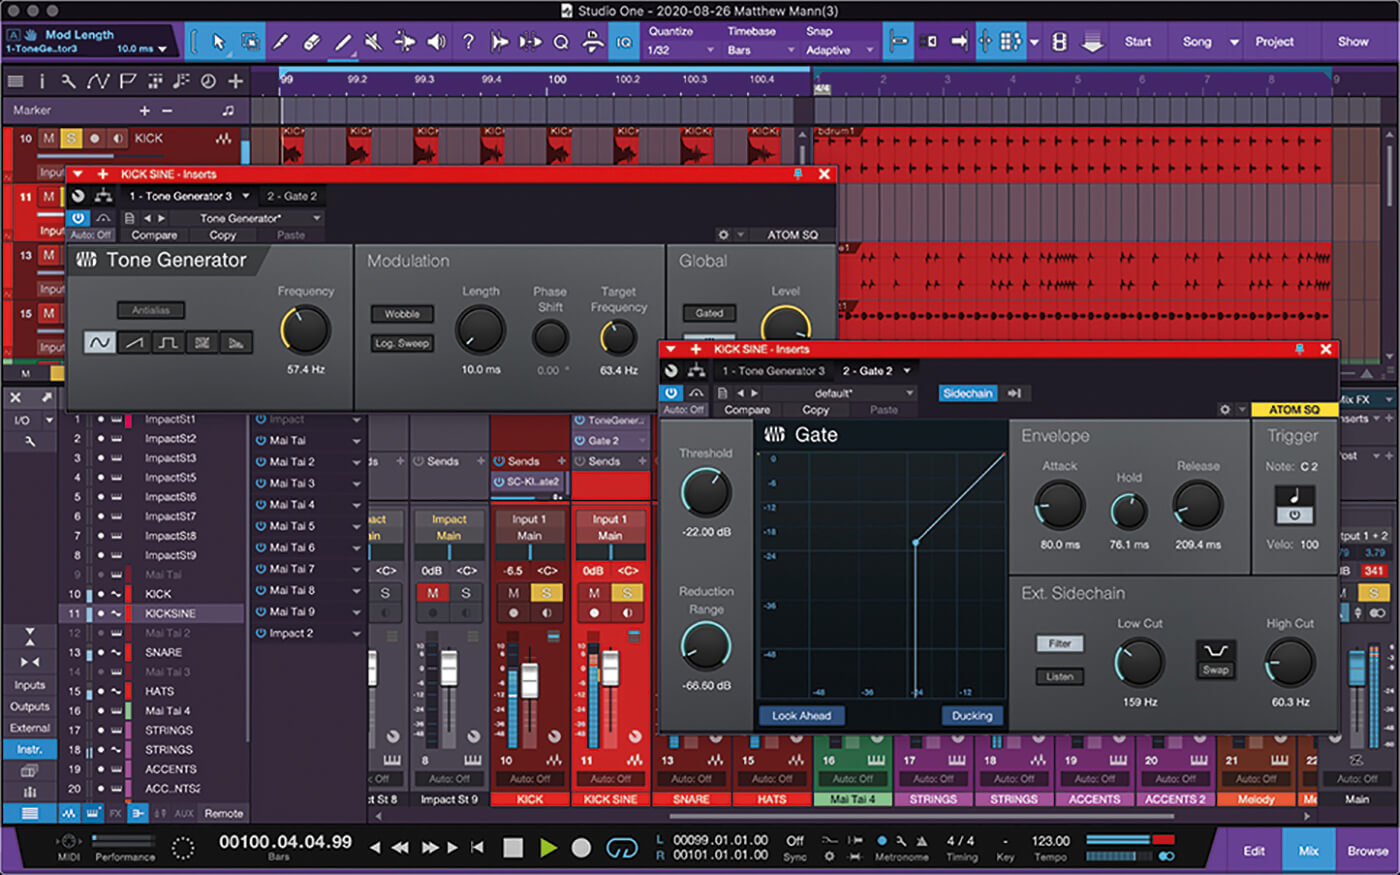
If you find that your kick drum doesn’t have enough weight to it, consider creating an aux track and adding a Tone Generator set to a 60Hz sine wave as an insert. Next, add a gate and set its sidechain input to receive from the kick drum track. Adjust the gate until the Tone Generator is only heard when triggered by the kick. Now add an audio track and route the output of the Tone track to its input. This should enable you to record the Tone track.
The same principle can be applied to snares, only this time using white noise. Set a Tone Generator to about 2kHz and add a gate with the sidechain input set to the snare. Adjust the release time to shape the length of the noise to taste. Then add an audio track and route the output of the noise track to its input.
Build that beat
What’s better than pads on a track? How about choppy, rhythmic pads? Create a pad track and insert a compressor. Use something such as a hi-hat track for the rhythm and select it from the compressor’s sidechain input on the pad track. Adjust the threshold, attack and release until you get a rhythmic pad.
In Studio One, it’s easy to create multi-instruments that are layered or split (or both). Create an instrument track and drag another instrument to the same track. Studio One will ask if you want to combine the instruments – you do, so click Combine. A multi-instrument is displayed with both instruments layered. To create a split, use the sliders above the virtual keyboard and drag them to the keys where you want the split to occur. You can also add Note FX and Effects to either instrument.
To er is human
If MIDI parts are too stiff and robotic, right-click them and hit Humanize. From the pop-up menu, you can add a velocity and/or note start range. Click okay to adjust the selected note so the timing is less perfect and more realistic.
To save time building up new tracks from scratch, create templates by dragging your most-used instruments, effects, busses, panels and layouts into the editing window. Once you have a good setup, select Save as Template in the File menu and give it a memorable descriptive name. From the Start Page, clicking New Song and the User Tab will display your saved templates. You can open it to find everything you’ve previously saved.
Lighten the load
To reduce processing power, convert your MIDI part to audio. Right-click on the Instrument Track (not the MIDI part) and select Transform to Audio Track from the menu. This can render the part as audio, remove virtual instruments and preserve any effects tails. If you’re absolutely sure you won’t need the MIDI part again, select it on the track, right-click it and, from the Event menu, select Bounce Selection.
Studio One comes packed with lots of sounds, including REX files. You can open REX files in the browser and expand them to see the individual audio slices. Dragging these slices onto Impact pads allows you to perform new rhythmic parts.
To experiment with different arrangements, copy song sections and drag them onto Scratch Pads for experimentation. You can add several Scratch Pads and try several different part arrangements. When you’re happy, drag the part back to the main timeline.
For an old-school console sound, right-click multiple tracks and choose Add Bus for Selected Channels. You can create drum busses, guitars busses, bass busses, keys busses, vocals busses – anything. At the top of each bus, click the Mix FX dropdown and select CTC-1, which emulates the sound of a hardware console, and has additional options: Classic, Tube and Custom. Make sure to click the Channel button and Bus in the Main Bus. You can add overdrive, noise, crosstalk and character to each channel. This technique helps glue tracks together and gives them a certain vintage character.
Guidance for better productions in Studio One 5: step-by-step
Kick the habit

1. Create an aux track and add Tone Generator as an insert. Select sine wave and adjust the frequency to about 60Hz to get a thick sub tone.
2. Add a gate after the Tone Generator. Set the sidechain input of the gate to the kick track. Adjust the threshold, reduction range, attack, hold and release to shape the kick’s tone.
Pad it out

3. Add a compressor to the inserts on a pad or string track. Set the compression ratio so that it’s fairly heavy, at about 4:1 or higher. You want lots of gain reduction in the strings when triggered.
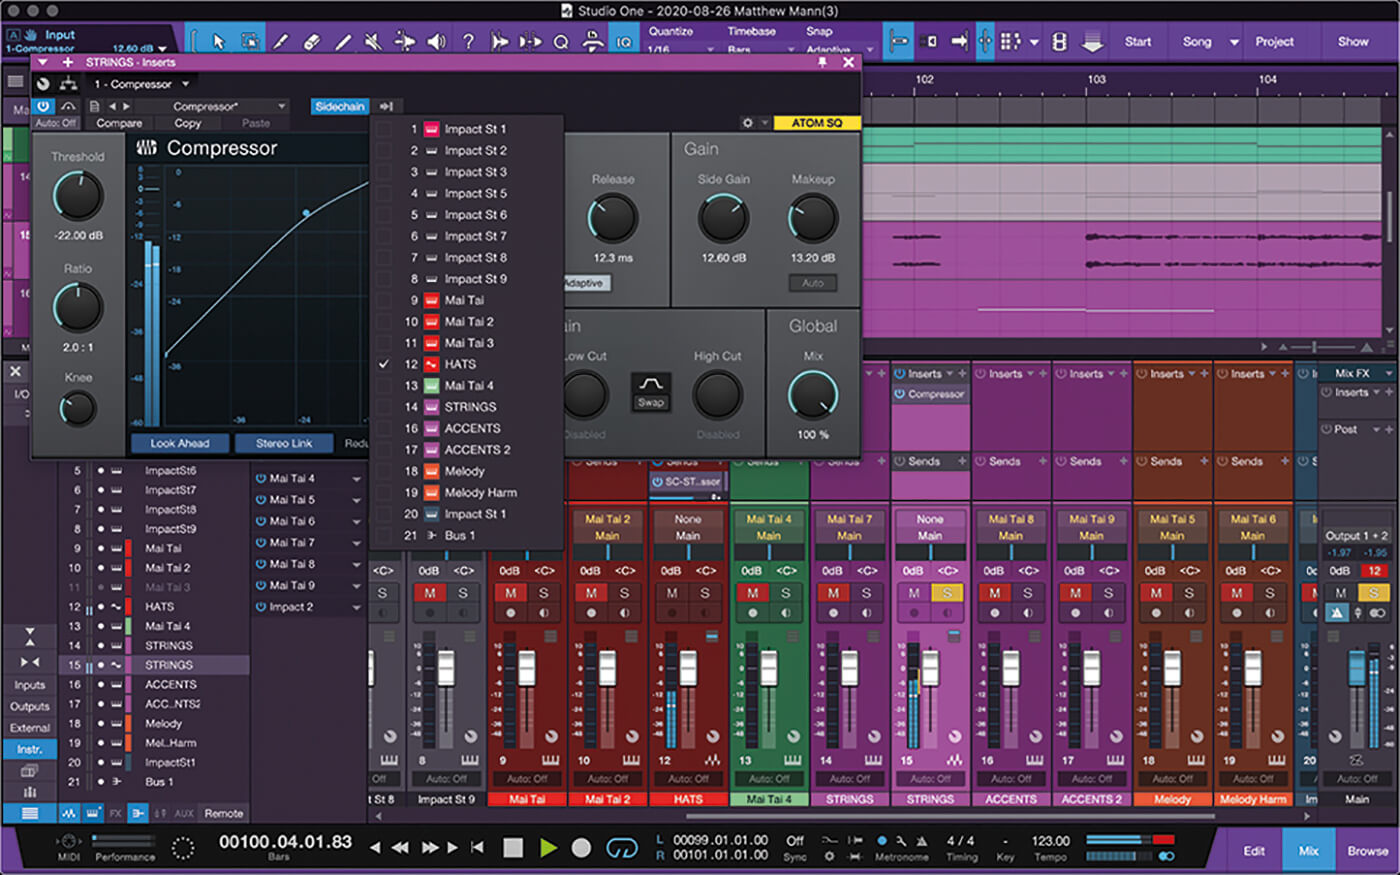
4. Set the sidechain input on the compressor to trigger from a hi-hat or other rhythmic track. Adjust the gain reduction to taste to create an interesting rhythmic sound.
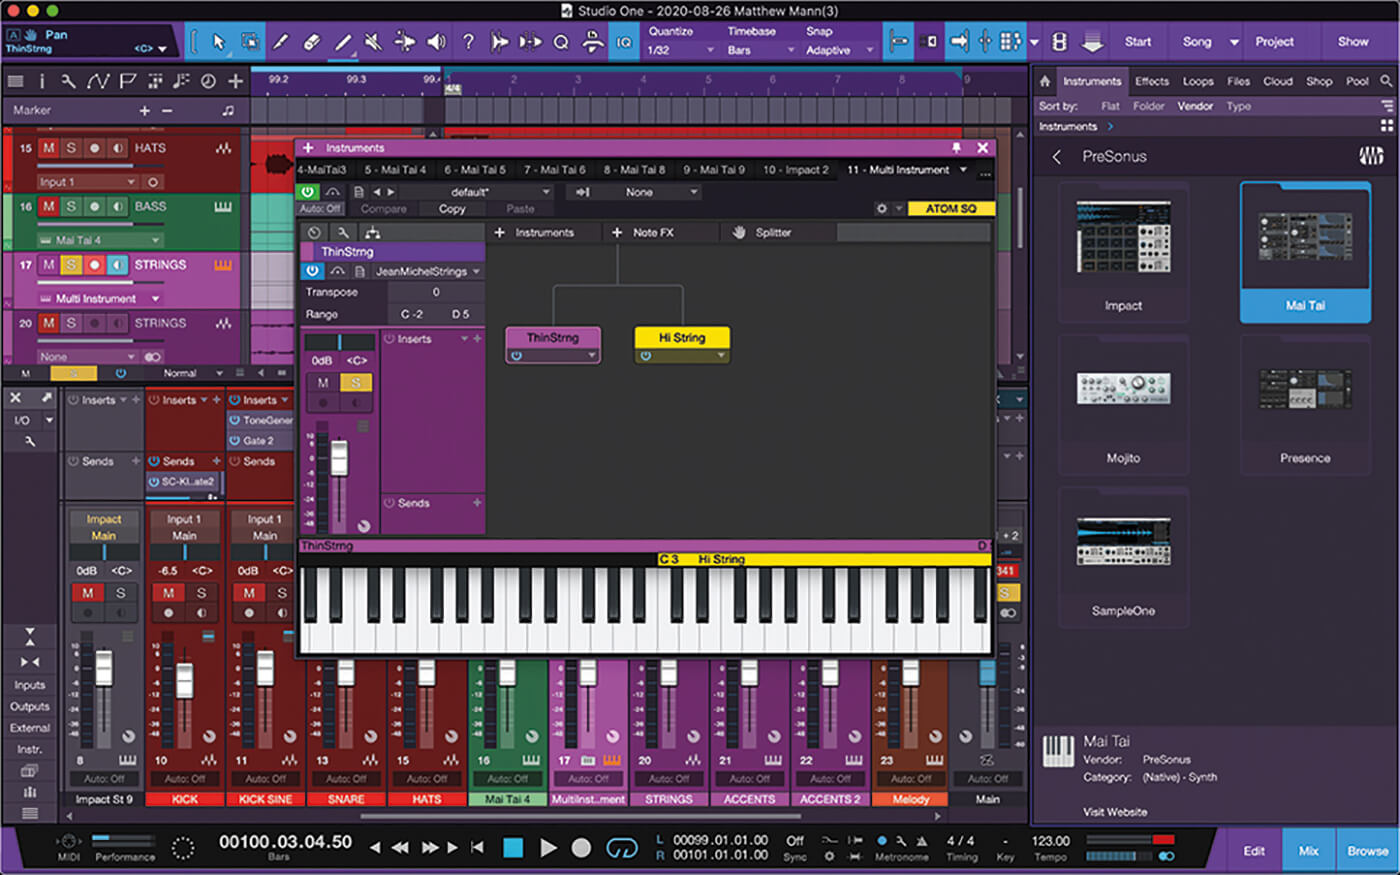
5. Drag an instrument from the browser to create an Instrument Track. Drop another instrument onto the track and click Combine. Adjust the range sliders to split the sounds.
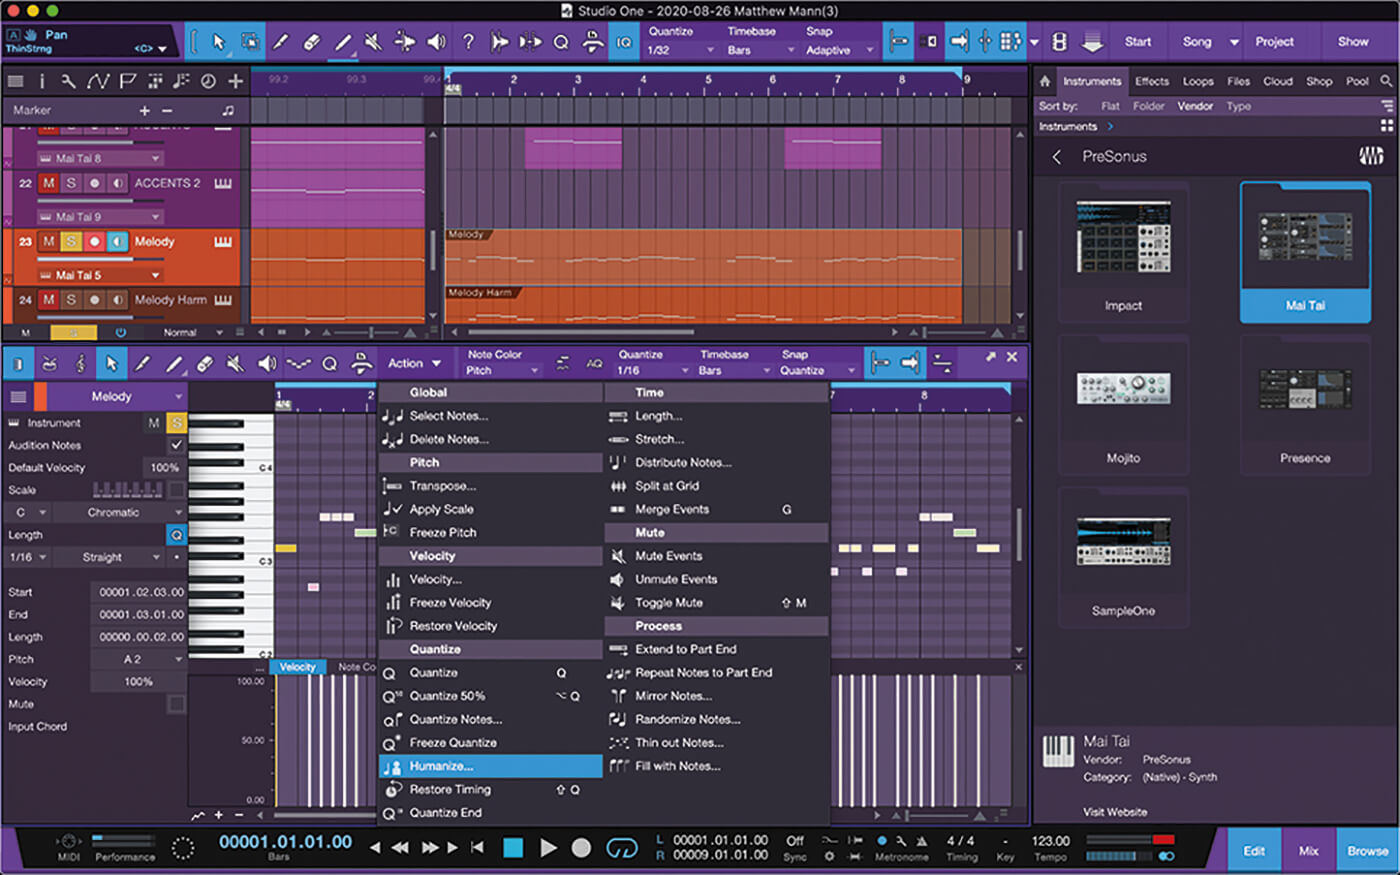
6. If a MIDI part is too stiff and robotic, select the MIDI notes with the range tool, right-click and select Humanize from the Quantize menu.
![]()
GETTING A TUNE-UP Sometimes getting a part to work in a track is simply a matter of tuning. If a part isn’t working, try playing it an octave higher or lower. It’s easy to transpose MIDI parts. Just select the notes (or the whole part), right-click and use the transport and/or velocity adjustments.
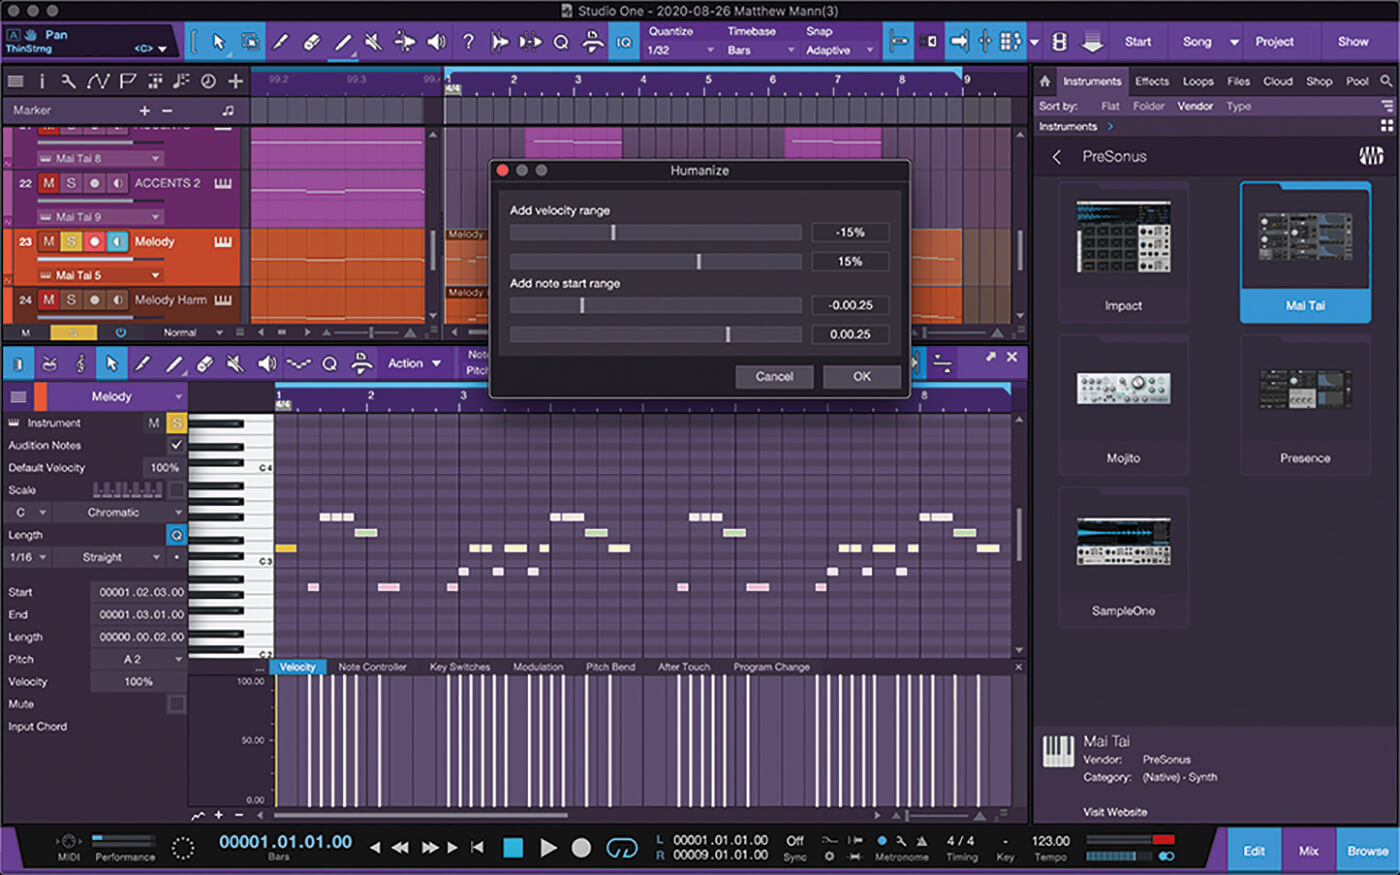
7. The Humanize pop-up menu has options for setting a velocity range and for note start. These ranges allow you to change the velocities and where the notes start.

8. Adjust the note-start ranges to unquantise the notes enough so that they have a more natural feel. If the notes are still too stiff, Humanize them again until they sound organic.
Smart shortcuts

9. To create a song-writing template, drag your most-used virtual instruments to the main area to create tracks. You can also add bus tracks, audio tracks, effects and anything else as needed.

10. When your song is set up, click File > Save as Template to save it for later recall. Create templates for songwriting and for mixing to speed up your creative processes.
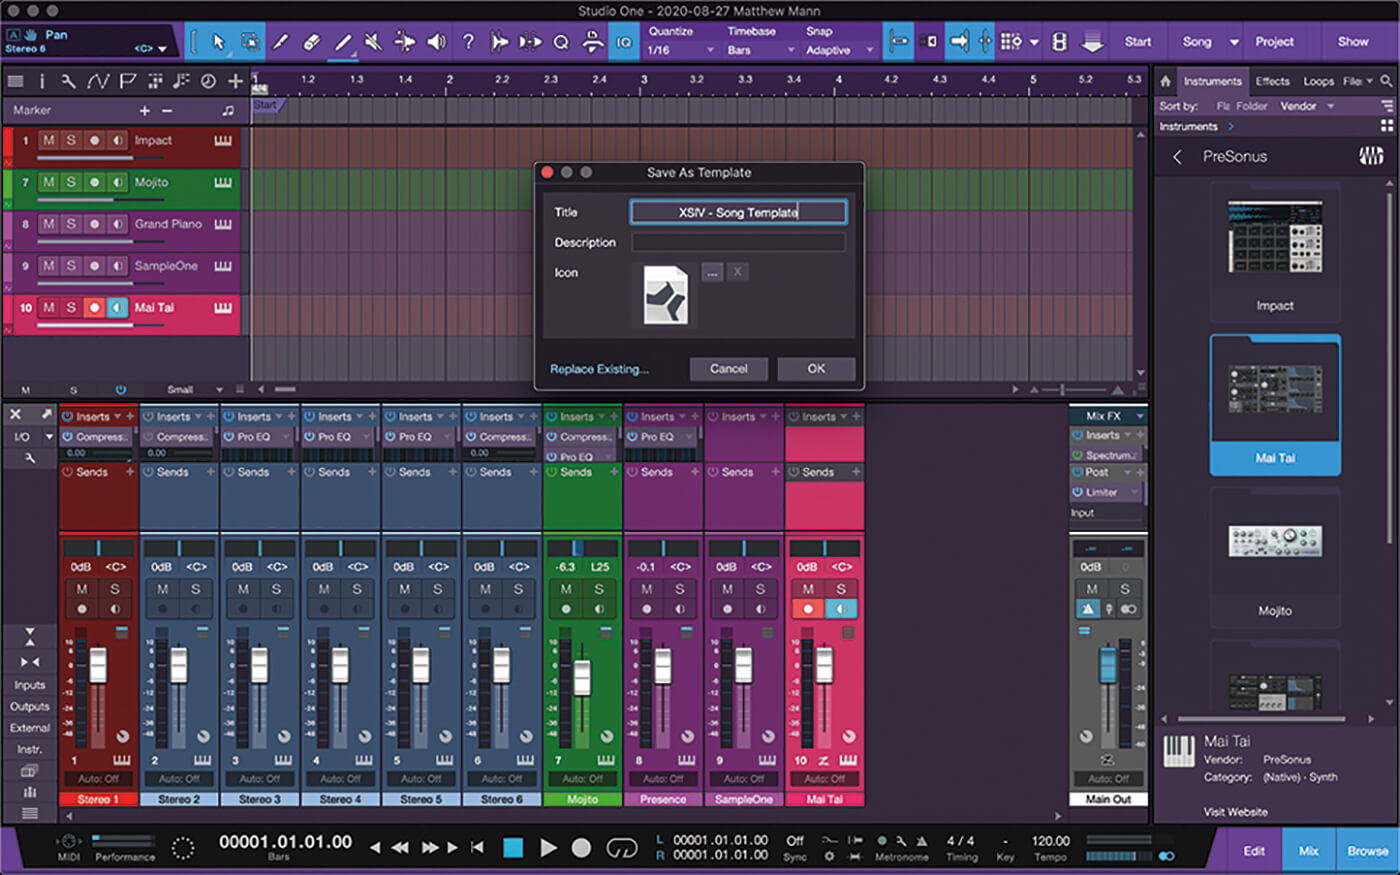
11. Issue each template with a simple, unique name, such as Songwriting, Mixing, Band Recording, Scoring – whatever reflects the reality of the template.
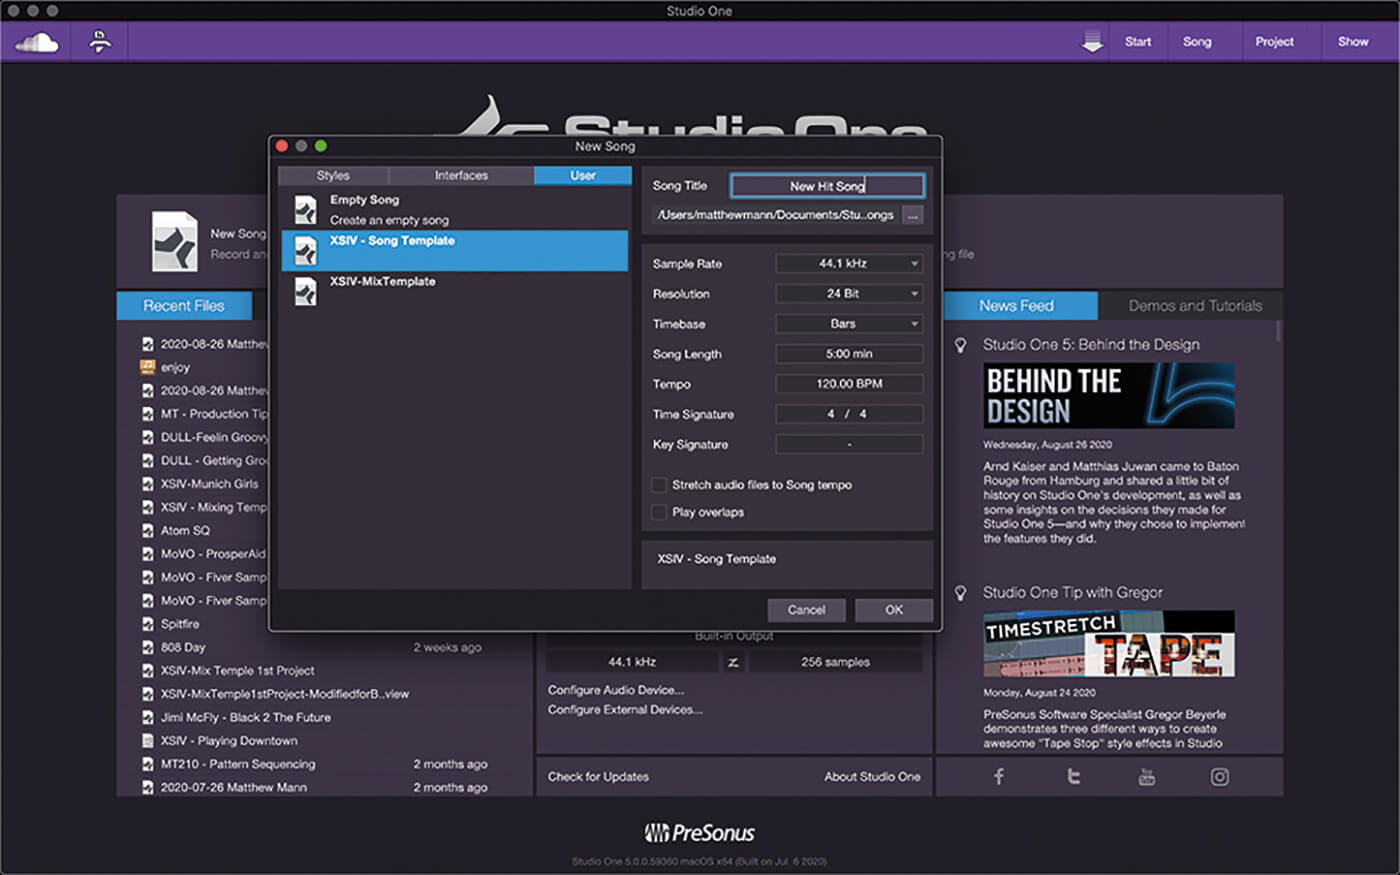
12. Now, when you click the User tab from the start page, you’ll be able to see your custom templates. As usual, these can be configured with song length, resolution, sample rate and more.
![]()
LOCK IT DOWN When you have a track or part just the way you want it, you can lock it so that it can’t be edited, or lock it in place on the timeline so that it can’t be moved. For the former, right-click and select Edit Lock. To lock an event on the timeline, right-click it and tick the Time Lock option. These can both be undone.
Lighten up

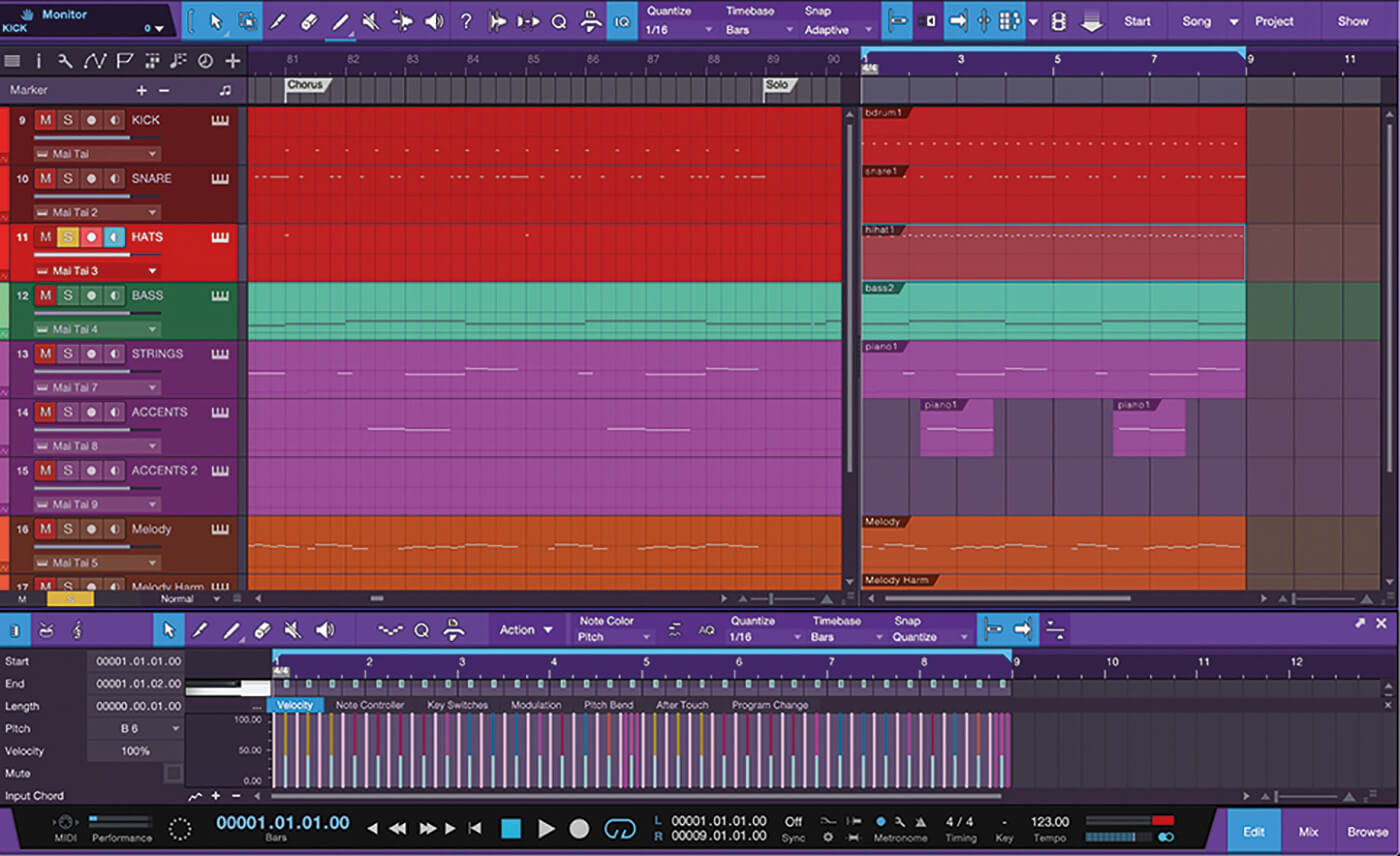
13. To edit MIDI parts in more detail, use the Explode Pitches to Track option. Drum tracks can be separated into multiple tracks by each drum instrument. Right-click the MIDI part to see this option.
14. The pitches are assigned to separate tracks and even named for you. This process makes it easy to render, process individually and then mix the parts.
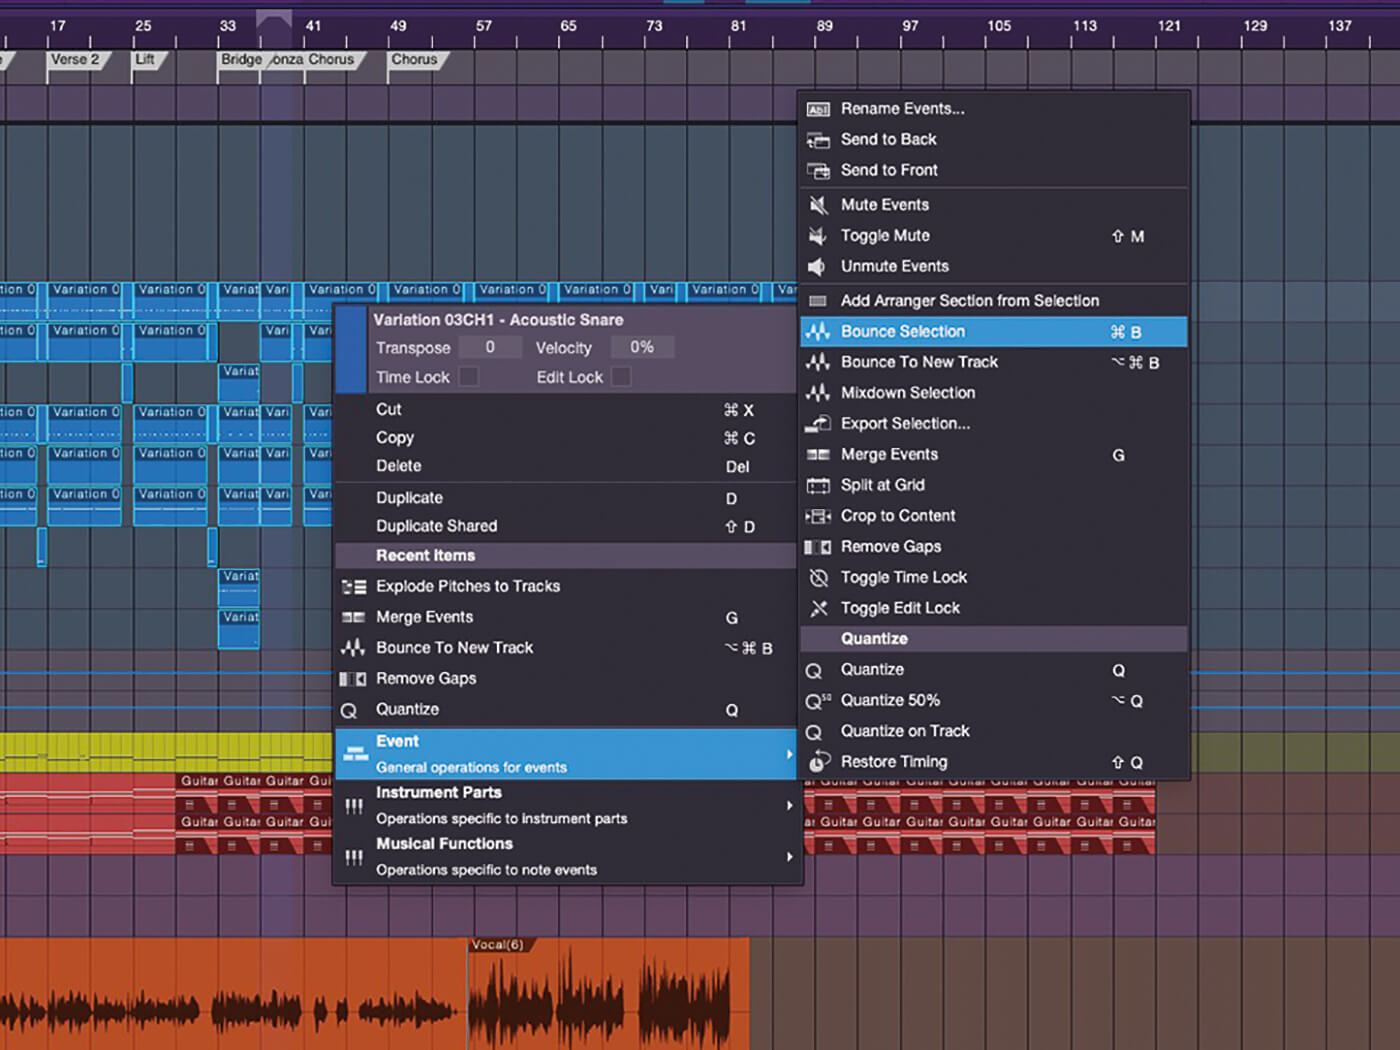
15. Highlight all the parts, right-click and, in the Event menu, choose Bounce Selection to render all the individual drum parts as audio.
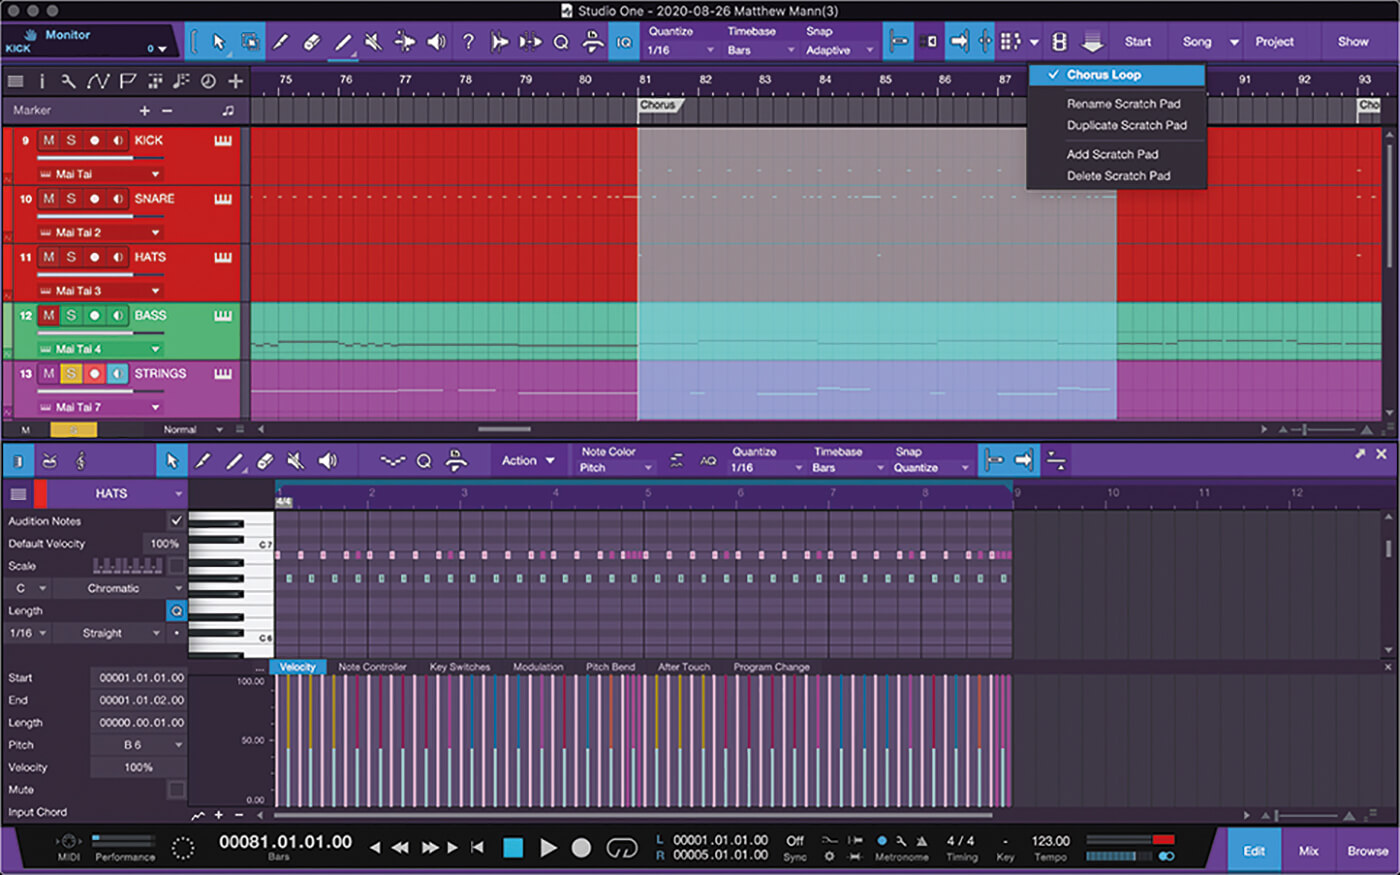
16. Click the Scratch Pad button. Copy and drag a song section to the Scratch Pad to further develop the idea and work out some variations.
17. Once you’ve developed an idea in the Scratch Pad, click Duplicate Scratch Pad to create a copy of your variation for further work.
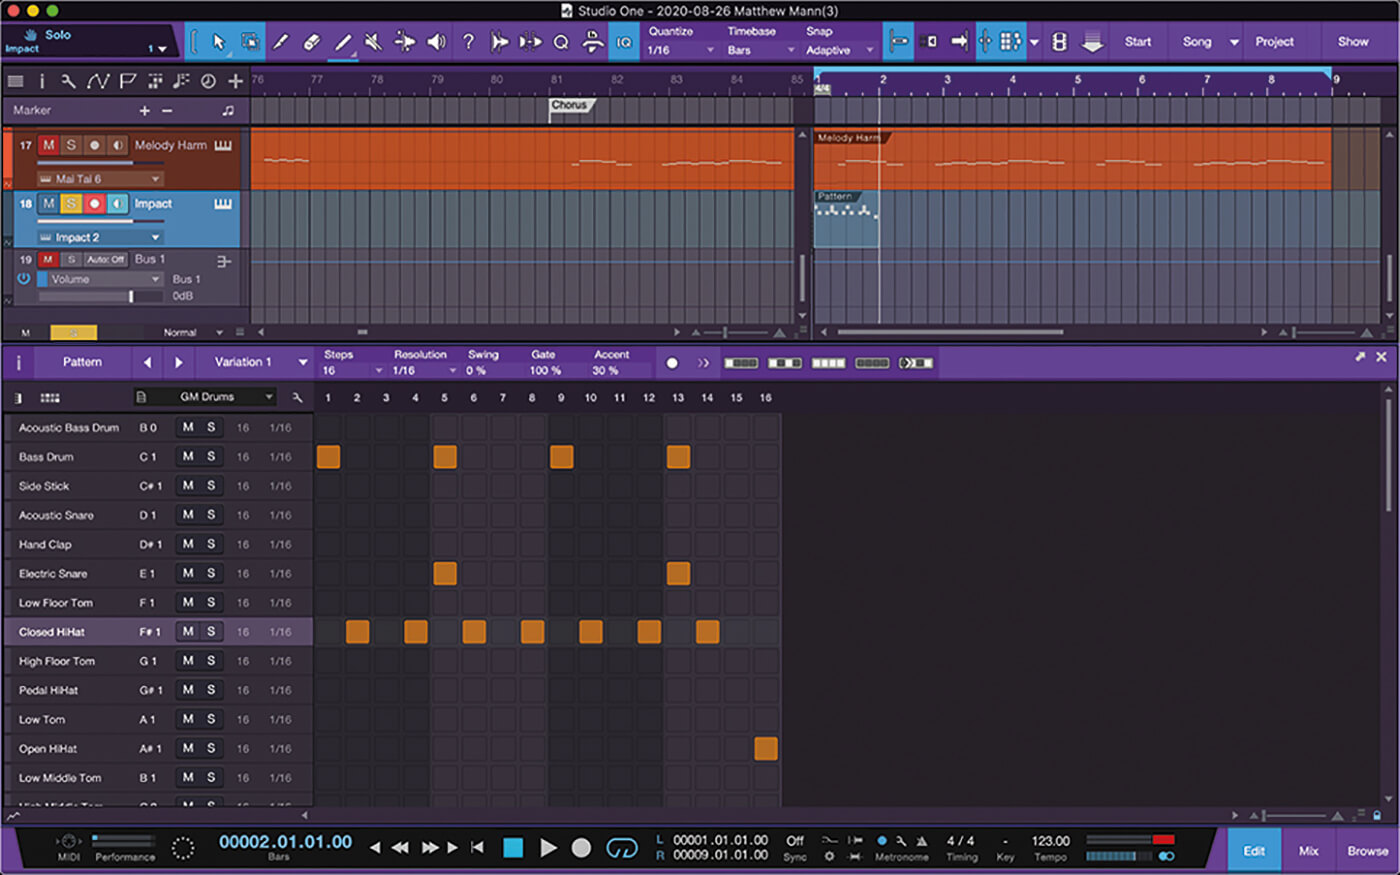
18. While working out variations, add additional instruments or Patterns to your parts to further develop them. Variations of patterns can also be developed in Scratch Pads.
For more PreSonus Studio One tutorials and workshops, check here.