Synth Sound Design in Reason 10
A fantastic synth sound can define a song. In the latest part of our Reason sound design series, Andy Jones looks at how you can add more punch to your Reason synth sounds… An incredible piece of music can be based on one great synth sound. Think back over the last four decades of some […]
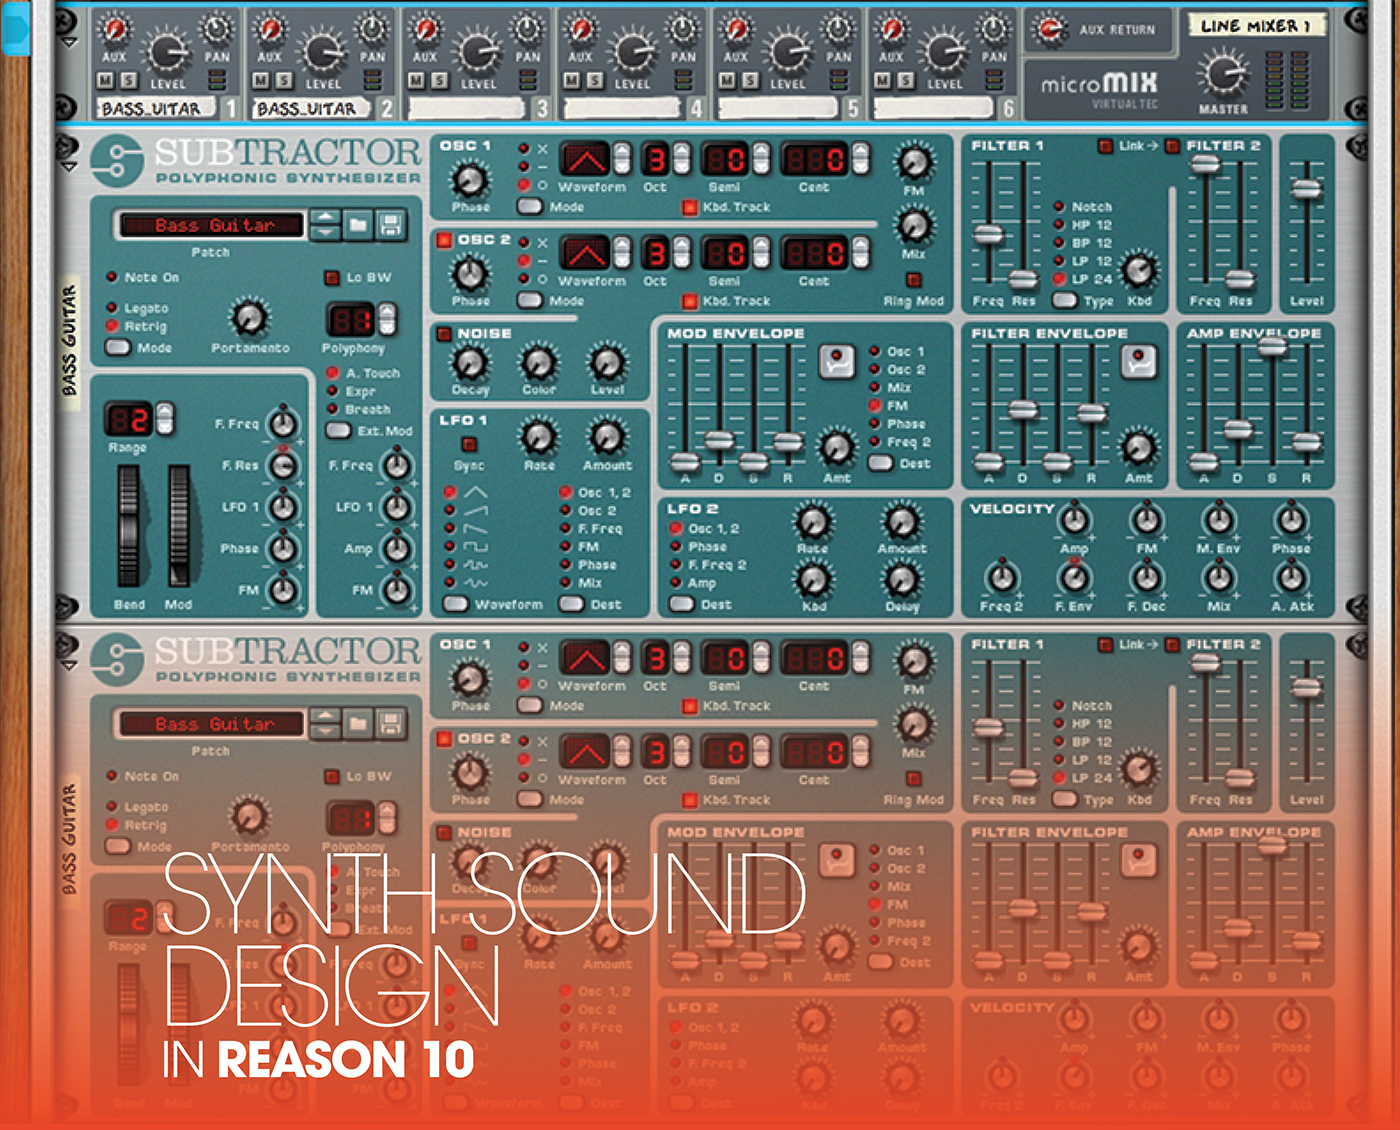
A fantastic synth sound can define a song. In the latest part of our Reason sound design series, Andy Jones looks at how you can add more punch to your Reason synth sounds…
An incredible piece of music can be based on one great synth sound. Think back over the last four decades of some of the big synth sounds that backed huge hits. That opening riff from The Human League’s Don’t You Want Me? That bass synth in Kylie’s Can’t Get You Out Of My Head, perhaps? Or what about that famous synth ’pluck’ from Insomnia by Faithless? Then there’s Darude’s sawtooth-like lead from Sandstorm? Or even the simple ’tot toot’ from Soft Cell’s Tainted Love? A great synth sound can define a track – a genre even.
Fortunately, when it comes to getting great synth sounds, Reason is the best DAW out there. It’s simply packed with instruments and Players designed to deliver electronic goodness on all levels, so you won’t be short of basses, leads, pads and more. However, as with all preset sounds, they can always be tweaked and improved to make them your own, and that is what this latest part of our sound design series is all about: turning good synth sounds into great synth sounds.
Combine to impress
In the opening parts of this series we introduced basic sound synthesis and how it works in Reason. We then looked at the Combinator and how it can be used for creative sound design. This is Reason’s extraordinary rack utility with which you can fill with just about anything you want, and then easily control everything within it – instruments, effects, and more – from a couple of dials and switches on a single channel. This time around we’re going to combine the synthesis and Combinator features to show how you can quite quickly take fairly basic preset sounds and turn them into greatness.
In terms of synthesis, we’re not going too deep so don’t worry if you haven’t got a synth brain (although you might want to take a quick look at Part 1 of this series at www.musictech.net to gather the basics of synthesis). We’ll show you how, on a simple electronic brass sound, simple detuning between synth oscillators gives you a fatter sound. Then we take this process up a notch or three with the Combinator.
Combinator is a great tool for sound design as it enables you to quickly blend instrument sounds together but, more importantly, all within a controlled environment, and we’ll be using it for just that this time around. One simple way of making a sound bigger is simply to double it up and Combinator is the fastest tool to allow this. We take our simple electronic brass sound, double it up and then spread it across the stereo field to give it far more presence. But that’s just the start…
We then introduce a second, more dramatic level of detuning by taking one of our synths and boldly detuning it away from the other. Suddenly our weak brass sound has become a tearing lead!
Using effects is a great way to liven up any sound. We’ll show you how using a delay on one of our Combinator synths will completely lift it and we’ll also introduce you to the Unison effect which brings yet more detuning to our sounds. It is effectively a third layer of detuning so be careful how you employ it!
Throughout the whole process we’ll also be employing some changes to the synth’s filters to lift and reduce certain sonic elements, and to also help push one synth’s sonic character away from the other.
An ace of bass
So far we’ve been talking about livening up a synth lead sound, taking a weak synthetic brass sound and turning it into a searing lead. Next up it’s time for livening up a bassier sound. The Unison detuning effect is not so useful in this instance – it simply doesn’t offer as much swell to our bass sound. However, detuning the two synths does work. But the best way to treat the bass sound is to filter one away from the other and then apply effects just to one. That way you use one bass as the kind of bedrock while you experiment more with the other. It means you retain a solid foundation to your sound while you go a bit crazy with the other part.
This comes by way of Reason’s excellent Pulveriser, a tool that can be used single -handedly for many a sound-altering task. Like many effects, you’ll have to be careful, but remember, because we’ve used Combinator, one bass is safely underpinning everything while we experiment. And experimentation is everything with sound design. Once you’re happy with what you’ve created, save it as a preset that you can call your own – you’ve designed something new and aren’t relying on Reason’s presets any more (well apart from being the ingredients!).
Next time we’ll look at some of Reason’s more rhythmic options for sound design.
Sound design for more synth punch: step-by-step
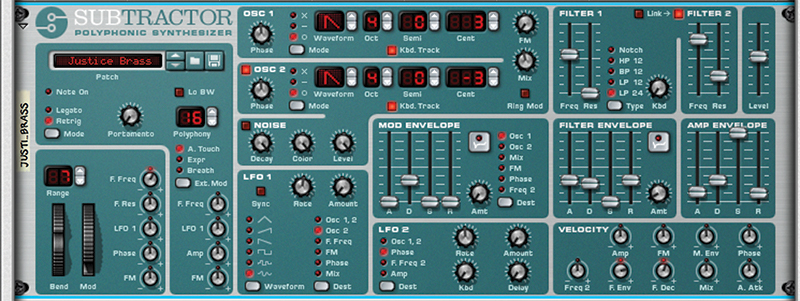
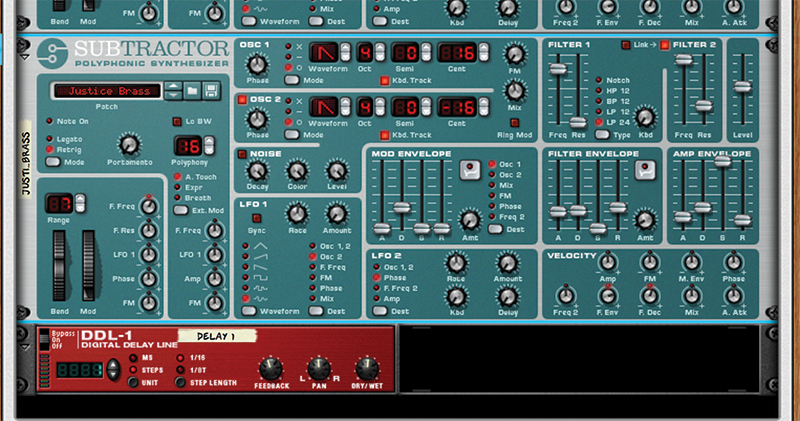
1. We’re using Subtractor in this tutorial, simply because it’s an easy synth to get your head around, and also a simple one to make better! Load in the Justice Brass preset. We hate synth brass but we’re going to change it!
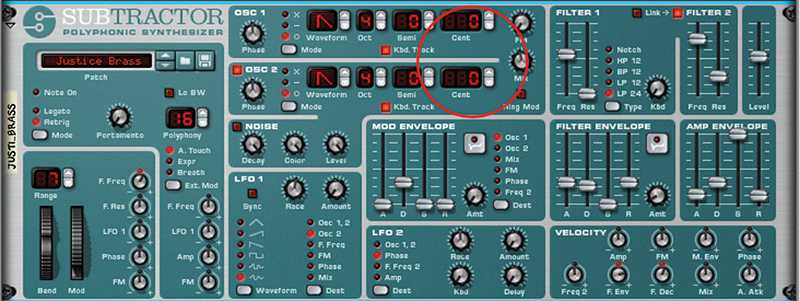
2. The first way you can make any synth sound more ’in your face’ is by detuning its oscillators. In this case they were already detuned by 3 cents so put them back to zero cents and listen to how lifeless it now sounds.
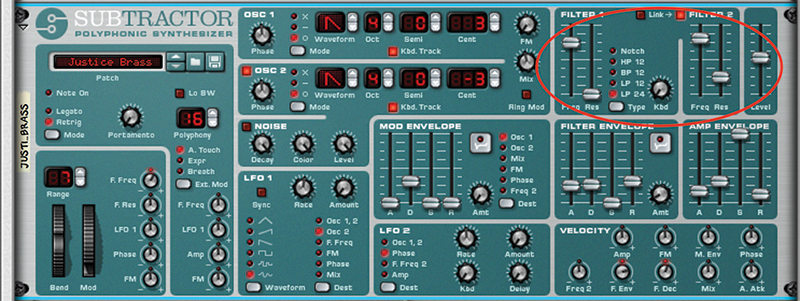
3. Now spread the tuning back to what it was (+3 cents on Osc 1 and -3 on Osc 2) and experiment with the Filter Cut off. Increasing it will give you far more punch on either filter.
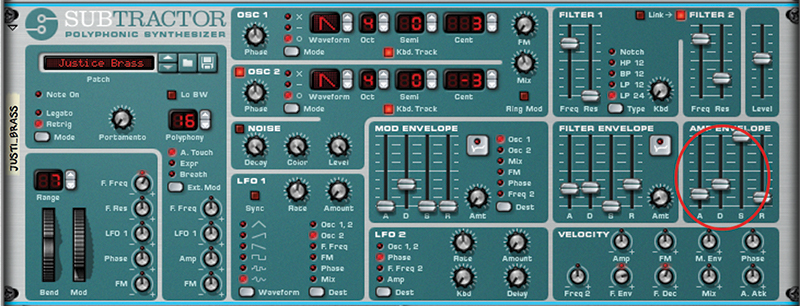
4. Now decrease the Attack Time in the Amp Envelope section. This also gives you way more punch straight away as the time in which the sound comes in is shortened.
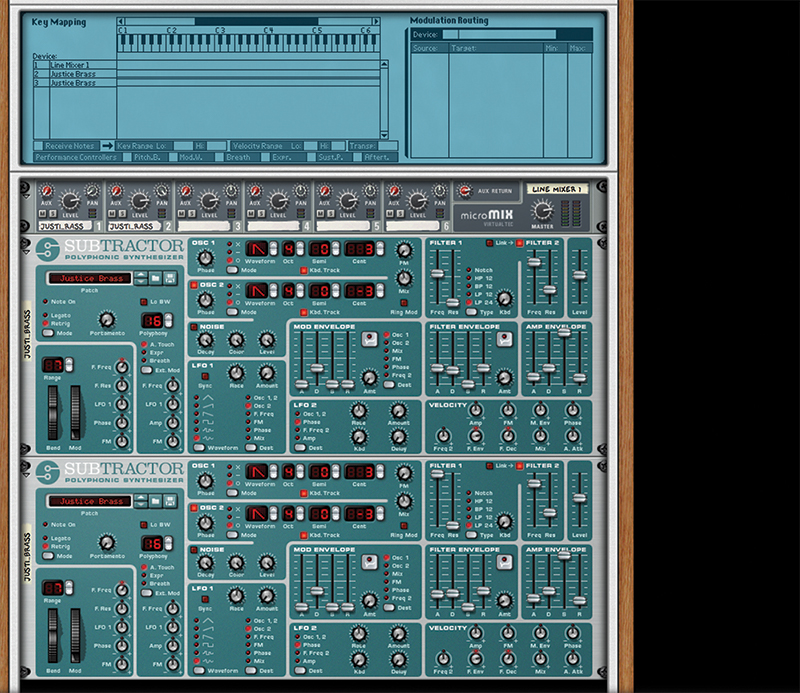
5. Doubling up a synth is the obvious way to increase the power of any sound, so load two instances of a Subtractor into a Combinator, still using the same Justice Brass preset.
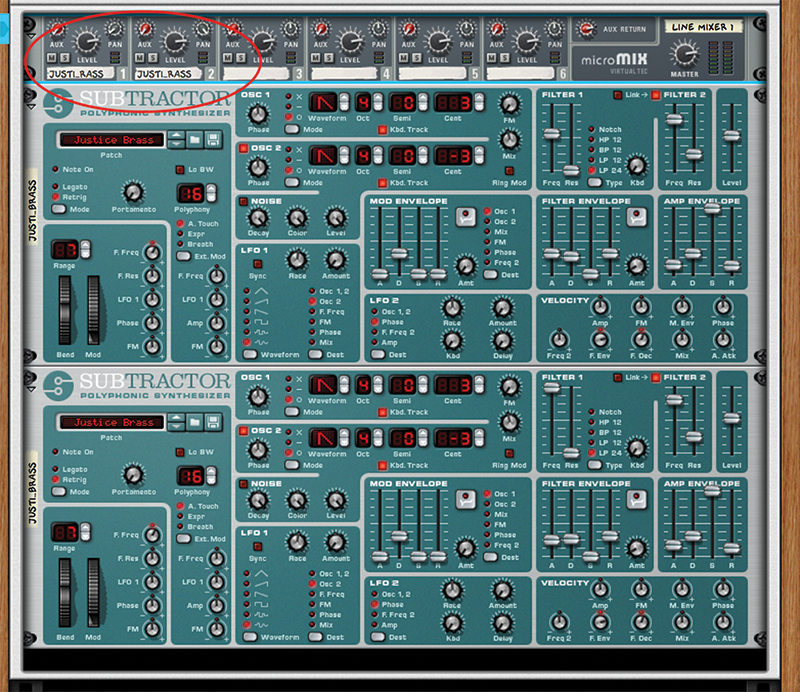
6. It’s a good idea when doubling up a sound like this to spread it across the stereo range so they are differentiated. This also gives you a lot more width and impact, so simply spread one left and one right using the mixer.
![]()
Two is better than… Combinator really does demonstrate how ’two is always better than one’ but it can be all too easy to think, ’Well, three is better than two, right?’ While Combinator makes it easy to stack we’ve found that two is the optimum, particularly for bass sounds.
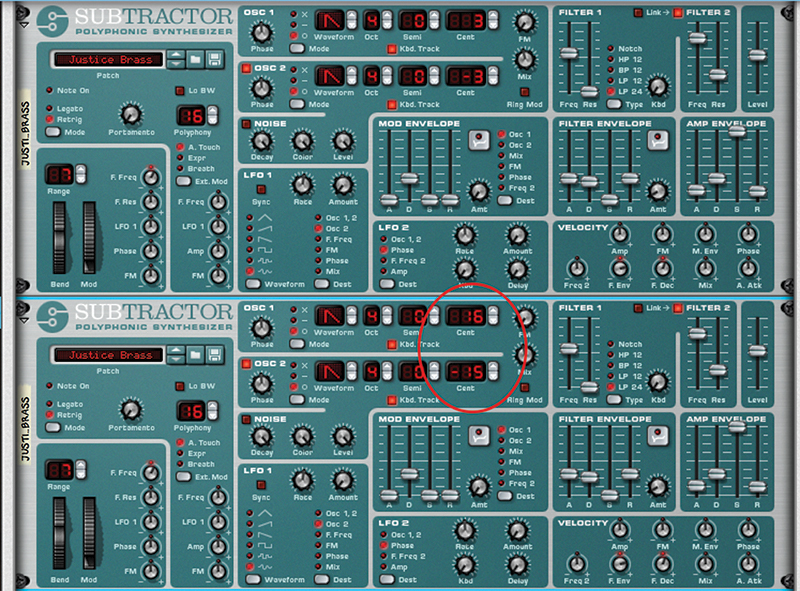
7. We’ve heard how adjusting tuning between oscillators fattens any sound up so now do it between synths. Set the tuning of the second Subtractor synth to +15 (on Oscillator 1) and -15 (Osc 2). The sound is now much bigger.
8. Now we’re going to add a delay to the second synth so drag a DDL-1 onto it and make sure only the output of this synth is going into it. Reduce the Dry/Wet mix and the delay time to the values shown.
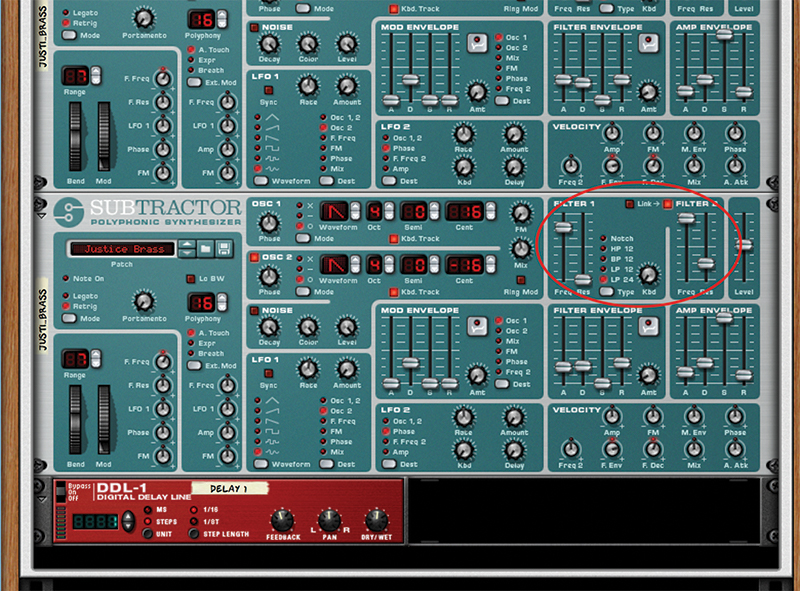
9. To give that delay a bit more kick we’ve now raised the Filter 2 amount. This gives the end of the sound some more bite. Feel free to experiment with the exact amount.
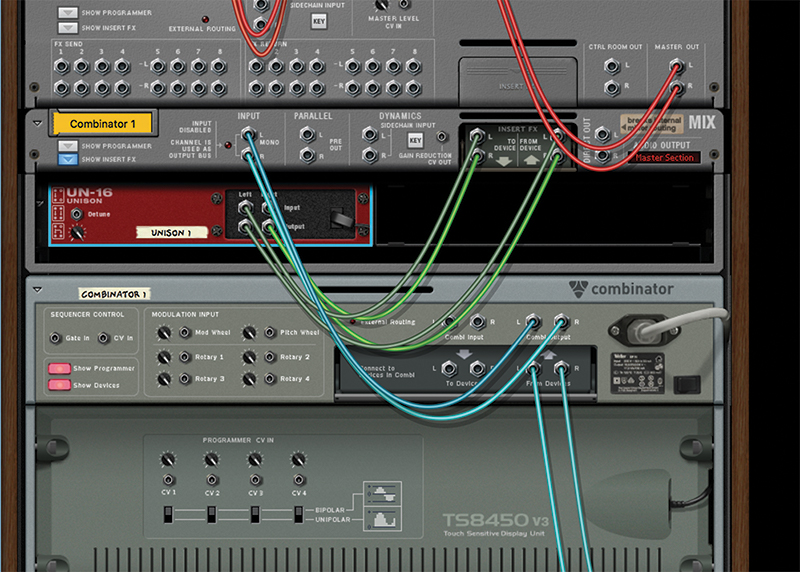
10. The Unison effect offers a similar detuning and fattening effect. It could be applied to a single synth sound for a similar effect, but why not go one step further and put it on both outputs via the Combinator?
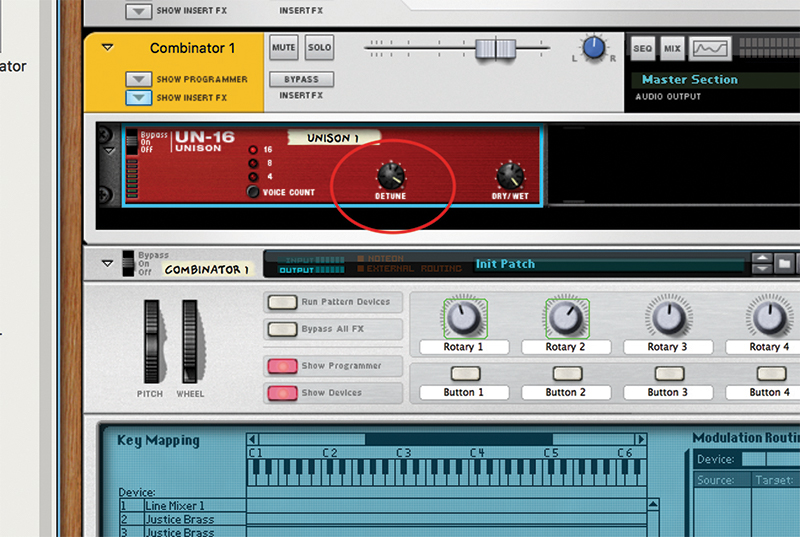
11. Now you’ve got a huge detuned pair of synths which are individually detuned and now their sound goes through another fattening process. Increase the effect – not too much – via the Detune dial.
![]()
Explore frequencies We’ve touched on treating a different frequency of our bass sound in the latter part of this tutorial, but you can explore this further using Reason’s Stereo Imager to help you treat the bass and treble part of your sound completely separately.
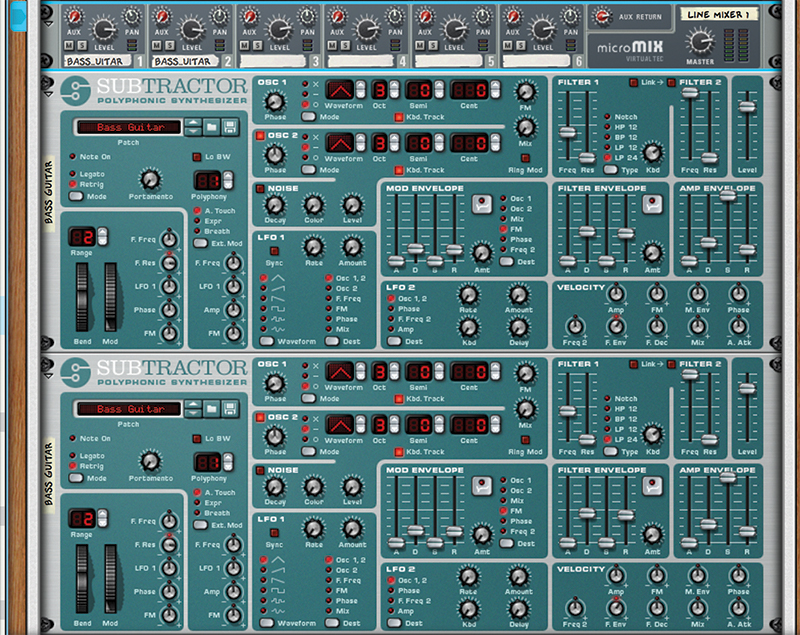
12. We’ll now give a bass sound more attitude. Load the Subtractors with the bass Guitar preset. With a bass sound we want to keep everything in the middle so set the pan position in the mixer back to centre.
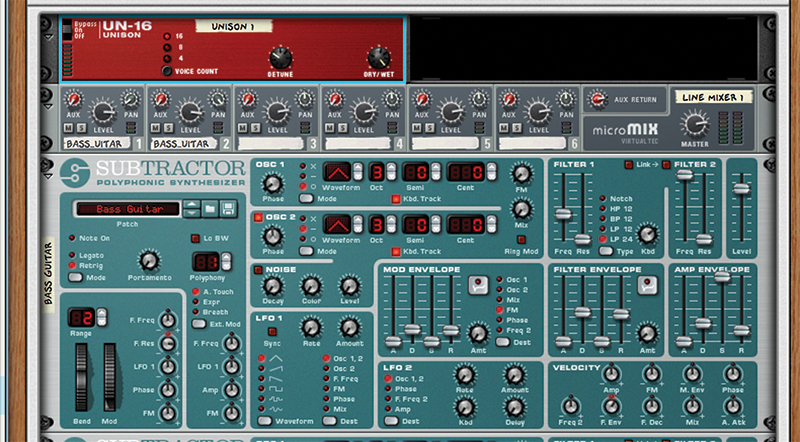
13. We’ll go straight for it with the Unison effect. While you do get some detuning, the effect isn’t as dramatic as it was with the lead sound we created on the previous pages.
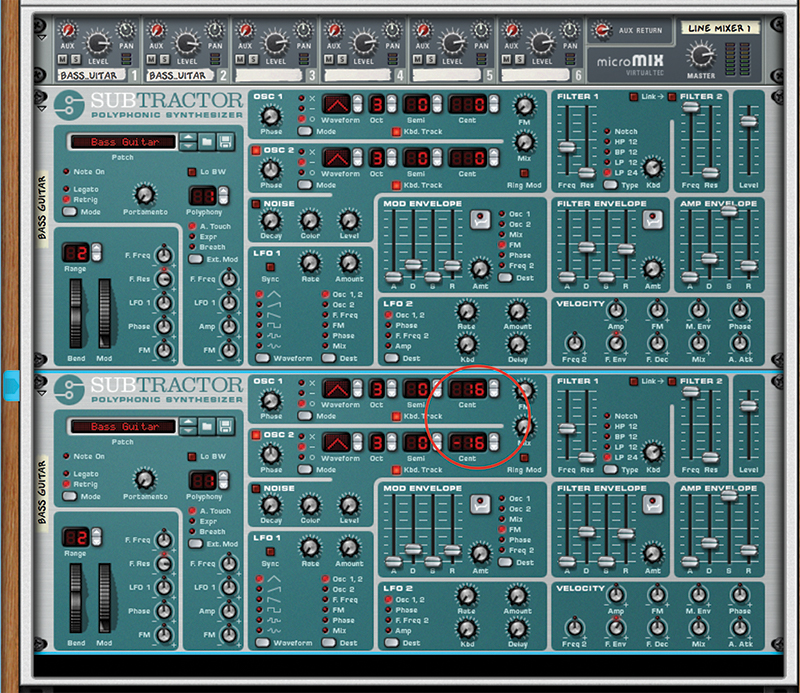
14. Instead, try detuning the second synth’s oscillators to an extreme, say +16 and -16 cents. This instantly gives you a lot more presence and sonic interest.
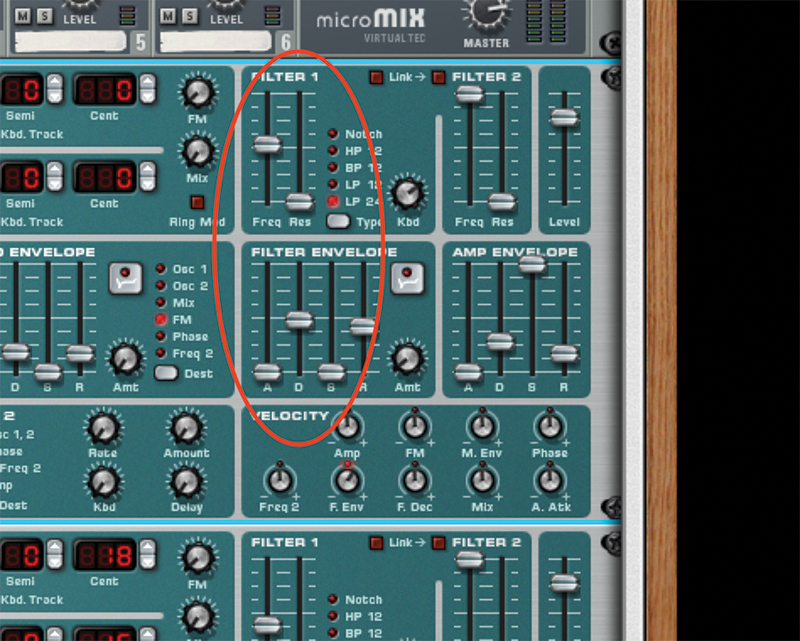
15. Now raise the Filter frequency on the first synth, but reduce the Decay time in the Filter Envelope section. This gives you more bite in the mid range but more punch overall.
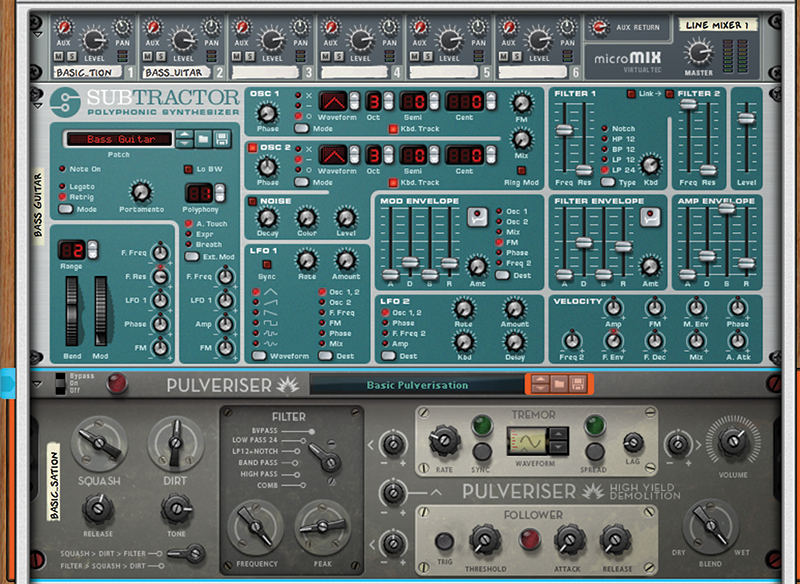
16. We’ve now added a Pulverizer Demolition to the top synth and you can really hear the effect it has on the slightly higher of the two bass sounds by increasing the Dirt and decreasing the Squash parameters.
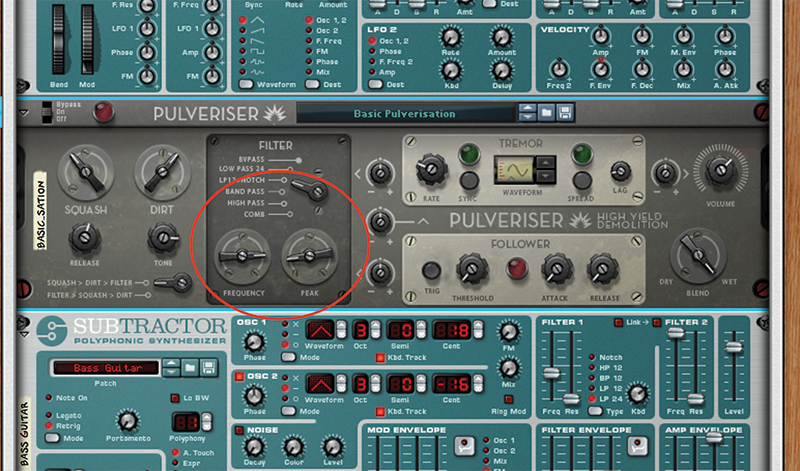
17. Pulveriser can easily get out of hand so you might need to tame it with the Frequency and Peak controls. These should help get you an even tighter sound should you need it.
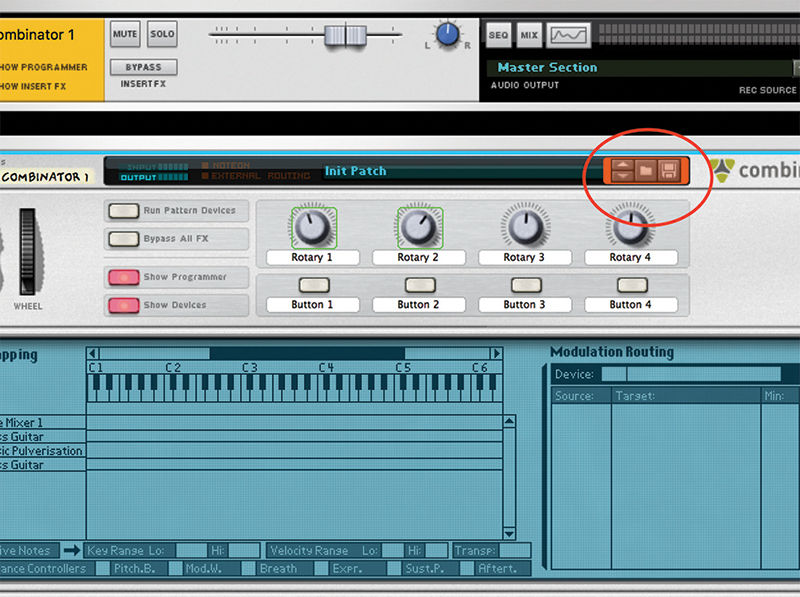
18. Finally, again it’s time to save your patch – another great advantage with using Combinator. Hit the disc icon to the right of the screen and choose a name – ’Ace Bass’, perhaps.