Tangible Sounds – Integrating Hardware in Cubase 9.5
While software plug-ins fully integrate with the DAW, Adam Crute demonstrates how to create a similar degree of integration with external hardware… Last time we explored how to hook-up your external synths and effects processors to Cubase and have them show-up as external plug-ins that can be dropped onto tracks or included in virtual racks […]
While software plug-ins fully integrate with the DAW, Adam Crute demonstrates how to create a similar degree of integration with external hardware…
Last time we explored how to hook-up your external synths and effects processors to Cubase and have them show-up as external plug-ins that can be dropped onto tracks or included in virtual racks in much the same way as software plug-ins. Handy though this is, a more complete integration between hardware and DAW can be achieved by harnessing Cubase MIDI devices.
The MIDI device manager
The MIDI Device Manager (let’s call it the MDM for short) is the starting point from where we can install, customise and manage device definitions for external MIDI hardware. These definitions let Cubase know how to work with a piece of hardware – each external device that you wish to control from Cubase should have its own definition in the MDM.
Cubase comes with a selection of definitions for common hardware and you can find definitions online that you can download and import. However, for the purposes of this tutorial, we’ll be starting from scratch and creating our own custom device definition.
CCs and Sysex
Practically all MIDI-equipped hardware will provide a means to adjust program parameters via MIDI messages, but there is no definitive standard specifying which message should control which parameter; rather, all devices tend to have their own unique mappings linking parameters to MIDI messages.
It’s common for some parameters to be controlled via simple MIDI CC (Continuous Controller, AKA Control Change) messages, but there are only 128 CC ‘channels’, some of which are reserved for standardised uses, so complex devices with many parameters tend to also use RPN (Registered Parameter Number), NRPN (Non-Registered Parameter Number) and/or SysEx (System Exclusive) messages for controlling parameters.
RPN and NRPN messages are formed by combining CC messages and so are easy to work with, but SysEx messages are more convoluted. We don’t have space to explain how these work, but you’ll find tutorials online. In any event, whichever approach your hardware takes, you should find full details in the MIDI Implementation/Specification tables in user manual.
MIDI values
MIDI messages are made up of a series of ‘bytes’. Some of these bytes specify the type and target of the message, and typically each message will also contain a value, for example, a note number, a controller value, etc.
A MIDI value byte is 7-bits long, so can represent values from 0 to 127. It’s adequate for many uses, but sometimes a higher resolution – ie. a greater range of values – is required. In such situations, two value bytes are combined as a 14-bit pair, giving a value range of 0 to 16,383.
A MIDI byte can only represent positive values, but a parameter may work with a value that can be positive or negative. In this scenario the device will apply an offset to the incoming MIDI value – for example, a MIDI value of 0 may map to a parameter value of -63. We need to keep this in mind when defining device parameters within Cubase.
Custom control panels
Once you’ve defined the parameters for a device, it is then a simple matter of using Cubase’s panel designer to create a custom control panel. Panels can be designed to appear in the track inspector, in mixer channel strips, or as general floating windows of any size and can include controllers such as knobs, faders and switches. We assign parameters to controllers so that Cubase knows what MIDI message to send in response to the controller being adjusted.
Preset references vs snapshots
When creating a new device definition in Cubase, one of the very first things that needs to be decided is whether Cubase will handle programs/patches as Preset References or as Snapshots. Once set, this setting cannot be changed, so it’s vital to select the correct option for your needs.
When using Preset References, Cubase maintains an editable list of program names with associated MIDI bank and program change messages. Programs can be selected directly from the track inspector, causing the corresponding bank-and-program change message to be sent. Any changes to device parameters need to be stored on the device so that they can be recalled by the program change message.
The alternative sees Cubase store snapshots of all device parameter values; when recalling a snapshot, Cubase transmits the parameter values back to the device, returning it to the state it was in when the snapshot was taken. This is essentially identical to how software plug-ins store their programs, and is generally the best option to choose unless you have decided against creating a control panel for the device; it is the method we’ll use here too… Before you start, create an External Instrument or External FX plug-in for your device, and have your hardware manual on hand.
Integrating Hardware: Step-by step
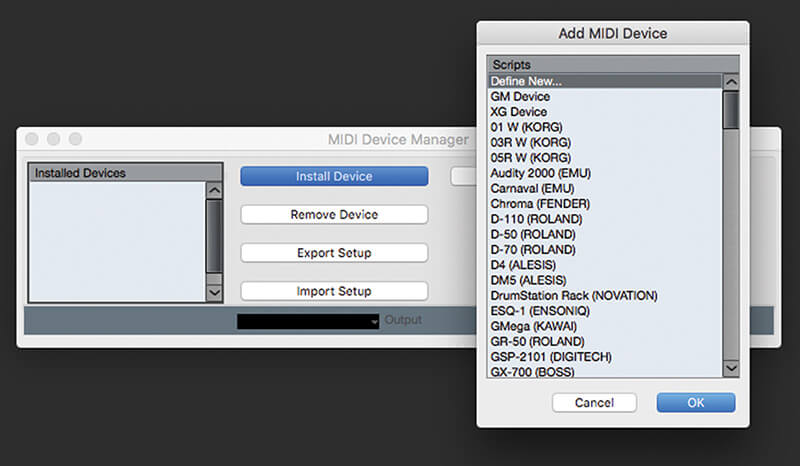
1. Open the MDM from “Studio>More Options”. Click “Install Device”, then in the window that opens select “Define New…” and click “OK”. Enter a name for the device at the top of the new window.
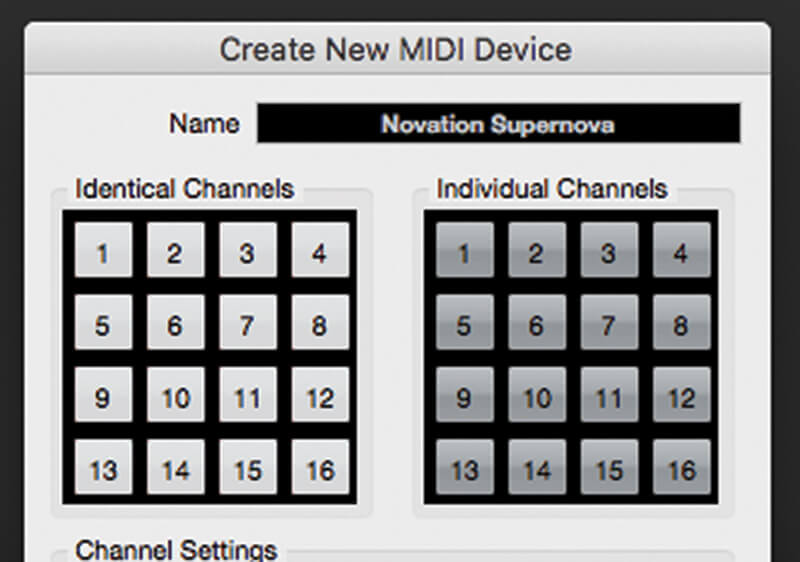
2. Under “Identical Channels” select every channel that responds identically to incoming messages; under “Individual Channels” select channels that respond differently.
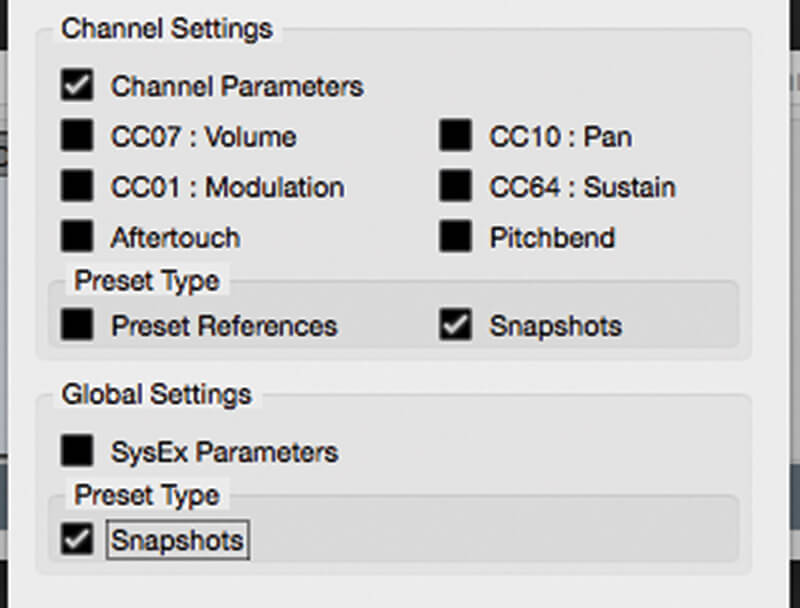
3. Under ‘Channel Settings’ tick ‘Channel Parameters’ and leave the other boxes in the section unticked. Under ‘Preset Type’ tick ‘Snapshots’. Under ‘Global Settings’ tick ‘SysEx Parameters’ if your device uses SysEx messages, and tick ‘Snapshots’. Click ‘OK’.

Panel Limitations Cubase’s control panels can include custom background graphics, so with a bit of work you can create fairly comprehensive device panels. There are limits to what can be achieved with Cubase’s panel editor, though: it lacks crucial controller types, such as dropdown menus.
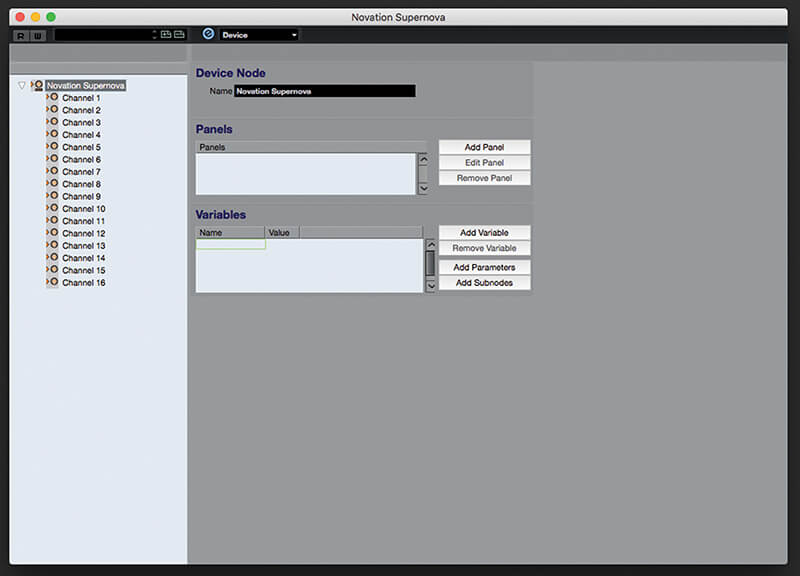
4. In the window that opens, the left panel shows a ‘tree’ representation of your device, with a ‘subnode’ for each MIDI channel you enabled for it. Device parameters are defined by adding items to the tree.
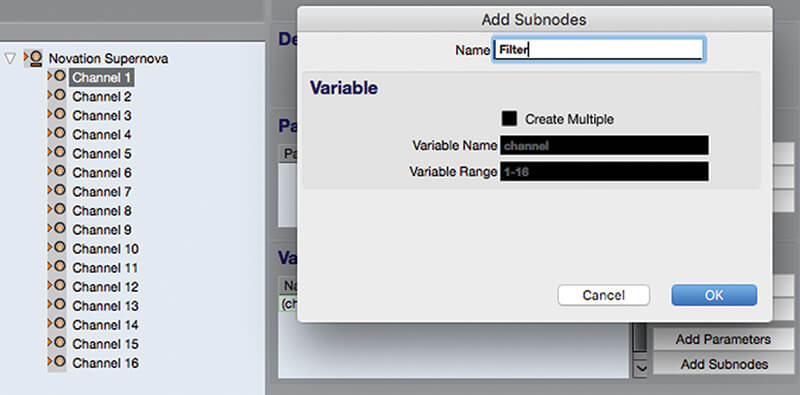
5. Select the first channel subnode in the tree and click Add ‘subnodes’; we’ll use this to group together related parameters and to help with panel design. Give the subnode a suitable name, E.G. ‘Filter’, and click ‘OK’.
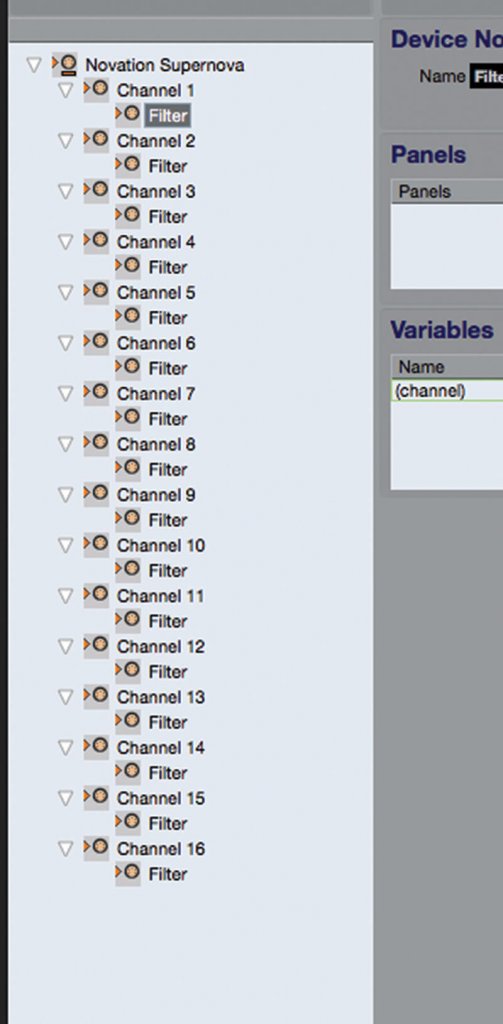
6. Expand the channel node so that the new subnode is visible; notice that, if an ‘identical’ channel, the new subnode has been created in all other ‘identical’ channels. Select the new subnode and click ‘Add Parameters’.