Technique of the Week: Adding width and depth to any sound
It’s long been a pursuit of every engineer and producer to create depth in their mix, and there’s seemingly an endless list of options and techniques to achieve it. Declan McGlynn explains… Stereo widening tools, reverbs and delays are the obvious go-to’s when it comes to depth and width but in isolation they can be […]
It’s long been a pursuit of every engineer and producer to create depth in their mix, and there’s seemingly an endless list of options and techniques to achieve it. Declan McGlynn explains…
Stereo widening tools, reverbs and delays are the obvious go-to’s when it comes to depth and width but in isolation they can be unnatural, especially to listeners using headphones. The obvious stereo effects can rarely reflect reality and how sound might react in a space, big or small. On top of that, they’re quite predictable and without more complex delay tools, can sound clichéd.
Combining these effects creates a more realistic and subtle stereo image, as well as allowing producers to create polyrhythms with some clever delay settings. By delaying reverb and adding reverb to delay, as well as treating the resulting feedback, it’s much easier to ‘place’ a sound behind the main sounds, creating that depth most of us are looking for.
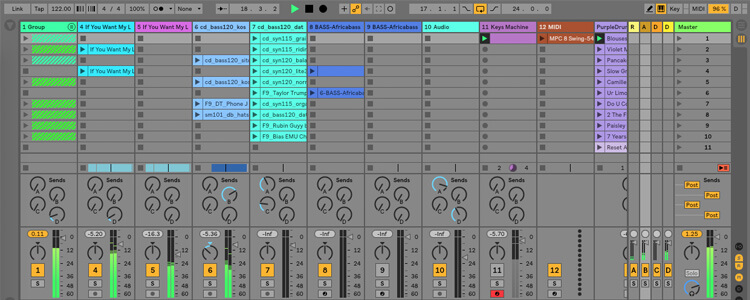
Let’s look at how it’s done – we’re going to use native Ableton Live plugins for this but it translates to any DAW or range of plugins.
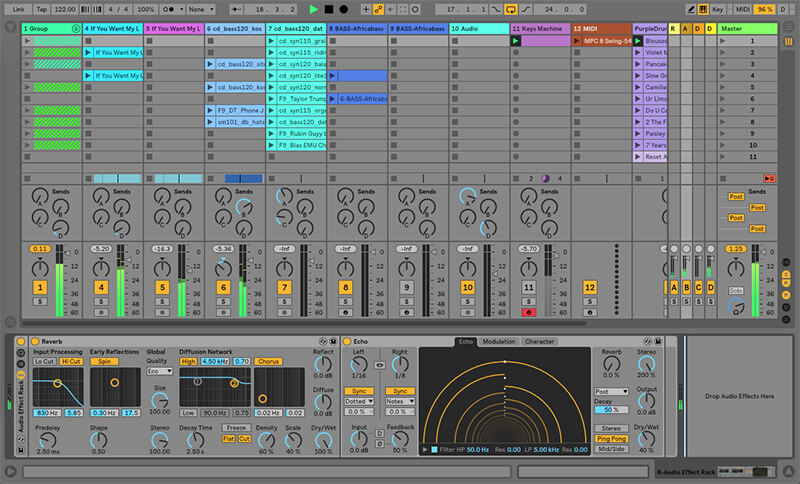
Create a return channel in your DAW of choice and load up a reverb plugin. Set it to 100% wet with a decay time of around 2.5 seconds and a size of 100. This should give you a fairly natural ‘hall’ style reverb effect.
Next load up an Echo plugin on the same channel. If you don’t have Live 10 you can use any delay plugin that has a Ping-Pong option. Set the delay up with around 40% wet and 50% feedback and set the delay time on one channel to 1/16th dotted and the other to 1/8th notes. You can experiment with these settings depending on the material being fed into the return channel.
Roll off some of the highs and lows to create a more mid-range sound. This will avoid the reverb’s delay becoming too ‘obvious’ in the mix and will help it bed in better.
Set the Stereo to 200% and begin to dial in a send amount from your DAW’s channel. In this case, we’re looking for the point where it’s not immediately audible until it’s muted – we don’t want to be able to hear the delay as an ‘effect’, we’re aiming for a more natural sound.
However it can be affective to ride the send level and feedback level with a MIDI controller in different parts of your track, especially on vocals as you approach the end of phrases or you go into breakdowns. It’s useful too to experiment with the modulation section to create subtle variations on each delay, which will help widen the stereo field further.
Essentially we’re delaying the reverb sound, but you can also swap the plugins around to add reverb to the delayed sound, which can work better on pads and more sustained sounds.