Explorations in Time and Pitch in Cubase 9.5 [Part 1]
Cubase has the ability to manipulate audio with almost the same degree of flexibility as can be achieved with MIDI – Adam Crute digs in to the options… The rate of change of technology has become, frankly, ludicrous. You upgrade to the latest shiny-thing only to find that a new version, which claims to be […]
Cubase has the ability to manipulate audio with almost the same degree of flexibility as can be achieved with MIDI – Adam Crute digs in to the options…
The rate of change of technology has become, frankly, ludicrous. You upgrade to the latest shiny-thing only to find that a new version, which claims to be better in every respect to the obsolete junk you’ve just sunk a month’s wages into, hits the shelves within a week.
Or, no sooner than you’ve finished smoothing-out all of the glitches and software incompatibilities that result from a typical operating system update, a new, (allegedly) better, more secure version is released and you have to go through the whole rigmarole again.
And again…
In such a world it’s comforting to think about the MIDI Specification (no, really… bear with me here!). Here is a technology that transformed the process of making music, and that was at the vanguard of
the computer music revolution, but that was so well-formulated that none of the subsequent leaps in music technology it heralded resulted in its own obsolescence.
Sure, some manufacturers have bolted on their own additions, and data transport mechanisms have evolved, but the underlying MIDI Specification has remained fixed at version 1.0 for 35 years – stick that in your pipes and smoke it, Microsoft, Apple, Google, et al!
Breaking the link
One of the reasons why MIDI became such an indispensable music making tool is that it broke the link between time and pitch in music production: changing the timing and length of MIDI events does not affect the pitch of the notes being created, and changing the pitch does not affect the timing. This is in stark contrast to the audio domain where, in the absence of any other processing, time and pitch are two sides of the same coin.
Since adding audio capabilities to Cubase, bringing MIDI-like time-and-pitch flexibility to the audio domain has been a primary goal of Steinberg’s developers, resulting in a suite of high-quality tools that are built in to and integrated with Cubase. There are a lot of options and choices so, over the next couple of months, I’m going to dig in to these tools and explore audio time and pitch manipulation in Cubase.
Track time base
MIDI is an intrinsically musical format whose timing is calculated based on musical beats, and so the actual length of any MIDI events or parts is always determined relative to the project tempo. Conversely, in the audio domain, timing is based on samples, which are themselves measured against real time and so independent of tempo.
To deal with this difference, Cubase allows all audio and MIDI tracks to be set to use either ‘Musical’ (I.E. bars and beats) or a ‘Linear’ (I.E. minutes and seconds) time base. When set to Musical time base a track’s parts and events are locked to bars-and-beats, and therefore tempo, whereas a Linear time base locks the track’s parts and events to minutes and seconds, making them immune to changes in tempo.
Tempo matching
There are two ways in which you might determine a project’s tempo. On the one hand, ‘live’ musical performances often push-and-pull on the tempo, and although it’s possible to feed a click to the musicians to keep them in time with the project tempo, this isn’t always desirable as a predefined rigid tempo may kill some of the music’s natural spontaneity.
So, when working with this sort of music, the producer may want to match and lock the project tempo to the fluctuating tempo of the live recording, especially if they plan to add MIDI parts or use tempo-synced effects. In this scenario the thing to do is to build a tempo map from the live recorded parts, something that’s easy, if a bit laborious, as I will show you in the step-by-step.
On the other hand, a producer may want to predefine a tempo, have imported audio parts match to this tempo, and have all audio parts – recorded or imported – follow any subsequent changes to the project tempo. This is often the approach when producing electronic music where a rigid unwavering beat is the norm.
There are a few ways of going about this form of tempo matching, but the one we’re going to look at is based on an old, yet effective technique that’s particularly suited to drum and rhythmic loops, and which was encapsulated by Propellerhead in their seminal ReCycle software.
Originally, this technique would involve cutting up – or slicing – a loop so that each drum hit, note or chord exists as an individual audio sample. Each sample would then be assigned to a note in a sampler, and a MIDI part produced that triggers the sampler notes in the correct order and timing to recreate the original loop.
Changes to the project tempo cause the MIDI part to play at the new tempo, but the sound of individual slices and the overall groove are unaffected. Cubase provides a built-in method of creating tempo-locked sliced loops of this kind – let’s see how…
Explorations in Time and Pitch – Tempo: step-by-step
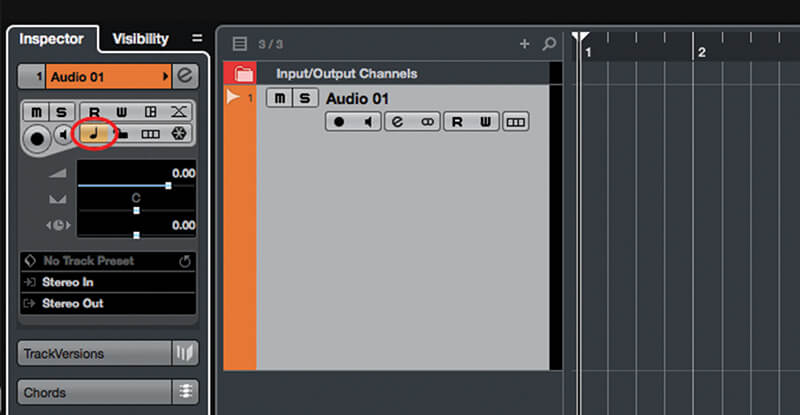
1. Create a new Cubase project, and create a new audio track within it. In the Track Inspector set the time base to Musical mode, I.E. the time base button will show a musical note with an amber background.
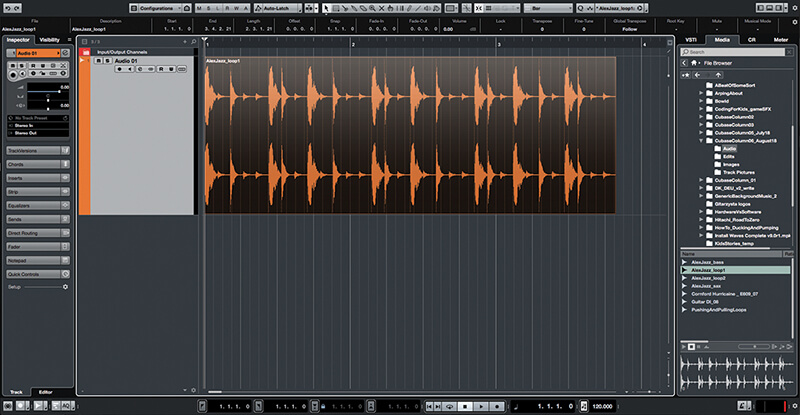
2. Open the Media browser in the Project window’s Right Zone, and find a drum loop that you like, and for which you know the BPM. Drag the loop to the beginning of the newly-created track.
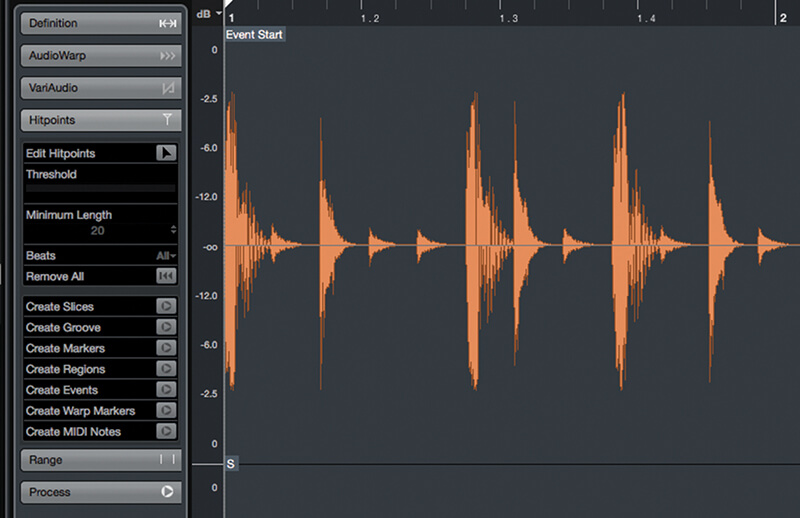
3. Double-click the imported loop to open it in the Sample Editor. Open the ’Hitpoints’ section of the Editor’s Left Zone (you may need to show the zone using the buttons at the top right of the Editor).
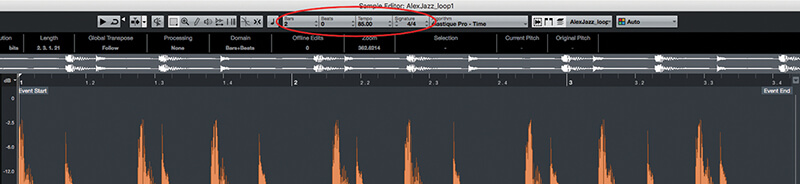
4. At the top of the Editor’s window there’s a set of controls that define the characteristics of the loop. Cubase will have had a crack at setting these automatically, but always check them and correct if necessary.
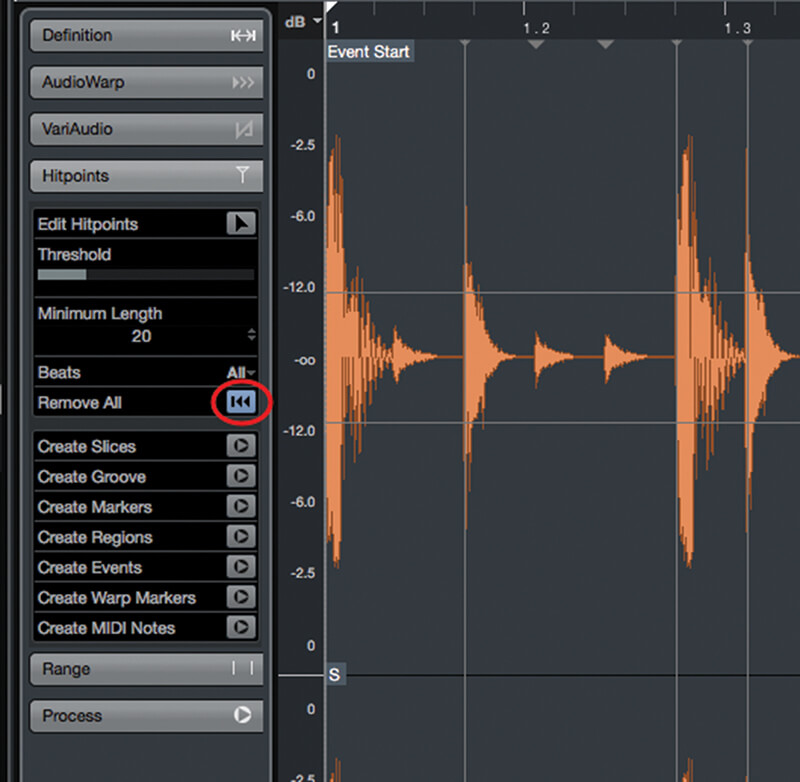
5. Depending on how your program preferences are configured, Cubase may have automatically created Hitpoints when you imported the loop – if so, click the ’Remove All’ button located at the bottom of the Editor’s Hitpoints inspector.
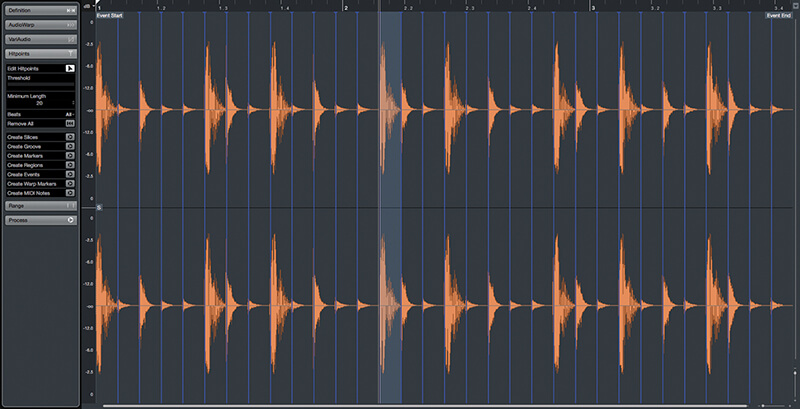
6. Activate the ’Edit Hitpoints’ tool using the button at the top of the Hitpoints inspector, then adjust the Threshold slider until a Hitpoint marker is shown just before each drum hit’s transient / onset in the waveform view.

Hitpoints are markers within an audio track, indicating the location of hits, notes or chords within the audio. They’re used within Cubase’s audio time and pitch manipulation tools, where they define reference points that are used to control the extent of a time or pitch process.
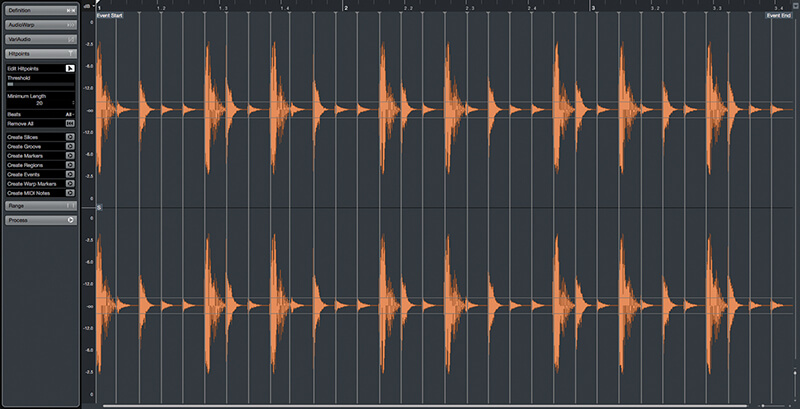
7. Each pair of Hitpoints defines a segment of the audio, and accuracy is important. With the Edit Hitpoint tool active, zoom the waveform display and work through, dragging the Hitpoints into more accurate position.
8. The Edit Hitpoints tool also allows you to audition segments by clicking in them, lock Hitpoints by clicking on their marker lines, remove Hitpoints by shift-clicking them, and add new Hitpoints by alt-clicking on the waveform.
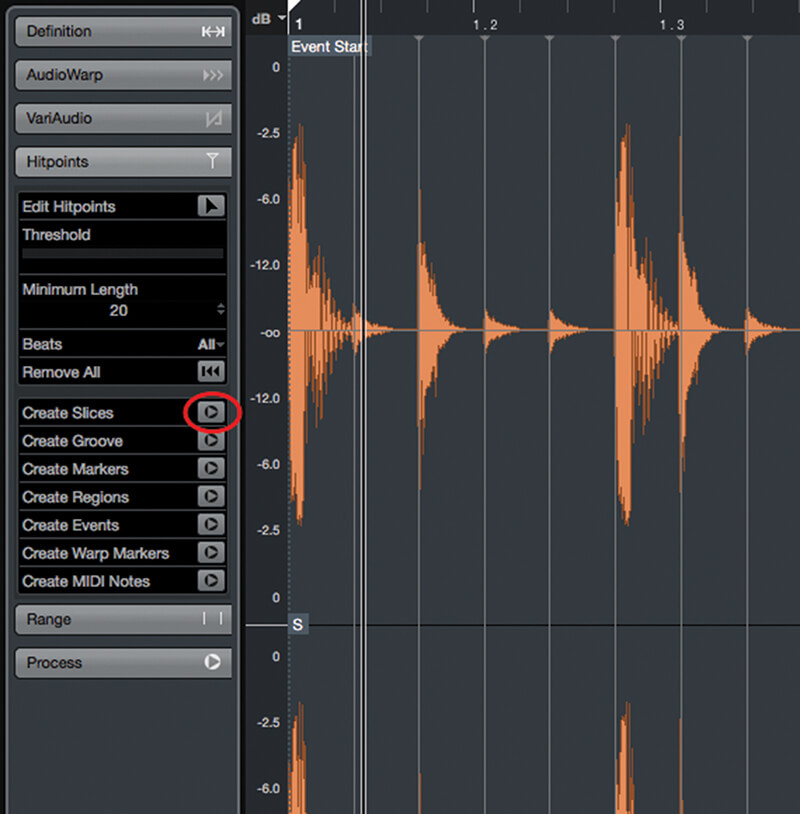
9. Deactivate the Edit Hitpoints tool and then click the ’Create Audio Slices’ button. You will be returned to the main Project window but the track will now contain a composite audio part made up of the loop slices.
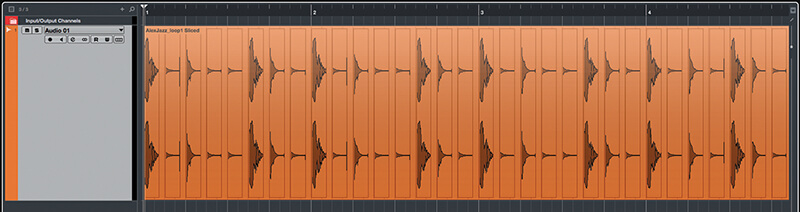
10. Start playback. Notice that the slices of the loop are now synchronised to the project’s tempo. If the loop’s tempo was different to the project tempo then gaps or overlaps may have appeared – there’s a way to fix that…
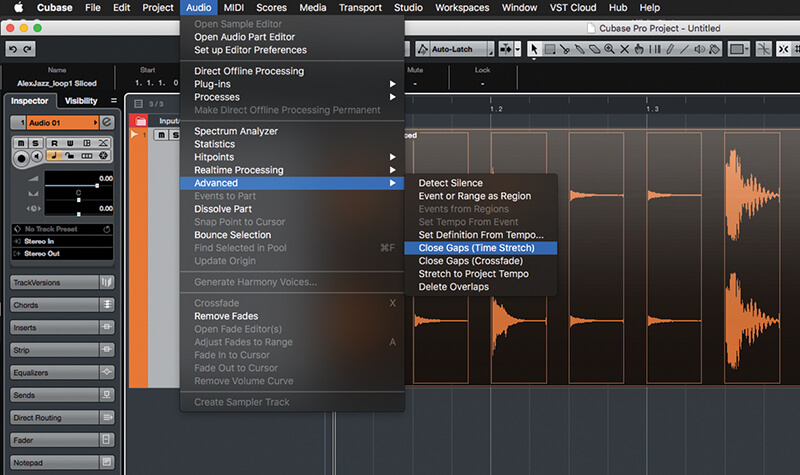
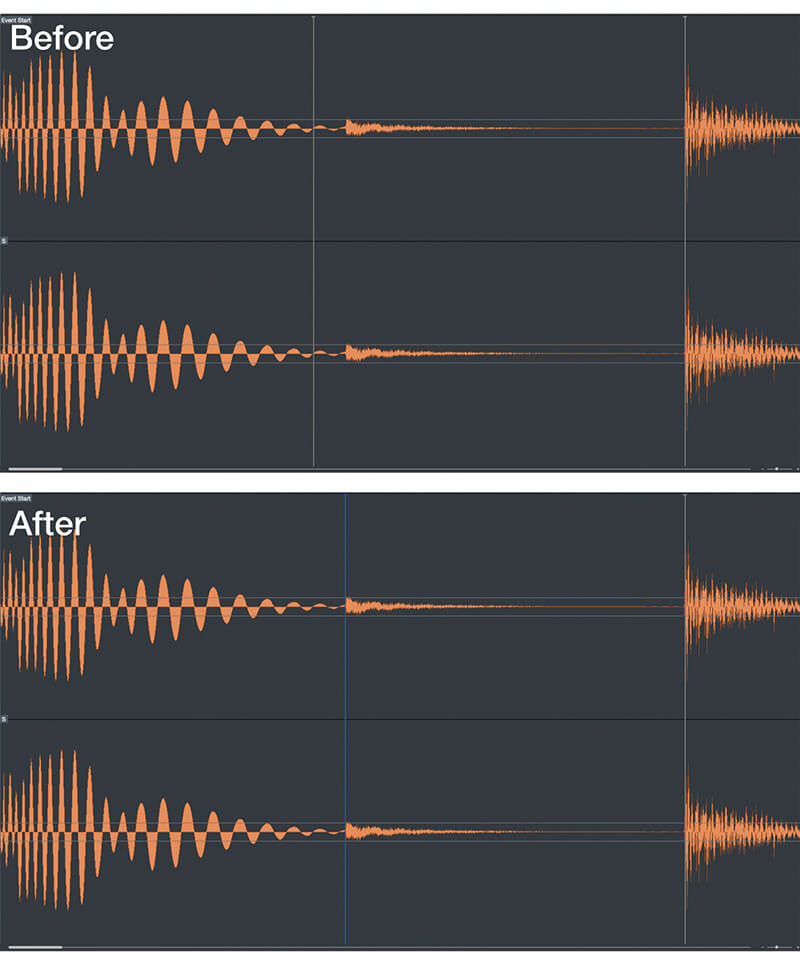
11. Select the sliced loop in the Project window and then select ’Audio -> Advanced’. Notice the two ’Close Gaps’ options – these will eliminate any gaps or overlaps using either time stretching or crossfading respectively.
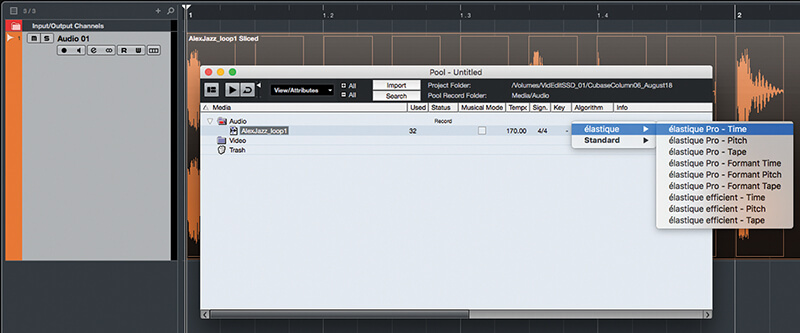
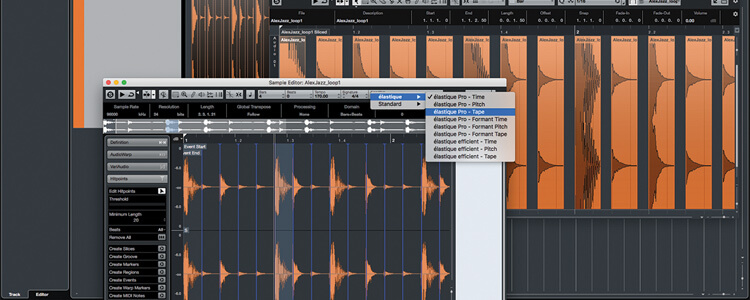
12. If using the time stretching method then the audio’s time stretch algorithm comes into play. To change this, open the Pool window and change the algorithm associated with the audio sample.
Tempo Detection Cubase’s Tempo Detection tool (’Project -> Tempo Detection…’) provides an automatic method of creating tempo maps. However, it’s not always accurate and tends to create a tempo change on every beat.
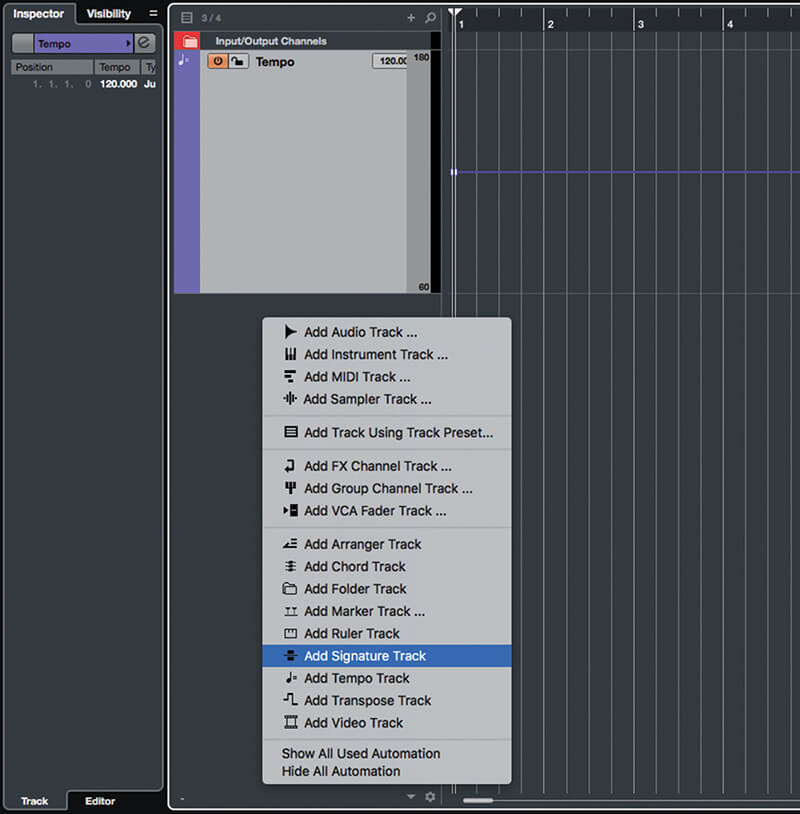
13. OK, so let’s look now at creating a project tempo map that follows the fluctuations of a live performance. Create a new project, and then add both a Tempo track and a Signature track to it.
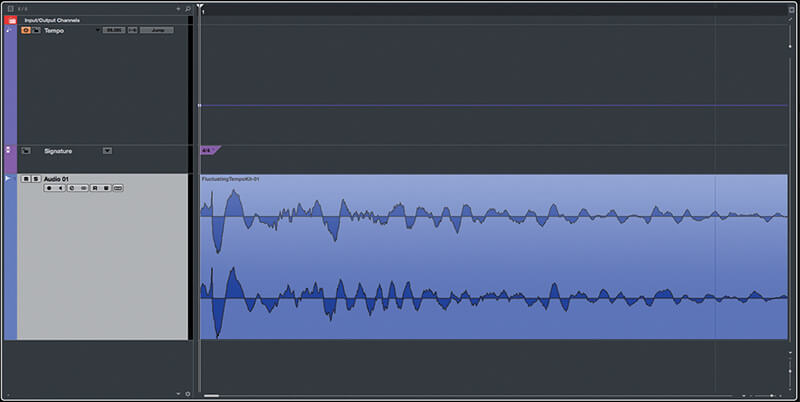
14. Add an audio track and import or record some audio whose tempo isn’t rigid. Make sure the first beat of the audio is lined up with the beginning of the project. Switch to the Range Selection tool.
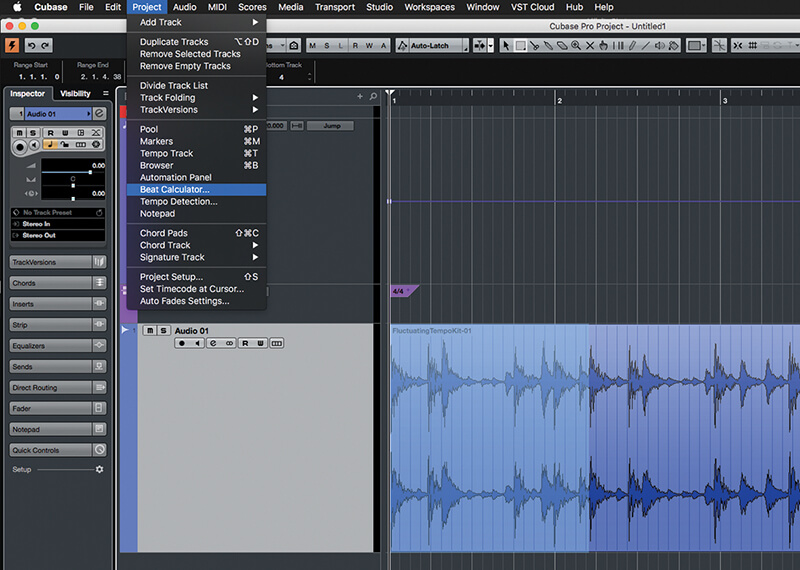
15. Create a range selection that encompasses the first ba or two of the audio – zoom-in to make sure the range is as accurate as possible. Select ’Project -> Beat Calculator…’ from the program menu.
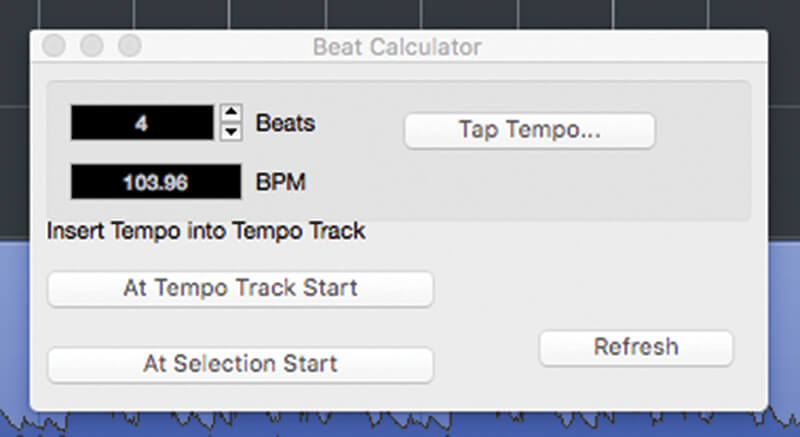
16. In the Beat Calculator panel, enter the number of beats that are within the selection, then in the ’Insert Tempo into Tempo Track’ section, click the ’At Selection Start’ button to add the tempo to the tempo track.
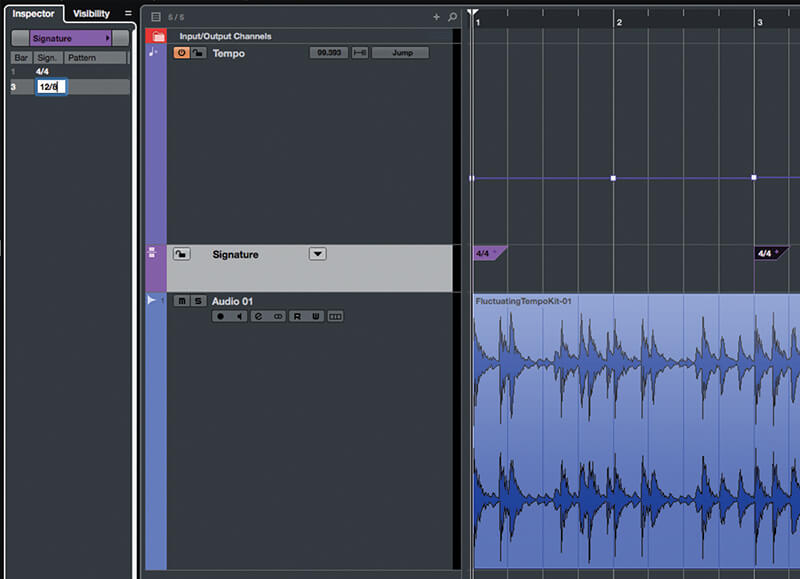
17. If there’s a time signature change within the selection, switch to the Pencil and click in the signature track to create a time signature event. Then, in the inspector, enter the new time signature value.
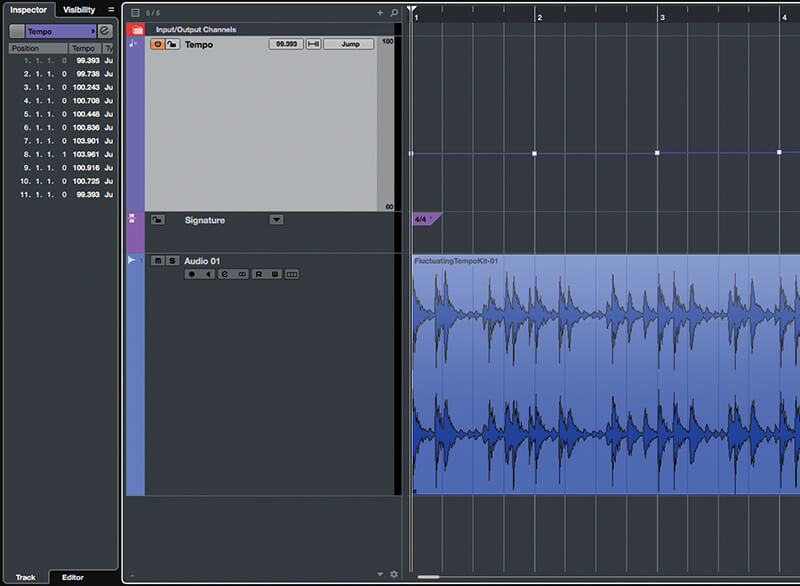
18. Repeat the process, dragging out one or more bars at a time and using the Beat Calculator to insert the calculated tempo. Remember that shorter range selections give better accuracy.