A step-by-step guide to stem mastering
We’ve explored the principles and the underlying therory, so now it’s time to get our hands dirty and stem-master a track, using Steinberg’s flexible Nuendo software – though this process is applicable to any DAW.
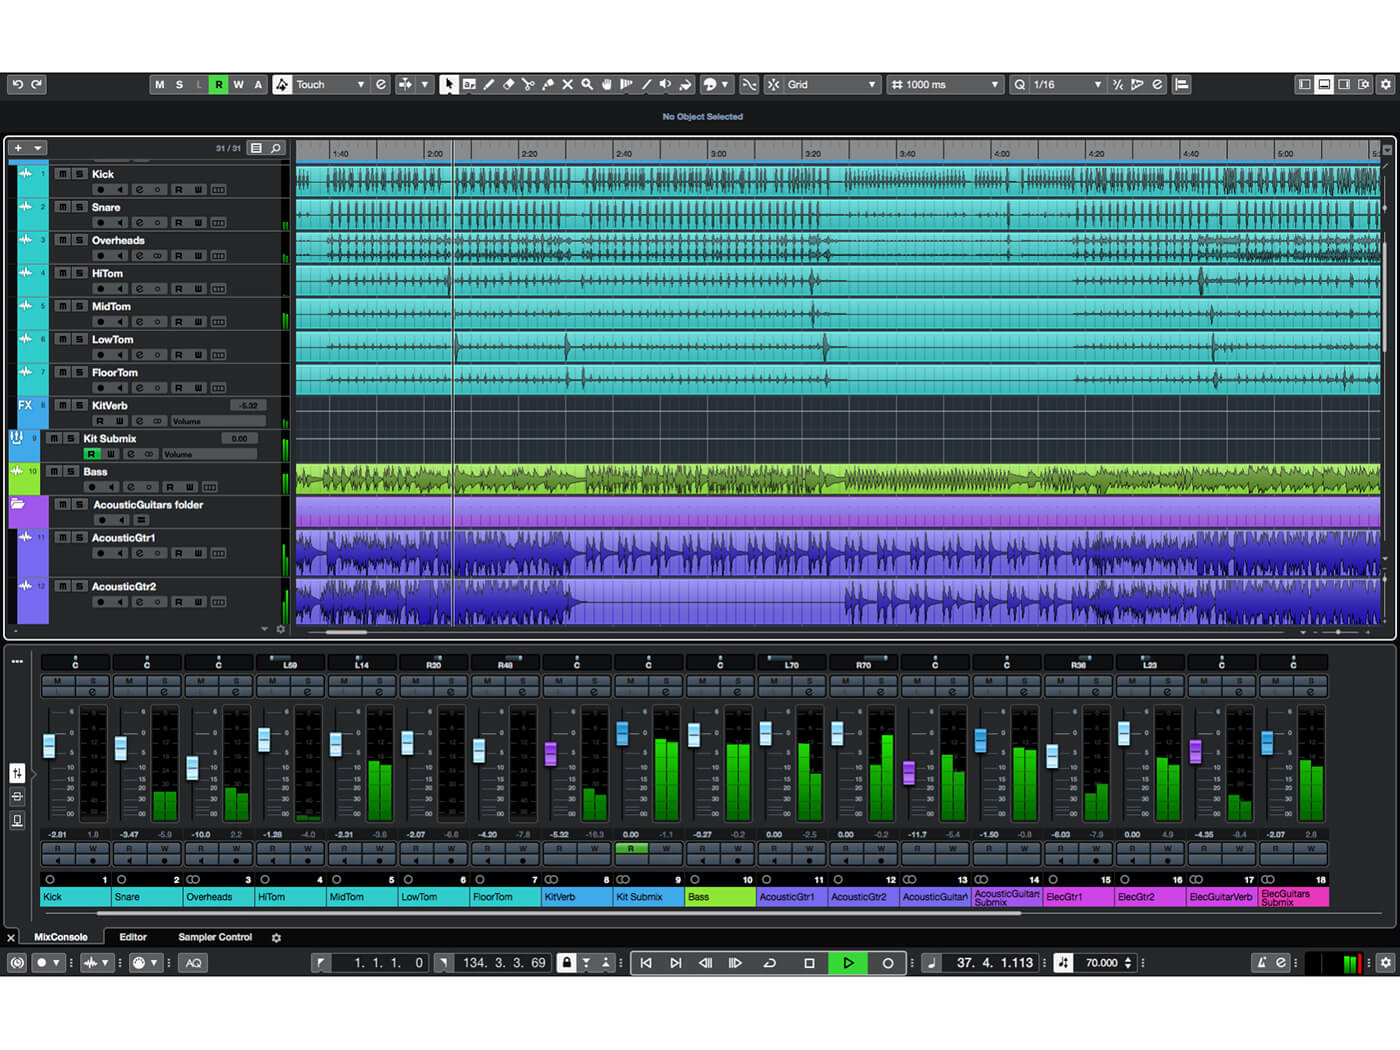
1. Start by creating some mastering stems. Open up an existing project in which you’ve created a final mix – effects, automation etc. The stems you choose to create will depend on the material you’re working with – we’re using something from a band recording session.
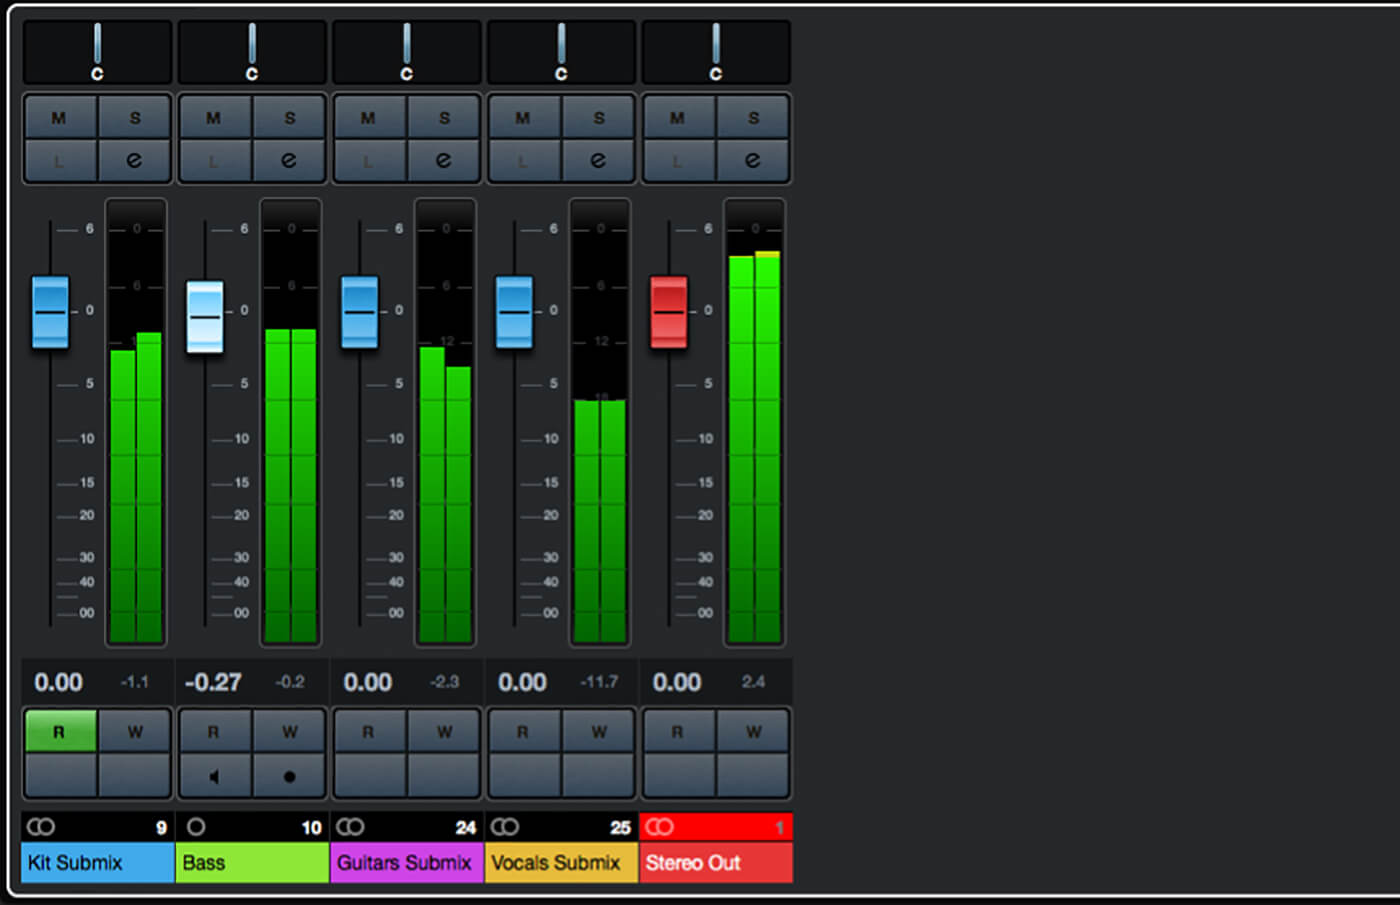
2. Consider the instrumentation of the project and how you may group its parts for mastering. We’re going to break ours down into kit, bass, guitars and vocals. Create a submix bus for each mastering stem and re-route your tracks to these submixes as needed.
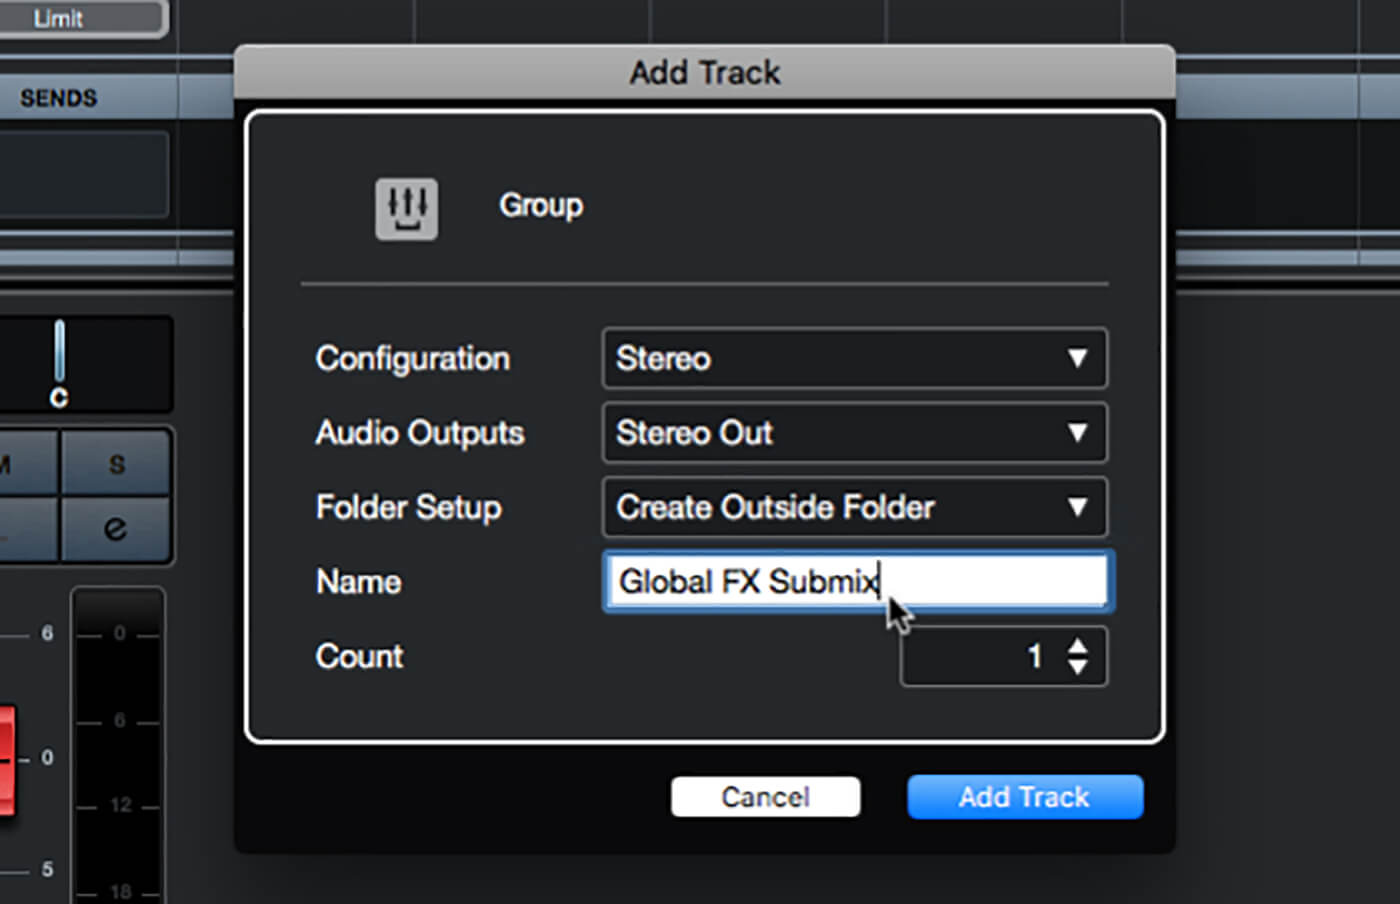
3. If you are using any reverbs or other effects that are ‘global’ to the mix, ie, that you are feeding with signals from many tracks within the mix, then these should also be routed to their own submix and exported as a stem.
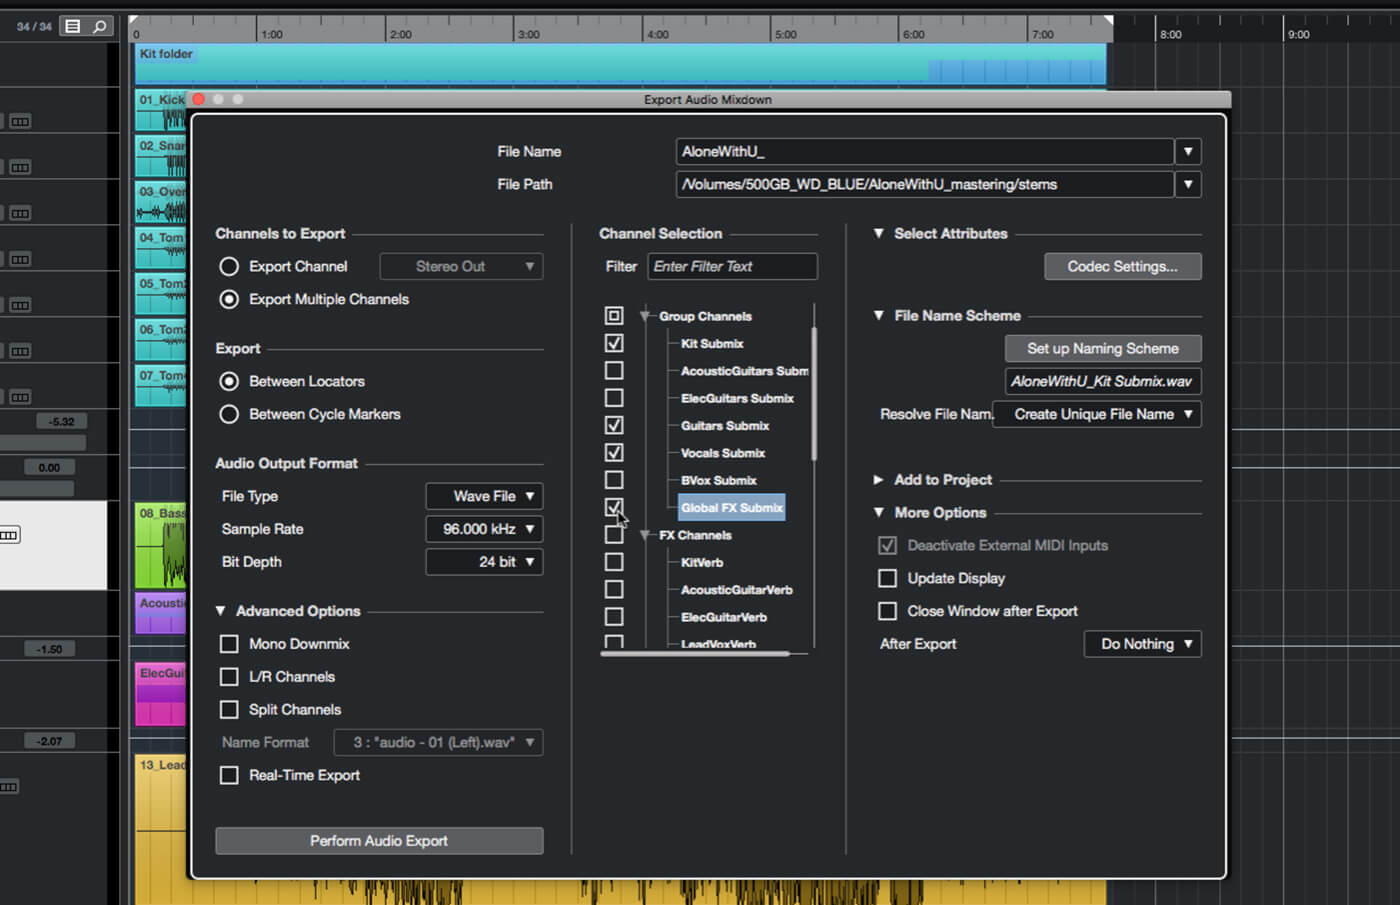
4. Use your DAW’s export functions to create the stem-mastering files. If it can export specific busses, then simply select and export each stem buss in turn. Alternatively, solo and export each submix channel in turn. Be sure your export range encompasses the entire mix.
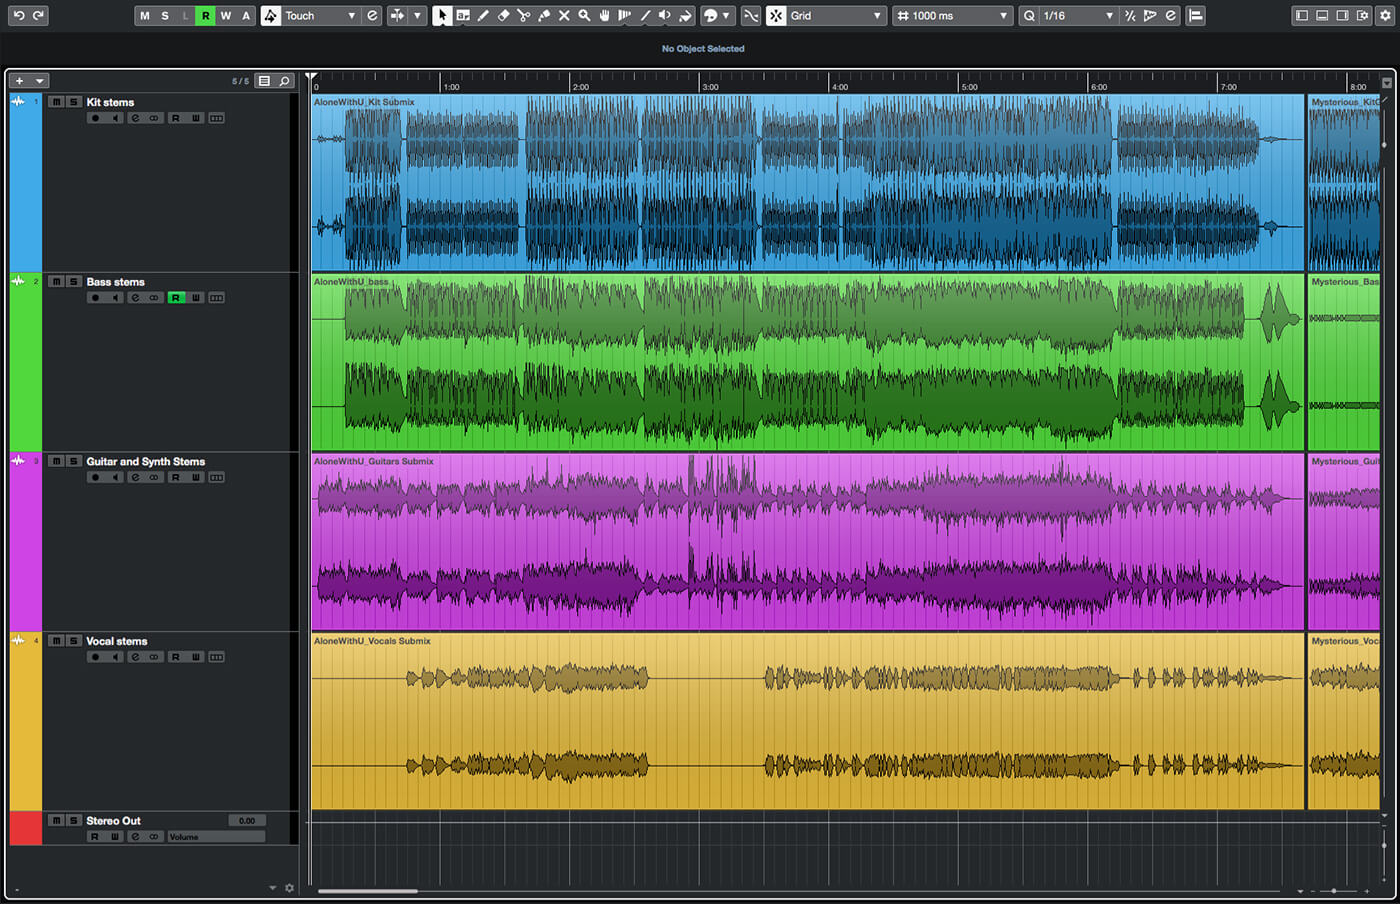
5. If you’re mastering a collection of songs, repeat the above procedure for each song. When ready, create a new session/project within your DAW and create a track for each stem group. Import the stems to the appropriate tracks and lay out songs in the desired order.

6. Insert a hard limiter on the master buss and set its threshold to -0.5dB. If you are targeting a bit-depth that’s lower than the one you’re working at, then also add a dither plug-in to the master buss and set its output bits as required.
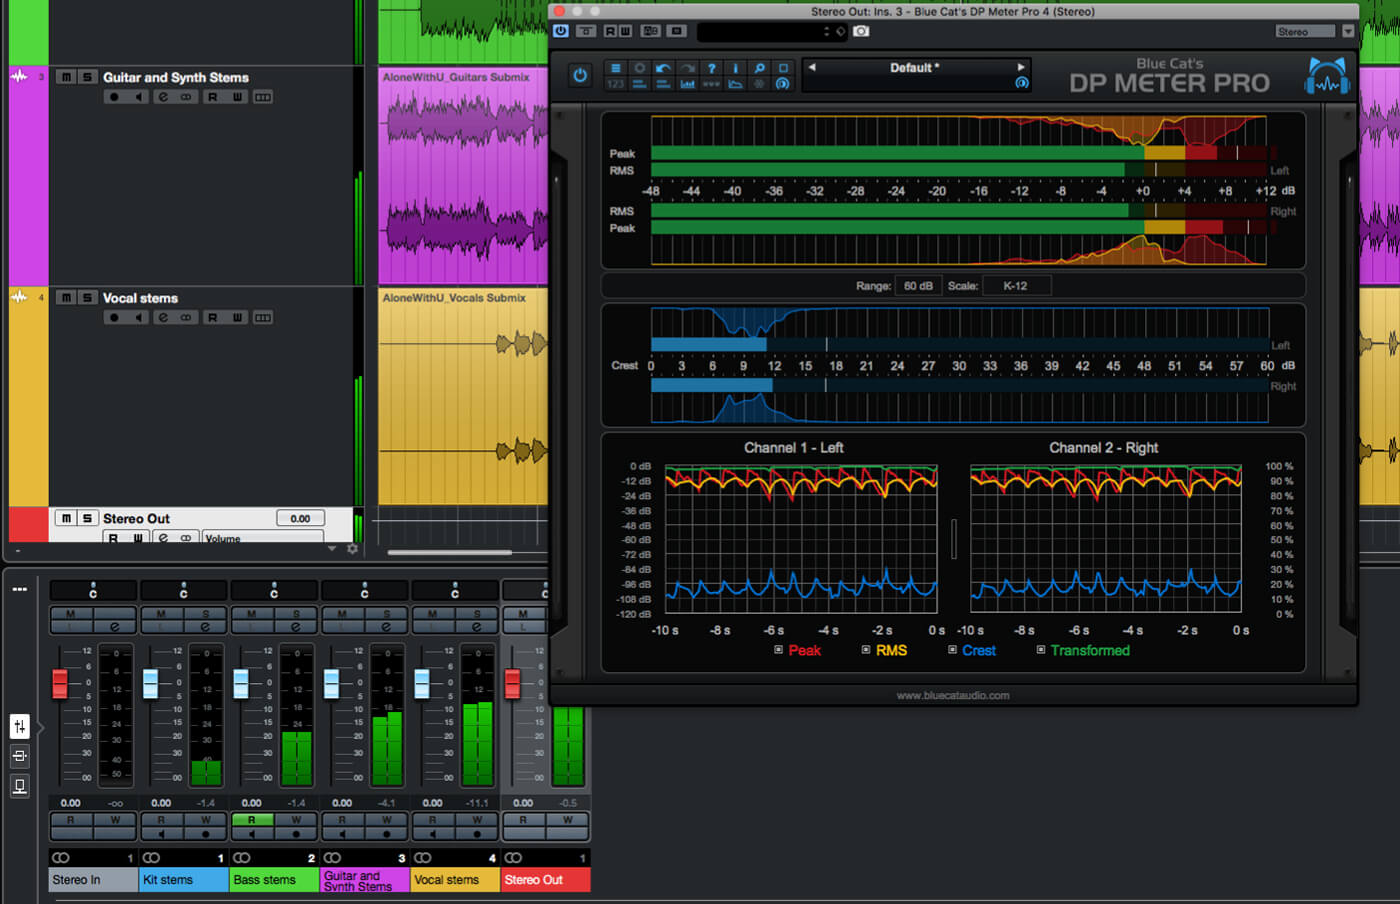
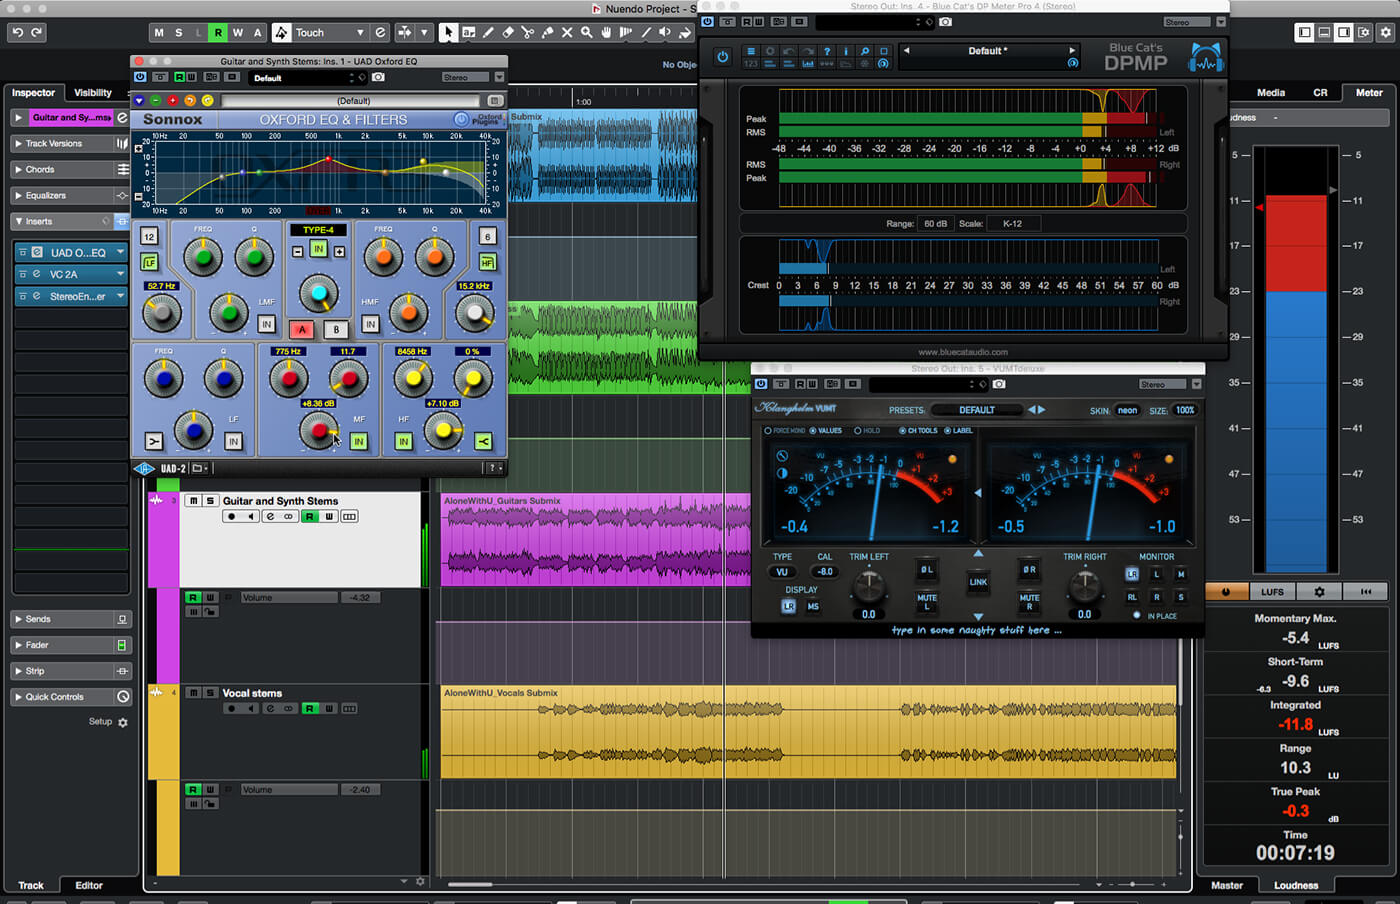
7. Metering is important in mastering and your DAW’s in-built channel meters are unlikely to cut it. Find a meter that shows peak, RMS and crest/dynamic range (BX Meter, Blue Cat’s DP Meter Pro, etc) and insert this on the master buss.
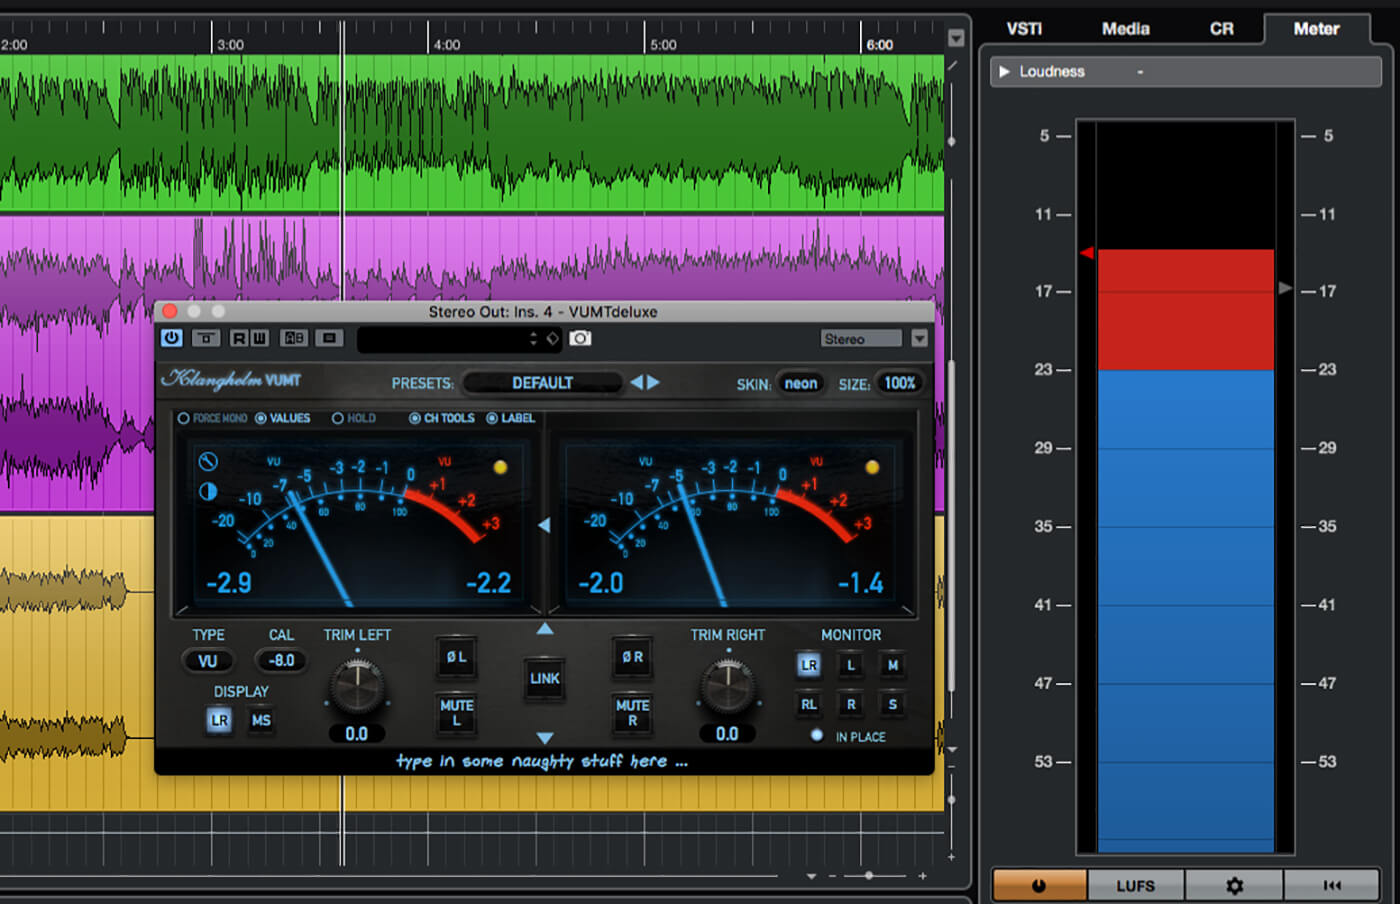
8. Loudness and VU-style metering are also useful in mastering – if your DAW provides these, or you have them as plug-ins, enable/insert these on the master buss. Refer to your meters throughout, but don’t forget to use your ears, too!
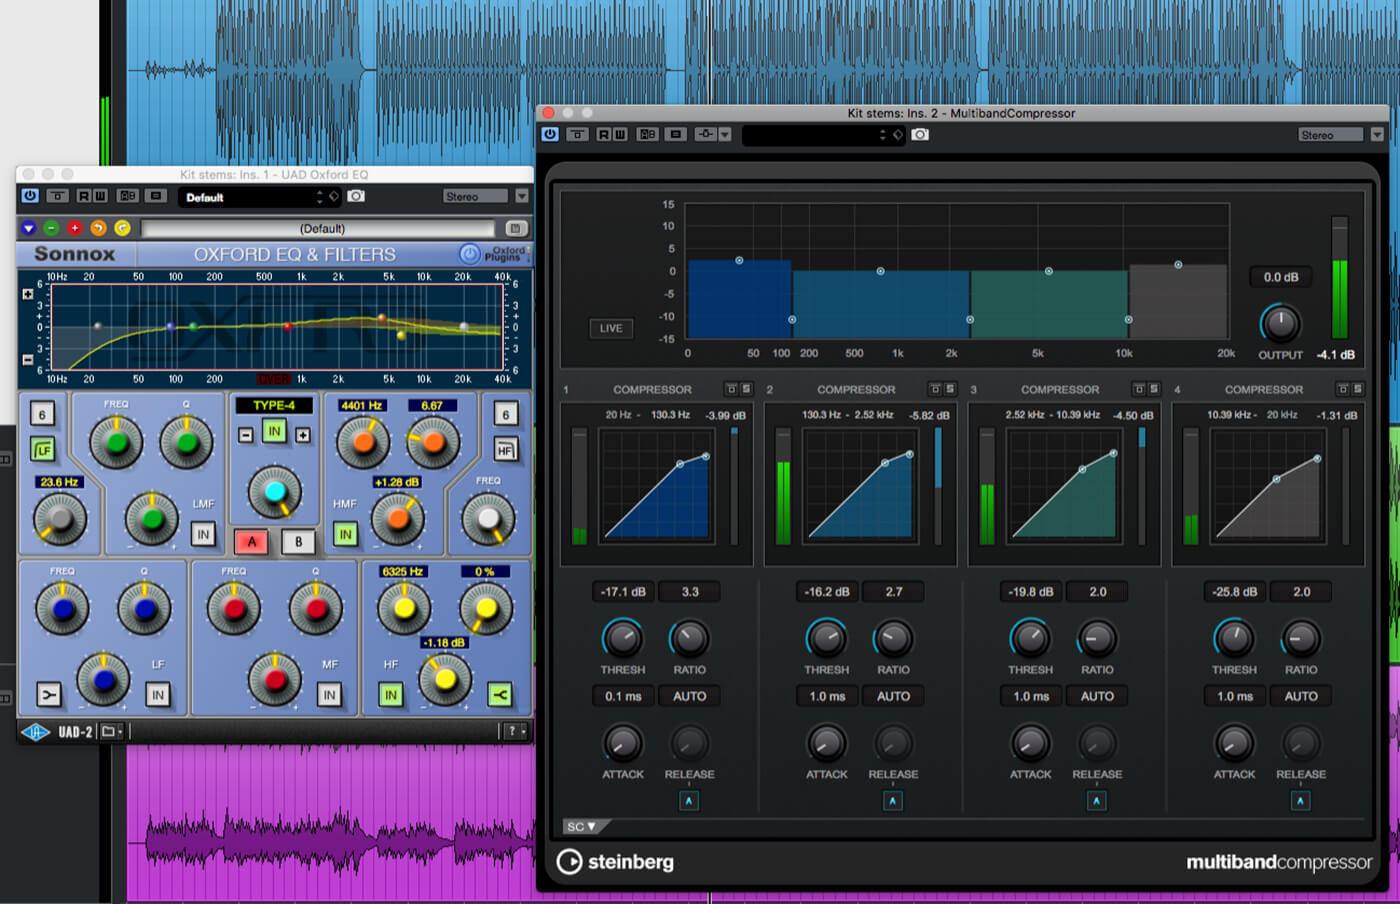
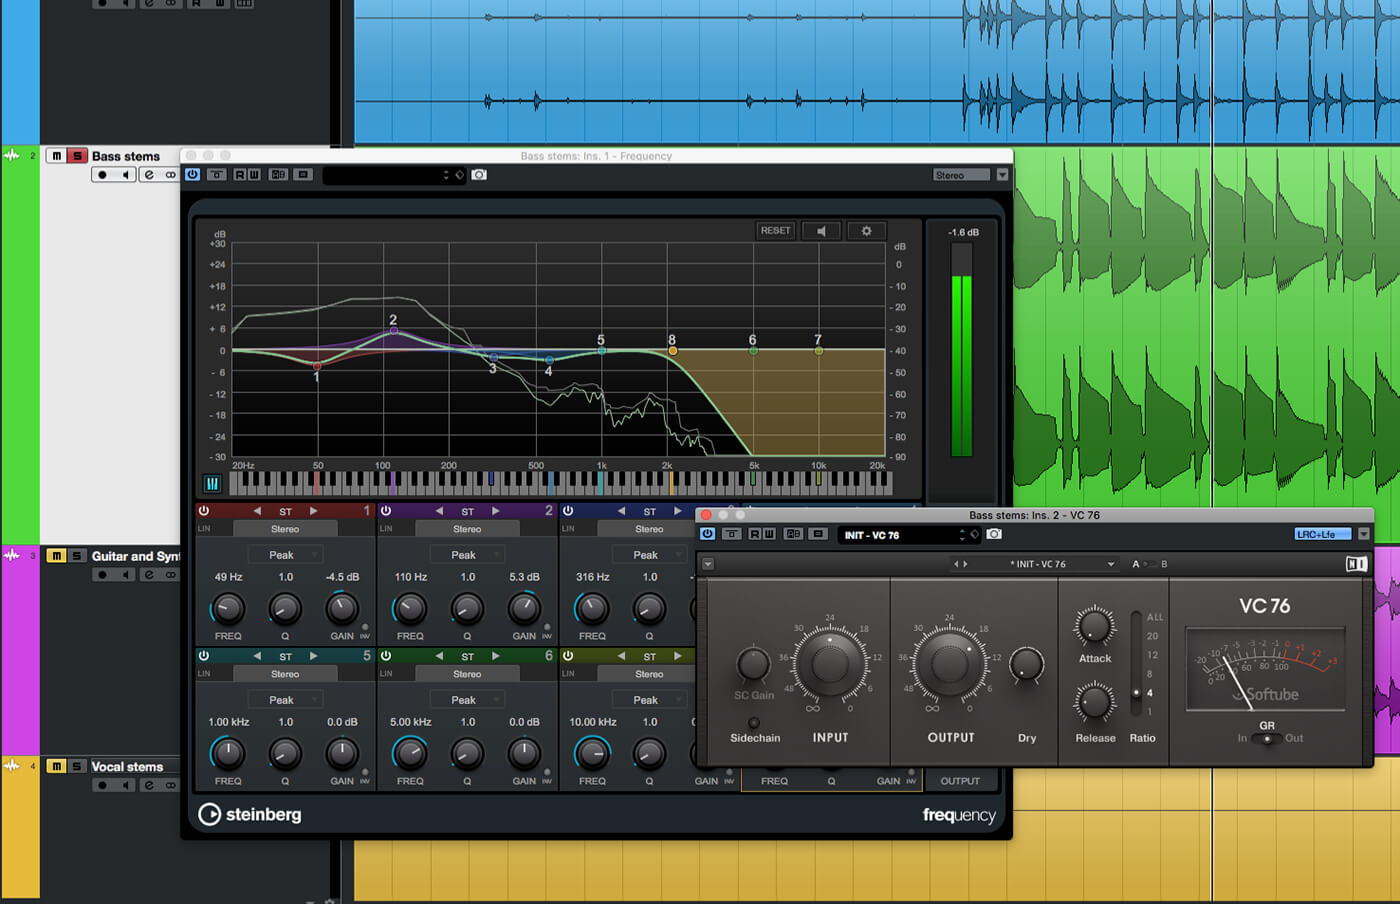
9. Solo your kit/drums track. If any EQ is needed, add and configure a preferred EQ processor. Also, consider if the kit needs to be more punchy and add a buss compressor or multi-band compressor if so, then set it up to your liking.

10. If mastering an album, you will need to consider how your chosen processor settings work with the other songs. Invariably, you will need to make changes to the settings, so save the effects chain (or individual plug-in patches) and move to the next song.
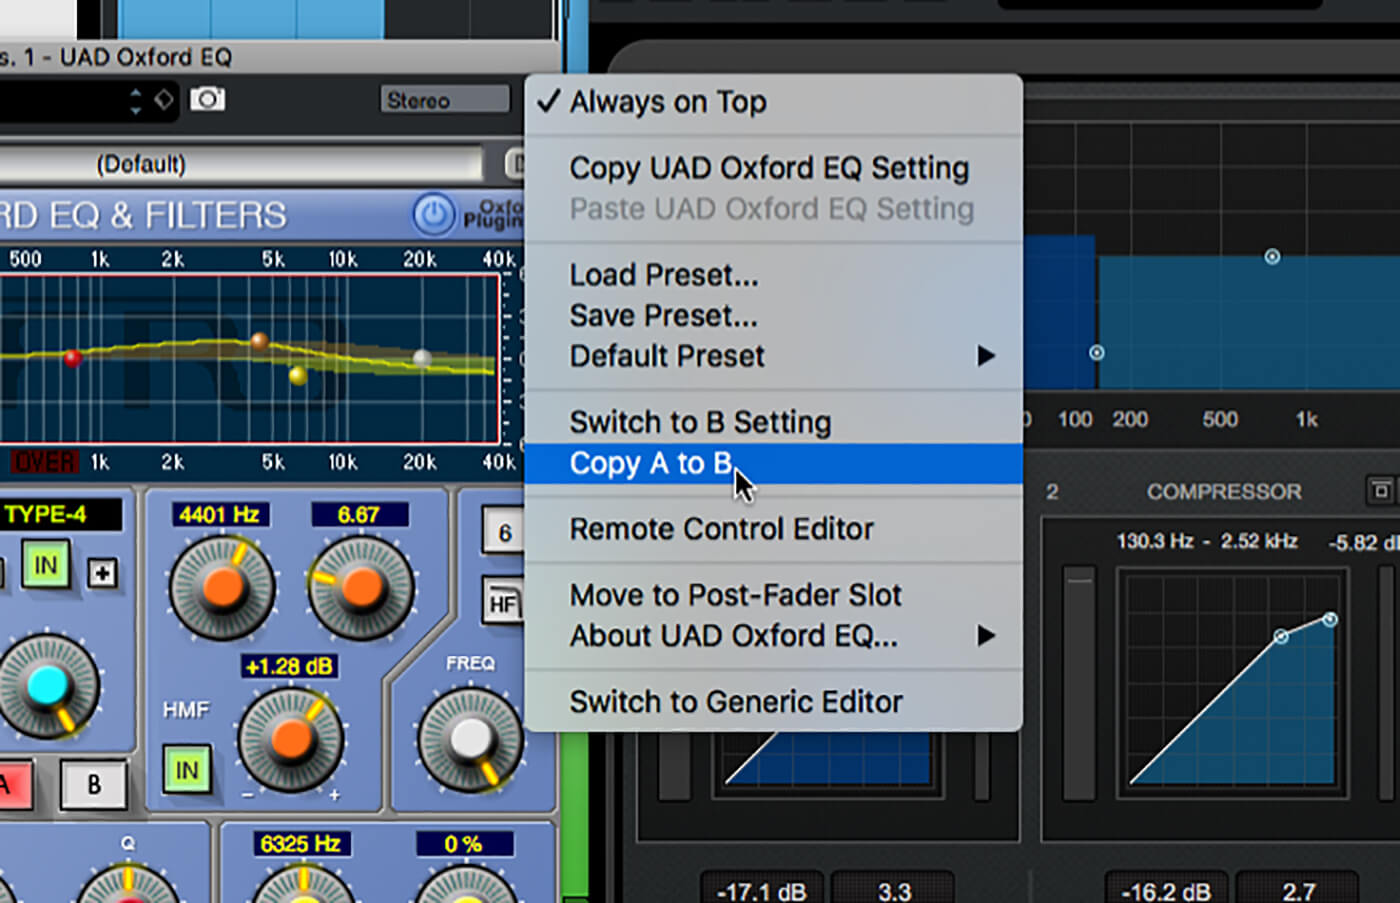
11. If your plug-ins support ‘A’ and ‘B’ settings, copy the A settings to B and then tweak these B settings until satisfied with the results. When comparing back to the first song, simply switch the plug-ins back to their A settings.
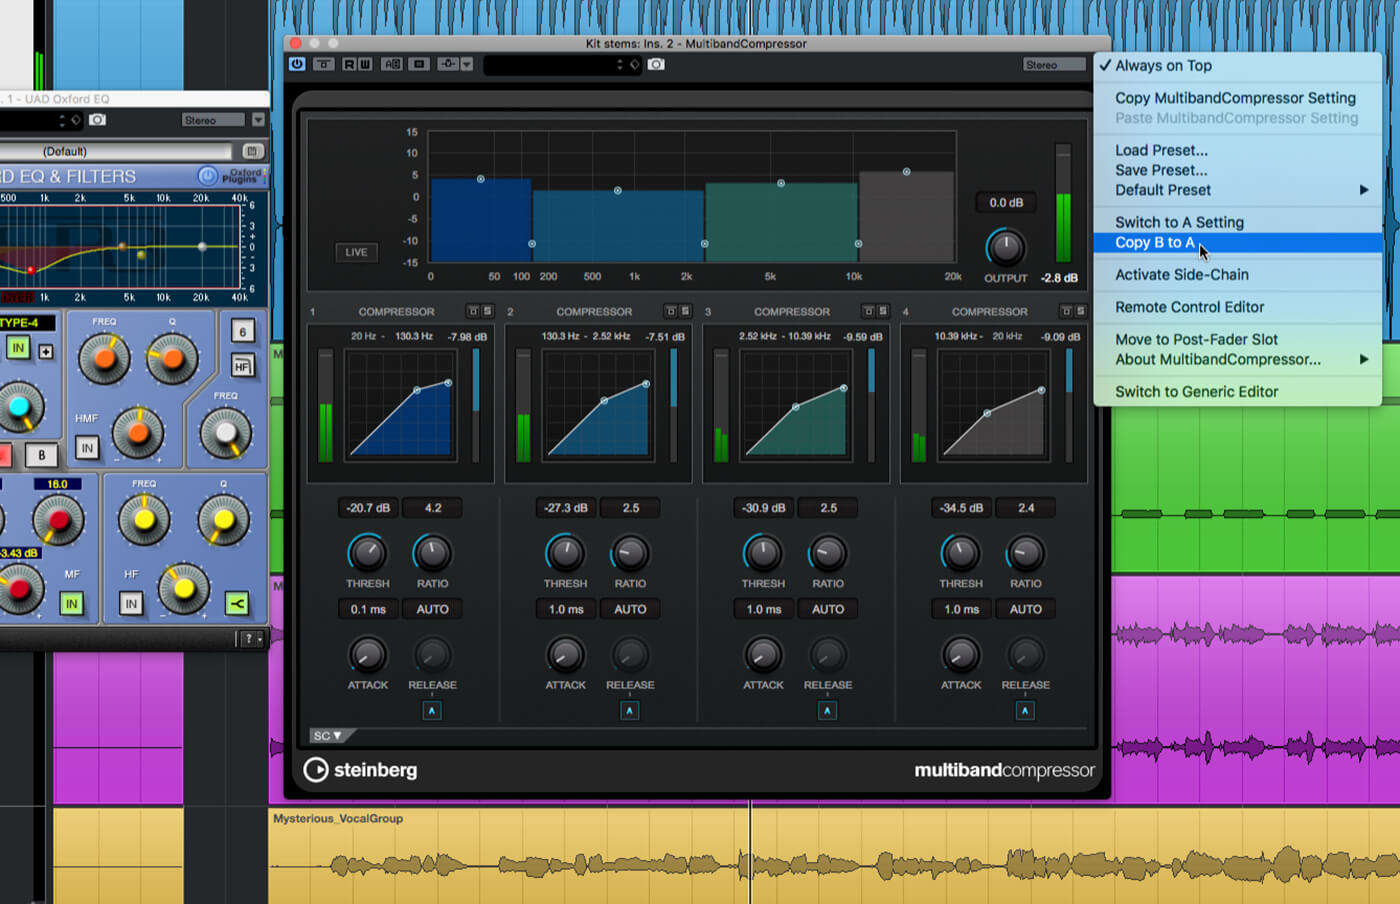
12. If your plug-ins don’t provide A and B settings you will need use effects chain saving and loading when comparing between songs. When happy with the settings for the second song, copy the B settings back to A and then save the song’s effects chain.
 13. Repeat this process for the other songs in your album. When done, move on to the next stem track and work through this, setting up processors for each song and saving their settings. Rinse and repeat for all stem tracks.
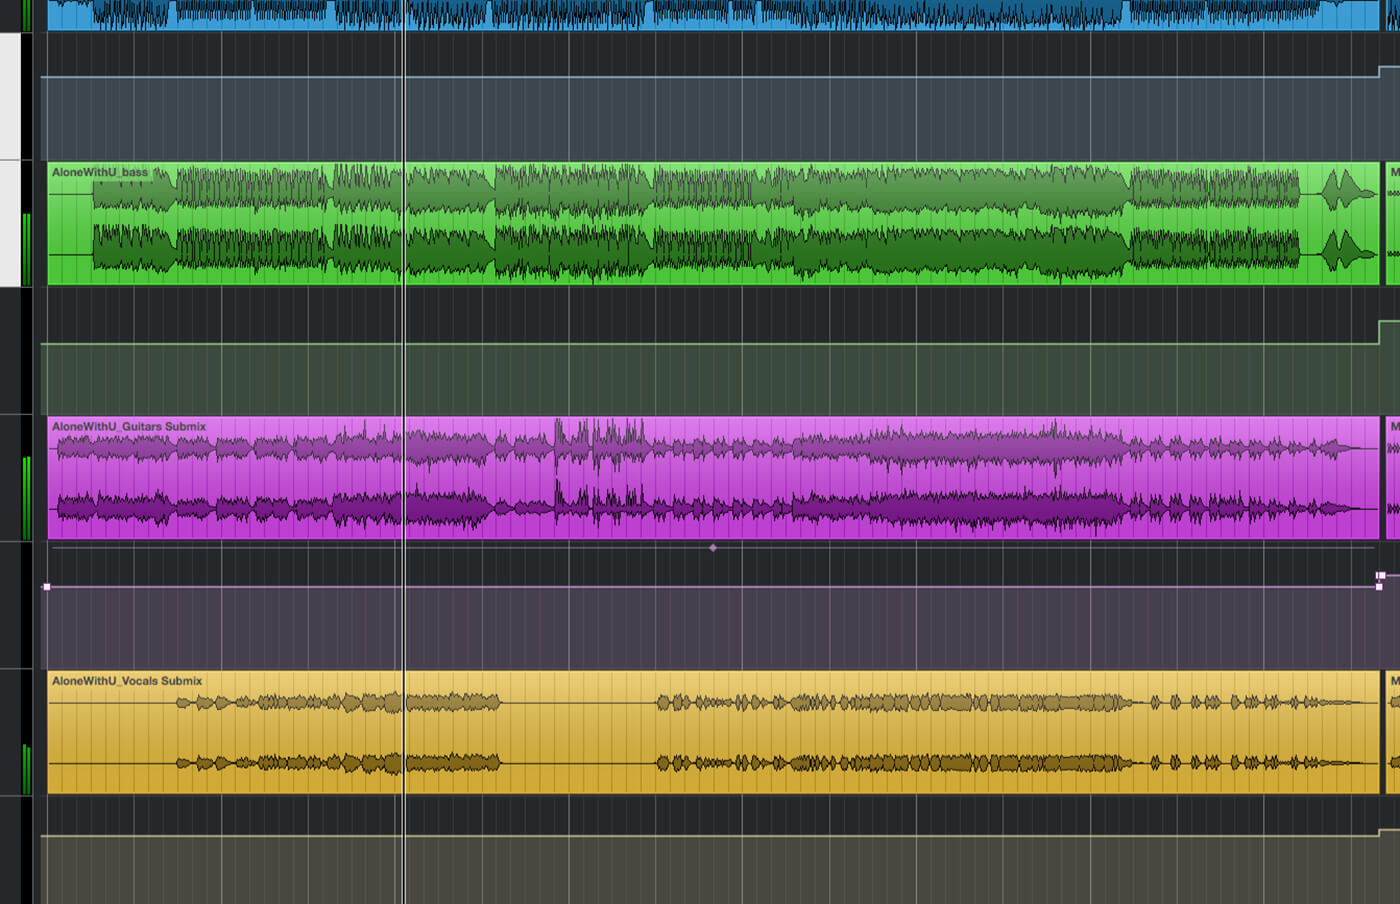
14. Un-solo all stems, move back to your first song and load its effects chains. Mix and balance the stems, but do so by editing channel automation rather than moving the faders – this ensures the balance isn’t lost when moving on to the next song.
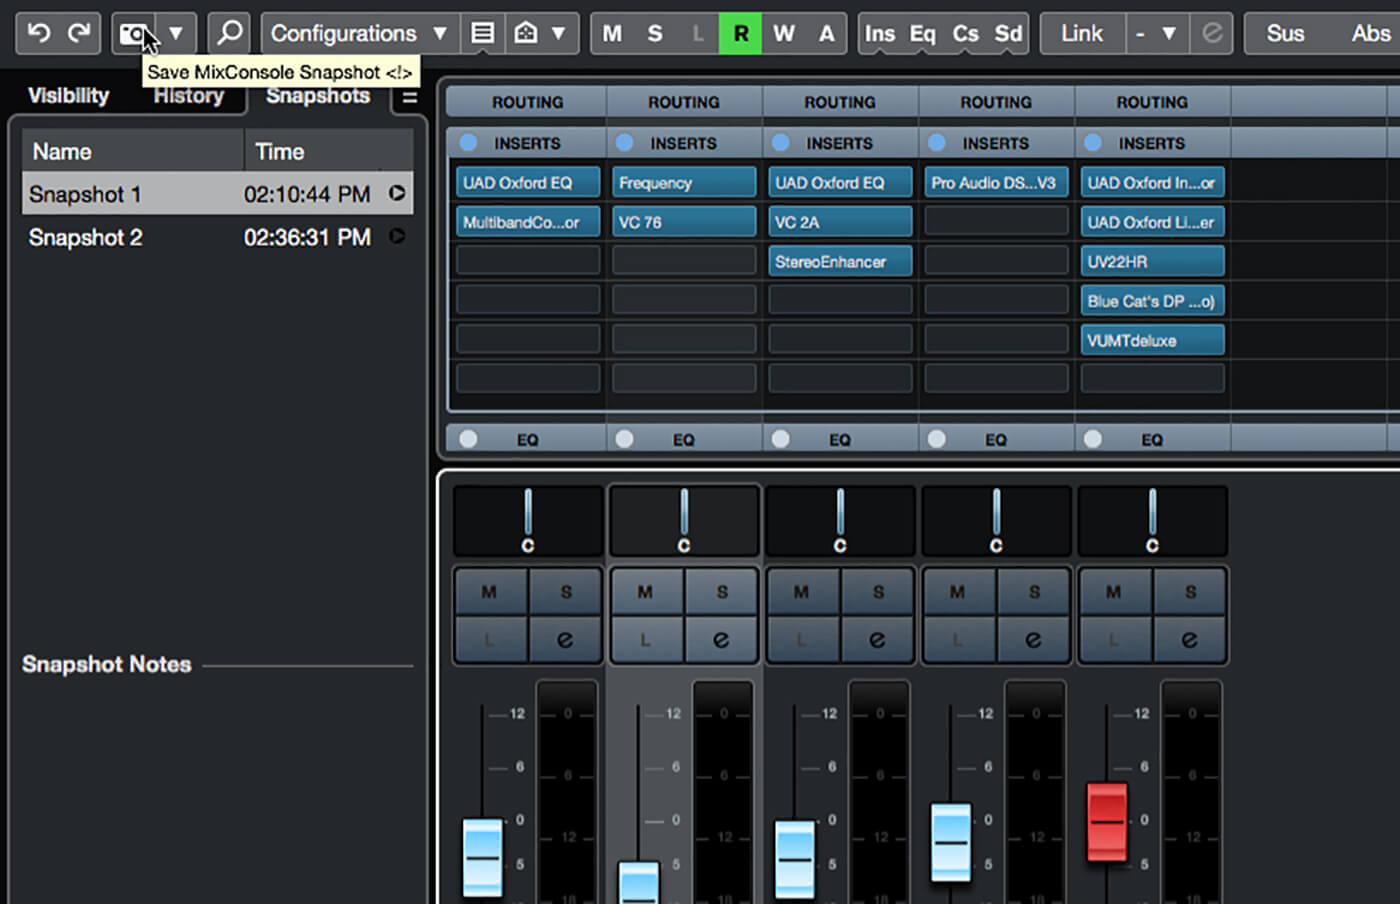
15. Repeat for each song in the album, always being sure to set the stem volume changes using channel automation. Remember, this ensures the balance of a song’s stems can be easily recalled. Alternatively, you could use mixer snapshots, if your DAW supports them.
16. Keep working through the songs, honing the processor settings and balance. Be sure to save any processor changes you are making before moving between songs. Keep a close eye on the meters to be sure you’re achieving the desired levels and dynamics.
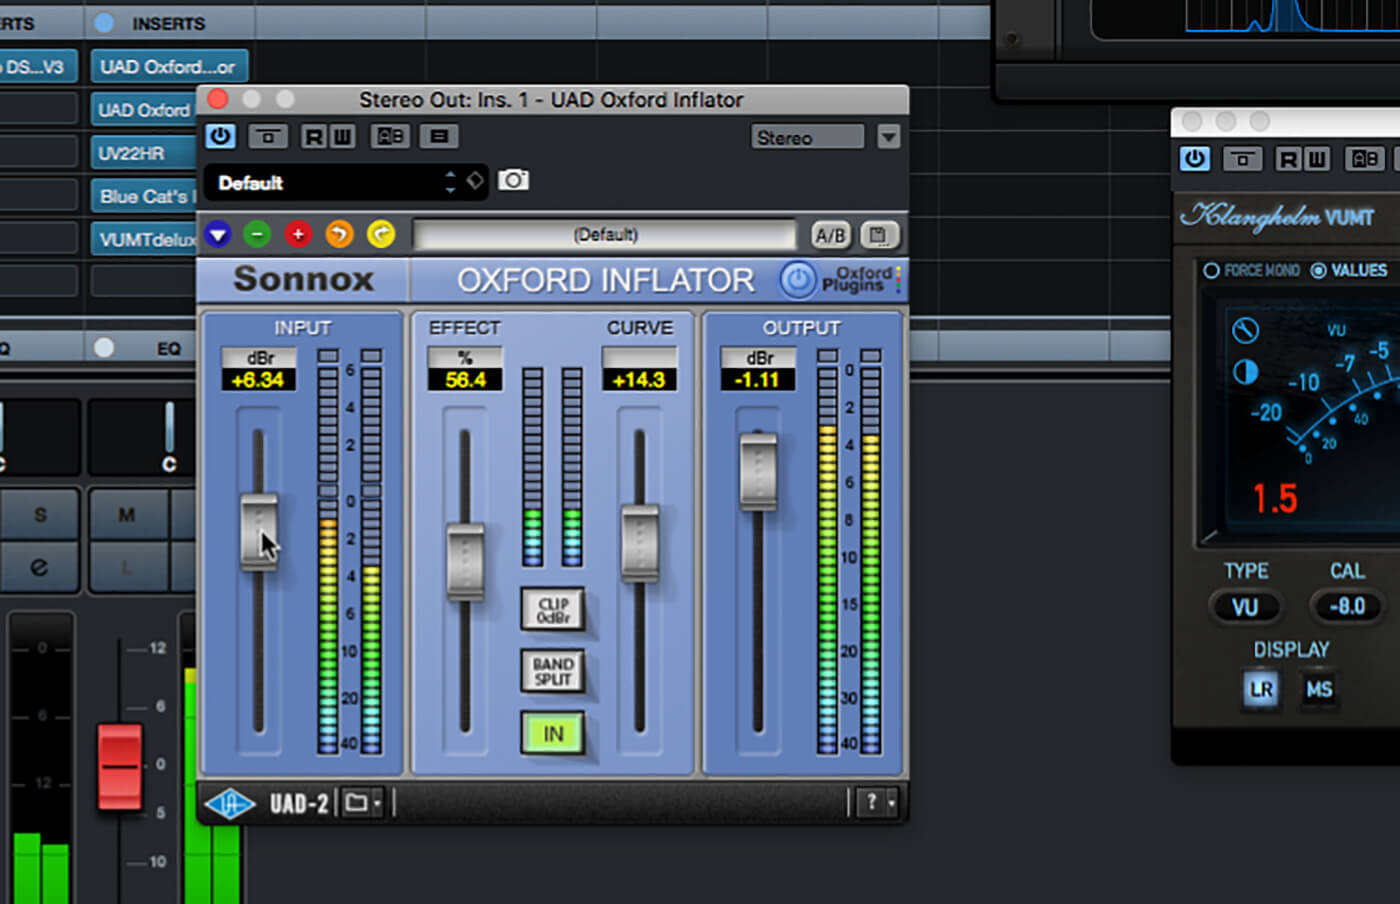
17. You can add a further catch-all dynamics processor on the master buss if you need to make global changes, but be very wary of over-compression, or use a saturation processor or similar to reduce dynamics without the need for more compression (beware fuzziness!).
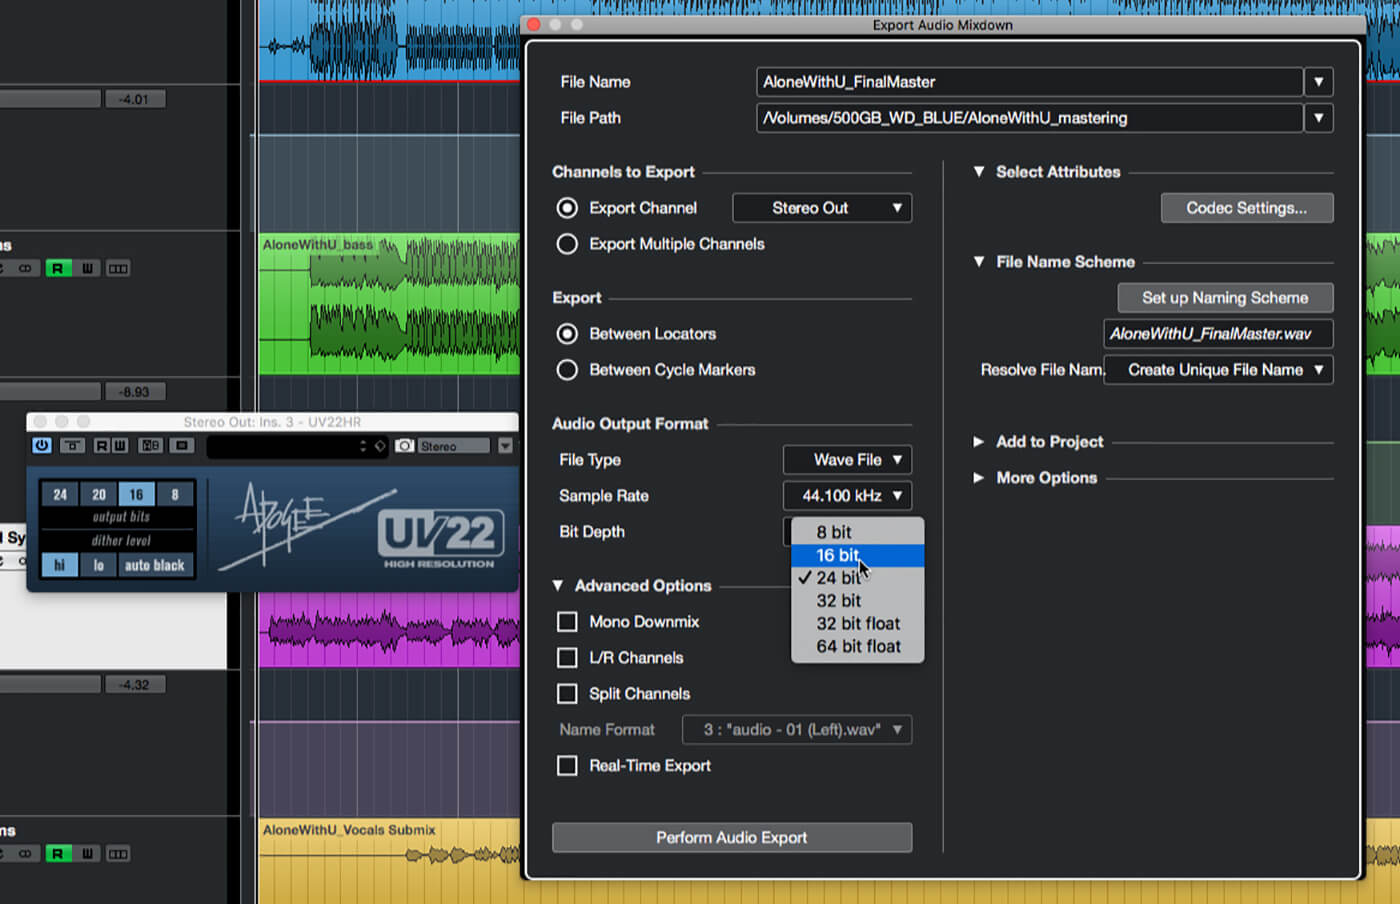
18. Finally, switch off all meters to save resources, then work through each song, remembering to load their effects chains, exporting each to a final mastered file. When done, be sure to compare your results with the unmastered mixes.
Learn more about stem mastering here. For more tutorials, click here.