Using Track Presets in Pro Tools 2018: Step-By-Step (Continued)
Mike Hillier continues his guide to Pro Tools’ new track presets, where he looks at creating presets for live and virtual instruments… 7. To build our own Track presets, start by building up a template channel. We’ve created a “Kick In” recording channel with an EQ and Gate in place. We’ve set up a few […]
Mike Hillier continues his guide to Pro Tools’ new track presets, where he looks at creating presets for live and virtual instruments…
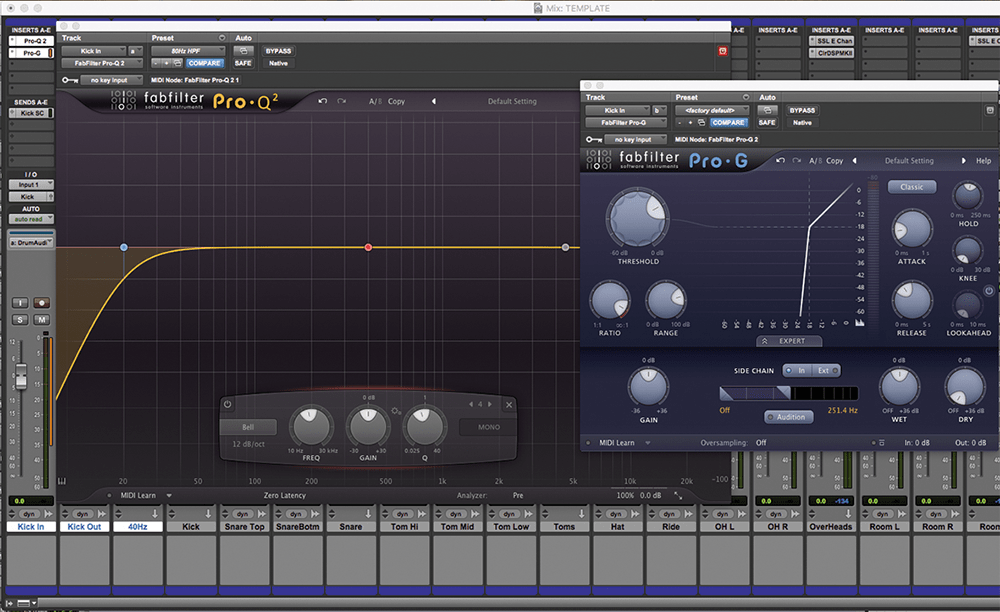
7. To build our own Track presets, start by building up a template channel. We’ve created a “Kick In” recording channel with an EQ and Gate in place. We’ve set up a few bands on the EQ with frequency and Q in obvious starting points
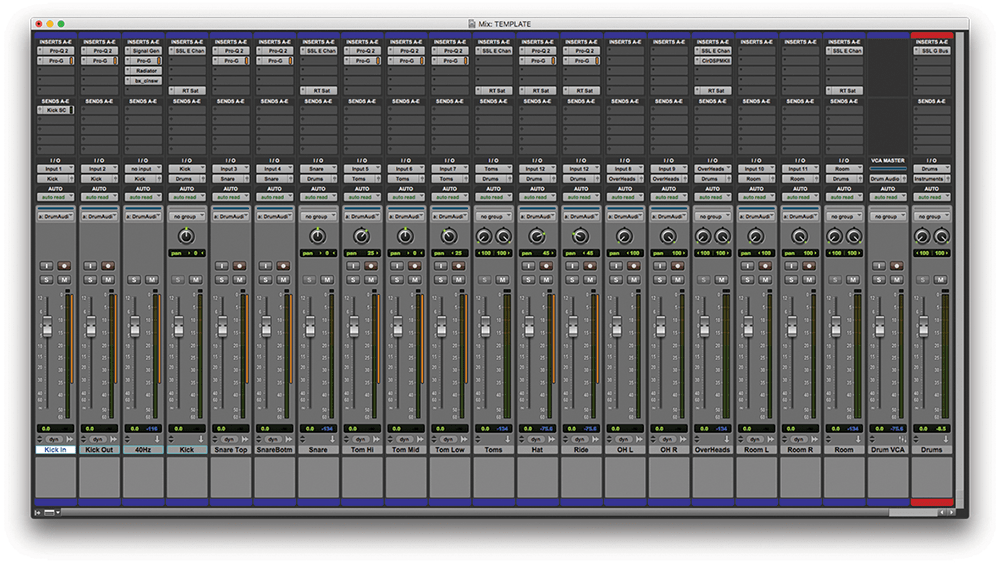
8. Because we intend to build a full selection of kit presets we’ve built up the whole kit in a template session before saving any templates. This way we can ensure everything is in place, groups and VCAs are allocated.
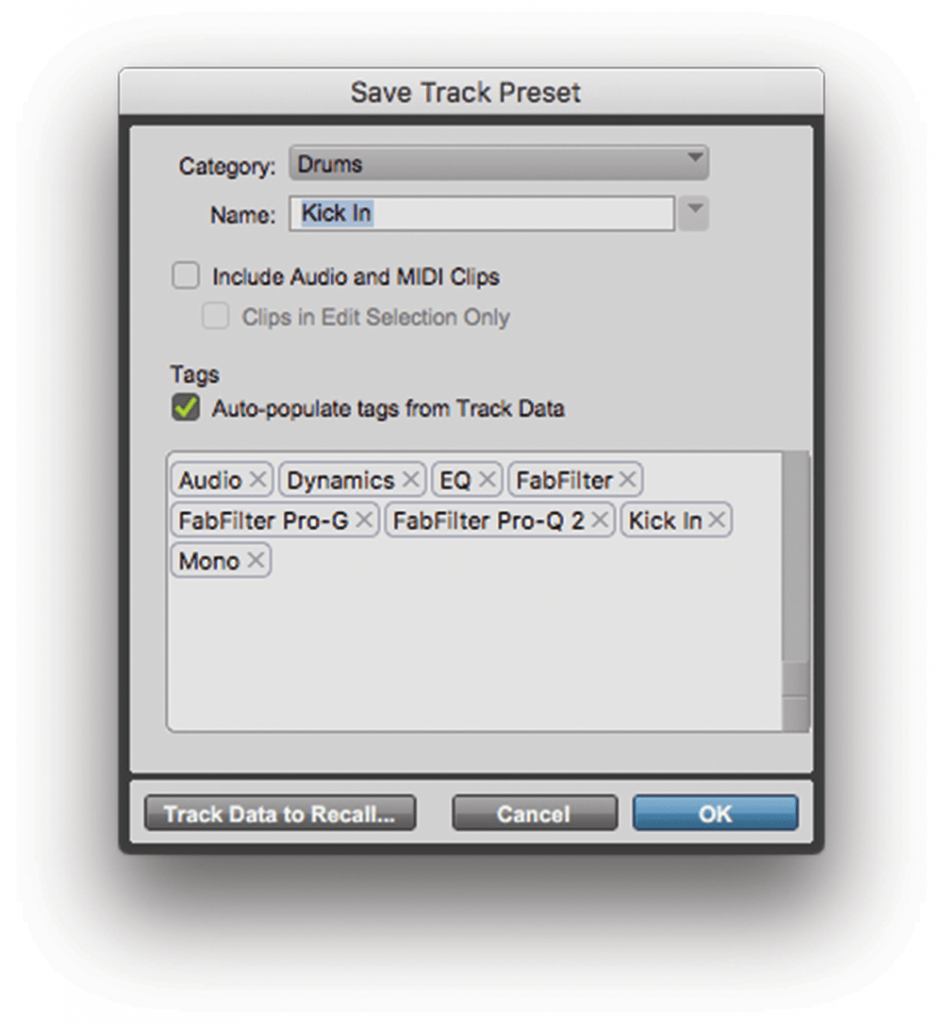
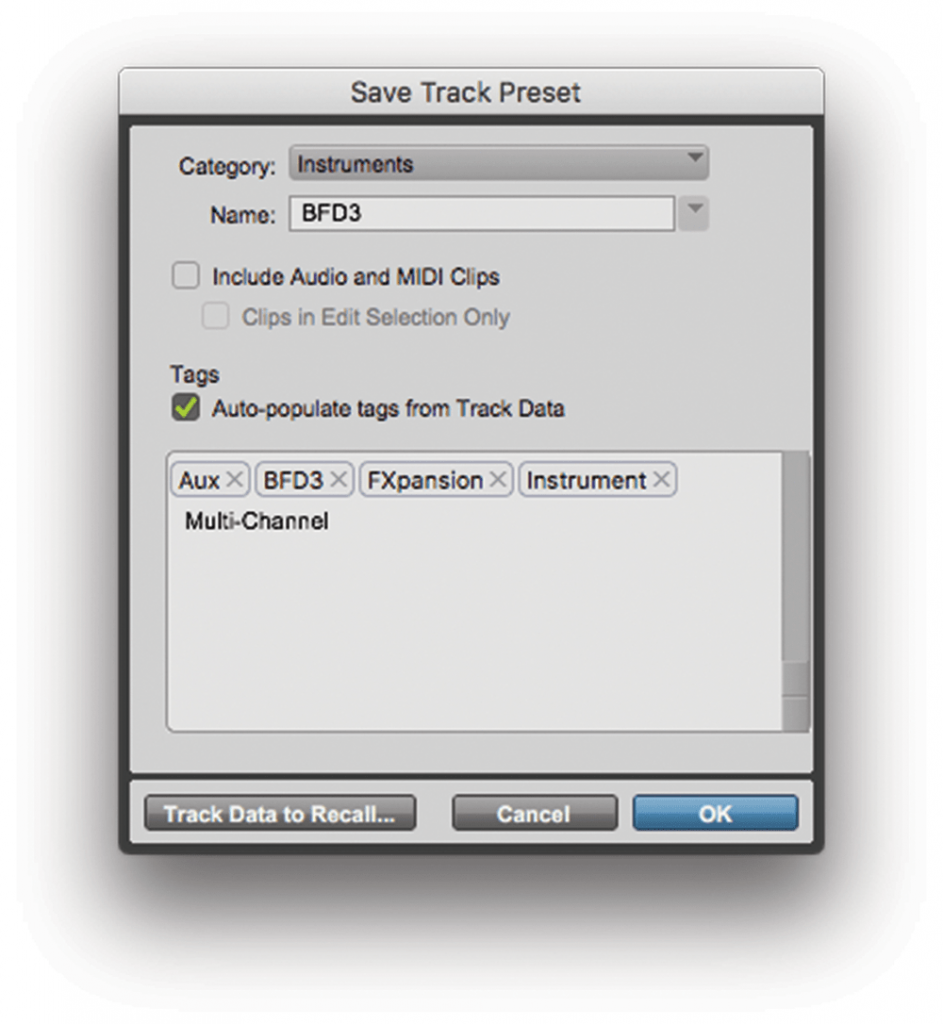
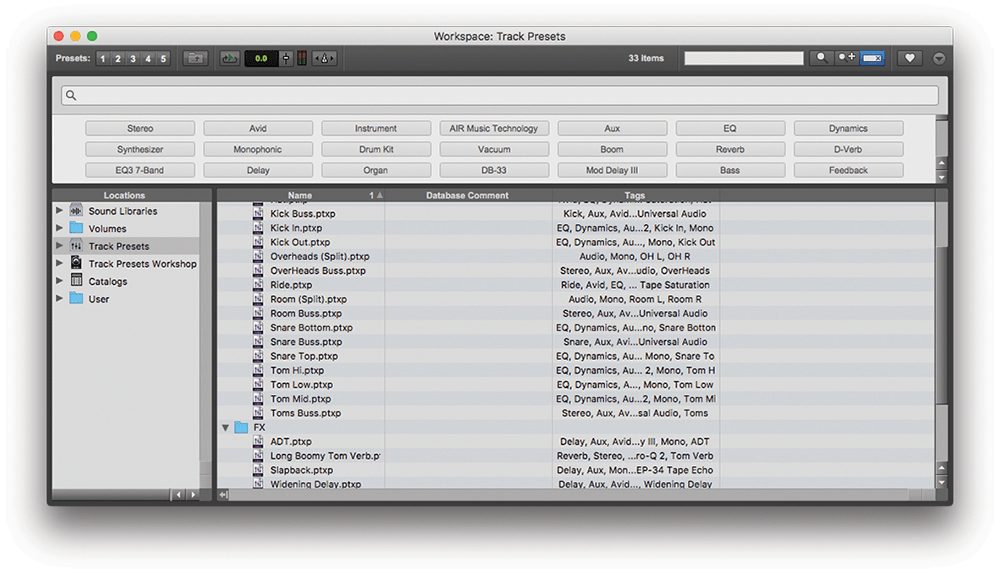
9. Highlight the channel you want to create as a Track Preset and select Track > Save Track Preset, or right click on the channel and select “Save Track Preset”. In the dialog box you will be able to name your Track Preset and add tags.
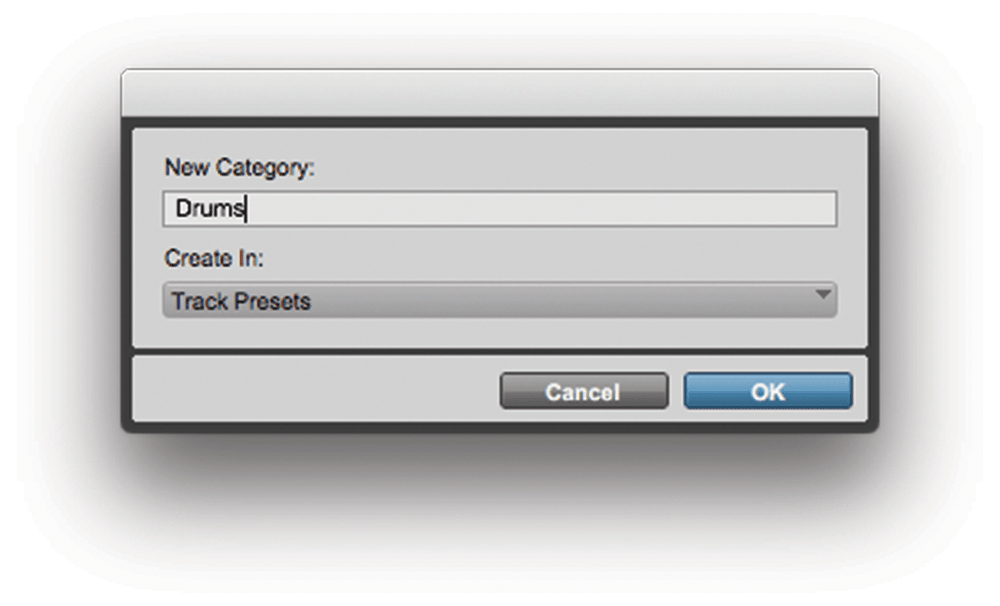
10. The Save Track Preset dialog box also provides an option for where to save the Preset. As we haven’t got any of our own folders we’ll need to create one. We’ve created a Drums folder in the Track Presets root to place our kit presets in.
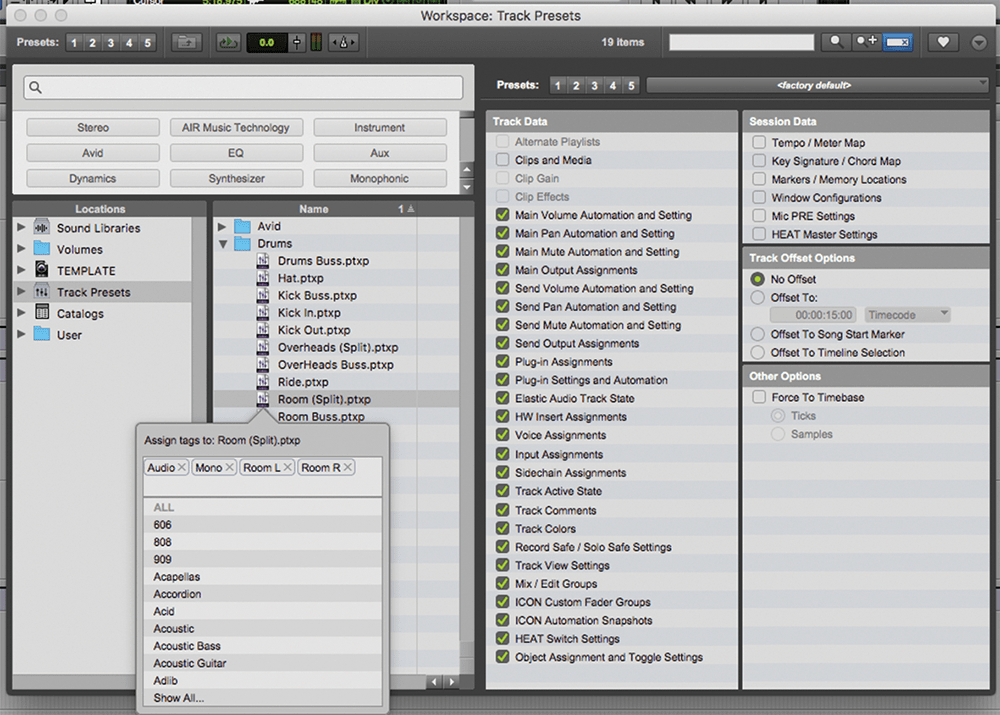
11. Go through the rest of the kit, adding Track Presets for each mic channel you are likely to use. That way when you come to mix a track and find a channel you may not usually track yourself, you’ll be prepared for it.
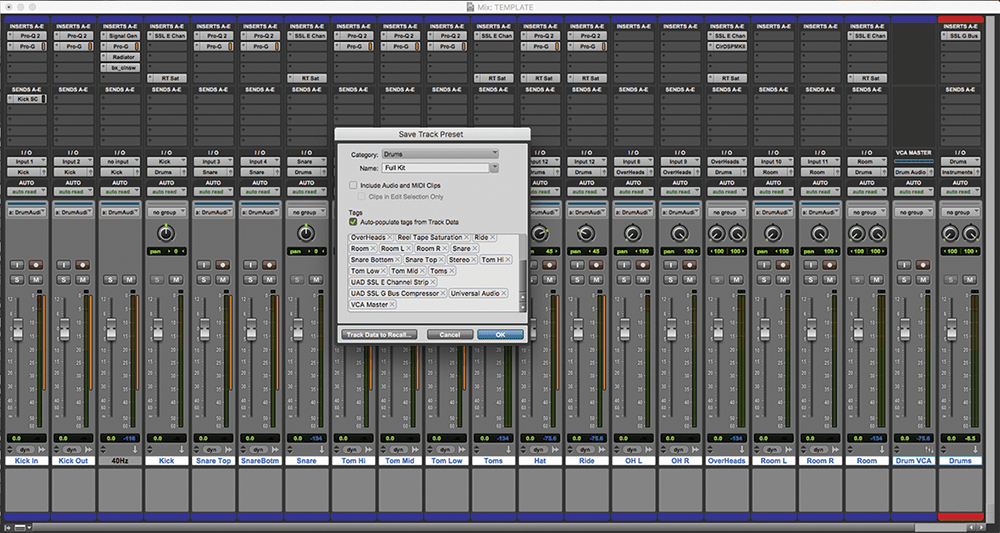
12. We want to create a Preset that brings back all the channels, complete with the plug-ins and routing as a single Track Preset. Highlight all the channels you want to use and select Track > Save Track Preset.
![]()
BOOM! For big boomy toms try adding a long hall reverb to an Aux. channel and filtering off everything but the subs. We’ve done this with D-Verb and an instance of FabFilter Pro-Q2, but any good reverb and EQ combination should work. We saved this as “Long Boomy Tom Verb” in our FX folder.
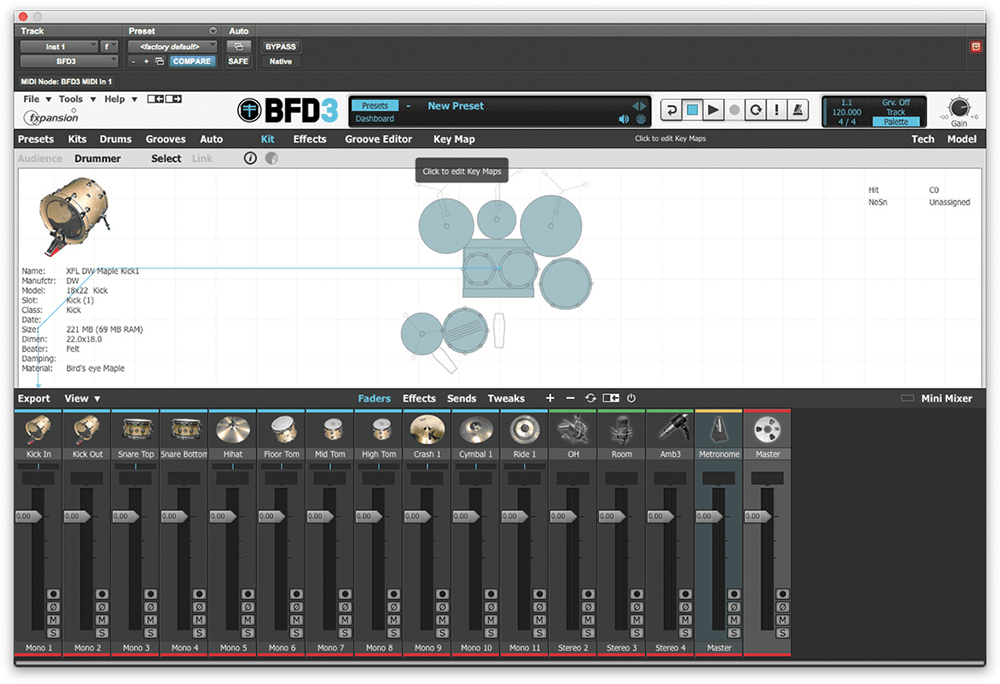
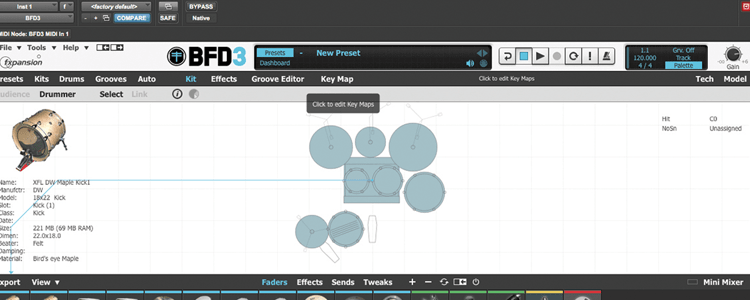
13. Virtual instruments with multiple outputs can be a nuisance to setup. Having a single Track Preset with the outputs pre-allocated is a time-saver. Here we are using BFD3 with the instruments routed to direct outputs.
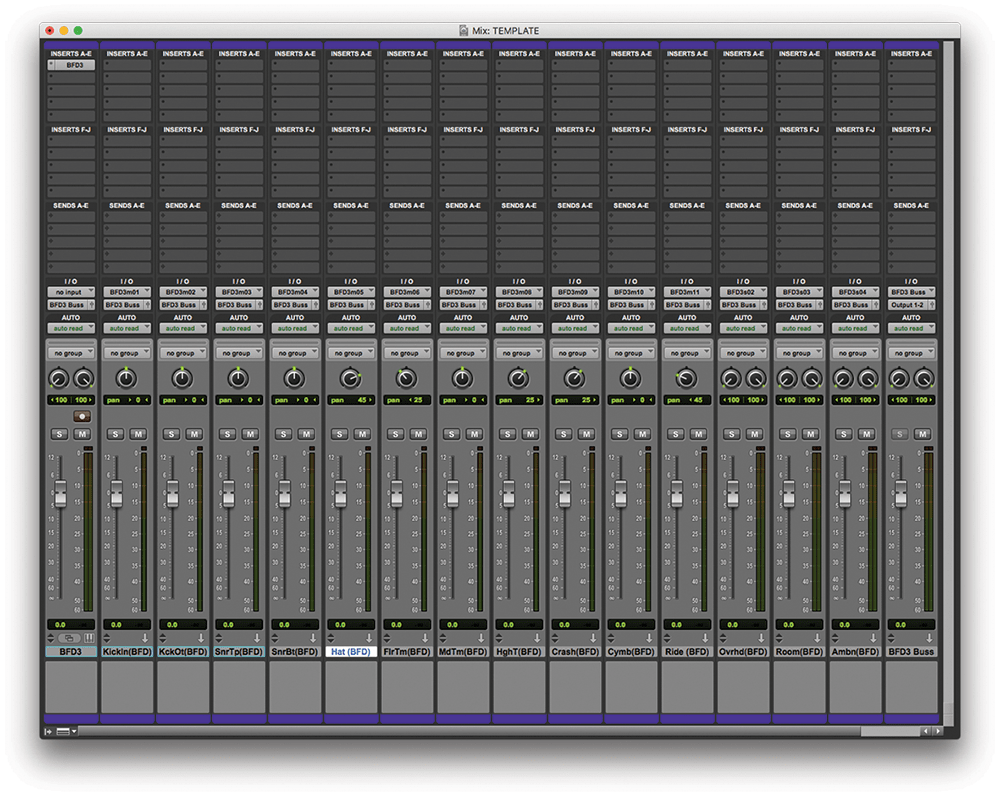
14. In Pro Tools we’ve created Aux. channels for each of the direct outputs from BFD3 and routed those to a master BFD3 Aux. buss channel. Each of the Aux. channel inputs is then routed out of BFD3 to the relevant Aux channels.
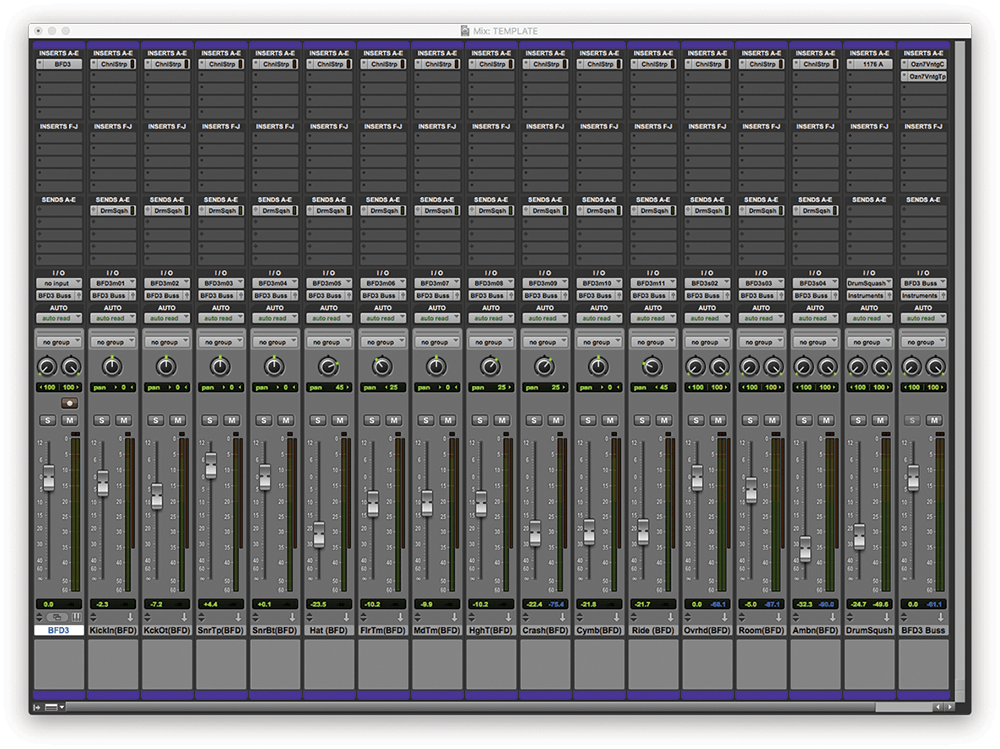
15. Add as many effects and additional channels as you see fit to the Track Preset. We’ve added a basic channel strip to each channel as well as a buss compressor and a parallel Squash Channel fed from Sends.
16. This time we’re not going to save each individual channel as it’s own Track Preset, we’re going to highlight all the channels at once and select Save Track Preset. Add the new preset to a new folder for instruments.
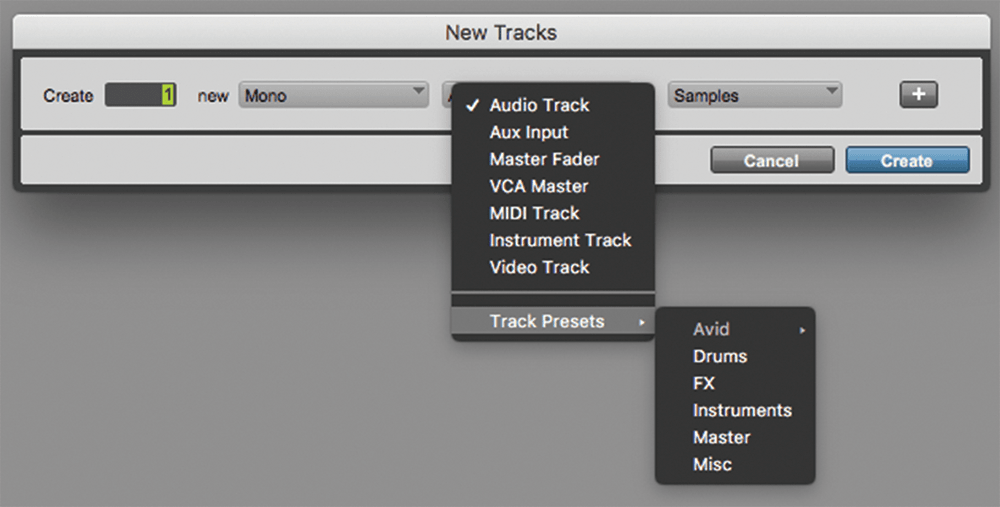
17. When we add a new channel to any session we get all our own track presets ready to be drawn upon or added to existing channels. We’ve started building up our library with options for a variety of effect sends and master bus processing.
18. We will most certainly continue to expand our Track Presets library as we discover more interesting plug-ins and processing options and ideas.